

Khaki CRX from Az


Thread Starter
Honda-Tech Member
Joined: May 2010
Posts: 14
Likes: 0
Heres the newest project. So right after the sedona run I found this bad boy, I picked this up for a steal and here is what I have been doing to it.No shaving here, I'm just trying to make her look nice for a little bit of dough. I have never seen a rex with a front end that has never been hit or bent in any way.
back when 1lowtacoma owned it

Only pic I have of the bay before

After some elbow grease

Some primer


and my daily that gets me to the paint store

I only shot it with single stage to match the rest of the color on the car, I think the guys at Auto paint plus here in flag did a pretty good job matching the paint from just the gas door. There is a lot more that is planning to be done to it but I'll only reveal what I'm working on as I get it done.
Oh yeah this in only my third time trying to paint, so I'm just chalking this all up to becoming a better painter.
Thanks for looking
just picked this up today, Es bushing kit and RTA bushings as well. After the weekend I get some time free so I'll get some updates


So it's no chase bays harness or anything like that but at least the back is done


Updates!
Got the headliner finished, I just had the material laying around so I tried to make this look as nice as possible. It'll probably won't stay tan as it doesn't flow with the rest of the plans for the car. It does however cover up the nasty blue cig burned one that came it the car.
Now the jambs match the rest of the car.

Headliner pics


Removing the ld quarter glass moulding, and sanding the driver side down.


Got the driver side in some primer to fill out some of the imperfections after sanding


Ok so this morn I woke up and decided that it was time to get this rex rolling. . . . . . . . . . well not exactly they way you would normally think.
So I went ahead and threw this little guy together and got the car on it.

Then Prepped the rest of the garage for paint today.

and shot the driver side quarter

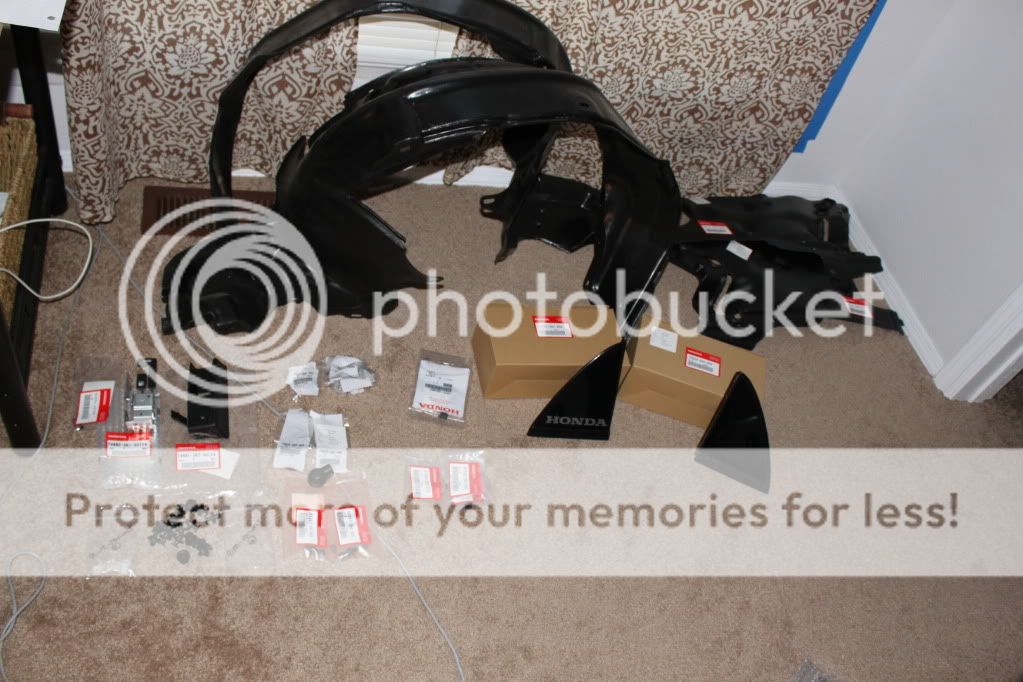
So I got a few goodies today for both of my cars
New Oem door moldings, Pillars, and clips
JDM P72
JDM P30
Obd2 2 Odb0 jumper harness
Odb2 2 Odb1 jumper harness

The power-plant for the Rex

Looks better than a cast manifold

Got some updates!
Some stuff showed up in the mail and g2integy came up for the weekend.
Started out getting the tranny on and some mild wiring.

Slid the motor into place


Picked up some hids

Mocked them up and almost in their final place some wiring to clean up and they'll look right.

Set the rad and fans in there trying to see what the final fitment is going to look like. And hooked up the hids to a batt and fired them up just cause I was anxious.


Got the knuckles all pressed apart and painted up. Some extended lugs for them too just waiting on the bearings which should be here tomorrow. As usual the suspension on this car was not original, so I had to order the integra bearing instead of the crx ones. Just one more day to the list of waiting for things to show up.
All the front window trim, roof moldings, clips and rear quarter trim showed up today as well.
Just ordered a odyssey batt and a password jdm bat relocation kit and some spherical RTA bushings.
So my other bushings are up for sale. Got three sets for civics. One new and one used energy suspension set and a no name oem replacement that looks identical to stock bushings.

Got all but one caliper cleaned up and ready for paint. I want something that looks stock, so I'll probably go with bronze or gold.

and picked up some stuff today

Decided to bust out the better camera for the rest of the build
The overspray will go away, just give me some time.
[IMG]http://i294.photobucket.com/albums/mm119/tkdas03/IMG_1524.jpg[/IMG
No paint needed
Some Wire Wheeling and they are starting to look much better.

And Got the rears cleaned up a bit. Still need to remove one of those ES bushings

One step closer. . . .
I love it when the fed ex guy shows up.
New triangles, splash guards, clips, corner light clips, hatch and gas lever assembly, hatch ball studs, six extra triangle clips because I didn't realize the new ones came with clips already in them.
One step closer....
My pile of **** as she likes to call it.
Yes the seats are knockoffs
Yes those are BWR lugnuts
Yes those are BWR LCA's
and no my lights aren't stanleys
Batman doesn't wanna get burned
Puts on my flame suit


One step closer.....
Another three packages showed up today

One step closer.....
I went outside this morning dreading today because of what I had to do. So I decided to make a little write up with pictures of how to correctly solder two wires together, while keeping them as low profile as you can to make them look clean.
Twist the two wires together

Cut off excess wire

Make sure you heat the wire before soldering to ensure a solid connection

Solder!

Much better!

I hope you remembered that heat shrink tubing!

The finished door harness all the way to the main harness

The other door harness soldered and loomed

Then I decided to move back over to the driver side and finish the driver side tuck, well mostly anyways

After tucking I cut the driverside fender for the sidemarkers, and my new fender moldings.

Two of these bad boys!

Plus these two spots!

Plus one of these!

Equals a much cleaner looking fender setup than before.


I know my sidemarkers aren't perfect, but they will have to do until I can paint the fenders again.
K so I haven't had too much time to wrench due to work picking up because of summer. But I did try to loom up my engine wire harness, Plugs all de-pinned and a few extended wires but not much. I'm also relocating my fuse box into the cabin but also haven't gotten to that yet. I know this is no chasebays/rywire milspec but it'll do for a while till I get some more cash up to buy one from the real guys.
Any of you flag guys that need any wiring done lemme know, I got a **** ton of loom left and am down for tucking anyone's ride up here. For a price.

and some up close shots, I pinned the distro plugs to new connectors


Picked up a kenwood deck with bluetooth for my phone and some references


So I stayed up late last night and got a few things done. I got a package in the mail and it turned out to be this

So I spent some time bolting the motor in completely.I got m=ost of the main electrical out of the way and I started the passenger side harness tuck. It got way late for me and I had to call it a night. But not before one last pic before I went to bed.

Got started on the driver side door a few days ago and finished today while I had some free time.
Pics! All I had was my BB so these pics kinda suck


So I traded the Low max replicas for these guys, Looked to be in pretty good condition.

back when 1lowtacoma owned it
Only pic I have of the bay before
After some elbow grease
Some primer
and my daily that gets me to the paint store
I only shot it with single stage to match the rest of the color on the car, I think the guys at Auto paint plus here in flag did a pretty good job matching the paint from just the gas door. There is a lot more that is planning to be done to it but I'll only reveal what I'm working on as I get it done.
Oh yeah this in only my third time trying to paint, so I'm just chalking this all up to becoming a better painter.
Thanks for looking
just picked this up today, Es bushing kit and RTA bushings as well. After the weekend I get some time free so I'll get some updates
So it's no chase bays harness or anything like that but at least the back is done
Updates!
Got the headliner finished, I just had the material laying around so I tried to make this look as nice as possible. It'll probably won't stay tan as it doesn't flow with the rest of the plans for the car. It does however cover up the nasty blue cig burned one that came it the car.
Now the jambs match the rest of the car.
Headliner pics
Removing the ld quarter glass moulding, and sanding the driver side down.
Got the driver side in some primer to fill out some of the imperfections after sanding
Ok so this morn I woke up and decided that it was time to get this rex rolling. . . . . . . . . . well not exactly they way you would normally think.
So I went ahead and threw this little guy together and got the car on it.
Then Prepped the rest of the garage for paint today.
and shot the driver side quarter
So I got a few goodies today for both of my cars
New Oem door moldings, Pillars, and clips
JDM P72
JDM P30
Obd2 2 Odb0 jumper harness
Odb2 2 Odb1 jumper harness
The power-plant for the Rex
Looks better than a cast manifold
Got some updates!
Some stuff showed up in the mail and g2integy came up for the weekend.
Started out getting the tranny on and some mild wiring.
Slid the motor into place
Picked up some hids
Mocked them up and almost in their final place some wiring to clean up and they'll look right.
Set the rad and fans in there trying to see what the final fitment is going to look like. And hooked up the hids to a batt and fired them up just cause I was anxious.
Got the knuckles all pressed apart and painted up. Some extended lugs for them too just waiting on the bearings which should be here tomorrow. As usual the suspension on this car was not original, so I had to order the integra bearing instead of the crx ones. Just one more day to the list of waiting for things to show up.
All the front window trim, roof moldings, clips and rear quarter trim showed up today as well.
Just ordered a odyssey batt and a password jdm bat relocation kit and some spherical RTA bushings.
So my other bushings are up for sale. Got three sets for civics. One new and one used energy suspension set and a no name oem replacement that looks identical to stock bushings.
Got all but one caliper cleaned up and ready for paint. I want something that looks stock, so I'll probably go with bronze or gold.
and picked up some stuff today
Decided to bust out the better camera for the rest of the build
The overspray will go away, just give me some time.
[IMG]http://i294.photobucket.com/albums/mm119/tkdas03/IMG_1524.jpg[/IMG
No paint needed
Some Wire Wheeling and they are starting to look much better.
And Got the rears cleaned up a bit. Still need to remove one of those ES bushings
One step closer. . . .
I love it when the fed ex guy shows up.
New triangles, splash guards, clips, corner light clips, hatch and gas lever assembly, hatch ball studs, six extra triangle clips because I didn't realize the new ones came with clips already in them.
One step closer....
My pile of **** as she likes to call it.
Yes the seats are knockoffs
Yes those are BWR lugnuts
Yes those are BWR LCA's
and no my lights aren't stanleys
Batman doesn't wanna get burned
Puts on my flame suit
One step closer.....
Another three packages showed up today
One step closer.....
I went outside this morning dreading today because of what I had to do. So I decided to make a little write up with pictures of how to correctly solder two wires together, while keeping them as low profile as you can to make them look clean.
Twist the two wires together
Cut off excess wire
Make sure you heat the wire before soldering to ensure a solid connection
Solder!
Much better!
I hope you remembered that heat shrink tubing!
The finished door harness all the way to the main harness
The other door harness soldered and loomed
Then I decided to move back over to the driver side and finish the driver side tuck, well mostly anyways
After tucking I cut the driverside fender for the sidemarkers, and my new fender moldings.
Two of these bad boys!
Plus these two spots!
Plus one of these!
Equals a much cleaner looking fender setup than before.
I know my sidemarkers aren't perfect, but they will have to do until I can paint the fenders again.
K so I haven't had too much time to wrench due to work picking up because of summer. But I did try to loom up my engine wire harness, Plugs all de-pinned and a few extended wires but not much. I'm also relocating my fuse box into the cabin but also haven't gotten to that yet. I know this is no chasebays/rywire milspec but it'll do for a while till I get some more cash up to buy one from the real guys.
Any of you flag guys that need any wiring done lemme know, I got a **** ton of loom left and am down for tucking anyone's ride up here. For a price.
and some up close shots, I pinned the distro plugs to new connectors
Picked up a kenwood deck with bluetooth for my phone and some references
So I stayed up late last night and got a few things done. I got a package in the mail and it turned out to be this
So I spent some time bolting the motor in completely.I got m=ost of the main electrical out of the way and I started the passenger side harness tuck. It got way late for me and I had to call it a night. But not before one last pic before I went to bed.
Got started on the driver side door a few days ago and finished today while I had some free time.
Pics! All I had was my BB so these pics kinda suck
So I traded the Low max replicas for these guys, Looked to be in pretty good condition.
Thread Starter
Honda-Tech Member
Joined: May 2010
Posts: 14
Likes: 0
Using four cans of this to get the grime out.

One done!


And Both Done!

There is still a little dirt in them but that's all the cleaning I could handle for today.
I could easily say the driver side was twice as dirty as the passenger side. I spent twice as much time cleaning it and didn't even get it all done.

Losing half my garage for concrete countertops = FTL
In attempt to find my batt drain and fuel pump problem, I took most of the wiring out of the car and laid it out in the garage.
Still need to pull the rear of the car.


One done!
And Both Done!
There is still a little dirt in them but that's all the cleaning I could handle for today.
I could easily say the driver side was twice as dirty as the passenger side. I spent twice as much time cleaning it and didn't even get it all done.
Losing half my garage for concrete countertops = FTL
In attempt to find my batt drain and fuel pump problem, I took most of the wiring out of the car and laid it out in the garage.
Still need to pull the rear of the car.
Thread Starter
Honda-Tech Member
Joined: May 2010
Posts: 14
Likes: 0
Updates!
Welded up the exhaust
Got the seats brackets made
Wiring problem figured out
New trailing arm bushings installed
Sourced a air box, overflow tank, and misc engine bay stuff.


Welded up the exhaust
Got the seats brackets made
Wiring problem figured out
New trailing arm bushings installed
Sourced a air box, overflow tank, and misc engine bay stuff.

Honda-Tech Member
Joined: Sep 2006
Posts: 7,709
Likes: 12
From: NoRthERn Cali
ditch the s2k seats, and wait for it.........
CRX EXCLUSIVE interior.
car is coming along nicely. but i sure hope you used adhesive heat shrink on the ends of that expandable sleeve. i use that stuff all the time for my tuck harnesses that i make, and regular heat shrink is not the way to go.
CRX EXCLUSIVE interior.
car is coming along nicely. but i sure hope you used adhesive heat shrink on the ends of that expandable sleeve. i use that stuff all the time for my tuck harnesses that i make, and regular heat shrink is not the way to go.

Trending Topics


Honda-Tech Member
Joined: Dec 2007
Posts: 34
Likes: 0
From: Relocated to Meridian, Idaho, United States
Very nice! I would have not considered that particular color scheme, it looks better than I would have expected.
The wiring tuck looks very professional, if you could find someone who would do that nice of a job for just money.
Greg
The wiring tuck looks very professional, if you could find someone who would do that nice of a job for just money.
Greg
Honda-Tech Member
Joined: Mar 2010
Posts: 787
Likes: 0
love the color and pretty much everything else just idk i hate messing with the stock interior i was even doubting putting in my recaros enjoy in my hatch but its everyone choice and well your rex is looking sick bro

Honda-Tech Member
Joined: Feb 2011
Posts: 198
Likes: 0
From: Bay Area
Yeah, I don't use the word tremendous ever. Maybe once every 10 years or something. So here it is: TREMENDOUS work.
Me and my 90 si are hanging out on the couch, looking at this build and she just said:
You should do that to me.
Me and my 90 si are hanging out on the couch, looking at this build and she just said:
You should do that to me.

Thread
Thread Starter
Forum
Replies
Last Post
RickyGoshDarn
Honda / Acura
15
Jul 29, 2004 04:07 PM