

lbk02si's---B I G---build thread!!!!

Thread Starter
Honda-Tech Member
Joined: Jan 2011
Posts: 8
Likes: 0
Hey guys, I'm new on here so I figured I'd post a build thread! This build has been going on for a few years now, so the first few pics are from the beginning of the swap. Anyways, enjoy!
K20z1 with tranny


Parts coming in this week hopefully:
Quaife 1.5way LSD
Hybrid Racing VSS converter
Spec Stage 2+ carbon semi-metallic/kevlar clutch
Avid Billet Motor mounts (street/race hardness 62a, i believe)
Spec Stage 2 plus clutch kit
 [/QUOTE]

My buddy showing how he feels about being sent the wrong parts.


 [/QUOTE]
And now for the pictures and some shennanigans!


the a3 coming out

matt saluting the a3 on its way out!


Hey Chris!! I got your fart can right here!!

so empty , and it doesn't even have half-Ivtec now...

where the hell did it go?!?!!!! it was just here a minute ago!!

Thats right! I fooled all you guys! This is my new UBER-Secret UBER-Badass new UBER-JDM motor in all its glory!!! Anybody wanna go to Mexico??!!

This is a great shot, here you can see my sweet new FMIC!

We gave up on getting my Avid Motor mounts in time, so Matt custom fabricated these new motor mounts! The guy is a genius!!

(LEFT)K20z1 (RIGHT)K20a3

Matt is trying to decide if its too big to fit...

Cameron got frustrated and couldn't possibly wait any longer!

And apparently the z1 wasn't enough to satisfy his lustful desires, so he immediately moved on Matt's 85 Toyota.....satisfaction achieved!

You can see my new "Driver Mod" here, complete with a new custom fabricated trick shifter (thanks again for another custom touch Matt!), F1 racing wheel, with one button (color coded of course), FMIC, and a seating position right on top of the motor(this way i can really closely monitor the new motor's performance, who needs gauges anyways!).
 [/QUOTE]
Spec Stage 2+ clutch going in

Z1 all put together

Rear view of completed z1


K20z1 with tranny
Parts coming in this week hopefully:
Quaife 1.5way LSD
Hybrid Racing VSS converter
Spec Stage 2+ carbon semi-metallic/kevlar clutch
Avid Billet Motor mounts (street/race hardness 62a, i believe)
Spec Stage 2 plus clutch kit
[/QUOTE]My buddy showing how he feels about being sent the wrong parts.
[/QUOTE]And now for the pictures and some shennanigans!
the a3 coming out
matt saluting the a3 on its way out!
Hey Chris!! I got your fart can right here!!
so empty
, and it doesn't even have half-Ivtec now...where the hell did it go?!?!!!! it was just here a minute ago!!
Thats right! I fooled all you guys! This is my new UBER-Secret UBER-Badass new UBER-JDM motor in all its glory!!! Anybody wanna go to Mexico??!!
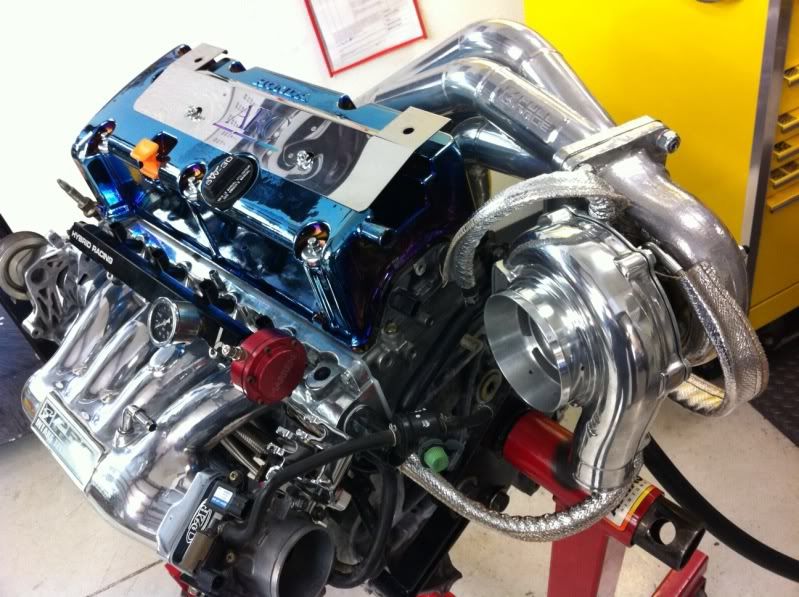
This is a great shot, here you can see my sweet new FMIC!
We gave up on getting my Avid Motor mounts in time, so Matt custom fabricated these new motor mounts! The guy is a genius!!
(LEFT)K20z1 (RIGHT)K20a3
Matt is trying to decide if its too big to fit...
Cameron got frustrated and couldn't possibly wait any longer!
And apparently the z1 wasn't enough to satisfy his lustful desires, so he immediately moved on Matt's 85 Toyota.....satisfaction achieved!
You can see my new "Driver Mod" here, complete with a new custom fabricated trick shifter (thanks again for another custom touch Matt!), F1 racing wheel, with one button (color coded of course), FMIC, and a seating position right on top of the motor(this way i can really closely monitor the new motor's performance, who needs gauges anyways!).
[/QUOTE]Spec Stage 2+ clutch going in
Z1 all put together
Rear view of completed z1

SUCCESS!! well.. sort of! Matt and I got the motor put in and everything put back together today. I uploaded the base map for the z1 into the ecu and the motor fired right up! So after we got the rest of the car put back together we took it out for a test drive with my laptop plugged into to the ecu monitoring the motor with the Kmanager software. Well we started getting a lot of knocks, and they were audible too. So we took the the car back to the shop, Matt did some checking and it seems like i might have a stuck lifter or might possibly need a valve lash adjustment. I'm still trying to learn Kpro and a little on tuning, Kmanager is a pretty sweet program with TONS of things things you can do, and TONS of things you can tweak. We'll be working on the lifter issue tomorrow, so wish us luck and speed so hopefully we can be done and me be ready for the drive to dallas on monday. Good thing I've got Matt though, i'd totally be screwed right now if i was without the mad scientist! anyways here's some pics of the z1 in the car.... yea yea i know looks pretty much the same except for the star trek badge!


uggghhh well...umm ****... today was NO FREAKIN BUENO!! Matt pulled the valve cover off and it wasn't but about 5 mins before he found the source of the knocking. turns out that the rocker arm return spring for the vtec cam lobe on cylinder 2 is completely broken off and laying in the bottom of the head! So because there is no spring there that rocker arm is just flapping around which explains the noise we were hearing and the knocks that we were seeing through Kmanager. pretty disappointing and depressing day all in all. so tomorrow i'm going to get in touch with the person/business i bought the motor from and see what they are willing to do about this since the guy i've been talking to claims that they tore the motor apart and checked everything (even though all the factory paint markers on the bolts were intact as they were from the factory). i'm assuming even if they are willing to make this right they won't be interested in doing so in a timely manner. so i'm guessing i'll be trying to source the part from the acura dealer in dallas and overnighting it to matt to get the repair done this week. HOPEFULLY i'll be able to take the next week off to get the clutch broken in and re-schedule my dyno tune for the following saturday (May 1st). Peter does have a great point about not rushing a build (and i def. don't want to) but man i can't tell you how disappointing and frustrating it is to put in all the work and have the motor installed in the car and then something being broken in the motor delaying it that much more! oh well, at least it'll all be worth it when its finally done and tuned!
anyways, here's the carnage pics from this morning.
notice the light shining through the gap under the cam lobe, the rocker/lobe on the left is good, bad one is on the right

the part of the spring that was sitting in the bottom of the head (about the middle of the picture, hard to see but its there)

this is the broken piece

anyways, here's the carnage pics from this morning.
notice the light shining through the gap under the cam lobe, the rocker/lobe on the left is good, bad one is on the right
the part of the spring that was sitting in the bottom of the head (about the middle of the picture, hard to see but its there)
this is the broken piece
Thread Starter
Honda-Tech Member
Joined: Jan 2011
Posts: 8
Likes: 0

 [/QUOTE]
Just got the pics of my new Mugen hood from Jotech today! If you are wonder the reason the hood isnt that shiny is because its basically raw carbon fiber, there isn't a gel coat on it. And yes the vents are functional, which is one big reason why i got this hood. anyways, enjoy!


 !!!!
!!!!
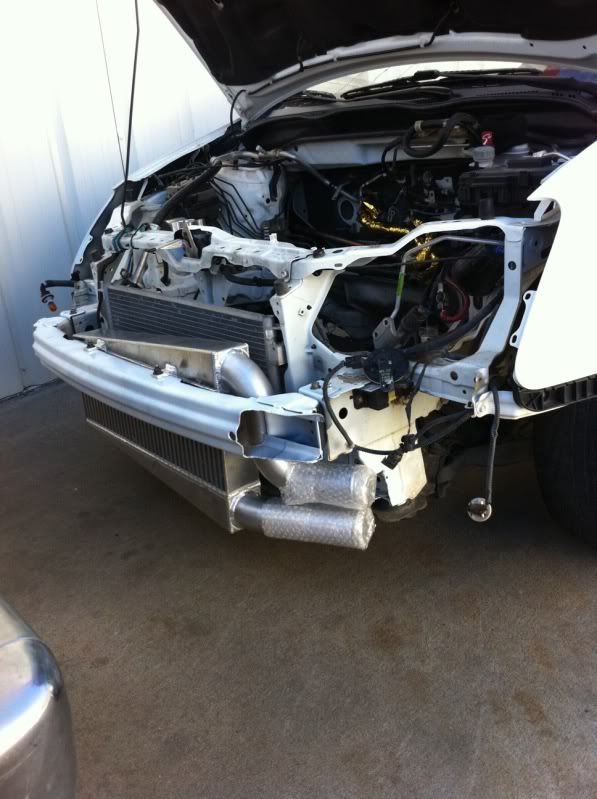
I've got a week off, and I had to stop in Mckinney for my little niece's soccer game before coming home, so I decided to go over to Jotech and check out the progress and see first hand some of my new toys! Well i have to say i'm really happy with the progress and the way everything looks right now! The motor is pretty much done, and the plan is to have it in the car and running this weekend or monday. There were some final cosmetic details I took care of while i was there like, getting the FPD re-anodized black to match the fuel rail, making sure the dipstick gets painted black (the orange sticks out like a clown's nose!), finding some new flat black Ray's lugs to match my new wheels, and decided on the braided hose's/AN fittings we'll be using. The car is in pieces right now, and they have a table with all my new parts laid out on it (which i forgot to get a picture of) that looks pretty cool! Anyways, things are coming together pretty good, and I was told that everything should be completed and ready by the end of this month. Only bad news is that I'll only be home this week and the week of thanksgiving, so if they aren't done by thanksgiving then i'll have to pick it up the week of christmas. Enjoy the pics!
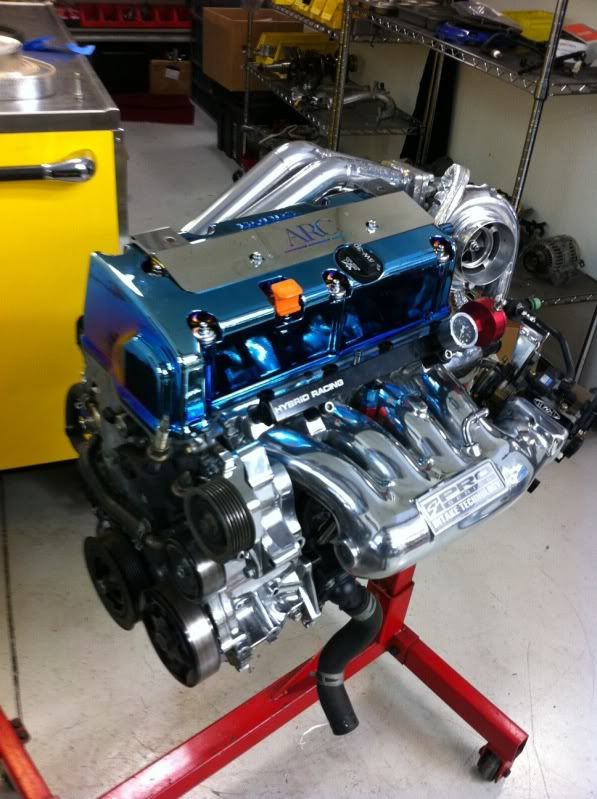
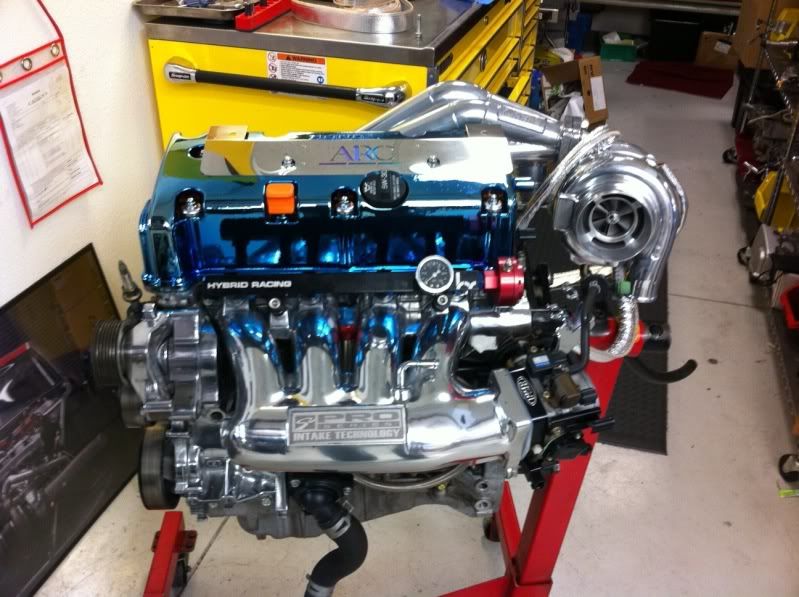
Motor Pics
Empty Bay with heat insulation installed
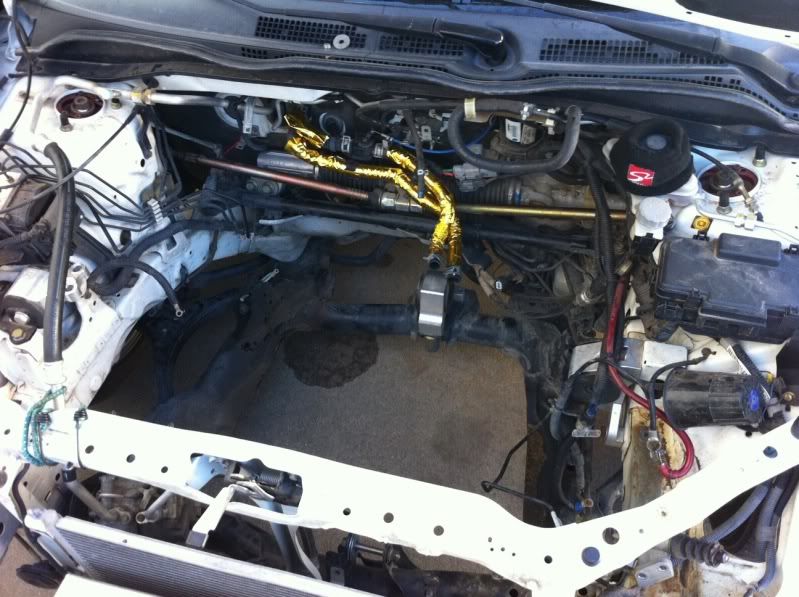
FMIC Pic
Motor Pics
Empty Bay with heat insulation installed
FMIC Pic
Went to Jotech when I was off for christmas to approve some exhaust changes they'd made. Turns out that the HKS muffler I had originally planned on using was WAYYY to long for my car, it actually stuck out like 4 inches past the bumper and looked really bad! So instead i'm going with a Vibrant muffler because its the only one that was short enough that they could find that would fit. Its still a polished stainless steel N1 style muffler though. Anyways, I took a couple pictures and a video. The video isn't the greatest bc when i sent it from my phone it flipped it vertically for some reason but its good enough for you to hear what my motor sounds like. It did not have the muffler on when I got there but it still sounded great!!! Its very deep and not as loud as my previous Buddy Club muffler thankfully.
VIDEO

You can see the fuel pulsation dampner after its been re-anodized black to match the fuel rail, the dipstick painted black and a black skunk2 oil cap.

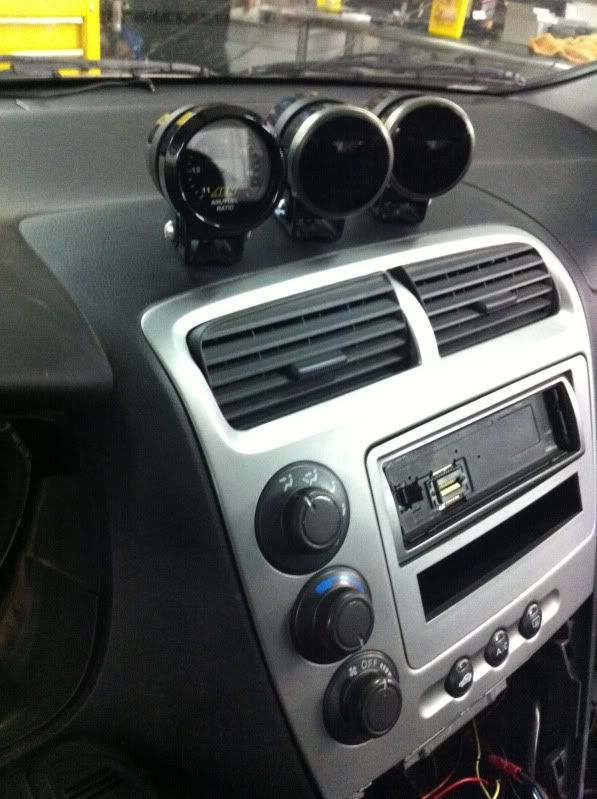
I couldn't get a picture of where the wires go into the dash because the windsheild was too dirty for me to get a clear picture. But the holes that were drilled to run the wires to the gauges are fitted with some little custom grommets/trim rings. Then they mounted them in some carbon fiber gauge pods. It looks like they were put in from the factory, can't say enough about the quality of work I've seen from the guys at Jotech!
VIDEO
You can see the fuel pulsation dampner after its been re-anodized black to match the fuel rail, the dipstick painted black and a black skunk2 oil cap.
I couldn't get a picture of where the wires go into the dash because the windsheild was too dirty for me to get a clear picture. But the holes that were drilled to run the wires to the gauges are fitted with some little custom grommets/trim rings. Then they mounted them in some carbon fiber gauge pods. It looks like they were put in from the factory, can't say enough about the quality of work I've seen from the guys at Jotech!
Today was a LONNNGGGGG day! I'm back in Dallas, and went to Jotech this afternoon, but the paint shop ran behind last week and didn't have my car finished up until after 6pm today. Jotech still has a couple of things to finish up before I can take the car home. Tomorrow they are finishing up mounting the boost controller, and the turbo timer, plus wiring up the turbo timer. I got to drive the car back from the paint shop to Jotech, and I'm rubbing all four tires pretty good, so tomorrow they'll be shaving and rolling the fenders, plus raising the suspension about 1/4" to fix this. The turbo is really responsive and feels REALLY strong! Currently, we have a conservative tune, with 91 octane, on it with 660cc injectors that dyno'd at 309whp. The motor and clutch have been broken in, and I will be driving the car for a few days just to make sure everything is good with it. It will be brought back to Jotech on saturday, where they will be finishing up the rest of the work they lack, as well as a couple things the body shop was not able to get to. The injectors will also be switched out to the new 1000cc injectors and the street tune map will be fine tuned and boost bumped up a little as well. After the street tune is finalized, Kenny will make me a second map for my race tune (high boost with race gas), he said he's expecting to be able to make 400-450whp on that tune!
Anyways, here's some preview pictures that I took at the body shop.
Fresh out of the paint booth

Vents still masked off

Front bumper installed, and everything buffed out and polished up


hood vent close up

Anyways, here's some preview pictures that I took at the body shop.
Fresh out of the paint booth
Vents still masked off
Front bumper installed, and everything buffed out and polished up
hood vent close up
Thread Starter
Honda-Tech Member
Joined: Jan 2011
Posts: 8
Likes: 0
Alright guys, Kenny finally posted all the pics up on Jotech's webpage!!!! Final dyno numbers for the race gas tune were 464whp/341wtq. I don't have the final numbers for the low boost street tune yet. I'll have those next week sometime though.
Check Jotech's webpage at www.jotechracing.com.
Dyno Video:
http://www.youtube.com/watch?v=Ye-FLQqd-nU&hd=1


Check Jotech's webpage at www.jotechracing.com.
Dyno Video:
http://www.youtube.com/watch?v=Ye-FLQqd-nU&hd=1
Ok, here's the dyno chart for the two tunes 91(current street tune) octane and 93 octane. Disregard the race gas label on the sheet, they just forgot to rename it because initially we were going to do a race gas tune but when it made 483/500whp 2,3,4th gears were absolutely useless bc it just spun all the way through all three gears. the 331whp tune is the 91 octane street tune i'm running right now, and its plenty right now, bc the torque steer and wheel spin in 2nd and 3rd gear can be pretty significant. The car will be going back to Jotech the week of April 12th for the Stoptech big brake kit installation and a few other things. They are also going to be doing another tune, this time we're going to use the Boost by Gear feature that Kpro has. Hopefully I'll be able to make a little more power with better traction and hopefully a little less torque steer.


As you guys know I've had an oil burning issue for a little while now. Turns out it was from a leak somewhere in the head, so I decided to keep driving the car (but constantly checking the oil) until I left for work bc it was going to be about a two week turn around for a head job. Everything was fine until last week before I left, when out of nowhere my exhaust had a funny notably louder tone to it and sounded like I had an exhaust leak. I took it straight home and found a bolt had come out on the turbo manifold, so I replaced that and it took car of the leak but my exhaust still sounded weird. I checked the plugs and found the #2 cylinder spark plug was fouled, so I replaced that and pulled the coil but there was no change in engine noise, so i swapped injectors and had the same result. Next i did a compression check and found that I had zero psi in the #2 cylinder, so the car was delivered back to Jotech on monday and they found this!

Yup thats an actual hole in the stock valve. So the head will be sent off to the machine shop and new stainless steel intake valves, and Supertech Iconel exhaust valves will be installed, and the leaking part fixed.
Yup thats an actual hole in the stock valve. So the head will be sent off to the machine shop and new stainless steel intake valves, and Supertech Iconel exhaust valves will be installed, and the leaking part fixed.

Thread
Thread Starter
Forum
Replies
Last Post
spoon23_JDizM AkA SpOoN20
Forced Induction
8
Apr 24, 2005 01:31 AM
CrRexSiR
Honda CRX / EF Civic (1988 - 1991)
2
Mar 30, 2004 04:25 PM