

D.I.Y Swapping front sway bar from DC5 to EP3

Thread Starter
DC5/EP3 MOD :)
Joined: Sep 2008
Posts: 2,659
Likes: 2
From: WI
So I searched and found plenty of rear sway bar DIYs but no front so I figured I would post mine up. Plus we all know I'm a DIY ***** so :weeeeeeeeee:
My race header clears my sway bar but JUST BARELY....So for peace of mind I decided to pick up an EP3 SI sway bar for cheap. This is a very easy solution to all of you who have clearance and rubbing issues!
So lets compare bars
bottom is RSX top is EP3

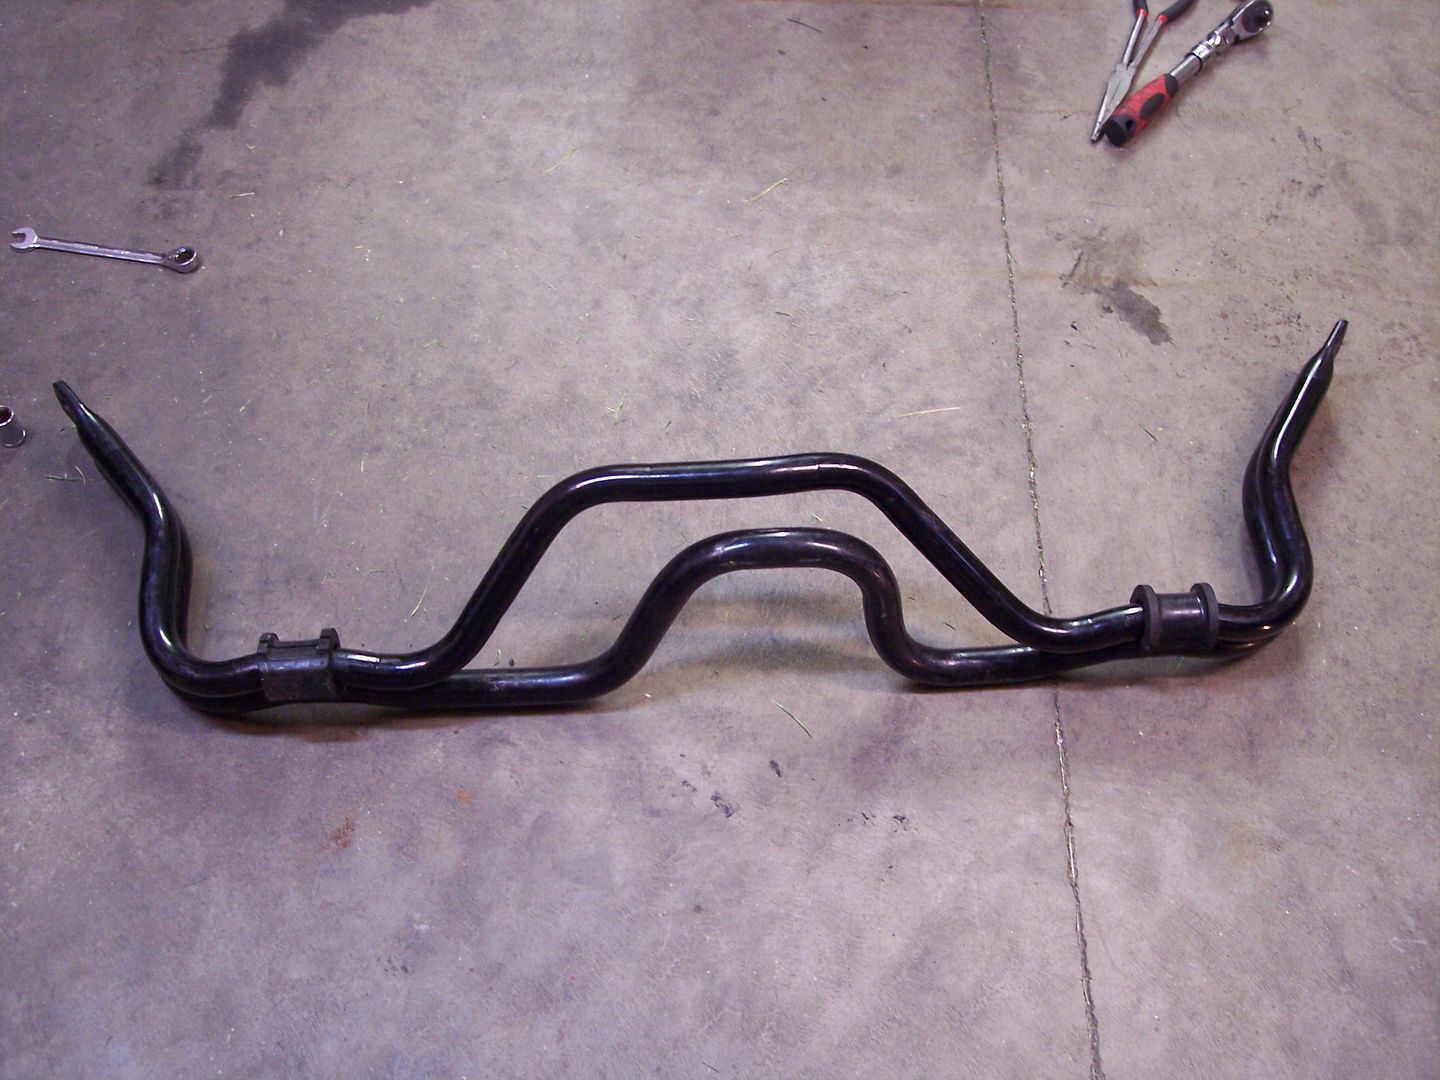
SOOO much more clearance room... why did they make the RSX bar sooo small?!
So lets get started... I did not take my wheels of. But start by lifting the car up obviously and safely secure it on jack stands.
next, start with the stabilizer links
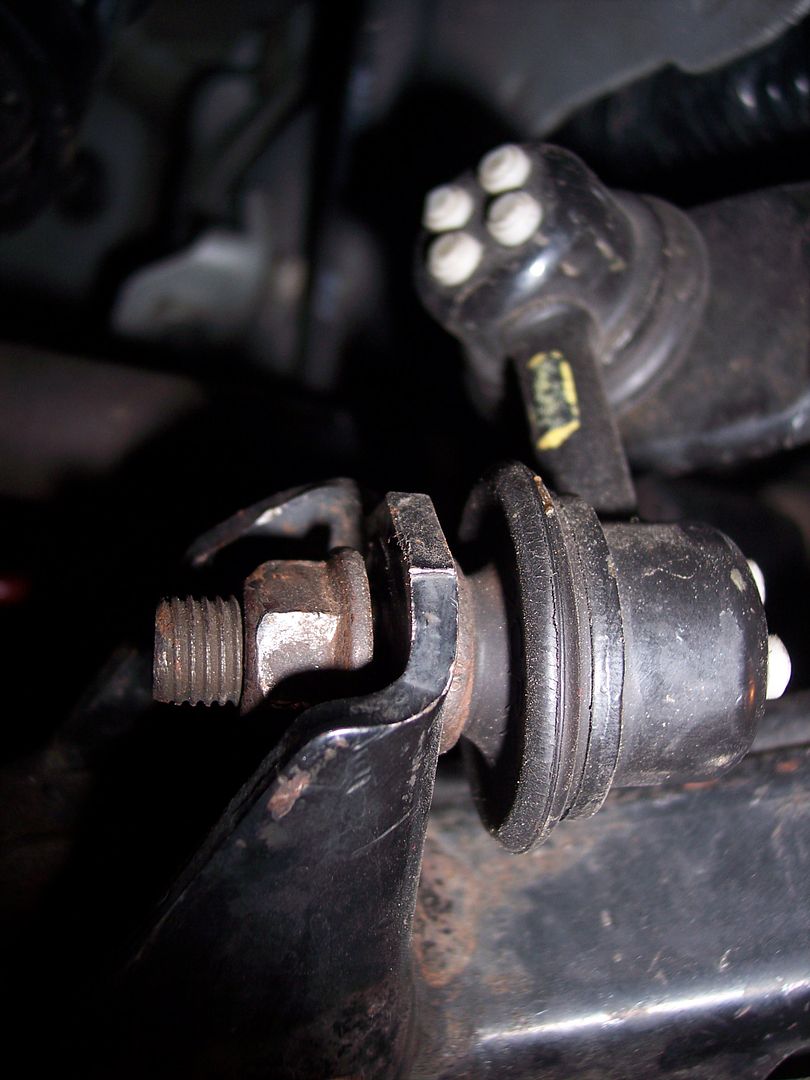
Using a 14MM gear wrench and using a socket style allen (or a regular allen) remove the link from the control arm.


Now remember to do this to both sides of course!
Then move further in and we will remove the 14mm bolts holding the sway bar brackets on

Two bolts for each bracket...

Now we are going to play with the header....
First I removed the flange bolts connect the header to the exahust


Then for ease later I unplugged my O2 sensor so the bar can get past it

Now go to the top of the engine.. you don't need to remove the header! You only have to loosen the manifold bolts! There are five of them

This will give you more flexibility to remove the sway bar. Now start wiggling it down towards the flange and remove it!!
Now if your new sway bar doesn't come with stabilizer links go ahead and take off the links like you did from the control arm and attach them to the new sway bar

Also just remove the bushings from the sway bar and place them on the new bar. They just slip off.
Now instal the same way you removed and bolt it all together!!
These aren't the best photos but its a HELL of a difference!
Before:

after:

My race header clears my sway bar but JUST BARELY....So for peace of mind I decided to pick up an EP3 SI sway bar for cheap. This is a very easy solution to all of you who have clearance and rubbing issues!
So lets compare bars
bottom is RSX top is EP3
SOOO much more clearance room... why did they make the RSX bar sooo small?!
So lets get started... I did not take my wheels of. But start by lifting the car up obviously and safely secure it on jack stands.
next, start with the stabilizer links
Using a 14MM gear wrench and using a socket style allen (or a regular allen) remove the link from the control arm.
Now remember to do this to both sides of course!
Then move further in and we will remove the 14mm bolts holding the sway bar brackets on
Two bolts for each bracket...
Now we are going to play with the header....
First I removed the flange bolts connect the header to the exahust
Then for ease later I unplugged my O2 sensor so the bar can get past it
Now go to the top of the engine.. you don't need to remove the header! You only have to loosen the manifold bolts! There are five of them
This will give you more flexibility to remove the sway bar. Now start wiggling it down towards the flange and remove it!!
Now if your new sway bar doesn't come with stabilizer links go ahead and take off the links like you did from the control arm and attach them to the new sway bar
Also just remove the bushings from the sway bar and place them on the new bar. They just slip off.
Now instal the same way you removed and bolt it all together!!
These aren't the best photos but its a HELL of a difference!
Before:
after:


Honda-Tech Member
Joined: Dec 2008
Posts: 426
Likes: 0
From: Texas

Thread
Thread Starter
Forum
Replies
Last Post
Shaynepolevault
Southern California (Sales)
1
Jan 7, 2010 11:06 PM
square_1
Acura RSX DC5 & Honda Civic EP3
11
Feb 3, 2009 05:21 AM
RickChew
Acura RSX DC5 & Honda Civic EP3
4
Feb 18, 2003 02:28 PM