

96 Talon + TL Projectors = Cut Cut Cut Some More

Thread Starter
Honda-Tech Member
Joined: Jul 2001
Posts: 2,675
Likes: 1
From: Paradise, Newfoundland Canada
This is my 3rd retro and still a work in progress, I'm taking my time and doing it over winter while my Talon is parked and waiting to be worked on.
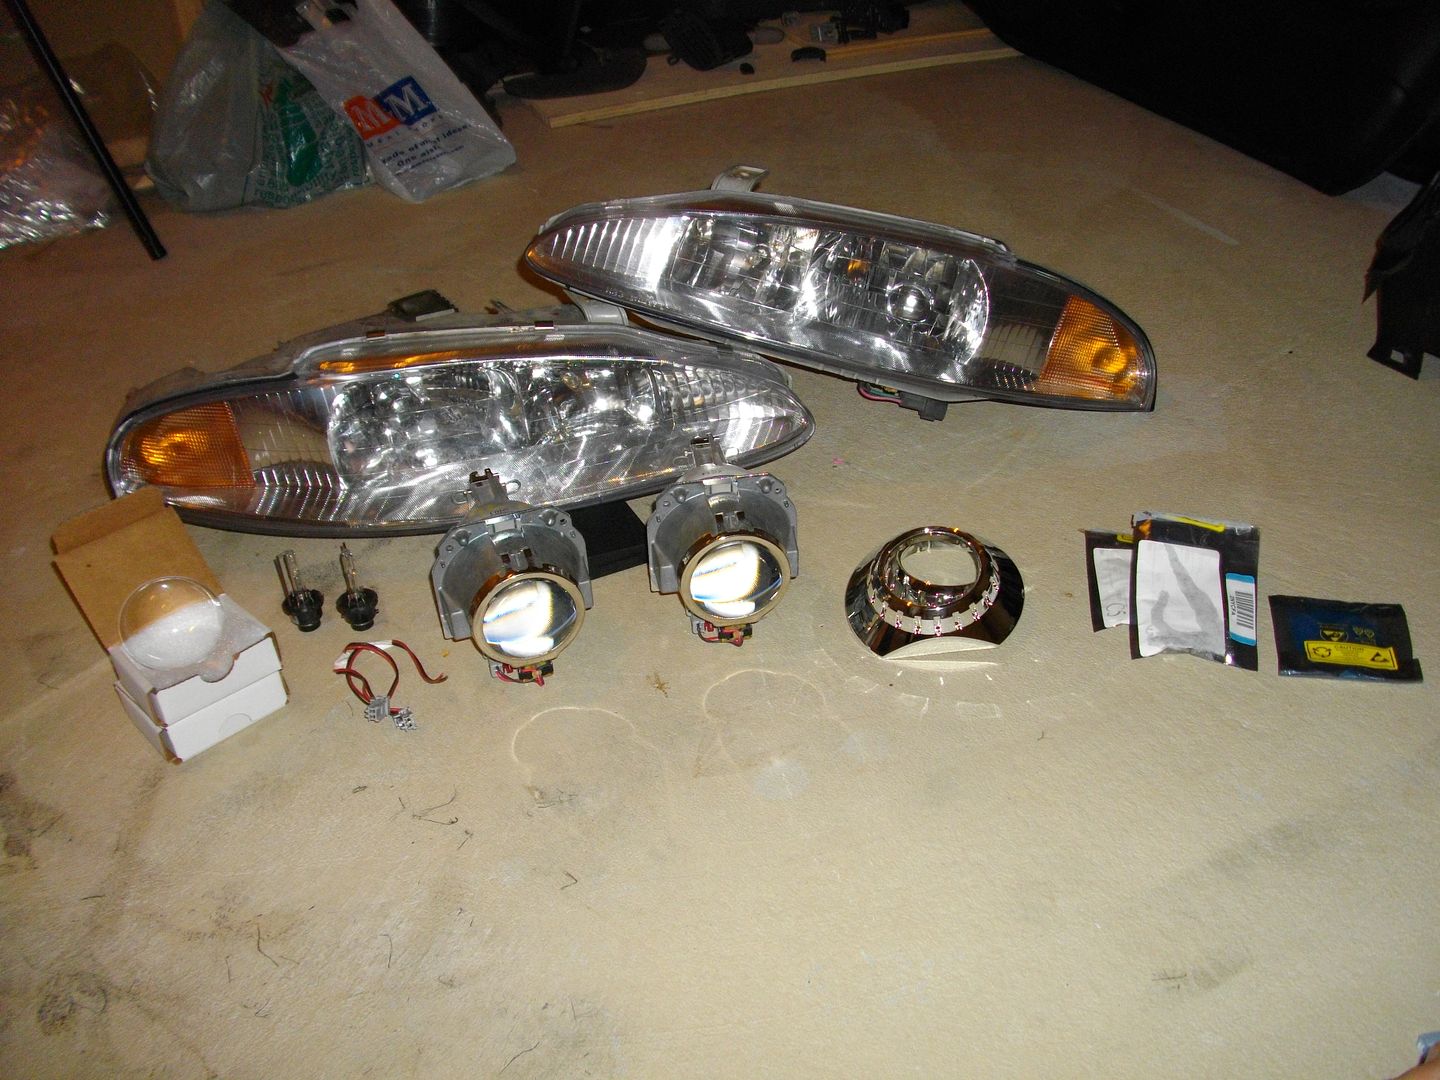
The parts:
Talon OEM Headlights
TL slope projectors
ZKW-R Clear Lenses
E46R Extended Shrouds
Morimoto 5000K bulbs (Going to change these for an OEM)
Bosch AL Gen 2 Ballasts (Boosted, not pictured)
Cree P4 Amber LEDs
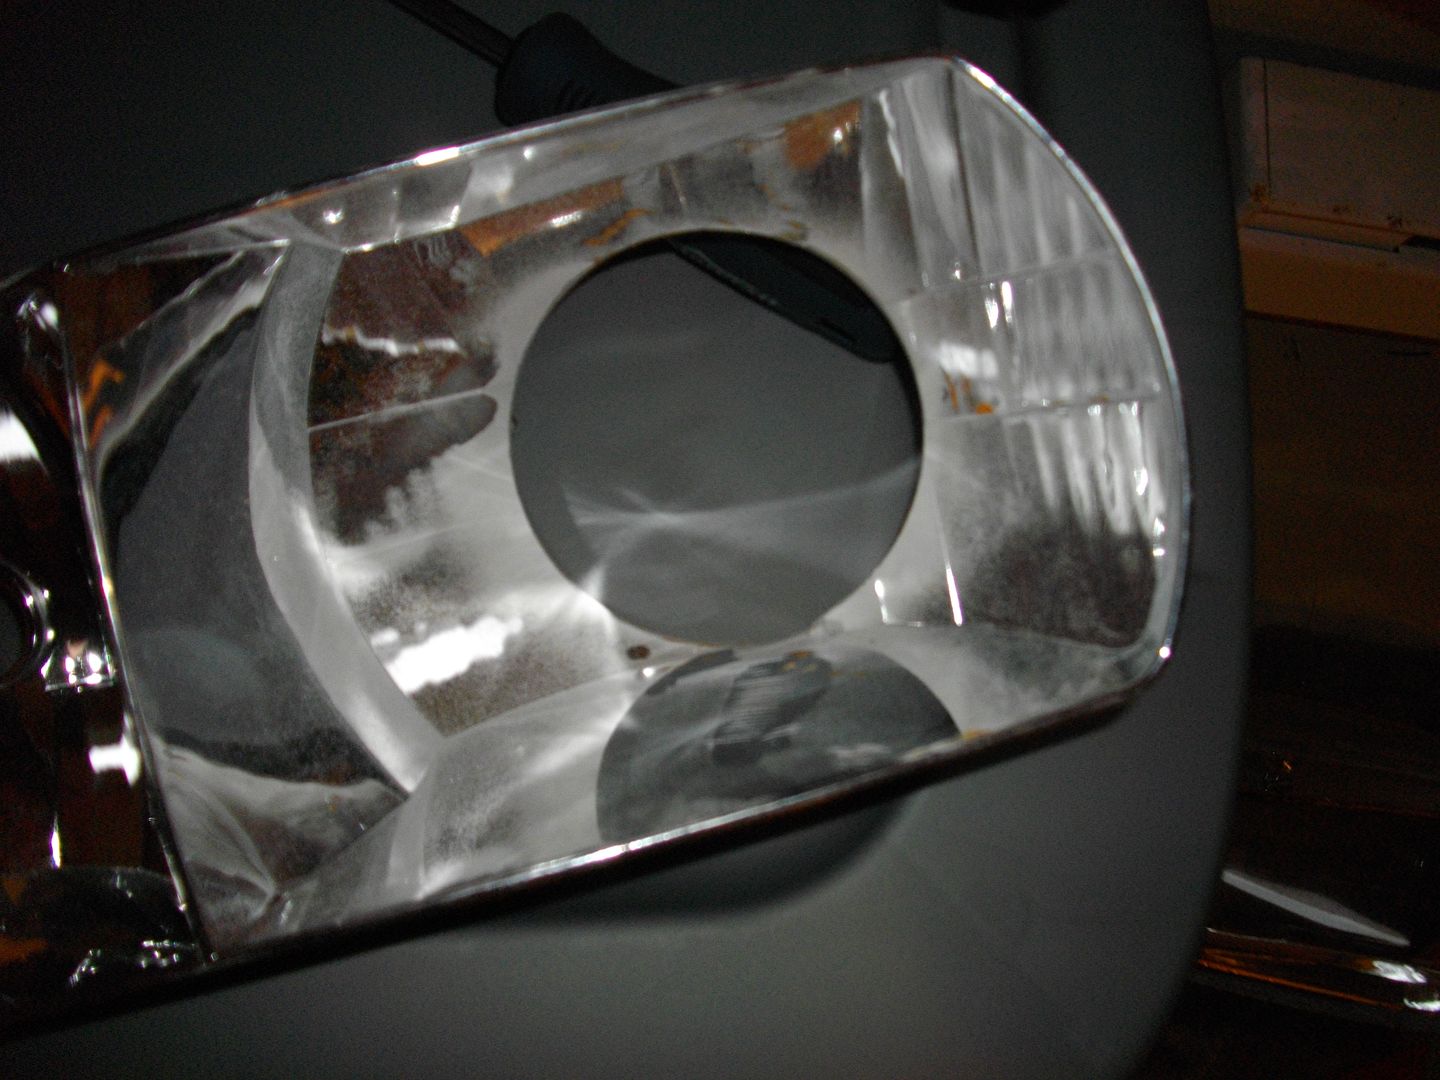
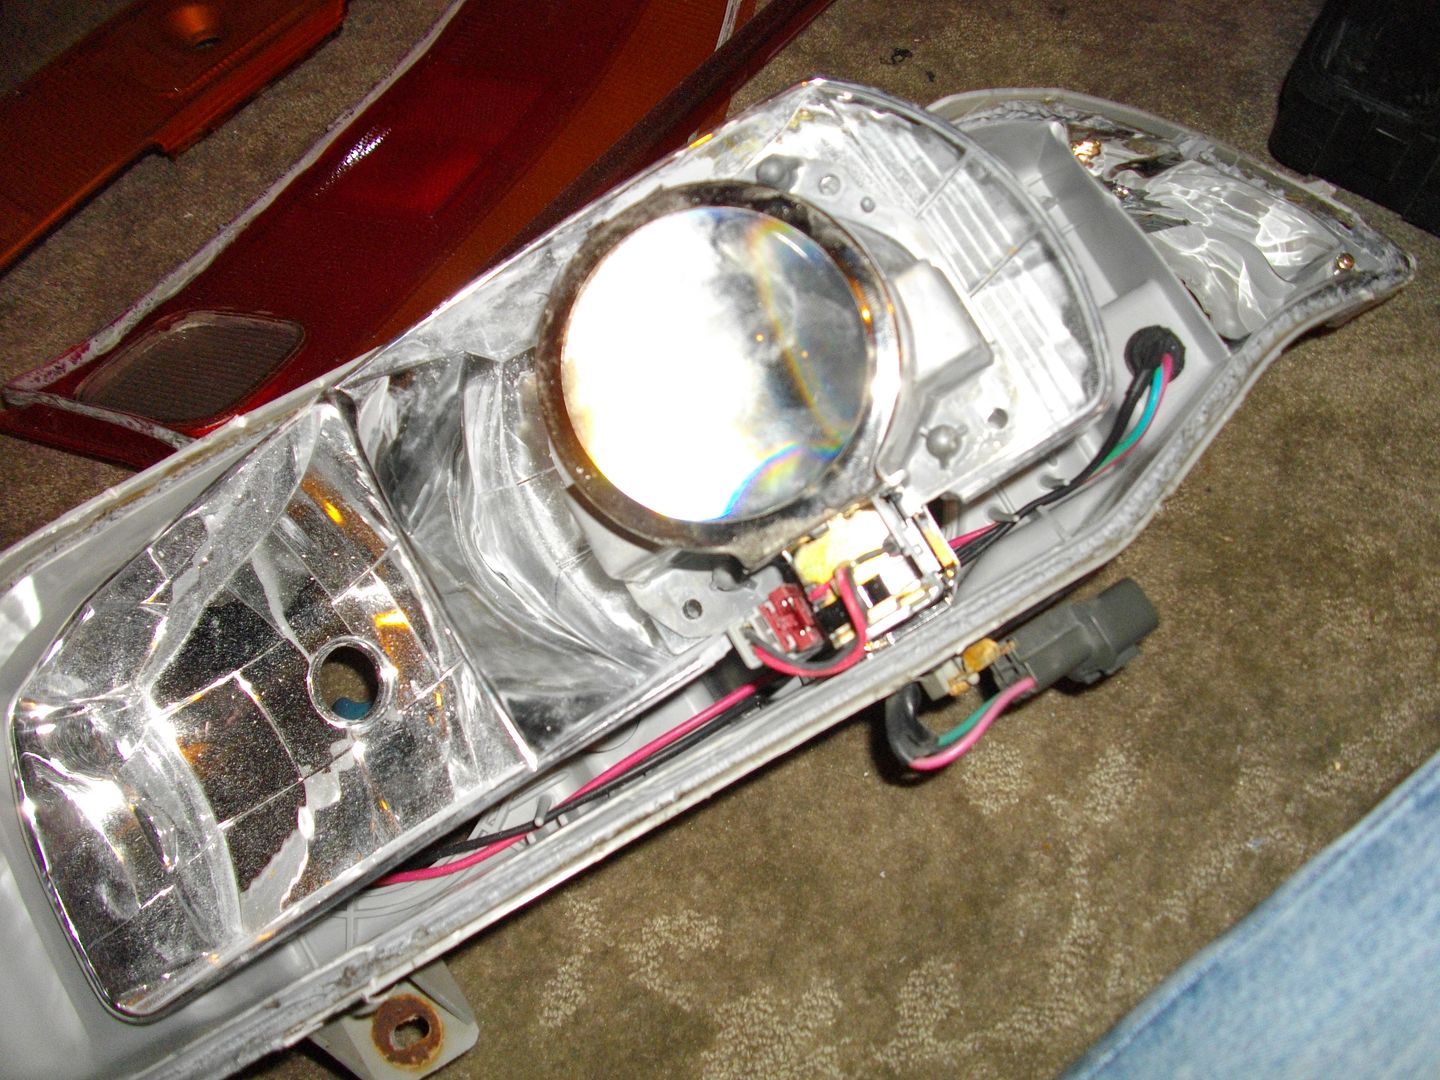
To start with I baked the headlights and opened them up. I knew this wouldn't be an easy retro from the get go due to the TLs size but this picture really illustrates what I have to work with.

I was a bit freaked out about hacking up the headlight so I started with my LED turns first. I wanted to do amber for marker and white for turn but the white wasn't bright enough so I went all amber.
First I made a template.

Then cut the template out of perf board and drilled some holes in it for the OEM screws to hold it in place.

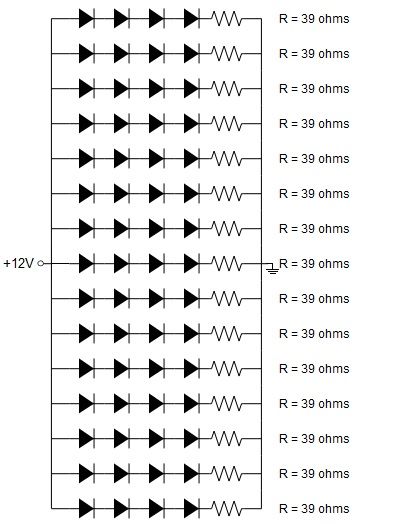
My circuit diagram.
I then cut some chrome vinyl out and stuck it on top, this way the board isn't visible through the clear lens.

With all the LEDs on and soldered up.

Lit up for the first time.

In the headlight housing.


Looks OEM.

The parts:
Talon OEM Headlights
TL slope projectors
ZKW-R Clear Lenses
E46R Extended Shrouds
Morimoto 5000K bulbs (Going to change these for an OEM)
Bosch AL Gen 2 Ballasts (Boosted, not pictured)
Cree P4 Amber LEDs
To start with I baked the headlights and opened them up. I knew this wouldn't be an easy retro from the get go due to the TLs size but this picture really illustrates what I have to work with.
I was a bit freaked out about hacking up the headlight so I started with my LED turns first. I wanted to do amber for marker and white for turn but the white wasn't bright enough so I went all amber.
First I made a template.
Then cut the template out of perf board and drilled some holes in it for the OEM screws to hold it in place.
My circuit diagram.
I then cut some chrome vinyl out and stuck it on top, this way the board isn't visible through the clear lens.
With all the LEDs on and soldered up.
Lit up for the first time.
In the headlight housing.
Looks OEM.
Thread Starter
Honda-Tech Member
Joined: Jul 2001
Posts: 2,675
Likes: 1
From: Paradise, Newfoundland Canada
After that was done I decided to tackle making the TLs fit into my headlights, this meant a lot of cutting.
Drilled out the back of the reflector bucket with a 3.25" hole saw.
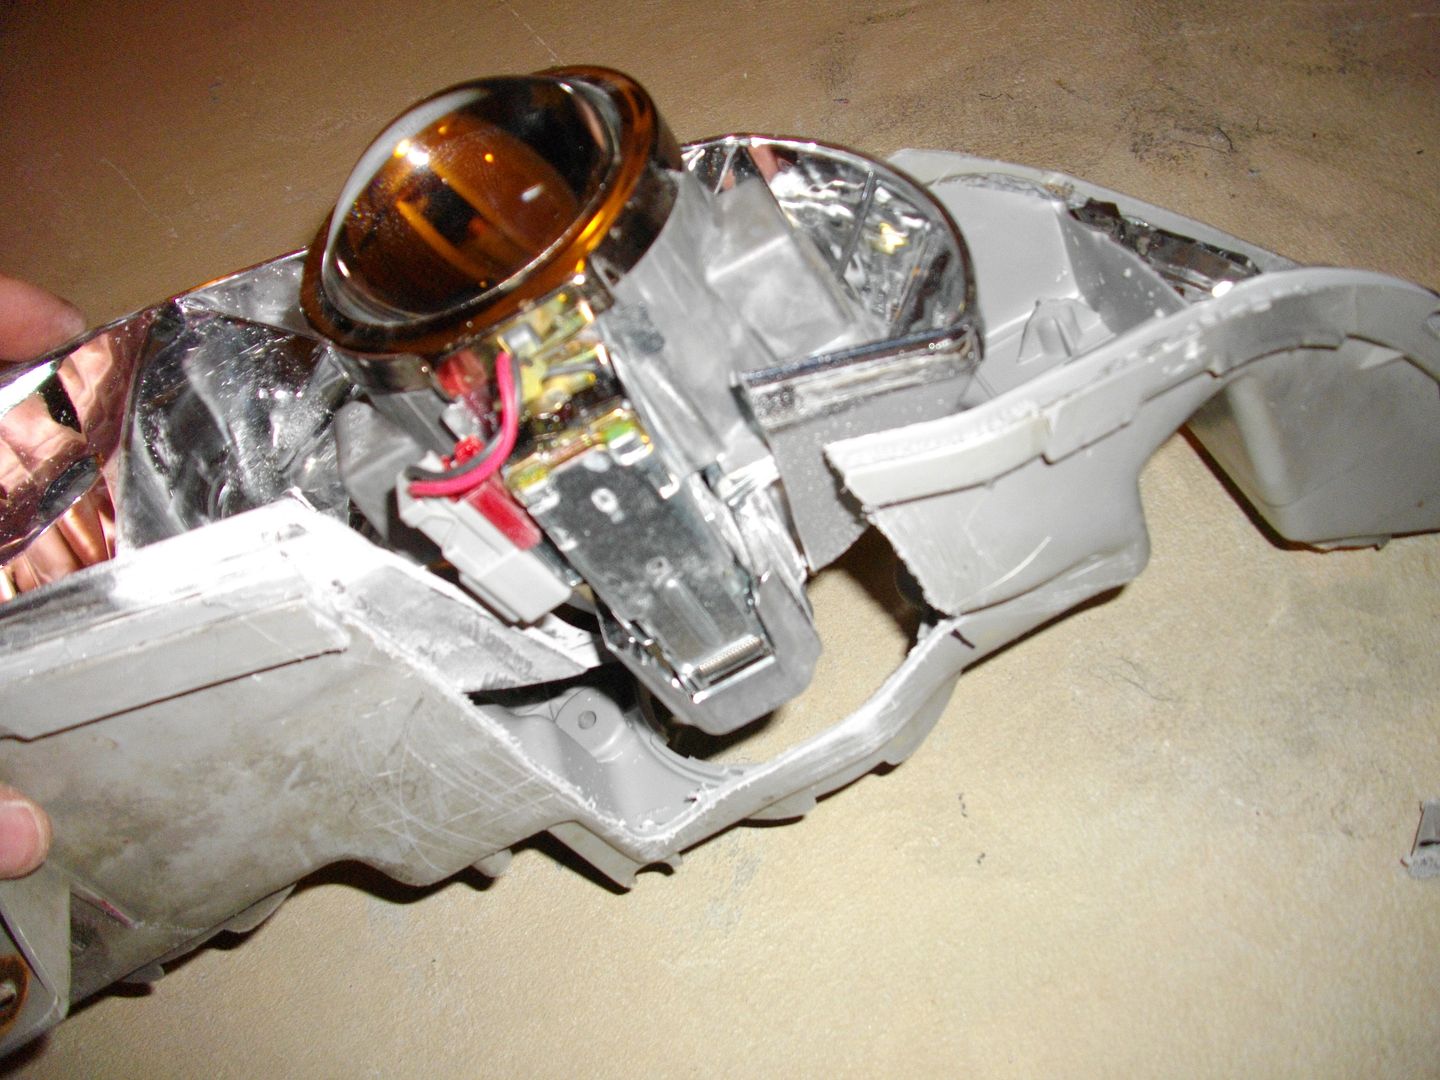
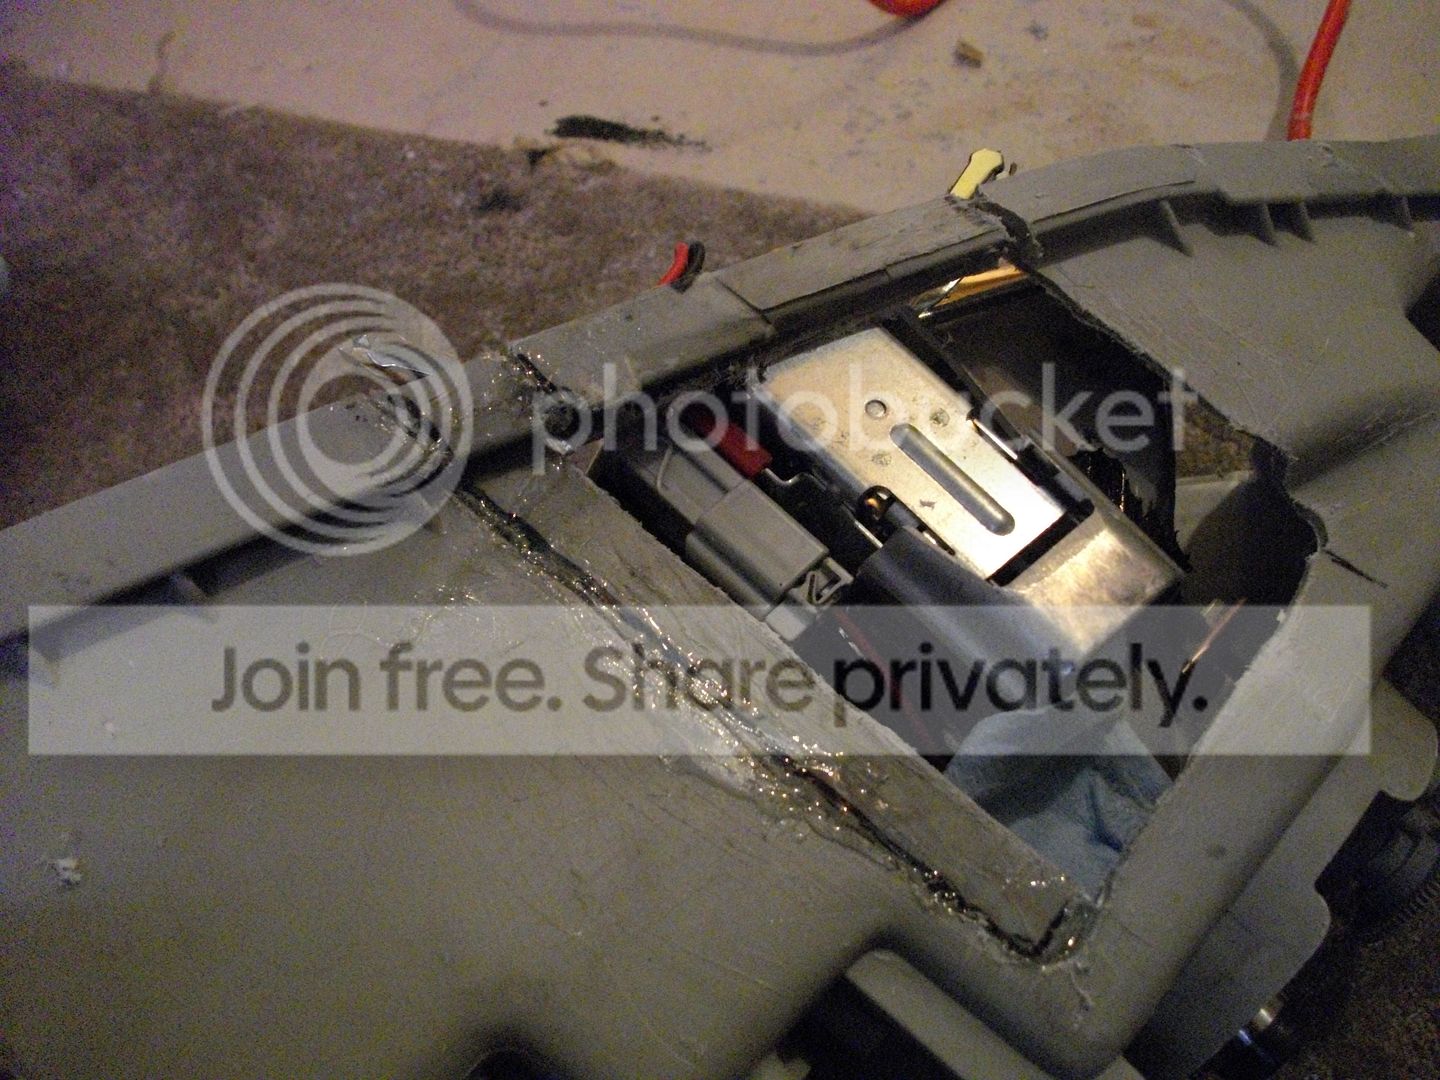
Then I had to chop a lot of the bottom out for the Bi Xenon solenoid to fit.

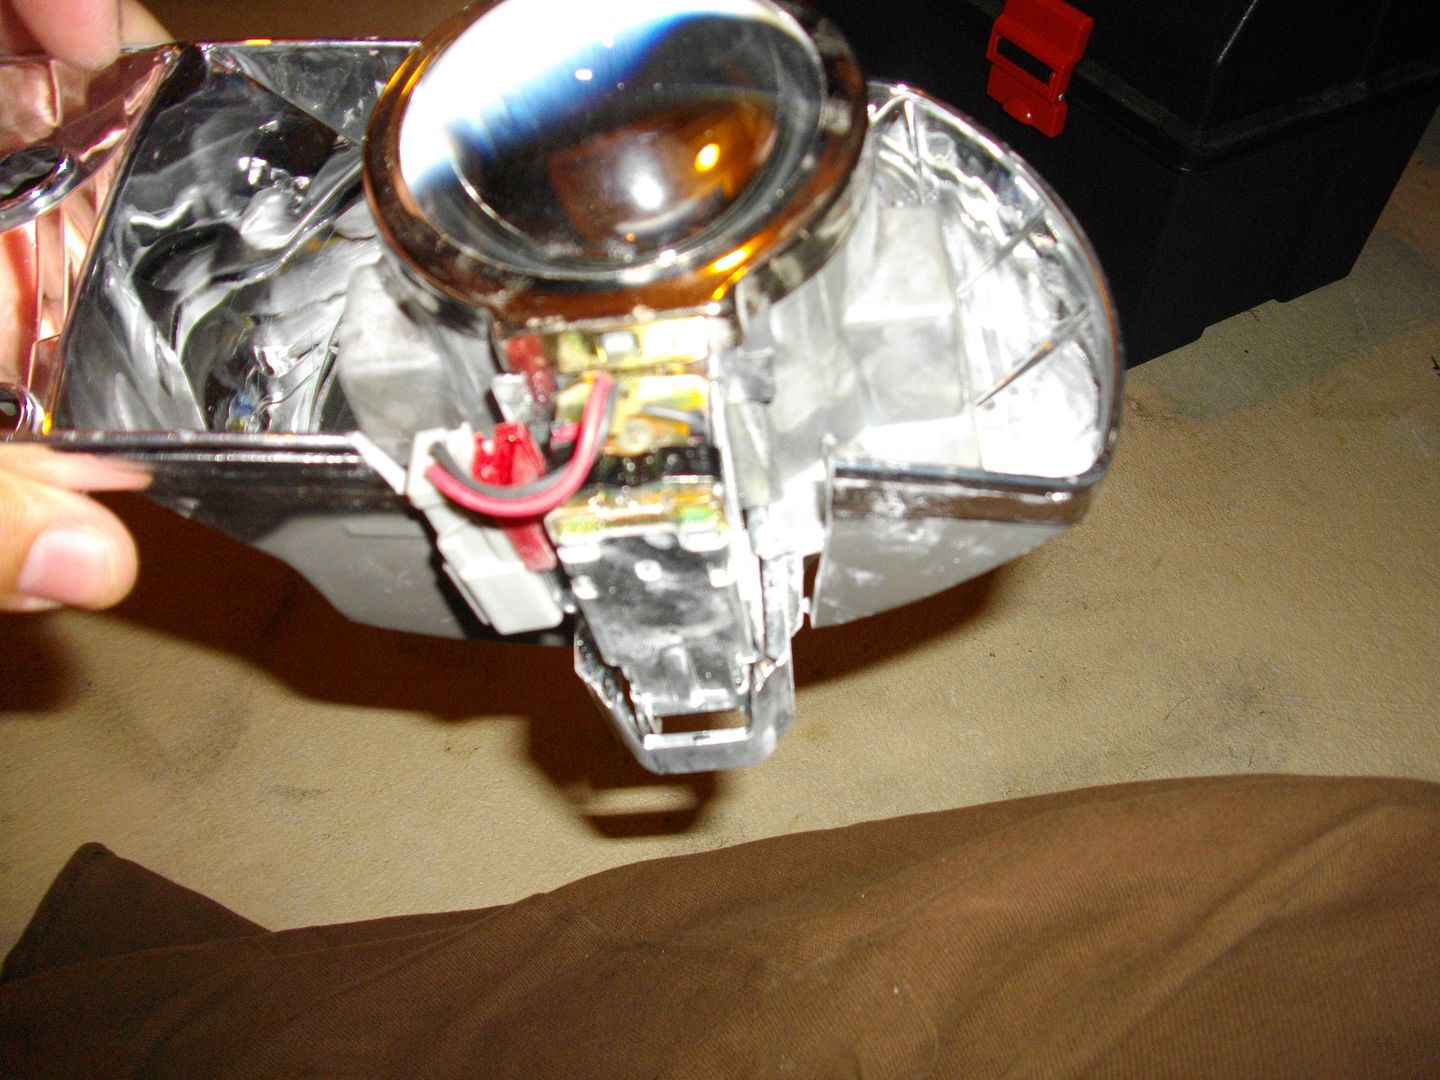
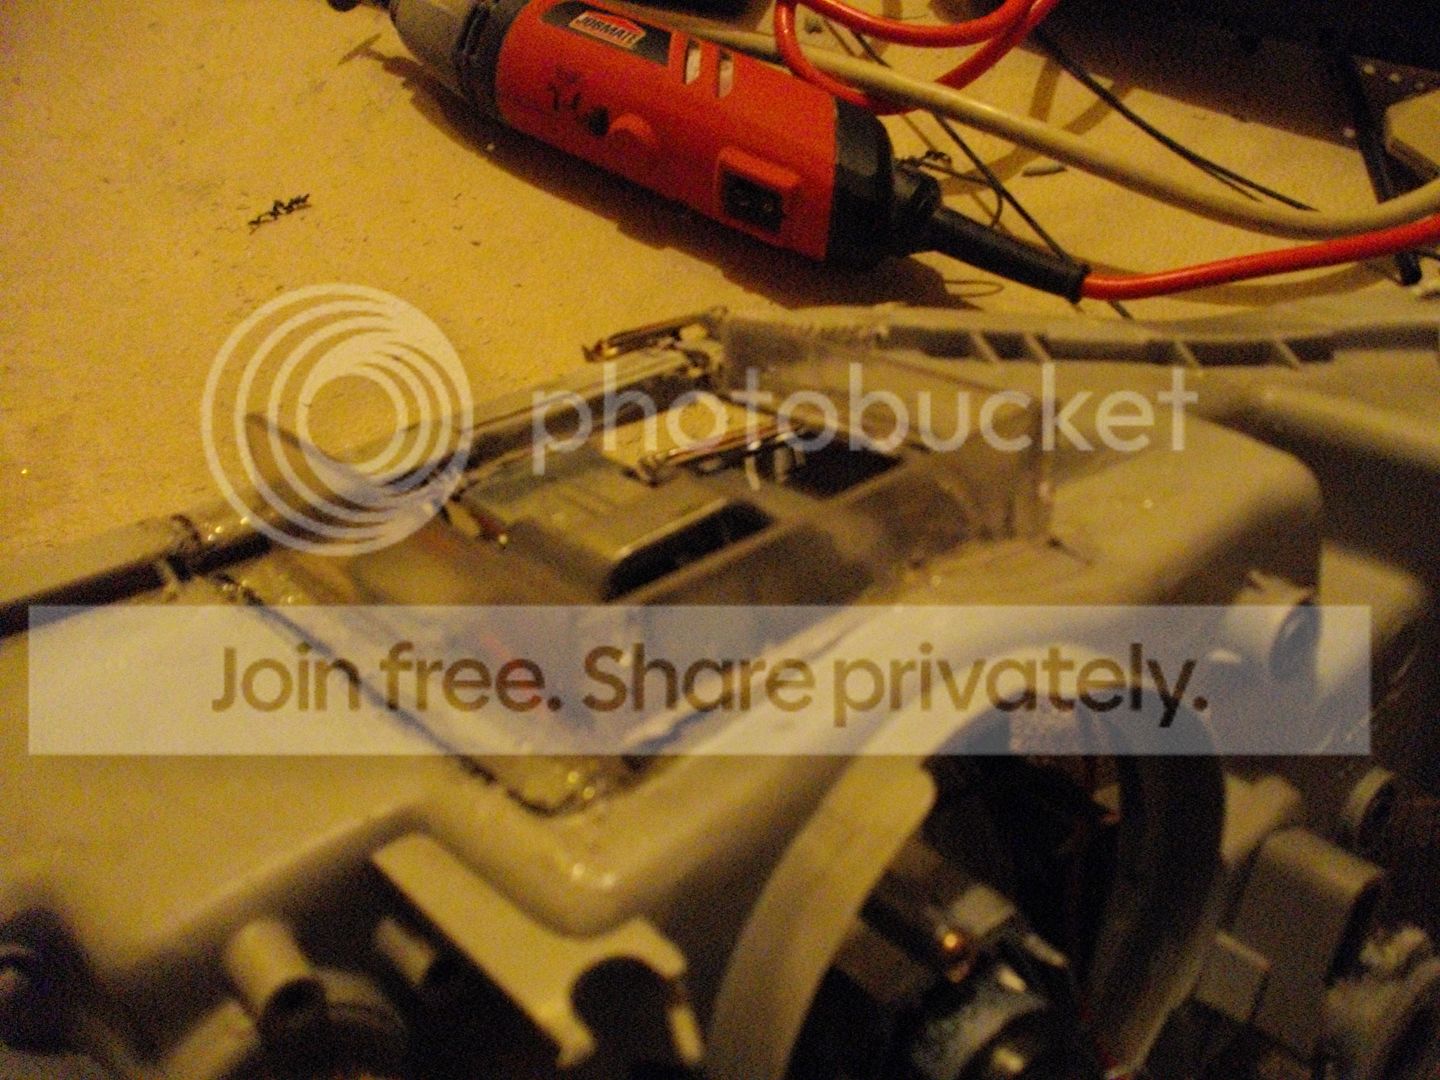
It still wouldn't fit in the headlight housing though so the Dremel came out again.
Marked for death.

It fits! I'm going to close this up with some Lexan, smooth it with some filler and paint the housing.

Drilled out the back of the reflector bucket with a 3.25" hole saw.
Then I had to chop a lot of the bottom out for the Bi Xenon solenoid to fit.
It still wouldn't fit in the headlight housing though so the Dremel came out again.
Marked for death.
It fits! I'm going to close this up with some Lexan, smooth it with some filler and paint the housing.
Thread Starter
Honda-Tech Member
Joined: Jul 2001
Posts: 2,675
Likes: 1
From: Paradise, Newfoundland Canada
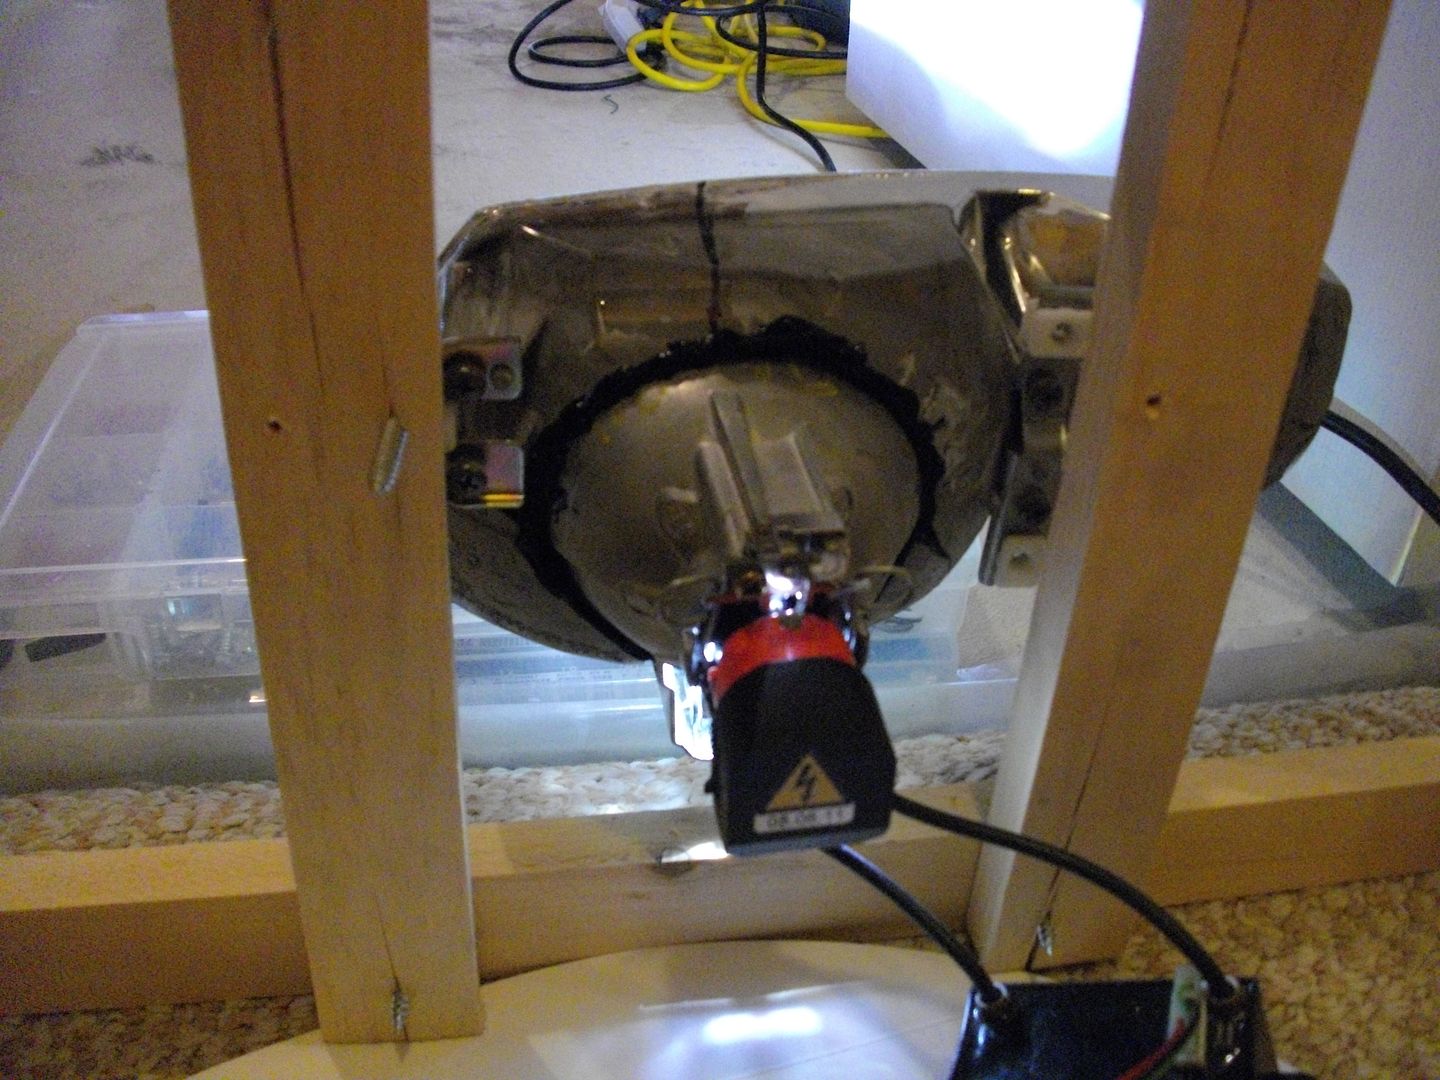
I then built a headlight jig out of wood and mounted the other reflector to it.

My leveling the vertical lines in the reflector I'm able to make sure the cut off will be level without having to put the lights on the car. The jig must always be in the same spot when in use, you'll notice tape lines and sharpie marks on the carpet.

Making sure the reflector bucket is level.


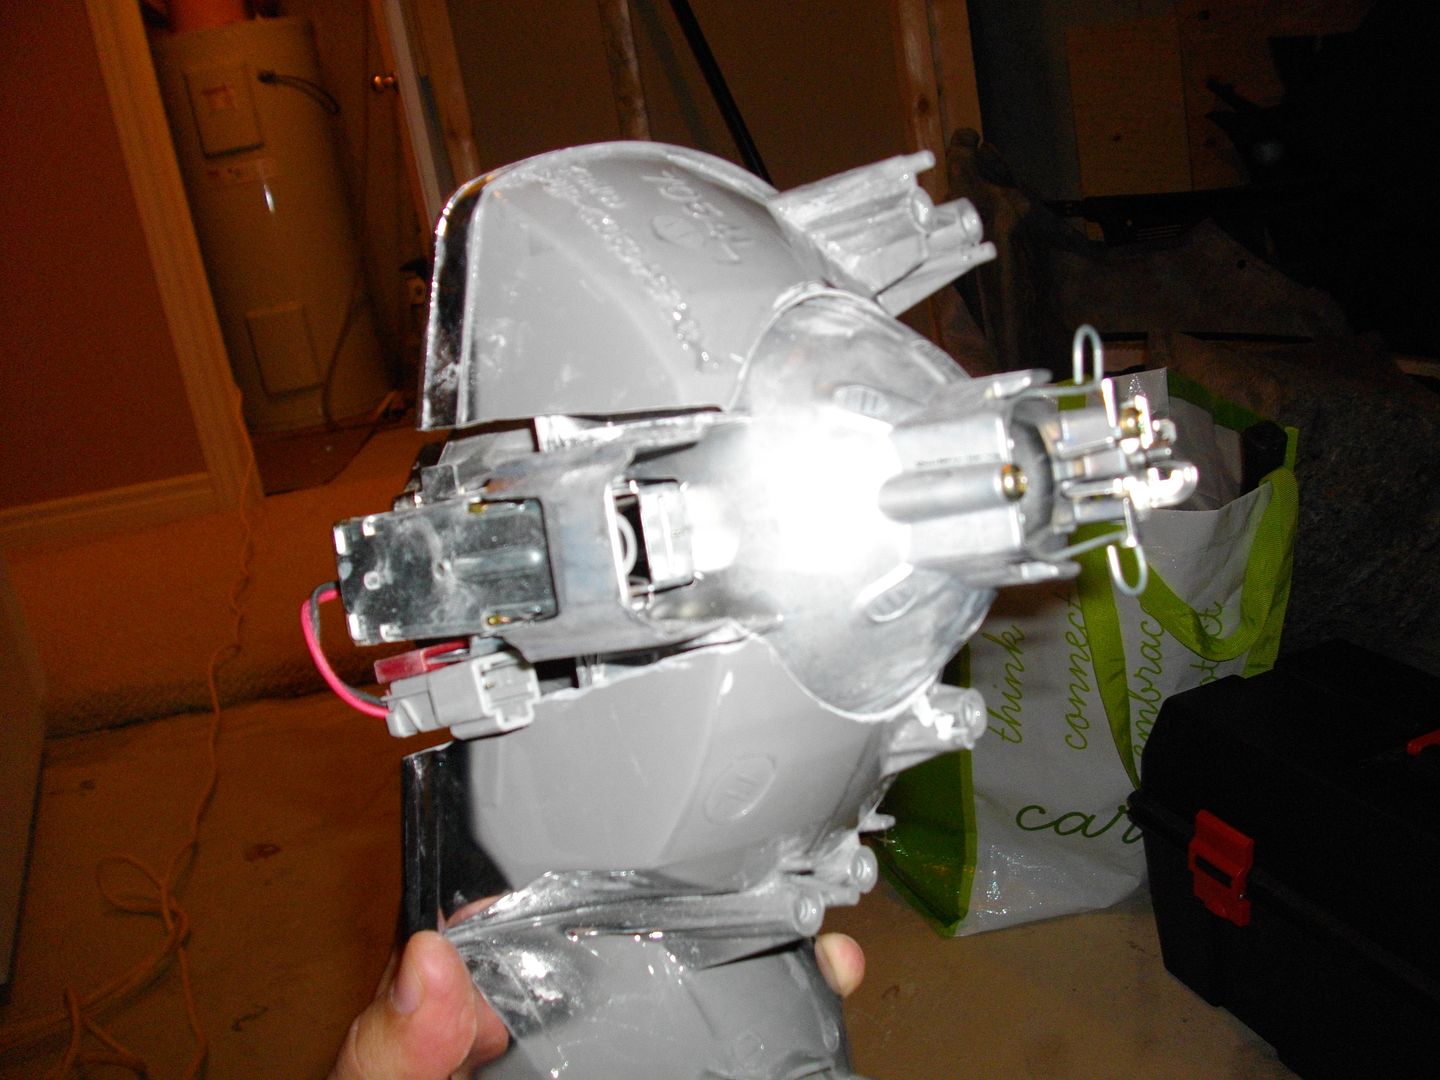
9006 Halogen fired up.
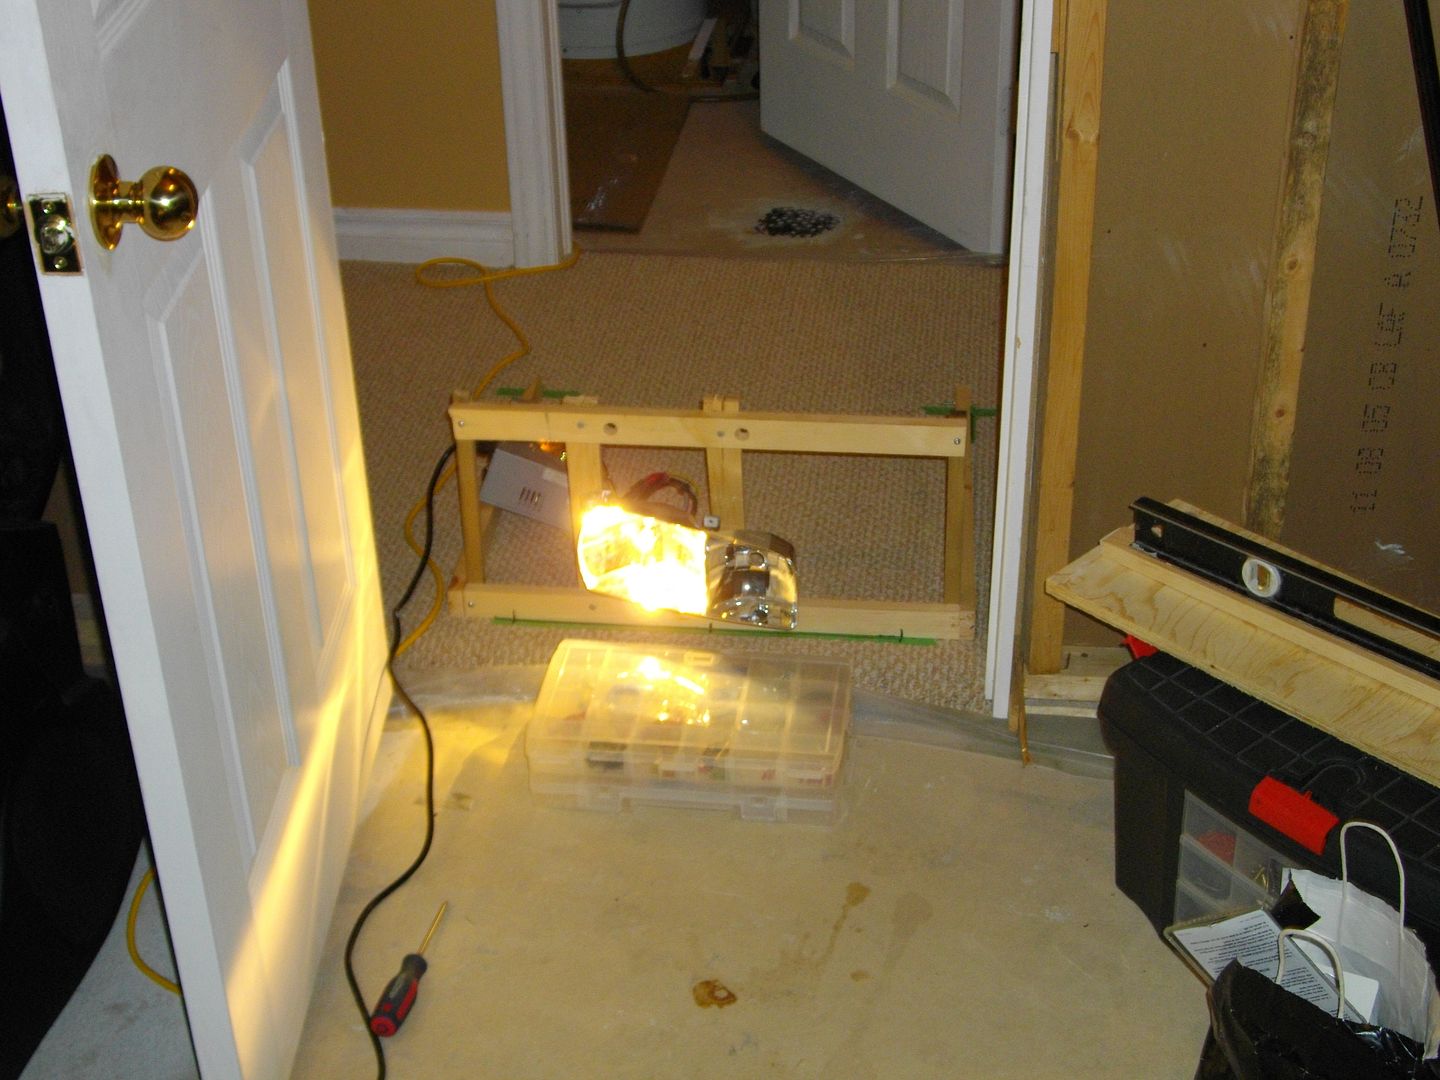
Halogen 'cut off' marked on the wall.
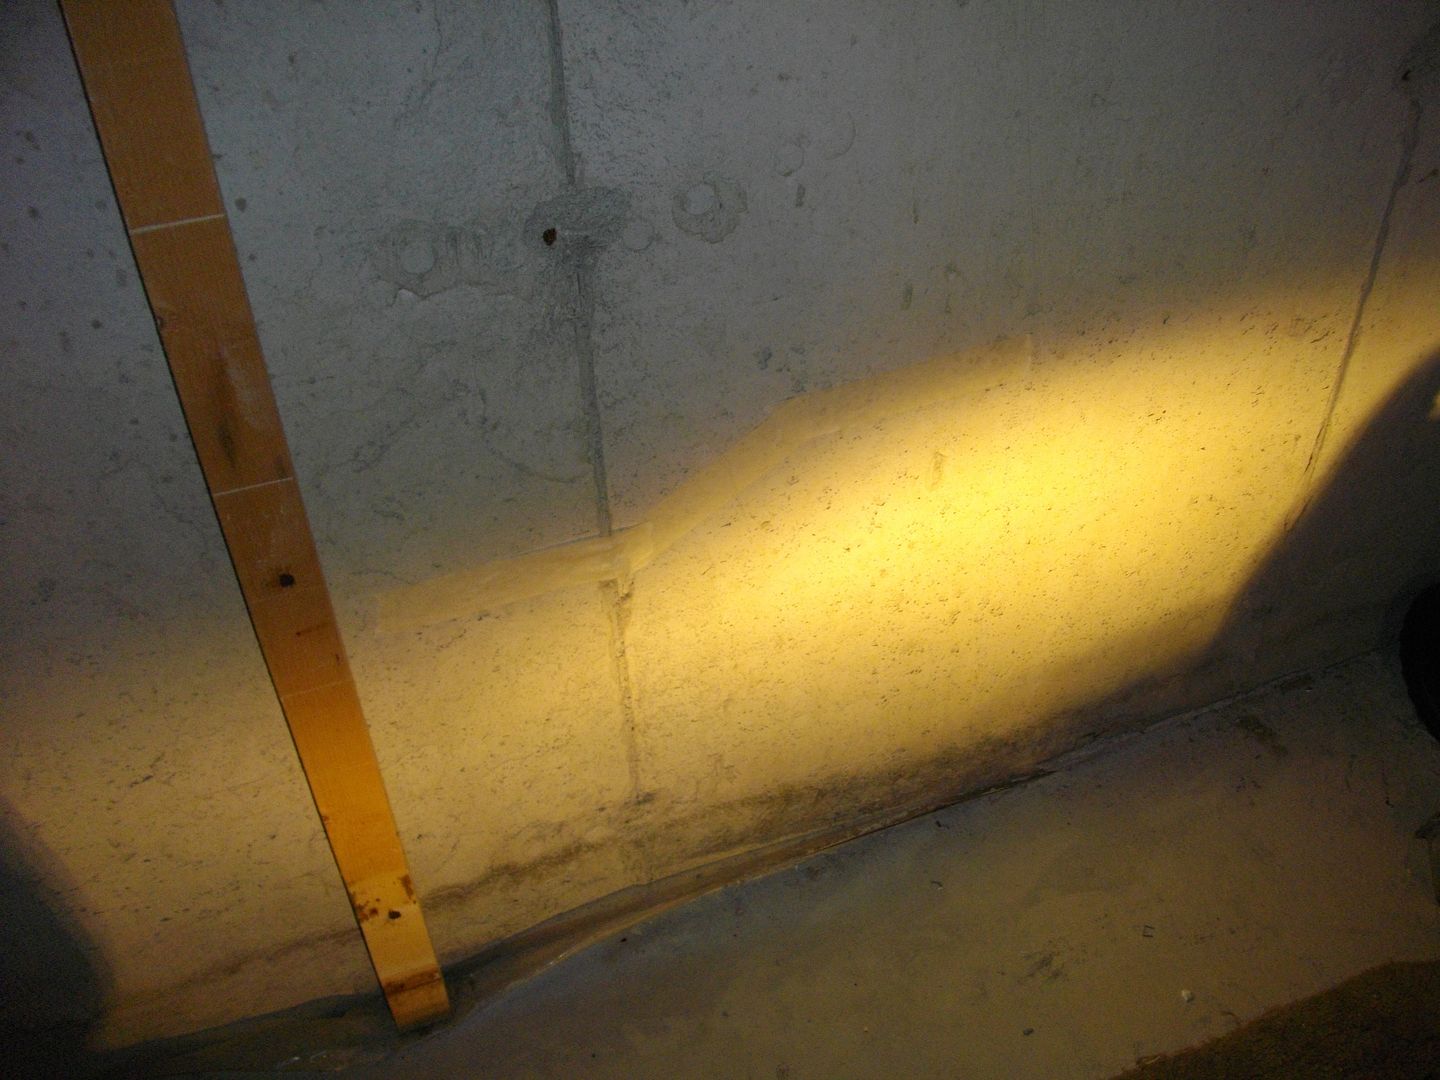
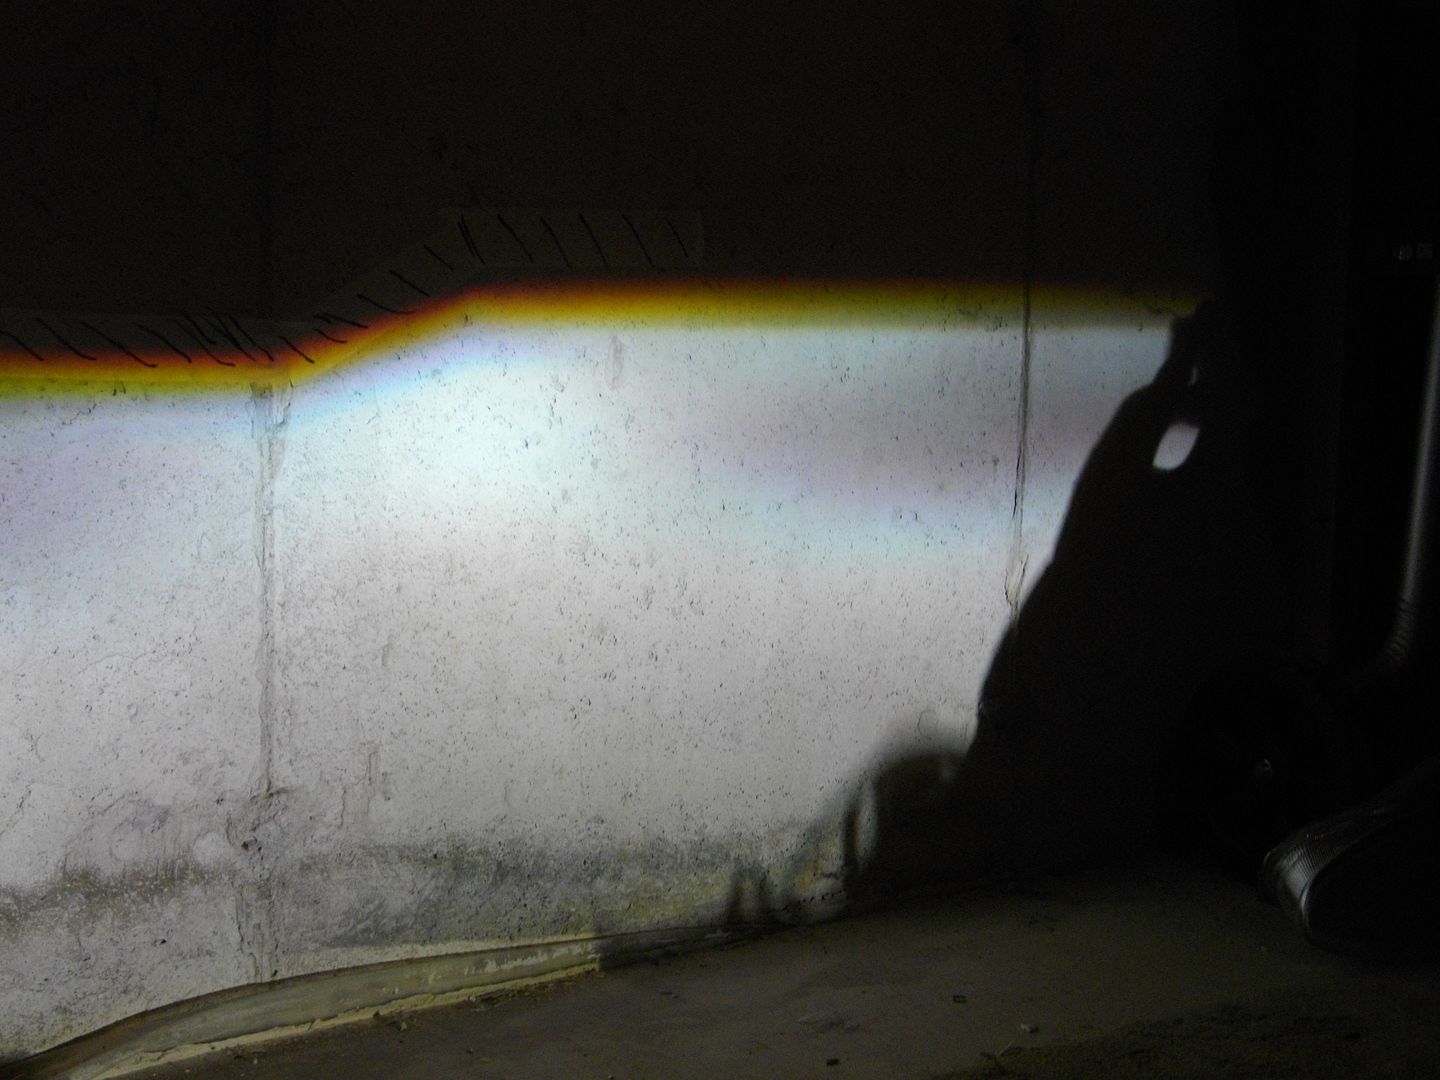
Swapped to the driver side bucket which is ready for the TL and put the TL in it and turned it on, damn close already.

I use Transtar Urethane Windshield Adhesive to hold the projector to the reflector bucket. The projector is a tight fit, I make sure to sand the projector and reflector and push the urethane in with a putty knife or my finger (this stuff is hard to get off your hands btw). I leave the projector on the whole time to unsure it's lined up still.
TL sitting on the jig for 24hrs for the urethane to cure.

After it's dry I fill any cracks or spots I couldn't get at with it on the jig and let it sit again.


Passenger side reflector bucket with the TL in place.


Now it's time for the E46R Extend shroud, cut cut cut. The Bi Xenon solenoid is huge and a big pain in the *** but I got the shroud to fit.

Cool 'Bi Xenon' stickers for The Retrofit Source.

Back in the housing.

My leveling the vertical lines in the reflector I'm able to make sure the cut off will be level without having to put the lights on the car. The jig must always be in the same spot when in use, you'll notice tape lines and sharpie marks on the carpet.
Making sure the reflector bucket is level.
9006 Halogen fired up.
Halogen 'cut off' marked on the wall.
Swapped to the driver side bucket which is ready for the TL and put the TL in it and turned it on, damn close already.
I use Transtar Urethane Windshield Adhesive to hold the projector to the reflector bucket. The projector is a tight fit, I make sure to sand the projector and reflector and push the urethane in with a putty knife or my finger (this stuff is hard to get off your hands btw). I leave the projector on the whole time to unsure it's lined up still.
TL sitting on the jig for 24hrs for the urethane to cure.
After it's dry I fill any cracks or spots I couldn't get at with it on the jig and let it sit again.
Passenger side reflector bucket with the TL in place.
Now it's time for the E46R Extend shroud, cut cut cut. The Bi Xenon solenoid is huge and a big pain in the *** but I got the shroud to fit.
Cool 'Bi Xenon' stickers for The Retrofit Source.
Back in the housing.
Thread Starter
Honda-Tech Member
Joined: Jul 2001
Posts: 2,675
Likes: 1
From: Paradise, Newfoundland Canada
Checking clearance with the lens on, just clears but a hair.

Screwed the LED board in place and put a 1" plastic plug in the housing with a hole drilled into it just big enough for the 18awg leads to pass through.

Shaved the headlight down to clear the E46R shroud when the light is adjusted as far out as possible. There might be a bit of a gap but I rather that then loose some adjustment.


Teaser of what it should look like. I need to buy a Porter Cable polisher to get my lenses looking brand new.


Screwed the LED board in place and put a 1" plastic plug in the housing with a hole drilled into it just big enough for the 18awg leads to pass through.
Shaved the headlight down to clear the E46R shroud when the light is adjusted as far out as possible. There might be a bit of a gap but I rather that then loose some adjustment.
Teaser of what it should look like. I need to buy a Porter Cable polisher to get my lenses looking brand new.


Joined: Jan 2002
Posts: 30,073
Likes: 59
From: Nowhere and Everywhere
Looks good man... would love to do LED signals but I'm not that up on circuiting, etc.
How are you going to deal with that section of sealant "channel" you removed from the headlight housing when you put the lenses back on?
How are you going to deal with that section of sealant "channel" you removed from the headlight housing when you put the lenses back on?
Thread Starter
Honda-Tech Member
Joined: Jul 2001
Posts: 2,675
Likes: 1
From: Paradise, Newfoundland Canada
I've got the channel glued back on this exception of a very small gap (less then 1/4") and I plan to use 3M window weld tape on the light, that should seal it perfect.
Made a bit more progress over the past couple of days.
Both Headlight shrouds are trimmed and it the process of being painted gloss black. I'm using Krylon Fusion and it should match my OEM paint close enough (The Talon didn't have a fancy black paint just black clearcoat).
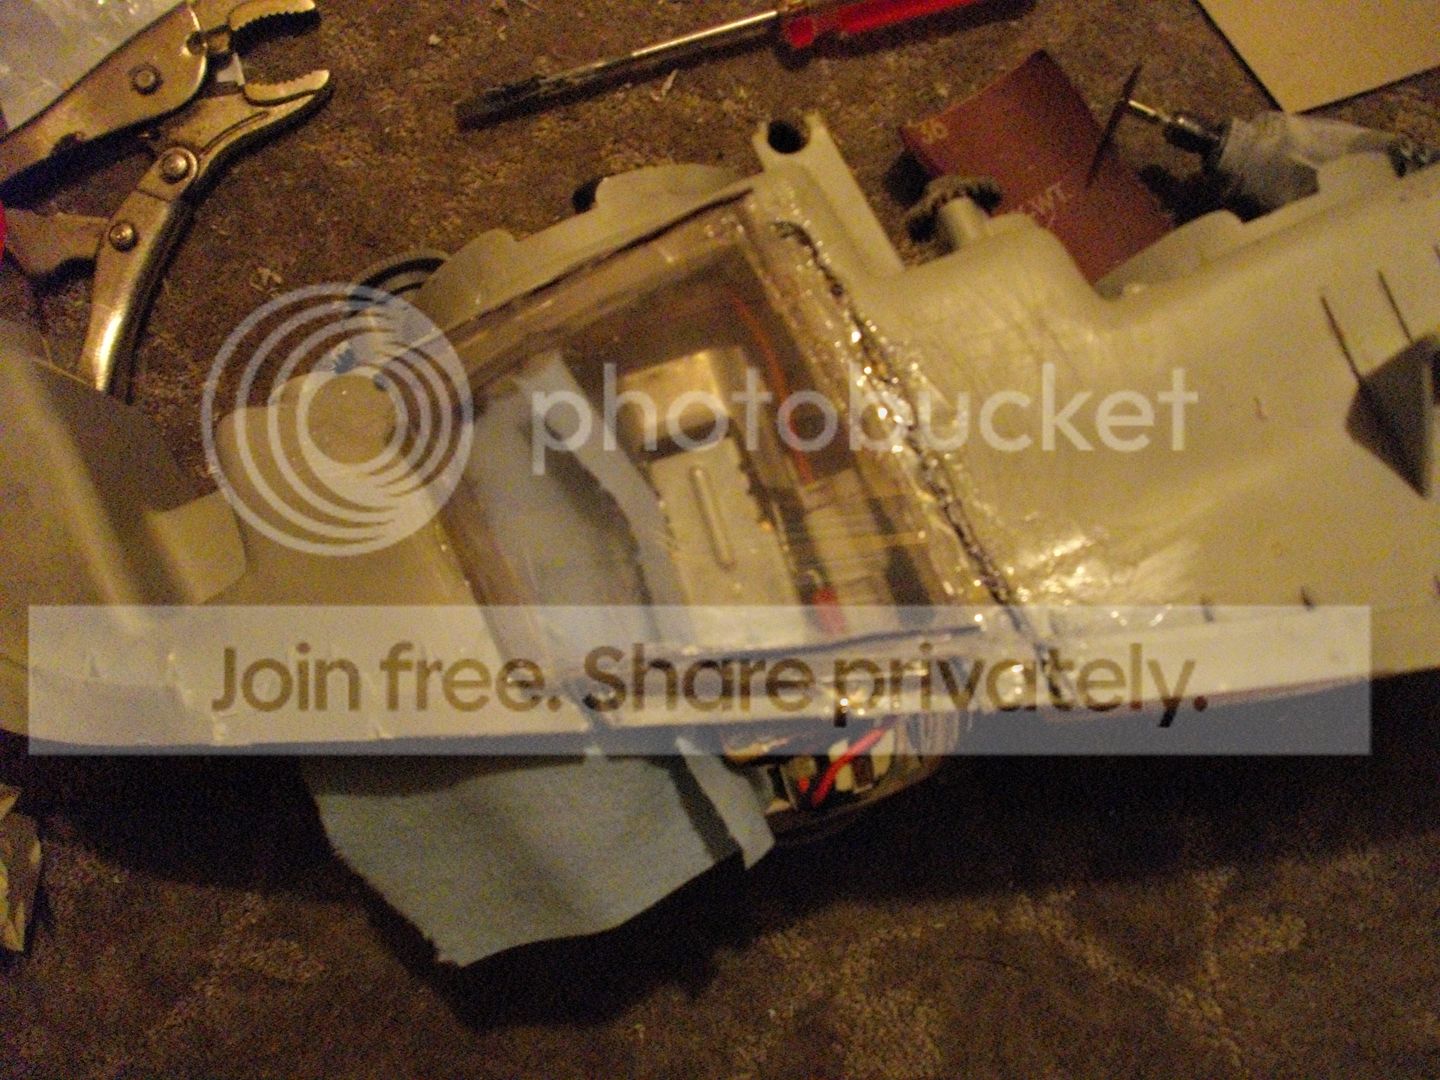
The big thing is I started to rebuild the bottom of the headlight housing. I plan to use some filler of some sort on top and paint it once I finish the construction of the box. If anyone knows of a filler that will work on Lexan and plastic, let me know please.
The last side is in place.
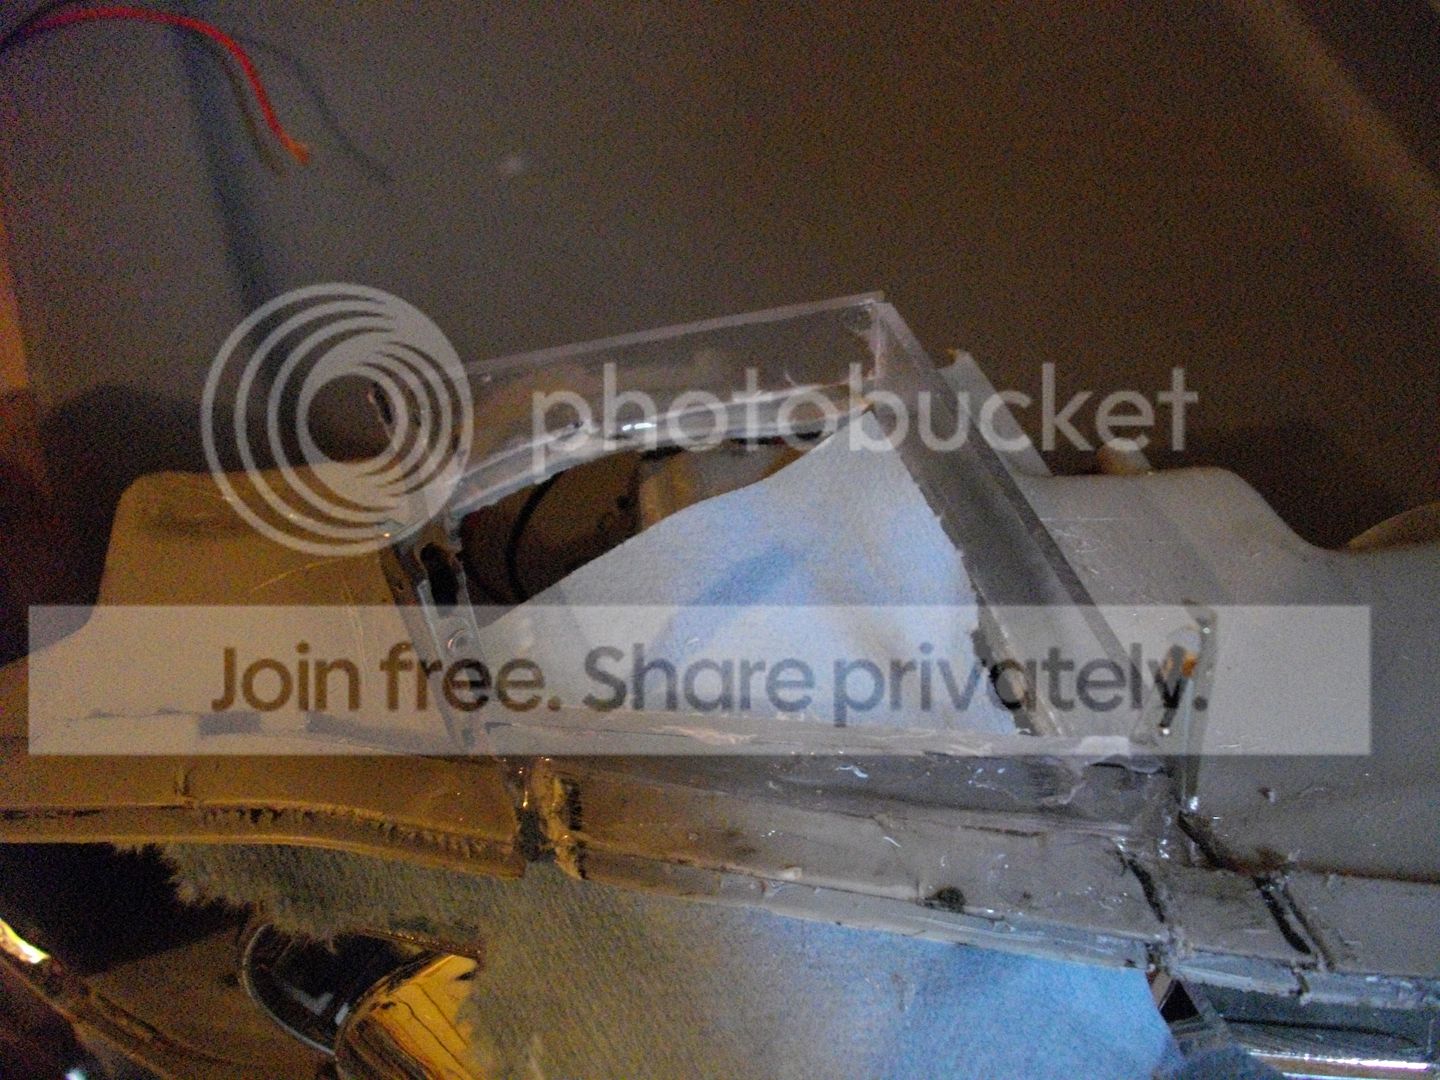
With the cap on it.

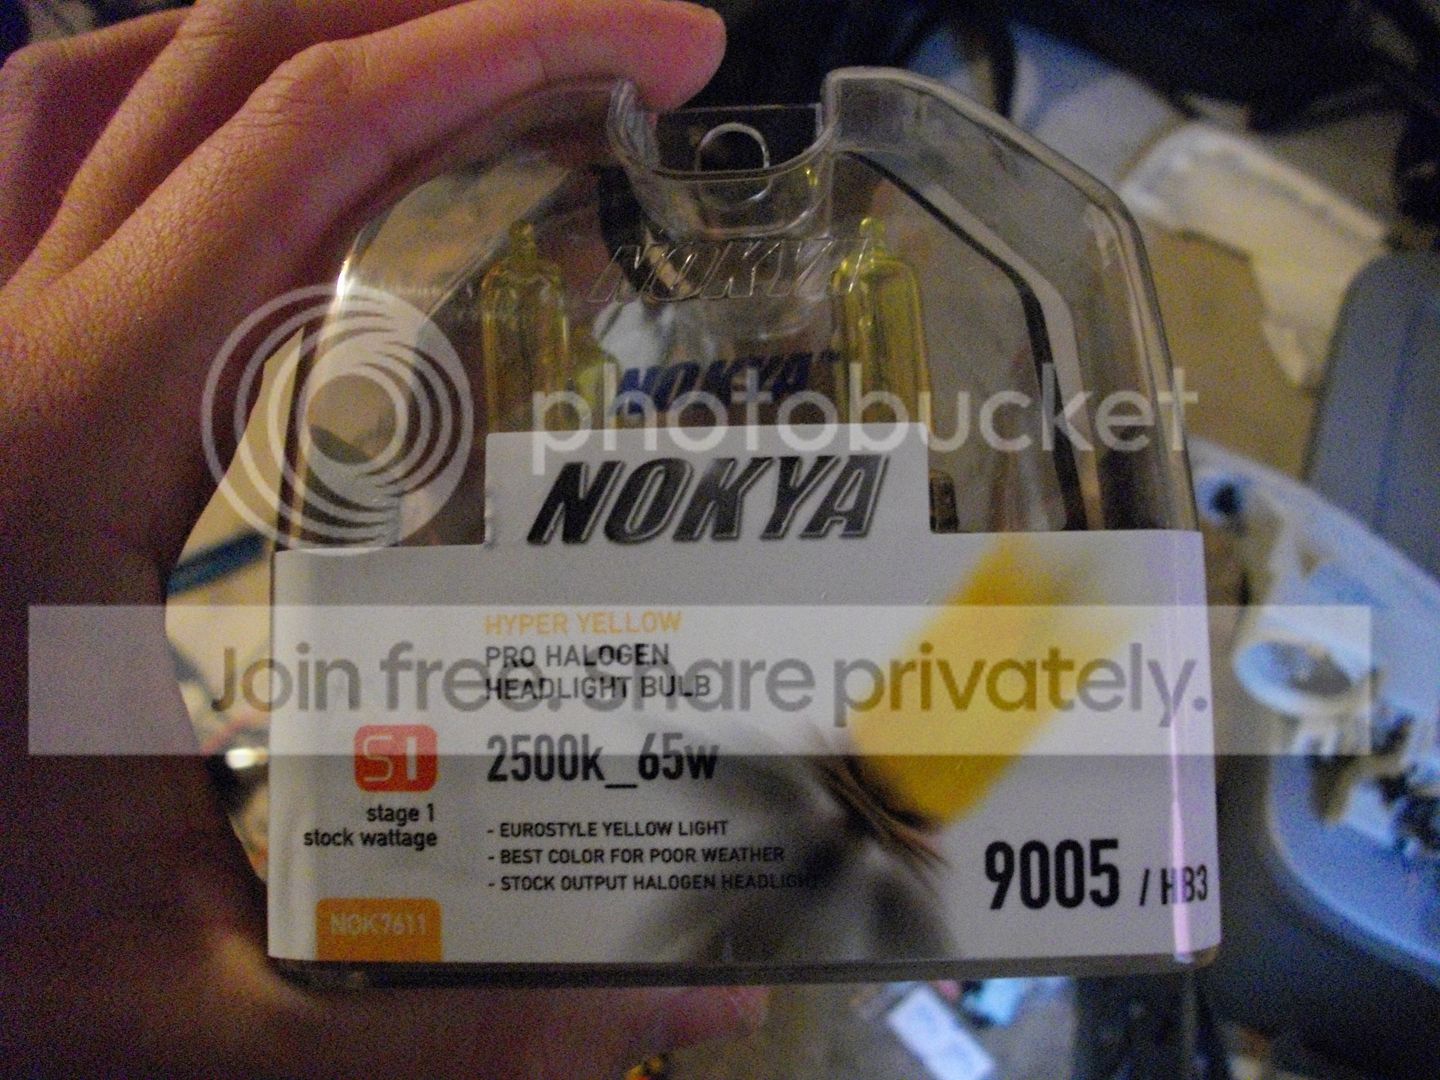
I also received my Nokya Hyper Yellows, these will be my DRL and maybe halogen highs if I decide I want them.
I had to see what the lights would look like with everything on of course.

I also made more head way on sanding the driver side lens, just need to do 1500 and 2000 grit and then it's ready to be polished.

Made a bit more progress over the past couple of days.
Both Headlight shrouds are trimmed and it the process of being painted gloss black. I'm using Krylon Fusion and it should match my OEM paint close enough (The Talon didn't have a fancy black paint just black clearcoat).
The big thing is I started to rebuild the bottom of the headlight housing. I plan to use some filler of some sort on top and paint it once I finish the construction of the box. If anyone knows of a filler that will work on Lexan and plastic, let me know please.
The last side is in place.
With the cap on it.
I also received my Nokya Hyper Yellows, these will be my DRL and maybe halogen highs if I decide I want them.
I had to see what the lights would look like with everything on of course.
I also made more head way on sanding the driver side lens, just need to do 1500 and 2000 grit and then it's ready to be polished.
Last edited by The G2 Racer; Dec 14, 2010 at 03:48 PM.

Thread
Thread Starter
Forum
Replies
Last Post
Vagitarian
Honda CRX / EF Civic (1988 - 1991)
21
May 24, 2012 12:57 PM
Hiroshima_VTi-S
Honda Civic / Del Sol (1992 - 2000)
2
Sep 24, 2006 02:26 PM
Jo3f1sh
Acura Integra
10
Aug 7, 2005 06:36 AM