

How to: auxiliary audio jack install on 2007 Accord SE


Thread Starter
Honda-Tech Member
Joined: Jun 2010
Posts: 10
Likes: 0
Like many others on this forum, I had the desire to be able to listen to my mp3 player or be able to play friend's players though the factory radio while in my Honda. When I had the project in mind, I had two considerations 1) I wanted to be able to be able to use a multitude of mp3 players and didn't want to be limited to just an Ipod and 2) I wanted a clean looking installation, most other installs that I had looked at while researching a bit typically had a 3.5mm wire running out of the dash/console somewhere that was then plugged into the player. I really didn't want this because I didn't think it look very clean. So here's how I went about it:
The first thing I did was gather all the parts I would need. I was able to get everything from Crutchfield, West Marine, Walmart, and from my little sister. More on that later.

Everything unpackaged
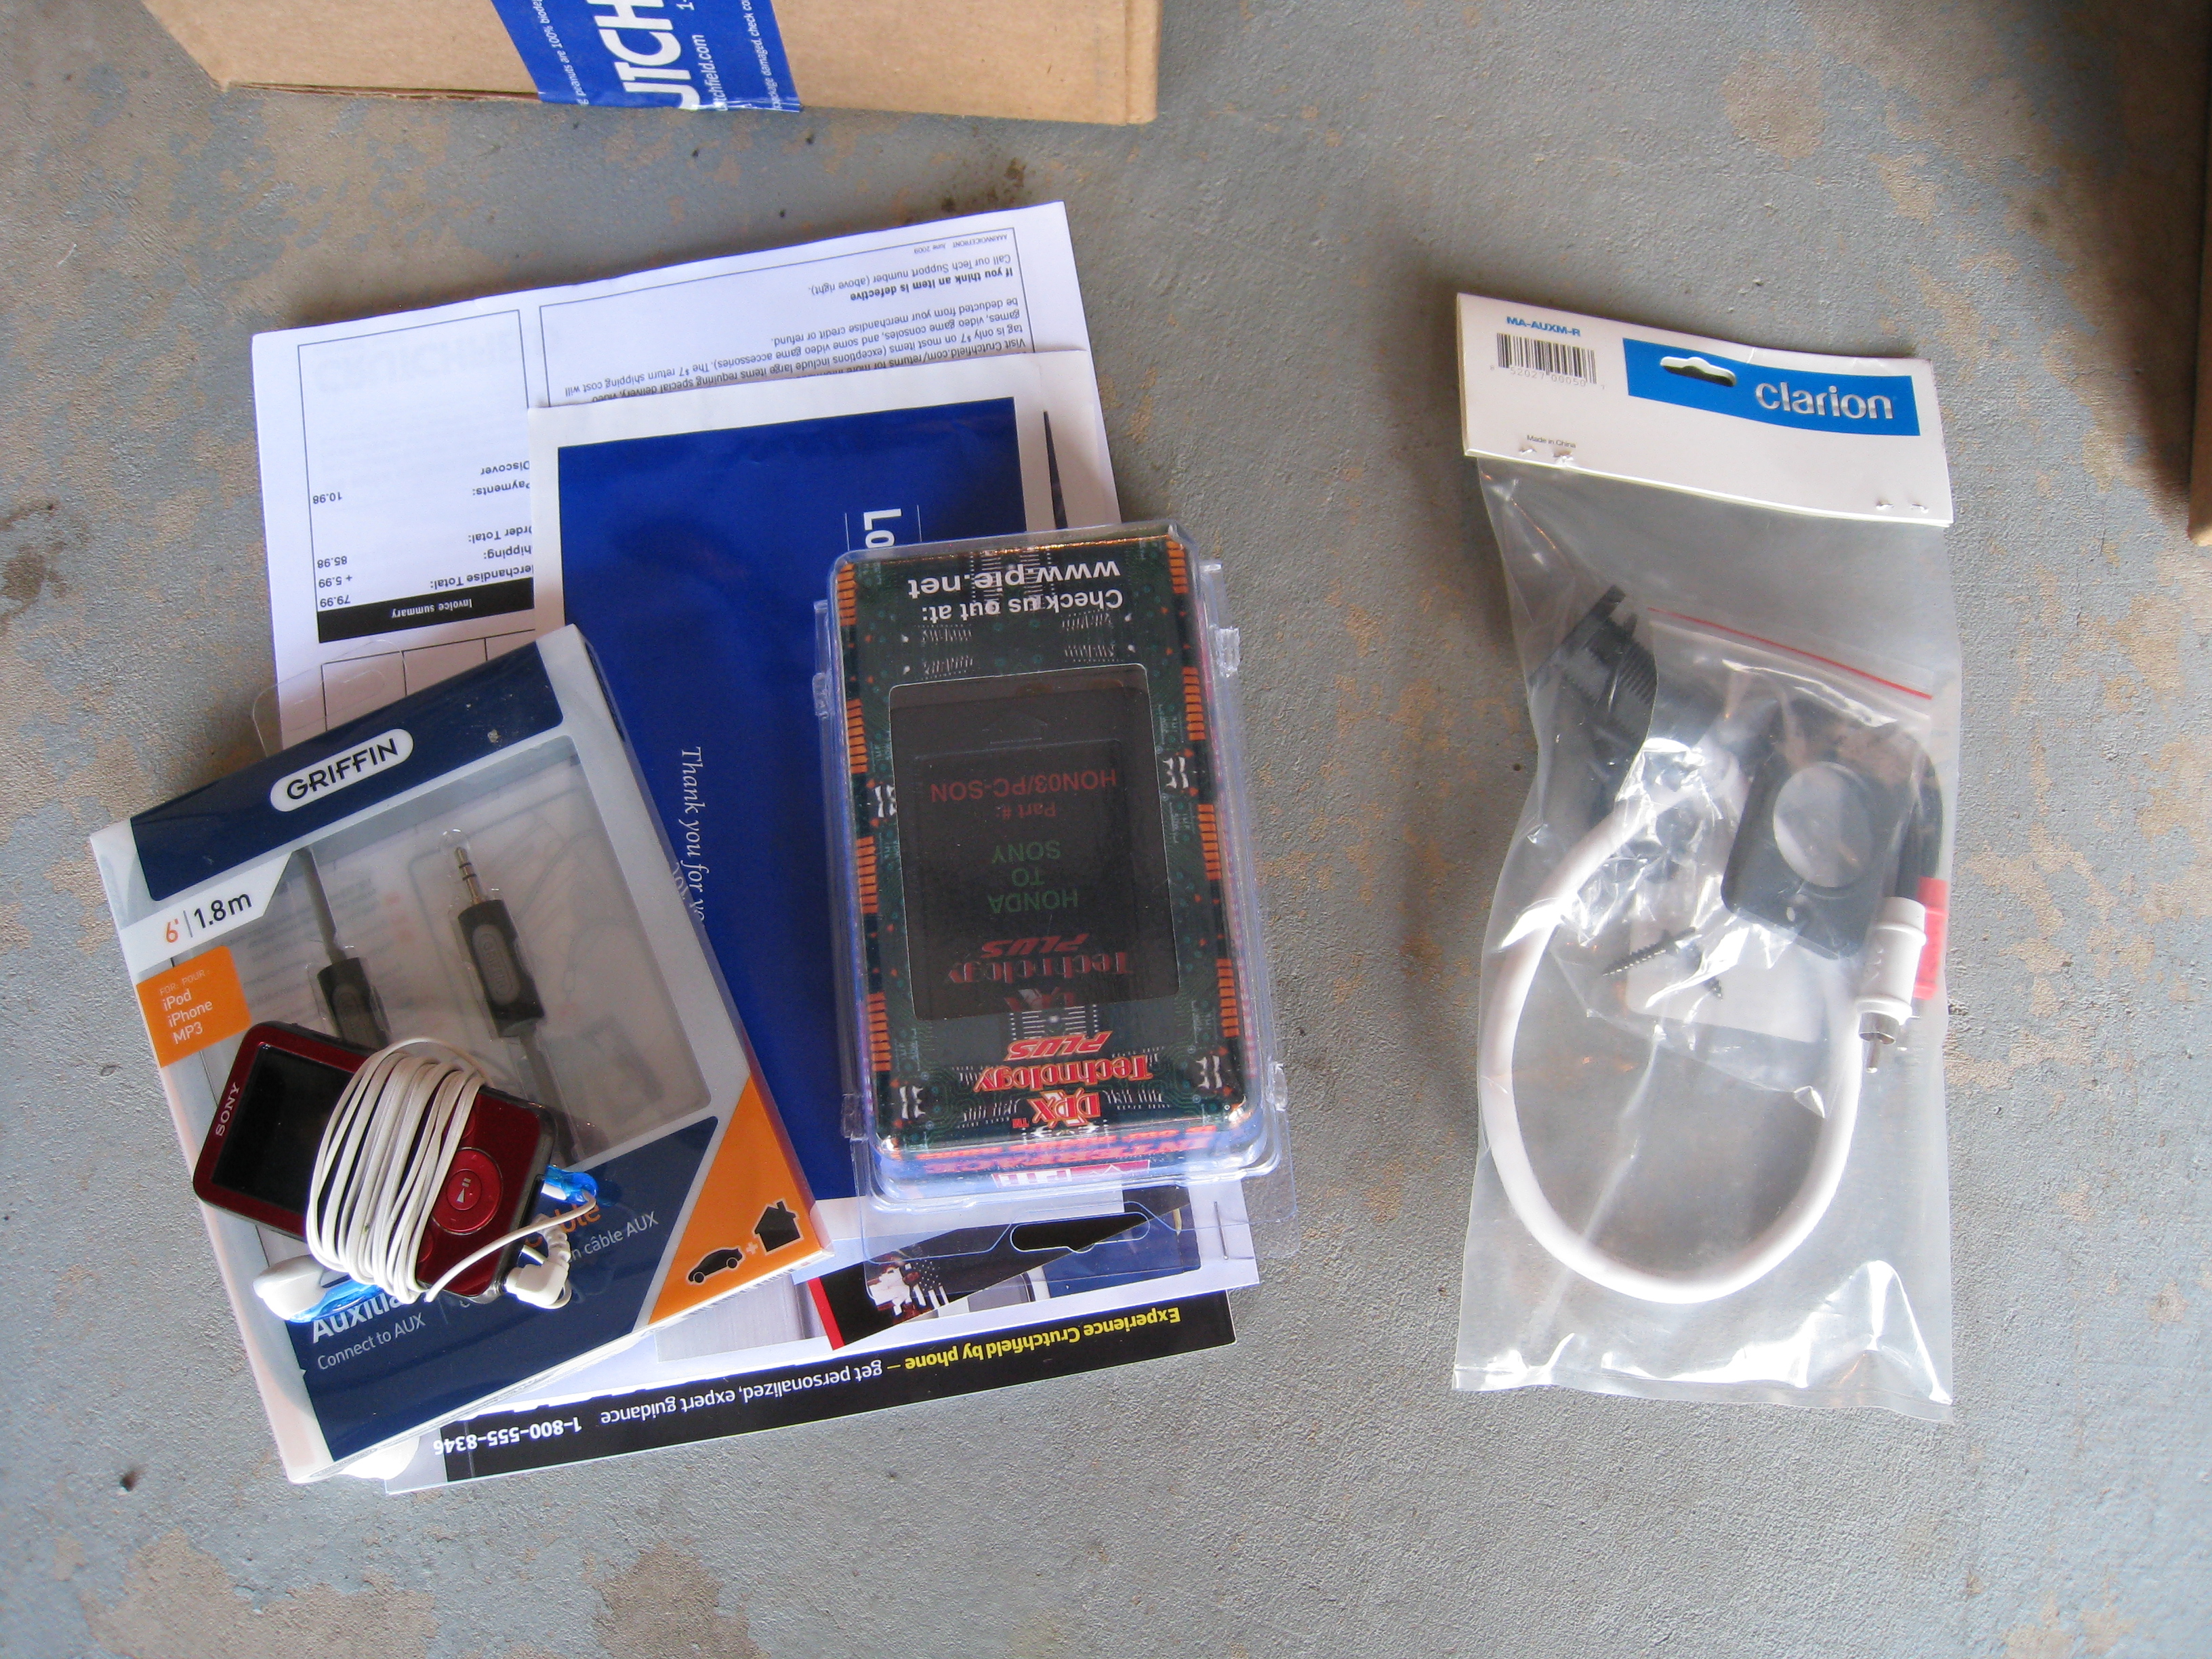
This is the input jack that I was able to find after considerable searching. It's made by Clarion Audio and I found it a few places like Amazon and for some odd reason, West Marine, a popular boating retailer carried it as well.
http://www.westmarine.com/webapp/wcs...9642&langId=-1
It ran me $24.99 and I think I took advantage of some free shipping offer they happened to be running at the time
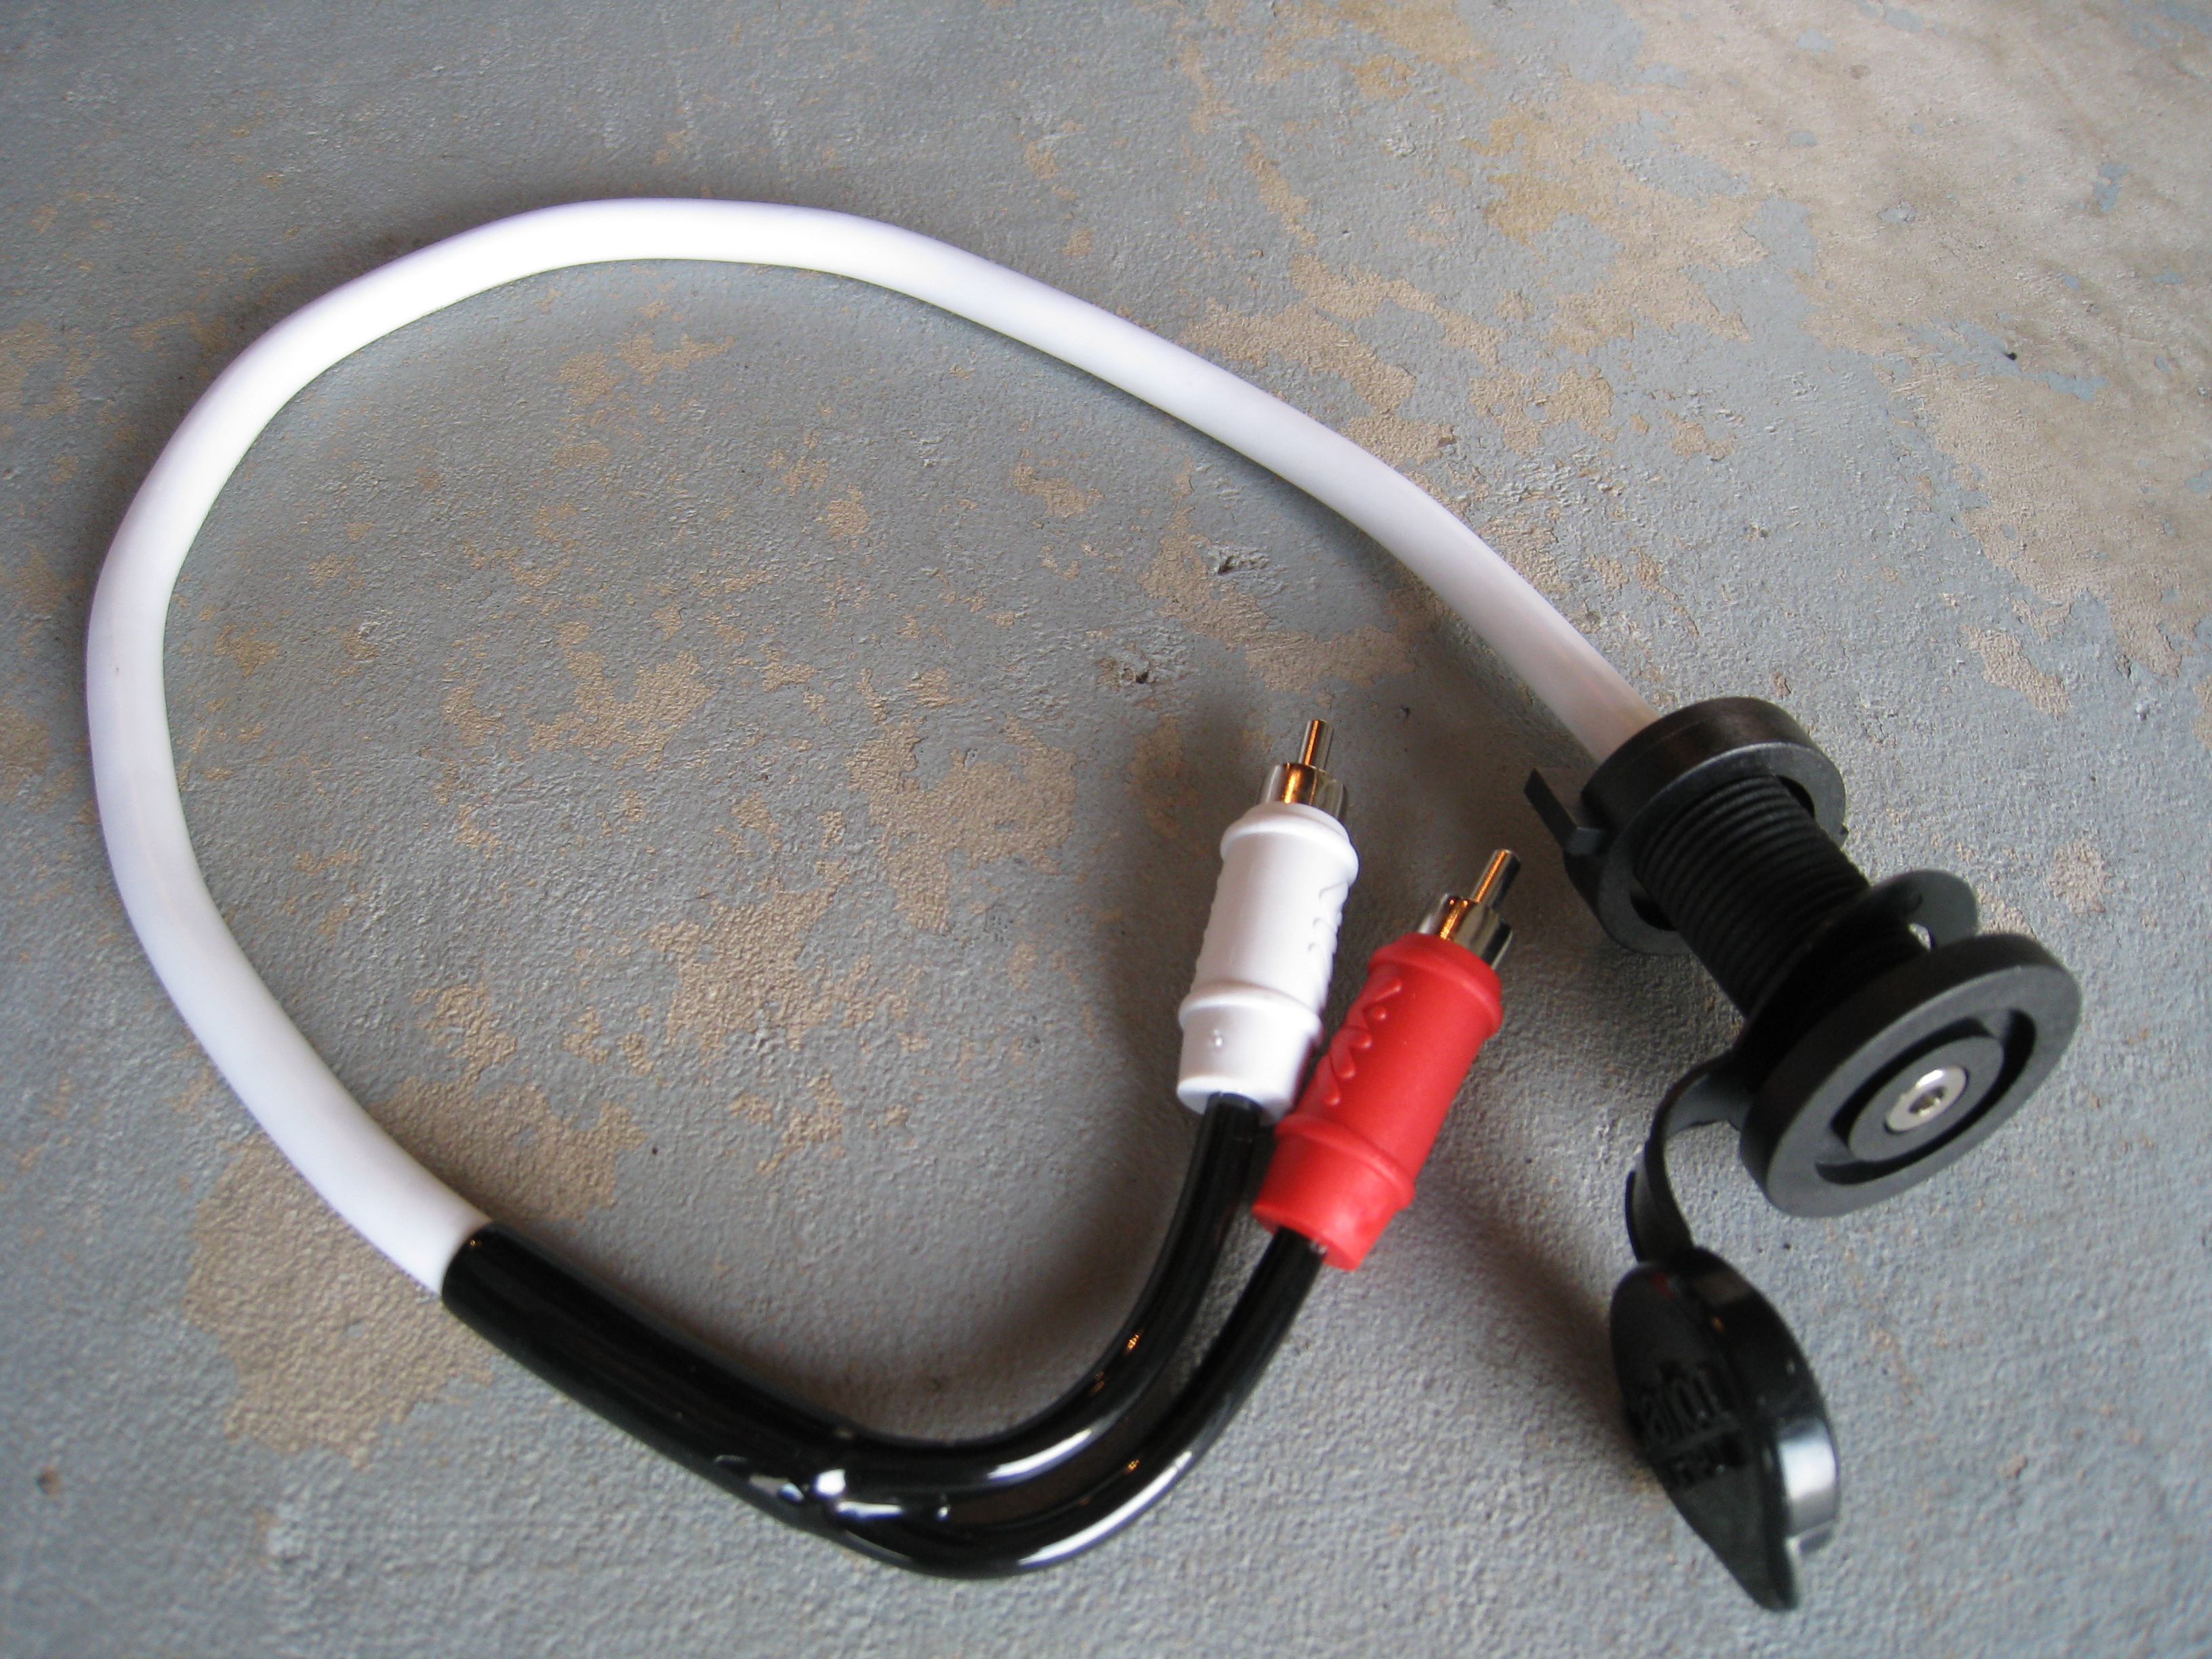
I wanted something exactly like this so I could have a port in my dash and not have to run a cord out in some weird location, so this fit the bill perfectly.
3.5mm Female jack on one end and male RCA on the other to get plugged into the auxiliary input adapter.

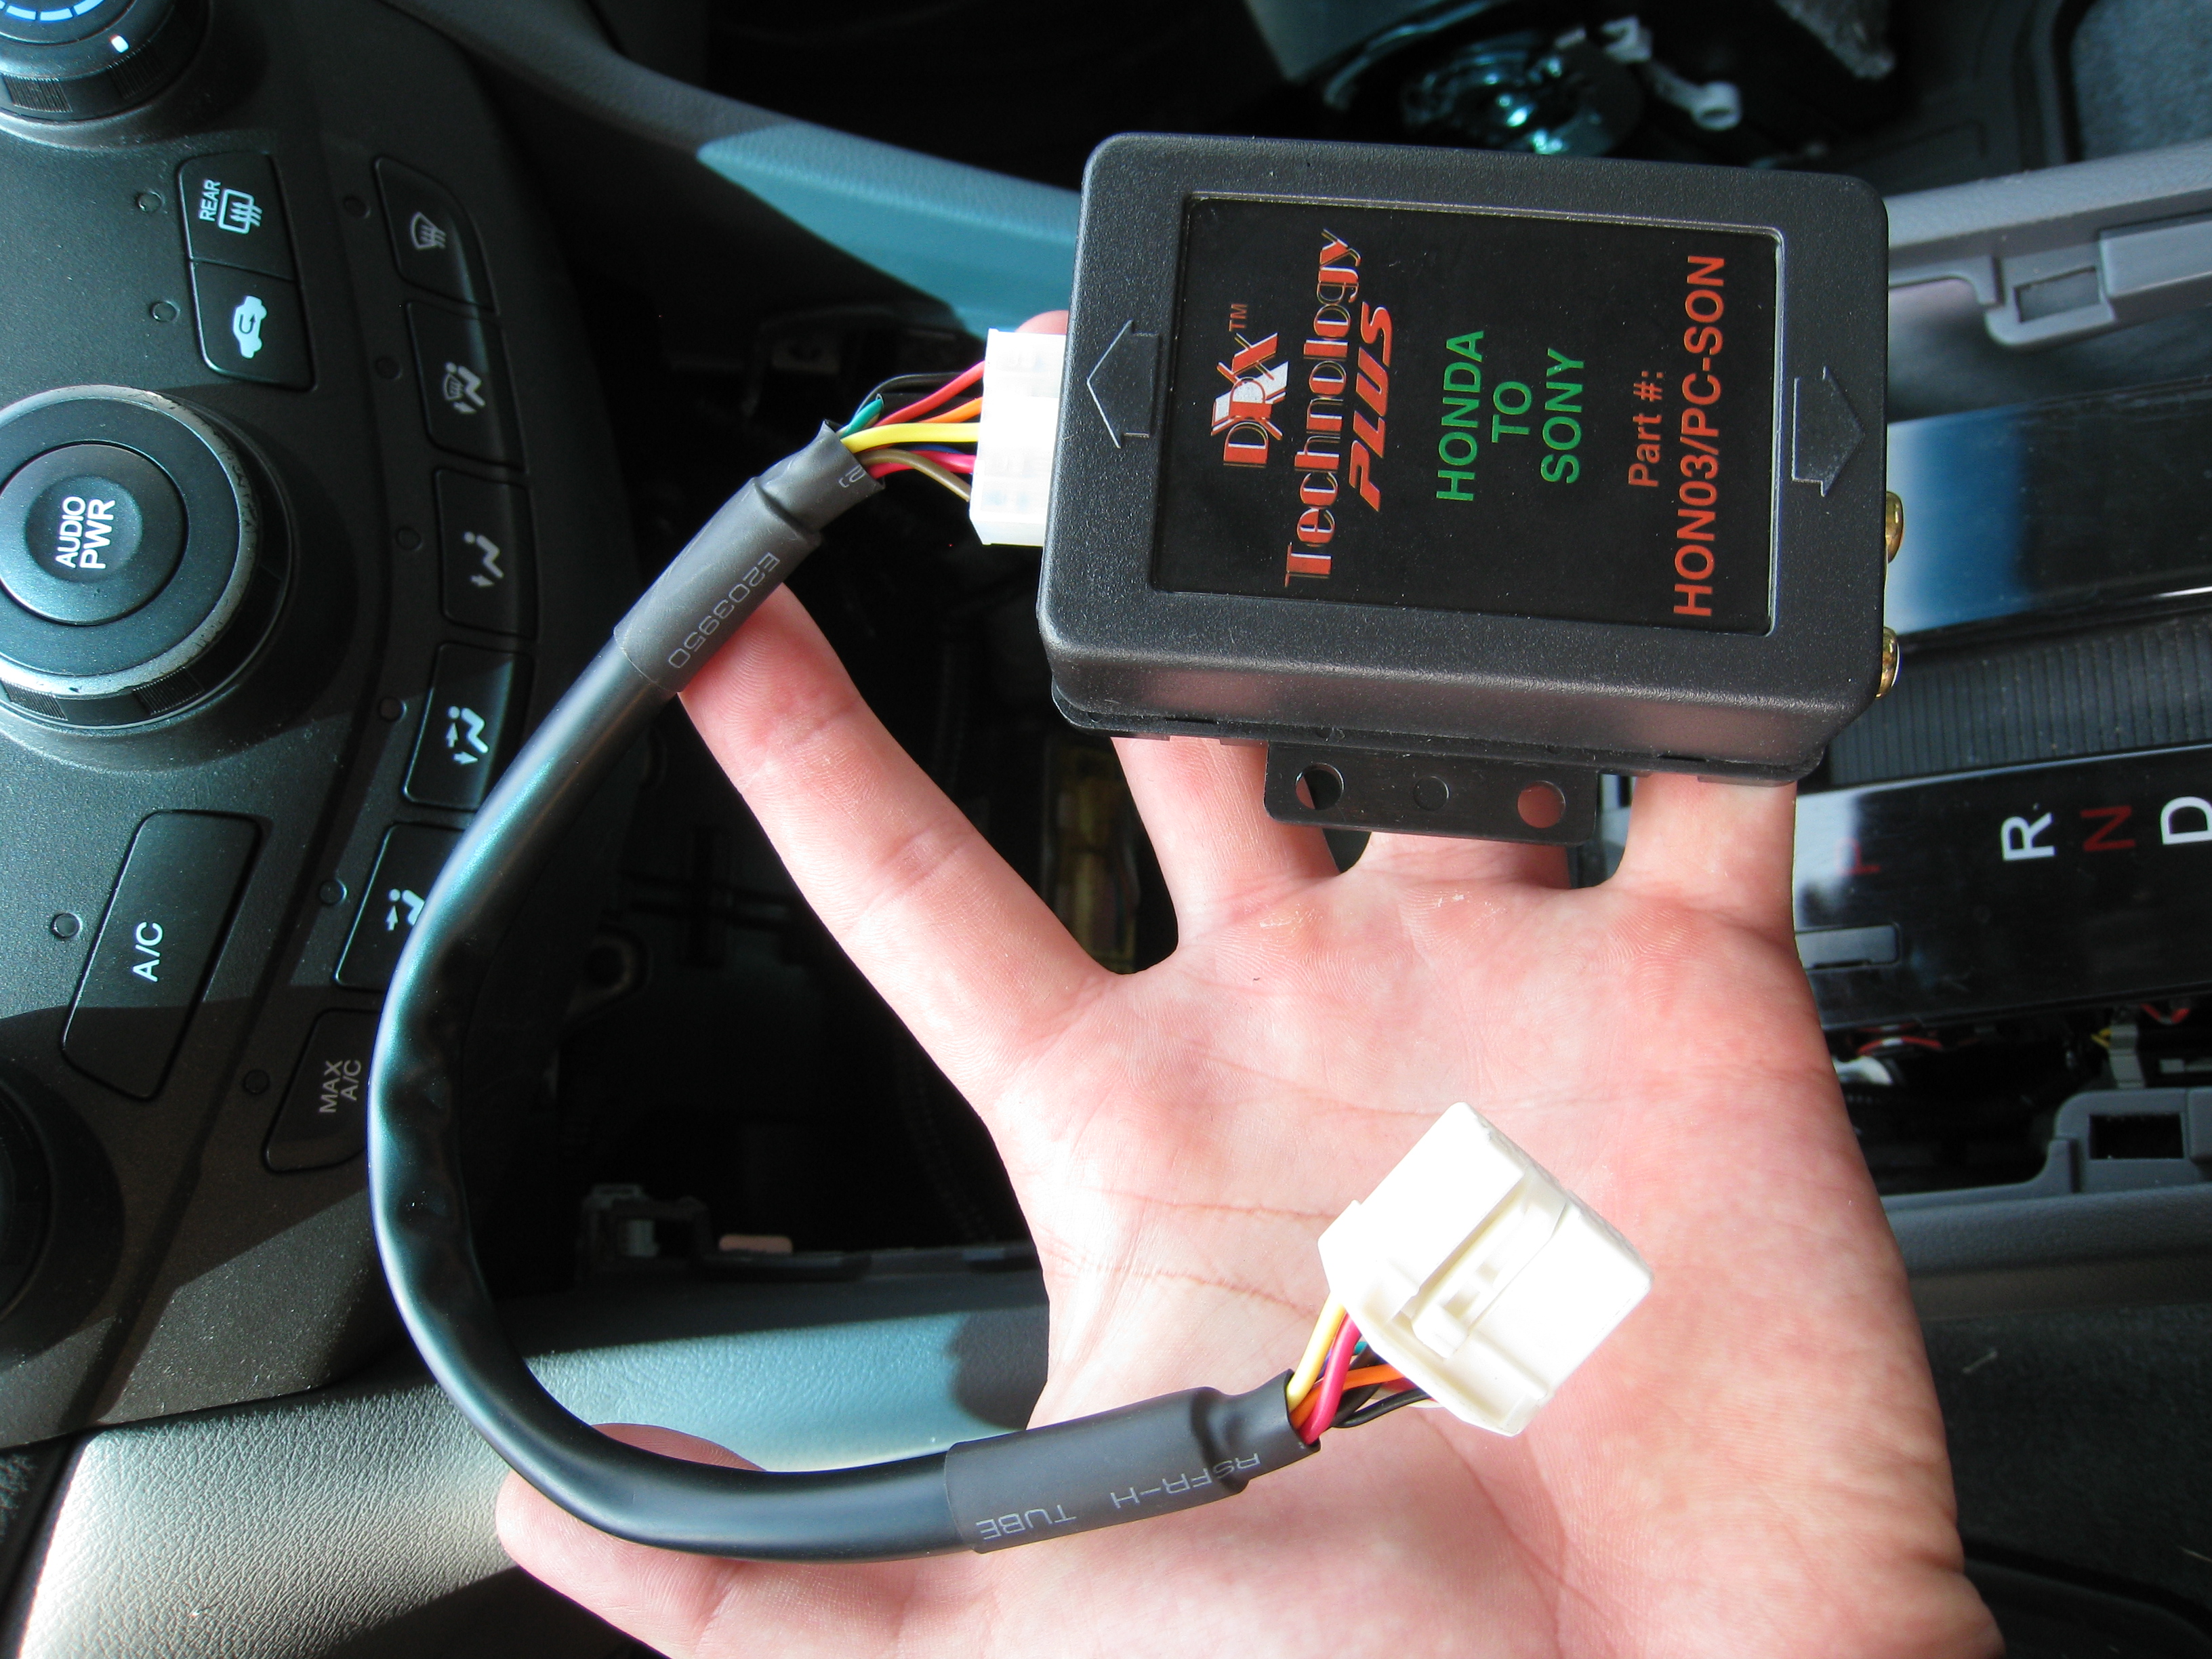
Next was the auxiliary adapter that I found at Crutchfield. These are sold by quite a few companies, but since I had a $75 giftcard laying around from Crutchfield, I ordered through them.
http://www.crutchfield.com/p_469HO03...er.html?tp=422
This ran $79.99 plus shipping, but with my giftcard, it was considerable cheaper for me.
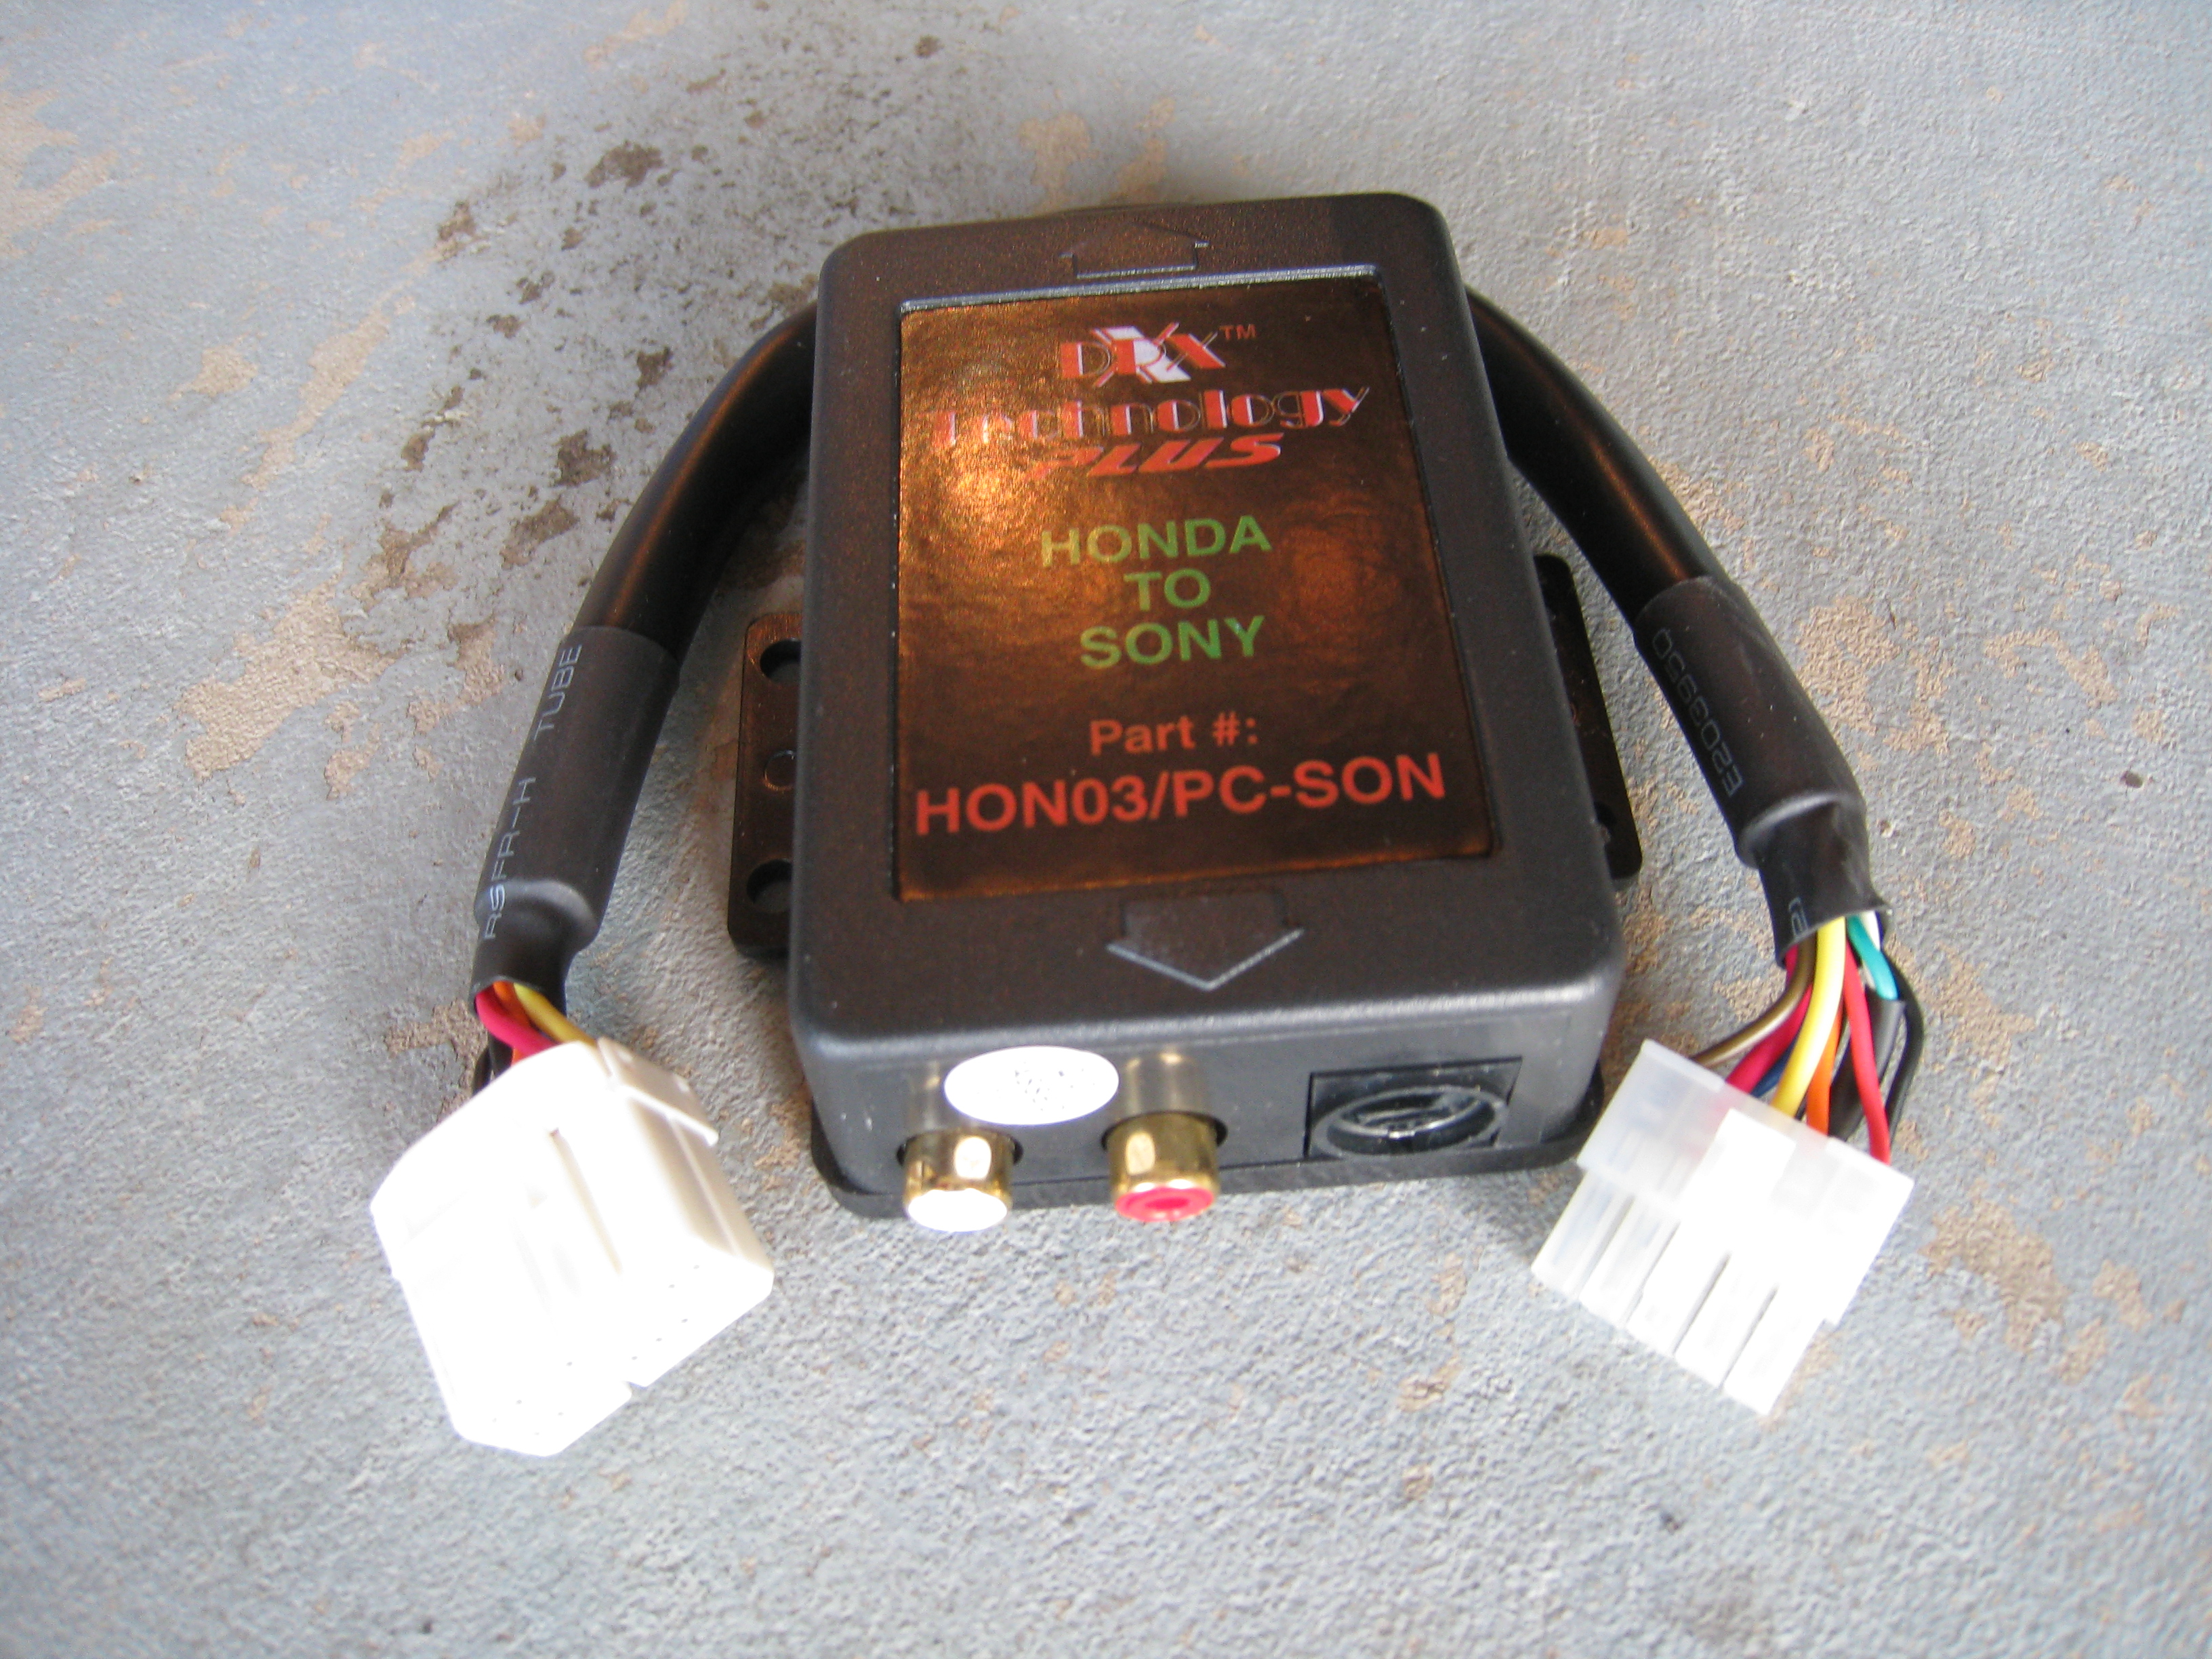
It comes with a wiring harness that is vehicle specific, so the setup was 100% plug and play.
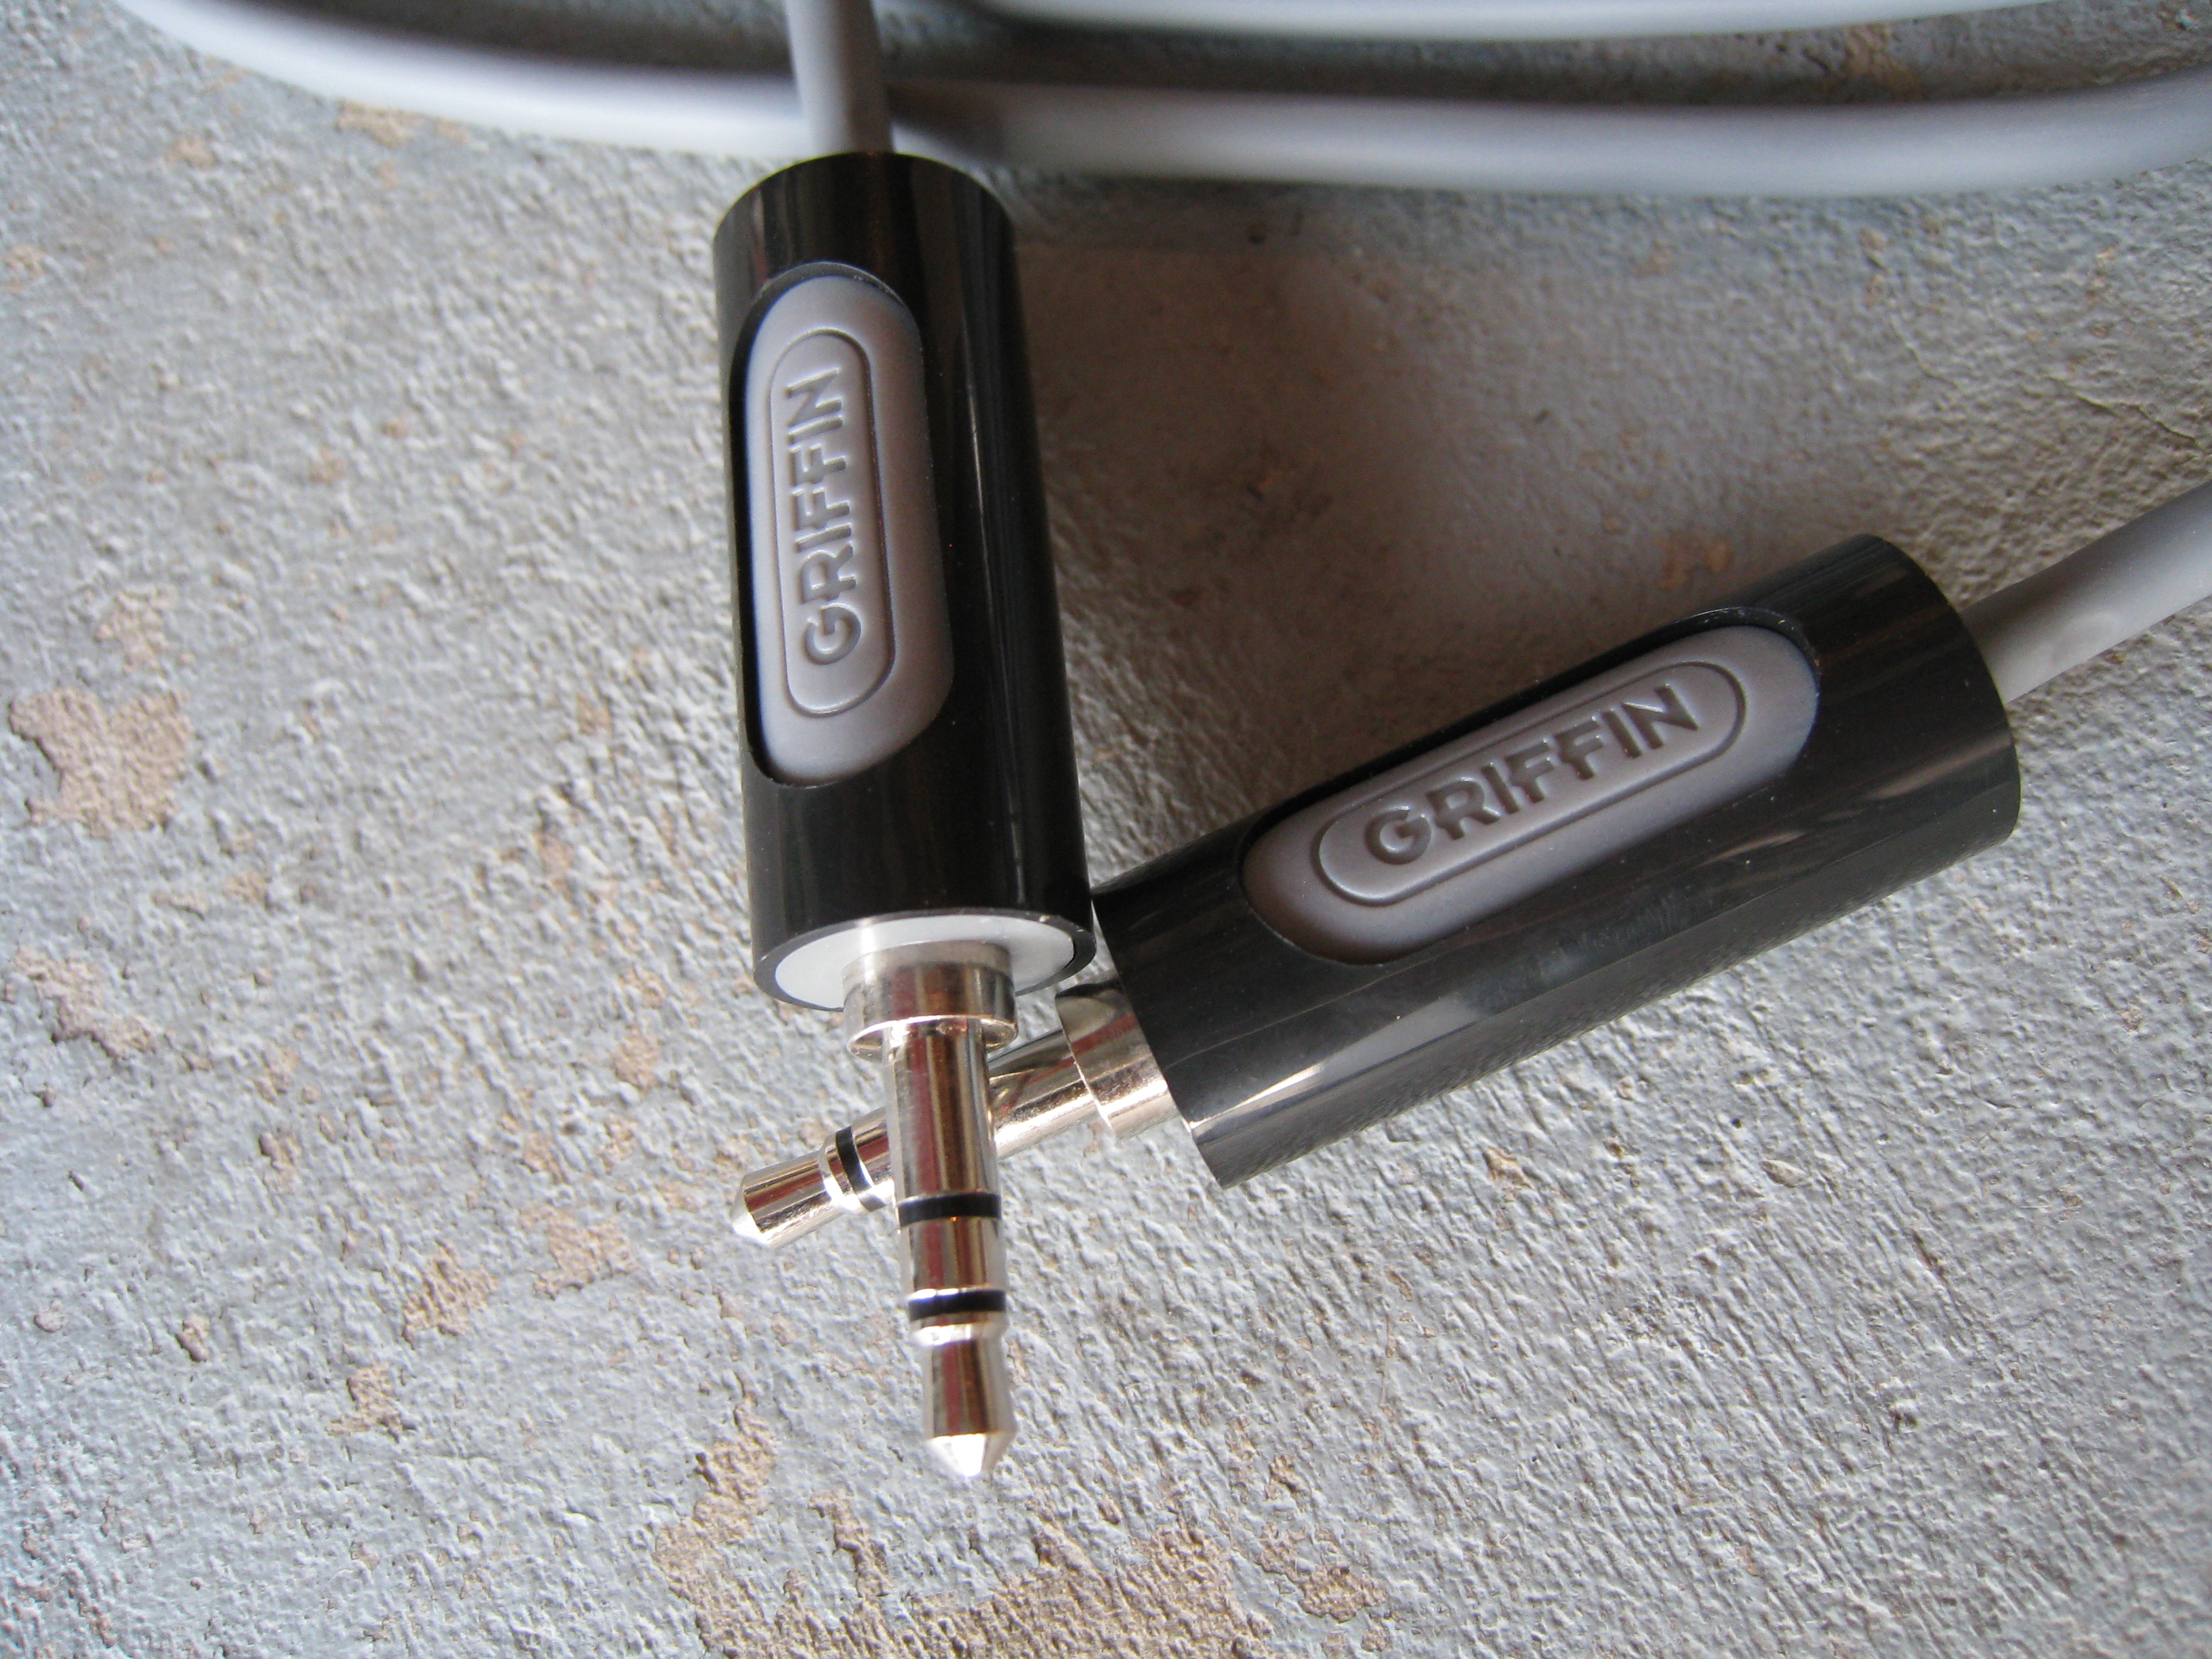
Next was a 3.5mm male to male audio cable that I picked up from Walmart for around $14.

One end will go to the female jack and the other to the mp3 player headphone jack.
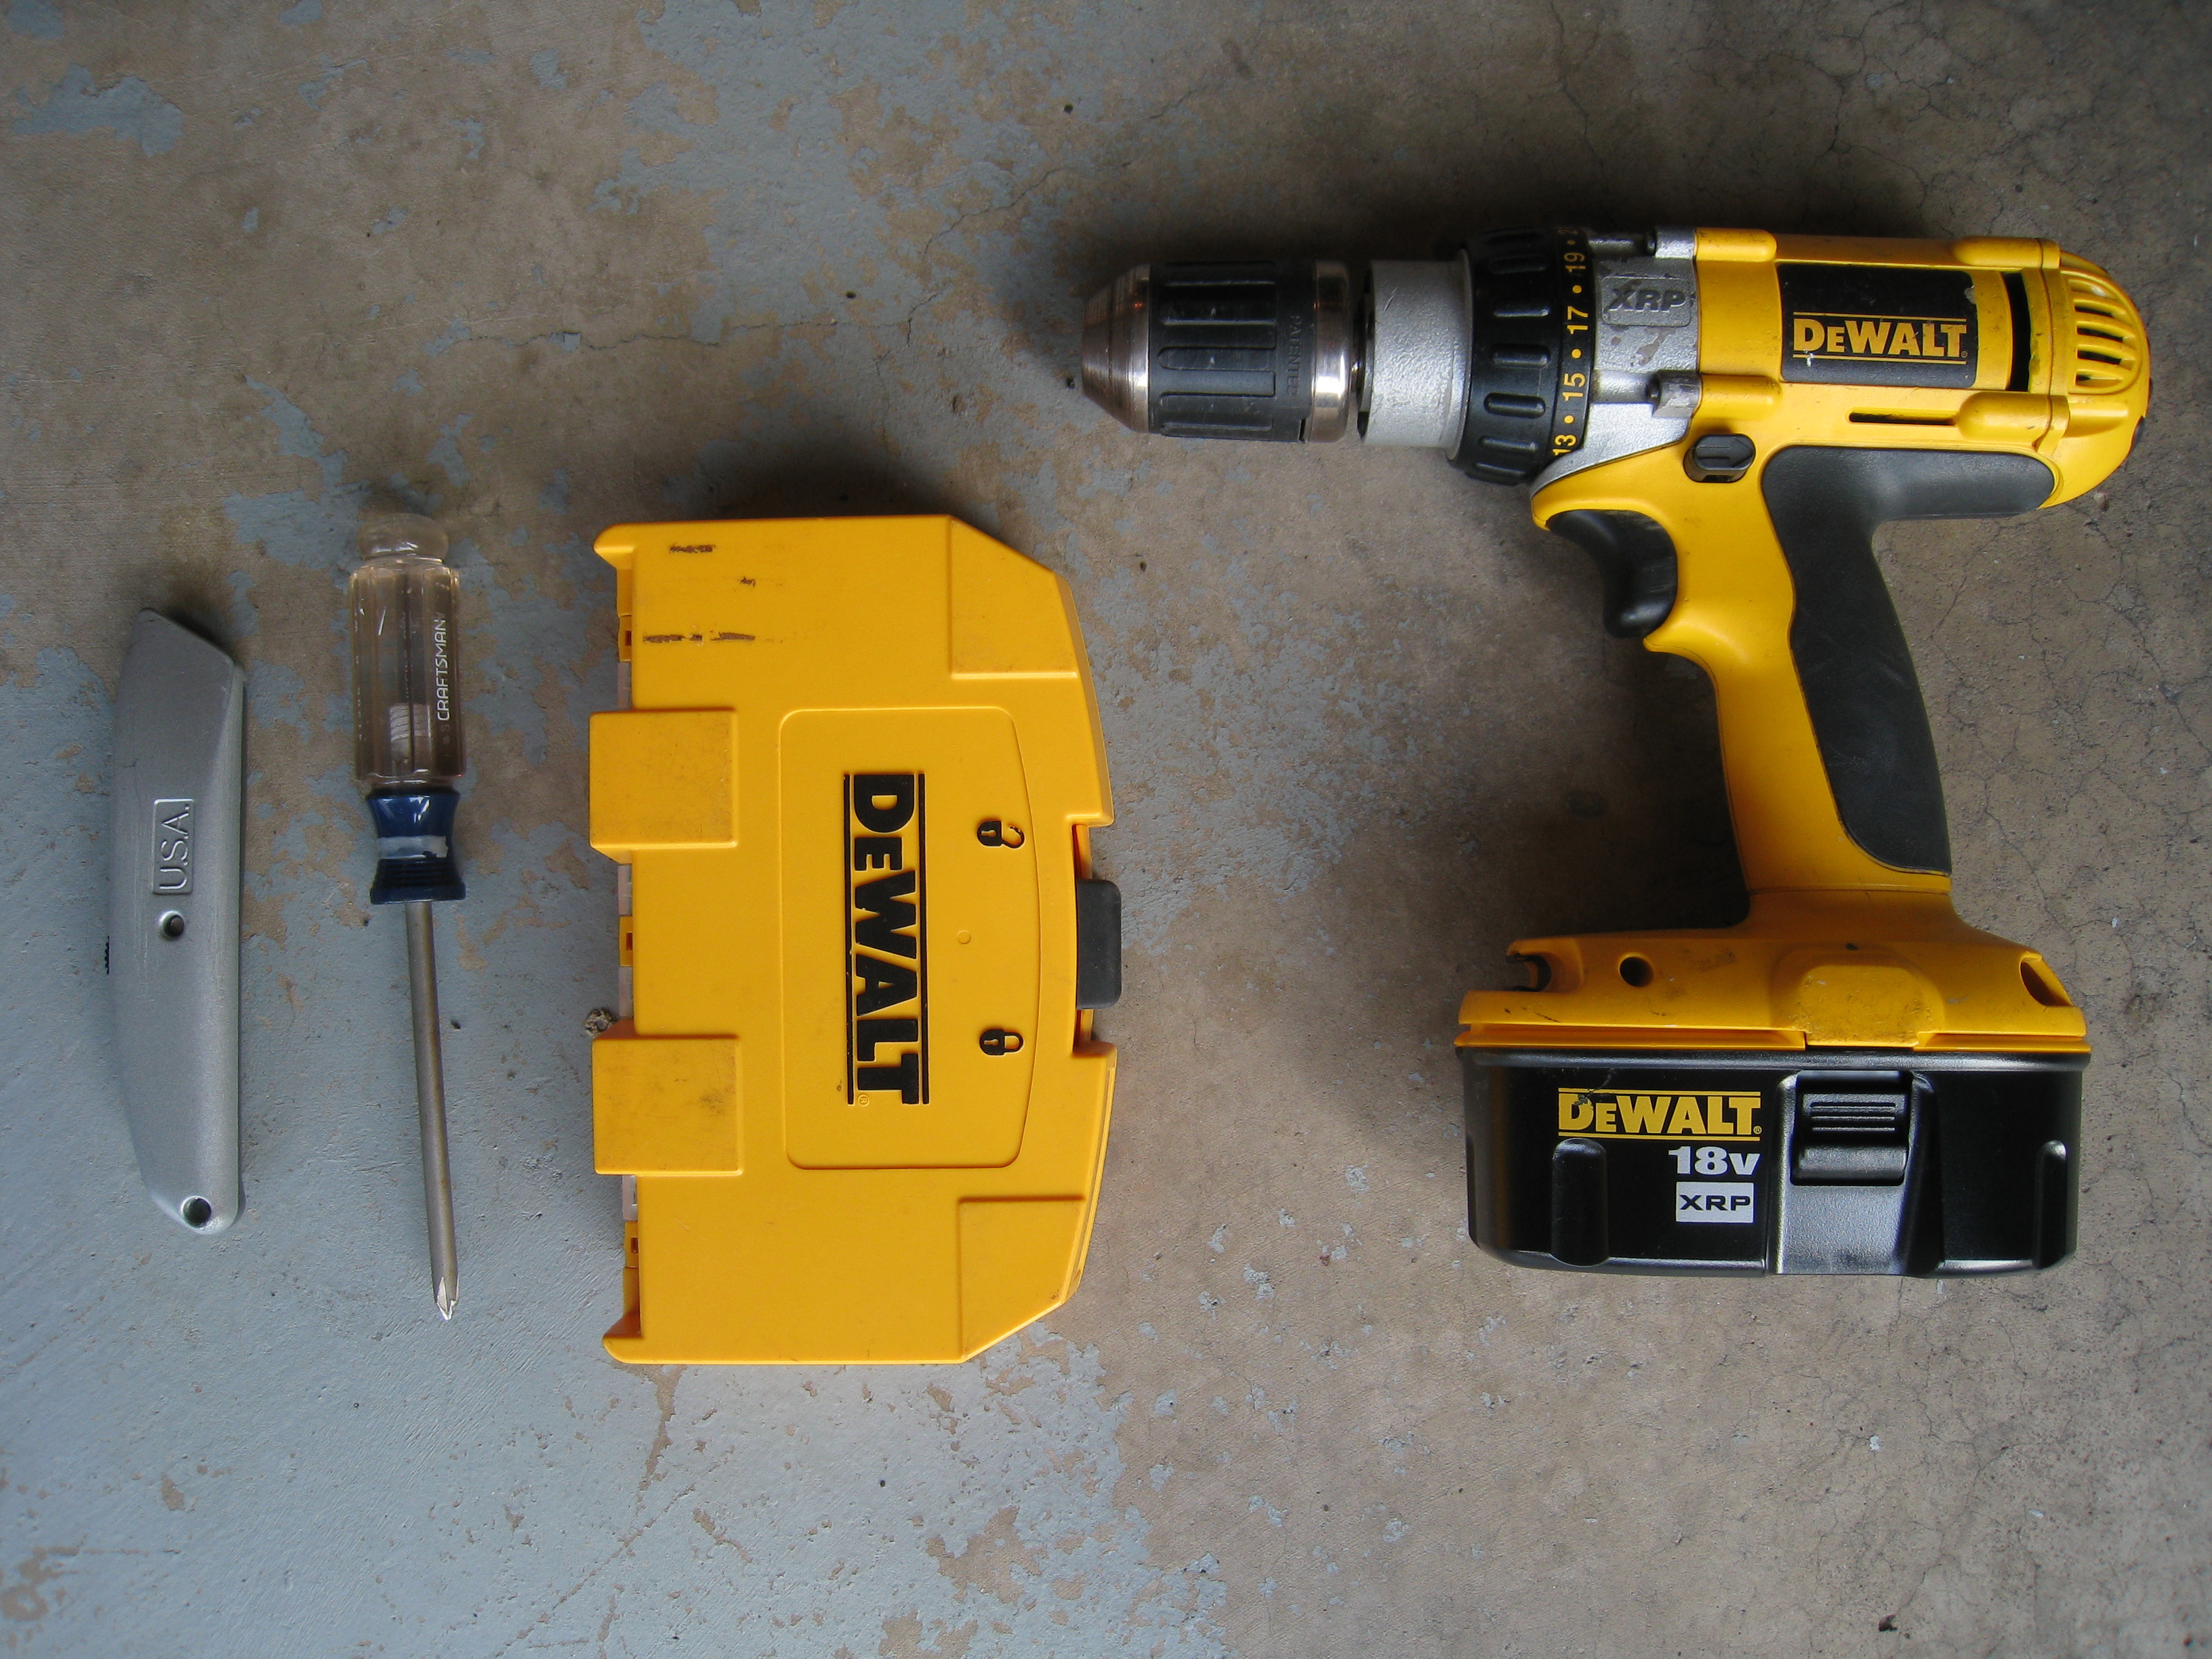
What I thought would be the required tools...
utility knife, #2 phillips, drill, and drill bits.
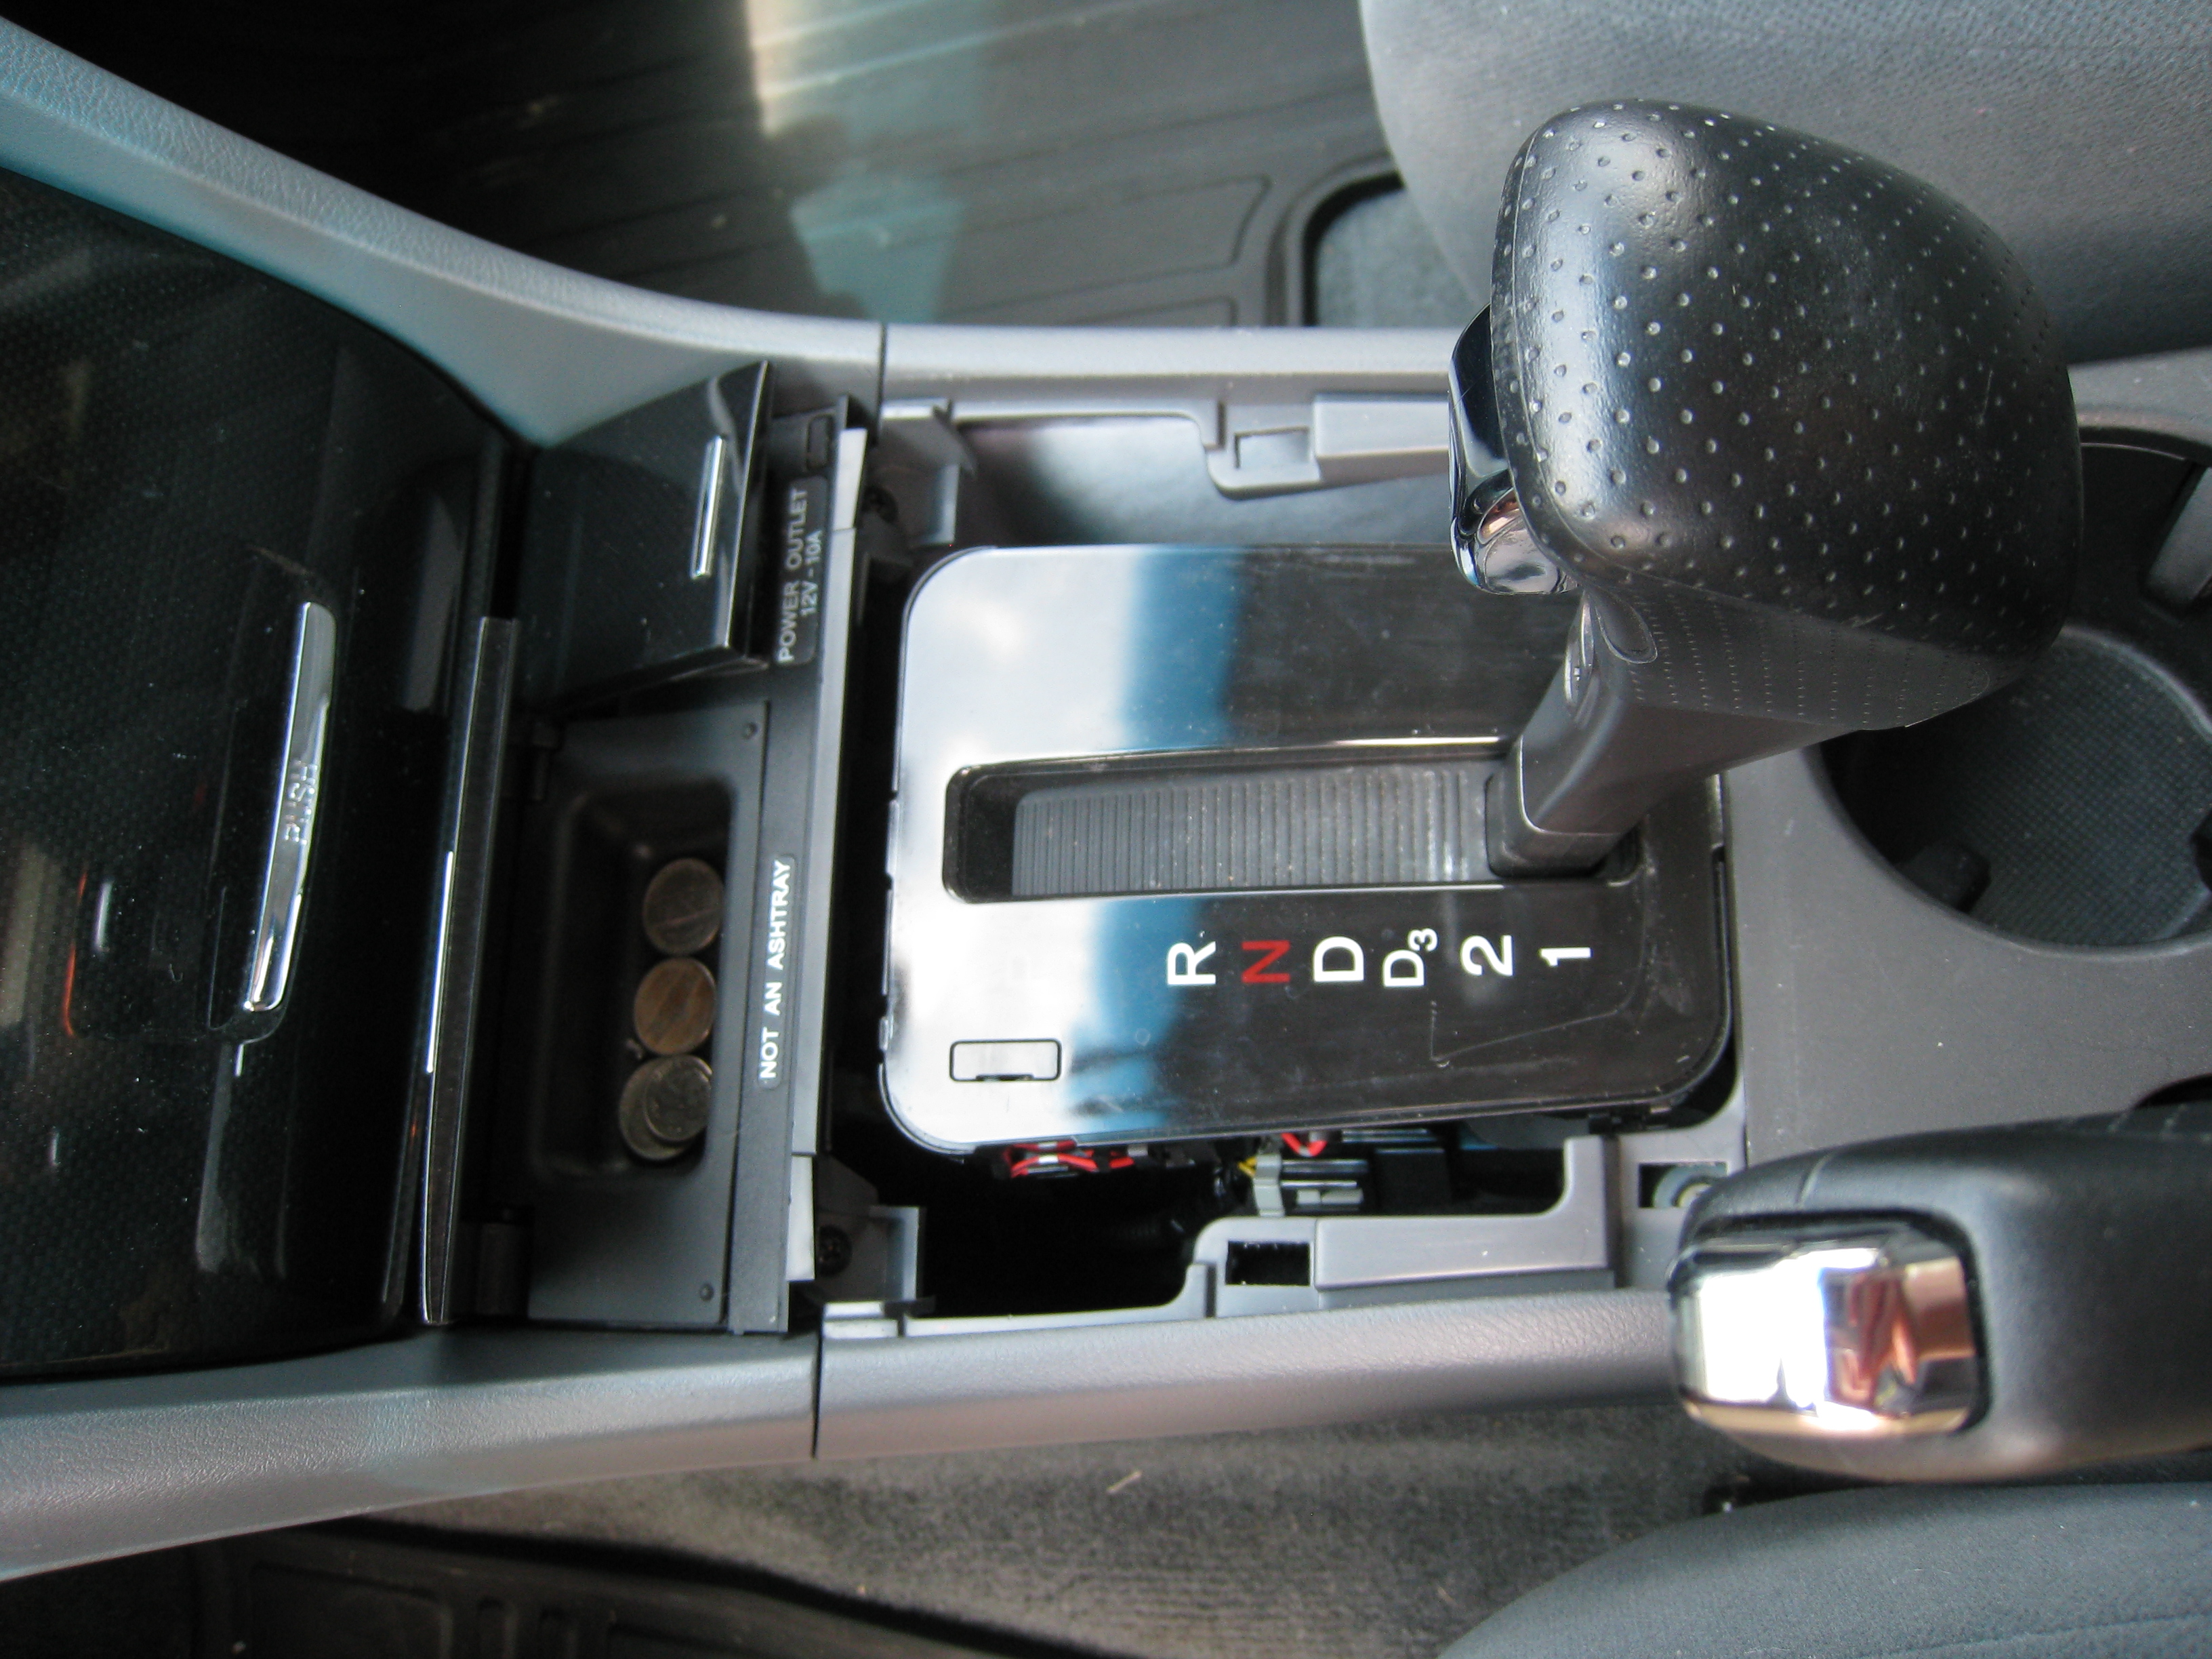
Now I had to decide where I was going to place the jack so it was convenient as well as would be out of the way and not look horrible. I considered placing it near the cup holders, in the center console near the 12v outlet, and in the storage compartment in from of the gear selector.


Ultimately, I chose the storage compartment, mainly due to it being out of the way and I could also place my mp3 player in the compartment when I left the vehicle and store the cord in there as well. Additionally with the wiring I had, it was the closest place to where the auxiliary adapter box would be installed.
BEFORE YOU START ANYTHING, MAKE SURE YOU HAVE THE FACTORY RADIO CODE!!! There is a security feature on these cars that disable the radio and the radio won't function if you remove the negative from the battery until you enter the code into the radio.
The interior of my 2007 Accord SE

The first step is to remove the trim panel around the gear selector. I've had to take the center console out previously, so I was somewhat familiar with the operation. If you elect to do this please be cautious. Interior trim can be a real pain in the butt with all the hidden clips and whatnot.
To do this, you first need to pop open the small doors in front of the panel to give you room to pry up on the trim panel.
Then give the panel a few good yanks around the perimeter and it should come lose.

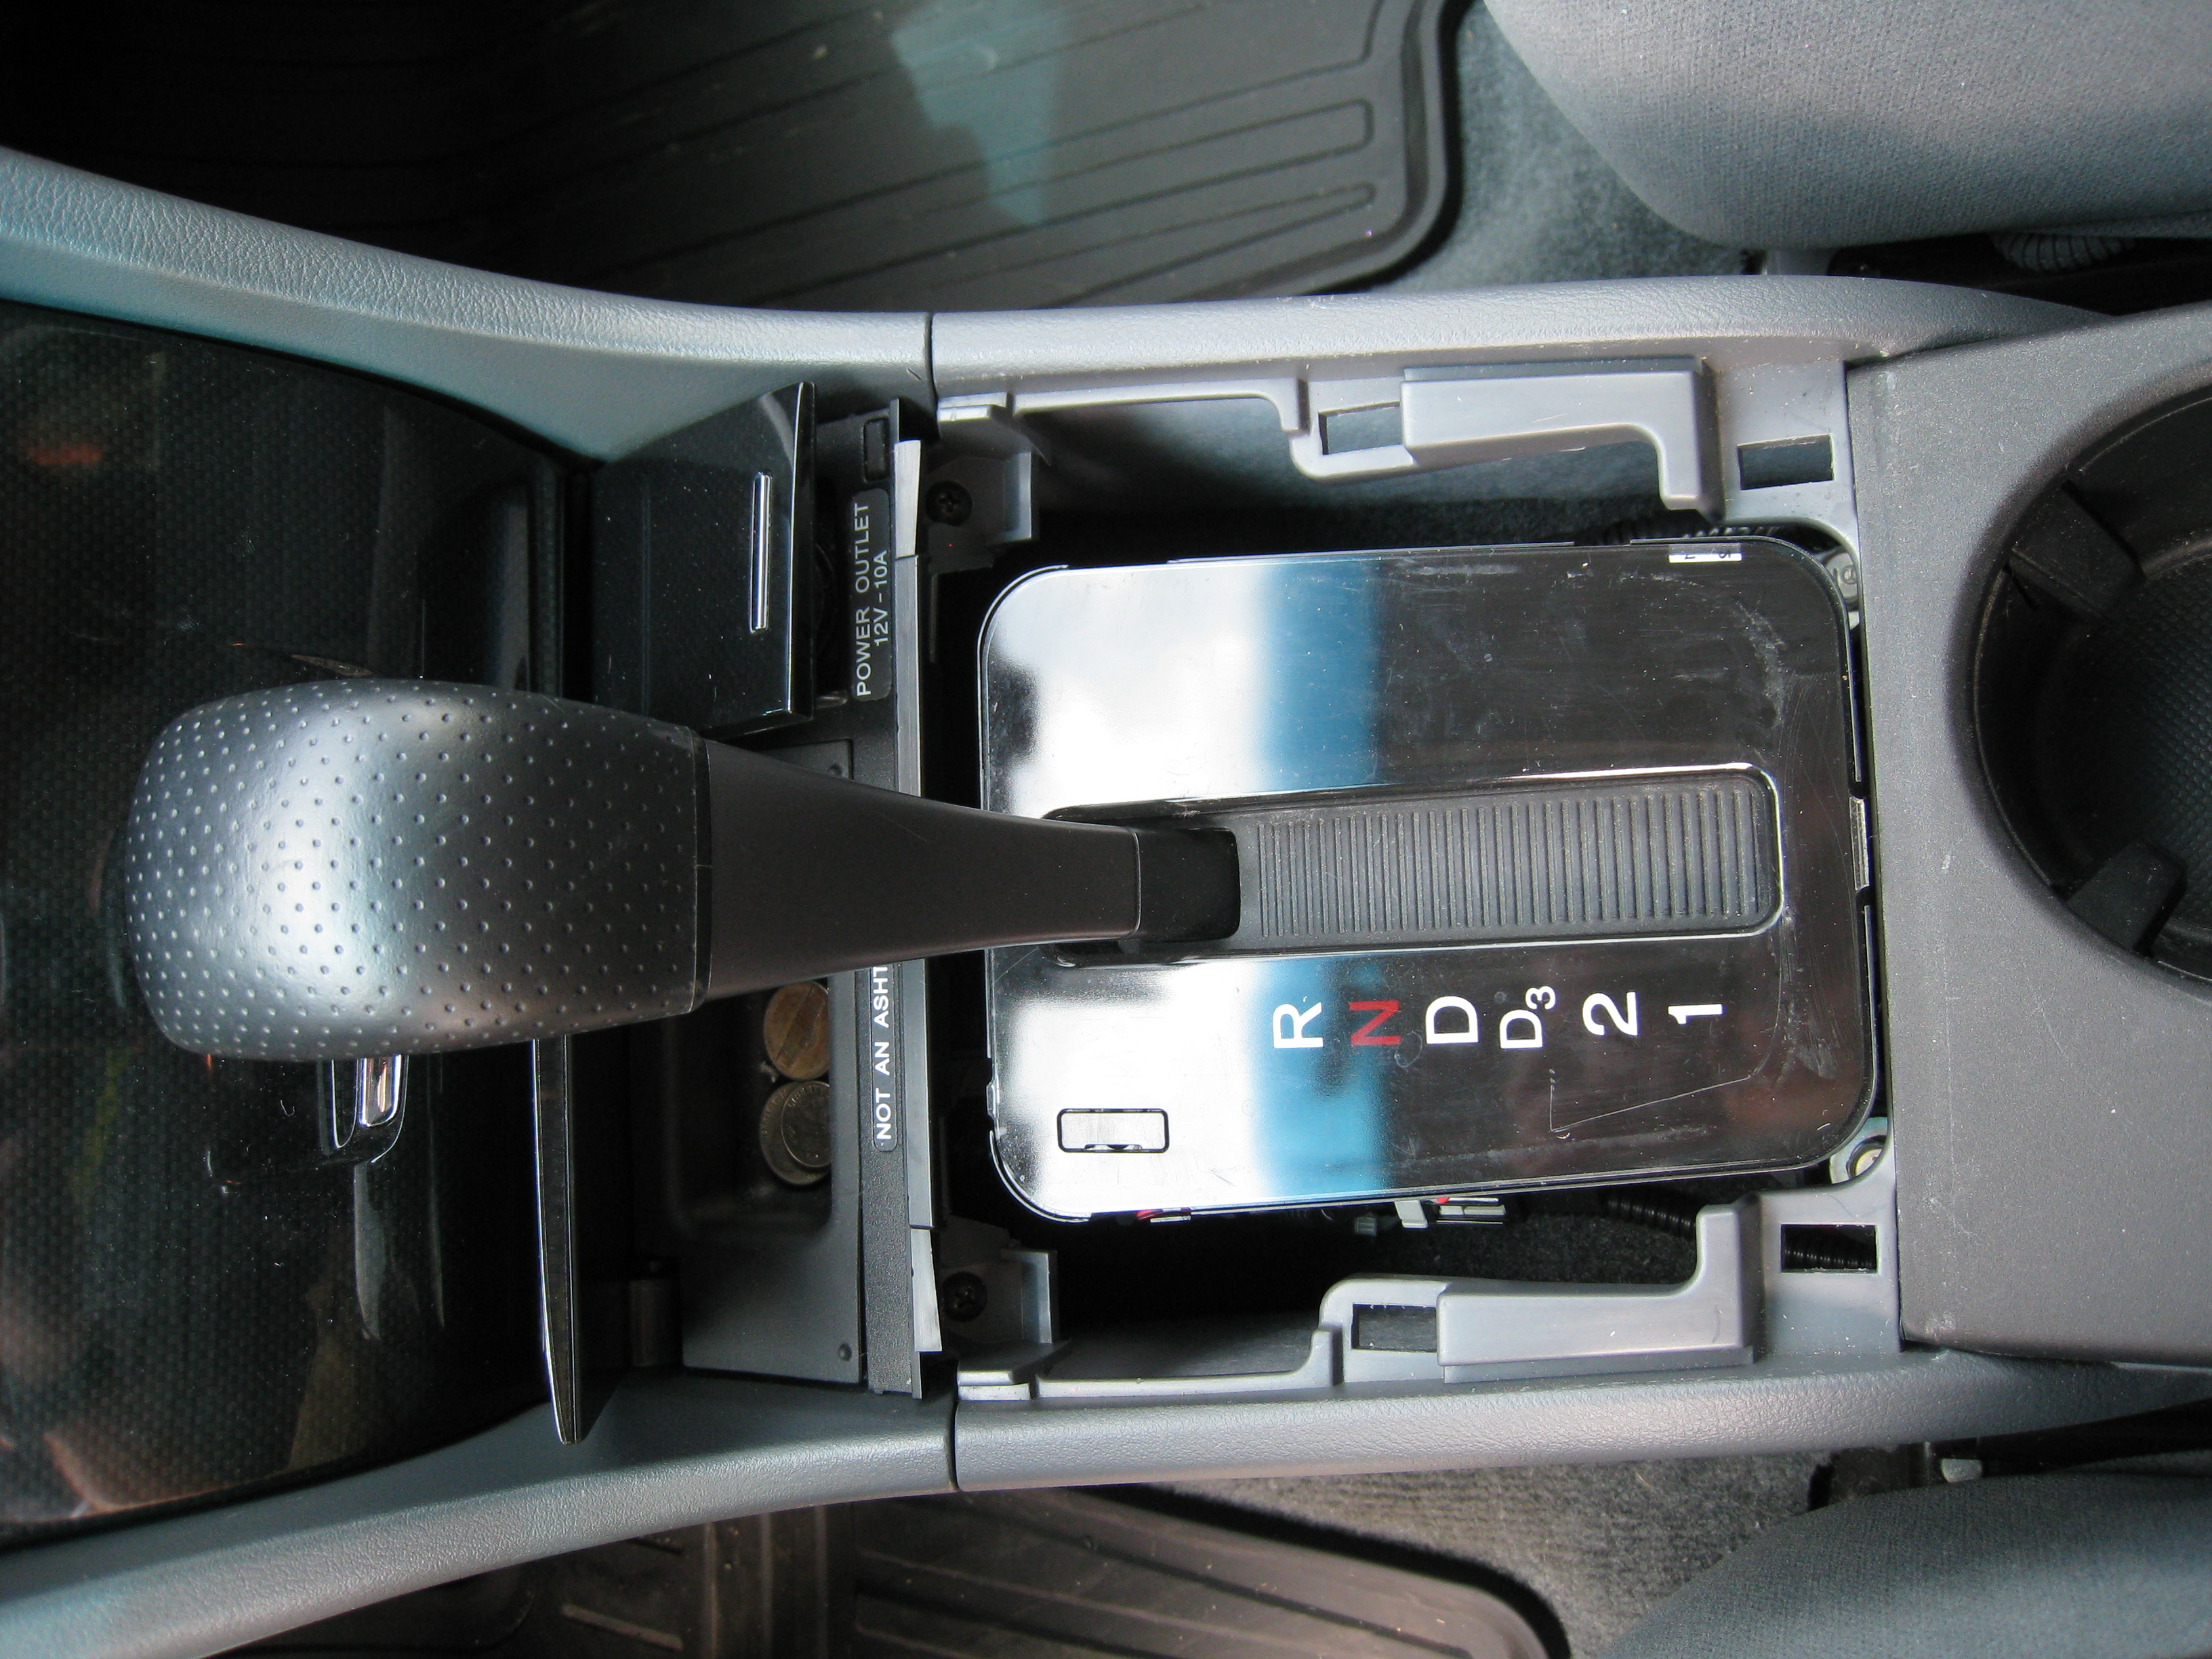
Once loose, it'll lift right off around the gear selector.
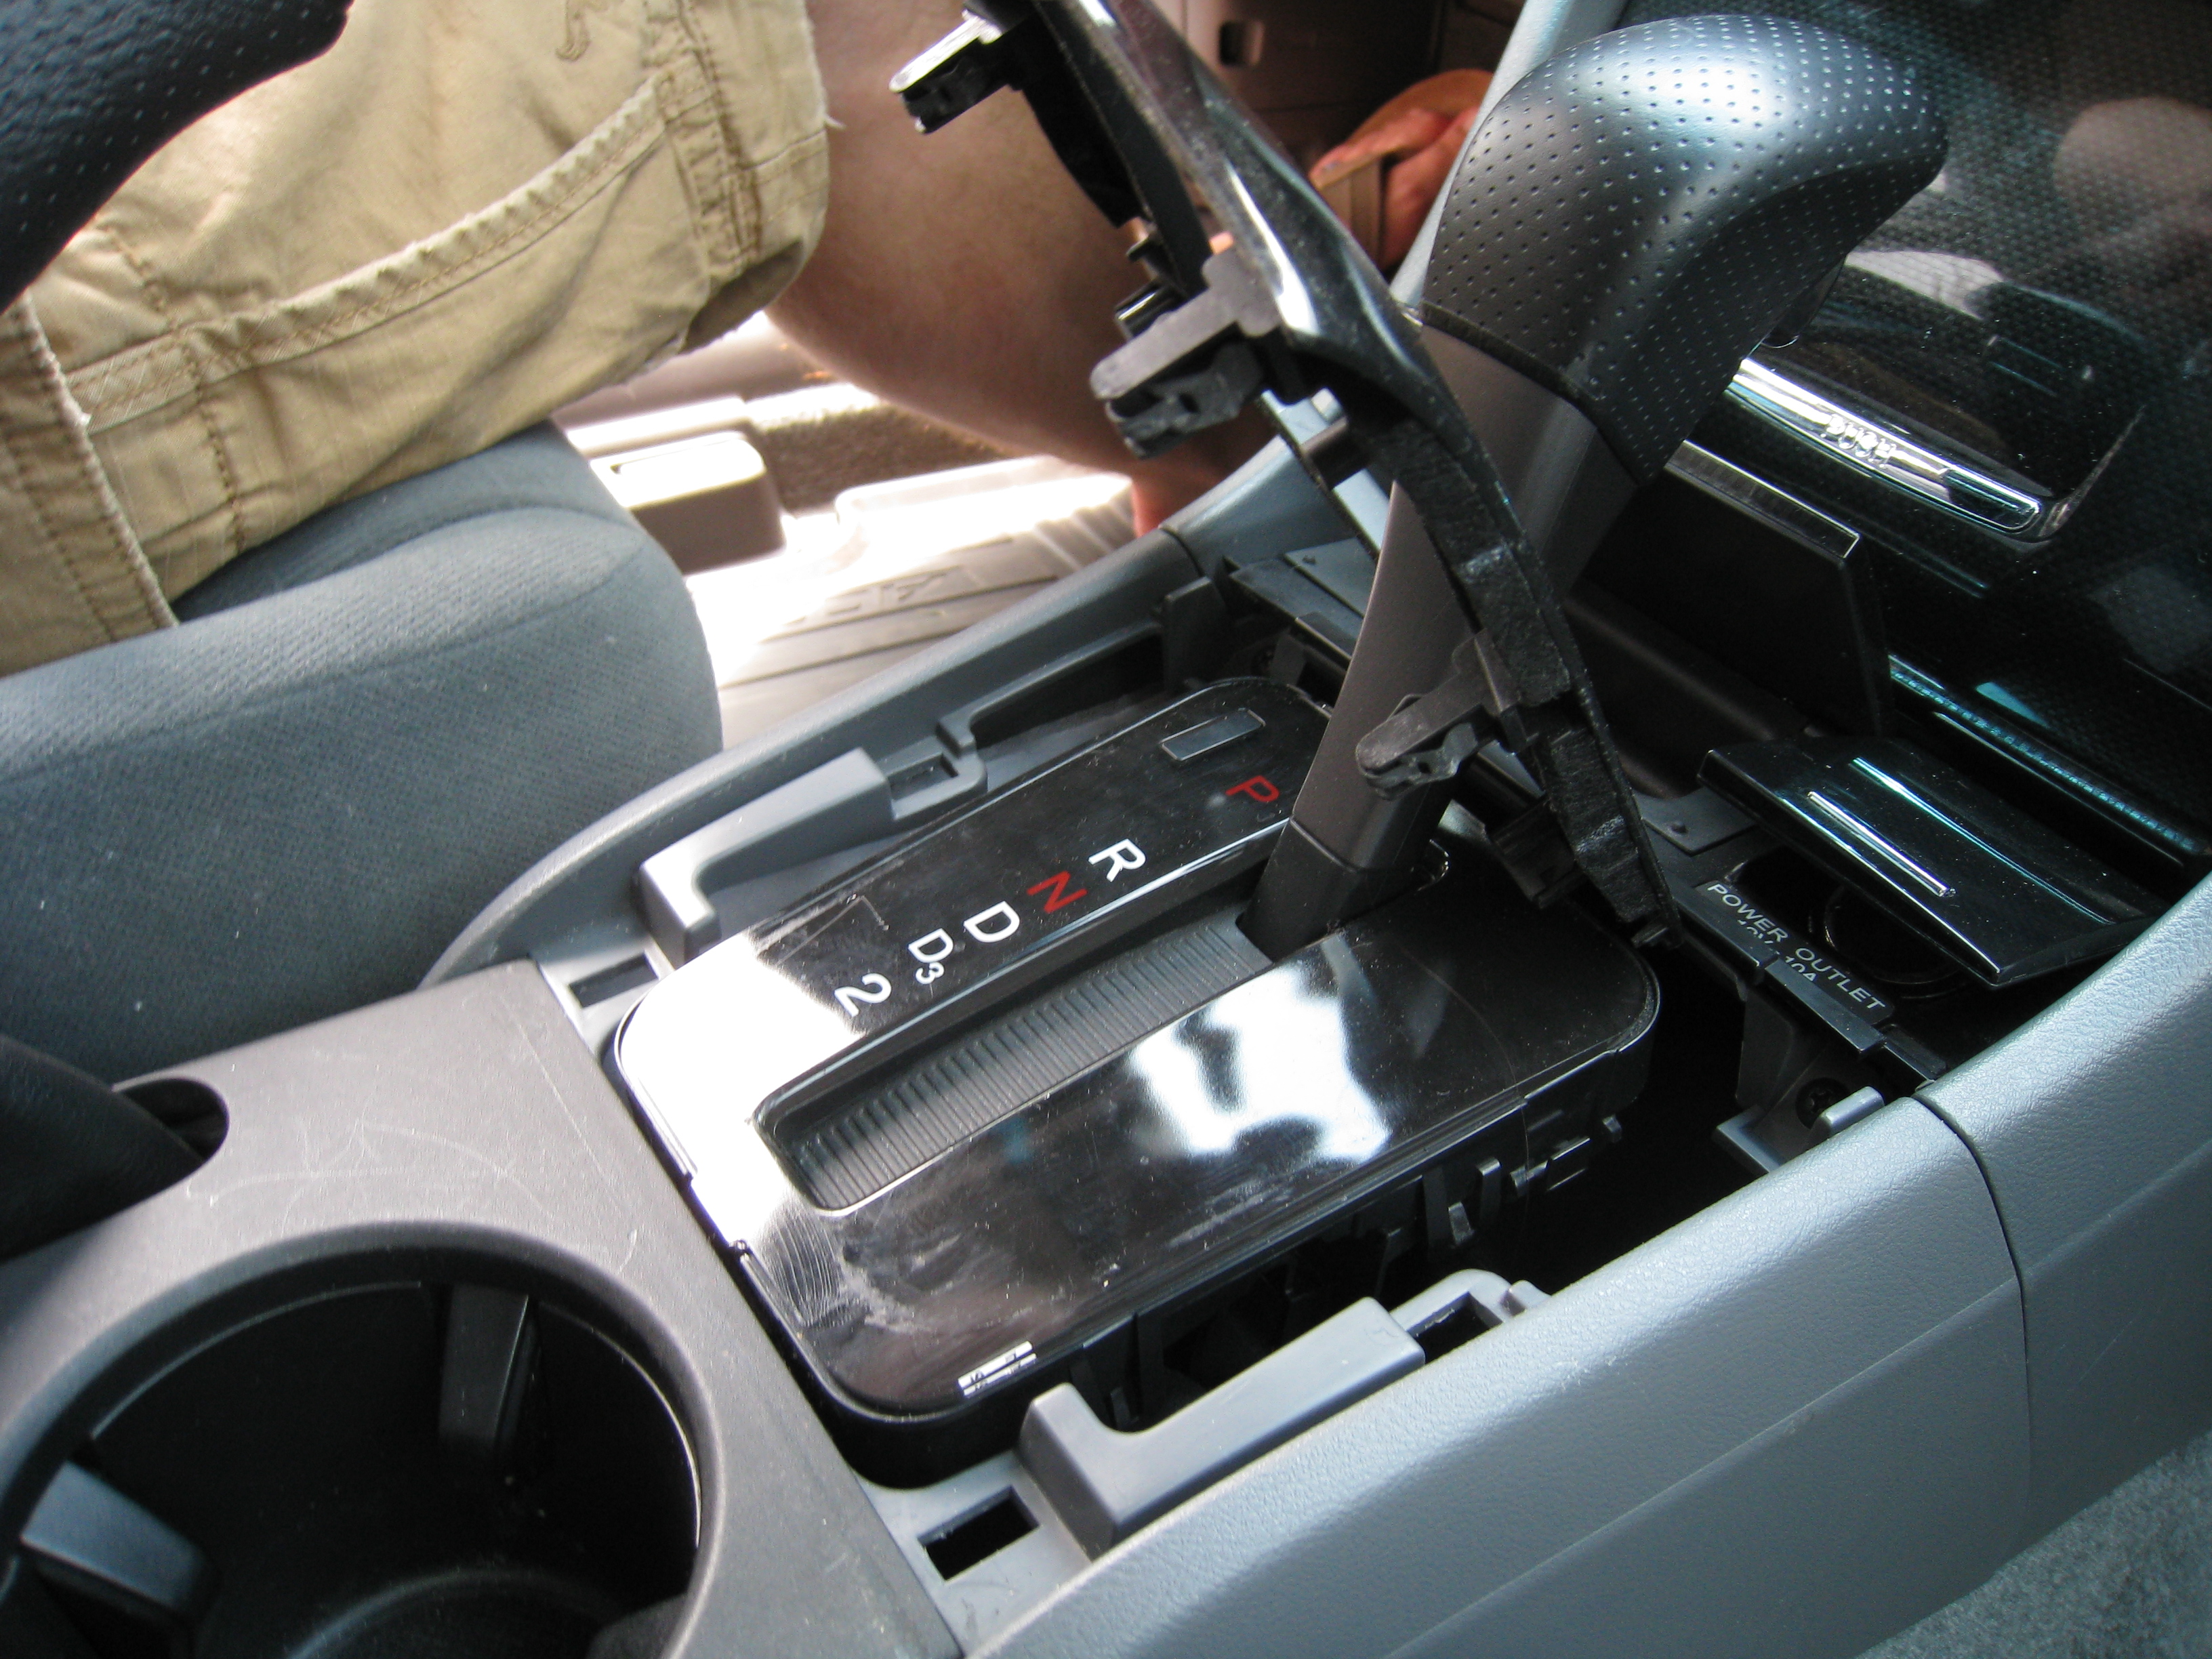
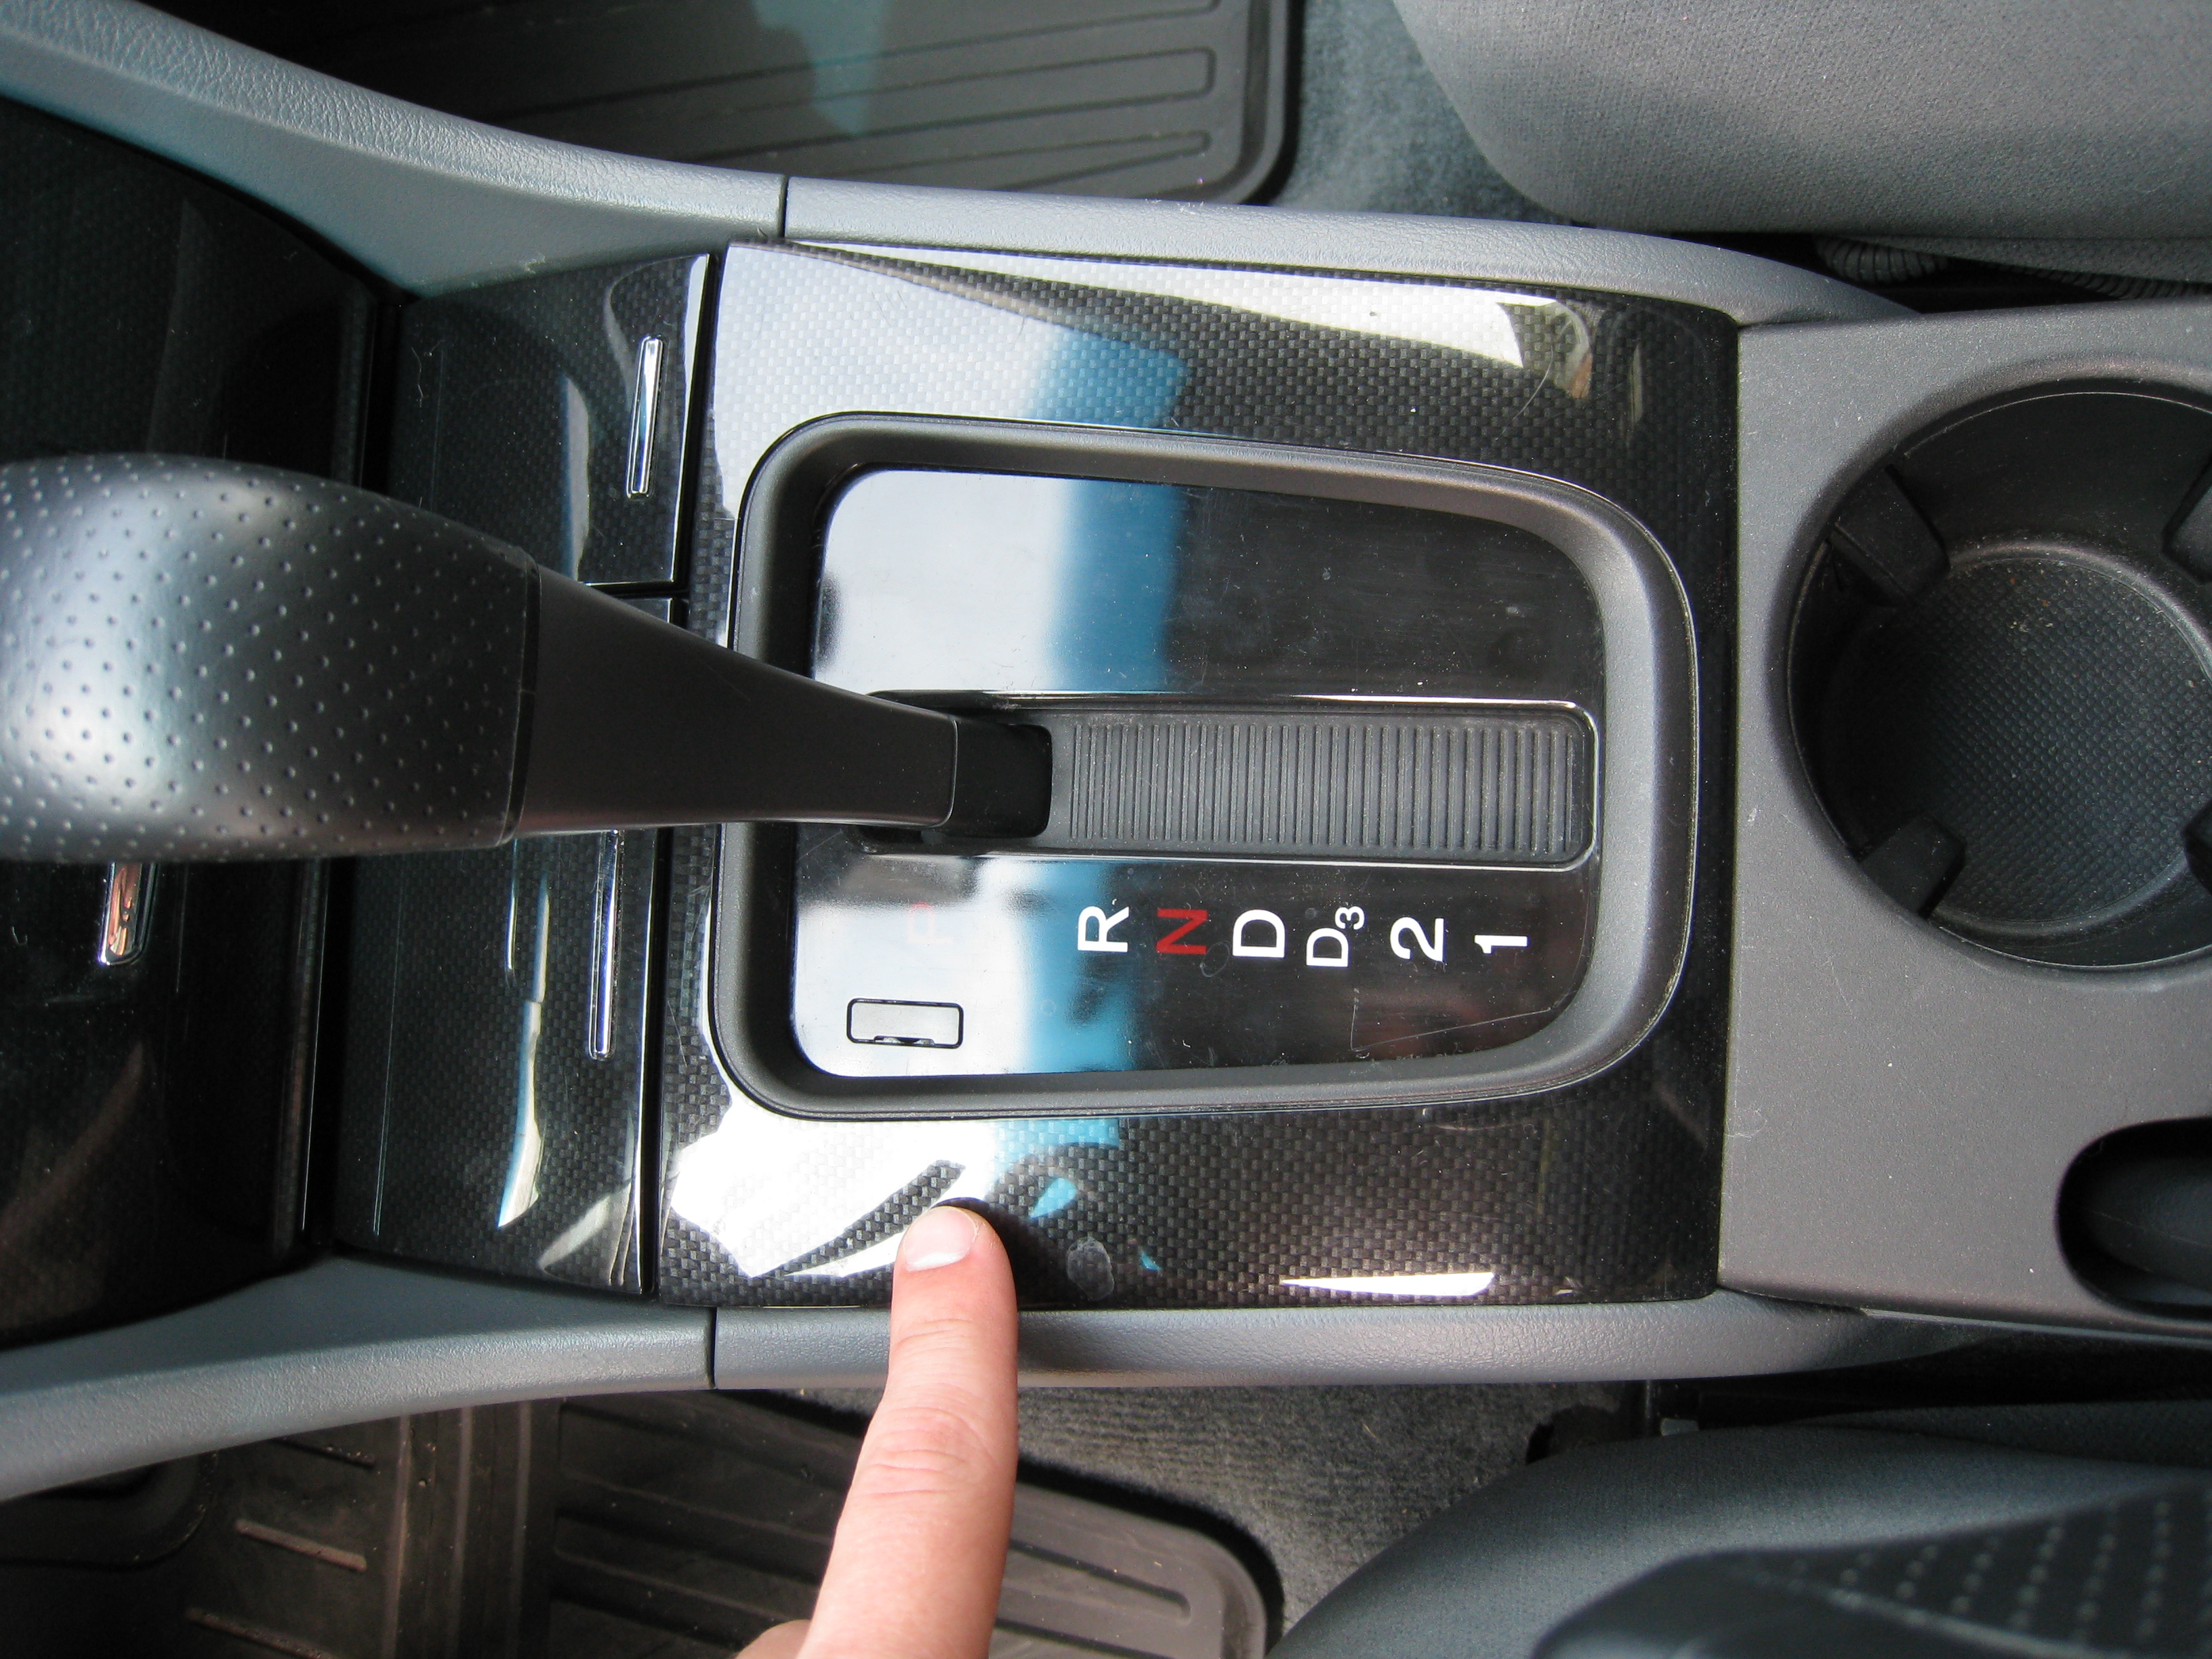
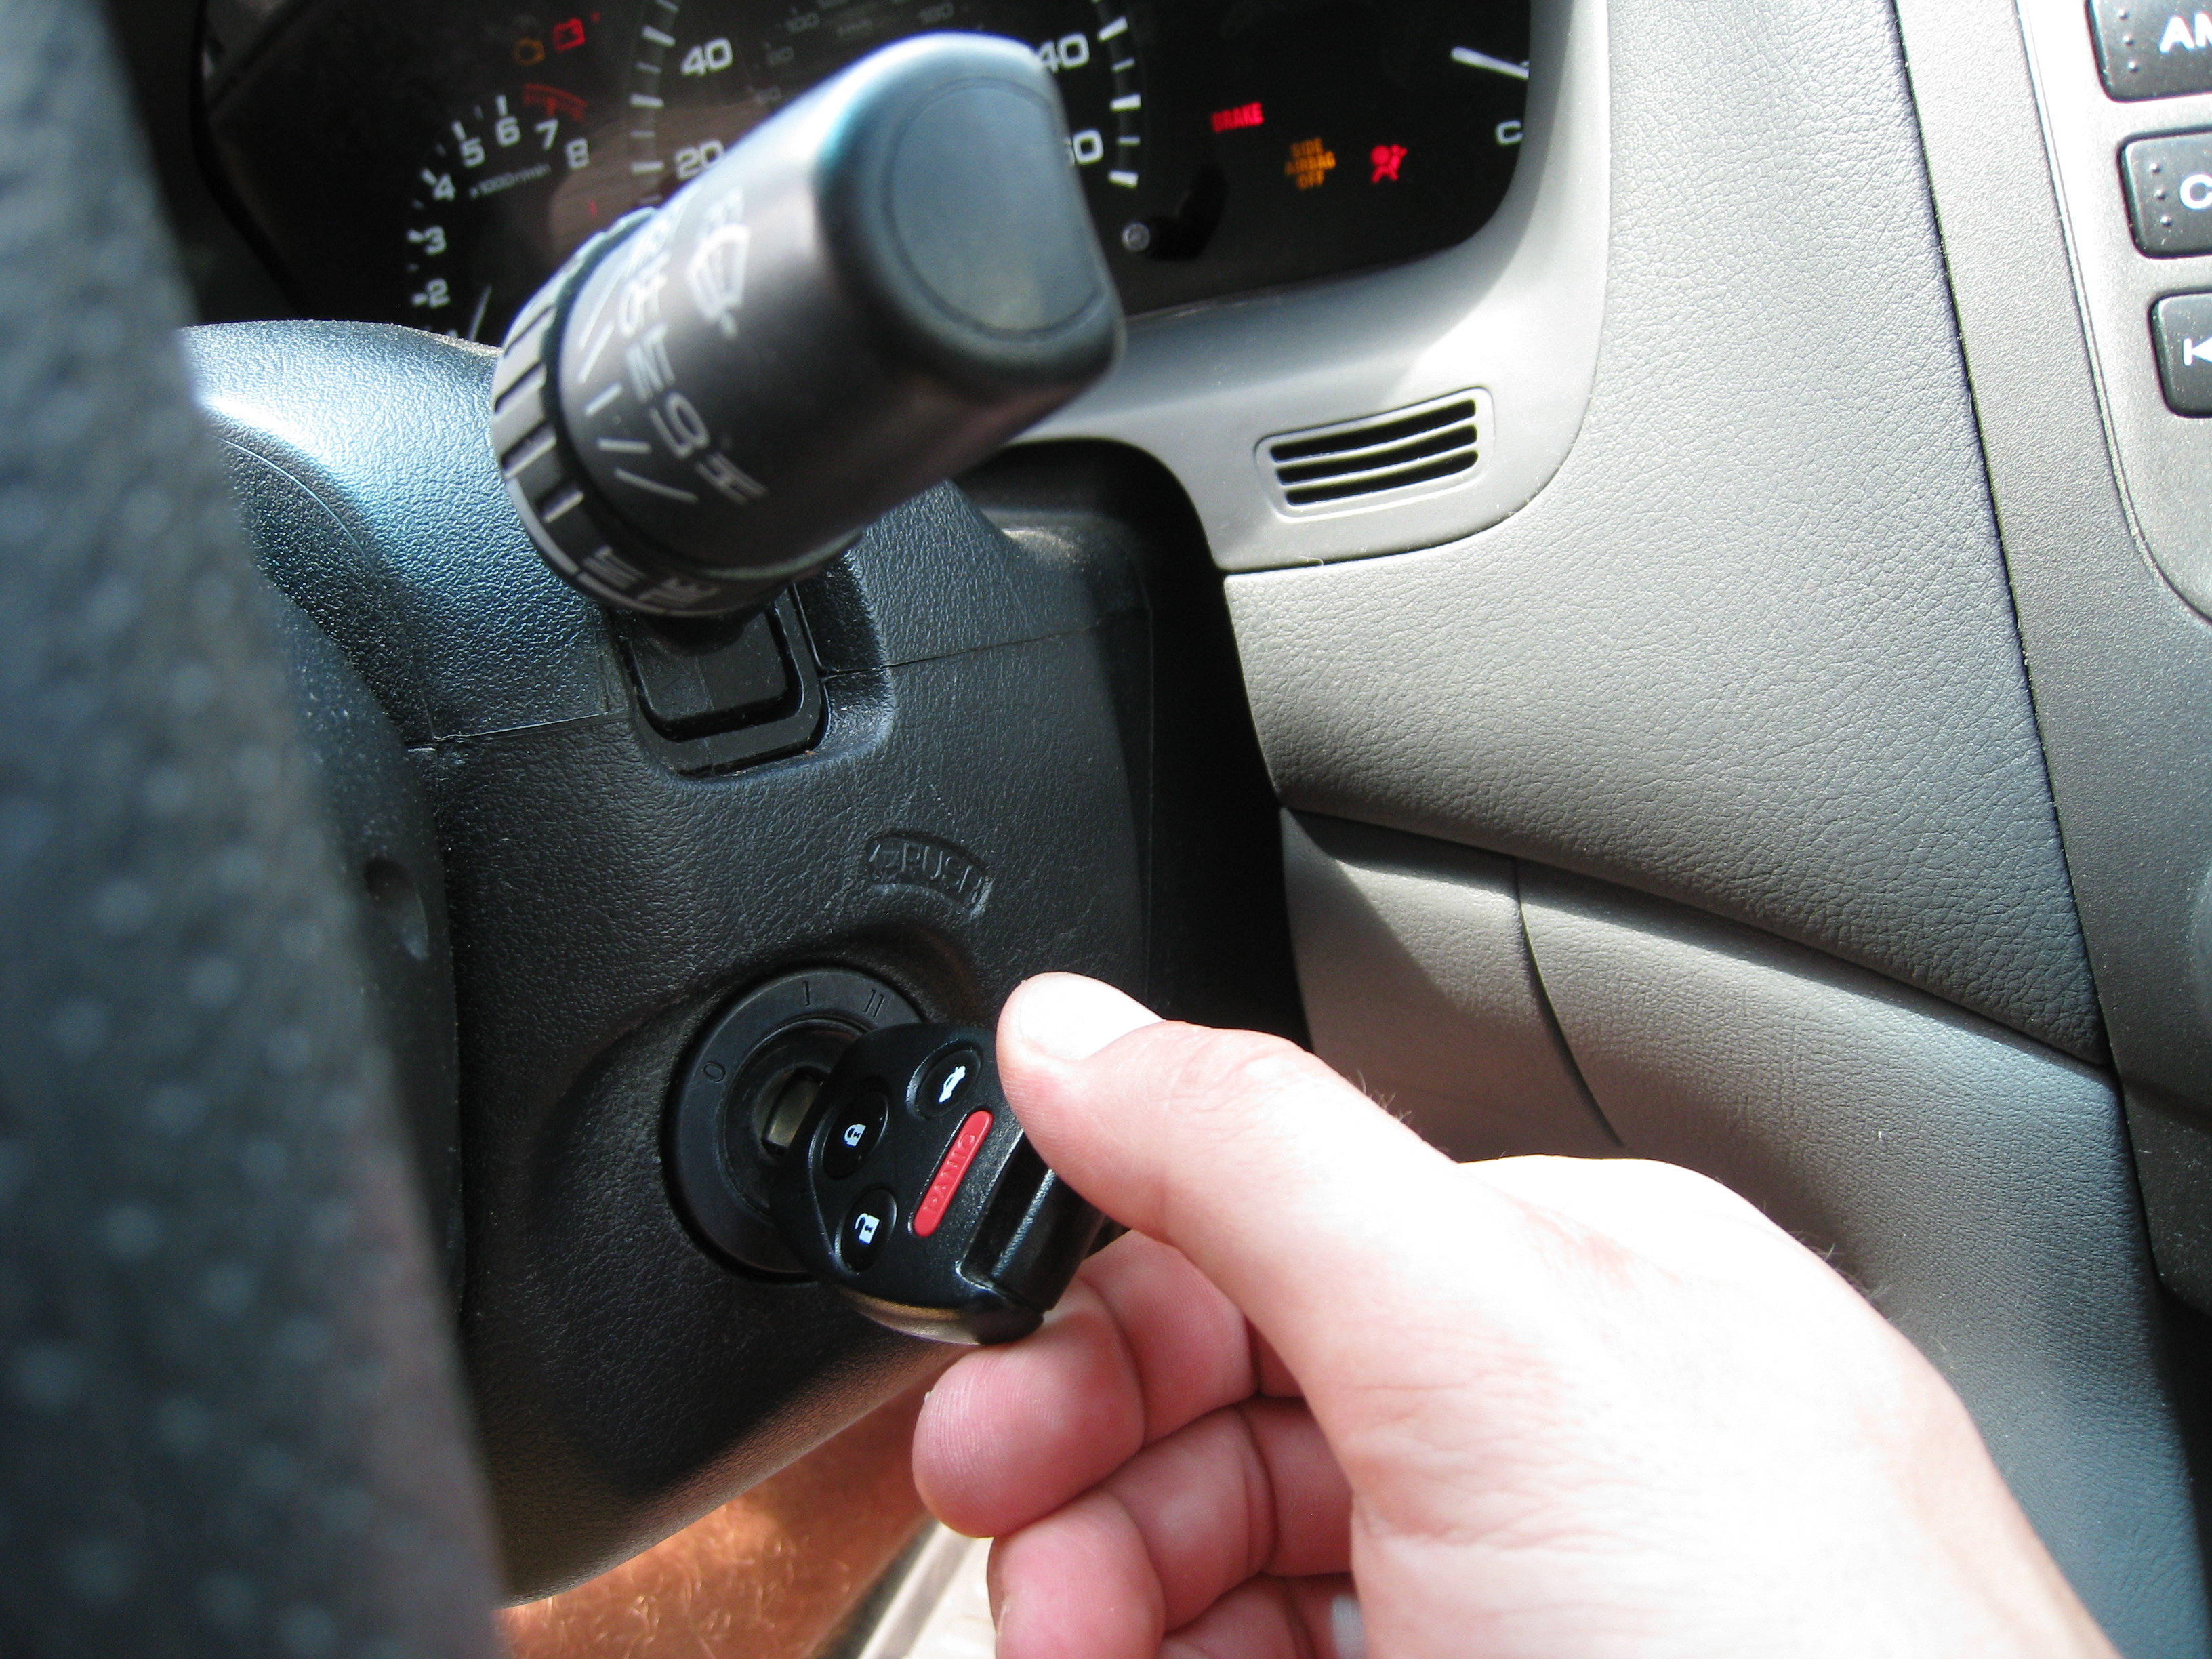
The Next thing you need to due is put the parking break on, put you key in the ignition and turn it to run, depress the brake, and move the shifter the whole way back to first gear. This will be helpful later when you need room to take out the main storage compartment underneath the radio.
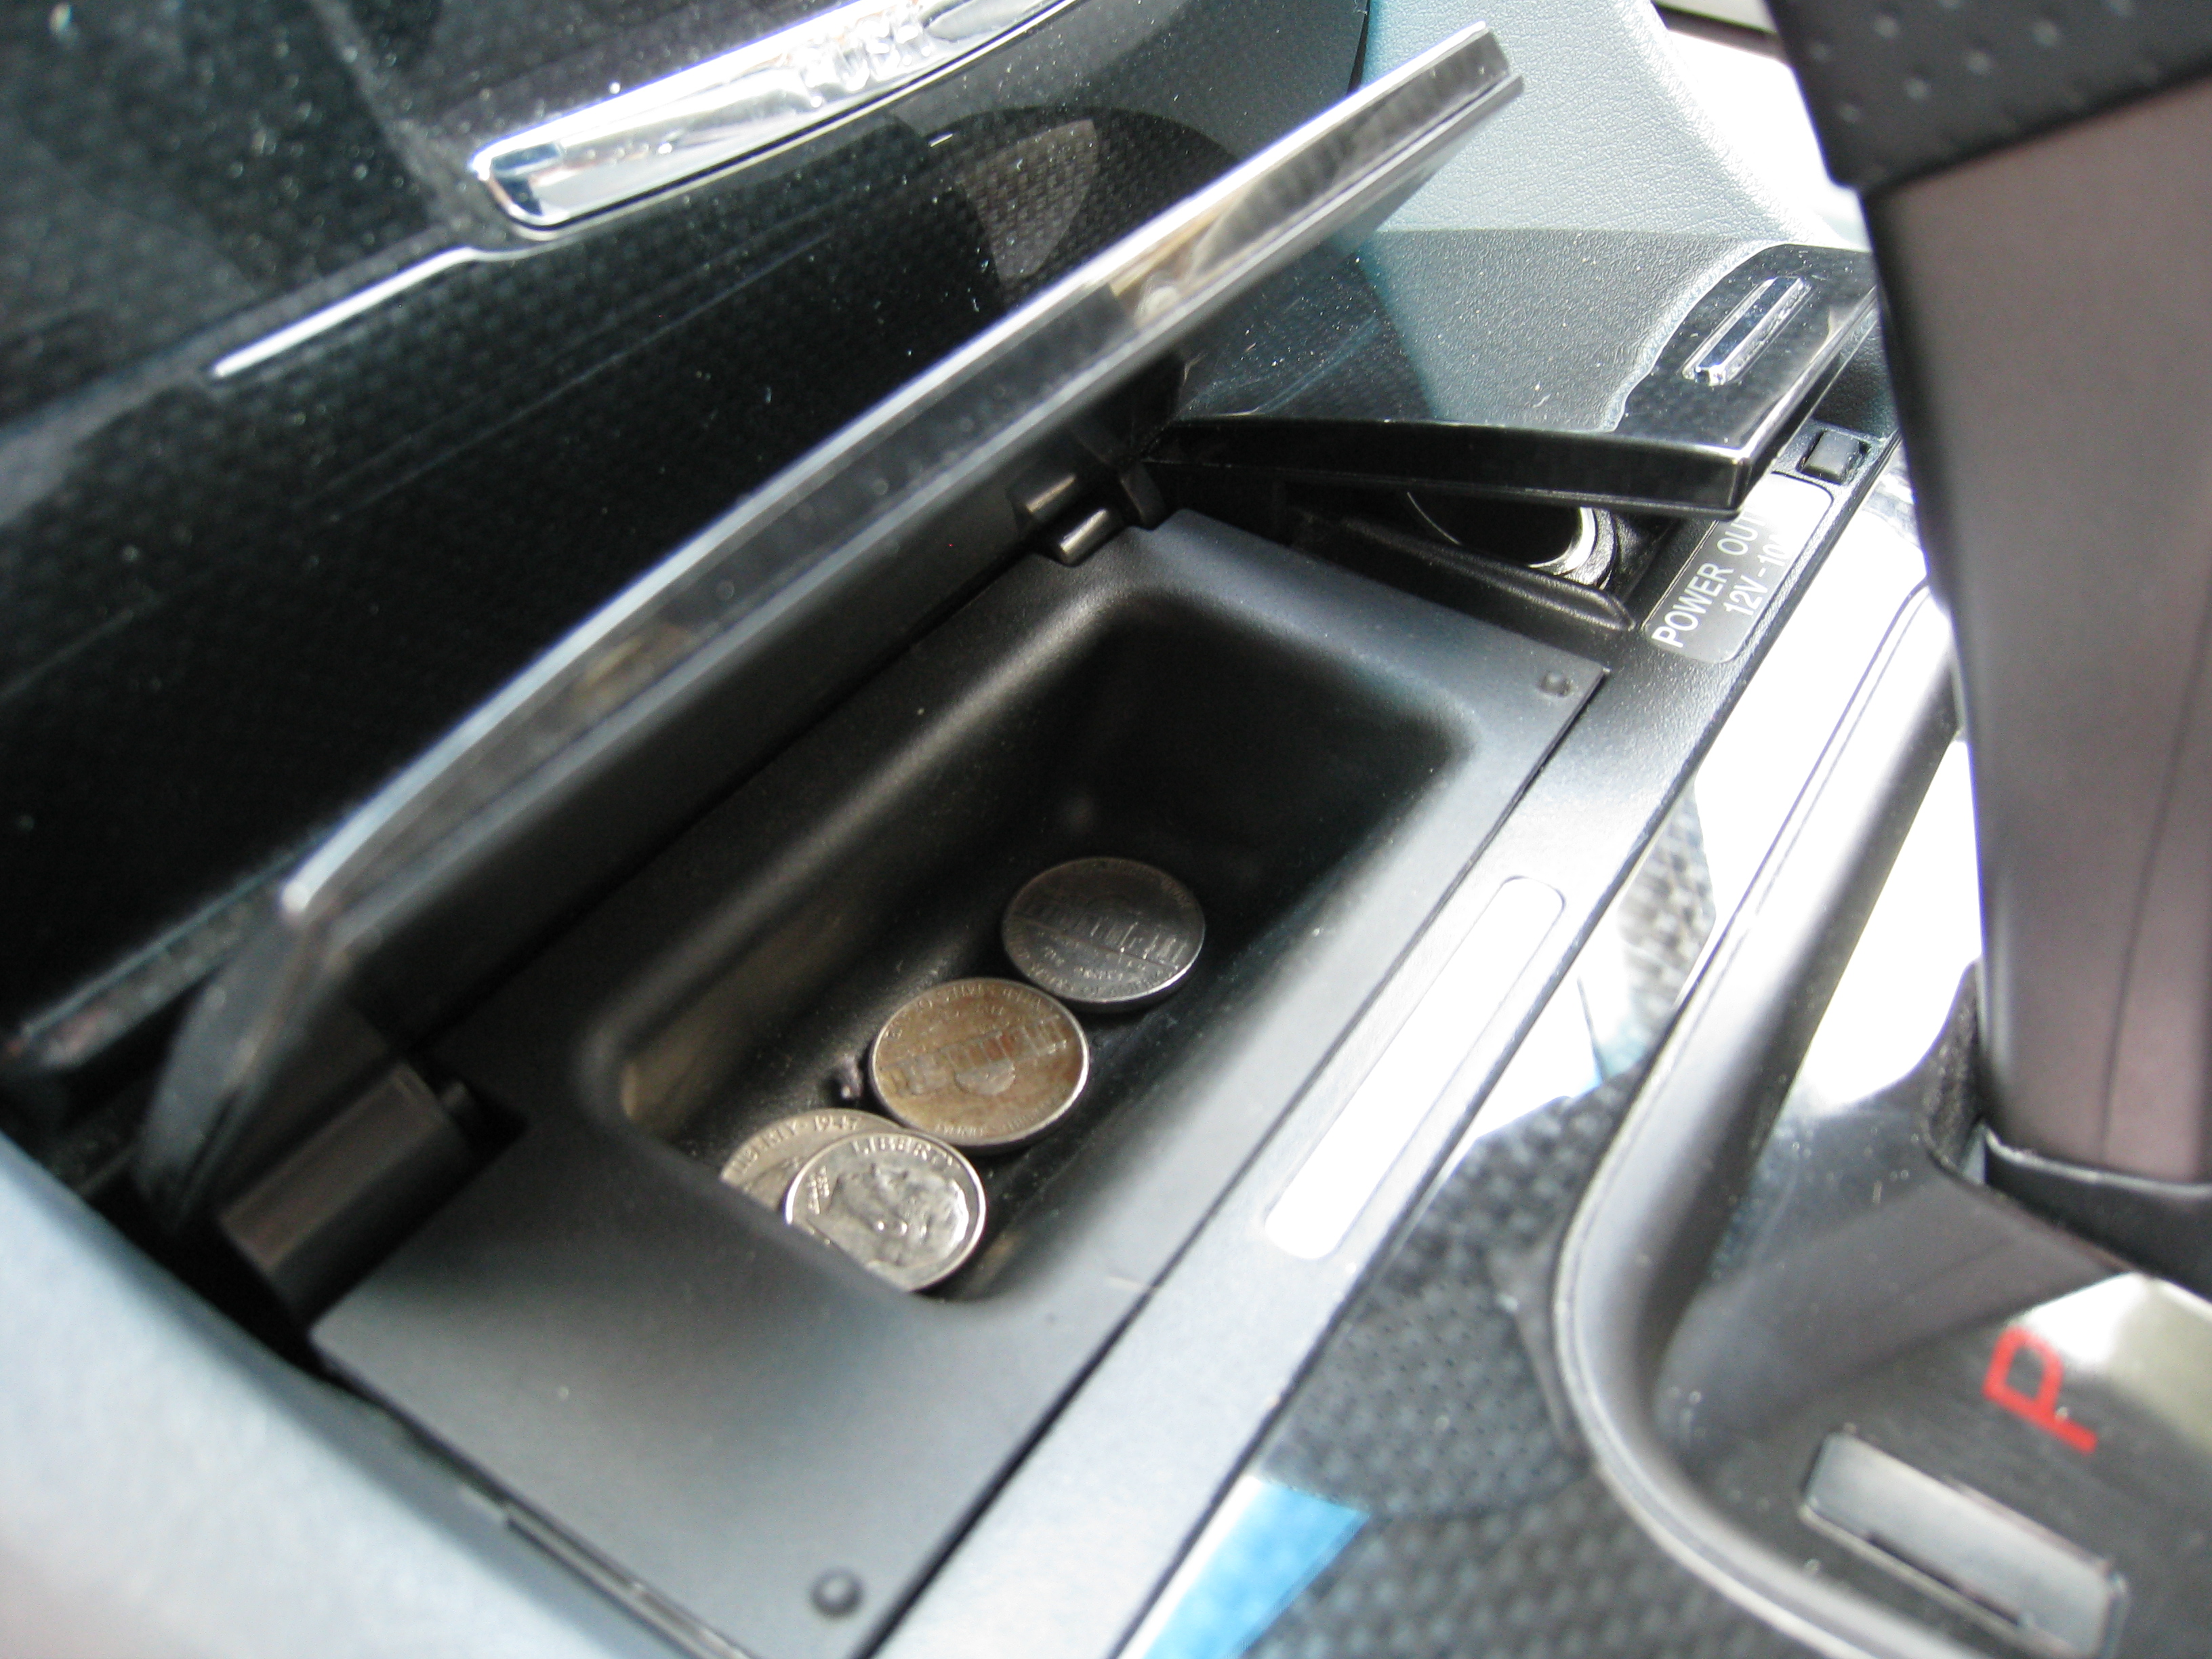
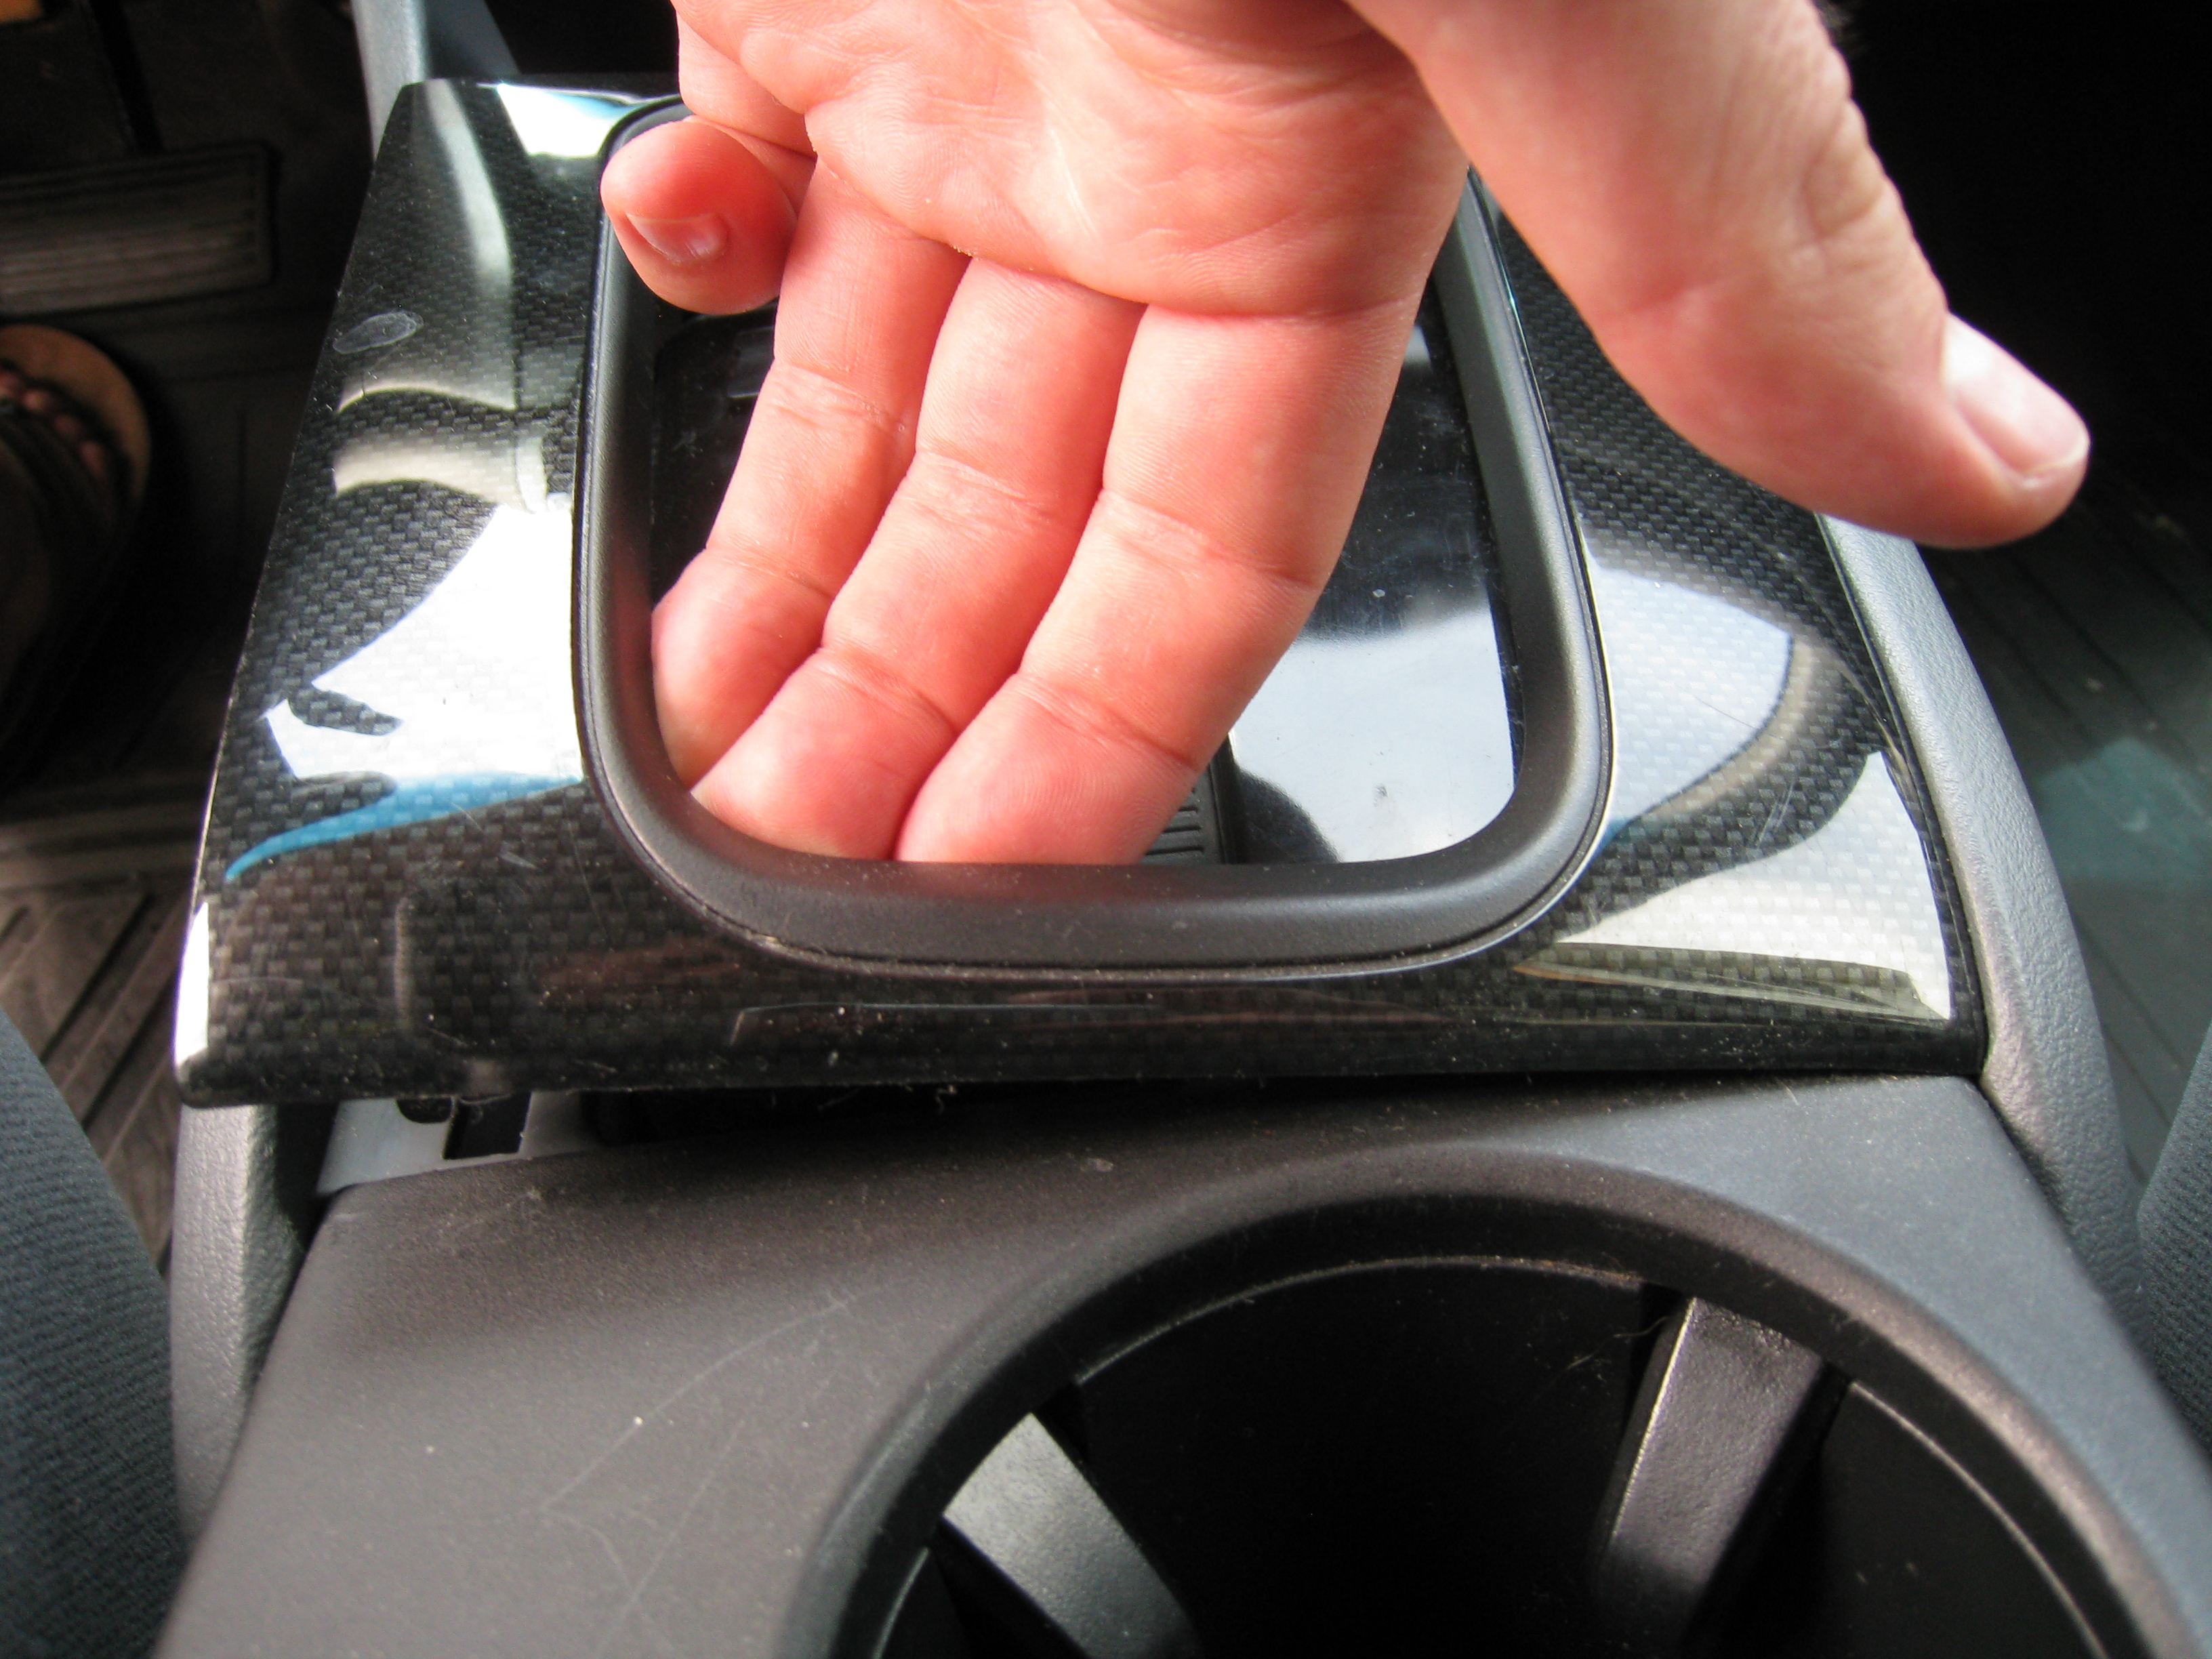
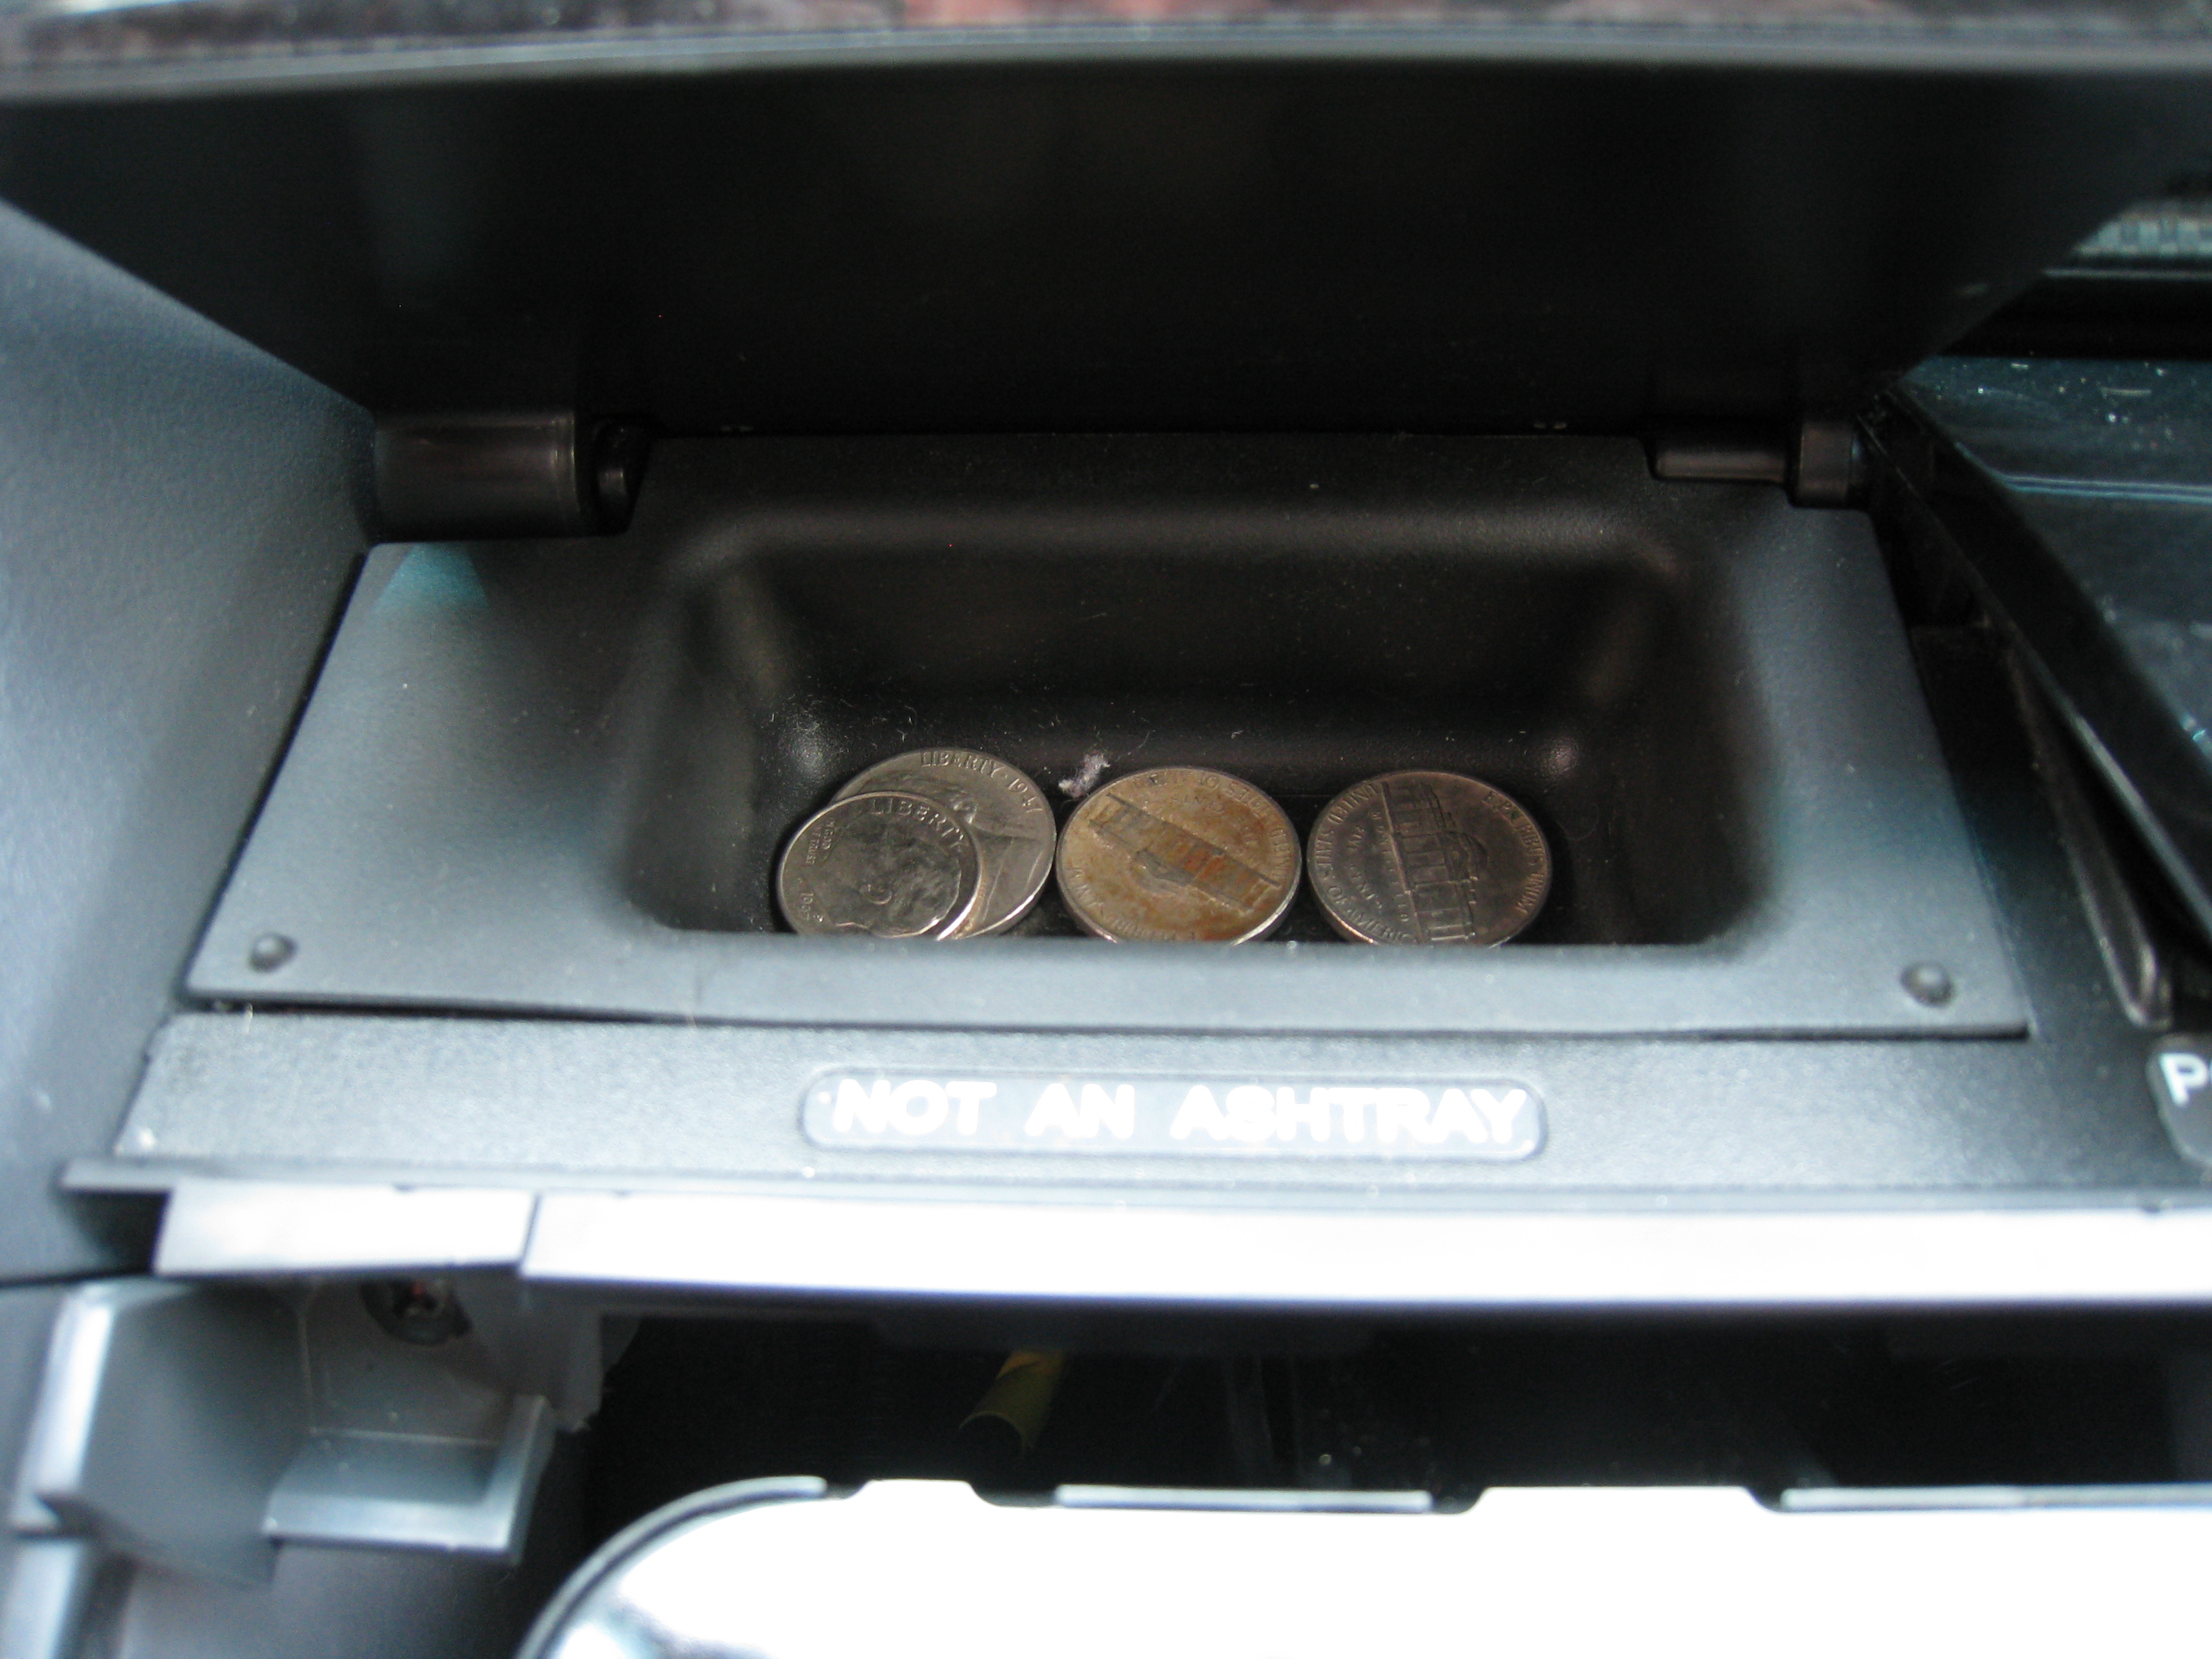
Next, is to remove the little coin tray. It took me a good while to figure out how to take it out the first time I had my dash apart. The actual rubber lined tray will pop out separately from the door, so don't go yanking on the door. If you put your fingers in the tray and pull upward on it, it should pop out.
After it comes out, it will expose two screws.

If these need to be removed.

And then the whole tray and 12v outlet assembly will come out.

You then need to unplug the 12v outlet so the assembly can be fully removed.

This exposes two move screws that need removed.
After taking out those two screws, give the compartment a tug to pop it lose.
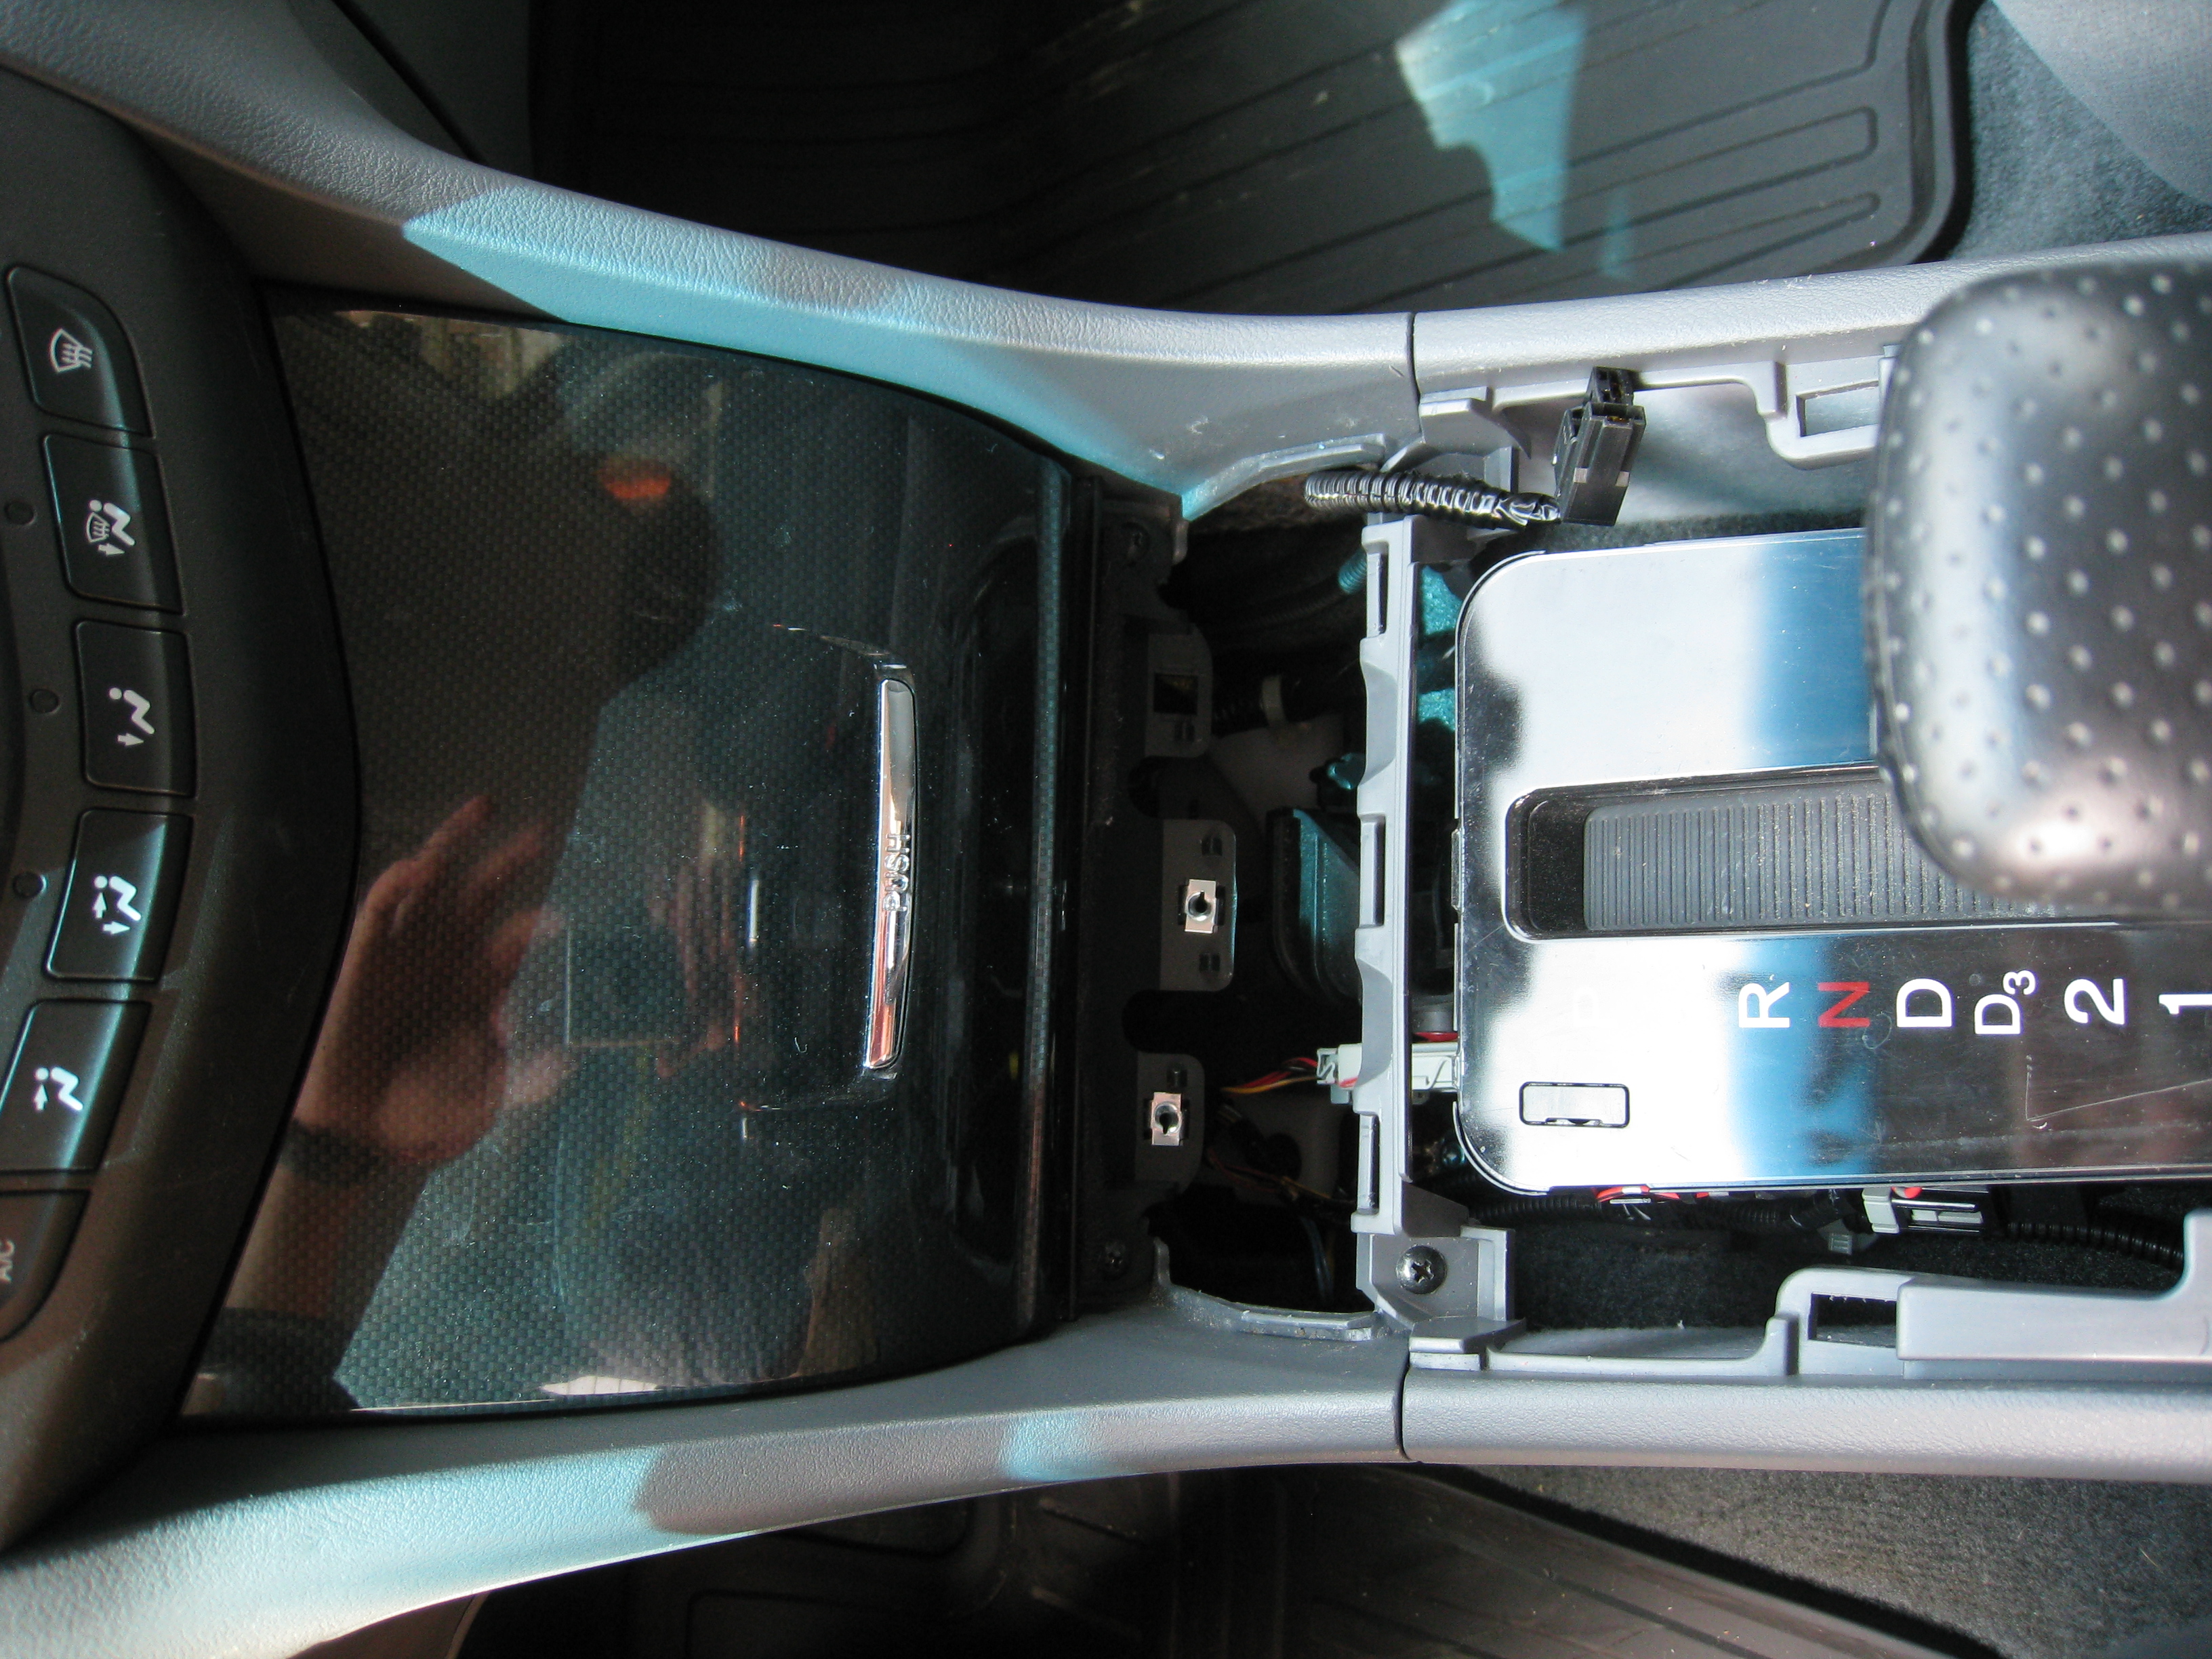
After that, close the door on the front of it to allow it to be removed from the dash.

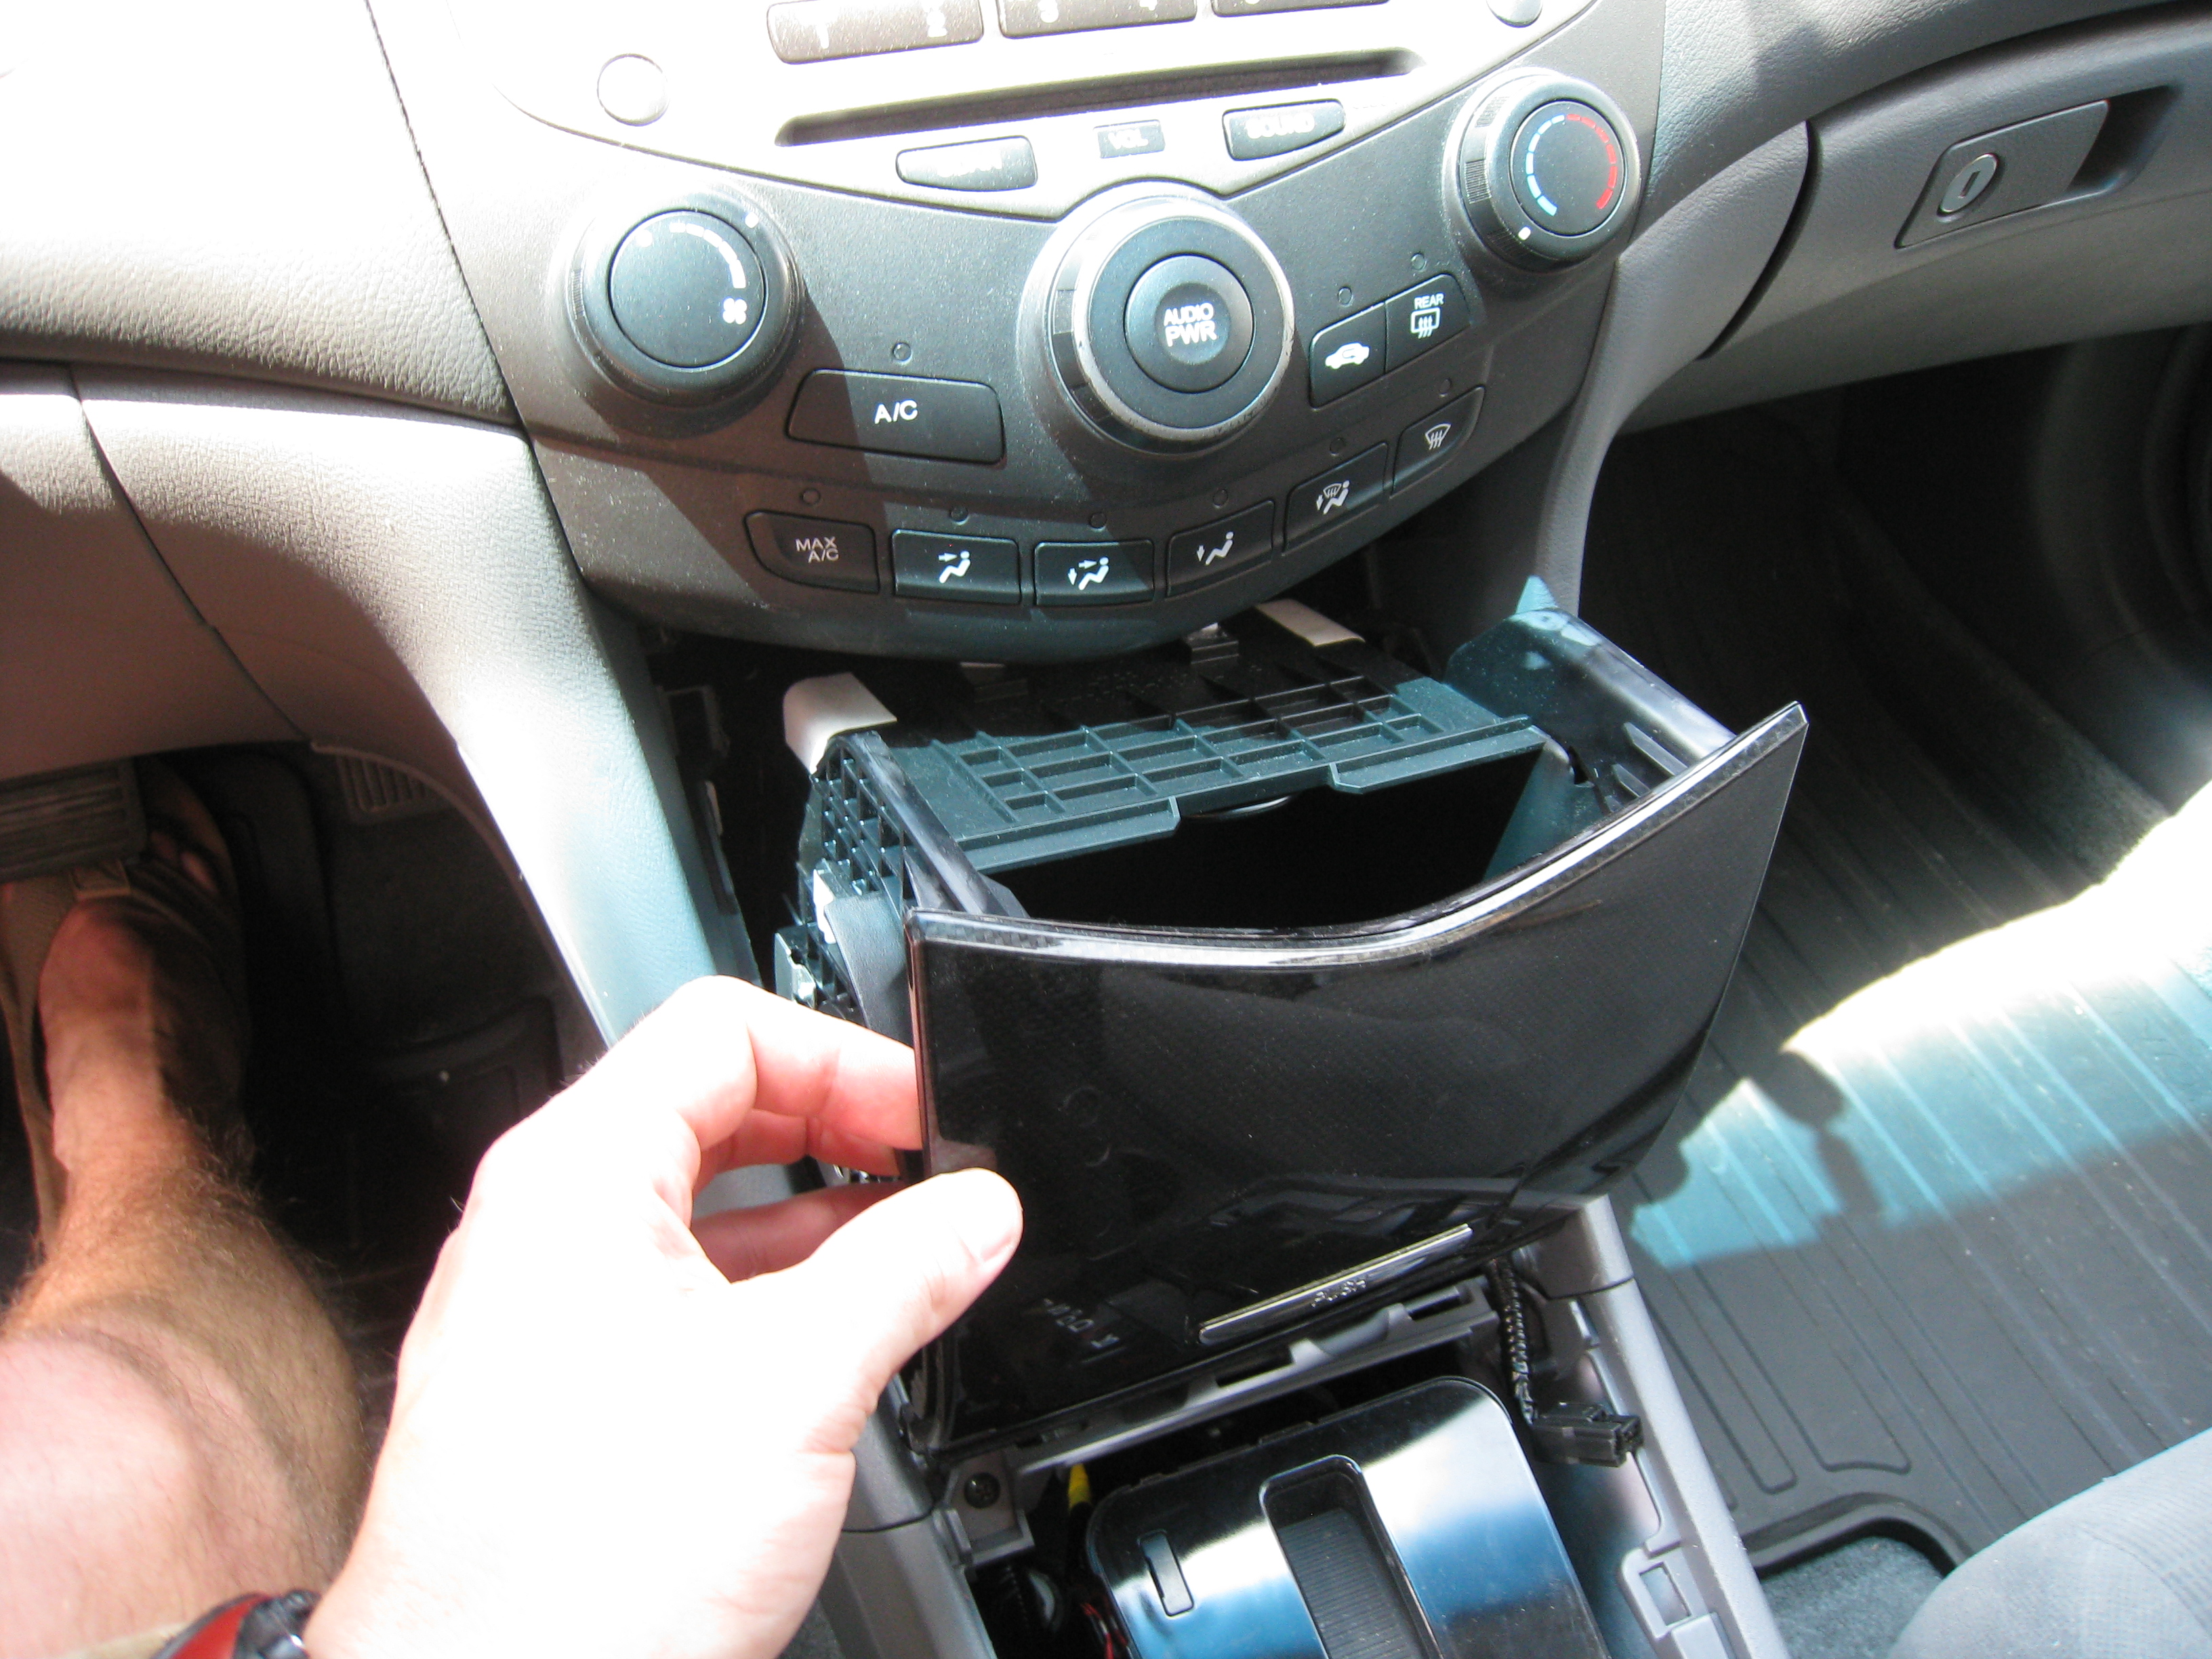
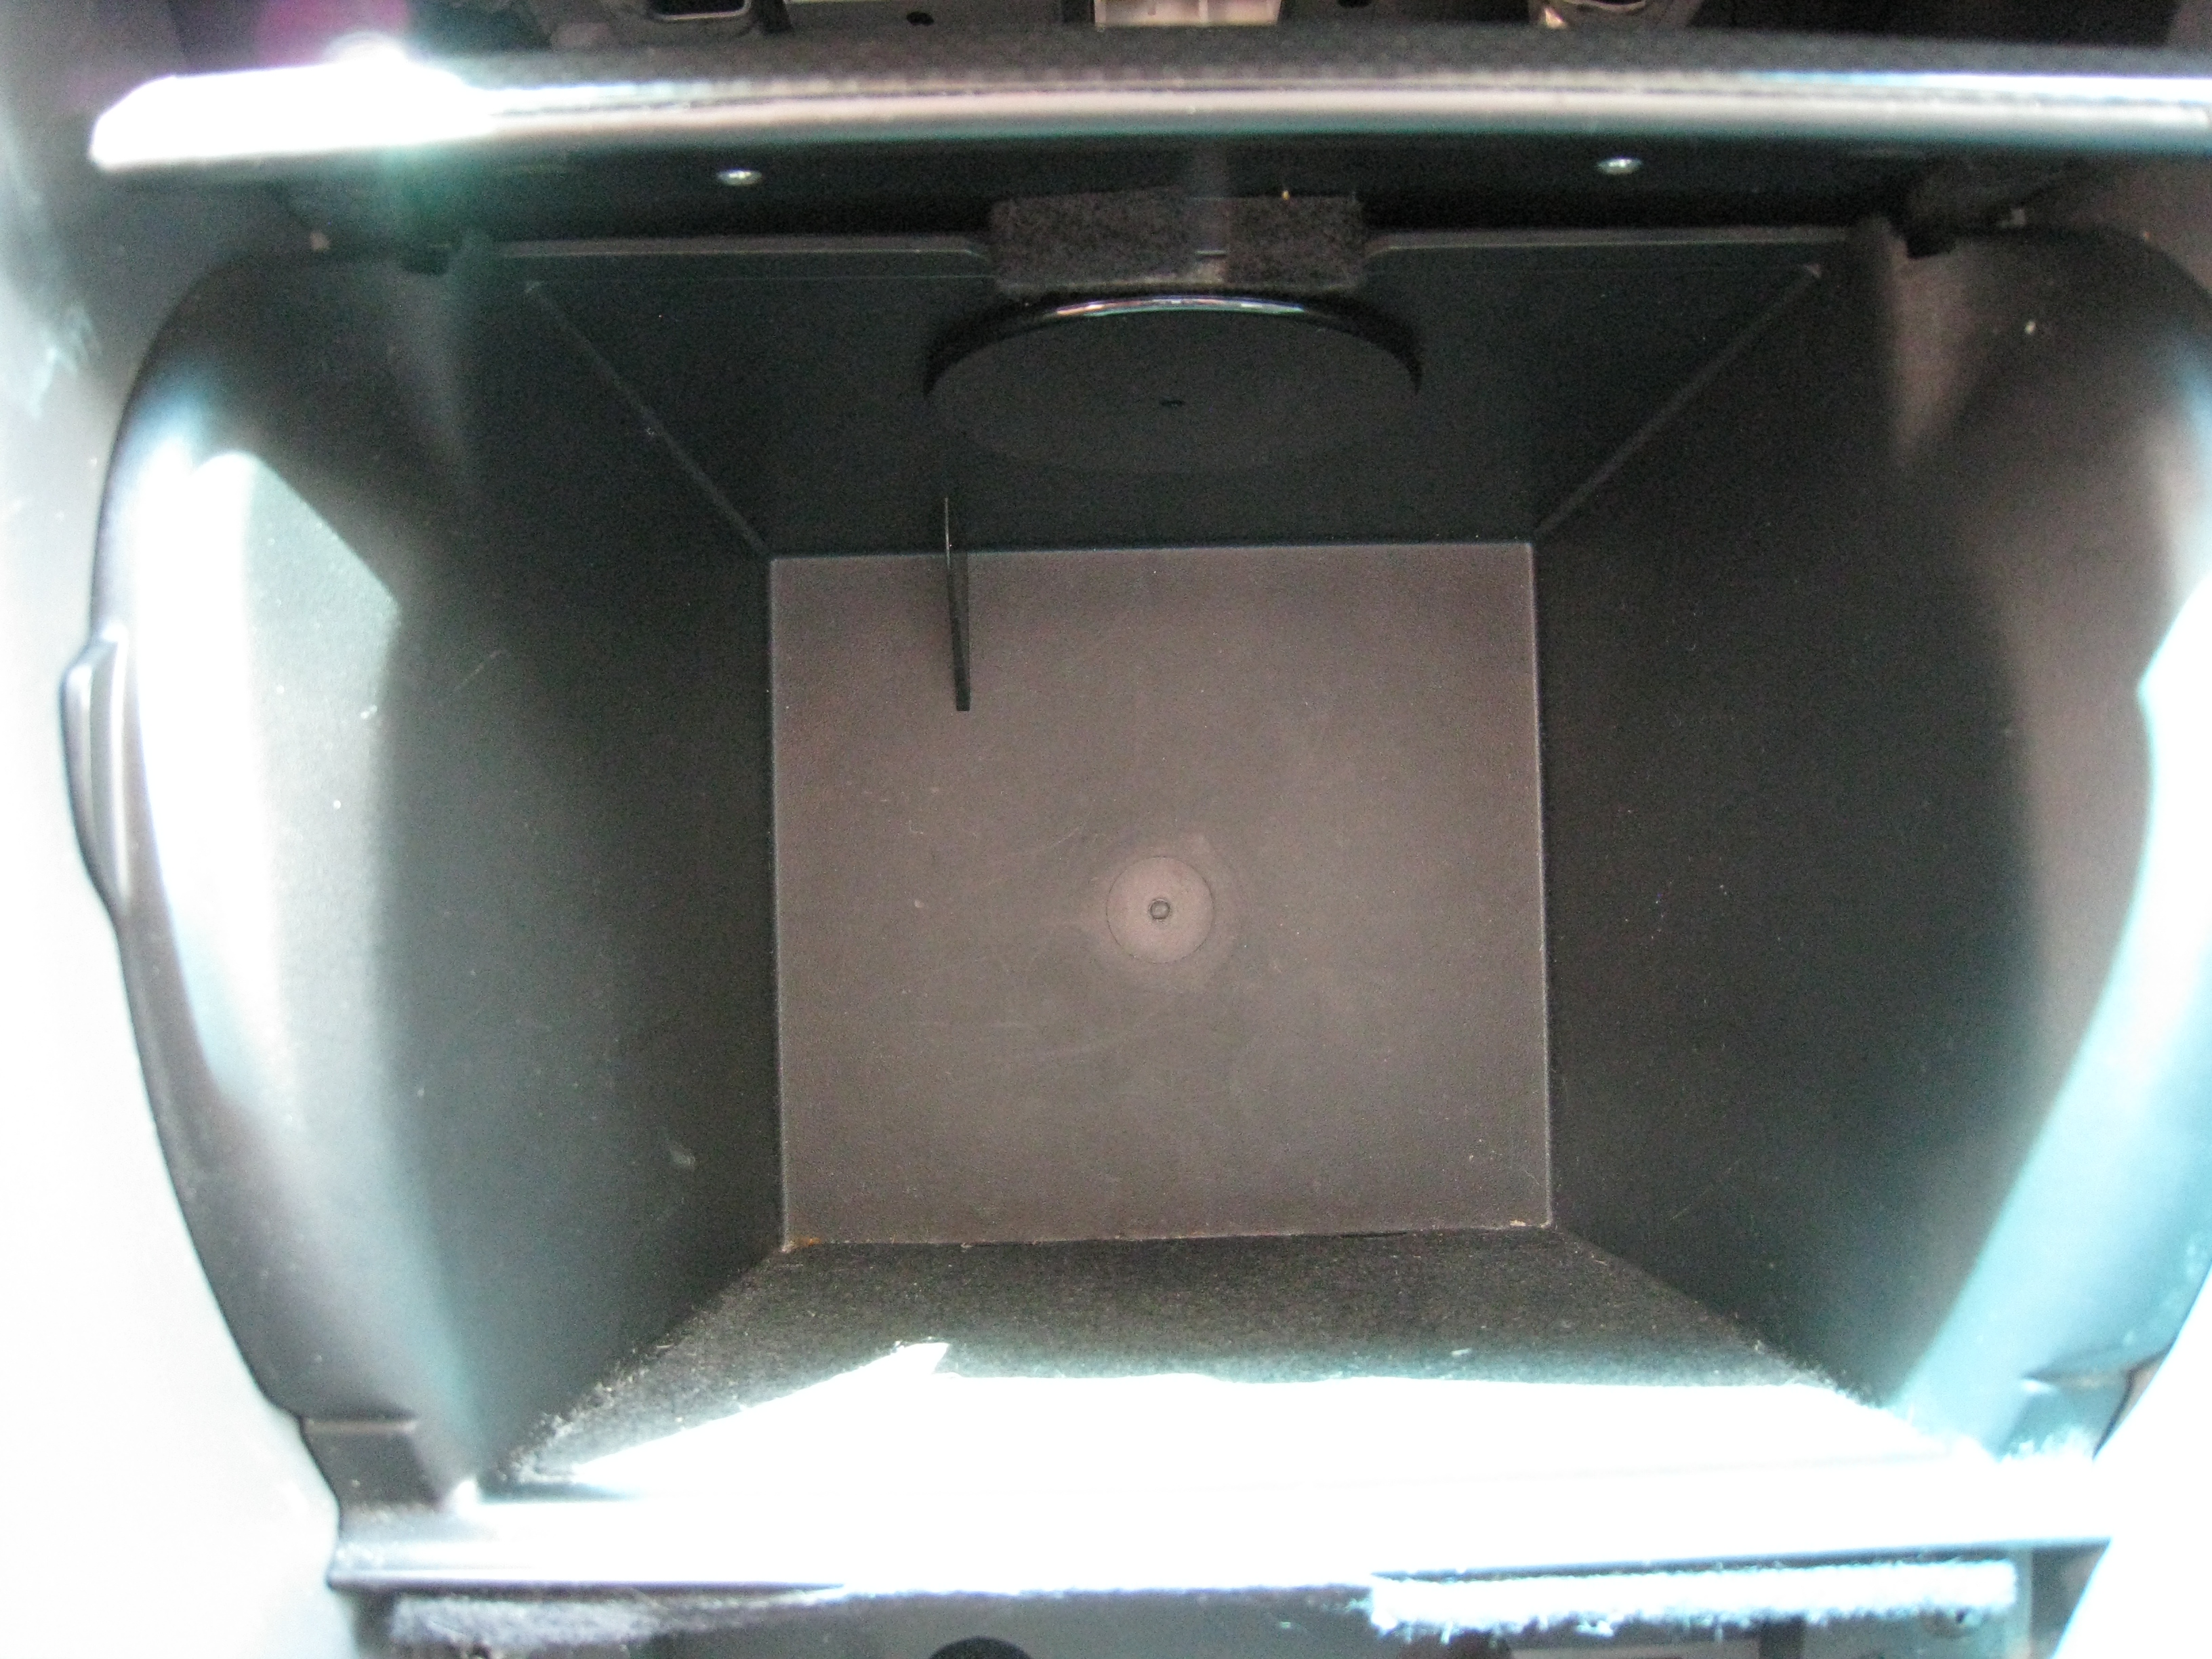
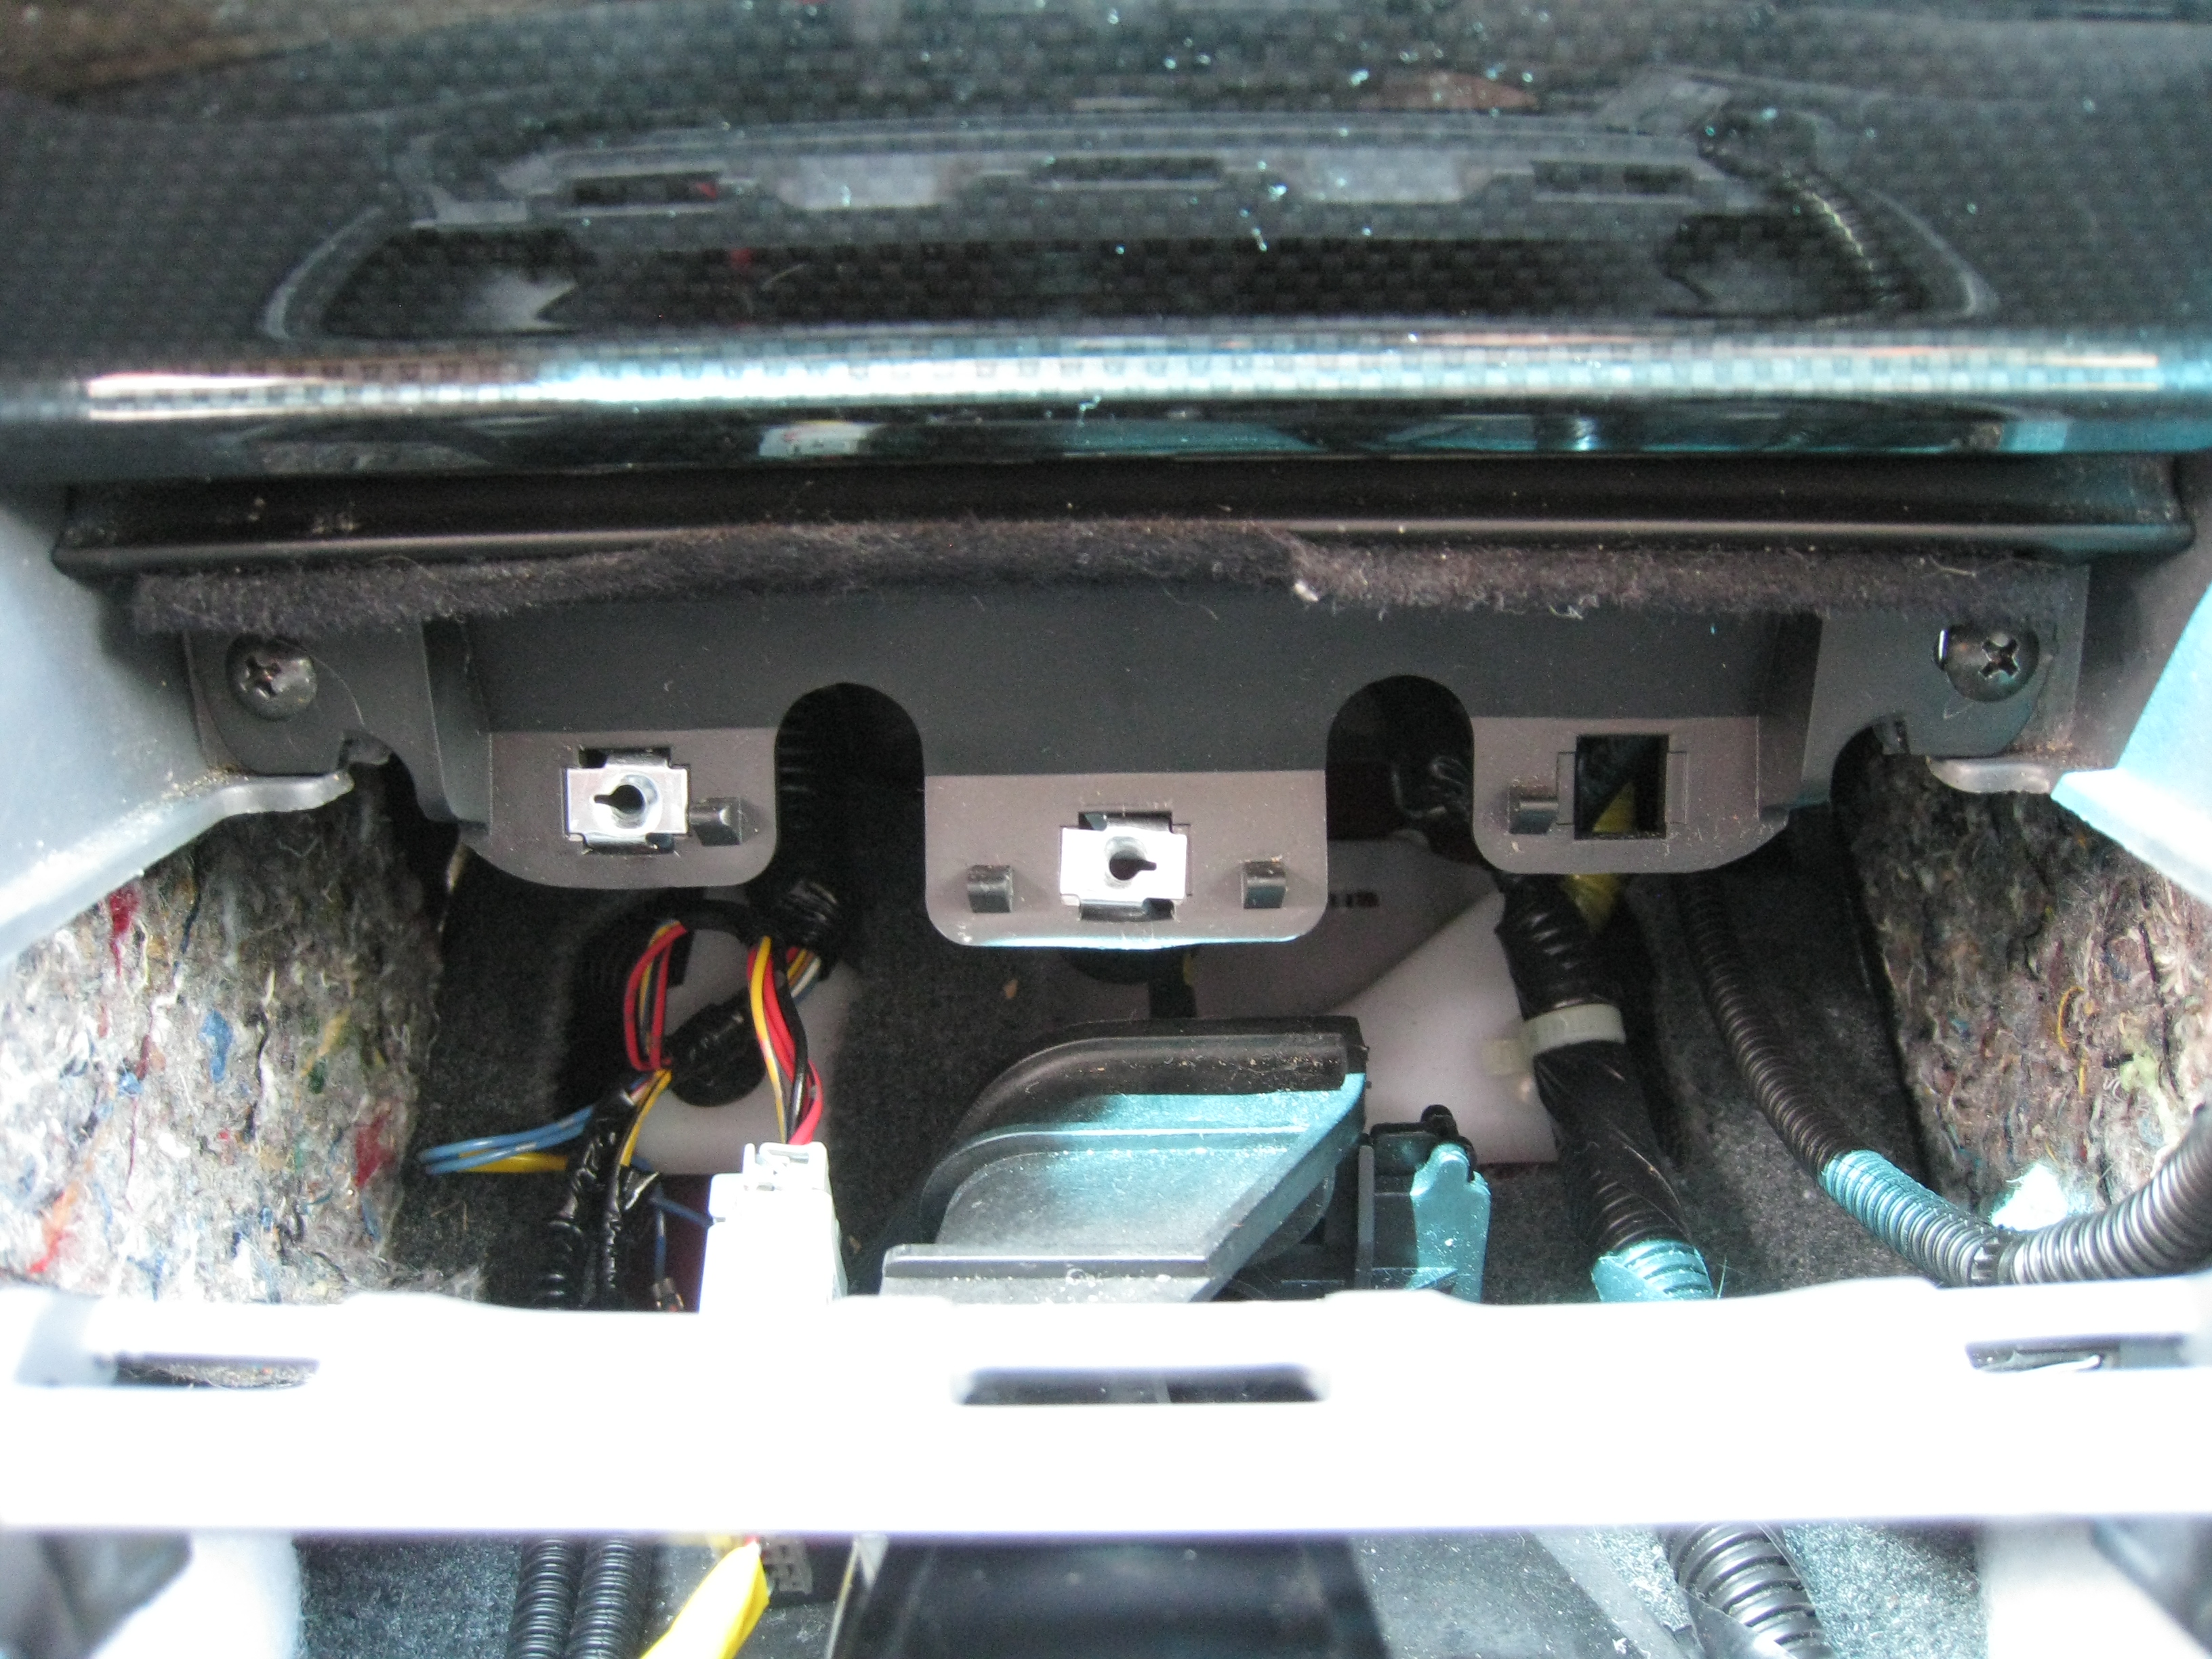
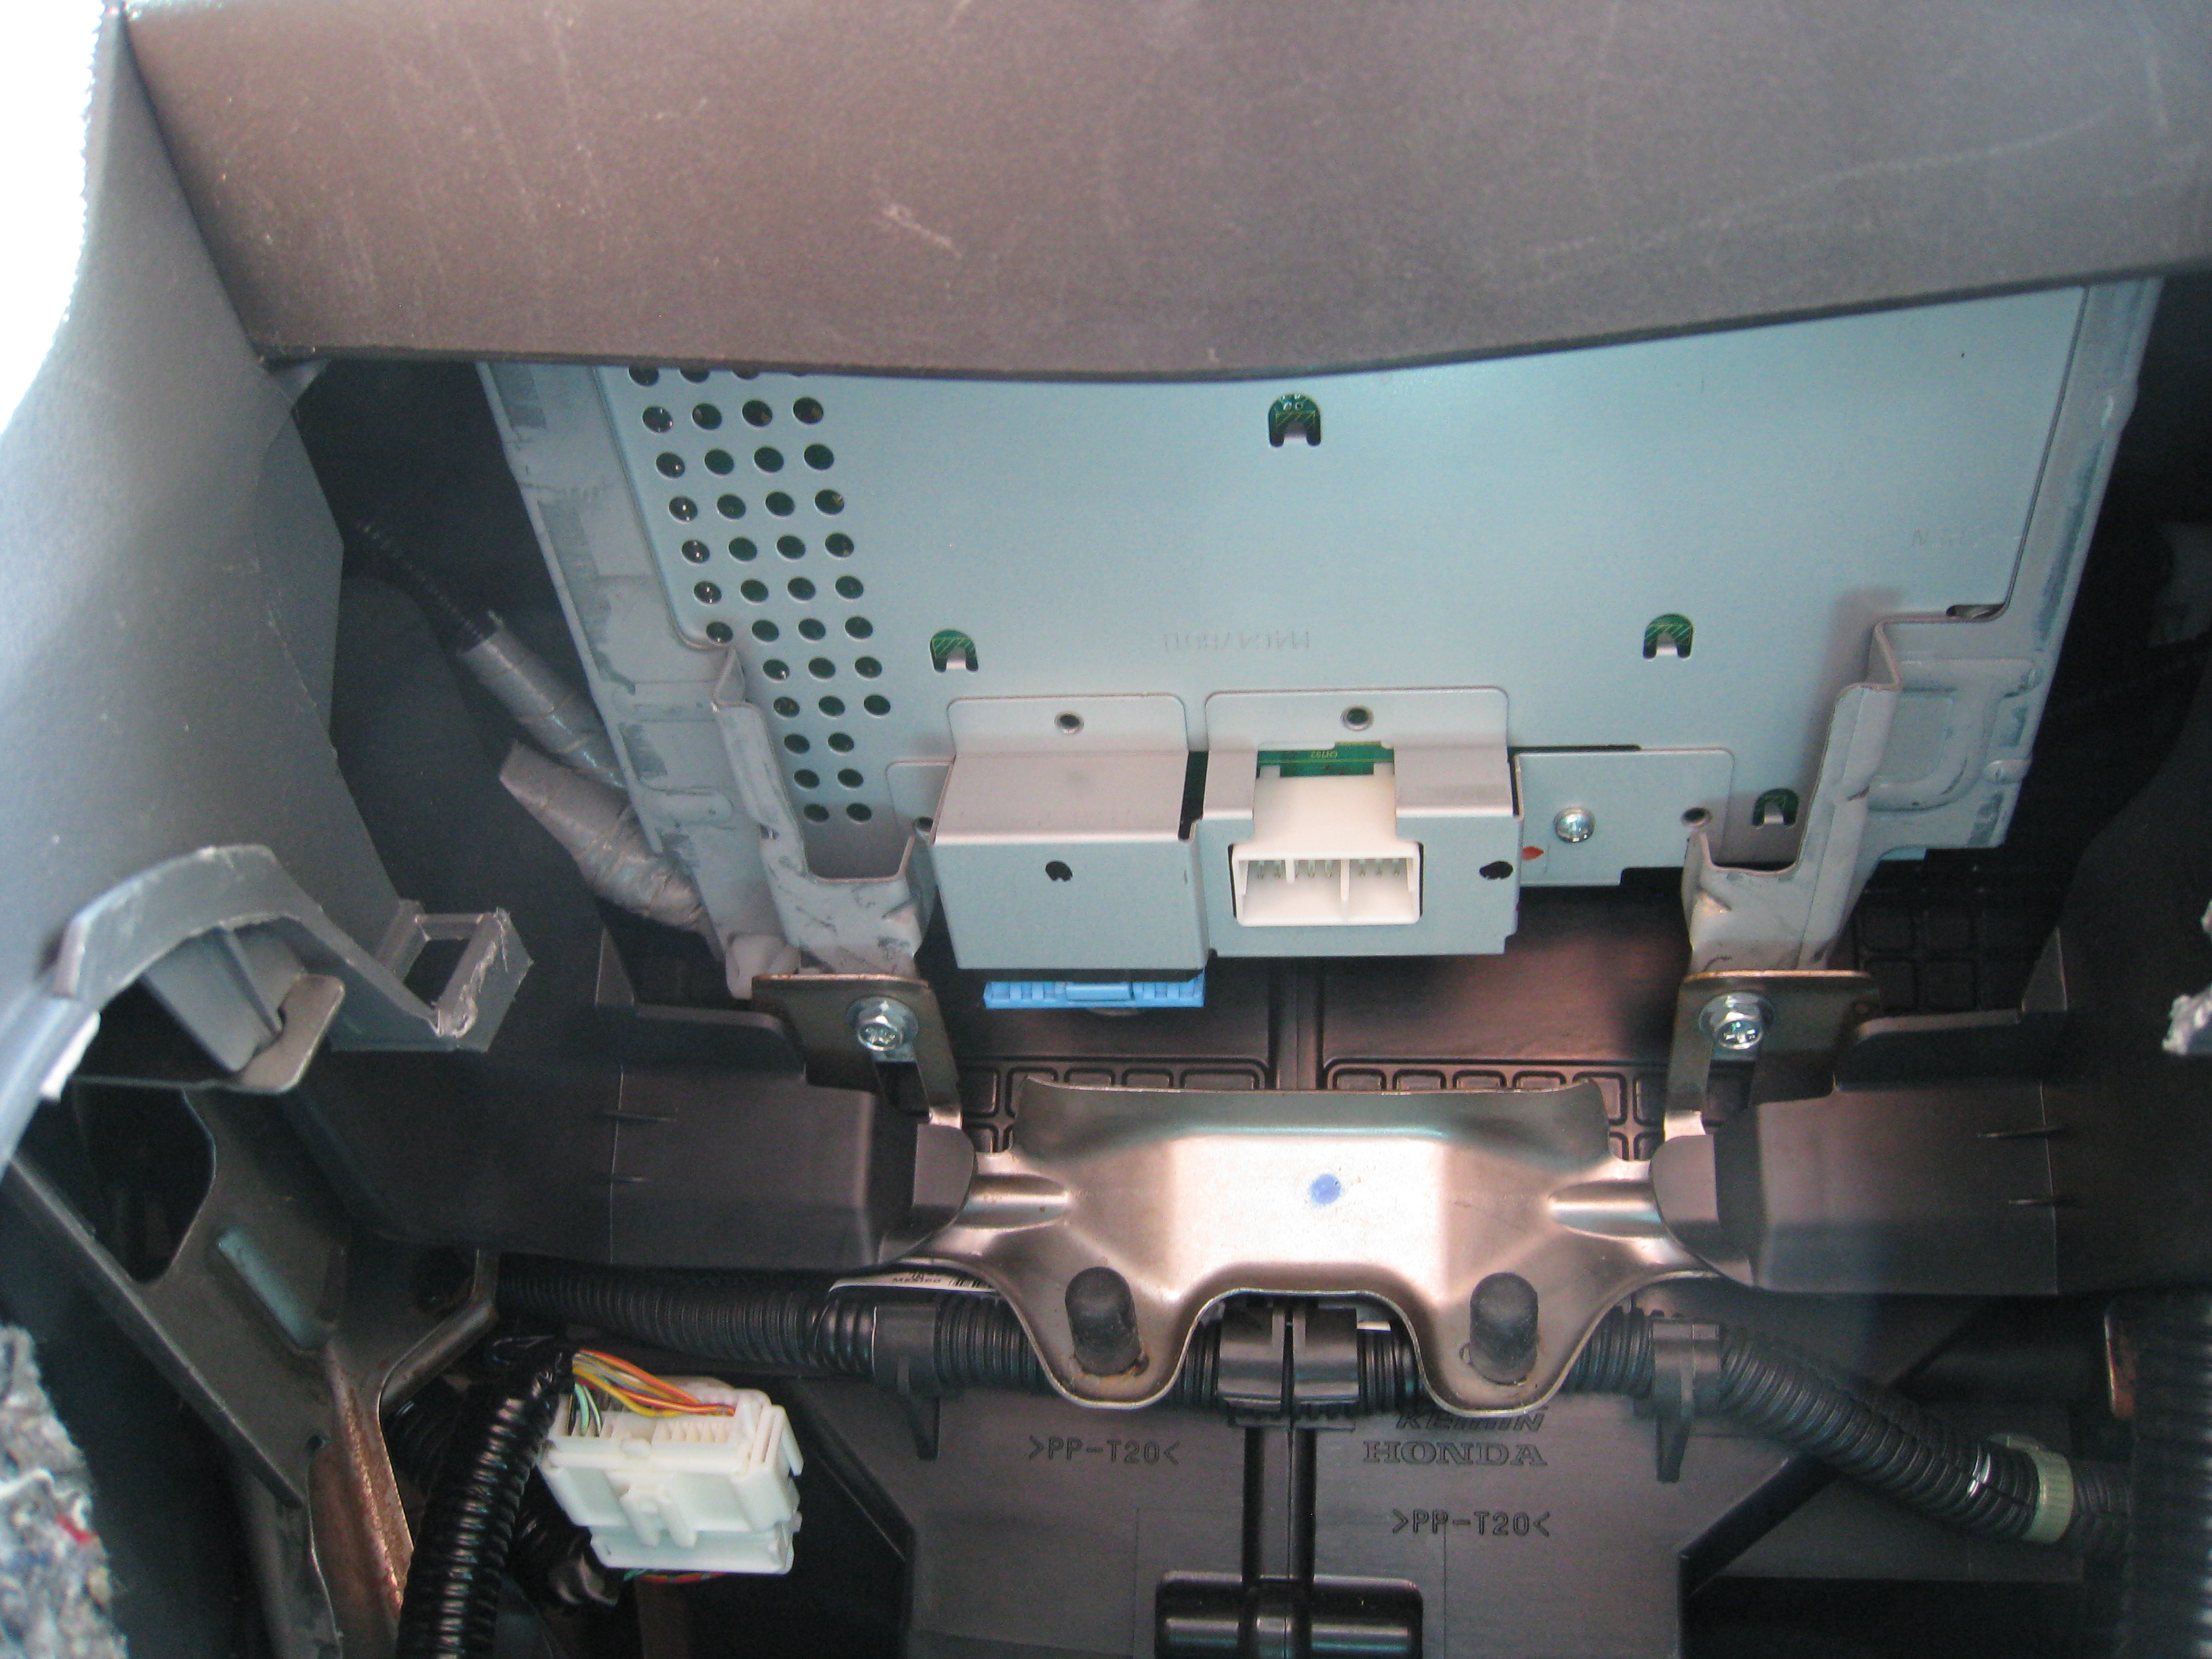
So now you have a pretty decent size hole in what used to be your dash.

If you look up in the hole at the bottom of the radio, you can see the port that you are looking for to connect the auxiliary input adapter to. This may vary depending on your model/year and whether you have navigation or remote CD changer.
At this point I wanted to make sure that all the parts and pieces would function before I went crazy drilling holes in my dash.
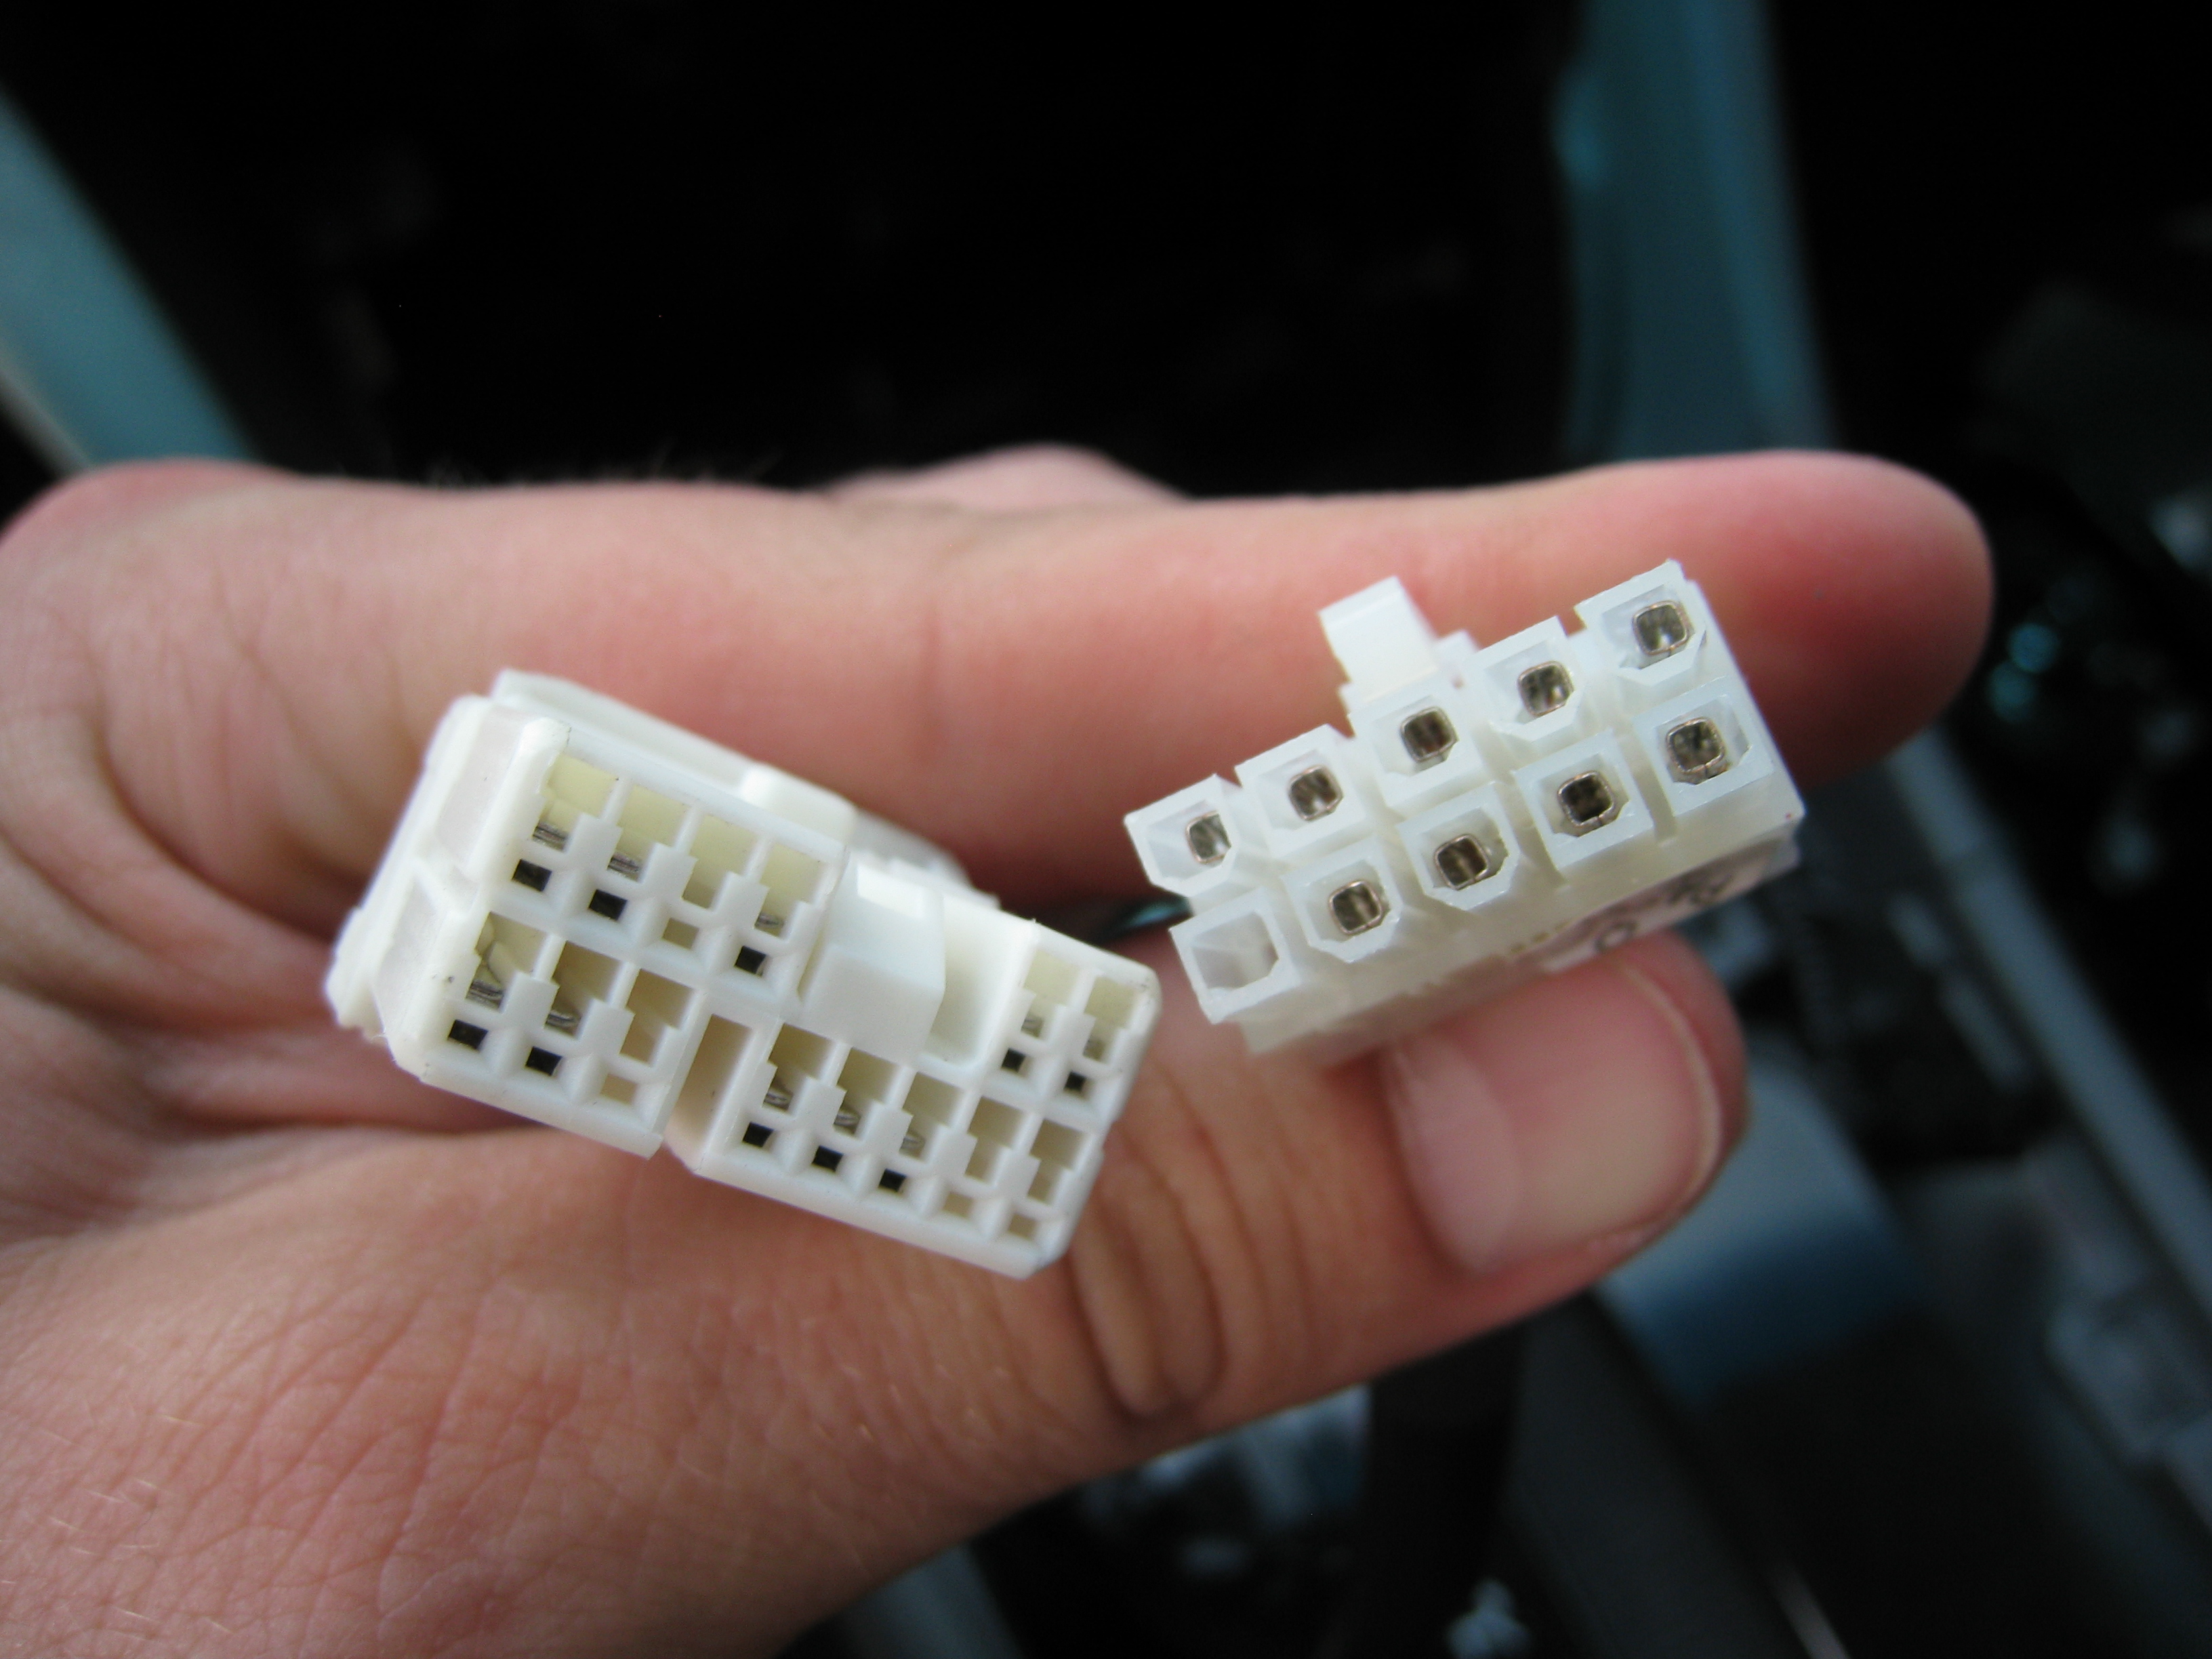
I took the supplied harness that came with the adapter box and plugged it into the port on the bottom of the radio.

Obviously the ends are different, so it'll only fit in one way.
Once that was plugged into, I hooked all the other pieces together and the mp3 player that I stole from my little sister for the day and tested it.
And of course it didn't work. I really had no idea why, then I remember reading somewhere that the radio needed to be reset in order for it to recognize the adapter. I really didn't want to do this because I didn't have the radio unlock code because I bought the car used. You can obtain the code by locating a certain number on the radio and calling the dealership and I believe they will give it to you free of charge. Since it was a Saturday, I didn't think the local dealership garage was open. Luckily though, all I had to do was turn off the ignition (remember it was turned on to put the car in 1st gear) and when I turned it back on everything worked as it was supposed to.
So since everything was working as I wanted to, now came the time to drill a hole. I wasn't think ahead and realized that I didn't have a 3/4" drill bit required for to make a hole for the input jack. So I had to take a quick trip to Lowe's to get the proper bit.
I prefer this style of bit when drill plastic because it'll cut the outside of the hole first and not screw up the plastic big time. The bit ran me something like $4.22 with tax.

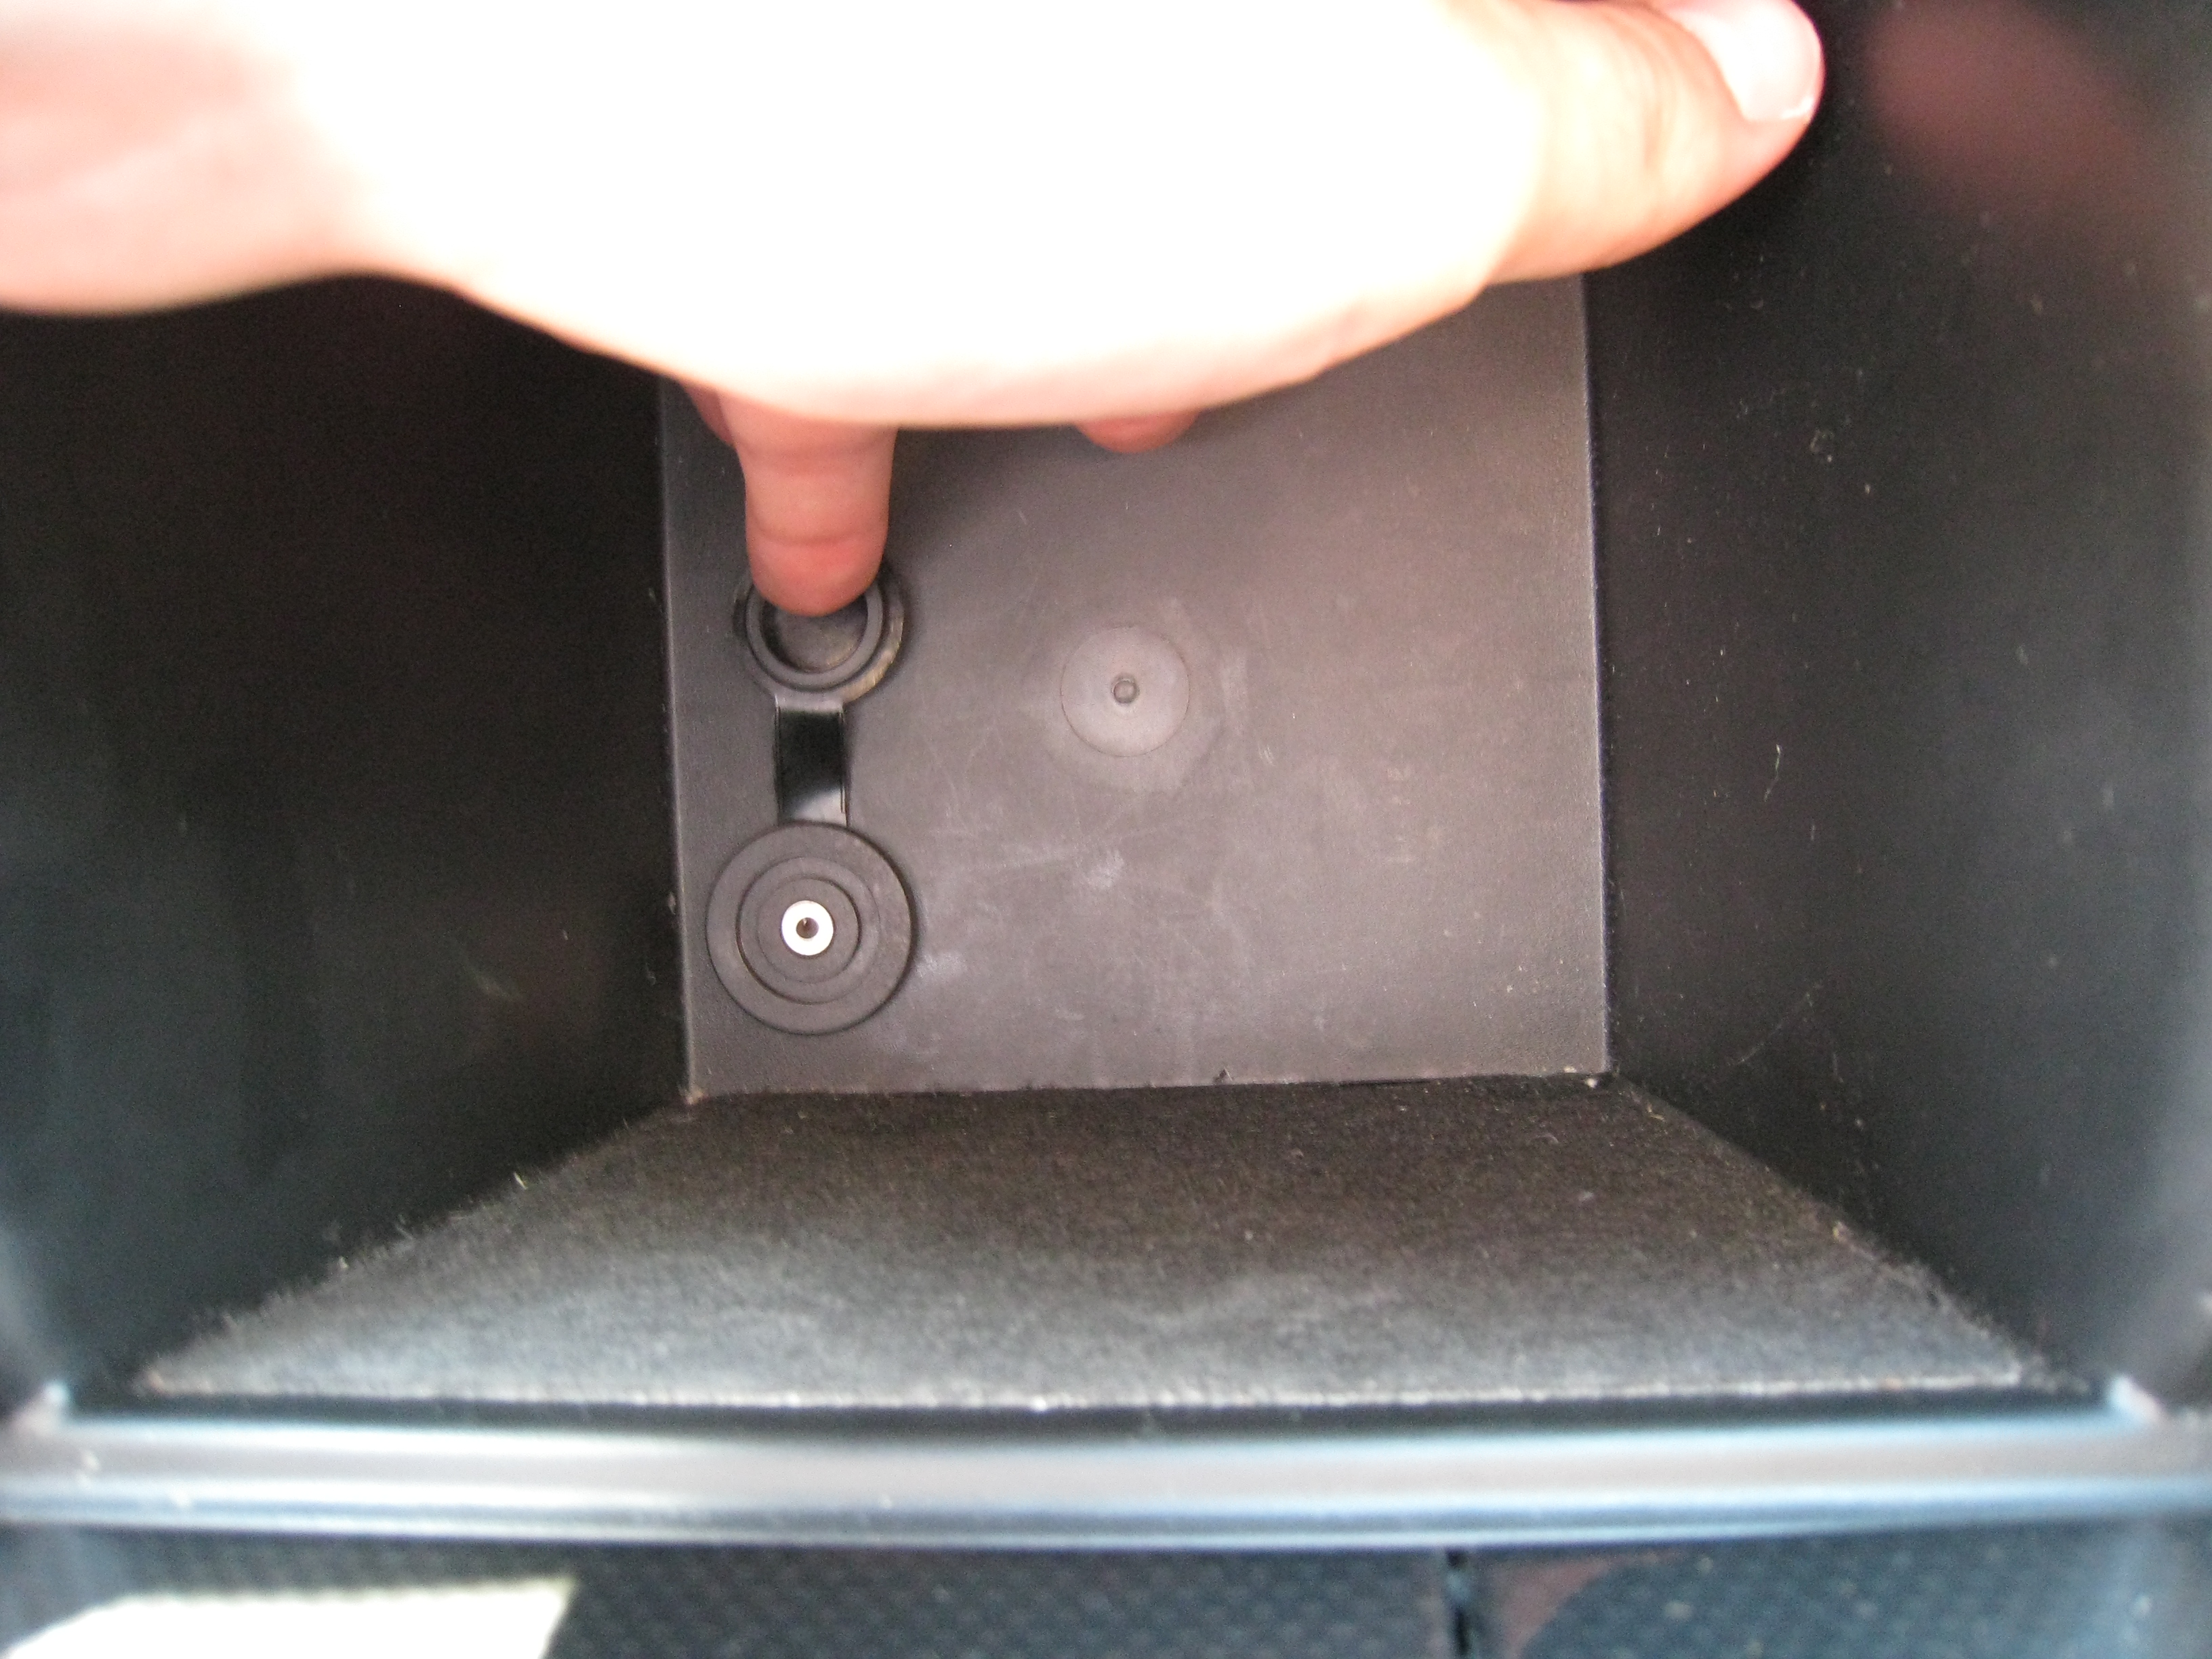
I decided I wanted the hole in the lower left corner of the compartment, why, I really have no idea. Personal preference I suppose.

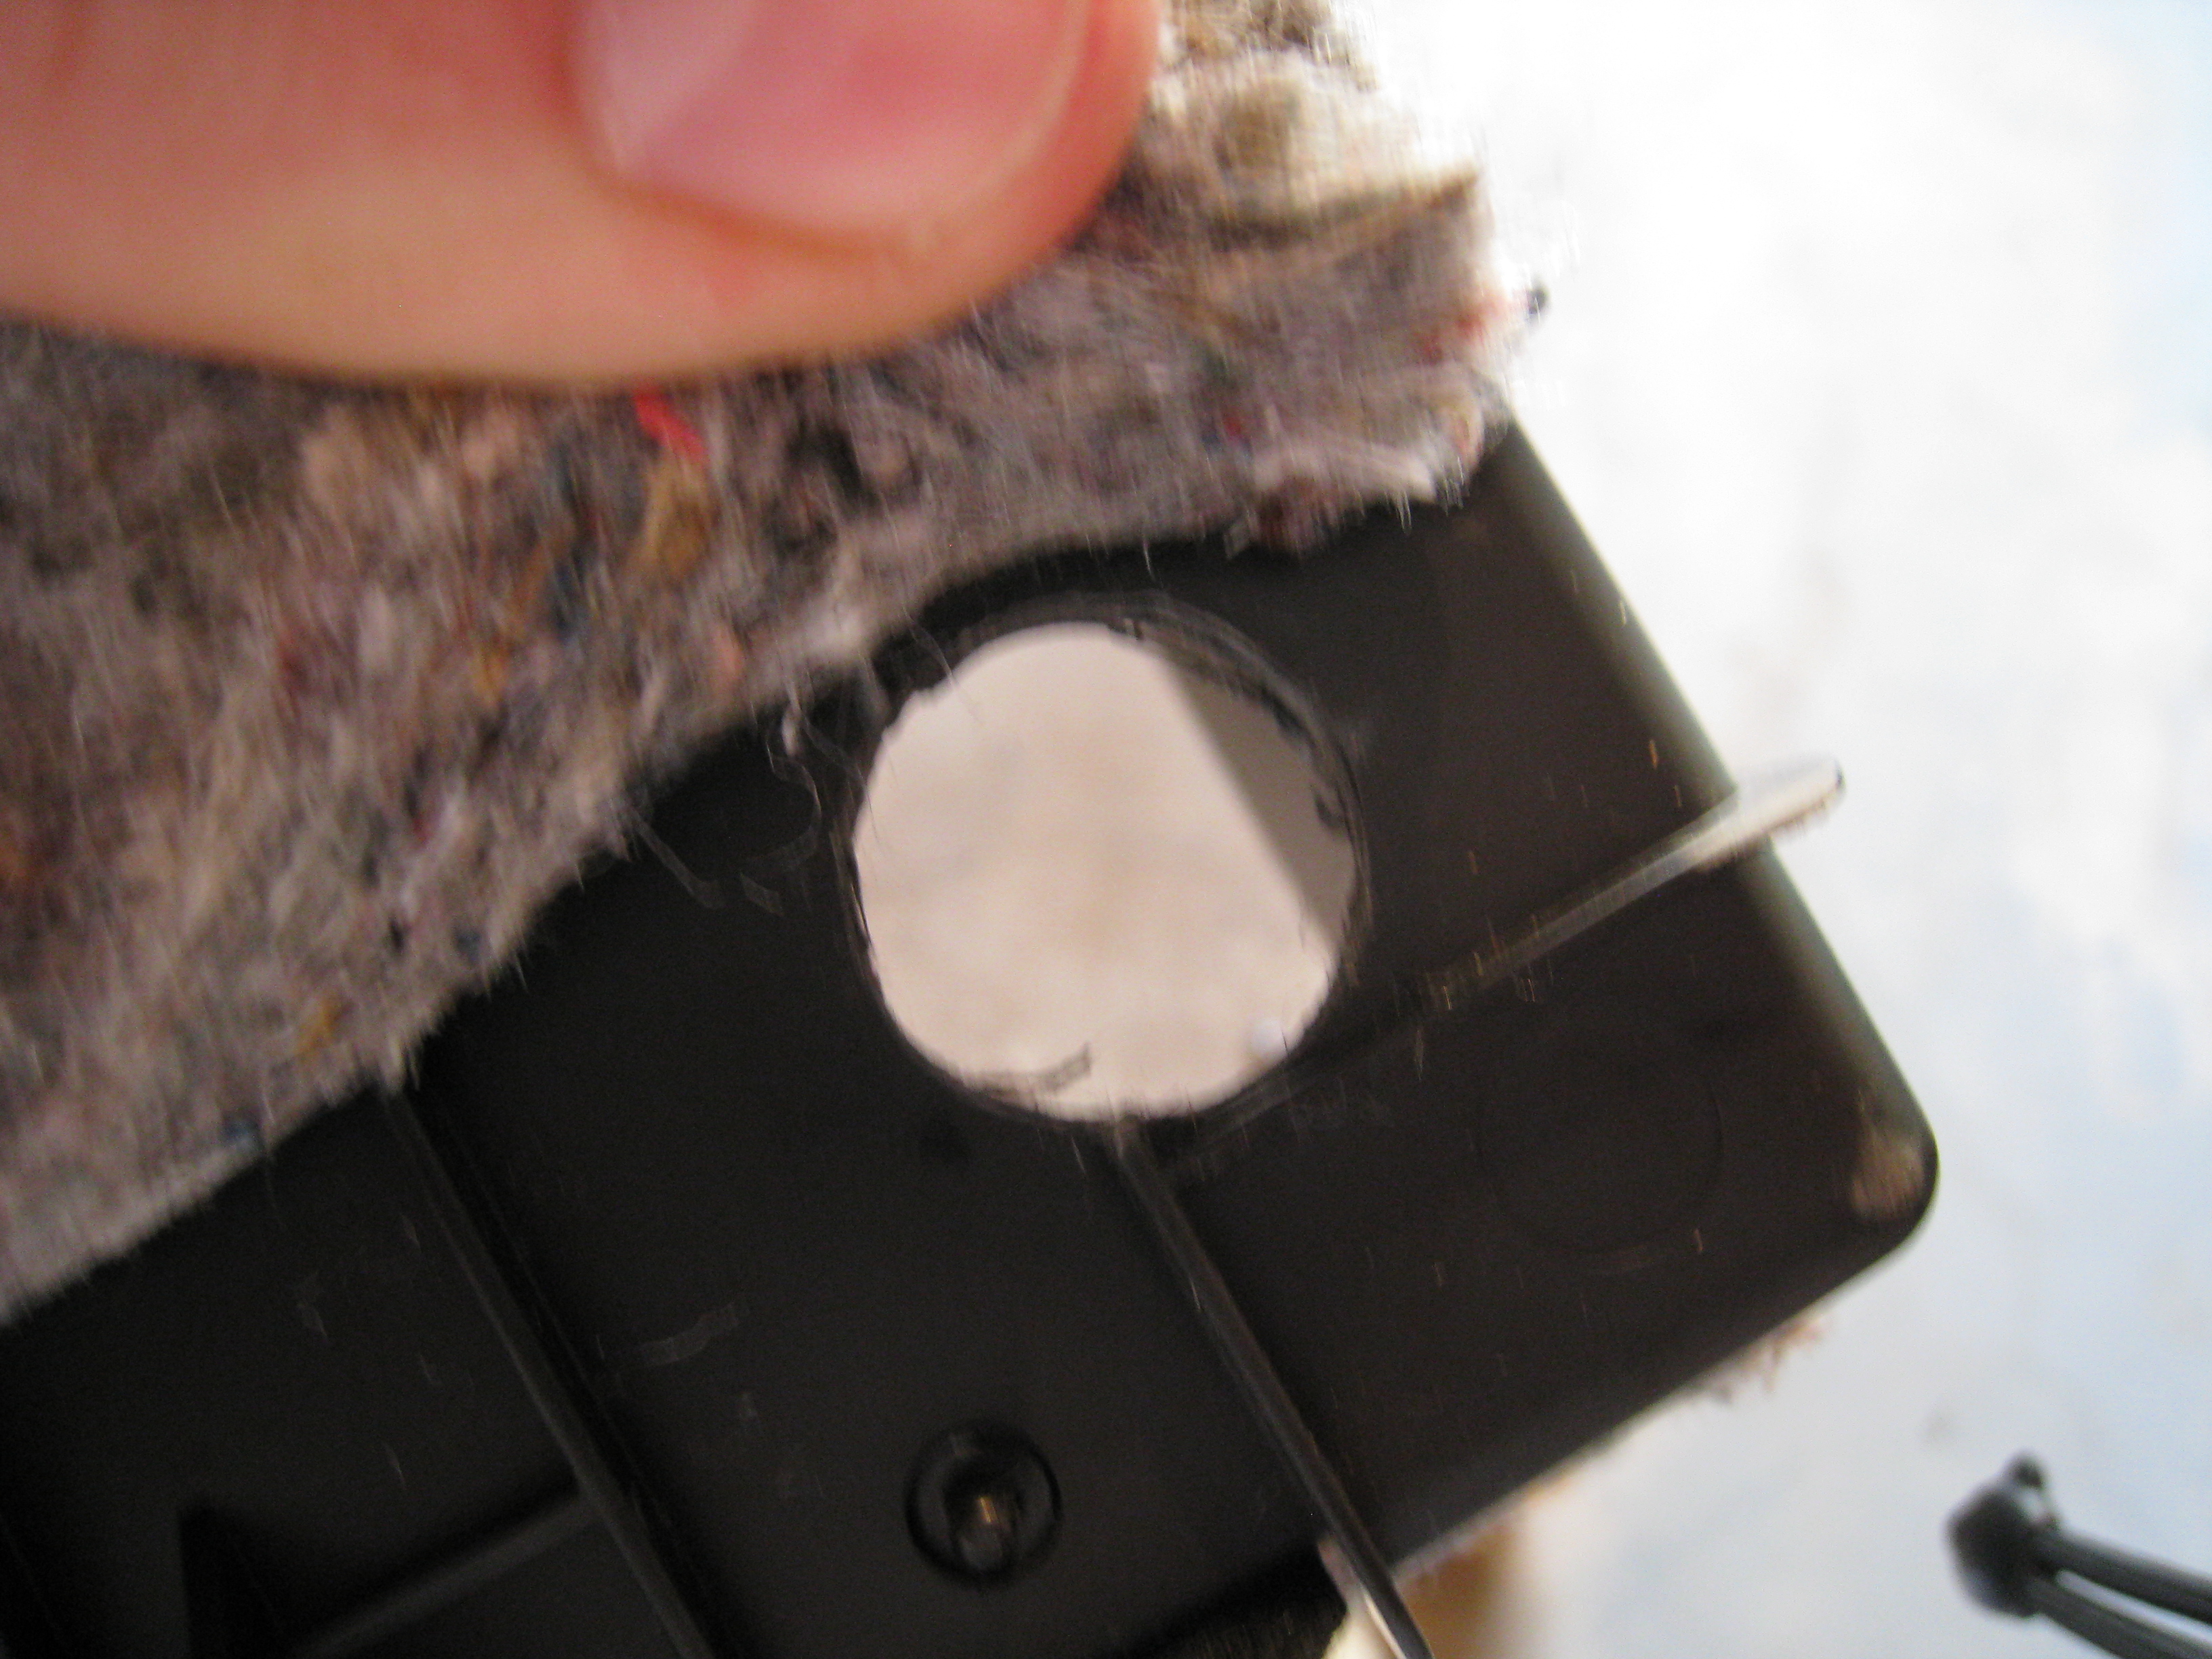
I drilled it out from the inside because of the reinforcement ribbing on the backside.

Hole from the backside. I did take the time to trim up the insulation on the back of the compartment with some scissors to make it look a little better and not interfere with the port.
The ribbing that I mentioned earlier needed to be trimmer down a little to allow the nut to be tightened down on the back side of the port to hold it in place. I wasn't too concerned with how it looked because no one was ever going to see it.

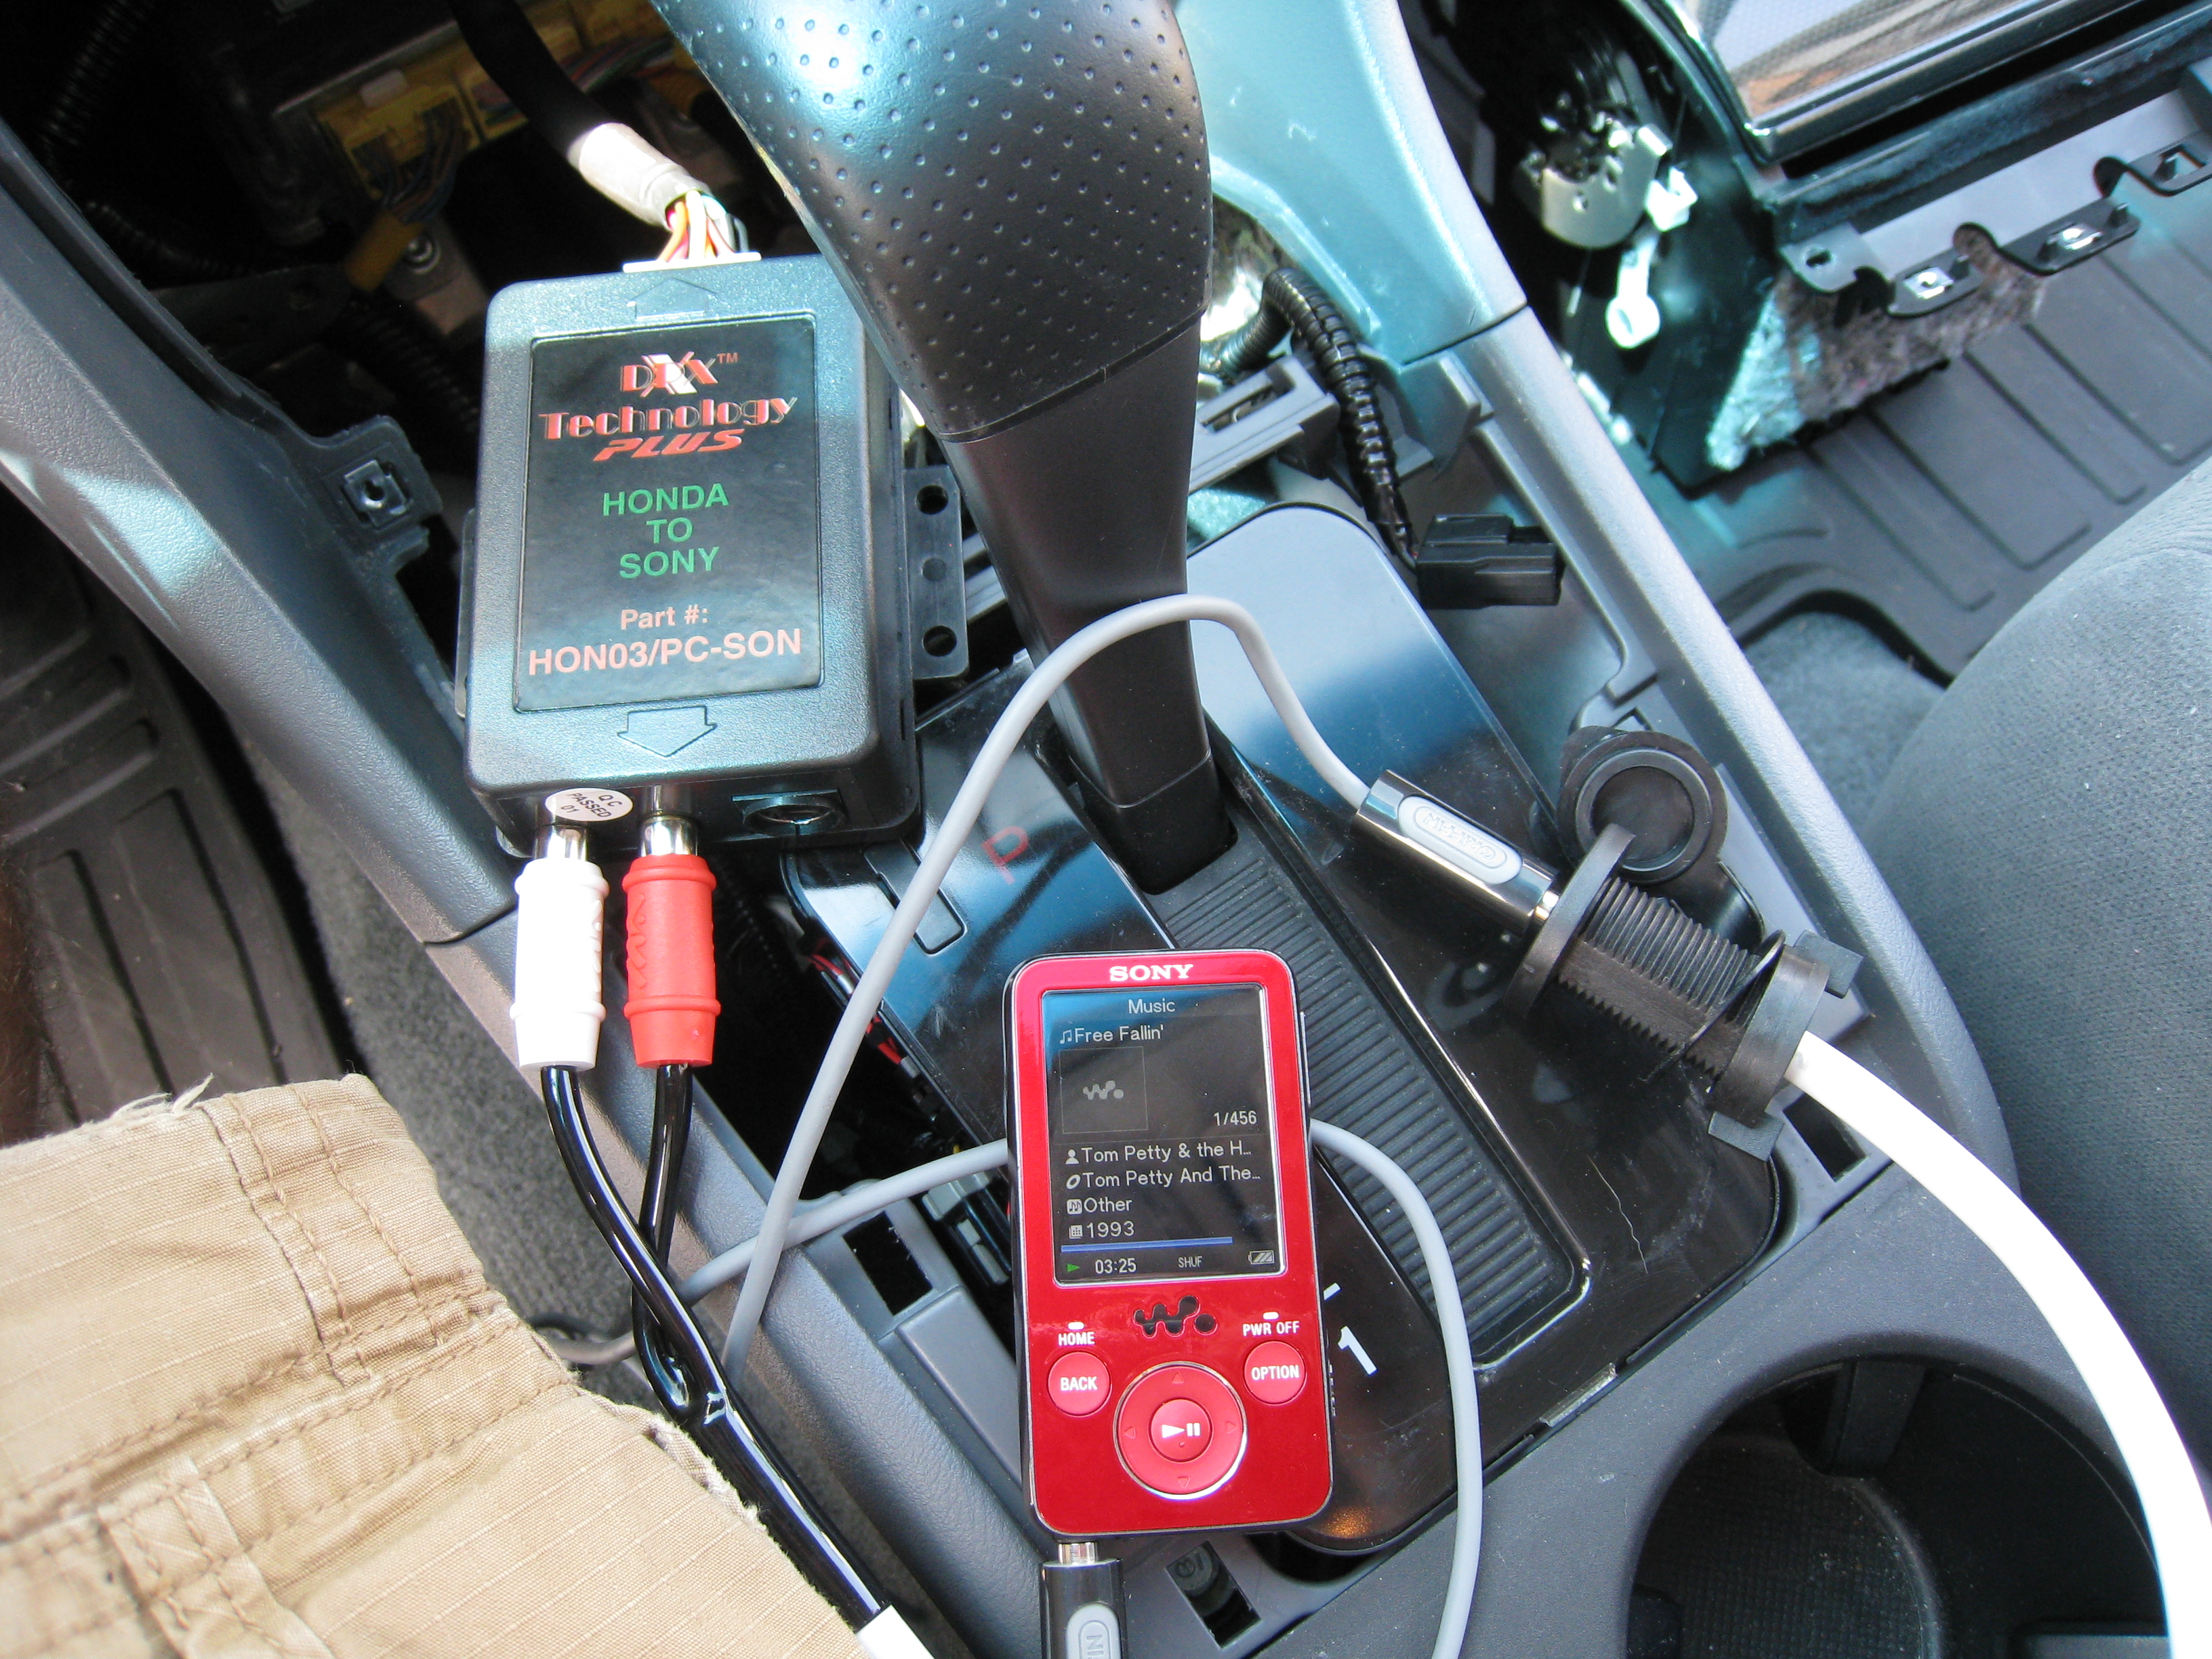
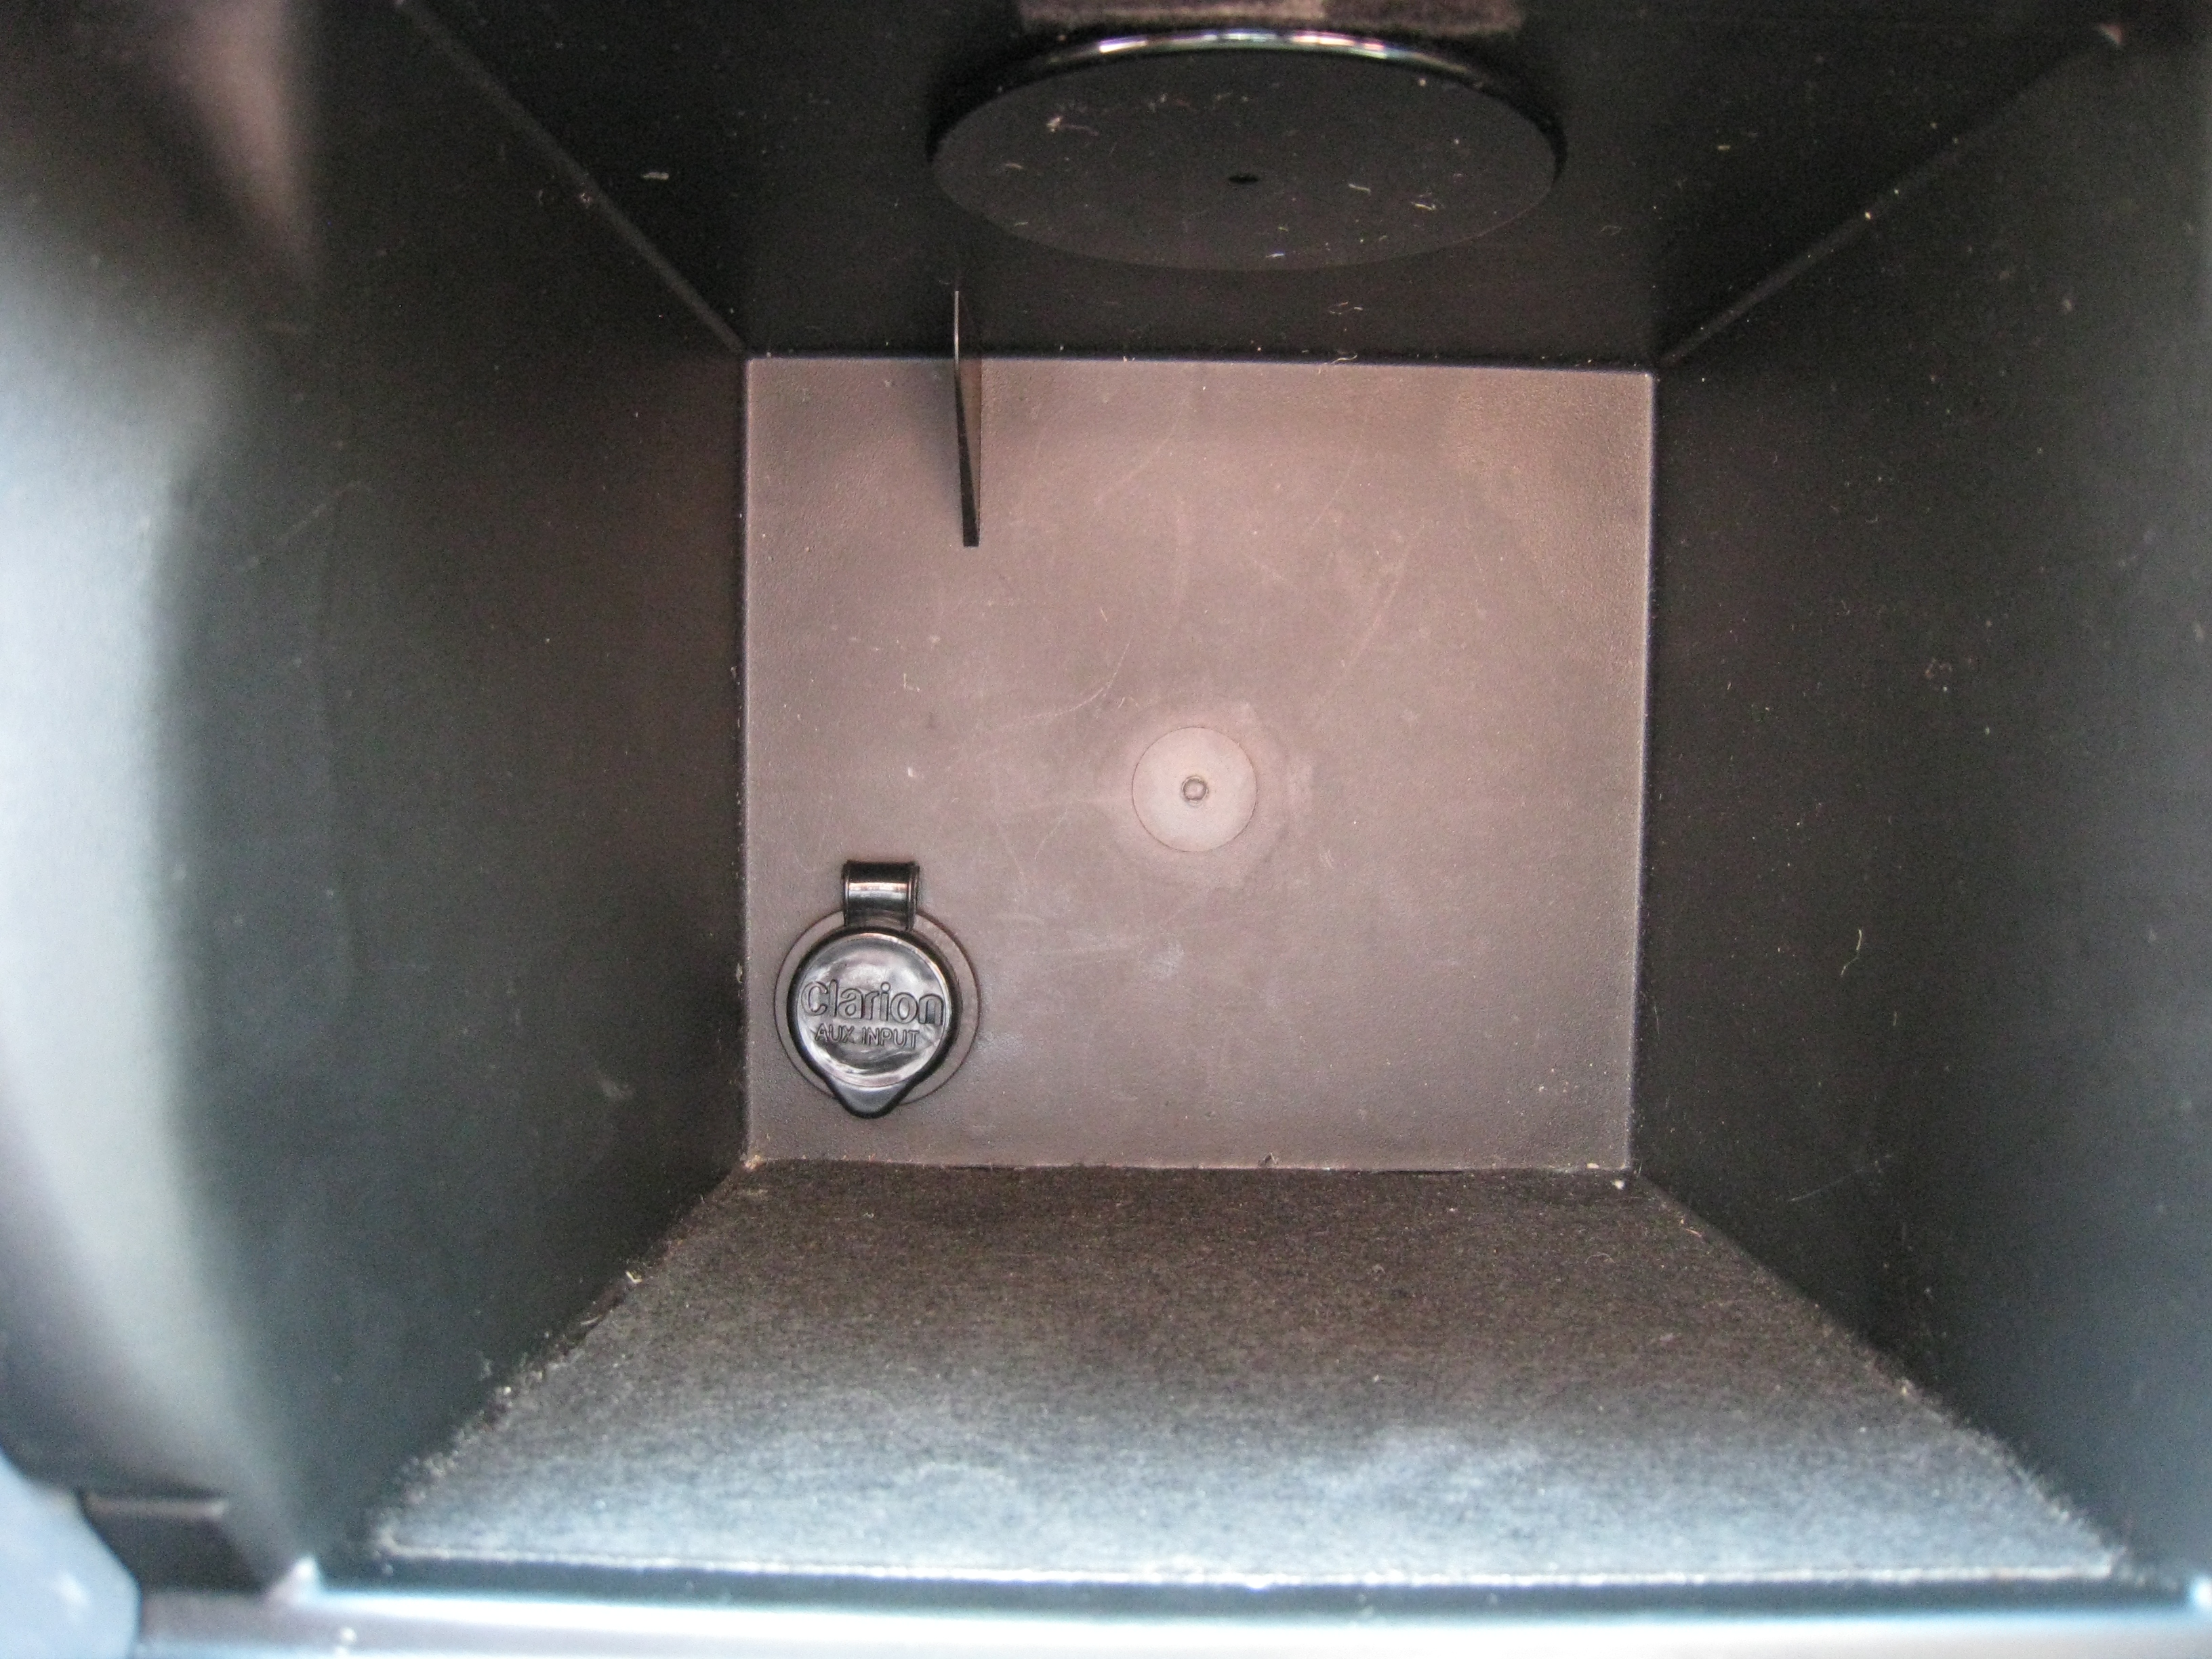
After all this, I just plugged the aux jack into the RCA terminals on the adapter box, put everything back together and then I was able to listen to my mp3 player anytime I wanted and maintain a clean looking interior.
All and all it took me about an hour and half to complete the project, though that does include the trip to Lowe's, a beer break with my dad, and a bit of searching on the internet for how to retrieve the radio code if necessary.
I'm pretty pleased with the setup, though I will warn, that it can be a a little bit more quiet than the factory radio so you do have to turn up the wolume slightly. You have to be a bit careful when switching back from a mp3 player to the radio and remember to turn the volume down if you want your eardrums to remain intact.
The first thing I did was gather all the parts I would need. I was able to get everything from Crutchfield, West Marine, Walmart, and from my little sister. More on that later.
Everything unpackaged
This is the input jack that I was able to find after considerable searching. It's made by Clarion Audio and I found it a few places like Amazon and for some odd reason, West Marine, a popular boating retailer carried it as well.
http://www.westmarine.com/webapp/wcs...9642&langId=-1
It ran me $24.99 and I think I took advantage of some free shipping offer they happened to be running at the time
I wanted something exactly like this so I could have a port in my dash and not have to run a cord out in some weird location, so this fit the bill perfectly.
3.5mm Female jack on one end and male RCA on the other to get plugged into the auxiliary input adapter.
Next was the auxiliary adapter that I found at Crutchfield. These are sold by quite a few companies, but since I had a $75 giftcard laying around from Crutchfield, I ordered through them.
http://www.crutchfield.com/p_469HO03...er.html?tp=422
This ran $79.99 plus shipping, but with my giftcard, it was considerable cheaper for me.
It comes with a wiring harness that is vehicle specific, so the setup was 100% plug and play.
Next was a 3.5mm male to male audio cable that I picked up from Walmart for around $14.
One end will go to the female jack and the other to the mp3 player headphone jack.
What I thought would be the required tools...
utility knife, #2 phillips, drill, and drill bits.
Now I had to decide where I was going to place the jack so it was convenient as well as would be out of the way and not look horrible. I considered placing it near the cup holders, in the center console near the 12v outlet, and in the storage compartment in from of the gear selector.
Ultimately, I chose the storage compartment, mainly due to it being out of the way and I could also place my mp3 player in the compartment when I left the vehicle and store the cord in there as well. Additionally with the wiring I had, it was the closest place to where the auxiliary adapter box would be installed.
BEFORE YOU START ANYTHING, MAKE SURE YOU HAVE THE FACTORY RADIO CODE!!! There is a security feature on these cars that disable the radio and the radio won't function if you remove the negative from the battery until you enter the code into the radio.
The interior of my 2007 Accord SE
The first step is to remove the trim panel around the gear selector. I've had to take the center console out previously, so I was somewhat familiar with the operation. If you elect to do this please be cautious. Interior trim can be a real pain in the butt with all the hidden clips and whatnot.
To do this, you first need to pop open the small doors in front of the panel to give you room to pry up on the trim panel.
Then give the panel a few good yanks around the perimeter and it should come lose.
Once loose, it'll lift right off around the gear selector.
The Next thing you need to due is put the parking break on, put you key in the ignition and turn it to run, depress the brake, and move the shifter the whole way back to first gear. This will be helpful later when you need room to take out the main storage compartment underneath the radio.
Next, is to remove the little coin tray. It took me a good while to figure out how to take it out the first time I had my dash apart. The actual rubber lined tray will pop out separately from the door, so don't go yanking on the door. If you put your fingers in the tray and pull upward on it, it should pop out.
After it comes out, it will expose two screws.
If these need to be removed.
And then the whole tray and 12v outlet assembly will come out.
You then need to unplug the 12v outlet so the assembly can be fully removed.
This exposes two move screws that need removed.
After taking out those two screws, give the compartment a tug to pop it lose.
After that, close the door on the front of it to allow it to be removed from the dash.
So now you have a pretty decent size hole in what used to be your dash.
If you look up in the hole at the bottom of the radio, you can see the port that you are looking for to connect the auxiliary input adapter to. This may vary depending on your model/year and whether you have navigation or remote CD changer.
At this point I wanted to make sure that all the parts and pieces would function before I went crazy drilling holes in my dash.
I took the supplied harness that came with the adapter box and plugged it into the port on the bottom of the radio.
Obviously the ends are different, so it'll only fit in one way.
Once that was plugged into, I hooked all the other pieces together and the mp3 player that I stole from my little sister for the day and tested it.
And of course it didn't work. I really had no idea why, then I remember reading somewhere that the radio needed to be reset in order for it to recognize the adapter. I really didn't want to do this because I didn't have the radio unlock code because I bought the car used. You can obtain the code by locating a certain number on the radio and calling the dealership and I believe they will give it to you free of charge. Since it was a Saturday, I didn't think the local dealership garage was open. Luckily though, all I had to do was turn off the ignition (remember it was turned on to put the car in 1st gear) and when I turned it back on everything worked as it was supposed to.
So since everything was working as I wanted to, now came the time to drill a hole. I wasn't think ahead and realized that I didn't have a 3/4" drill bit required for to make a hole for the input jack. So I had to take a quick trip to Lowe's to get the proper bit.
I prefer this style of bit when drill plastic because it'll cut the outside of the hole first and not screw up the plastic big time. The bit ran me something like $4.22 with tax.
I decided I wanted the hole in the lower left corner of the compartment, why, I really have no idea. Personal preference I suppose.
I drilled it out from the inside because of the reinforcement ribbing on the backside.
Hole from the backside. I did take the time to trim up the insulation on the back of the compartment with some scissors to make it look a little better and not interfere with the port.
The ribbing that I mentioned earlier needed to be trimmer down a little to allow the nut to be tightened down on the back side of the port to hold it in place. I wasn't too concerned with how it looked because no one was ever going to see it.
After all this, I just plugged the aux jack into the RCA terminals on the adapter box, put everything back together and then I was able to listen to my mp3 player anytime I wanted and maintain a clean looking interior.
All and all it took me about an hour and half to complete the project, though that does include the trip to Lowe's, a beer break with my dad, and a bit of searching on the internet for how to retrieve the radio code if necessary.
I'm pretty pleased with the setup, though I will warn, that it can be a a little bit more quiet than the factory radio so you do have to turn up the wolume slightly. You have to be a bit careful when switching back from a mp3 player to the radio and remember to turn the volume down if you want your eardrums to remain intact.
Honda-Tech Member
Joined: Jan 2008
Posts: 5,191
Likes: 0
From: Portland, OR, USA
very nice! this is a well thought out how to. props!
edit: you got me thinking about the un used aux button on my mom's escape... turns out, it uses the same box (only designed to work with a ford radio) as you purchased. i'm going to install this on her car. thanks!!
edit: you got me thinking about the un used aux button on my mom's escape... turns out, it uses the same box (only designed to work with a ford radio) as you purchased. i'm going to install this on her car. thanks!!
Honda-Tech Member
Joined: Feb 2005
Posts: 2,659
Likes: 0
From: Sd, CA
absolutely well done.
just one question, why did you end up using a honda to sony adapter? would any work? honda to....?
i just wanted to toss this out there as well...similar but one step further...also on a boat site. wtf
http://www.just4boats.com/ProductDet...ductCode=35251
just one question, why did you end up using a honda to sony adapter? would any work? honda to....?
i just wanted to toss this out there as well...similar but one step further...also on a boat site. wtf
http://www.just4boats.com/ProductDet...ductCode=35251
Thread Starter
Honda-Tech Member
Joined: Jun 2010
Posts: 10
Likes: 0
absolutely well done.
just one question, why did you end up using a honda to sony adapter? would any work? honda to....?
i just wanted to toss this out there as well...similar but one step further...also on a boat site. wtf
http://www.just4boats.com/ProductDet...ductCode=35251
just one question, why did you end up using a honda to sony adapter? would any work? honda to....?
i just wanted to toss this out there as well...similar but one step further...also on a boat site. wtf
http://www.just4boats.com/ProductDet...ductCode=35251
Sorry for the somewhat delayed response, but with regards to the Sony to Honda adapter:
I didn't really have a preference in what type of adapter I used, so long as it had RCA outputs on it. I'm sure that with this type of installation the brand it adapts to doesn't really matter because that port isn't being utilized. The Sony one was the one that happened to be the most inexpensive, so that was what I went with. Granted if you do had an auxiliary CD changer installed in your vehicle, you may have to be a little more cautious to what you buy.

Trending Topics
H-T Order of Merit
Joined: Dec 1999
Posts: 96,672
Likes: 38
From: Siege Perilous
Honda-Tech Member
iTrader: (6)
Joined: Aug 2003
Posts: 6,139
Likes: 0
From: In Texas watching out for the Fuzz, US
very useful thread very nice write up, If my tsx didn't already have the aux jack I would be doing this set up

Trial User
Joined: Dec 2010
Posts: 1
Likes: 0
hey im just wondering if the honda to sony adapter will work if my factory installed radio is a cd changer? because i bought the adapter and i took everything apart, but the plug for the adapter didn't fit, is there a special adapter i need or can i just buy another plug for the adapter? thanks in advance
Honda-Tech Member
Joined: Dec 2010
Posts: 7
Likes: 0
From: California
Sorry for the somewhat delayed response, but with regards to the Sony to Honda adapter:
I didn't really have a preference in what type of adapter I used, so long as it had RCA outputs on it. I'm sure that with this type of installation the brand it adapts to doesn't really matter because that port isn't being utilized. The Sony one was the one that happened to be the most inexpensive, so that was what I went with. Granted if you do had an auxiliary CD changer installed in your vehicle, you may have to be a little more cautious to what you buy.
I didn't really have a preference in what type of adapter I used, so long as it had RCA outputs on it. I'm sure that with this type of installation the brand it adapts to doesn't really matter because that port isn't being utilized. The Sony one was the one that happened to be the most inexpensive, so that was what I went with. Granted if you do had an auxiliary CD changer installed in your vehicle, you may have to be a little more cautious to what you buy.
Also did your car have the 6 disc indash CD player? Mine does and I just got my car a couple weeks ago and have been wanting to do the same thing to it. Thank You for this great post.

Honda-Tech Member
Joined: May 2009
Posts: 64
Likes: 0
Everybody is saying it, but much props for an excellent write up. I have not seen this addressed with such clarity and detail. Thanks man. Common problem with an awesome solution!

Trial User
Joined: Feb 2011
Posts: 1
Likes: 0
Thanks for the great writeup. I purchased the Hon03/PC-Son adapter but I can't figure out how to route the wires or where to place the adapter so that it is out of the way. The provided harness seems too short. (I also have an "updated" version so the harness is thicker and can act as a pass-through as well). Approximately where did you place the unit?

Honda-Tech Member
Joined: Sep 2009
Posts: 27
Likes: 0
i jus purchased an 07 accord se last week and was very confused about the aux button till i saw this thread. very very halpful, thanks for an amazing right up. but quick question i have the stock 6 disc cd changer and wanted to upgrade to the navi, will the navi swap right in w/o and custom work and also will this adapter plug right in also?

Trial User
Joined: Mar 2011
Posts: 1
Likes: 0
First, Excellent write up!
I just installed the auxillary connection in my Honda and it is everything I expected it to be. The instructions within the write up were right on point from start to finish. The hardest part for me was putting the center storage box back in. It gave me a lot of trouble. I gave up on it and have accepted the fact that the slot door will no longer close. Overall I'm very much pleased with how it turned out. Very neat solution. Highly recommend to other '07 Accord SE Owners.
I just installed the auxillary connection in my Honda and it is everything I expected it to be. The instructions within the write up were right on point from start to finish. The hardest part for me was putting the center storage box back in. It gave me a lot of trouble. I gave up on it and have accepted the fact that the slot door will no longer close. Overall I'm very much pleased with how it turned out. Very neat solution. Highly recommend to other '07 Accord SE Owners.

Thread
Thread Starter
Forum
Replies
Last Post