

DIY How to install copper o-rings in a Block

Thread Starter
HELLO,GOOD MORNIN'
Joined: Sep 2002
Posts: 8,909
Likes: 0
From: Savin lives
I dont think we have one so i decided to do it.
It's a very easy task but if everyone is as **** as i am it has to be perfect. The best way to learn is buy trial and error. I had more error with this than anything else i've done.
First time i put my block together i was good in a cylinders except number 2. i had coolant inside the combustion chamber without even starting the car up...lol
Gap in the oring was slightly to big, start over.
So we will start with what you need,
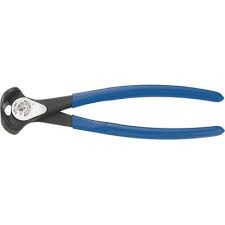
End cutting tool
mallet with a wooden end

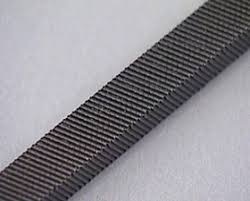
18 gauge copper wire

this is what GE says in their instructions, Here is what i add my personal preference and you will see why
a file
Golden eagle was even impressed with what i did.
first you want to measure out a little more than what you need around the cylinder. i measured out about a 1ft per cylinder just to be safe.
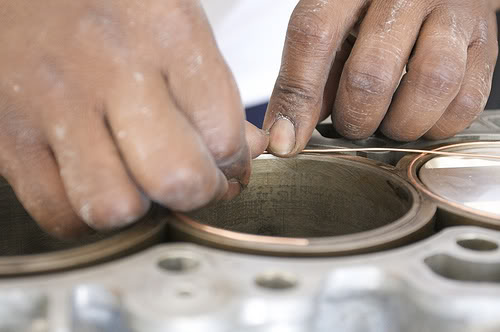
you want to file your end when you make your first cut because it will make it difficult to see if you actually made the connection between the 2 copper o-rings.
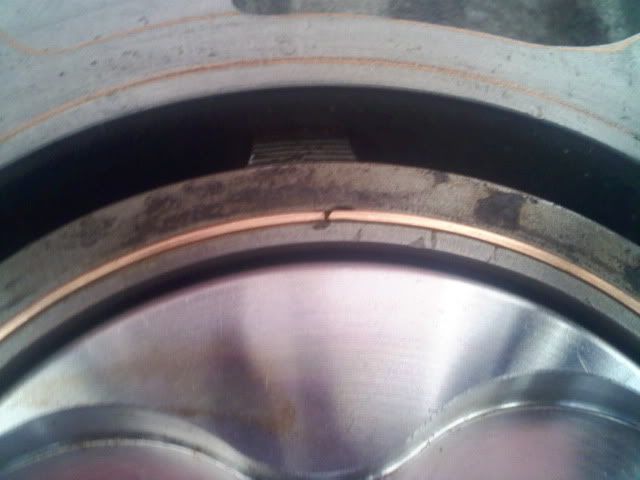
not good-you can see the gap.
here's how you do it
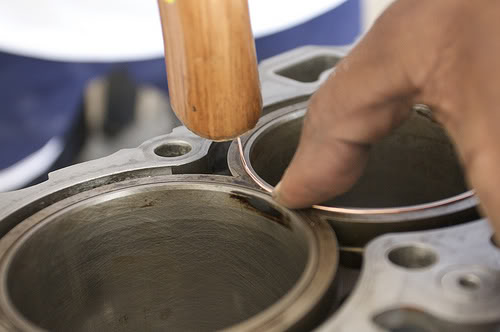
lay the o-ring in and gently tap
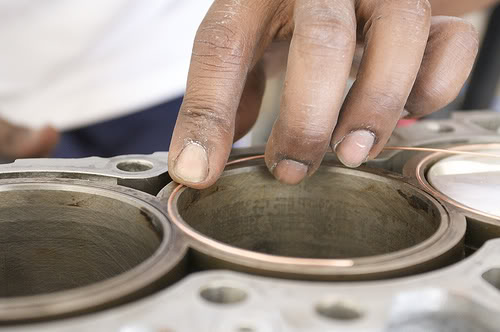
once you get to the end you should the other end. this is important IMO because you will make the o-ring seal perfect. Once you get to the end file your way into place. dont cut but file it down that way when you are perfect it will slide in place just snug enough but not to tight
here is a good one, but not perfect.
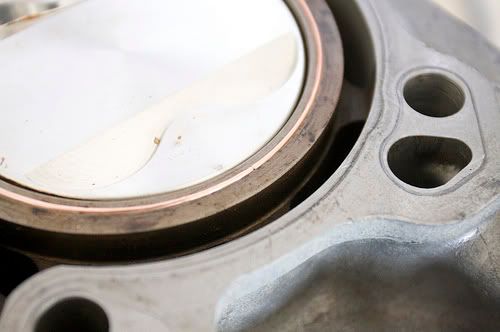
Here is a perfect one with both ends filed tell me where you find the lines. looks like a complete circle with no gaps.
I hope this helps people that run into problems like what i did.I like to do things myself.
It's a very easy task but if everyone is as **** as i am it has to be perfect. The best way to learn is buy trial and error. I had more error with this than anything else i've done.
First time i put my block together i was good in a cylinders except number 2. i had coolant inside the combustion chamber without even starting the car up...lol
Gap in the oring was slightly to big, start over.
So we will start with what you need,
End cutting tool

mallet with a wooden end

18 gauge copper wire

this is what GE says in their instructions, Here is what i add my personal preference and you will see why
a file

Golden eagle was even impressed with what i did.
first you want to measure out a little more than what you need around the cylinder. i measured out about a 1ft per cylinder just to be safe.
you want to file your end when you make your first cut because it will make it difficult to see if you actually made the connection between the 2 copper o-rings.
not good-you can see the gap.
here's how you do it
lay the o-ring in and gently tap
once you get to the end you should
the other end. this is important IMO because you will make the o-ring seal perfect. Once you get to the end file your way into place. dont cut but file it down that way when you are perfect it will slide in place just snug enough but not to tighthere is a good one, but not perfect.
Here is a perfect one with both ends filed tell me where you find the lines. looks like a complete circle with no gaps.
I hope this helps people that run into problems like what i did.I like to do things myself.
Honda-Tech Member
Joined: May 2007
Posts: 1,319
Likes: 0
From: Southern Cali, Estados Unidos
Thread Starter
HELLO,GOOD MORNIN'
Joined: Sep 2002
Posts: 8,909
Likes: 0
From: Savin lives
i know they do but they don't have anything about using a file. and this makes 1 less link that OUR members have to click to.
This is for the OCD at heart, people that want to be perfect because they are worried that they cant see the small gap and didn't do it right.
this makes it pretty much flawless and less of a chance to make a mistake. with filling your way down till it falls smoothly and snugly in the grove the lines o-rings will seal perfectly with no gap at all. non measurable anyway.
i like my filling technique
Last edited by ahobbs; May 26, 2009 at 04:22 PM.
Honda-Tech Member
Joined: May 2007
Posts: 1,319
Likes: 0
From: Southern Cali, Estados Unidos
i know they do but they don't have anything about using a file. and this makes 1 less link that OUR members have to click to.
This is for the OCD at heart, people that want to be perfect because they are worried that they cant see the small gap and didn't do it right.
this makes it pretty much flawless and less of a chance to make a mistake. with filling your way down till it falls smoothly and snugly in the grove the lines o-rings will seal perfectly with no gap at all. non measurable anyway.
i like my filling technique
This is for the OCD at heart, people that want to be perfect because they are worried that they cant see the small gap and didn't do it right.
this makes it pretty much flawless and less of a chance to make a mistake. with filling your way down till it falls smoothly and snugly in the grove the lines o-rings will seal perfectly with no gap at all. non measurable anyway.
i like my filling technique


Trending Topics
Honda-Tech Member
Joined: Mar 2004
Posts: 7,913
Likes: 0
From: North Georgia/Atlanta
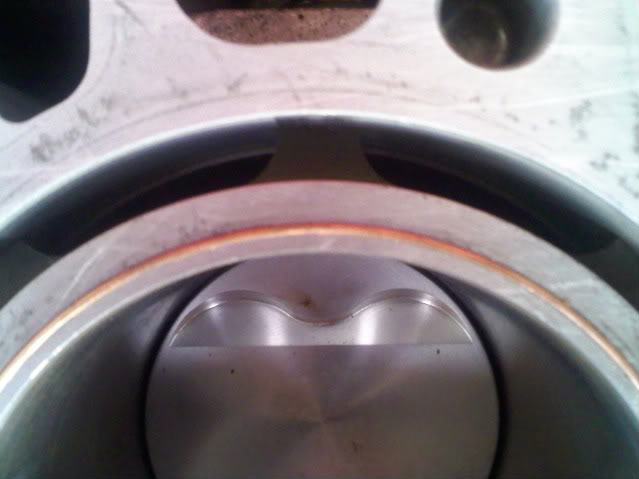
although i agree with your method and its smart, my rings always look like picture #1 when i go to put my head on and i have never EVER had a temp spike or blown head gasket or anything. The copper just crushes to much for that imperfection to truly matter. everyime i remove my head, there is zero gap from the crush. Nice write up though.
Thread Starter
HELLO,GOOD MORNIN'
Joined: Sep 2002
Posts: 8,909
Likes: 0
From: Savin lives
yeah i unerstand that and i figured i was good until i found coolant in the cylinder...lol without putting pressure in the system.
so i choose to be as **** as possible
so i choose to be as **** as possible

Honda-Tech Member
Joined: Nov 2011
Posts: 1,165
Likes: 0
From: FRANCE
I tried yesterday on my block

and on these cylinder below I think there is a little gap, do you think I need to remove it?

It is very hard to remove it, how can I do without damage the sleeve please?
and on these cylinder below I think there is a little gap, do you think I need to remove it?
It is very hard to remove it, how can I do without damage the sleeve please?
Who is Mr Robot?
iTrader: (2)
Joined: Jul 2004
Posts: 21,474
Likes: 10
From: ATL - Where the Pimps and Players dwell
There should be no gap between ends. When the ring crushes it mushrooms the top and doesn't expand the ring so you'd still have a gap
Who is Mr Robot?
iTrader: (2)
Joined: Jul 2004
Posts: 21,474
Likes: 10
From: ATL - Where the Pimps and Players dwell
Yes
Lay the wire in the groove (don't trim it from the spool it's on yet) and once you complete the circle around the groove cut off just a little bit extra and handfile the remainder until it's snug with no gap and no overlap/sharp edges on both cut ends
(I emphasize hand filing here, any electrical tool will remove too much too fast and you'll have to start over)

Who is Mr Robot?
iTrader: (2)
Joined: Jul 2004
Posts: 21,474
Likes: 10
From: ATL - Where the Pimps and Players dwell
Looks like you did it perfectly, as I see no gaps or edges. Well done, now just do it three more times lol
HAHA I try, just glad I could point you in the right direction. If you see Steeve_Civic's last post and pic that is what the end result should look like
It's great info and ahobbs is a very knowledgeable member and always more than willing to share his knowledge and experiences for the benefit of others
I still think this needs to be stickied or put in the FAQs at the very least
Well, old school hot rod technology but if it works then hey, that is all that matters lol
Speaking of ahobbs, how's the car? Haven't seen you post up in a bit
I still think this needs to be stickied or put in the FAQs at the very least
Well, old school hot rod technology
but if it works then hey, that is all that matters lolSpeaking of ahobbs, how's the car? Haven't seen you post up in a bit