

My ED7 Rebuild - USDM to US/JDM Dribble…

Thread Starter
Honda-Tech Member
Joined: May 2002
Posts: 697
Likes: 0
From: Not Here, WA
Main Entry:
- drib•ble
Pronunciation:
- \ˈdri-bəl\
Function:
- verb
Etymology:
- frequentative of drib to dribble
Date:
- circa 1589
transitive verb1: to issue sporadically and in small bits
intransitive verb3: to come or issue in piecemeal or desultory
Just to touch on some of the history with this car…
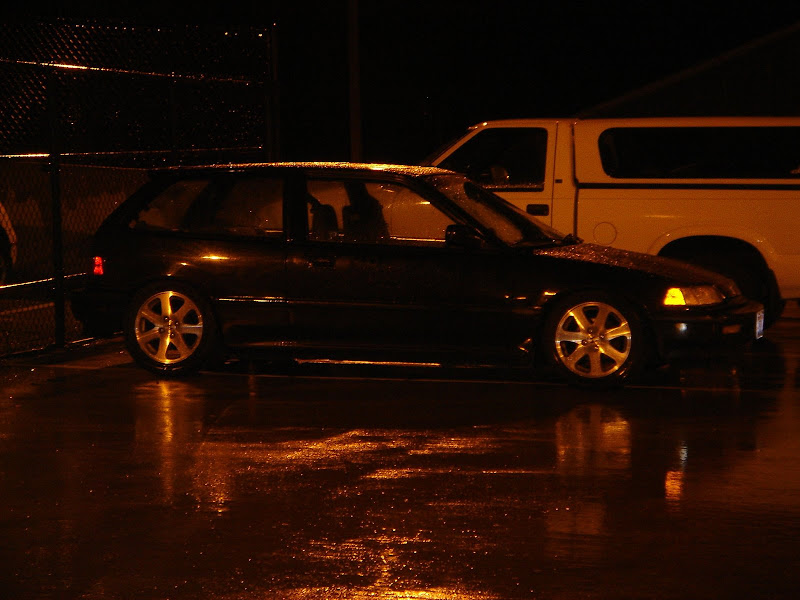
1990 Polar White Honda Civic Si with one accident.
My best friend in high school bought this car from the original owner and owned it up till I think ’03 when I purchased it from him. Long story short I kind of grew up with this car so I’m a bit attached to it.
Now to the fun part… well not really!
On September 11, 2008 there was an accident and subsequently a death on the road I travel to work - Chuckanut Drive. Due to the accident I had to turn around and take an alternate route to work. On my way to the freeway a silver Ford Taurus was doing roughly 15mph so I gave him a single quick light tap of the horn. At that moment he slammed on his brakes and I slid under him.
I know what you’re thinking and you’re correct; I was following too close. Regardless of my distance, conditions, and circumstances physics has a lot to do with life and that day I failed!
So begins the update of my daily driver or should I say new project car…
I was so mad after the accident I just wanted to take the bent and broken pieces off the car. I forgot to take pictures…
- drib•ble
Pronunciation:
- \ˈdri-bəl\
Function:
- verb
Etymology:
- frequentative of drib to dribble
Date:
- circa 1589
transitive verb1: to issue sporadically and in small bits
intransitive verb3: to come or issue in piecemeal or desultory
Just to touch on some of the history with this car…
1990 Polar White Honda Civic Si with one accident.
My best friend in high school bought this car from the original owner and owned it up till I think ’03 when I purchased it from him. Long story short I kind of grew up with this car so I’m a bit attached to it.
Now to the fun part… well not really!
On September 11, 2008 there was an accident and subsequently a death on the road I travel to work - Chuckanut Drive. Due to the accident I had to turn around and take an alternate route to work. On my way to the freeway a silver Ford Taurus was doing roughly 15mph so I gave him a single quick light tap of the horn. At that moment he slammed on his brakes and I slid under him.
I know what you’re thinking and you’re correct; I was following too close. Regardless of my distance, conditions, and circumstances physics has a lot to do with life and that day I failed!
So begins the update of my daily driver or should I say new project car…
I was so mad after the accident I just wanted to take the bent and broken pieces off the car. I forgot to take pictures…
Thread Starter
Honda-Tech Member
Joined: May 2002
Posts: 697
Likes: 0
From: Not Here, WA
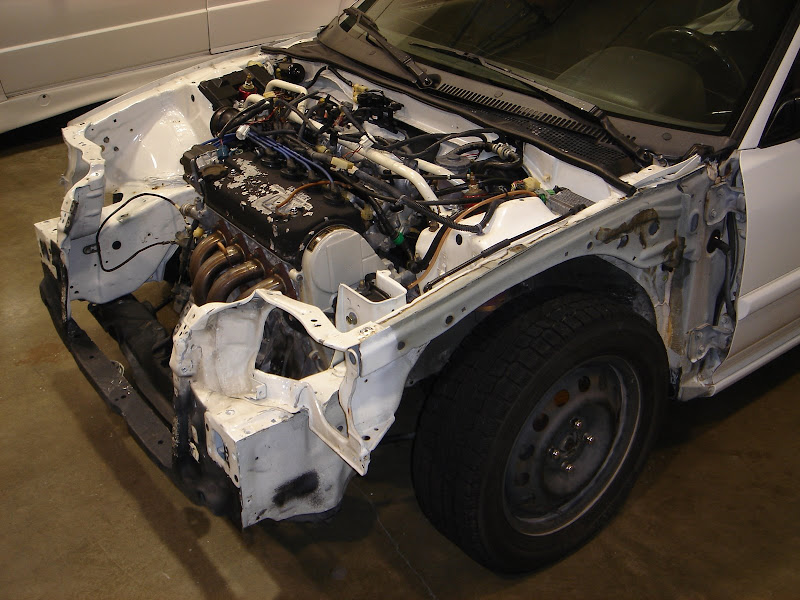
So not to make one large post I thought I’d do this in stages. I don’t know why I want to do a rebuild thread, but here we are! I’m writing and for those who care or are bored: you’re reading.
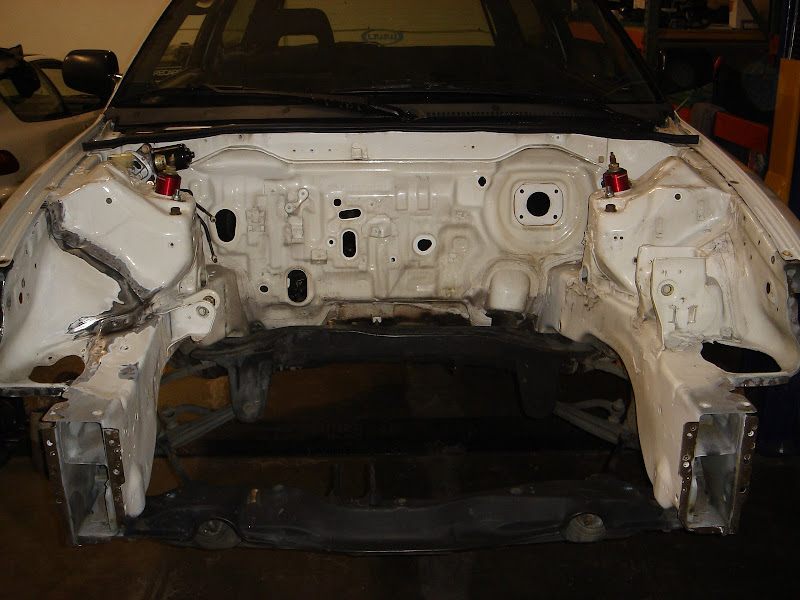
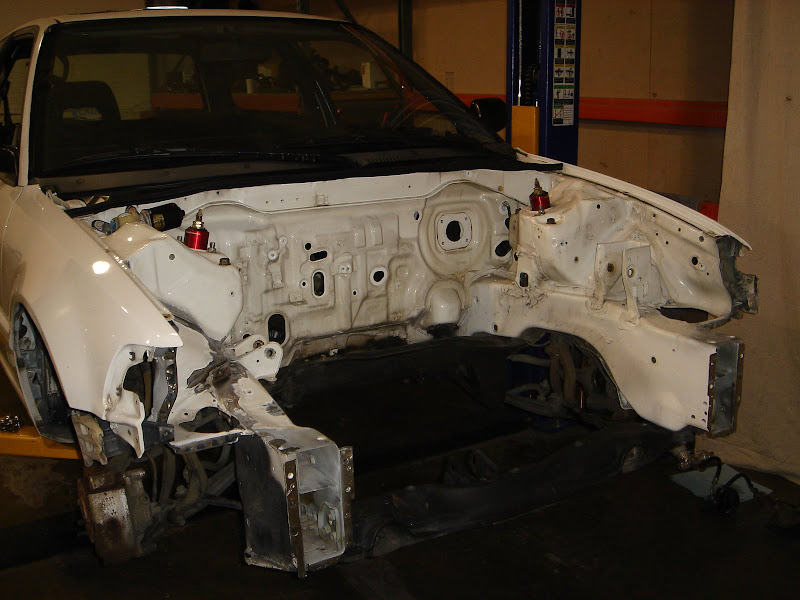
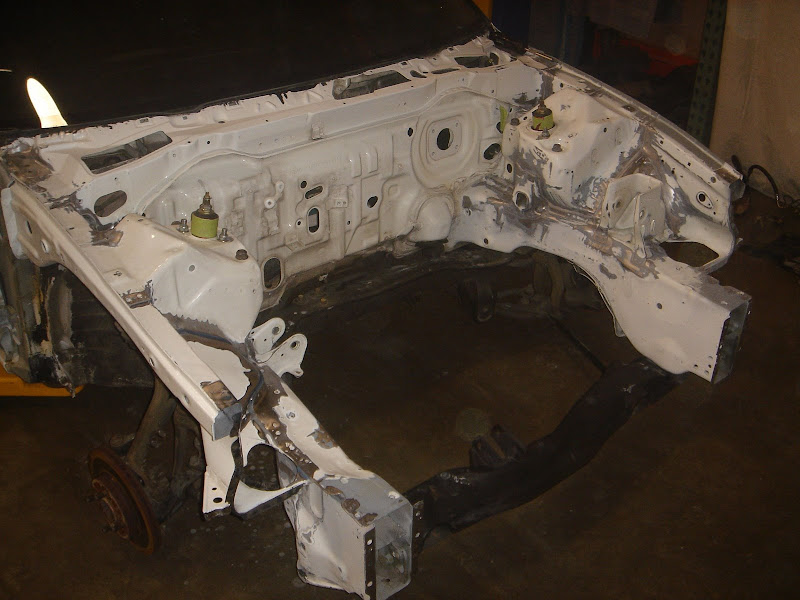
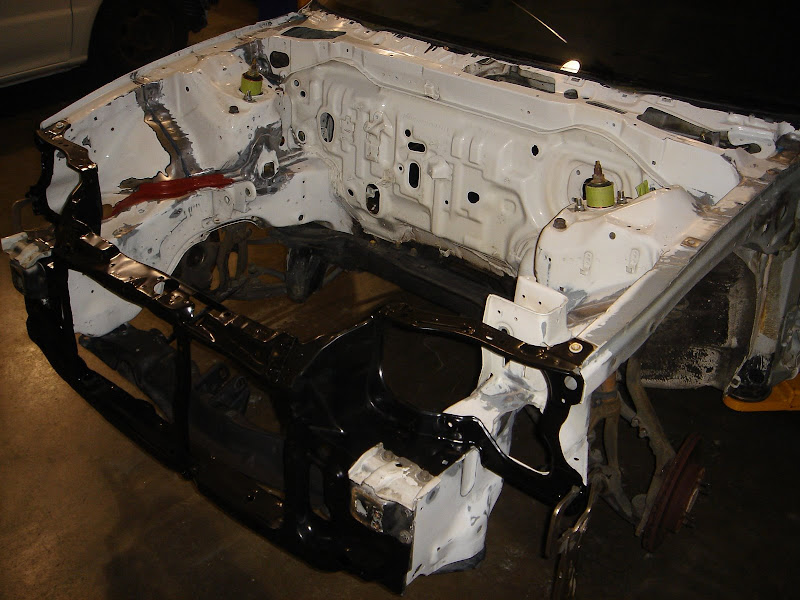
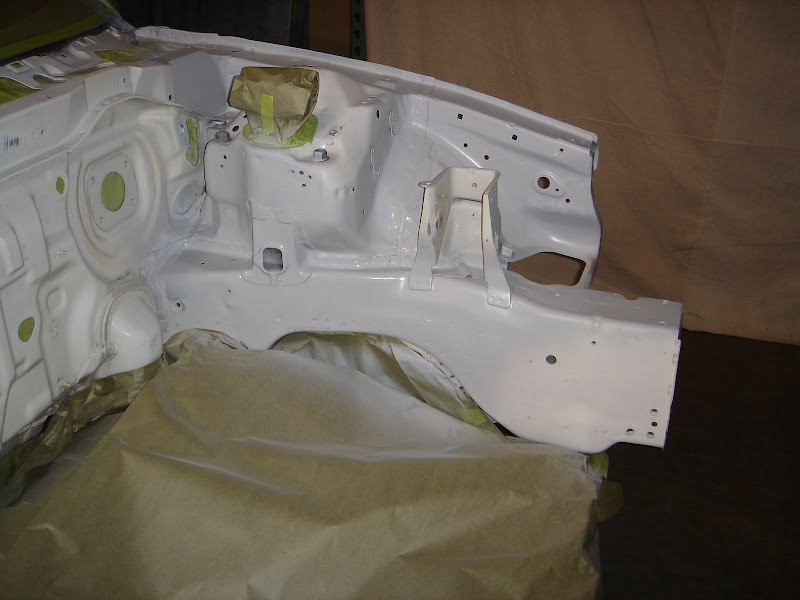
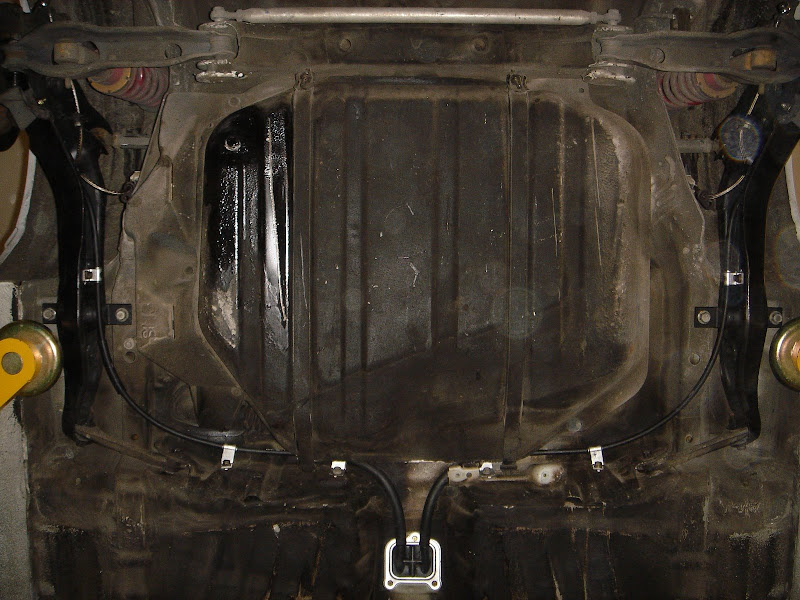
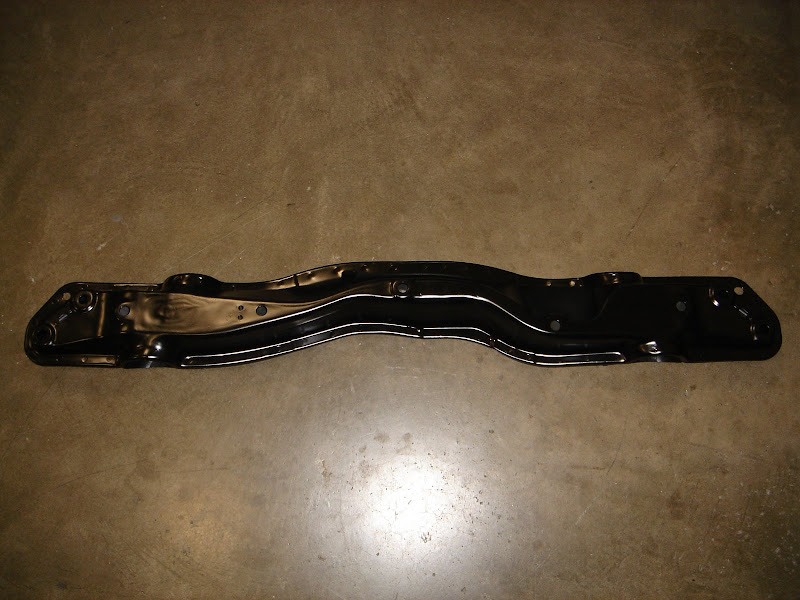
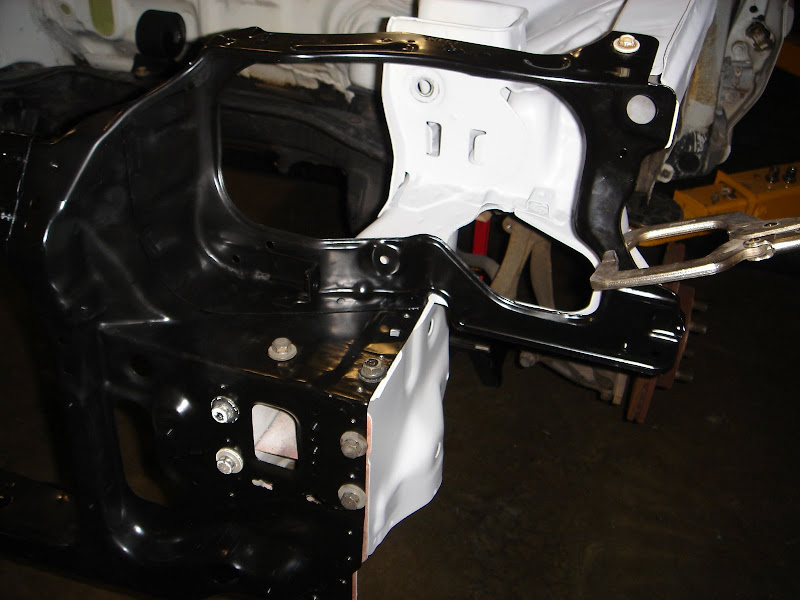
This was the second and most gratifying part removal - the last of the bulkhead.
Bulkhead removed and ready for a new one - or so I thought.
I found a bit of rust from the first accident back in ‘98.
This was the second and most gratifying part removal - the last of the bulkhead.
Bulkhead removed and ready for a new one - or so I thought.
I found a bit of rust from the first accident back in ‘98.
Thread Starter
Honda-Tech Member
Joined: May 2002
Posts: 697
Likes: 0
From: Not Here, WA
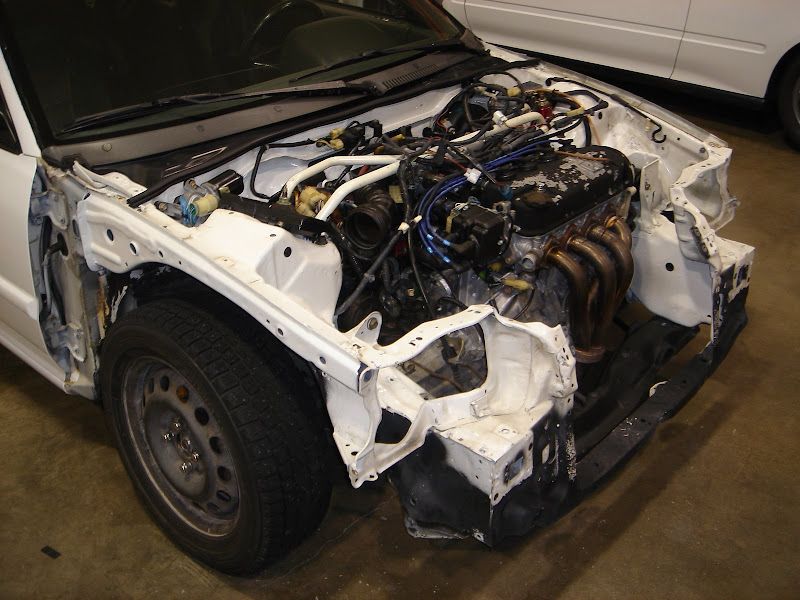
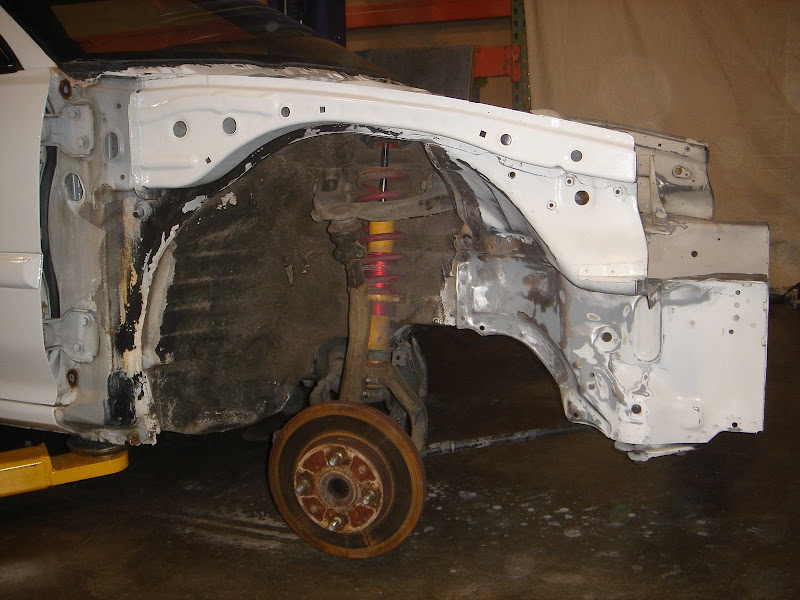
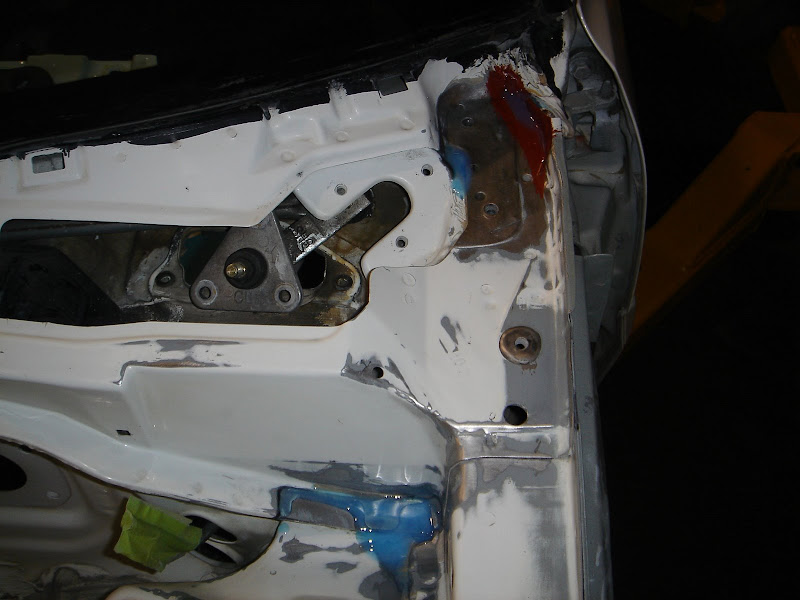
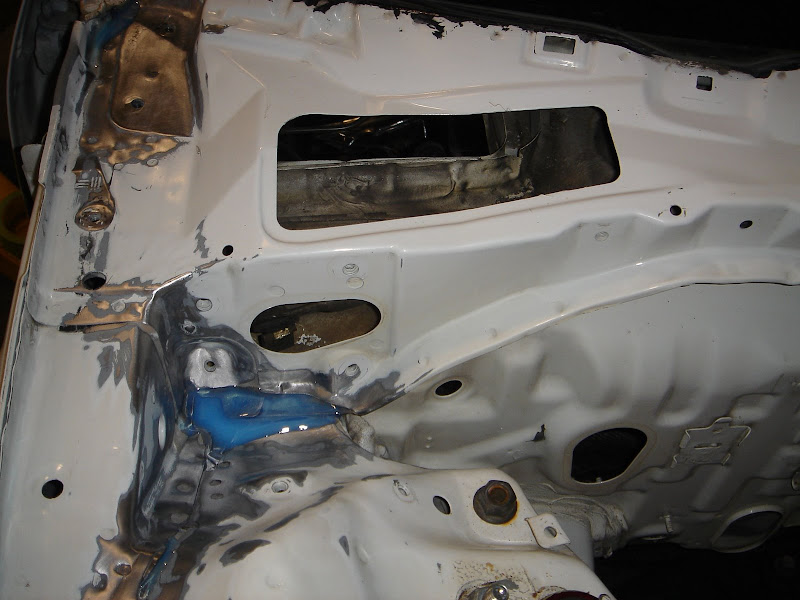
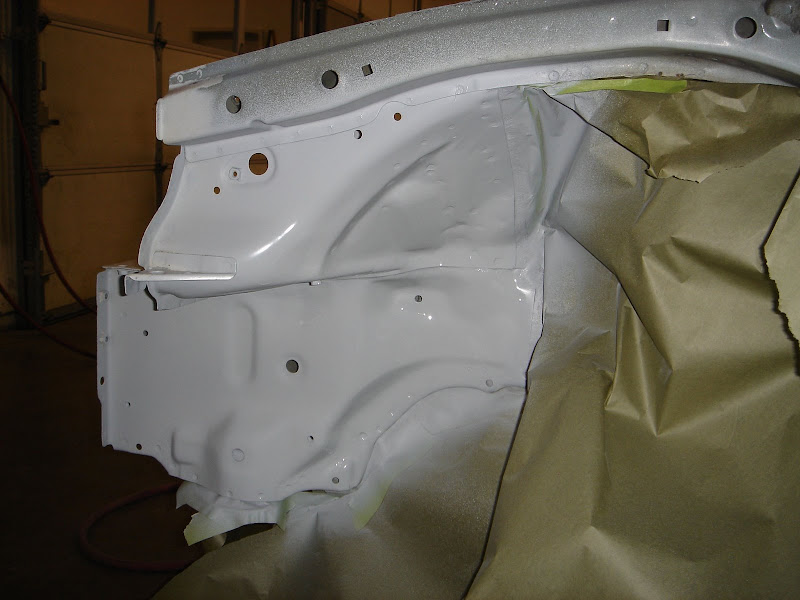
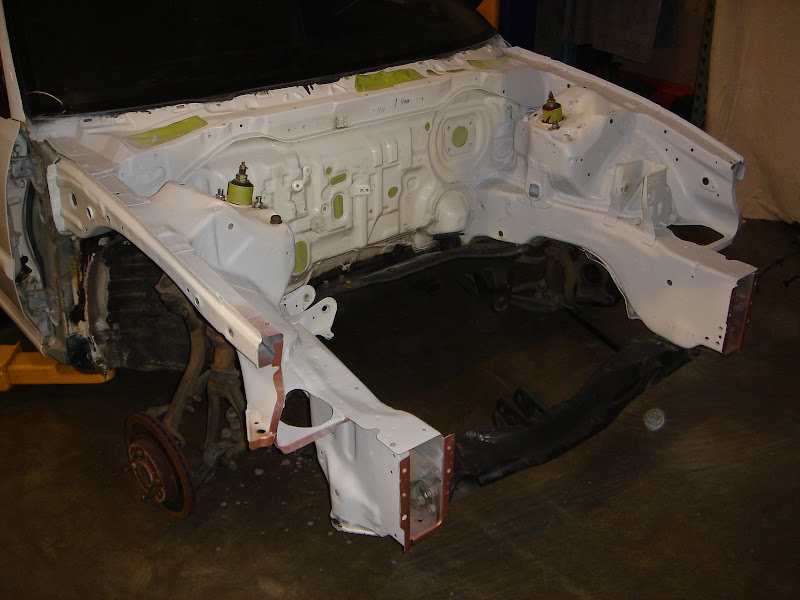
When I started this project I thought it would just be an EF9 front so I could install my spare B16A…
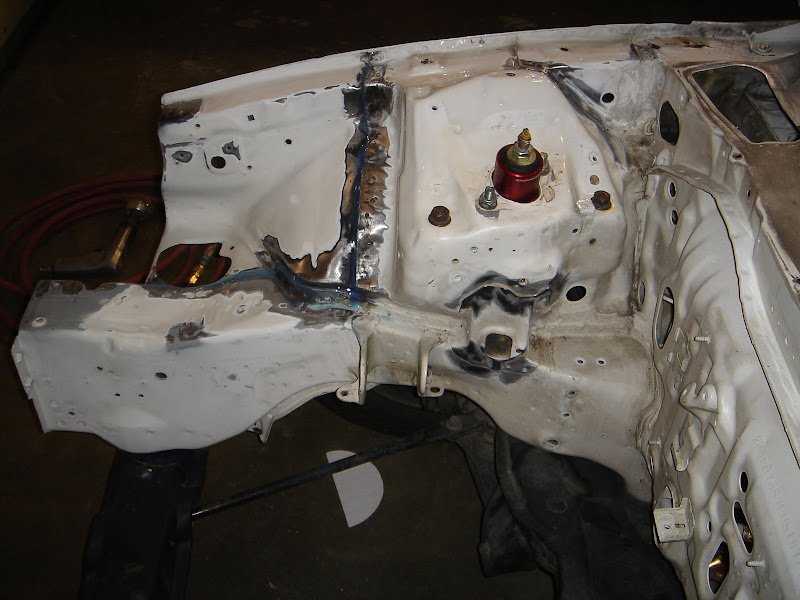
What went from just a little rust repair and seam seal replacement…
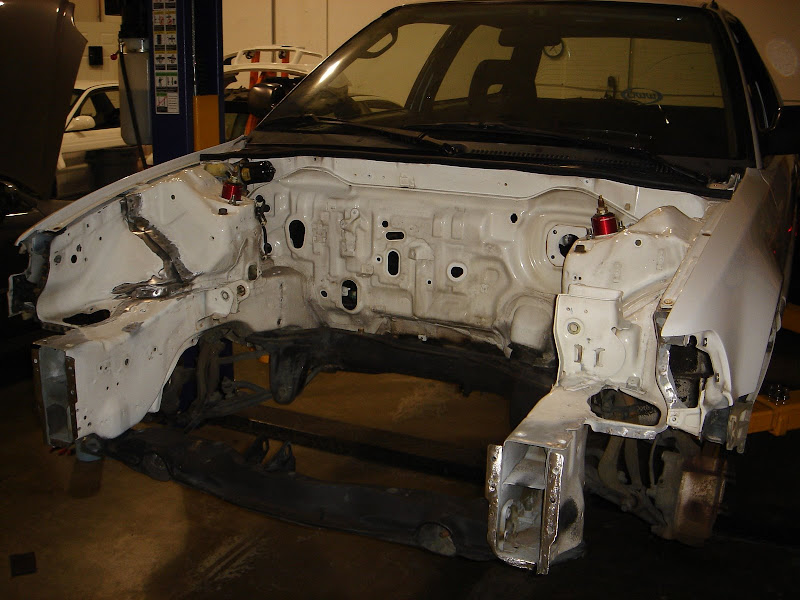
...went to this


What went from just a little rust repair and seam seal replacement…
...went to this
Thread Starter
Honda-Tech Member
Joined: May 2002
Posts: 697
Likes: 0
From: Not Here, WA
Since the car has been in major down time. I thought I’d take the time to install DA trailing arms:
- New indexed trailing arm bushings - that job sucked as the DA bushings are not round, but more of a slight oval.
-> Stock brakes from my ’94 Si
--> Fairly new: brembo rotors
--> Porterfield R4S pads
--> Stainless-steel brake lines
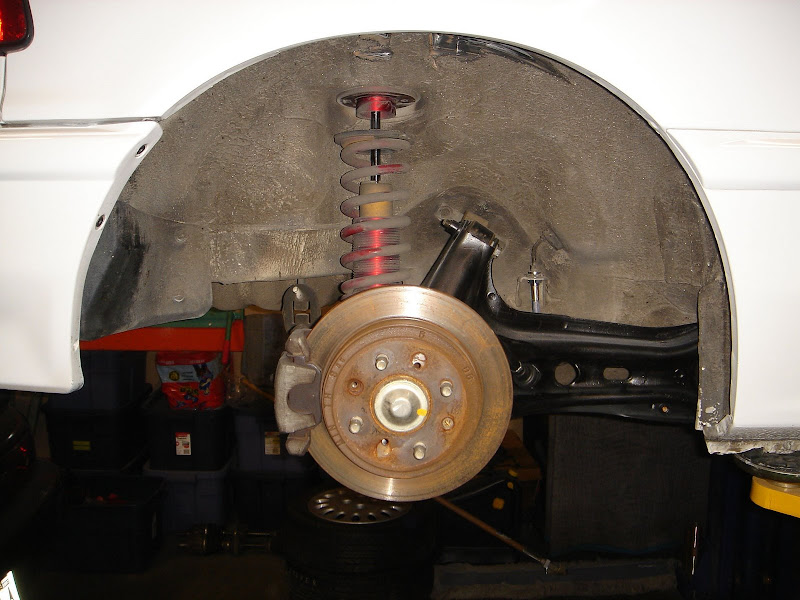
->New DA e-brake cables
- New indexed trailing arm bushings - that job sucked as the DA bushings are not round, but more of a slight oval.
-> Stock brakes from my ’94 Si
--> Fairly new: brembo rotors
--> Porterfield R4S pads
--> Stainless-steel brake lines
->New DA e-brake cables
Last edited by 01-0041; Jan 17, 2009 at 01:58 PM.
Thread Starter
Honda-Tech Member
Joined: May 2002
Posts: 697
Likes: 0
From: Not Here, WA
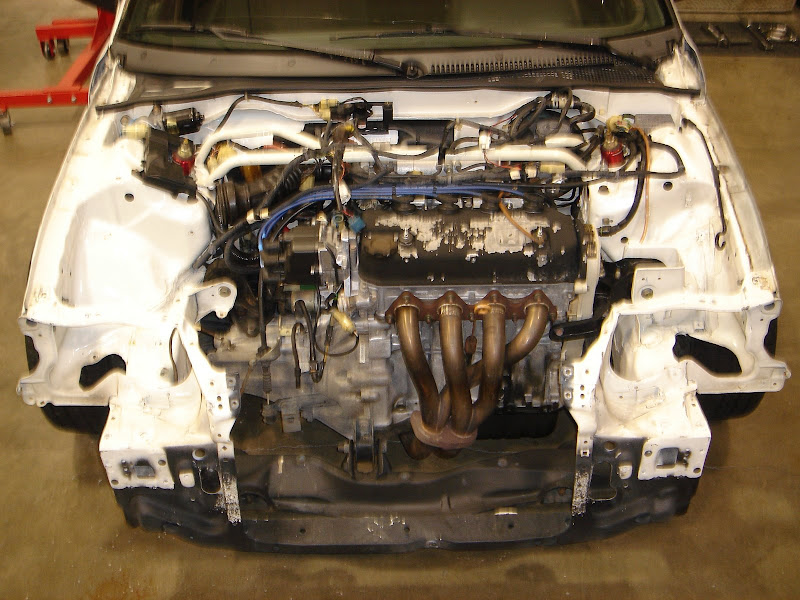
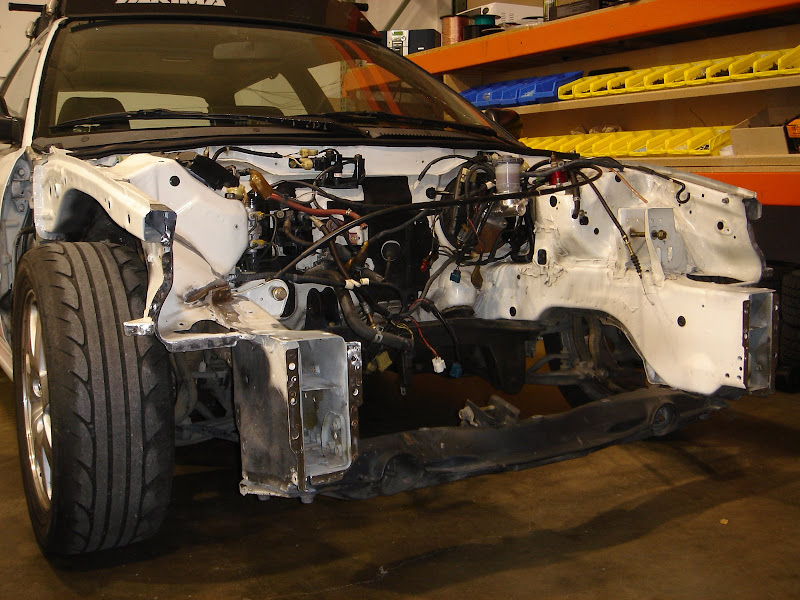
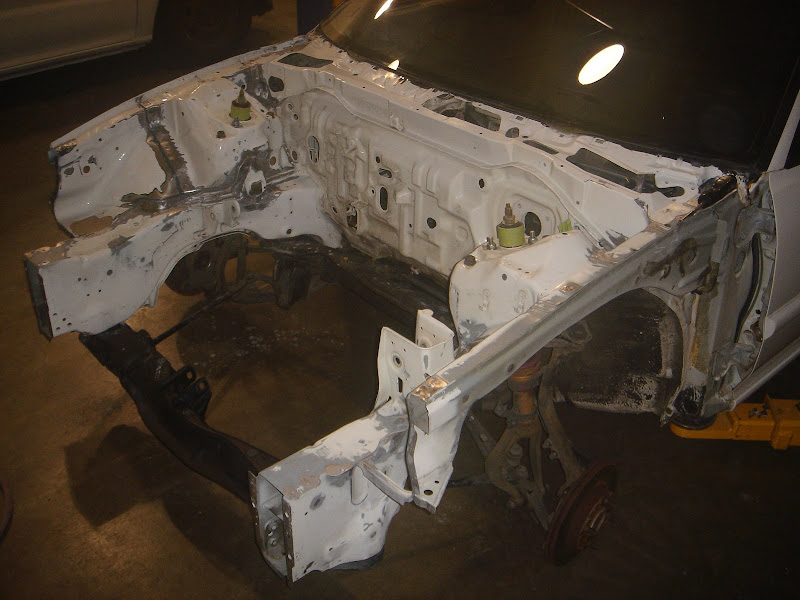
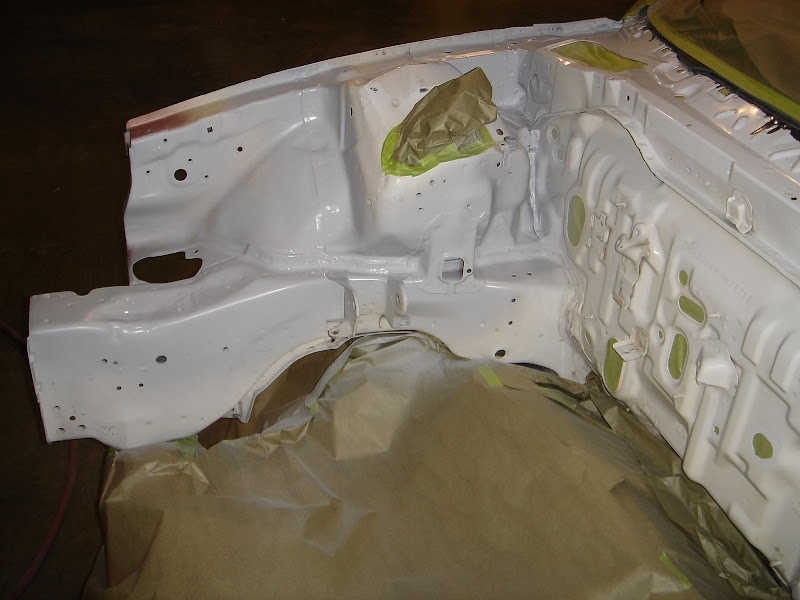
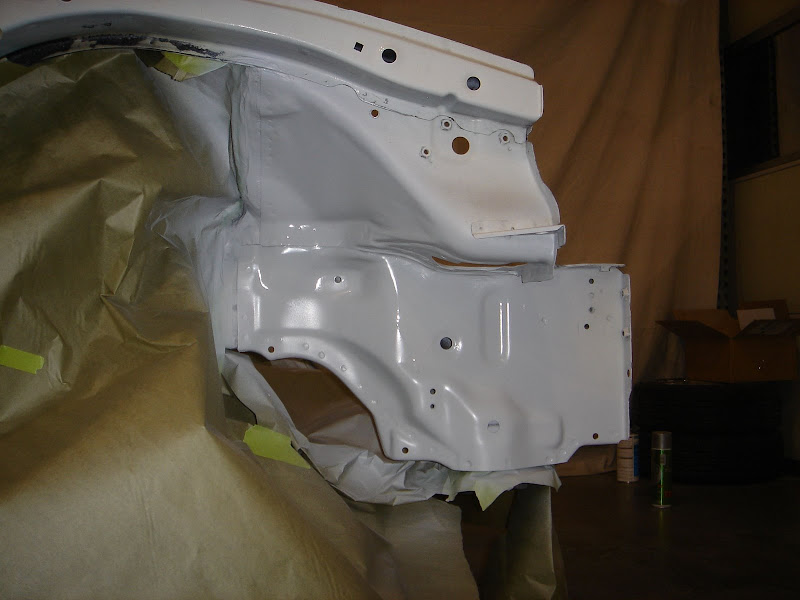
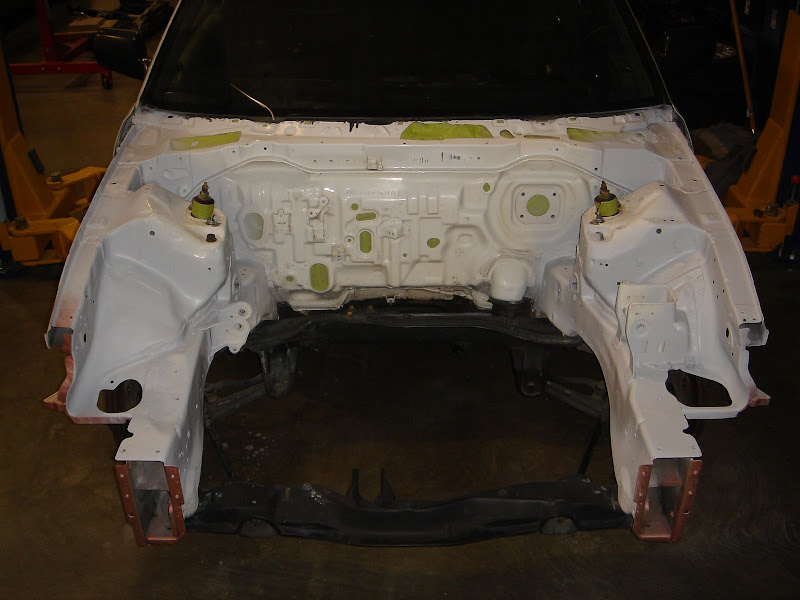
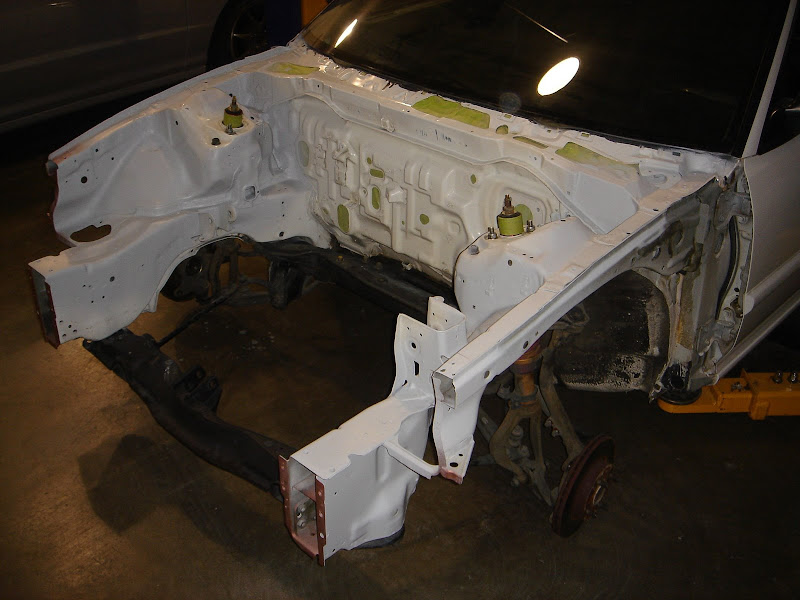
I was just thinking about my engine and how I’m not happy with the way it looks.
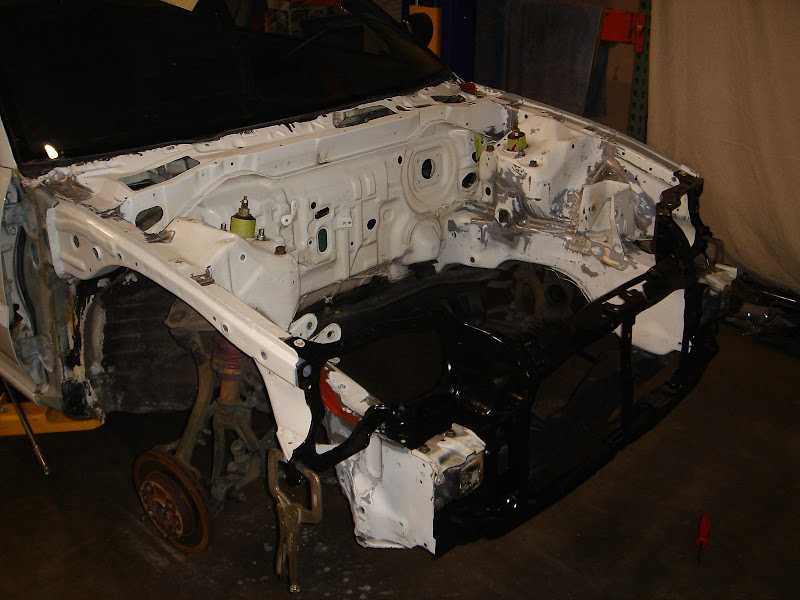
Primer just waiting for sanding and seam sealer
Knowing I won’t be driving the ’90 for a while I was screwing around on Craigslist and found a black ’90 that needed the parts I just took out of my white ’90. hmm… good fit and new DD! No more driving the racecar on the street!!!!
Anyway, I received my Innovative Mounts kit the other day. Now that the black ’90 is the daily driver I can use the mounts of choice - well close second. Okay not even close - I wanted a front clip but the kid who was buying the engine flaked out on me. I was going to use OE Hard mounts from the clip, but these will work - had to get shore 75A so they looked correct in my eye. I know this car will only make me happy - I hope!!!!
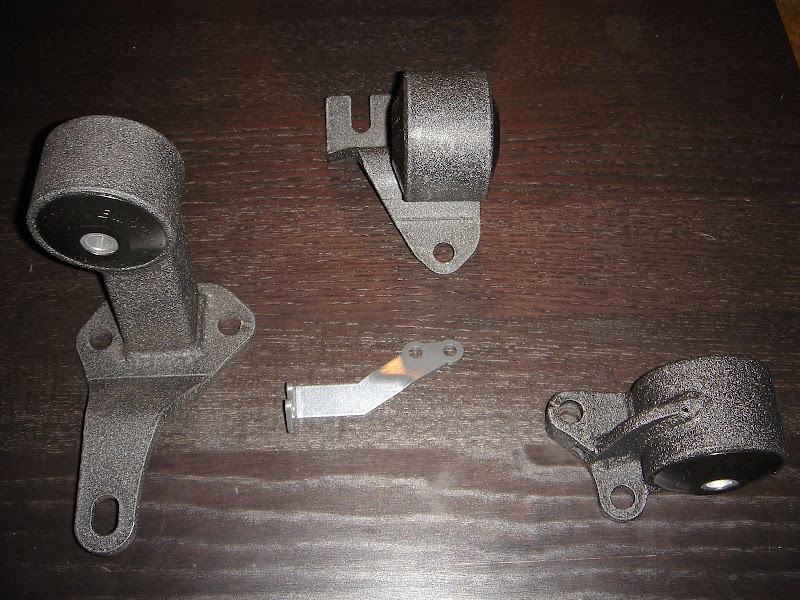
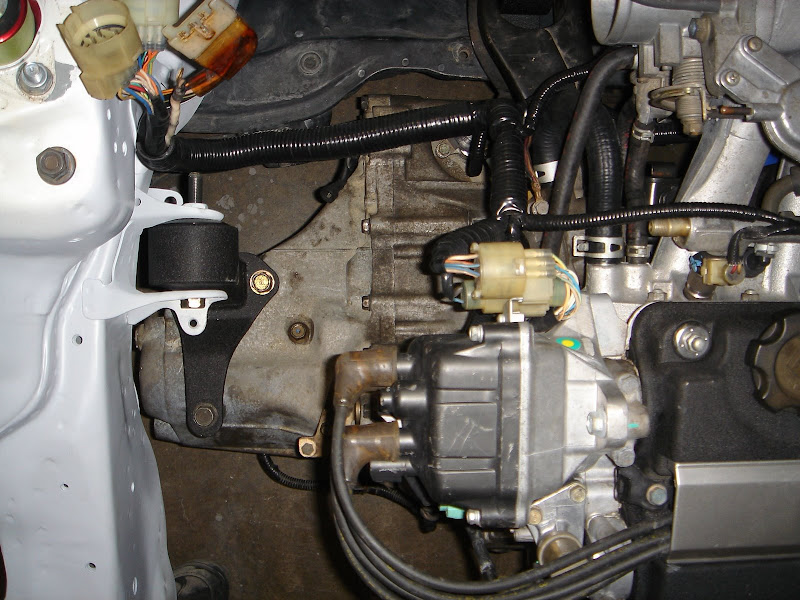
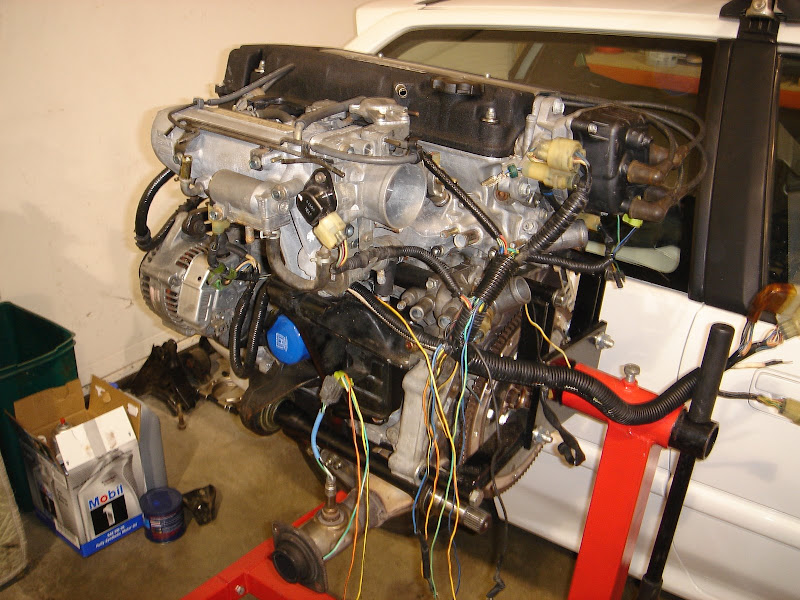
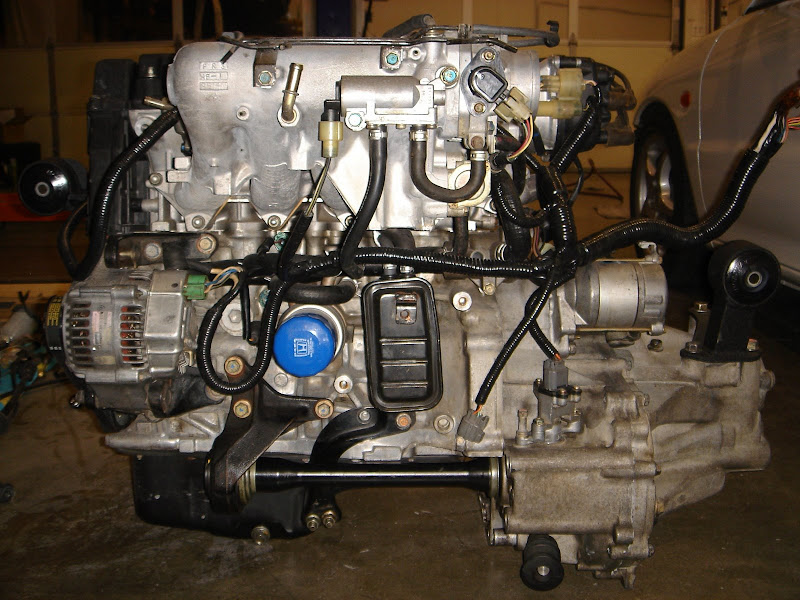
Now that the mounts are in I need to finish building my transmission and mate it to the engine - happened a few days ago - to see how everything fits.
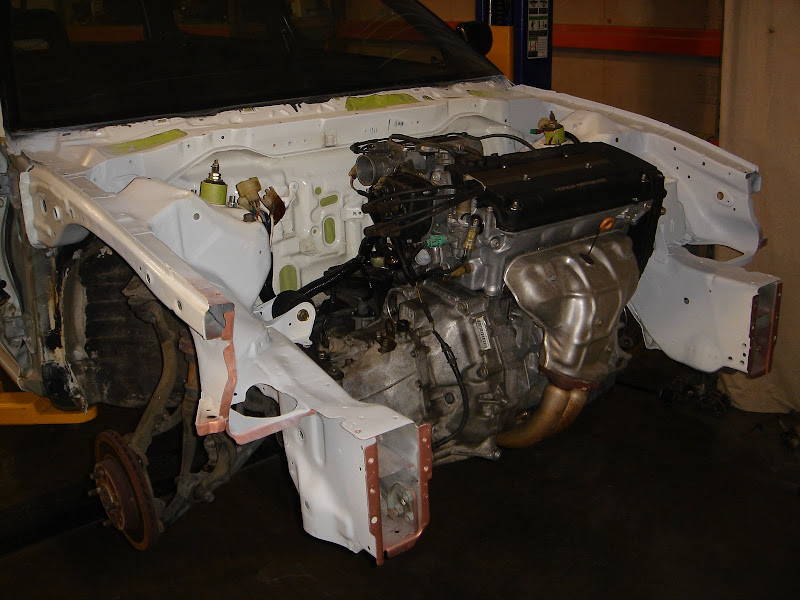

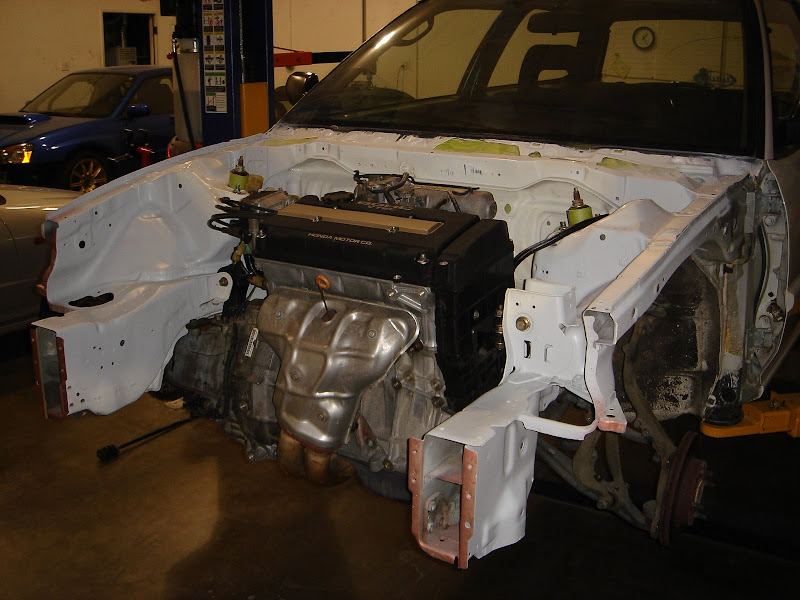
Sorry, the engine and transmission are still kind of dirty…
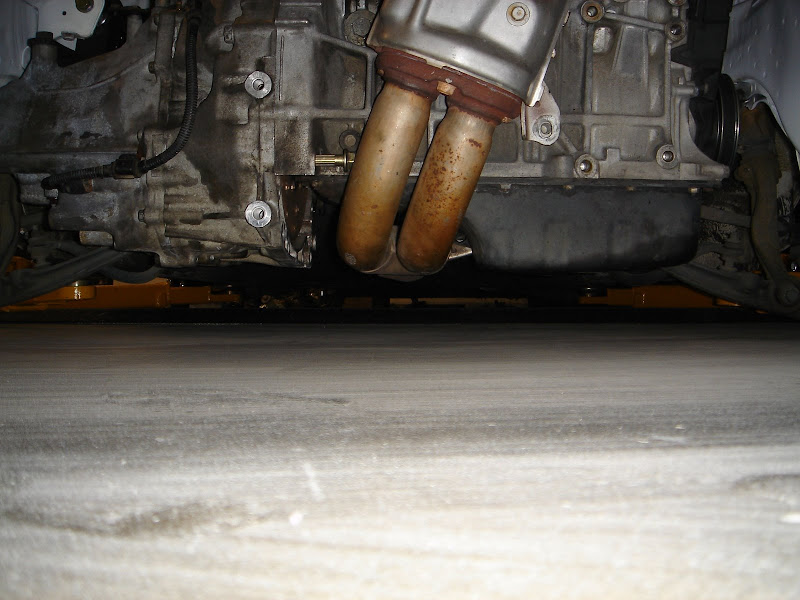
It’s a tight fit. Once the engine was bolted in the car I remembered why it took me so long to do this to my DD!

Primer just waiting for sanding and seam sealer
Knowing I won’t be driving the ’90 for a while I was screwing around on Craigslist and found a black ’90 that needed the parts I just took out of my white ’90. hmm… good fit and new DD! No more driving the racecar on the street!!!!
Anyway, I received my Innovative Mounts kit the other day. Now that the black ’90 is the daily driver I can use the mounts of choice - well close second. Okay not even close - I wanted a front clip but the kid who was buying the engine flaked out on me. I was going to use OE Hard mounts from the clip, but these will work - had to get shore 75A so they looked correct in my eye. I know this car will only make me happy - I hope!!!!
Now that the mounts are in I need to finish building my transmission and mate it to the engine - happened a few days ago - to see how everything fits.
Sorry, the engine and transmission are still kind of dirty…
It’s a tight fit. Once the engine was bolted in the car I remembered why it took me so long to do this to my DD!
Last edited by 01-0041; Jan 22, 2009 at 12:56 AM. Reason: spelling

Trending Topics
Thread Starter
Honda-Tech Member
Joined: May 2002
Posts: 697
Likes: 0
From: Not Here, WA
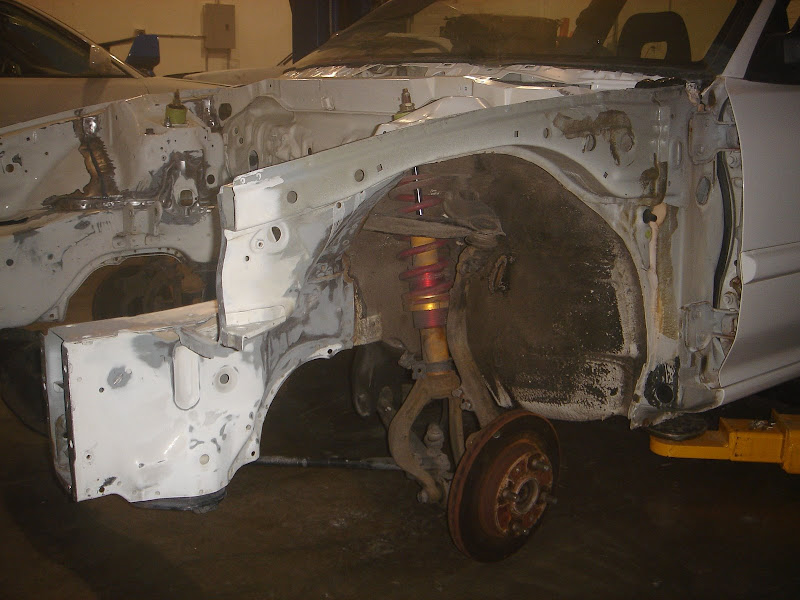
It’s just a mock up. The engine is coming out this evening. I need to massage the frame rail just a bit.
Plus:
- prep
- seam seal
- weld on the bulkhead
- paint
The list goes on…
Plus:
- prep
- seam seal
- weld on the bulkhead
- paint
The list goes on…

B*a*n*n*e*d
Joined: Jul 2008
Posts: 535
Likes: 0
From: Manahawkin, NJ, Ocean Country
Hey PLEASE let me were you got thorws heads for your D16???? If you what to I'll buy them off form you? But I this what to know who makes them???
Honda-Tech Member
Joined: Jan 2008
Posts: 5,191
Likes: 0
From: Portland, OR, USA
Nice build up! i love what you're doing to your car. Question: where did you get your bulk head, how much was it, and how hard is it to remove and re-install? I ask because i have an 89 dx hatch and it's all bent down on the drivers side above the headlight from it being shoved under another vehicle of some sort
Thread Starter
Honda-Tech Member
Joined: May 2002
Posts: 697
Likes: 0
From: Not Here, WA
Thread Starter
Honda-Tech Member
Joined: May 2002
Posts: 697
Likes: 0
From: Not Here, WA
Nice build up! i love what you're doing to your car. Question: where did you get your bulk head, how much was it, and how hard is it to remove and re-install? I ask because i have an 89 dx hatch and it's all bent down on the drivers side above the headlight from it being shoved under another vehicle of some sort
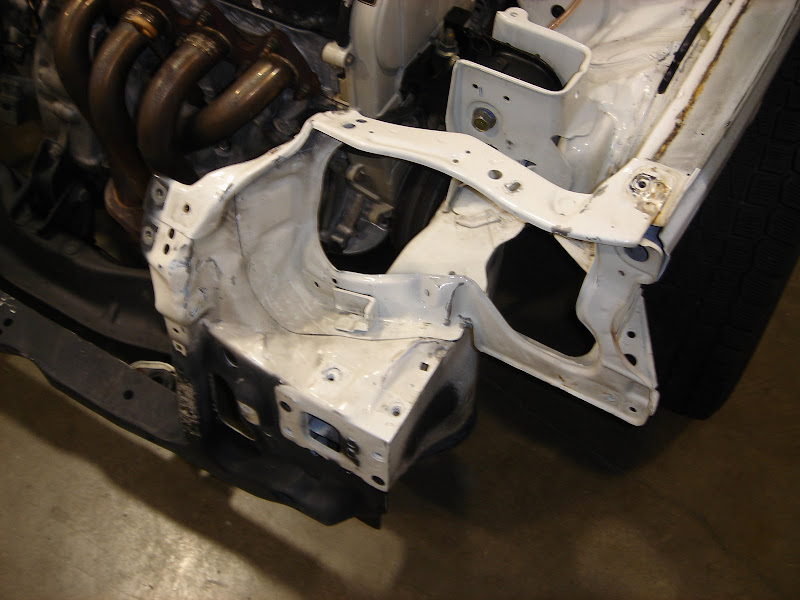
I typically don’t reveal many of my projects as some of the stuff I’ve developed may go to market once I’m done with school - the downside is I come from a true motorsports background so I take a lot of the things I’ve picked up over the years and apply them to my cars. You’ll notice I like the factory look and feel of Honda - it’s the only manufacture I ever owned!
The bulkhead is from our local Honda dealership…
Price depends on where you buy it and who you know - $227.02 online.
Removal wasn’t fun since it was replaced in ’98. I took the long way to remove it - grinding the welds to preserve the rest of the front…
You could use a spot weld drill, but they can do more harm than good.
Last edited by 01-0041; Dec 14, 2009 at 10:51 PM. Reason: Spelling
B*a*n*n*e*d
Joined: Jul 2008
Posts: 535
Likes: 0
From: Manahawkin, NJ, Ocean Country


Thread Starter
Honda-Tech Member
Joined: May 2002
Posts: 697
Likes: 0
From: Not Here, WA
Dribble for the day…
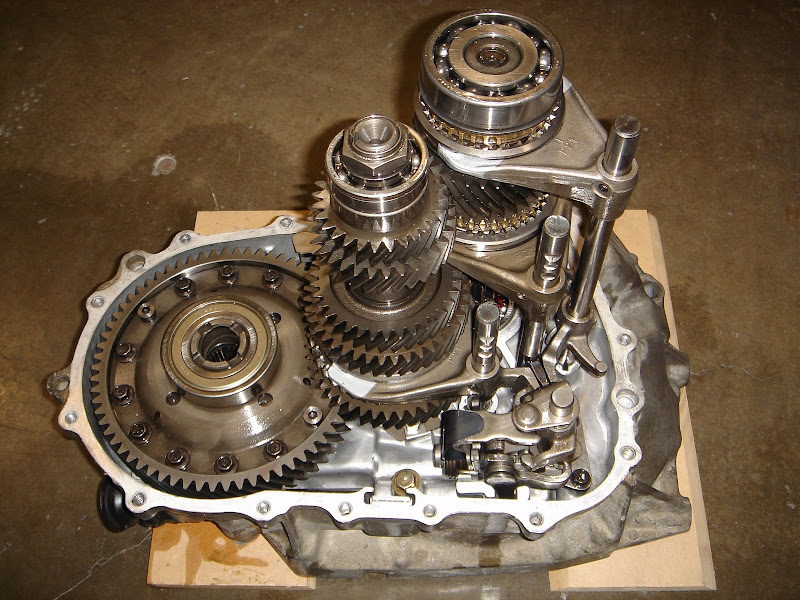
Finished the transmission last night - more of a fun shot of the internals ;-)
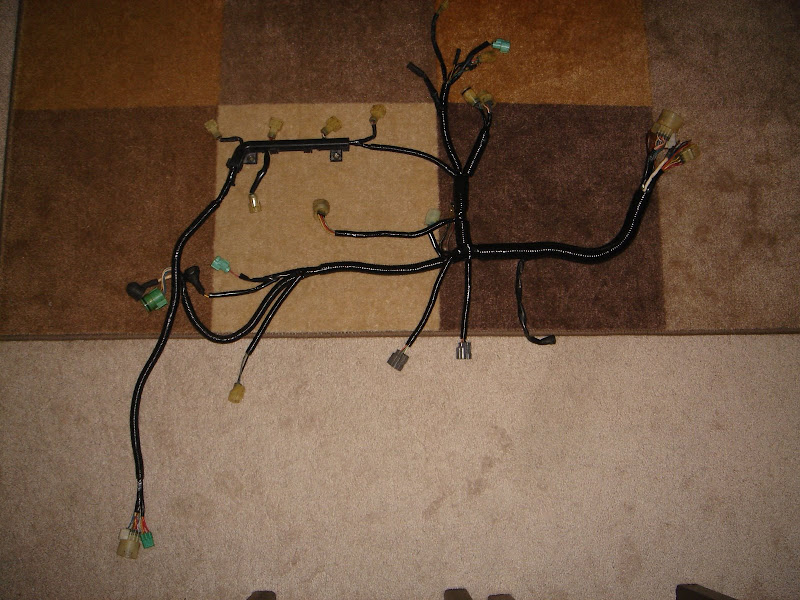
Ahh… the joys of wiring! I do love a good wiring harness. It’s kind of funny; over the years I’ve always wanted to find the distributor for Hondas electrical tape or should I say Sumitomo…
This is the start of my engine harness - only a few will notice what’s going on here
The harness at 95% - it only need a connector
Looking at my harnesses I guess Scotch tape will do since I’ve been using it for years. I just hate how shinny it is. On that note I wonder how long it’s going to take for someone to suggest shrink rapping etc. I’ll leave that for the racecar. When you think about it this is still going to be a street driven Civic.
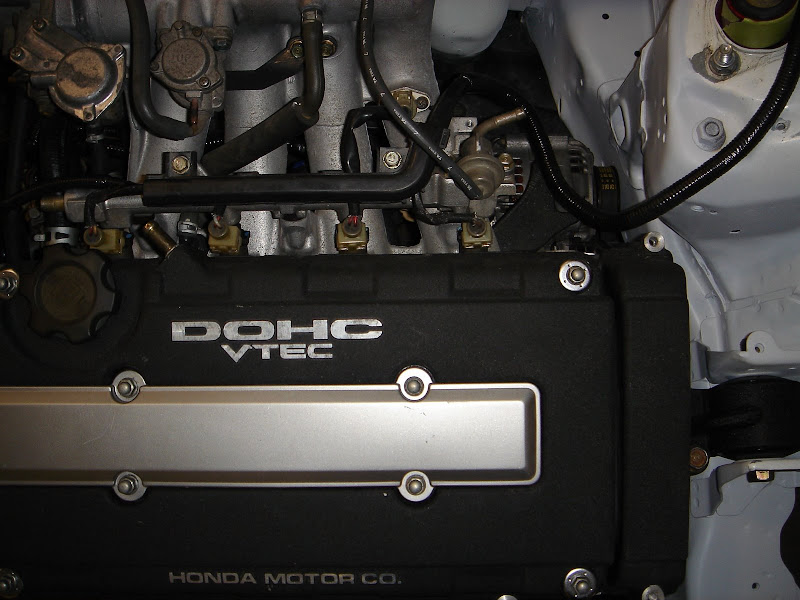
More fun with the engine… I need to reinstall it one last time for fitment now that I have the proper alternator belt length - it was really short

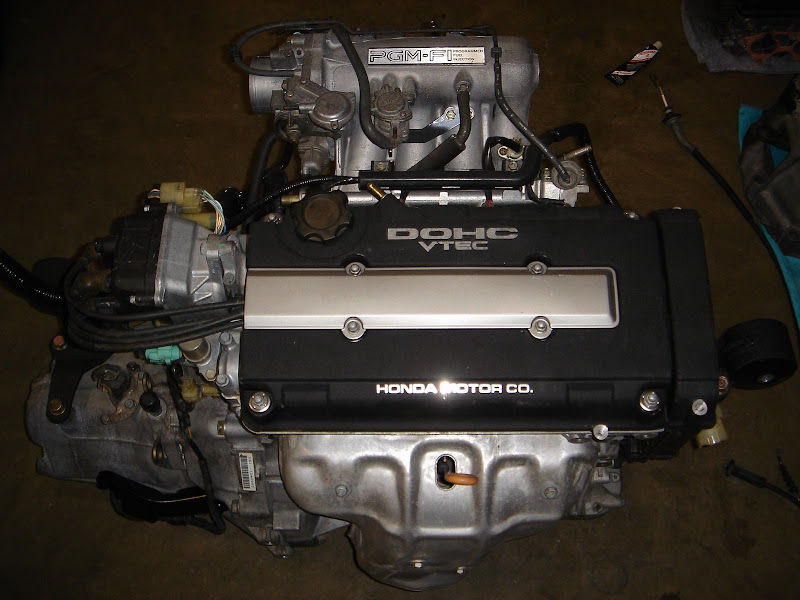
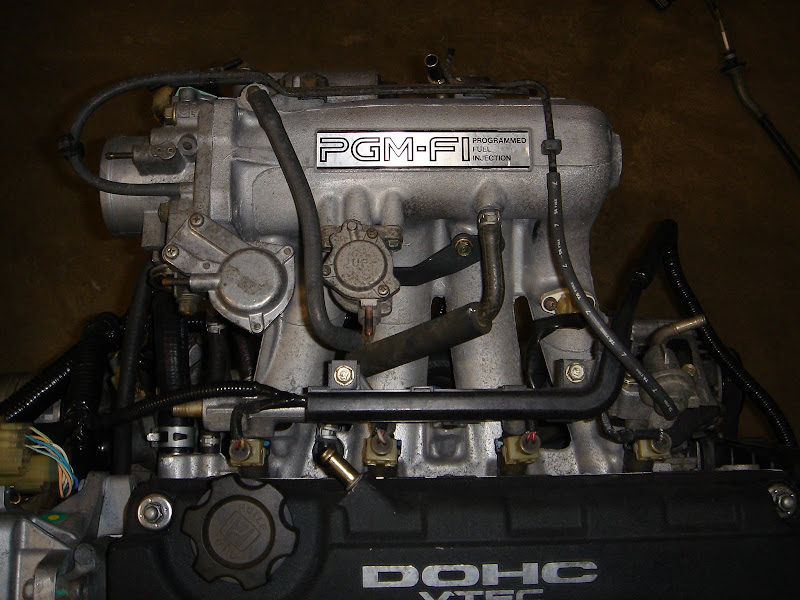
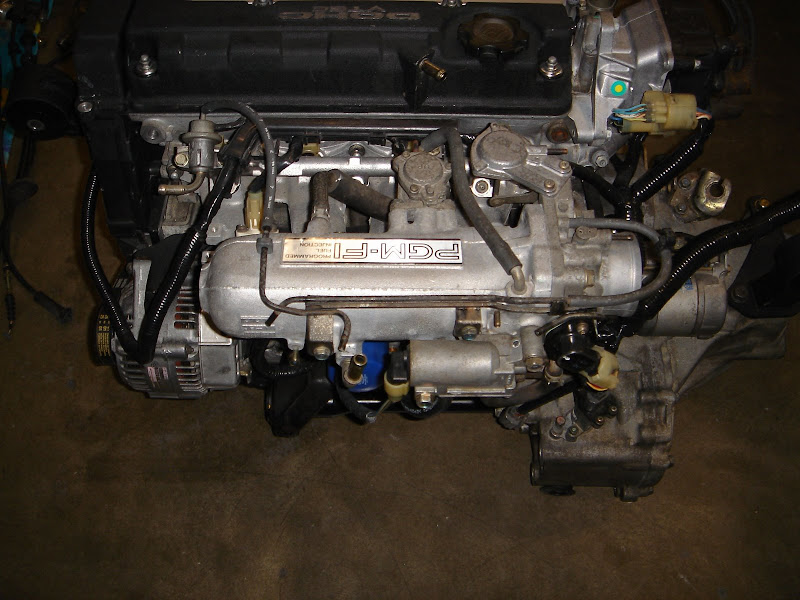
The last few pictures are more for fun than anything else. Since the engine and transmission were spares for my racecar everything should be good to go.
The only additions to this engine were the JDM OBD0 intake and throttle body.
The nice thing is I received the cable transmission from a friend who lent it to a friend who ran it out of oil. I guess the nice thing is the case is in great shape except for the oxidation on the outside. I know it’s clean as I ran it twice in the heated parts washer. Long story short I swapped all of the internals from one of my hydraulic transmissions only after modifying the case to except the limited slip differential.
- I need to say thank you to Guillaume and Ben of 20•20 Motorsports for their help on this little project!
More to come soon:
- Seam sealer
- Weld on bulkhead
- Finish prepping the engine bay
- Pressure wash the front wheel arch, scrub, and prep
- Paint
Lots to do!!!!
Finished the transmission last night - more of a fun shot of the internals ;-)
Ahh… the joys of wiring! I do love a good wiring harness. It’s kind of funny; over the years I’ve always wanted to find the distributor for Hondas electrical tape or should I say Sumitomo…
This is the start of my engine harness - only a few will notice what’s going on here
The harness at 95% - it only need a connector
Looking at my harnesses I guess Scotch tape will do since I’ve been using it for years. I just hate how shinny it is. On that note I wonder how long it’s going to take for someone to suggest shrink rapping etc. I’ll leave that for the racecar. When you think about it this is still going to be a street driven Civic.
More fun with the engine… I need to reinstall it one last time for fitment now that I have the proper alternator belt length - it was really short
The last few pictures are more for fun than anything else. Since the engine and transmission were spares for my racecar everything should be good to go.
The only additions to this engine were the JDM OBD0 intake and throttle body.
The nice thing is I received the cable transmission from a friend who lent it to a friend who ran it out of oil. I guess the nice thing is the case is in great shape except for the oxidation on the outside. I know it’s clean as I ran it twice in the heated parts washer. Long story short I swapped all of the internals from one of my hydraulic transmissions only after modifying the case to except the limited slip differential.
- I need to say thank you to Guillaume and Ben of 20•20 Motorsports for their help on this little project!
More to come soon:
- Seam sealer
- Weld on bulkhead
- Finish prepping the engine bay
- Pressure wash the front wheel arch, scrub, and prep
- Paint
Lots to do!!!!
Thread Starter
Honda-Tech Member
Joined: May 2002
Posts: 697
Likes: 0
From: Not Here, WA
…just another night of working on the car!
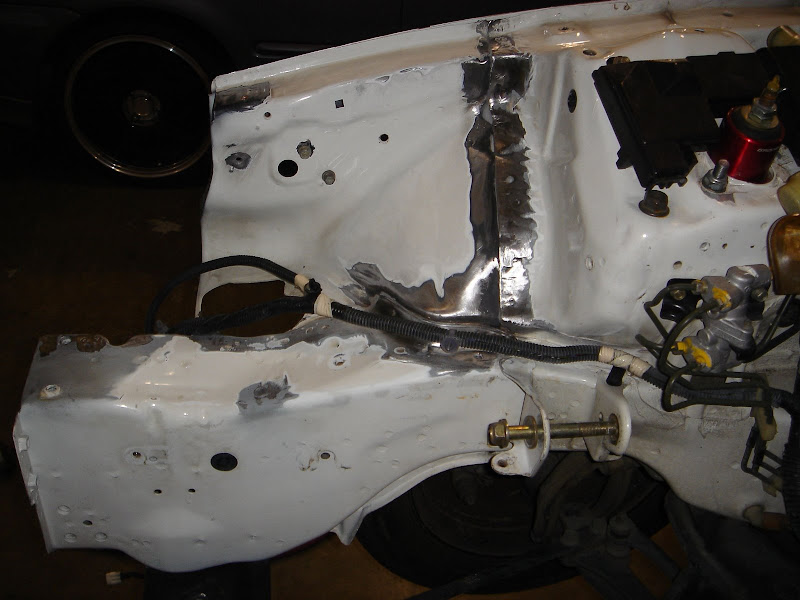
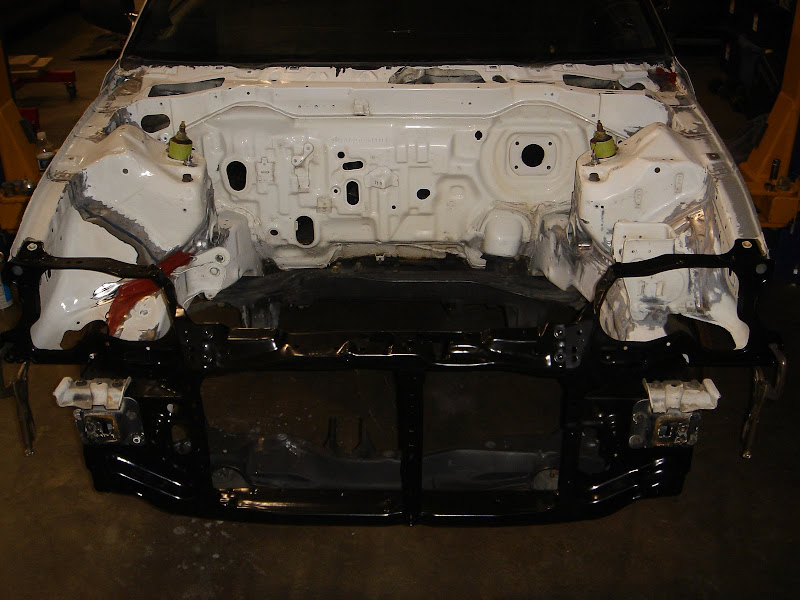
I’ll call this step four of a six step process. I did most of the work a couple of days ago now, but here’s what it should look like when it goes in the car. I need to scuff it for the final coat of paint then reassemble for final installation - after the engine bay is painted of course.
Funny story of the day: wrecked car, engineer, and a factory bulkhead…
I now know I’m never going to make money doing bodywork! I’ve fit the bulkhead four times now and I think I’m finally happy with the result. ;-) If you look at the pictures below they only tell you half of the story. Let’s just say if it could be perfect this is as close as it’s going to get and yes, I did use the calipers!
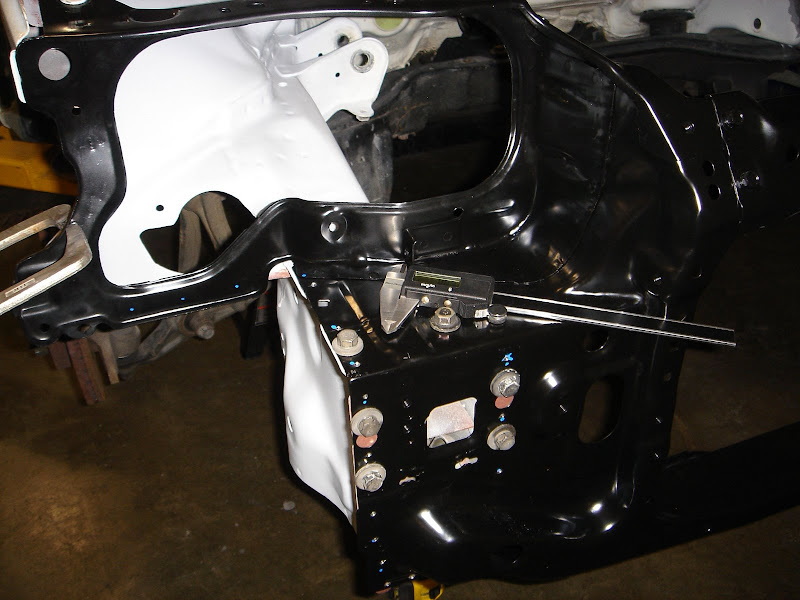

Honda-Tech Member
Joined: Oct 2007
Posts: 444
Likes: 1
From: Long Island, N.Y., U.S.A
looks good. ive been looking fora shot of the back of a b16 assembled. if the motor is still out of the car can you take one back shot with the harness moved. I am curious as to where the hoses exiting the oil catch can go.