

part 1: my dc2 wire tuck and rhd conversion build WITH PICS

Thread Starter
Junior Member
Joined: Oct 2007
Posts: 242
Likes: 0
From: los angeles, ca, usa
heres a few pics of my right hand conversion i just did on my dc2 along with adding type r front end once done, i have done a wire tuck and im just posting pics of it so theres another wire tuck to get ideas from....may not be the greatest but i think im doing a ok job so far...all questions and comments welcome, if there more i need to learn ill get it from you guys from this post.....( NOTE THIS RIGHT HAND AND WIRE TUCKING HAS BEEN GOING ON ABOUT 2 WEEKS NOW AT THIS POINT)
my 97 ls in stock form


dirty as hell but well worth it once done

all interior taken out and usdm firewall ready to have all spot welds drilled out, its about 100 of them roughly, ( NO HACKING IT OUT) complete firewall only

here is a interior shot from the rear, what you know about gutted out interior, lol....

heres engine bay with all removed

heres a front shot, this is alot of work can not be done without right tools, do not attempt this thinking it can be done in a couple days if you have no experience as you can see the mess you make at this point

here is my front clip that i have to tear apart, this is the downtime before the fun starts, i also have to take out the left engine bay beam and replace due to last owner runing into parking block right at the tow hooks and bent part of the frame....got my drill welder, grinder and all required tools to get job done, time to get started!!!!

firewall installed next day and fit like a glove just needs to be welded up at the seams and all the spot welds re spotted with the welder, as you can see i replaced that engine bay beam and bolted on type r radiator support, before i weld it i need to make sure all front end lines up correctly as i can change that once welded up

my jdm vin unfortunetly its gotta get cut out and U.S. vin welded in just to clear up the headache i may have later with dmv if something were to happen and they see different vin's

firewall installed and right beam in engine bay has been replaced, also type r radiator support bolted on just to make sure everything lines back up

a pic of some of the spot welds that got welded back up so you can see, the whole wall in and out has been welded back up and even more fro extra protections to make sure wall is in there and good!!!!!

here is that pic of my vin from US firewall and welded into jdm wall, very important that vin number match up or you will have a headache with dmv if this simple cosmetic change will save you trouble


now engine bay is ready and painted to start wire tuck adn bolt on things

my 97 ls in stock form
dirty as hell but well worth it once done
all interior taken out and usdm firewall ready to have all spot welds drilled out, its about 100 of them roughly, ( NO HACKING IT OUT) complete firewall only
here is a interior shot from the rear, what you know about gutted out interior, lol....
heres engine bay with all removed
heres a front shot, this is alot of work can not be done without right tools, do not attempt this thinking it can be done in a couple days if you have no experience as you can see the mess you make at this point
here is my front clip that i have to tear apart, this is the downtime before the fun starts, i also have to take out the left engine bay beam and replace due to last owner runing into parking block right at the tow hooks and bent part of the frame....got my drill welder, grinder and all required tools to get job done, time to get started!!!!
firewall installed next day and fit like a glove just needs to be welded up at the seams and all the spot welds re spotted with the welder, as you can see i replaced that engine bay beam and bolted on type r radiator support, before i weld it i need to make sure all front end lines up correctly as i can change that once welded up
my jdm vin unfortunetly its gotta get cut out and U.S. vin welded in just to clear up the headache i may have later with dmv if something were to happen and they see different vin's
firewall installed and right beam in engine bay has been replaced, also type r radiator support bolted on just to make sure everything lines back up
a pic of some of the spot welds that got welded back up so you can see, the whole wall in and out has been welded back up and even more fro extra protections to make sure wall is in there and good!!!!!
here is that pic of my vin from US firewall and welded into jdm wall, very important that vin number match up or you will have a headache with dmv if this simple cosmetic change will save you trouble
now engine bay is ready and painted to start wire tuck adn bolt on things
Last edited by rhdekhatchie; Dec 10, 2008 at 11:24 AM.


Thread Starter
Junior Member
Joined: Oct 2007
Posts: 242
Likes: 0
From: los angeles, ca, usa
thanks im trying to do this one right, i know people have there opinions on rhd conversion...my thing is if you going to do it make sure you do it right, ill keep updates going appreciate the compliments though


Trending Topics
Thread Starter
Junior Member
Joined: Oct 2007
Posts: 242
Likes: 0
From: los angeles, ca, usa
here is pics of my wire tuck so far that im doing, this pic is where i mounted the fuse box

this pic is of the left side of the cabin harness that i have to hang/guide through side frame plug that power door wires run through
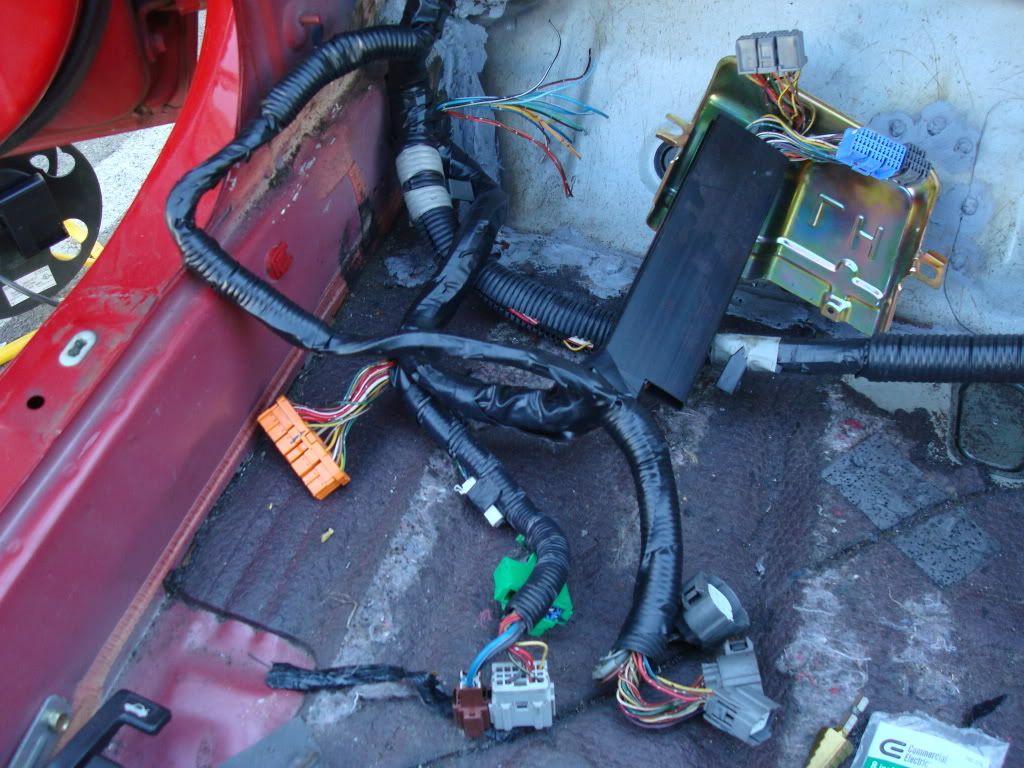
this is where i ran headlight/abs/ground wires through and re taped everything up for protection, asyou can see i have ran the wring through the plug that door wires run through....it is very clean and safe way to do it this way so no wires get rubbed on metal and further cause electrical problems later, also the orange abs plug im going to guide through a hole thats right between the fender lining and frame if you can see right to the upper left

here is a pic of my harness half way through the left side of the car, as you can see ive re taped everything back up and hung my abs fuse box nice and neat along frame....(NOTE I AM GOING TO BE HIDING MY ABS PUMP INSIDE THE CAR UNDER THE DASH AND STEEL BRAIDED LINES ARE GOING TO BE USED TO OPERATE SO I DONT LOOSE ABS)

i will be extending those orange abs plugs hanging back into the car later once i get extra wire from my jdm cabin harness, this is just another shot of the left side

here is where i have all my grounds for left side, no need to drill new holes as the ones you use on the inside of the engine bay work fine. you just have to put 10mm bolt in through the backside and there you go

here is a overall pic of left side 90 percent done

these wires are wires that come from my switch on my left door, i have to extend them to right side so i can have master switches over there now that car is right hand

now here is where my wiring has been tacked up with mount hold zip ties, you can get from home depot its a clean and easy way to hold up harness....notice the plugs there are the plugs that would normally be guided through the upper left/right sides of the firewall and the engine harness would connect to them, but since wires will be hiding the engine harness will wrap under intake manifold and down into the hole right above the harness in the middle of pic

now the right side, cant say this sides easier as it is not, im going to have fun with this side, you got to have patience with this or you will f*#k up bad and not know where to start, oh and the grey wire harness cover there i have to remove and take the once off from the jdm cabin harness so i can bold it up to the firewall exactly like it would be in a right hand dc2

another shot
now here is right side harness tucked on outside, done same way as left

here the wire to the left is guided through a already drill hole and ran to the wiper motor out the way or eyes, and the wire to the right is the brake resivour cap wires that will be coming out of the shock tower a connected straight to cap without much wire to be seen

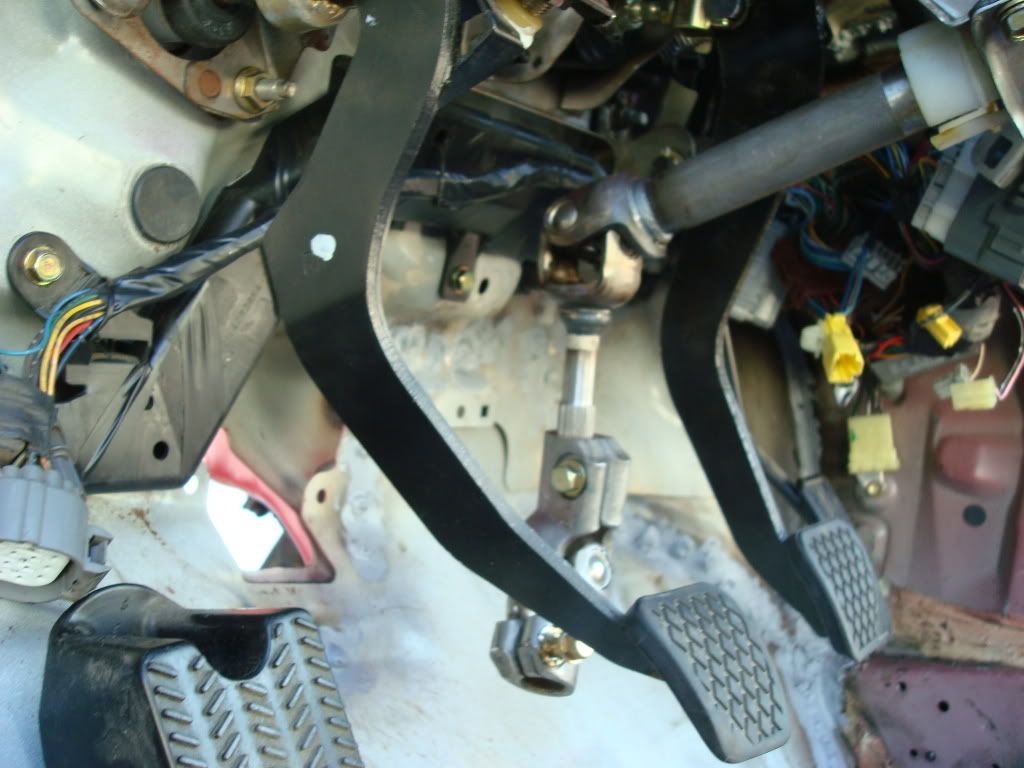
here is right side where grounds are bolted up once again

there is the harness bolted up behind the pedals nice and neat, pays off to take time out and do it right for a better outcome.
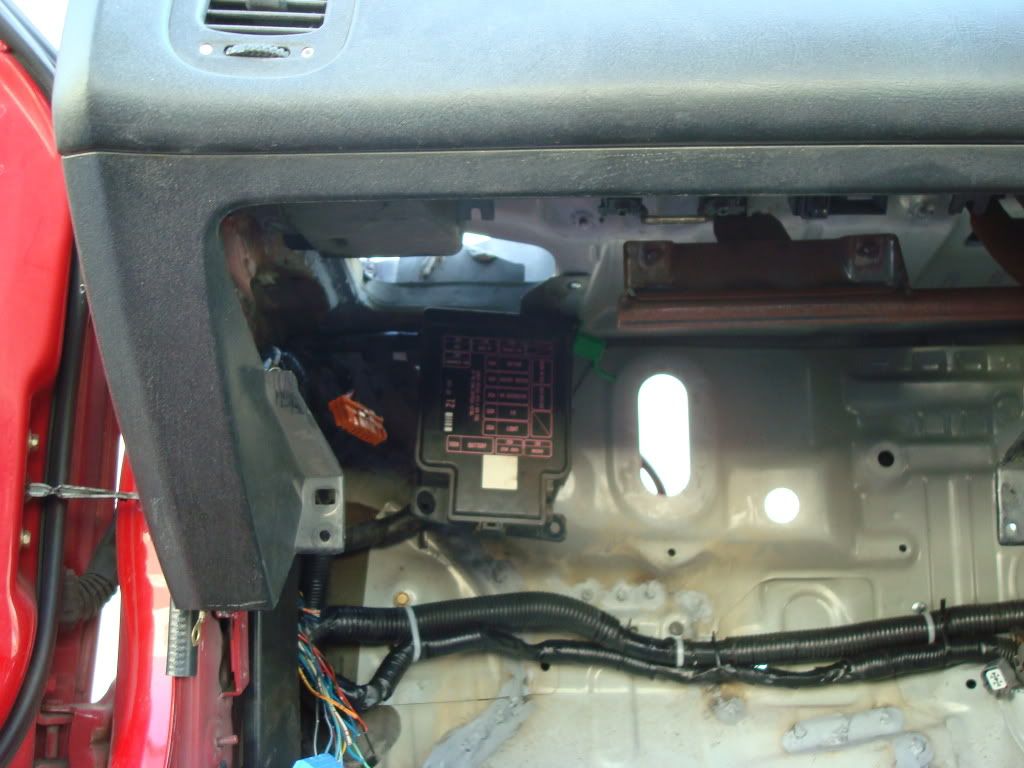
now i have to clean up around under dash fuse panel and start getting things plugged in and some things extended to plug in so this area will be clean
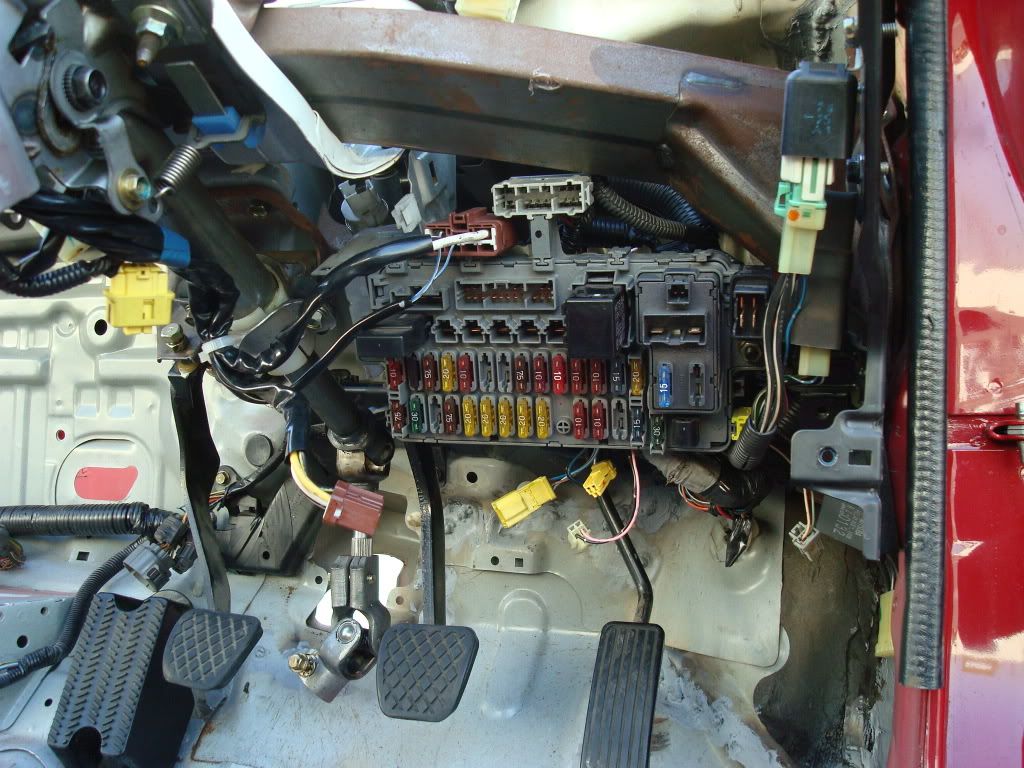
now here is pic of fuse box with dash installed to make sure everything was out the way and dash could bolt up

notice the hole above fuse box, i will be welding that closed so no water leaks as it will rop right on to box and into my car....
another shot of dash installed along with the steering column


now time to bolt up crossmember and all other things im going to keep in engine bay WILL UPDATE PICS AS I GO ALONG AND MAKE CORRECTIONS ON ALL WIRE EXTENSIONS AND POST PICS OF THOSE.....STAY TUNED AND SEE HOW IT COMES OUT, THANKS FOR LOOKING AND ANY QUESTIONS BE MORE THEN GLAD TO ANSWER OR OPINIONS!!!!

this pic is of the left side of the cabin harness that i have to hang/guide through side frame plug that power door wires run through
this is where i ran headlight/abs/ground wires through and re taped everything up for protection, asyou can see i have ran the wring through the plug that door wires run through....it is very clean and safe way to do it this way so no wires get rubbed on metal and further cause electrical problems later, also the orange abs plug im going to guide through a hole thats right between the fender lining and frame if you can see right to the upper left
here is a pic of my harness half way through the left side of the car, as you can see ive re taped everything back up and hung my abs fuse box nice and neat along frame....(NOTE I AM GOING TO BE HIDING MY ABS PUMP INSIDE THE CAR UNDER THE DASH AND STEEL BRAIDED LINES ARE GOING TO BE USED TO OPERATE SO I DONT LOOSE ABS)
i will be extending those orange abs plugs hanging back into the car later once i get extra wire from my jdm cabin harness, this is just another shot of the left side
here is where i have all my grounds for left side, no need to drill new holes as the ones you use on the inside of the engine bay work fine. you just have to put 10mm bolt in through the backside and there you go
here is a overall pic of left side 90 percent done
these wires are wires that come from my switch on my left door, i have to extend them to right side so i can have master switches over there now that car is right hand
now here is where my wiring has been tacked up with mount hold zip ties, you can get from home depot its a clean and easy way to hold up harness....notice the plugs there are the plugs that would normally be guided through the upper left/right sides of the firewall and the engine harness would connect to them, but since wires will be hiding the engine harness will wrap under intake manifold and down into the hole right above the harness in the middle of pic
now the right side, cant say this sides easier as it is not, im going to have fun with this side, you got to have patience with this or you will f*#k up bad and not know where to start, oh and the grey wire harness cover there i have to remove and take the once off from the jdm cabin harness so i can bold it up to the firewall exactly like it would be in a right hand dc2
another shot
now here is right side harness tucked on outside, done same way as left
here the wire to the left is guided through a already drill hole and ran to the wiper motor out the way or eyes, and the wire to the right is the brake resivour cap wires that will be coming out of the shock tower a connected straight to cap without much wire to be seen
here is right side where grounds are bolted up once again
there is the harness bolted up behind the pedals nice and neat, pays off to take time out and do it right for a better outcome.
now i have to clean up around under dash fuse panel and start getting things plugged in and some things extended to plug in so this area will be clean
now here is pic of fuse box with dash installed to make sure everything was out the way and dash could bolt up
notice the hole above fuse box, i will be welding that closed so no water leaks as it will rop right on to box and into my car....
another shot of dash installed along with the steering column
now time to bolt up crossmember and all other things im going to keep in engine bay WILL UPDATE PICS AS I GO ALONG AND MAKE CORRECTIONS ON ALL WIRE EXTENSIONS AND POST PICS OF THOSE.....STAY TUNED AND SEE HOW IT COMES OUT, THANKS FOR LOOKING AND ANY QUESTIONS BE MORE THEN GLAD TO ANSWER OR OPINIONS!!!!
Thread Starter
Junior Member
Joined: Oct 2007
Posts: 242
Likes: 0
From: los angeles, ca, usa
ok here is another update, today i swapped vins from left hand dash to right hand dash, i just drilled out rivets and pulled plate off and riveted it into thte right hand dash....heres pics of usdm dash

here are pics with vin on right hand dash


then here is pic with vin lined up with dash and window installed, now it has a perfect visible vin on the dash that can be seen through the winsdshield where its supposed to be.....for those cops that would have a aissue with not been able to see a vin in the dash and have your car towed and sent to dmv ref to have checked out.....these lil changes make life alot easier


now here is some wires from the inside cabin harness along left off interior that i hade to extend....LOOK AT THAT MESS!!!


NOW ALL ELECTRICAL TAPE HA BEEN REWRAPPED AROUND AND LOOKS NORMAL AND NOW EXTENDED TO RUN ACROSS FIREWALL TO THE RIGHT AND PLUG IN AT THE UNDER DASH FUSE BOX WHICH IS NOW ON MY RIGHT, LOOKS SO MUCH BETTER NOW!!!!!


WILL UPDATE PICS OF ROUTING WIRES BACK AND FORTH ALONG FIREWALL ONCE I COMPLETE THE RIGHT SIDE NOW, ILL DO THAT TOMM.!!!!
here are pics with vin on right hand dash
then here is pic with vin lined up with dash and window installed, now it has a perfect visible vin on the dash that can be seen through the winsdshield where its supposed to be.....for those cops that would have a aissue with not been able to see a vin in the dash and have your car towed and sent to dmv ref to have checked out.....these lil changes make life alot easier
now here is some wires from the inside cabin harness along left off interior that i hade to extend....LOOK AT THAT MESS!!!
NOW ALL ELECTRICAL TAPE HA BEEN REWRAPPED AROUND AND LOOKS NORMAL AND NOW EXTENDED TO RUN ACROSS FIREWALL TO THE RIGHT AND PLUG IN AT THE UNDER DASH FUSE BOX WHICH IS NOW ON MY RIGHT, LOOKS SO MUCH BETTER NOW!!!!!
WILL UPDATE PICS OF ROUTING WIRES BACK AND FORTH ALONG FIREWALL ONCE I COMPLETE THE RIGHT SIDE NOW, ILL DO THAT TOMM.!!!!
Thread Starter
Junior Member
Joined: Oct 2007
Posts: 242
Likes: 0
From: los angeles, ca, usa
ok this morning i have shaved my rear moldings on quarter panels on both sides, i welded a peice of 1/4 inch square plates on the inside of the cabin, it was easy cause my rear panels are already out and side molding holes are easy to access while i have interior stripped so i got this out the way, my doors are type r doors i just bought are red type r doors so there is no moldings to shave.... im going to block and sand the holes then spray so it doesnt rust until i get paint job....here is pic of before and 2 pics after....


Thread Starter
Junior Member
Joined: Oct 2007
Posts: 242
Likes: 0
From: los angeles, ca, usa
here is a quick update from over the weekend i finsished the wire tuck mmore less i juust have to weld a braket under dash to hold abs pump and then start doing mmy brake line tuck, but i thought i post pics of the interior all installed and the tuck so far, also the wires hanging from roof are my sunfroof wires i have to extend and run accross roof interior, i will be installing a carbon fiber headliner that i have and i will update that when i install that headliner...i have came a long way in almost 3 weeks i say i just need to continue and ill be done soon...anyone with any questions let me know or your opinions as i know ill get the truth from you guys....thanks, now time to continue.....be back soon with next update!!!!


