

HOW TO make you own camera mount for $5.

Thread Starter
Honda-Tech Member
Joined: Nov 2007
Posts: 2,740
Likes: 0
From: Jersey
I first posted this thread in the audio/security/video forum, but I think it can also be here since it is specific to my car (a 2006-current civic).
Welcome...I was tired of watching videos of people filming themselves driving, while they hold the camera, or with it taped to their steering wheel. I actually don't intend to film myself driving too much, but I thought I would help my fellow car enthusiasts. This is made from PVC that I had laying around, and under $3 in hardware purchased from Home Depot. Keep in mind, that this mount is made specifically for my car (2008 Si) and specifically for my camera (Casio Exilim). It mounts onto the passenger side headrest posts, and is made that I can have my car comfortably full of people without them (or I) hitting the camera mount. You may need to make adjustments to make it work for you, but you should still be able to follow my basic plan. Read through the entire post before you decide to tackle this, so you can better understand what you need, and what needs to be done.
*Seat posts for 2006+ SIs are 6 5/8" apart (to the center) so if yours are the same, you can pretty much follow this verbatum*
What you'll need for this project:
Length of 1/2" PVC pipe (14 3/8" to be exact)
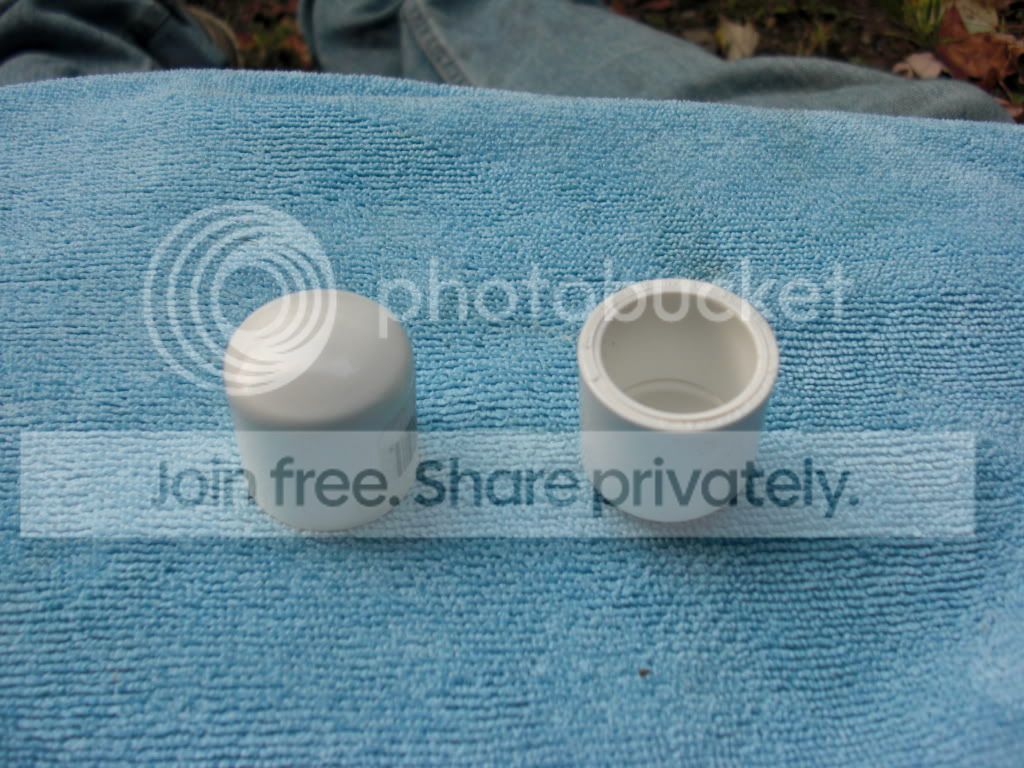
(2) 1/2" PVC end caps
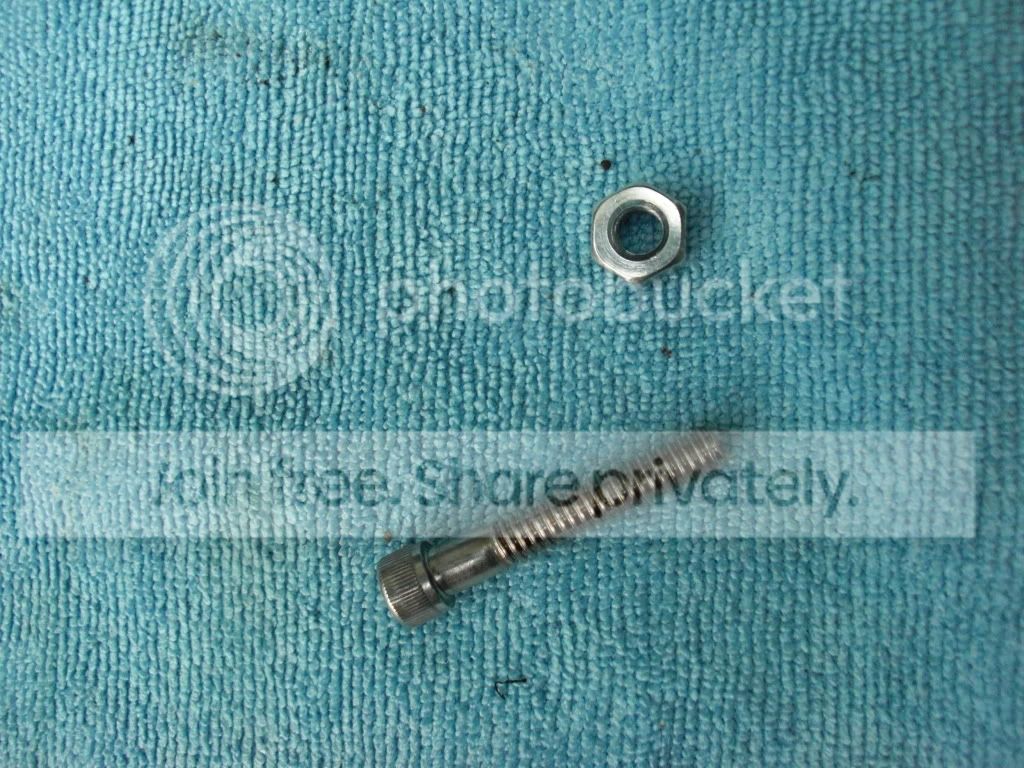
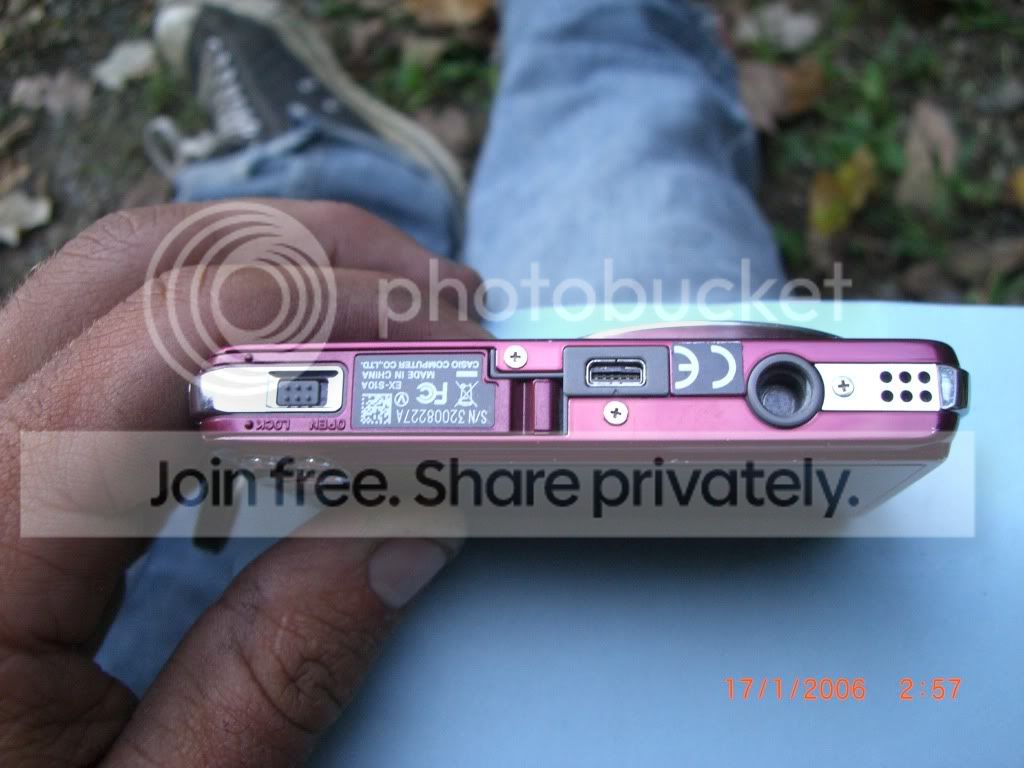
Cap Screw Socket (1/4" x 1.5" with 3/16" allen socket in top) and 7/16" nut that fits the 1/4" cap screw. Best to bring your camera in Home Depot with you to check if the screw is the proper thread for the mount hole in the bottom.
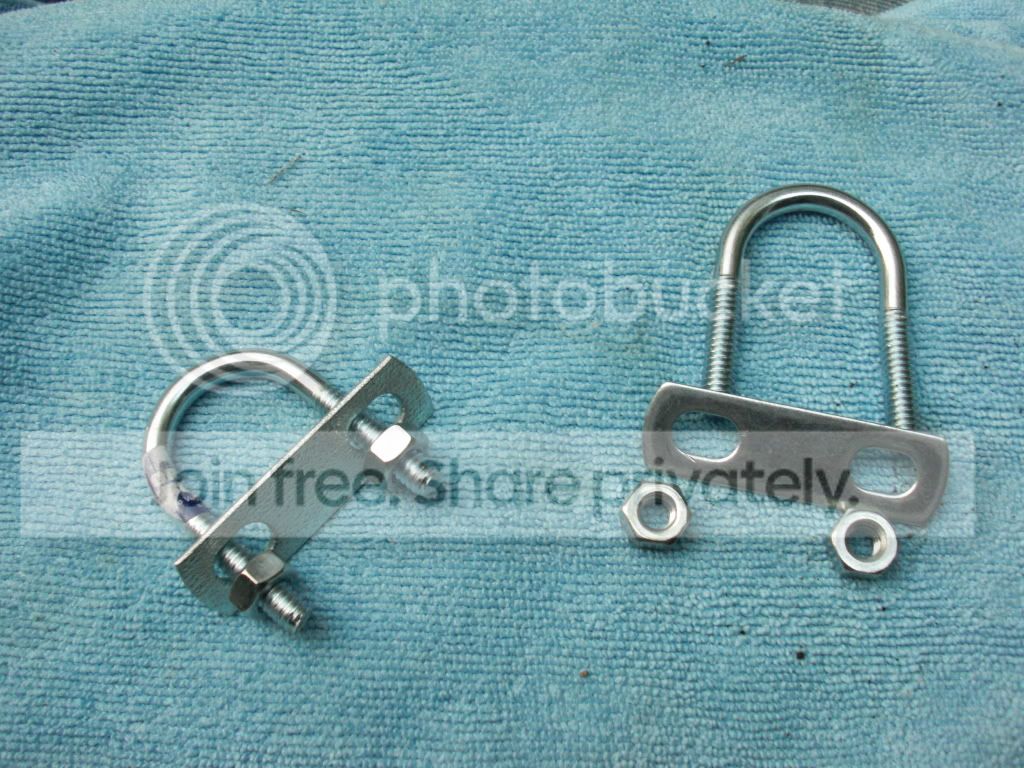
(2) 1/4" U-bolts (they come assembled as shown below). The space between the two threaded pieces should be 1 1/4".
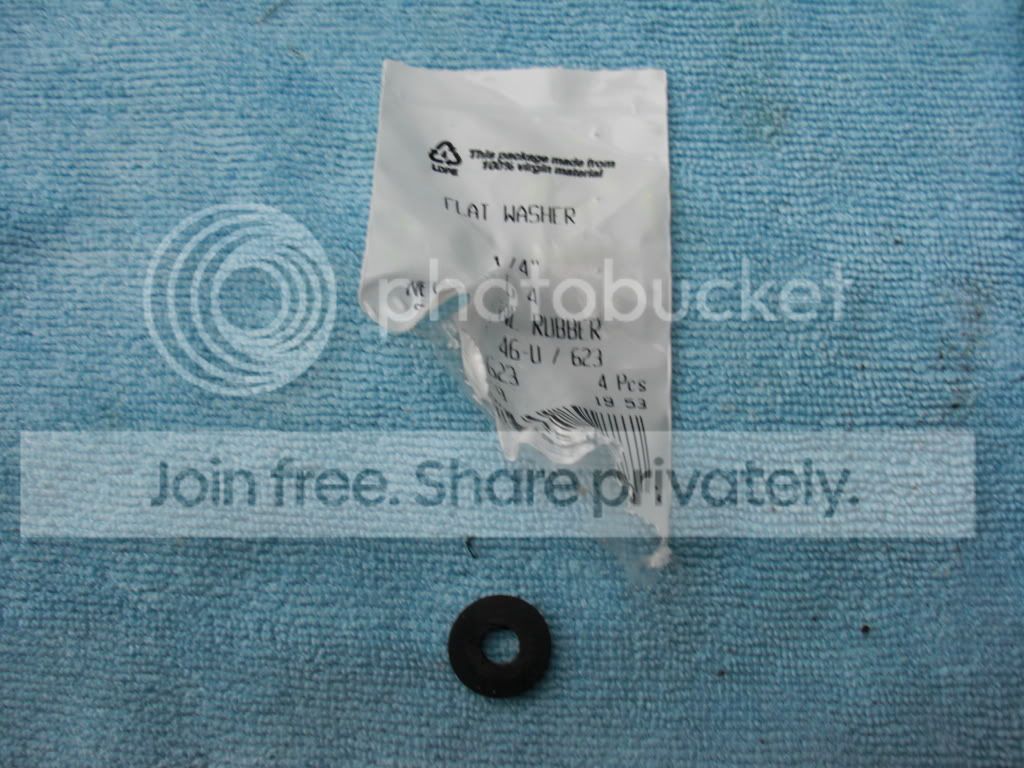
(8) 1/4" Rubber washers. The ones I got came in bags of 4.
(4) 1/4" Rubber screw caps

Hacksaw
7/16" Wrench
3/16" Allen Key
Drill w/ 1/4" bit
Optional (if you plan to paint it):
400 grit sandpaper or steel wool
1000 (or higher) sandpaper
Primer
Paint of choice
Now...the fun part.
Step 1:
Cut the PVC to length (14 3/8") with the hacksaw. Gently sand away the burrs on the end(s).
Step 2:
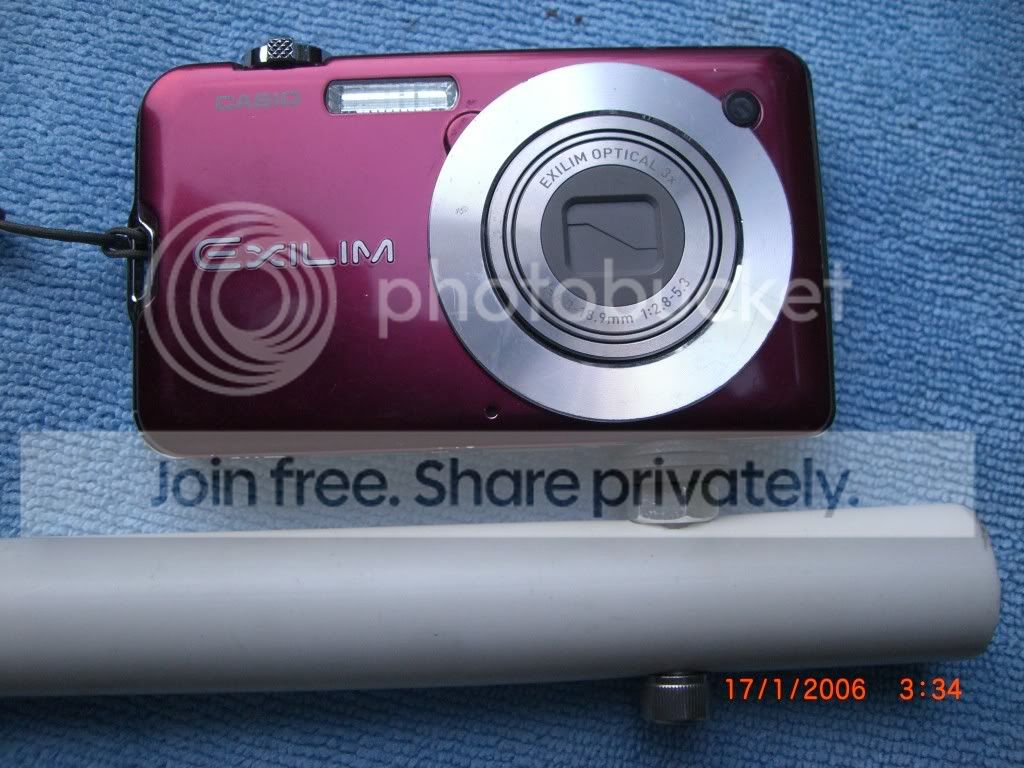
Measure for camera mount. Mine is 1 5/8" from the end of the pvc, set up for my Casio Exilim with this offset mounting hole. You may need to adjust the measurement either way if you mounting hole is in another location.
Notice how mounting hole is not is center of camera.
Step 3:
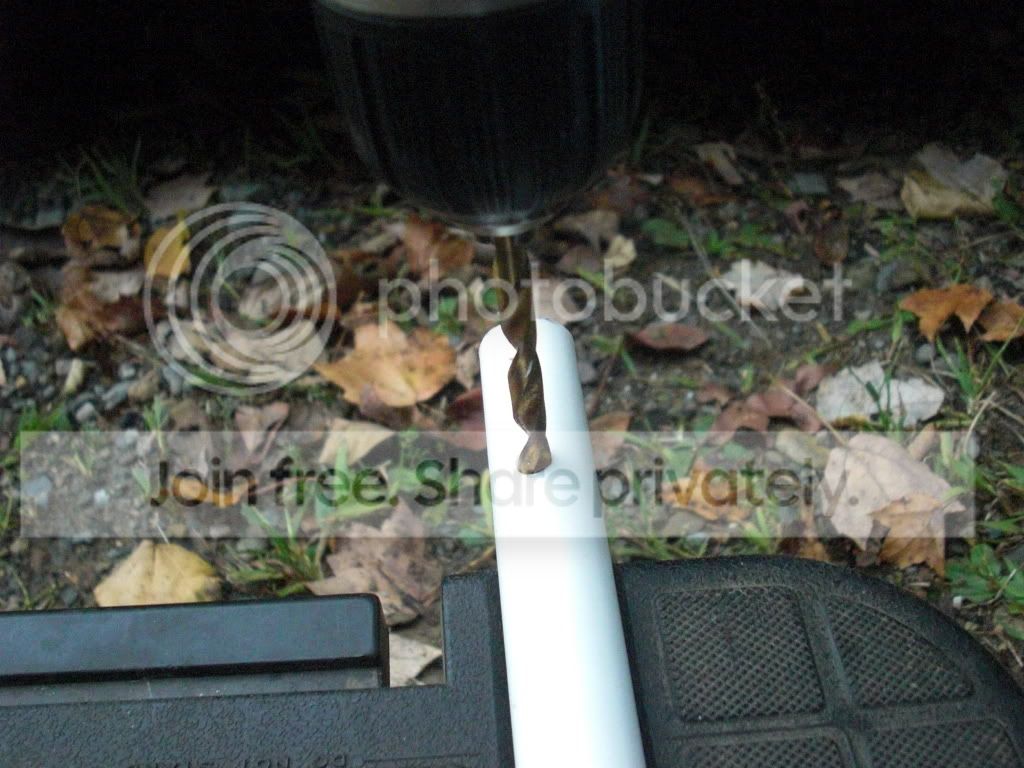
Drill hole for camera mounting screw. Keep the drill as close to square as possible. *A drill press comes in handy for this process. I used a drill press to drill all of my holes, and they came out perfectly square. I just took the pictures with my drill/bit in the holes, for the majority of you who don't have a drill press*
Step 4:
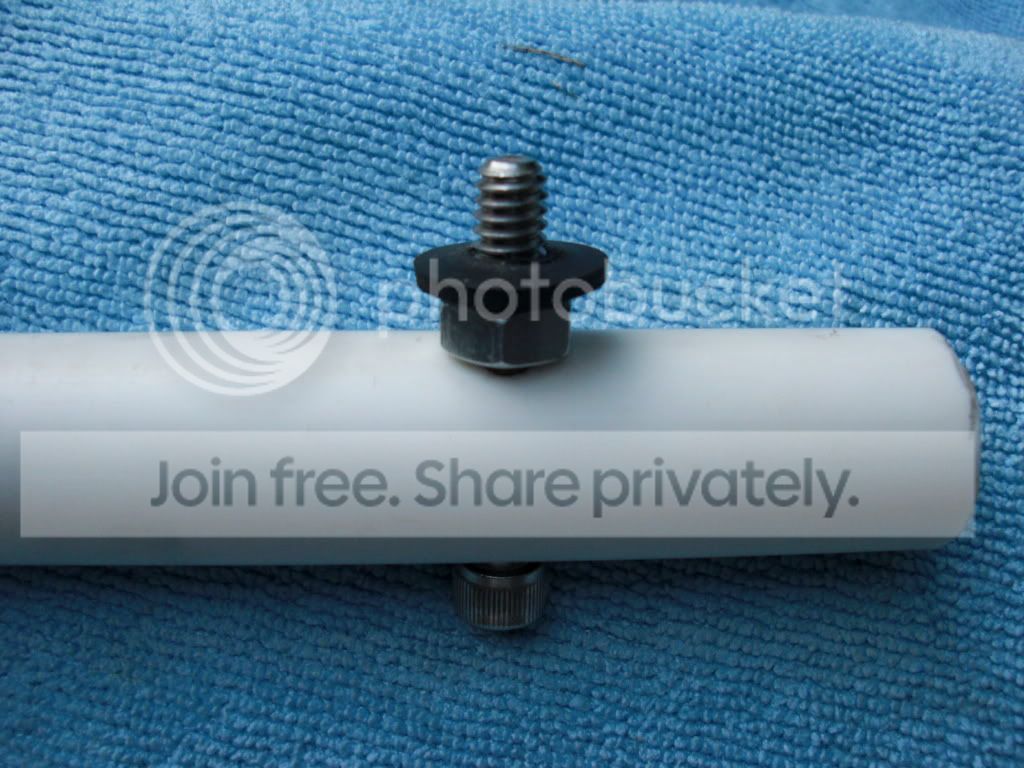
Assemble cap screw and nut as shown, but don't put the washer(s) on yet.
Step 5:
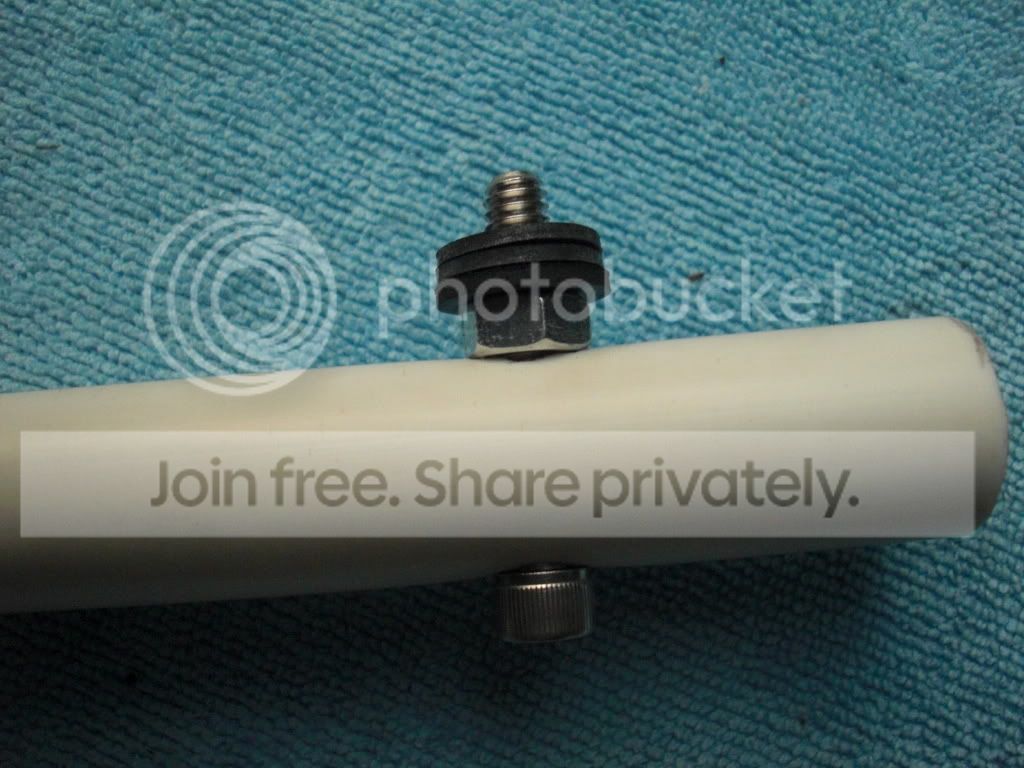
Tighten mount snugly with 7/16" wrench and 3/16" allen key (3/16" allen bit in my screw driver). Do not overtighten as it will start to squeeze the pvc pipe.

Step 6:
Put 4 rubber washers on. I know there are only 3 in this pic, but put 4 on.
Step 7:
Screw camera onto mount. Do not overtighten as you strip your camera's thread. Add or remove washers as needed until it looks like this.
Step 8:
Remove camera from mount, so that you don't scratch it while working.
Step 9:
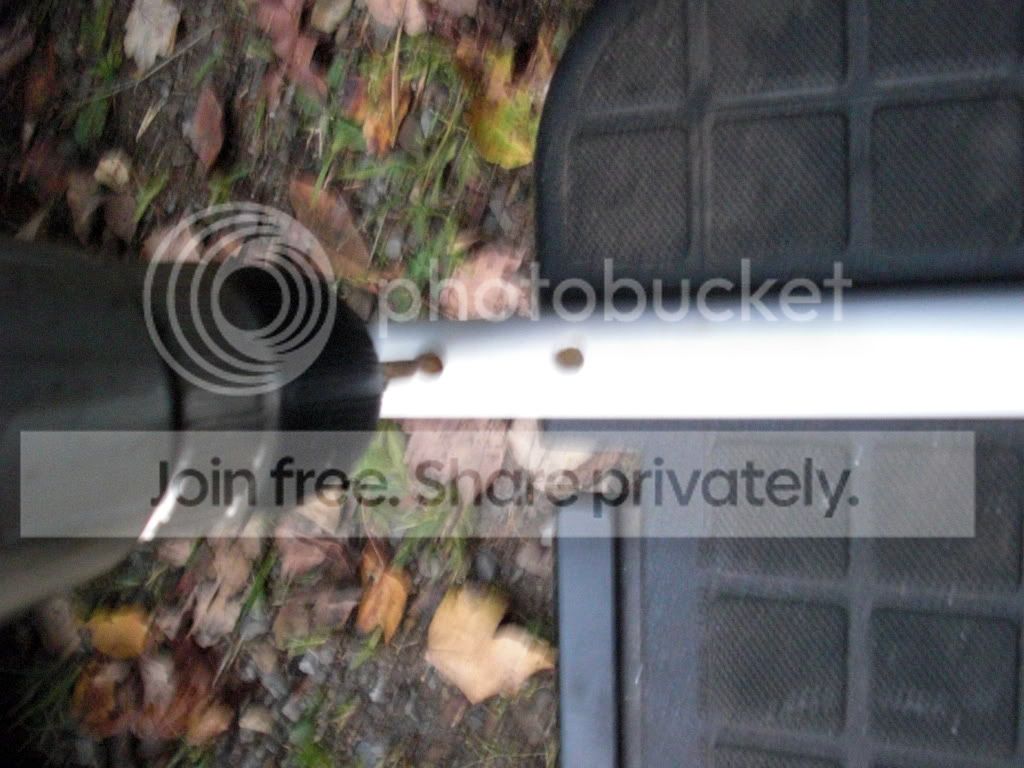
Measure from the other end of the pvc (opposite the camera mount). These holes will be drilled perpendicular to the camera mount so measure accordingly. Make marks at 7/8", 2 1/8", 7" & 8 1/4".
Step 10:
Drill a 1/4" hole at each mark. Keep each hole as square as possible to the camera mount bolt to ensure your camera will film the road ahead, and not the sunroof or floormat.
Step 11:
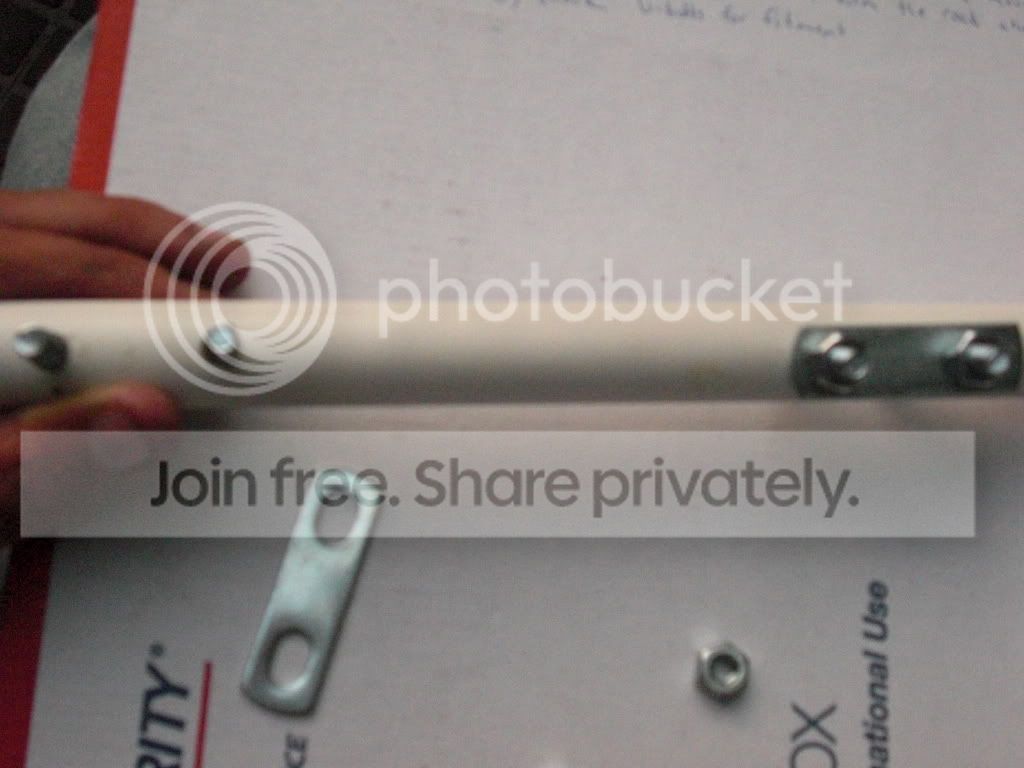
Check U-bolts for fitment.
Step 12:
Remove U-bolts and go to the car with everything.
Step 13:
Install the setup on your passenger side seat. If you can't figure out how to assemble it from this picture, you probably shouldn't be doing this by yourself.
This was only a mock-up to check for fitment so don't tighten anything. If you followed my directions, it should have been perfect.

Step 14:
Install the end caps on the pvc pipe. Do not push them all of the way on, as they will interfere with the u-bolts. Just push them on a little until snug.
*If you aren't going to paint the setup, skip ahead to step 19.*
Step 15:
Remove all of bolts and mounts from the pvc, leaving just the pipe with it's two installed end caps. Gently scuff the entire thing with the sandpaper or steel wool to give the primer something to grip. Wipe down with mineral spirits and allow to dry.
Step 16:
Once dry, spray the pvc with the primer in a well ventilated area. *Run a piece of wire through a hole and hang from something to make painted easier.* Allow primer to completely dry.
Step 17:
Sand with fine grit sandpaper to remove any fuzzies or whatever. I used 1500 but 1000 is fine. Clean well with damp rag and allow to dry.
Step 18:
Spray the pvc with your paint. I chose flat black to match the interior plastic colors, and it matches very well. Allow to fully dry.
Step 19:
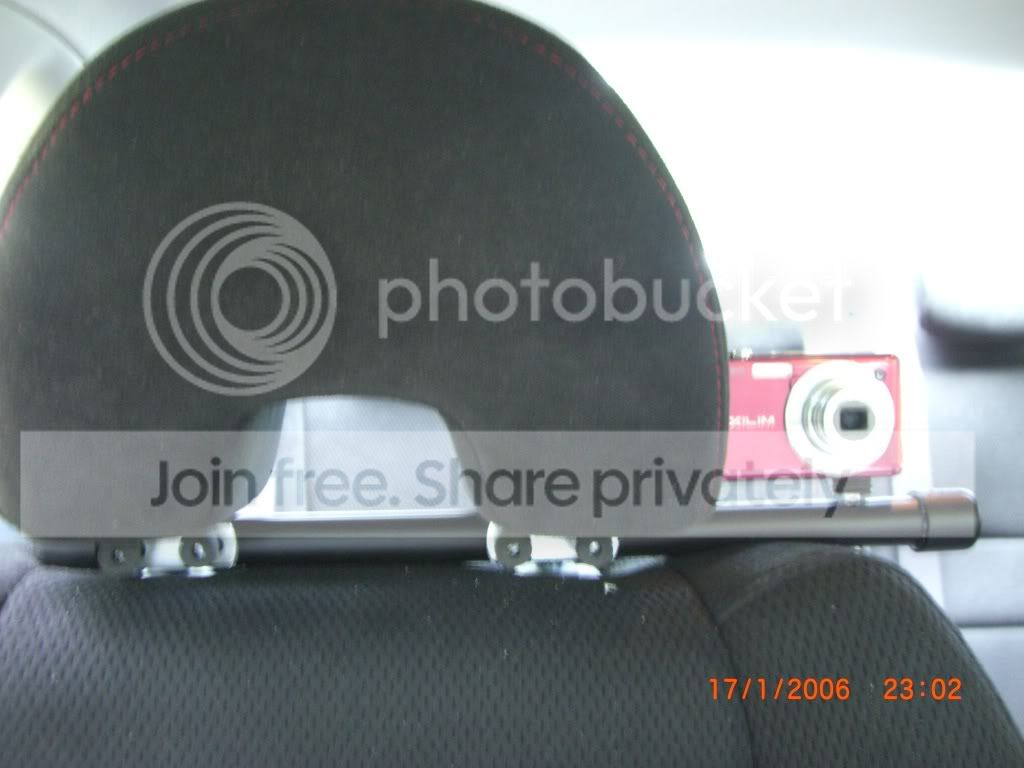
Assemble the setup on your seat.
Step 20:
Put screw covers on and screw camera onto mount.
If it is all done correctly, it should look like this.
 I ended up not using the original screw covers that I bought, because they were white, and didn't match. I ended up cutting some rubber/carbon plugs things I had, and they threaded right on the end of the u-bolts.
I hope this helps you out. If you have any questions, post them in here, or pm me.
*Will update with test video tonight or tomorrow!*
Welcome...I was tired of watching videos of people filming themselves driving, while they hold the camera, or with it taped to their steering wheel. I actually don't intend to film myself driving too much, but I thought I would help my fellow car enthusiasts. This is made from PVC that I had laying around, and under $3 in hardware purchased from Home Depot. Keep in mind, that this mount is made specifically for my car (2008 Si) and specifically for my camera (Casio Exilim). It mounts onto the passenger side headrest posts, and is made that I can have my car comfortably full of people without them (or I) hitting the camera mount. You may need to make adjustments to make it work for you, but you should still be able to follow my basic plan. Read through the entire post before you decide to tackle this, so you can better understand what you need, and what needs to be done.
*Seat posts for 2006+ SIs are 6 5/8" apart (to the center) so if yours are the same, you can pretty much follow this verbatum*
What you'll need for this project:
Length of 1/2" PVC pipe (14 3/8" to be exact)
(2) 1/2" PVC end caps
Cap Screw Socket (1/4" x 1.5" with 3/16" allen socket in top) and 7/16" nut that fits the 1/4" cap screw. Best to bring your camera in Home Depot with you to check if the screw is the proper thread for the mount hole in the bottom.
(2) 1/4" U-bolts (they come assembled as shown below). The space between the two threaded pieces should be 1 1/4".
(8) 1/4" Rubber washers. The ones I got came in bags of 4.
(4) 1/4" Rubber screw caps
Hacksaw
7/16" Wrench
3/16" Allen Key
Drill w/ 1/4" bit
Optional (if you plan to paint it):
400 grit sandpaper or steel wool
1000 (or higher) sandpaper
Primer
Paint of choice
Now...the fun part.
Step 1:
Cut the PVC to length (14 3/8") with the hacksaw. Gently sand away the burrs on the end(s).
Step 2:
Measure for camera mount. Mine is 1 5/8" from the end of the pvc, set up for my Casio Exilim with this offset mounting hole. You may need to adjust the measurement either way if you mounting hole is in another location.
Notice how mounting hole is not is center of camera.
Step 3:
Drill hole for camera mounting screw. Keep the drill as close to square as possible. *A drill press comes in handy for this process. I used a drill press to drill all of my holes, and they came out perfectly square. I just took the pictures with my drill/bit in the holes, for the majority of you who don't have a drill press*
Step 4:
Assemble cap screw and nut as shown, but don't put the washer(s) on yet.
Step 5:
Tighten mount snugly with 7/16" wrench and 3/16" allen key (3/16" allen bit in my screw driver). Do not overtighten as it will start to squeeze the pvc pipe.
Step 6:
Put 4 rubber washers on. I know there are only 3 in this pic, but put 4 on.
Step 7:
Screw camera onto mount. Do not overtighten as you strip your camera's thread. Add or remove washers as needed until it looks like this.
Step 8:
Remove camera from mount, so that you don't scratch it while working.
Step 9:
Measure from the other end of the pvc (opposite the camera mount). These holes will be drilled perpendicular to the camera mount so measure accordingly. Make marks at 7/8", 2 1/8", 7" & 8 1/4".
Step 10:
Drill a 1/4" hole at each mark. Keep each hole as square as possible to the camera mount bolt to ensure your camera will film the road ahead, and not the sunroof or floormat.
Step 11:
Check U-bolts for fitment.
Step 12:
Remove U-bolts and go to the car with everything.
Step 13:
Install the setup on your passenger side seat. If you can't figure out how to assemble it from this picture, you probably shouldn't be doing this by yourself.
This was only a mock-up to check for fitment so don't tighten anything. If you followed my directions, it should have been perfect.
Step 14:
Install the end caps on the pvc pipe. Do not push them all of the way on, as they will interfere with the u-bolts. Just push them on a little until snug.
*If you aren't going to paint the setup, skip ahead to step 19.*
Step 15:
Remove all of bolts and mounts from the pvc, leaving just the pipe with it's two installed end caps. Gently scuff the entire thing with the sandpaper or steel wool to give the primer something to grip. Wipe down with mineral spirits and allow to dry.
Step 16:
Once dry, spray the pvc with the primer in a well ventilated area. *Run a piece of wire through a hole and hang from something to make painted easier.* Allow primer to completely dry.
Step 17:
Sand with fine grit sandpaper to remove any fuzzies or whatever. I used 1500 but 1000 is fine. Clean well with damp rag and allow to dry.
Step 18:
Spray the pvc with your paint. I chose flat black to match the interior plastic colors, and it matches very well. Allow to fully dry.
Step 19:
Assemble the setup on your seat.
Step 20:
Put screw covers on and screw camera onto mount.
If it is all done correctly, it should look like this.
I ended up not using the original screw covers that I bought, because they were white, and didn't match. I ended up cutting some rubber/carbon plugs things I had, and they threaded right on the end of the u-bolts. I hope this helps you out. If you have any questions, post them in here, or pm me.
*Will update with test video tonight or tomorrow!*
 (no homo)
NO MERCY!
Joined: Dec 2006
Posts: 4,914
Likes: 1
From: San Antonio, TX, U.S.
FAIL!!!!!!
j/k
Good job on the DIY. I'm sure more people will chime in as soon as they get off work/school/drinking/etc. DIY's take time to develop so they're always appreciated here on H-T. 
j/k
Good job on the DIY. I'm sure more people will chime in as soon as they get off work/school/drinking/etc. DIY's take time to develop so they're always appreciated here on H-T.
Trending Topics

Thread Starter
Honda-Tech Member
Joined: Nov 2007
Posts: 2,740
Likes: 0
From: Jersey
<TABLE WIDTH="90%" CELLSPACING=0 CELLPADDING=0 ALIGN=CENTER><TR><TD>Quote, originally posted by Trey »</TD></TR><TR><TD CLASS="quote">Looks kind of like mine..... </TD></TR></TABLE>
Your's is really nice. Looks great.
</TD></TR></TABLE>Your's is really nice.
Looks great.
Thread Starter
Honda-Tech Member
Joined: Nov 2007
Posts: 2,740
Likes: 0
From: Jersey
<TABLE WIDTH="90%" CELLSPACING=0 CELLPADDING=0 ALIGN=CENTER><TR><TD>Quote, originally posted by Kidnkorner »</TD></TR><TR><TD CLASS="quote">Now all you need is some remote toggle button so you dont have to reach over your shoulder to start recording.</TD></TR></TABLE>
That'd be really nice. If I had a nicer camera, with that capability, I'd figure out a way. I am already working on one where the camera mount portion will be adjustable, and if it works as planned, it will only cost like two more dollars in supplies. (If anyone is interested in a DIY adjustable mount, lemme know and maybe I'll speed up the process and add that DIY onto here.)
Thank you all. I know it isn't the prettiest thing, but it is not intended to be. Like I said, I was just trying to help people out, on a budget. And, although mine isn't a work of art, it is pretty discrete, and matches the interior rather well. My friend actually got in the passenger seat last night, and rode in the car with me for a couple hours (with like 5 stops, so he kept getting in & out) and he didn't notice it until 2 hours after he got in the car. I can guarantee that it will never go anywhere and it does takes video really well. I accidentally deleted the test video last night, so I guess I won't have one up until tomorrow.
Honda-Tech Member
Joined: May 2007
Posts: 403
Likes: 0
From: Westminster/Huntington Beach/Seal Beach, CA, United States
this is awesome, I think I'll do it. Right now i just stick my camera in the hole in the passenger headrest, but its hard to start/stop the camera.
<TABLE WIDTH="90%" CELLSPACING=0 CELLPADDING=0 ALIGN=CENTER><TR><TD>Quote, originally posted by i-VTEC_DOHC »</TD></TR><TR><TD CLASS="quote">damn man thats really awesome!
now u gotta make one where u can stick to the outside of your car now</TD></TR></TABLE>
x2 that would be sick.
<TABLE WIDTH="90%" CELLSPACING=0 CELLPADDING=0 ALIGN=CENTER><TR><TD>Quote, originally posted by i-VTEC_DOHC »</TD></TR><TR><TD CLASS="quote">damn man thats really awesome!
now u gotta make one where u can stick to the outside of your car now
</TD></TR></TABLE>x2 that would be sick.
Thread Starter
Honda-Tech Member
Joined: Nov 2007
Posts: 2,740
Likes: 0
From: Jersey
<TABLE WIDTH="90%" CELLSPACING=0 CELLPADDING=0 ALIGN=CENTER><TR><TD>Quote, originally posted by i-VTEC_DOHC »</TD></TR><TR><TD CLASS="quote">damn man thats really awesome!
now u gotta make one where u can stick to the outside of your car now</TD></TR></TABLE>
<TABLE WIDTH="90%" CELLSPACING=0 CELLPADDING=0 ALIGN=CENTER><TR><TD>Quote, originally posted by a1staecksauce »</TD></TR><TR><TD CLASS="quote">
x2 that would be sick. </TD></TR></TABLE>
You ask and you shall recieve. Tomorrow will be spent devising a way to do this...on a budget of course.
now u gotta make one where u can stick to the outside of your car now
</TD></TR></TABLE><TABLE WIDTH="90%" CELLSPACING=0 CELLPADDING=0 ALIGN=CENTER><TR><TD>Quote, originally posted by a1staecksauce »</TD></TR><TR><TD CLASS="quote">
x2 that would be sick. </TD></TR></TABLE>
You ask and you shall recieve.
Tomorrow will be spent devising a way to do this...on a budget of course.
Honda-Tech Member
Joined: May 2007
Posts: 5,773
Likes: 1
From: killafornia
<TABLE WIDTH="90%" CELLSPACING=0 CELLPADDING=0 ALIGN=CENTER><TR><TD>Quote, originally posted by 2008fijibluesi »</TD></TR><TR><TD CLASS="quote">
You ask and you shall recieve. Tomorrow will be spent devising a way to do this...on a budget of course. </TD></TR></TABLE>
awesome! let us know how its goin!
You ask and you shall recieve.
Tomorrow will be spent devising a way to do this...on a budget of course. </TD></TR></TABLE>awesome! let us know how its goin!
Honda-Tech Member
Joined: Nov 2005
Posts: 1,252
Likes: 0
From: memphis, tn, usa
to do it outside the car, couldnt u just flip the way it is now on a longer piece of pipe and have ur window cracked just a bit? that sounds like the cheapest and easiest way to do it. i know there are better ways, and that u can make something to bolt under the car or wherever, but that just sounds like a cheap and easy way to go outside. and btw, good job on the diy. i like it when people document and show the details
Thread Starter
Honda-Tech Member
Joined: Nov 2007
Posts: 2,740
Likes: 0
From: Jersey
<TABLE WIDTH="90%" CELLSPACING=0 CELLPADDING=0 ALIGN=CENTER><TR><TD>Quote, originally posted by 95turbodteg »</TD></TR><TR><TD CLASS="quote">to do it outside the car, couldnt u just flip the way it is now on a longer piece of pipe and have ur window cracked just a bit? that sounds like the cheapest and easiest way to do it. i know there are better ways, and that u can make something to bolt under the car or wherever, but that just sounds like a cheap and easy way to go outside. and btw, good job on the diy. i like it when people document and show the details</TD></TR></TABLE>
The could probably work. You'll see what I have cooking soon.
The could probably work. You'll see what I have cooking soon.

Thread
Thread Starter
Forum
Replies
Last Post
2008fijibluesi
Audio / Security / Video
15
Sep 14, 2009 06:16 AM
SpoonMe
Road Racing / Autocross & Time Attack
16
Aug 26, 2003 08:53 AM
shamun
Acura Integra Type-R
10
Jul 13, 2001 02:57 PM