

Universal Carbon Fiber Diffuser


I am selling a single universal carbon fiber diffuser. The part will fit most sport compact cars. The part is 29 inches long and 24 inches wide and it only weighs 2.5 lbs!
The part is produced using aerospace grade carbon and processes. I use an autoclave to cure the part at 250 degrees under 300 PSI of pressure. This produces an extremely high quality part with very little resin and and extremely low void content.
If interested please PM, if you view please bump.
Need to get rid of this....New price is $380!!!...that's an insane price.
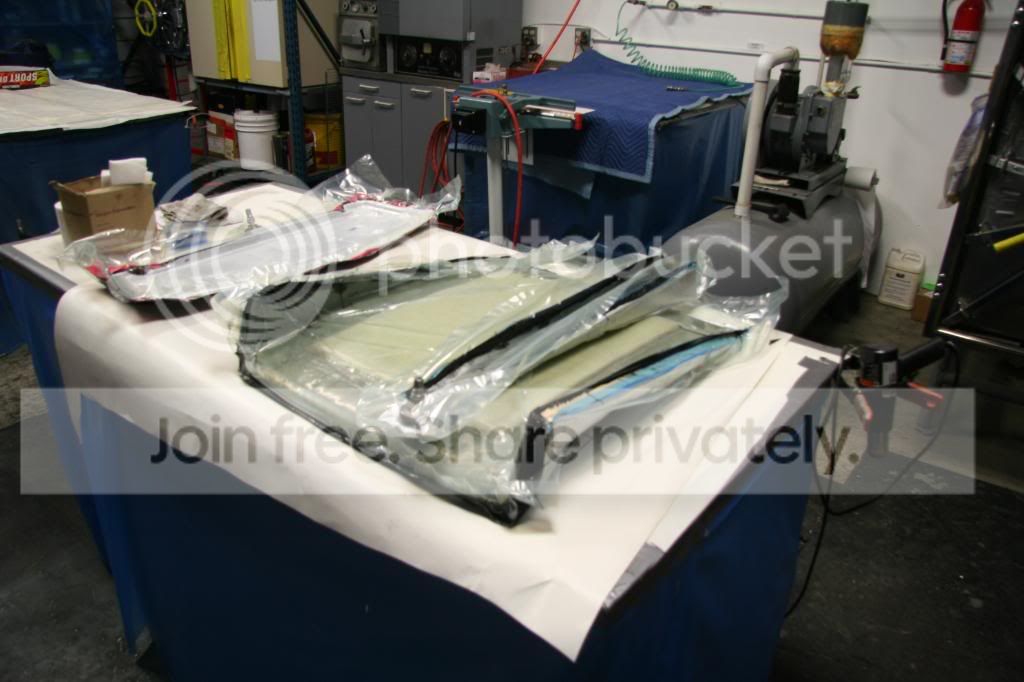
Here are pictures of the build process:
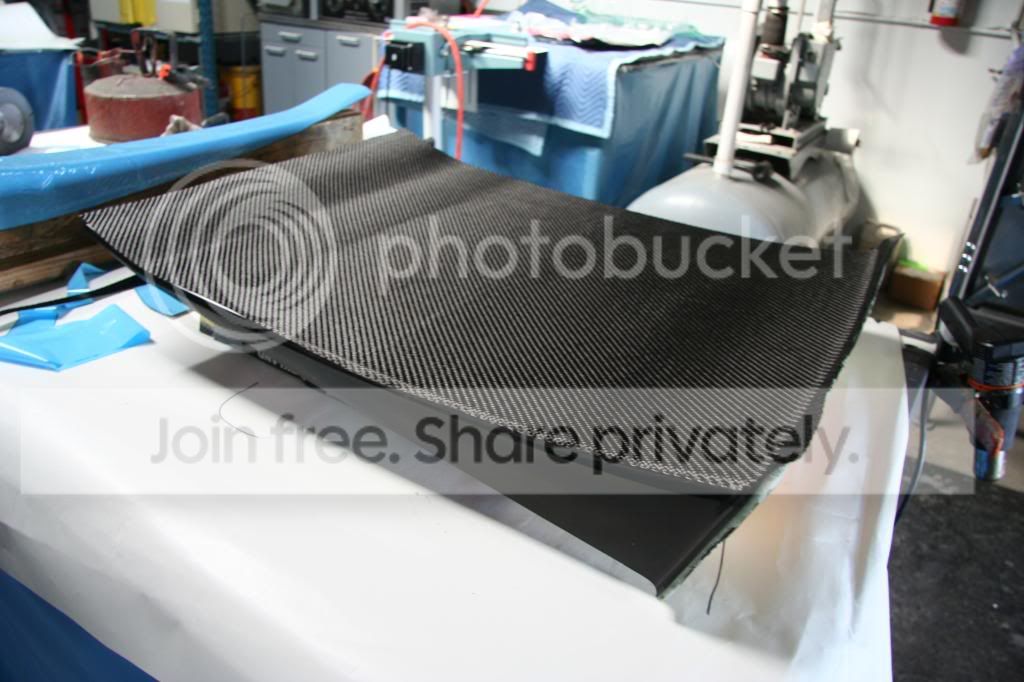

Here are the parts right out of the autoclave:

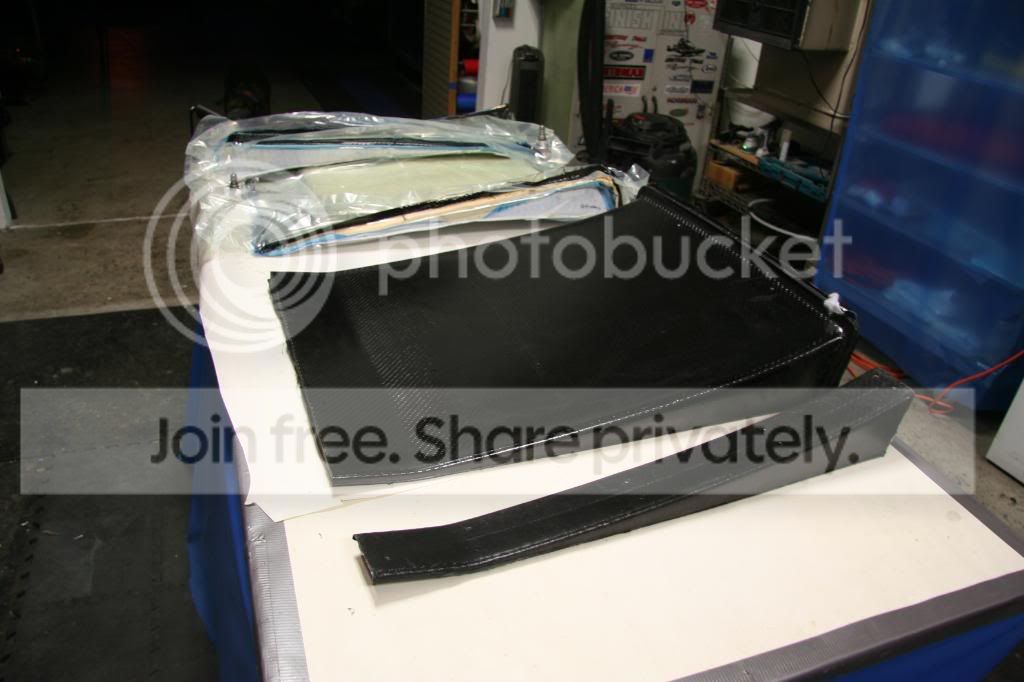
This is the finished product. Note, I still have to cut off the flashing:

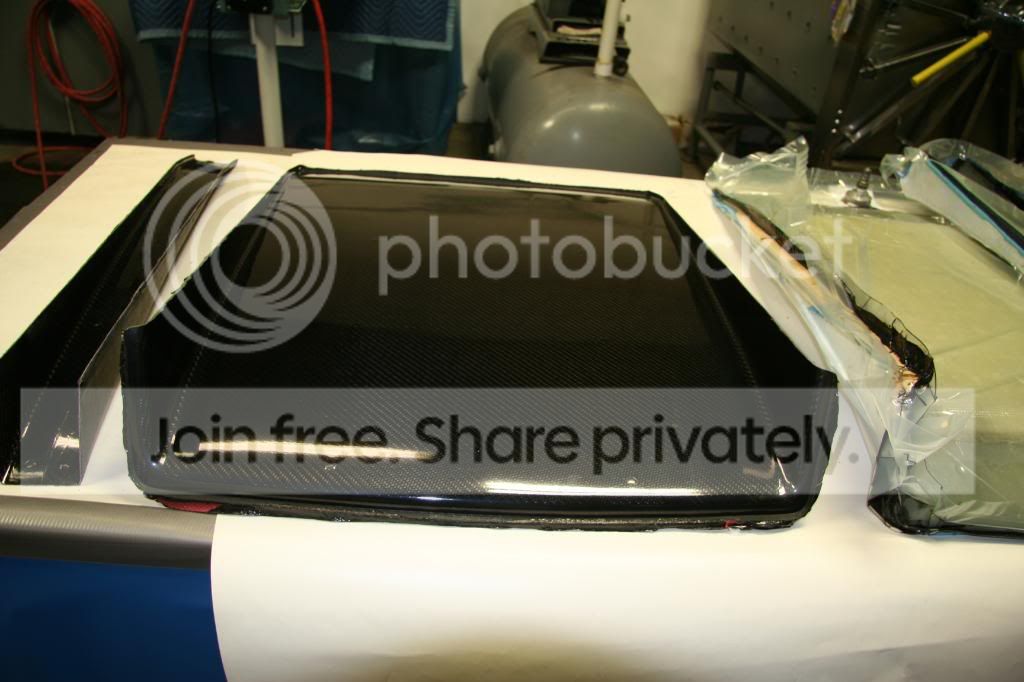

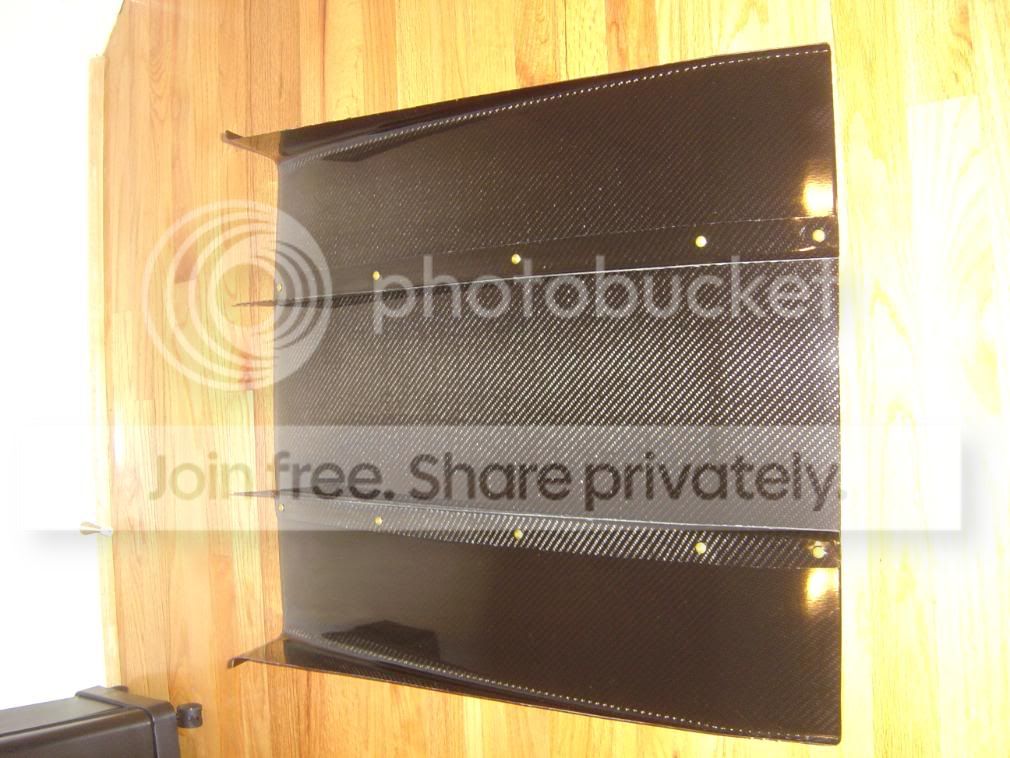
Here is the part with the flashing cut off, polished, and cleaned up:


This is what the diffuser looks like on my Integra Type R:


Modified by RPM at 1:51 PM 8/14/2008
Modified by RPM at 12:34 PM 10/16/2008
The part is produced using aerospace grade carbon and processes. I use an autoclave to cure the part at 250 degrees under 300 PSI of pressure. This produces an extremely high quality part with very little resin and and extremely low void content.
If interested please PM, if you view please bump.
Need to get rid of this....New price is $380!!!...that's an insane price.
Here are pictures of the build process:
Here are the parts right out of the autoclave:
This is the finished product. Note, I still have to cut off the flashing:
Here is the part with the flashing cut off, polished, and cleaned up:
This is what the diffuser looks like on my Integra Type R:
Modified by RPM at 1:51 PM 8/14/2008
Modified by RPM at 12:34 PM 10/16/2008
Last edited by RPM; Mar 11, 2009 at 10:10 AM.


<TABLE WIDTH="90%" CELLSPACING=0 CELLPADDING=0 ALIGN=CENTER><TR><TD>Quote, originally posted by b18ctrb »</TD></TR><TR><TD CLASS="quote"> Looks nice  Price is a little steep. You can get a Voltex or Varis one for that much. But none the less I like it</TD></TR></TABLE>
As far as i'm aware Voltex does not produce a diffuser for the Honda/Acura marque and their diffusers for other vehicles cost around $700.
My item is very similiar to the Varis diffuser in design BUT very different in how it's produced. The Varis is laid up using wet carbon. In fact, they only have 1 layer of 3k carbon, 3 layers of fiberglass, and another layer of 3k carbon for looks. They have a huge amount of resin in the part. The Varis costs $675.
As far as i'm aware, none of these japanese diffusers produce a diffuser using an autoclave. What does an autoclave do? At over 250 PSI of pressure you get extreme compaction of the carbon, all excess resin is squeezed out and you get an extremely strong part which is also very light. My part weighs 2.5 lbs. The varis diffuser is more than TWICE as heavy as my part and its structurally weaker.
Most JDM companies do not use and autoclave because they are expensive. The autoclave in the picture is worth more than a million dollars. These materials and processes are aerospace grade. I guarantee you this is the highest quality you can go and it's cheaper than the competition!
Price is a little steep. You can get a Voltex or Varis one for that much. But none the less I like it</TD></TR></TABLE>As far as i'm aware Voltex does not produce a diffuser for the Honda/Acura marque and their diffusers for other vehicles cost around $700.
My item is very similiar to the Varis diffuser in design BUT very different in how it's produced. The Varis is laid up using wet carbon. In fact, they only have 1 layer of 3k carbon, 3 layers of fiberglass, and another layer of 3k carbon for looks. They have a huge amount of resin in the part. The Varis costs $675.
As far as i'm aware, none of these japanese diffusers produce a diffuser using an autoclave. What does an autoclave do? At over 250 PSI of pressure you get extreme compaction of the carbon, all excess resin is squeezed out and you get an extremely strong part which is also very light. My part weighs 2.5 lbs. The varis diffuser is more than TWICE as heavy as my part and its structurally weaker.
Most JDM companies do not use and autoclave because they are expensive. The autoclave in the picture is worth more than a million dollars. These materials and processes are aerospace grade. I guarantee you this is the highest quality you can go and it's cheaper than the competition!

I remember your thread from before. I think your product is worth it but since no one has any experience with you I think that might hurt you a little.
Why don't you get a group buy started? I'd imagine you could discount the price a little if you had a couple pre-paid orders.
Why don't you get a group buy started? I'd imagine you could discount the price a little if you had a couple pre-paid orders.
Trending Topics
Member
Joined: Oct 2007
Posts: 1,875
Likes: 0
From: in my EK, loving the 30 plus MPG
^ uh oh, doesnt sound too good. def reminds me of the Varis diffuser I had, but I know Varis quality is top knotch thats why people pay what they do for their products, & thats why they're used on top tuner cars in Japan. nice piece though
With get RIGHT's permission I have posted my response to a conversation we had about the differences in material appearance of my diffuser vs the Varis. The response highlights some design features of my diffuser.
(6:46 PM 7/31/2008) RPM: I use one layer of 3k carbon fiber and one layer of 12k carbon fiber. The 3k layer gives a 3D effect and the 12k carbon fiber has more of a flat black tint to it. I guarantee you it's not plastic. I use an aerospace grade carbon and epoxy resin with a black tint.
The reason why the Varis looks the way it does is because they use one layer of wet 3k carbon, 2-3 layers of fiberglass, and another layer of 3k carbon. The reason why they use so much fiberglass is because the part is laid up wet and there is such a high resin content. Because of the high resin content the part is structurally weak, so you have to add multiple layers to strengthen it up. Since the varis unit is laid up by hand it also has an extremely large amount of air pockets in the fiber itself. When you cut it you will get frayed edges because you have fiber with no resin impregnated in it.
I cure the part in an autoclave at 250 degrees at over 300 PSI. The pressure forces the epoxy resin into the fiber matrix and it evacuates all air from the fiber, when you cut my part you will get less fraying and it will appear like a single solid piece of material. This compaction results in a much more structurally sound material. Although I have less material than a Varis unit, my part has much more actual carbon fiber. I do not use any fiberglass in my parts. It's pure carbon fiber.
I'm glad it was noted that their are extreme differences because in fact they are totally different in their composition and how they are produced.
If you don't mind i'd actually like to post this conversation on HT. This will help people to understand the differences in material composition of my part verses something laid up by hand.
One of the downsides of vacuum bagging carbon fiber is that you will get an impression of the vacuum bag on the back side of the part. I have been able to mitigate this by developing some proprietary bladder material. This eliminates wrinkles from the vacuum bag.
Because it is a universal piece it does not come with the hardware to mount it. You can easily source the hardware from any home improvement store such as Home Depot. In total the hardware shouldn't cost you more than $10 if you mount it the same way I did. It took less than 30 min for me to line up the diffuser and mount it to my car.
Here is what I did to mount it:
"I am using four 12 inch long stainless steel threaded rods bolted to the trunk of the car. The rods are .25 inches in diameter.
The rods are connected to four points on the diffuser. Use nuts on each side of the threaded rods to hold the diffuser in place. I used a total of 4
nuts per rod. Two nuts to sandwich the floor of the car and two nuts
to sandwich the diffuser in place. I did this so I can adjust the
angle of the diffuser by simply dropping the threaded rod or pulling
it up. There are already holes in the diffuser where the vertical vanes
are bolted to the main tunnel. You can re-use these holes for your threaded rods.
If you have to make the holes larger to accommodate the threaded
rods I suggest that you use a stepped drill bit, this cuts carbon the cleanest.
This is what I did but you can mount it anyway you want. "
"One other thing. I cut off my rear tow hook so I can run a higher
angle on the diffuser. You don't have to do this. You can simply cut a
slit in your diffuser OR place the diffuser low enough so it doesn't
come in contact with the tow hook. It's up to you."
<TABLE WIDTH="90%" CELLSPACING=0 CELLPADDING=0 ALIGN=CENTER><TR><TD>Quote, originally posted by RPM »</TD></TR><TR><TD CLASS="quote">New price. Up.</TD></TR></TABLE> 
