

My stealth wideband install

Thread Starter
Honda-Tech Member
Joined: Apr 2007
Posts: 184
Likes: 0
From: Modesto, Ca, USA
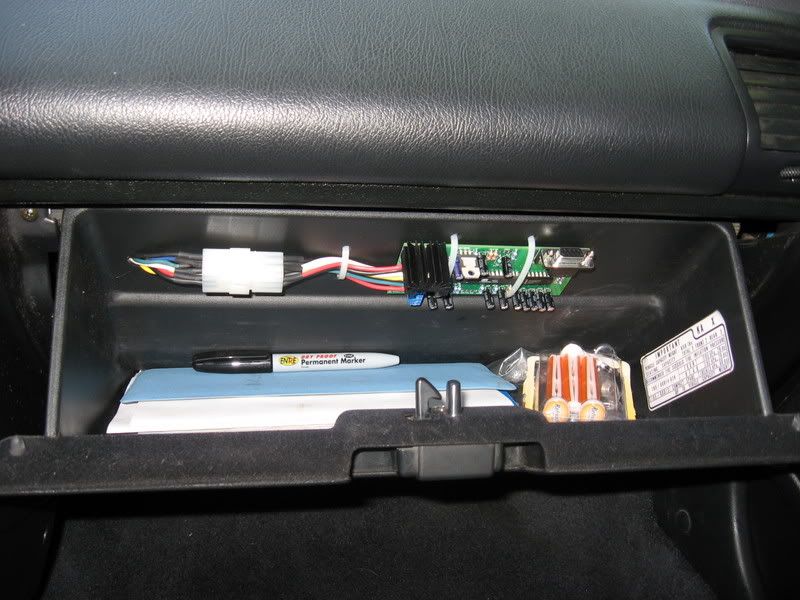
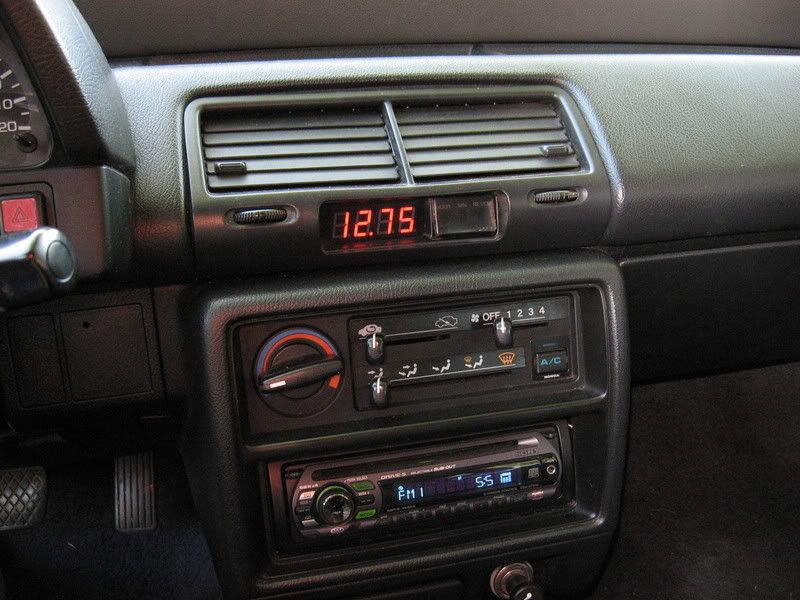
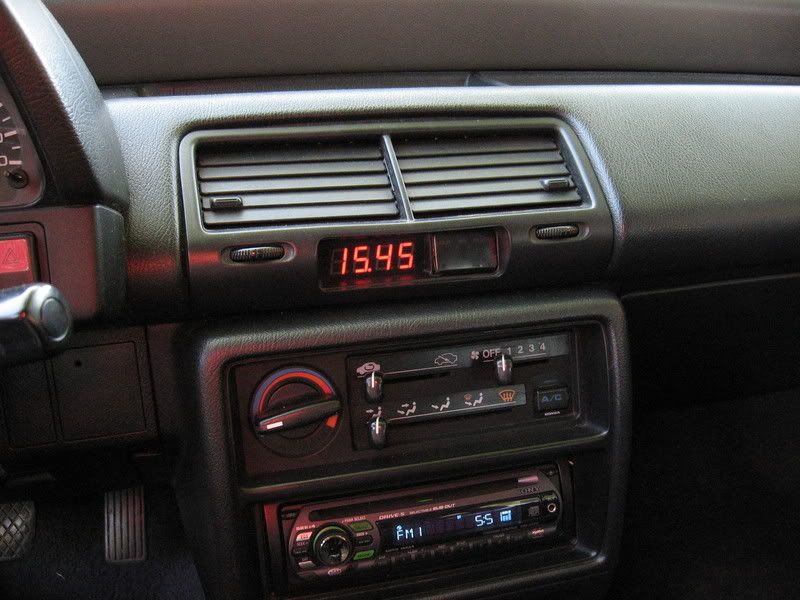
I bought and assembled my wideband kit from 14point7.com last week and finally got around to installing it. I put the display in the stock clock location and the board in the glove box. It's a little dim when in direct sunlight but other than that its perfect. Not bad for about 120 bucks invested

Thread Starter
Honda-Tech Member
Joined: Apr 2007
Posts: 184
Likes: 0
From: Modesto, Ca, USA
Thanks guys, these are the only pics i have but tomorrow i will pop the vent out and snap a pic. I basicallt just gutted the stock clock and glued in the circut board. It actually fit quite nice.

Trending Topics

Member
Joined: Mar 2006
Posts: 1,413
Likes: 0
From: Under the hood of a 4th gen,, Oregon, usa
<TABLE WIDTH="90%" CELLSPACING=0 CELLPADDING=0 ALIGN=CENTER><TR><TD>Quote, originally posted by 55superbeetle »</TD></TR><TR><TD CLASS="quote">My stereo took over the clock duties  </TD></TR></TABLE>
< OEM cassette player so how do you like that wideband? did it include the O2?
</TD></TR></TABLE>< OEM cassette player
so how do you like that wideband? did it include the O2?
Thread Starter
Honda-Tech Member
Joined: Apr 2007
Posts: 184
Likes: 0
From: Modesto, Ca, USA
The wideband works great. I am going to compare it to my lm-1 when i get a chance.
The sensor was not included. The kit was 70 bucks and the sensor was 45. It has a bunch of other cool features and will datalog also.
The sensor was not included. The kit was 70 bucks and the sensor was 45. It has a bunch of other cool features and will datalog also.
Member
Joined: Mar 2006
Posts: 1,413
Likes: 0
From: Under the hood of a 4th gen,, Oregon, usa
<TABLE WIDTH="90%" CELLSPACING=0 CELLPADDING=0 ALIGN=CENTER><TR><TD>Quote, originally posted by 55superbeetle »</TD></TR><TR><TD CLASS="quote">The wideband works great. I am going to compare it to my lm-1 when i get a chance.
The sensor was not included. The kit was 70 bucks and the sensor was 45. It has a bunch of other cool features and will datalog also.</TD></TR></TABLE>
so what is involved in putting it together as opossed to thier "assembled" kit?
The sensor was not included. The kit was 70 bucks and the sensor was 45. It has a bunch of other cool features and will datalog also.</TD></TR></TABLE>
so what is involved in putting it together as opossed to thier "assembled" kit?
Thread Starter
Honda-Tech Member
Joined: Apr 2007
Posts: 184
Likes: 0
From: Modesto, Ca, USA
Just some basic soldering. This was my first time building anything like this but it was basic enough that even a beginner like me pulled it off. I was a little confused on how to get it to communicate with my PC but the seller walked me through it and it was actually really easy.
Member
Joined: Mar 2006
Posts: 1,413
Likes: 0
From: Under the hood of a 4th gen,, Oregon, usa
<TABLE WIDTH="90%" CELLSPACING=0 CELLPADDING=0 ALIGN=CENTER><TR><TD>Quote, originally posted by 55superbeetle »</TD></TR><TR><TD CLASS="quote">Just some basic soldering. This was my first time building anything like this but it was basic enough that even a beginner like me pulled it off. I was a little confused on how to get it to communicate with my PC but the seller walked me through it and it was actually really easy.</TD></TR></TABLE>
im definatly going to consider it for my turbo build. should cut costs down quite a bit thanks
im definatly going to consider it for my turbo build. should cut costs down quite a bit
thanks
Honda-Tech Member
Joined: May 2002
Posts: 40
Likes: 0
Great job!
I was in the process of doing the same thing with the display then I saw this post. You beat me to it!
Quick question for you.. I don't see the ribbon cable coming off the controller to the display. How are you interfacing the display with the controller? Are you using one of the analog outputs?
Cheers!
Thread Starter
Honda-Tech Member
Joined: Apr 2007
Posts: 184
Likes: 0
From: Modesto, Ca, USA
I reverse mounted the connector and routed it through the back side of the glovebox. There is directions on how to do it on their site.
Here u go,
http://www.14point7.com/JAW/FAQ/Reverse-Mount.jpg
I will get some pics of the install soon
Here u go,
http://www.14point7.com/JAW/FAQ/Reverse-Mount.jpg
I will get some pics of the install soon
Honda-Tech Member
Joined: Dec 2004
Posts: 218
Likes: 0
From: Va, USA
i feel like a retard for asking this question, but can i use JAW if my o2 is disabled? i wasnt sure if i still had to run it through the ECU or if it was like its own controller. thanks and be gentle. hahaha