

blacked out my headlights with the BRONZE. check it out.

Thread Starter
Honda-Tech Member
Joined: Oct 2004
Posts: 779
Likes: 0
From: 626 ballin park., ca, usa
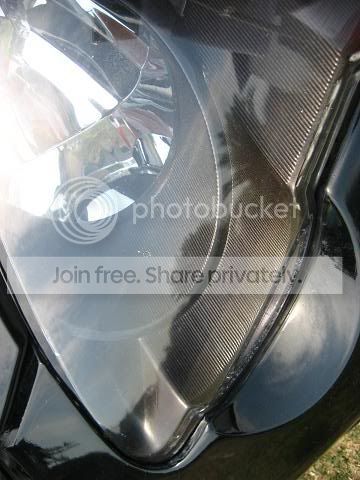
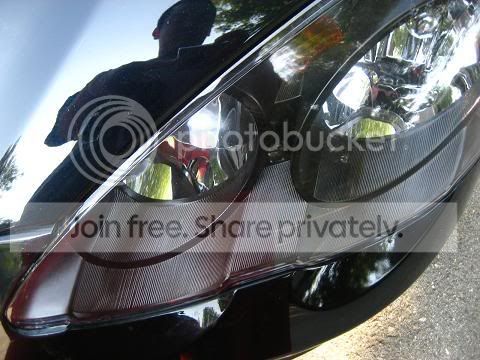
so finally decided to black out my headlights with the hint of bronze turned out better then i expected it. very happy with how the color turned out but no so great with the quality. here r some pics.
rewriting for the ones that want to do it. the things u will need. most of these can be found at ur local wal-mart. for the transparent black, try one of ur guys hobby shack. thats where i got mine.
1 can Rust-Oleum Dark Bronze Metallic
1 can Rust-Oleum Plastic Primer
2 cans Testors Model Master Transparent Black Window Tint
2 cans Testors Model Masters Clear Gloss Top Coat or watever clear coat u want
1 Quart or Pint Paint Thinner
1 roll masking tape (depending on method)
1 pack fine steel wool
OVEN
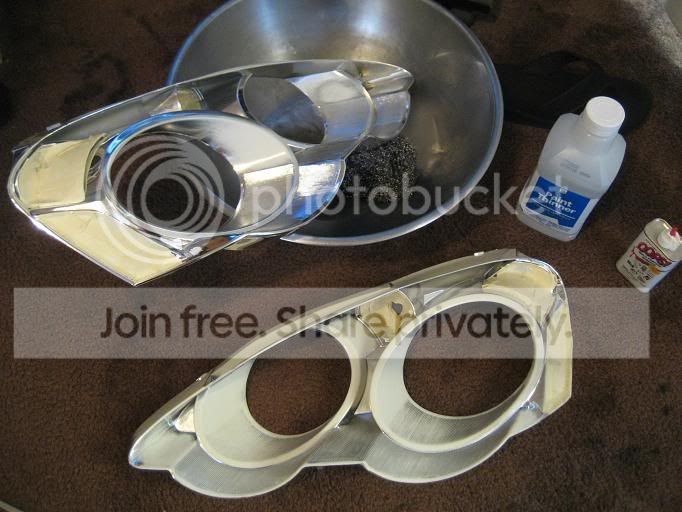
remove ur headlights. preheat ur oven to 220. leave it in there for about 15-20 mins pulls right apart. remove the inner part.
REMOVING THE CHROME
YOU CAN SKIP THIS PART AND JUST PRIMER IT
first tried to remove as much chrome as i possibly can. make sure u mask off the part u dont want to paint. use the paint thinner and the steel wool. works great.
PRIMER
make sure u mask the parts off that u dont want to paint. get the primer leave for about 30 mins.
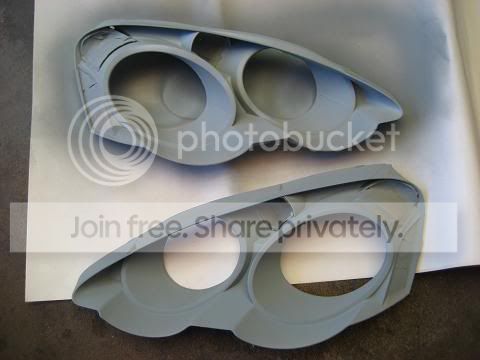
after the primer. go ahead and spray on the bronze. i did about 2 coats. try avoid making the paint run. after that. go ahead and leave that for about 30-40 mins

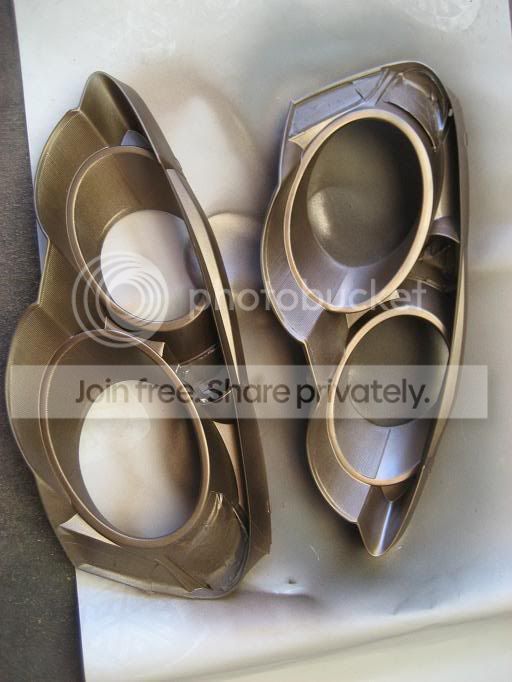
TRANSPARENT BLACK
this part is a lil hard. gotta have good judgment. cant really tell how much transparent paint is on. i did about 3 coats. which i think is a lil to much. cuz my bronze is a lil darker then oem. so i would say about 2. then let it sit for about an hour or so. then spray on the clear coat. after finishing all that let it sit for a couple hours just to be safe to b sure its completely dry. reassemble, avoid having the paint part of the headlight touch the glue or rubber cement or watever it is. cuz that will rip off the paint. put back together the headlight completely and throw it back in the oven to seal it up again. i recommend using claps. works really good. super tight.
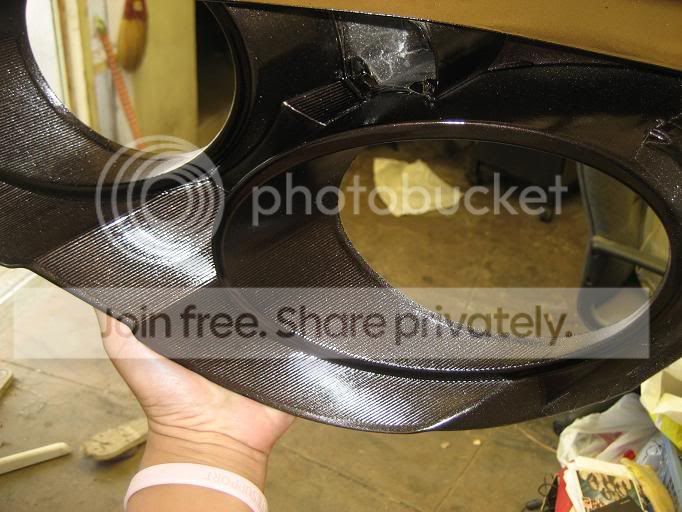
back on the car. then ur go0d to g0
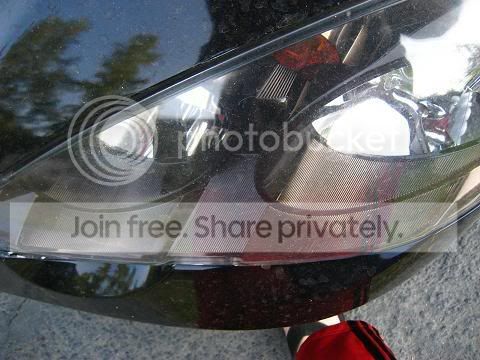
and this is my friends oem itr headlights. so tell me how close i am.
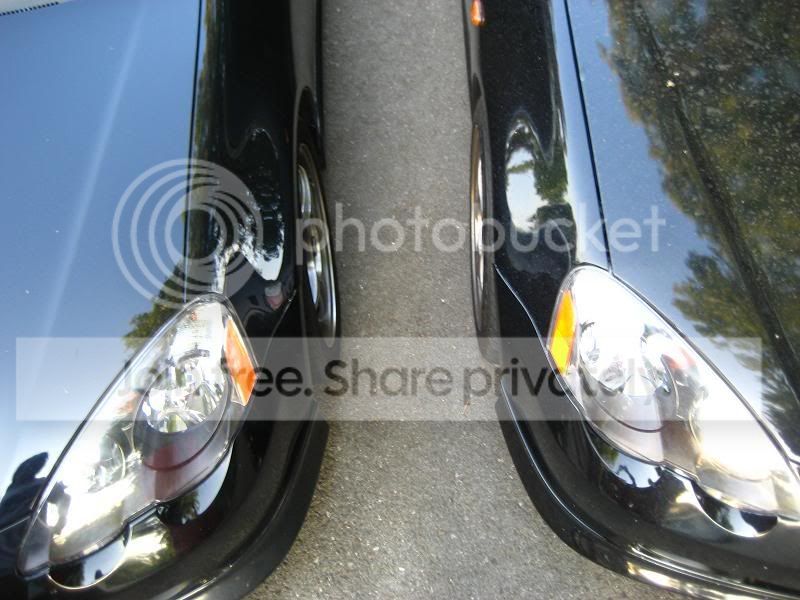
side by side comparison. mine of the left friends in the right. couldnt get good pictures by u can still tell.

so let me kno wat u guys think.
hope this is a good enuff write up.
if i left anything out. feel free to ask any questions.
Modified by DC5s0uth at 1:20 AM 8/2/2007
Modified by DC5s0uth at 12:45 PM 8/2/2007
rewriting for the ones that want to do it. the things u will need. most of these can be found at ur local wal-mart. for the transparent black, try one of ur guys hobby shack. thats where i got mine.
1 can Rust-Oleum Dark Bronze Metallic
1 can Rust-Oleum Plastic Primer
2 cans Testors Model Master Transparent Black Window Tint
2 cans Testors Model Masters Clear Gloss Top Coat or watever clear coat u want
1 Quart or Pint Paint Thinner
1 roll masking tape (depending on method)
1 pack fine steel wool
OVEN
remove ur headlights. preheat ur oven to 220. leave it in there for about 15-20 mins pulls right apart. remove the inner part.
REMOVING THE CHROME
YOU CAN SKIP THIS PART AND JUST PRIMER IT
first tried to remove as much chrome as i possibly can. make sure u mask off the part u dont want to paint. use the paint thinner and the steel wool. works great.
PRIMER
make sure u mask the parts off that u dont want to paint. get the primer leave for about 30 mins.
after the primer. go ahead and spray on the bronze. i did about 2 coats. try avoid making the paint run. after that. go ahead and leave that for about 30-40 mins
TRANSPARENT BLACK
this part is a lil hard. gotta have good judgment. cant really tell how much transparent paint is on. i did about 3 coats. which i think is a lil to much. cuz my bronze is a lil darker then oem. so i would say about 2. then let it sit for about an hour or so. then spray on the clear coat. after finishing all that let it sit for a couple hours just to be safe to b sure its completely dry. reassemble, avoid having the paint part of the headlight touch the glue or rubber cement or watever it is. cuz that will rip off the paint. put back together the headlight completely and throw it back in the oven to seal it up again. i recommend using claps. works really good. super tight.
back on the car. then ur go0d to g0
and this is my friends oem itr headlights. so tell me how close i am.
side by side comparison. mine of the left friends in the right. couldnt get good pictures by u can still tell.
so let me kno wat u guys think.
hope this is a good enuff write up.
if i left anything out. feel free to ask any questions.
Modified by DC5s0uth at 1:20 AM 8/2/2007
Modified by DC5s0uth at 12:45 PM 8/2/2007
Thread Starter
Honda-Tech Member
Joined: Oct 2004
Posts: 779
Likes: 0
From: 626 ballin park., ca, usa
<TABLE WIDTH="90%" CELLSPACING=0 CELLPADDING=0 ALIGN=CENTER><TR><TD>Quote, originally posted by Mr.Kantot »</TD></TR><TR><TD CLASS="quote">i dont see a difference in those comparison pictures cuz of the glare.
good job though</TD></TR></TABLE>
thanks. yea i kno. couldnt get a good shot.
good job though</TD></TR></TABLE>
thanks. yea i kno. couldnt get a good shot.
Junior Member
Joined: Jan 2007
Posts: 431
Likes: 0
From: Somewhere inbetween NV and NJ
looks hot ... when it wasnt inside ... lol ... too much glare ... nice job though ... i plan on doing something like that too cause i dont want to buy or anything ... lol
Trending Topics
Junior Member
Joined: Jul 2007
Posts: 130
Likes: 0
From: AL, USA
Ive been wanting to blackout my headlights but Im just too afraid I will mess up, did you follow a writeup or a DIY article or something that showed you how to do it
Thread Starter
Honda-Tech Member
Joined: Oct 2004
Posts: 779
Likes: 0
From: 626 ballin park., ca, usa
<TABLE WIDTH="90%" CELLSPACING=0 CELLPADDING=0 ALIGN=CENTER><TR><TD>Quote, originally posted by justbriaN »</TD></TR><TR><TD CLASS="quote">were they easy to pull apart?</TD></TR></TABLE>
yea they were. didnt break anything.
yea they were. didnt break anything.
Thread Starter
Honda-Tech Member
Joined: Oct 2004
Posts: 779
Likes: 0
From: 626 ballin park., ca, usa
<TABLE WIDTH="90%" CELLSPACING=0 CELLPADDING=0 ALIGN=CENTER><TR><TD>Quote, originally posted by IntgrB18C5 »</TD></TR><TR><TD CLASS="quote">Ive been wanting to blackout my headlights but Im just too afraid I will mess up, did you follow a writeup or a DIY article or something that showed you how to do it</TD></TR></TABLE>
i didnt break anything. iv done a couple headlights in the past. all the same. i just needed the right paint that was about it.
i didnt break anything. iv done a couple headlights in the past. all the same. i just needed the right paint that was about it.
Honda-Tech Member
Joined: Jul 2005
Posts: 4,971
Likes: 1
From: Wisconsin
<TABLE WIDTH="90%" CELLSPACING=0 CELLPADDING=0 ALIGN=CENTER><TR><TD>Quote, originally posted by DC5s0uth »</TD></TR><TR><TD CLASS="quote">i didnt break anything. iv done a couple headlights in the past. all the same. i just needed the right paint that was about it. </TD></TR></TABLE>
Why is Rustoleum metal paint, the right paint? I would think Krylon Fusion...
Why is Rustoleum metal paint, the right paint? I would think Krylon Fusion...
Thread Starter
Honda-Tech Member
Joined: Oct 2004
Posts: 779
Likes: 0
From: 626 ballin park., ca, usa
<TABLE WIDTH="90%" CELLSPACING=0 CELLPADDING=0 ALIGN=CENTER><TR><TD>Quote, originally posted by WhiteOnRice »</TD></TR><TR><TD CLASS="quote">
Why is Rustoleum metal paint, the right paint? I would think Krylon Fusion...</TD></TR></TABLE>
cuz i couldnt find the right krylon fusion paint. and cuz it has to b metallic. in order for it to really shine through the transparent black. i only saw flat colors for the fusion. so thats y i got the rustolem.
Thread Starter
Honda-Tech Member
Joined: Oct 2004
Posts: 779
Likes: 0
From: 626 ballin park., ca, usa
<TABLE WIDTH="90%" CELLSPACING=0 CELLPADDING=0 ALIGN=CENTER><TR><TD>Quote, originally posted by 02bluteg »</TD></TR><TR><TD CLASS="quote">Damn looks amazing!!!
Good job, i spent $500 for my jdm's. I love them but it was a lot of money.</TD></TR></TABLE>
thanks. but i would rather have the real stuff. still plan on gettin a pair though. waiting on a good pair and price to come across.
<TABLE WIDTH="90%" CELLSPACING=0 CELLPADDING=0 ALIGN=CENTER><TR><TD>Quote, originally posted by InstantClassic »</TD></TR><TR><TD CLASS="quote">How did you pull them apart? Oven? </TD></TR></TABLE>
yea i threw it in the oven. i forgot about them once. shat my pants. thought they melted already. but the sealant was super melted so pulled them apart like cheese.