


Sub in Spare Tire Compartment (completly hidden)

Thread Starter
Honda-Tech Member
Joined: Jun 2006
Posts: 263
Likes: 0
From: Racine, Wi, USA
i tryed searching and i couldnt find anything about this, im very interested in making something like this and any help with how to do it and how to make the sub and/or amp hidden would be greatly appreciated
New User
Joined: Jun 2001
Posts: 1,963
Likes: 0
From: San Francisco, CA, USA
Old Fart
Joined: May 2004
Posts: 26,173
Likes: 18
From: kelowna, bc, canada
<TABLE WIDTH="90%" CELLSPACING=0 CELLPADDING=0 ALIGN=CENTER><TR><TD>Quote, originally posted by rcurley55 »</TD></TR><TR><TD CLASS="quote">http://www.sounddomain.com/rcurley
go to the last page or so</TD></TR></TABLE>??
<TABLE WIDTH="90%" CELLSPACING=0 CELLPADDING=0 ALIGN=CENTER><TR><TD>Quote, originally posted by benihana881 »</TD></TR><TR><TD CLASS="quote">i tryed searching and i couldnt find anything about this, im very interested in making something like this and any help with how to do it and how to make the sub and/or amp hidden would be greatly appreciated </TD></TR></TABLE> Do you know anything about fiberglass? 94
94
go to the last page or so</TD></TR></TABLE>??
<TABLE WIDTH="90%" CELLSPACING=0 CELLPADDING=0 ALIGN=CENTER><TR><TD>Quote, originally posted by benihana881 »</TD></TR><TR><TD CLASS="quote">i tryed searching and i couldnt find anything about this, im very interested in making something like this and any help with how to do it and how to make the sub and/or amp hidden would be greatly appreciated </TD></TR></TABLE> Do you know anything about fiberglass?
94
New User
Joined: Jun 2001
Posts: 1,963
Likes: 0
From: San Francisco, CA, USA
Honda-Tech Member
Joined: Jun 2004
Posts: 6,416
Likes: 0
From: Seattle
http://img.photobucket.com/alb...0.jpg
http://img.photobucket.com/alb...3.jpg
http://img.photobucket.com/alb...7.jpg
Lost about 3 inches of trunk space
http://img.photobucket.com/alb...3.jpg
http://img.photobucket.com/alb...7.jpg
Lost about 3 inches of trunk space
Old Fart
Joined: May 2004
Posts: 26,173
Likes: 18
From: kelowna, bc, canada
OK, better, still some pix, "This Image Is Temporarily Unavailable" anyway, nice clean install 
Constructive criticism= With as much detail that you put into it, why is the "sub floor" black carpet?
Anyway, back to topic, still waiting for replay from benihana881 94
Constructive criticism= With as much detail that you put into it, why is the "sub floor" black carpet?
Anyway, back to topic, still waiting for replay from benihana881
94
Thread Starter
Honda-Tech Member
Joined: Jun 2006
Posts: 263
Likes: 0
From: Racine, Wi, USA
<TABLE WIDTH="90%" CELLSPACING=0 CELLPADDING=0 ALIGN=CENTER><TR><TD>Quote, originally posted by fcm »</TD></TR><TR><TD CLASS="quote">??
Do you know anything about fiberglass? 94</TD></TR></TABLE>
no i dont sorry
Do you know anything about fiberglass?
94</TD></TR></TABLE>no i dont sorry
Trending Topics
Honda-Tech Member
Joined: Aug 2004
Posts: 2,006
Likes: 4
From: Sterling Heights, MI, USA
<TABLE WIDTH="90%" CELLSPACING=0 CELLPADDING=0 ALIGN=CENTER><TR><TD>Quote, originally posted by a_s_ol_ »</TD></TR><TR><TD CLASS="quote">Lost about 3 inches of trunk space </TD></TR></TABLE>
Plus your spare.
</TD></TR></TABLE>Plus your spare.
Old Fart
Joined: May 2004
Posts: 26,173
Likes: 18
From: kelowna, bc, canada
Then you will have to learn, [not that hard] or pay someone else to do it.
Another option would be something like a MTX ThunderForm enclosure... http://www.mtx.com/mtxHomePage_content.html or a JL Audio Stealthbox... http://mobile.jlaudio.com/prod...d=168
Here are 800,000 or so sites that have something to do with "how to fiberglass a sub box"... http://www.google.com/search?s...b+box if you wan to take it on yourself. 94
94
Another option would be something like a MTX ThunderForm enclosure... http://www.mtx.com/mtxHomePage_content.html or a JL Audio Stealthbox... http://mobile.jlaudio.com/prod...d=168
Here are 800,000 or so sites that have something to do with "how to fiberglass a sub box"... http://www.google.com/search?s...b+box if you wan to take it on yourself.
94
Thread Starter
Honda-Tech Member
Joined: Jun 2006
Posts: 263
Likes: 0
From: Racine, Wi, USA
<TABLE WIDTH="90%" CELLSPACING=0 CELLPADDING=0 ALIGN=CENTER><TR><TD>Quote, originally posted by benihana881 »</TD></TR><TR><TD CLASS="quote">im building this for woods class, so it has to be made out of wood anyways</TD></TR></TABLE>
Old Fart
Joined: May 2004
Posts: 26,173
Likes: 18
From: kelowna, bc, canada
Well then, get yourself a 1/2 sheet of 1" and a 1/2 sheet of 3/4" MDF, use 3/4" MDF and cut a bottom piece that will fit into the bottom of the well, [center may have to be cut out so it will sit down as low as possible] then using as few pieces as possible, [1"MDF] cut the sides, front and back, [4 would be easiest, but may need as many as 8 to get the volume you need] with 4 pieces you make a box, with more then 4 you will have to angle the sides of the pieces so they fit together, like a barrel, again using 1"MDF cut your top to fit the top of the tire well, it will sit on top of the side pieces.
The hole that was cut in the bottom, so it would sit as low as possible will have to be sealed, using 1" and 3/4" MDF cut enough spacers so the top will clear the tire mount.
EG; if you cut a 5" hole in the bottom plate and it lets the bottom plate sit 2" lower, [with tire mount sticking up in the middle] then cut 1x1"x6" disk cut as small a hole in it as you can so it will just sit on the bottom plate, now cut another disk that is 1" bigger then the hole you cut in the first disc, and cut a hole in it , just big enough so it will sit on the first disc/spacer, make as many or as few as needed to clear the tire mount, drilling a hole in the top disc so a bolt can be installed to hold box down.
Apply glue to all the surfaces, [except between the bottom spacer and bottom plate] and use the bolt to hold it together until the glue sets up, remove bolt, take the spacers that are glued together to a belt sander and remove excess wood, [keeping it at least 3/4" thick all over] should end up looking like a little wooden dome, put glue on the bottom and place on bottom plate and install bolt till glue sets up, this should all be done with bottom plate in the tire well, so bolt hole is centered properly.
Once "dome" is in place, remove bottom plate and glue and screw sides on to bottom plate and each other, the more sides there are the harder it will be.
Once sides are glued in place, reinstall bottom plate bolt it down, set top in place, and decide where speaker is going to go, don't forget, mounting depth of the sub is an issue, sub magnet will have to clear the "dome", so sub may have to be offset to one side or the front or back.
Once you know where the sub is going remove top and use a router w/ hole cutter to cut your speaker hole, I would also counter sink the sub into the MDF at least 1/4", if you want the sub to sit flush or lower you may have to add a 3/4" disk that is at least 1" bigger then the outside diameter of the sub and glue it to the underside of top plate, centering it with the sub opening, do this before you start cutting the mounting hole, [a 1/8" centering hole can be drilled into the top and disc for centering.
Once mounting hole is cut, top plate can be reinstalled on top of "box" and then you can reach in through the mounting hole and trace the inside edge of the box, at the same time make sure the sub fits, [magnet clears] before removing everything.
Line "box" with plastic and fill with water to check volume, if you have done it right the "box" should be bigger then it needs to be, excess volume can be used up with bracing,
EG; "box" turns out to be .25cuft too big, that's a good thing, use .25cuft of MDF for bracing inside the box, along the seems maybe a brace or 2 or 3 between top and bottom, the stronger/stiffer the cabinet the better.
Once bracing is done, "paint" inside of cabinet with fiberglass resin, [no fiberglass mat needed] to seal the MDF, run a bead of silicone along all the seems [don't forget to fiberglass the inside of the top], do not get fiberglass resin on the gluing surface, glue and screw the top of box on, silicone the inside edge, [through sub opening.
A little clean up, maybe some carpet on top of cabinet and your done.
If your doing this in "shop class" your instructor should be able to help along the way. Good luck, feel free to IM me if you have other questions. 94
The hole that was cut in the bottom, so it would sit as low as possible will have to be sealed, using 1" and 3/4" MDF cut enough spacers so the top will clear the tire mount.
EG; if you cut a 5" hole in the bottom plate and it lets the bottom plate sit 2" lower, [with tire mount sticking up in the middle] then cut 1x1"x6" disk cut as small a hole in it as you can so it will just sit on the bottom plate, now cut another disk that is 1" bigger then the hole you cut in the first disc, and cut a hole in it , just big enough so it will sit on the first disc/spacer, make as many or as few as needed to clear the tire mount, drilling a hole in the top disc so a bolt can be installed to hold box down.
Apply glue to all the surfaces, [except between the bottom spacer and bottom plate] and use the bolt to hold it together until the glue sets up, remove bolt, take the spacers that are glued together to a belt sander and remove excess wood, [keeping it at least 3/4" thick all over] should end up looking like a little wooden dome, put glue on the bottom and place on bottom plate and install bolt till glue sets up, this should all be done with bottom plate in the tire well, so bolt hole is centered properly.
Once "dome" is in place, remove bottom plate and glue and screw sides on to bottom plate and each other, the more sides there are the harder it will be.
Once sides are glued in place, reinstall bottom plate bolt it down, set top in place, and decide where speaker is going to go, don't forget, mounting depth of the sub is an issue, sub magnet will have to clear the "dome", so sub may have to be offset to one side or the front or back.
Once you know where the sub is going remove top and use a router w/ hole cutter to cut your speaker hole, I would also counter sink the sub into the MDF at least 1/4", if you want the sub to sit flush or lower you may have to add a 3/4" disk that is at least 1" bigger then the outside diameter of the sub and glue it to the underside of top plate, centering it with the sub opening, do this before you start cutting the mounting hole, [a 1/8" centering hole can be drilled into the top and disc for centering.
Once mounting hole is cut, top plate can be reinstalled on top of "box" and then you can reach in through the mounting hole and trace the inside edge of the box, at the same time make sure the sub fits, [magnet clears] before removing everything.
Line "box" with plastic and fill with water to check volume, if you have done it right the "box" should be bigger then it needs to be, excess volume can be used up with bracing,
EG; "box" turns out to be .25cuft too big, that's a good thing, use .25cuft of MDF for bracing inside the box, along the seems maybe a brace or 2 or 3 between top and bottom, the stronger/stiffer the cabinet the better.
Once bracing is done, "paint" inside of cabinet with fiberglass resin, [no fiberglass mat needed] to seal the MDF, run a bead of silicone along all the seems [don't forget to fiberglass the inside of the top], do not get fiberglass resin on the gluing surface, glue and screw the top of box on, silicone the inside edge, [through sub opening.
A little clean up, maybe some carpet on top of cabinet and your done.
If your doing this in "shop class" your instructor should be able to help along the way. Good luck, feel free to IM me if you have other questions.
94New User
Joined: Jun 2001
Posts: 1,963
Likes: 0
From: San Francisco, CA, USA
<TABLE WIDTH="90%" CELLSPACING=0 CELLPADDING=0 ALIGN=CENTER><TR><TD>Quote, originally posted by fcm »</TD></TR><TR><TD CLASS="quote">OK, better, still some pix, "This Image Is Temporarily Unavailable" anyway, nice clean install
Constructive criticism= With as much detail that you put into it, why is the "sub floor" black carpet?
Anyway, back to topic, still waiting for replay from benihana881 94</TD></TR></TABLE>
those pix are not important anyway - just stock photos. It's black carpet for a few reasons:
1. it's the most forgiving material out there
2. my brother uses his trunk, so it had to be durable
3. it matches the theme of a grey interior, but black floor mats
4. it's harder to tell that the trunk has been raised
Thanks
Constructive criticism= With as much detail that you put into it, why is the "sub floor" black carpet?
Anyway, back to topic, still waiting for replay from benihana881
94</TD></TR></TABLE>those pix are not important anyway - just stock photos. It's black carpet for a few reasons:
1. it's the most forgiving material out there
2. my brother uses his trunk, so it had to be durable
3. it matches the theme of a grey interior, but black floor mats
4. it's harder to tell that the trunk has been raised
Thanks
Honda-Tech Member
Joined: Mar 2004
Posts: 2,184
Likes: 2
From: Raleigh, NC, us
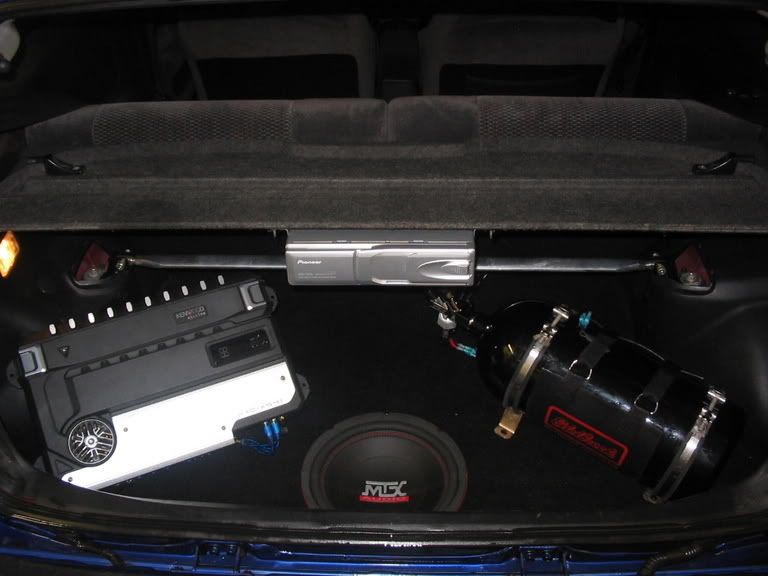
hers a pic of mine( click to enlarge) built a small box 18x20 x?(3/4"mdf). didnt raise the floor at all, only have mounting depth for a couple of mtx woofers, or an infinity kappa(coming soon) then i traced the floor carpet on 1/8"( 1/8 so it can bend during install) hard board, jig sawed it out , carpeted, and put it in. just whipped out the same thing for my 95 ex coupe sat. at work in about an hour. very easy to do. with just wood.

hope this helps.
hope this helps.
Honda-Tech Member
Joined: Aug 2005
Posts: 860
Likes: 0
From: 717 PA, USA
Old Fart
Joined: May 2004
Posts: 26,173
Likes: 18
From: kelowna, bc, canada
<TABLE WIDTH="90%" CELLSPACING=0 CELLPADDING=0 ALIGN=CENTER><TR><TD>Quote, originally posted by rcurley55 »</TD></TR><TR><TD CLASS="quote">
those pix are not important anyway - just stock photos. It's black carpet for a few reasons:
1. it's the most forgiving material out there
2. my brother uses his trunk, so it had to be durable
3. it matches the theme of a grey interior, but black floor mats
4. it's harder to tell that the trunk has been raised
Thanks</TD></TR></TABLE> OIC, still niece and clean 94
those pix are not important anyway - just stock photos. It's black carpet for a few reasons:
1. it's the most forgiving material out there
2. my brother uses his trunk, so it had to be durable
3. it matches the theme of a grey interior, but black floor mats
4. it's harder to tell that the trunk has been raised
Thanks</TD></TR></TABLE> OIC, still niece and clean
94

Thread
Thread Starter
Forum
Replies
Last Post
jjzend600rr
Audio / Security / Video
4
Sep 17, 2007 12:18 PM