

What I did to my Civic today - my build thread

Honda-Tech Member
Joined: Mar 2006
Posts: 806
Likes: 0
From: Colorado
It's still very much a possibility. The T25 is in my top 3 choices for a turbo.
I've worked with it before and really like the spool speed, but on D15/16 applications it won't hold strong power to redline and the peak power is lacking a bit. Not a deal-breaker though.
The 14b (IMO) is the best match for the D15/16 powerplant; the spool speed is only slightly later than the T25, and it will hold strong power all the way to redline. I've worked with the 14b's before also, but I do agree the J pipes on most DSM applications is a bit more work. But a point that a friend of mine made a couple years ago is that most people with 2nd Gen Eclipses usually change out thier T25 for the older 14b anyway...
My 3rd choice is the undersized T3 found on SAABs, with .42/.48 A/R configuration.
Umm... thanks, I think
Thread Starter
Honda-Tech Member
Joined: Apr 2012
Posts: 83
Likes: 0
From: Oregon
Thanks man! You stay tuned, and I'll keep it coming!
Speaking of which...
Day 1 of "Dynamat"
I've been waiting all week to start this, and I was pretty stoked to get going this morning. Started a little after 10am, and finished major coverage of the floor, and even crept up the walls a bit by about 5:30.
http://youtu.be/l7nU0xZ9J7Q

Here's your basic supplies. Peel & Seal, and a utility knife - extra blades are a good idea. You should also have a heat gun or a hair dryer. If there isn't a heat gun OR a hair-dryer in your house... then you are a sad, lonely individual. Stop working on your car right now and get a girlfriend.
You'll need 1 blade for every 2 rolls of Peel & Seal. You'll need two rolls to do the floor, one more roll if you want to go up the sides, and another roll to do your doors.
Peel & Seal is sold per 12.5 sq. feet. @ approx $17
I'm not doing my doors until next payday though - Peel & Seal is cheap, but not free.
The Dynamat Extreme Door Kit has 12 sq. feet - I've seen it sell for as much as $110, but if you buy it on eBay (and aren't getting scammed by a knockoff) you can get it as cheap as $60. Cheaper than that, and you're not getting real Dynamat.
Personally, I've been installing for years, used it all, and it's all the same. Get what you want though, just make sure you're getting a good deal
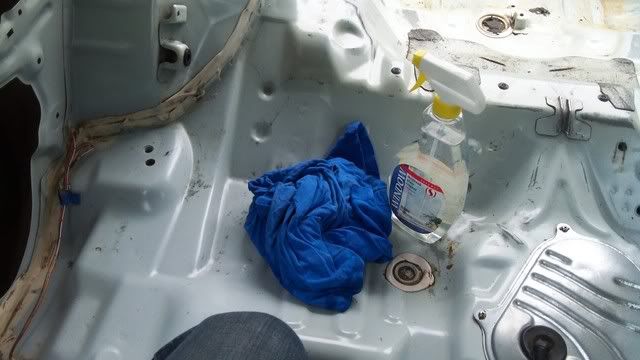
Even though I cleaned the back pretty good last weekend, there was still dust to clean off. Do not skip this step. Whether you're using Dynamat, FatMat, Hushmat, or Peel & Seal, if you don't clean well enough, it won't adhere properly.
I recommend a cleaner that has alcohol in it to help with drying. You can use straight alcohol if you want, but I used window cleaner (which I make myself). You can make your own window cleaner by mixing water, vinegar, and rubbing alcohol. I guess at what proportions to use and it works okay for me - so don't ask me for specifics.


Don't just start unrolling and sticking it to the floor!
Measure out a section you want to cover, and then cut some of your roll into PANELS that will fit that section. Don't guess at how long to make your panels should be, and don't cut your entire roll into the same length either.
Get out a tape measure and figure it out properly, leaving yourself an extra inch or so than you will need. If you nake your panels too long, and you'll have too much scraps and will have to buy more material. If you make your panels too short, you'll have to use lots of small pieces to fill the gaps you created by being lazy - your turnout will look like a patchwork quilt.
Just take your time, and do it right. Like most projects, your end product will depend mostly on your preparation.

This is not required, nor does it replace your heat-gun or hair-dryer. What I have going on is just a small space-heater keeping my pre-cut panels warm before I lay them. It's important that your panels be soft and pliable; they don't have to be hot to the touch, but they should be warm when you lay them down. I'll elaborate more later.

Laying the first panel down. It's important to start at one edge and work your way toward the other, peeling the paper backing off as you go. If you bought Dynamat, they give you a roller to help apply it to the metal - throw it out, it's useless. You'll need to press hard with your hands and fingers; I made a fist and beat on it like an angry ape pounding at the ground. This isn't easy work, especially if you have a lot of metal to cover. If you've ever laid carpet before, you know exactly what I'm talking about.
You will also run into air-bubbles. If you're careful, you'll have less bubbles. Use your utility knife to make a small incision, and press the air out with your fingers. Take the bubbles seriously for two reasons.
1. A bubble means the product is not making contact with metal - this means it won't do ANY GOOD at stopping vibration in that spot.
2. A bubble means the product is not making contact with metal - this also means there is oxygen between the product and the metal, and oxygen will cause problems to the product.
Don't worry about patching the areas where you cut to get the bubbles out, you're not patching a roof - it doesn't have to be waterproof. You can patch it if you want to, it's just cosmetic at that point. The most important part is that THE PRODUCT IS MAKING CONTACT WITH THE METAL.

As you get toward the end, slow down and if you need to make cuts, do it carefully so you have a nice edge at the end. If you have scraps, make sure to save them. I stuck my scraps back onto the paper backing and set them aside.

Here, you can see the corner I'm about to put this into at the edge of the wheel well.

This is the same panel after it went in.

This is what I meant about having your panels being pliable - if you can do this, you're doing it wrong.

If it's warm enough, it should do this. [if you want to giggle, now is the time]

I also wanted to point out that there will be some gaps that are unavoidable in your install - don't worry about it. Cut your panels smart, and do the best you can to get the most coverage out of each one. When you're ALL DONE with the project, this is what your scraps are for. Also, your roll of Peel & Seal will yield three 2" strips - I suggest making about a dozen of these for when you're working around difficult parts of the wheel wells, as well as the back wall of the hatch. These are also handy for narrow sections, or other large gaps if you screwed up somewhere else. As I said, cut your panels smart, and get the most out of each one.

My girly caught me werkin'


This is where she's at right now. Got the floor covered except for a few very small gaps, and started to go up the wheel-wells toward the sides.
Tomorrow I'll get the project finished and have even more pics to share.
Speaking of which...
Day 1 of "Dynamat"
I've been waiting all week to start this, and I was pretty stoked to get going this morning. Started a little after 10am, and finished major coverage of the floor, and even crept up the walls a bit by about 5:30.
http://youtu.be/l7nU0xZ9J7Q
Here's your basic supplies. Peel & Seal, and a utility knife - extra blades are a good idea. You should also have a heat gun or a hair dryer. If there isn't a heat gun OR a hair-dryer in your house... then you are a sad, lonely individual. Stop working on your car right now and get a girlfriend.
You'll need 1 blade for every 2 rolls of Peel & Seal. You'll need two rolls to do the floor, one more roll if you want to go up the sides, and another roll to do your doors.
Peel & Seal is sold per 12.5 sq. feet. @ approx $17
I'm not doing my doors until next payday though - Peel & Seal is cheap, but not free.
The Dynamat Extreme Door Kit has 12 sq. feet - I've seen it sell for as much as $110, but if you buy it on eBay (and aren't getting scammed by a knockoff) you can get it as cheap as $60. Cheaper than that, and you're not getting real Dynamat.
Personally, I've been installing for years, used it all, and it's all the same. Get what you want though, just make sure you're getting a good deal
Even though I cleaned the back pretty good last weekend, there was still dust to clean off. Do not skip this step. Whether you're using Dynamat, FatMat, Hushmat, or Peel & Seal, if you don't clean well enough, it won't adhere properly.
I recommend a cleaner that has alcohol in it to help with drying. You can use straight alcohol if you want, but I used window cleaner (which I make myself). You can make your own window cleaner by mixing water, vinegar, and rubbing alcohol. I guess at what proportions to use and it works okay for me - so don't ask me for specifics.
Don't just start unrolling and sticking it to the floor!
Measure out a section you want to cover, and then cut some of your roll into PANELS that will fit that section. Don't guess at how long to make your panels should be, and don't cut your entire roll into the same length either.
Get out a tape measure and figure it out properly, leaving yourself an extra inch or so than you will need. If you nake your panels too long, and you'll have too much scraps and will have to buy more material. If you make your panels too short, you'll have to use lots of small pieces to fill the gaps you created by being lazy - your turnout will look like a patchwork quilt.
Just take your time, and do it right. Like most projects, your end product will depend mostly on your preparation.
This is not required, nor does it replace your heat-gun or hair-dryer. What I have going on is just a small space-heater keeping my pre-cut panels warm before I lay them. It's important that your panels be soft and pliable; they don't have to be hot to the touch, but they should be warm when you lay them down. I'll elaborate more later.
Laying the first panel down. It's important to start at one edge and work your way toward the other, peeling the paper backing off as you go. If you bought Dynamat, they give you a roller to help apply it to the metal - throw it out, it's useless. You'll need to press hard with your hands and fingers; I made a fist and beat on it like an angry ape pounding at the ground. This isn't easy work, especially if you have a lot of metal to cover. If you've ever laid carpet before, you know exactly what I'm talking about.
You will also run into air-bubbles. If you're careful, you'll have less bubbles. Use your utility knife to make a small incision, and press the air out with your fingers. Take the bubbles seriously for two reasons.
1. A bubble means the product is not making contact with metal - this means it won't do ANY GOOD at stopping vibration in that spot.
2. A bubble means the product is not making contact with metal - this also means there is oxygen between the product and the metal, and oxygen will cause problems to the product.
Don't worry about patching the areas where you cut to get the bubbles out, you're not patching a roof - it doesn't have to be waterproof. You can patch it if you want to, it's just cosmetic at that point. The most important part is that THE PRODUCT IS MAKING CONTACT WITH THE METAL.
As you get toward the end, slow down and if you need to make cuts, do it carefully so you have a nice edge at the end. If you have scraps, make sure to save them. I stuck my scraps back onto the paper backing and set them aside.
Here, you can see the corner I'm about to put this into at the edge of the wheel well.
This is the same panel after it went in.
This is what I meant about having your panels being pliable - if you can do this, you're doing it wrong.
If it's warm enough, it should do this. [if you want to giggle, now is the time]
I also wanted to point out that there will be some gaps that are unavoidable in your install - don't worry about it. Cut your panels smart, and do the best you can to get the most coverage out of each one. When you're ALL DONE with the project, this is what your scraps are for. Also, your roll of Peel & Seal will yield three 2" strips - I suggest making about a dozen of these for when you're working around difficult parts of the wheel wells, as well as the back wall of the hatch. These are also handy for narrow sections, or other large gaps if you screwed up somewhere else. As I said, cut your panels smart, and get the most out of each one.
My girly caught me werkin'
This is where she's at right now. Got the floor covered except for a few very small gaps, and started to go up the wheel-wells toward the sides.
Tomorrow I'll get the project finished and have even more pics to share.
Last edited by childishthing; May 19, 2012 at 09:52 PM.

Honda-Tech Member
Joined: May 2012
Posts: 5
Likes: 0
From: Kitchener, Ontario
Nice Job! I am about to do this exactly, although I have heard some mixed things about using Peel and Seal, and im not sure if I want to cheap out or going expensive, (dont really wanna fork out that kind of money for dynamat or something similar) thoughts?


B*a*n*n*e*d
Joined: Mar 2012
Posts: 254
Likes: 0
From: BAY AREA KILLA NORCALI
good job on that sound deadening daaaam. looks like it should have been factory man  keep it up. i like the strips that travel along the top of the wheel wells next to the rear shock towers, that is gonna drown out all the noise from the tires kicking up lil rocks/debris.
keep it up. i like the strips that travel along the top of the wheel wells next to the rear shock towers, that is gonna drown out all the noise from the tires kicking up lil rocks/debris.

Honda-Tech Member
Joined: Apr 2012
Posts: 17
Likes: 0
Nice job on the sound deadening. Looks pro actually. My brother works part time in a custom audio shop here in Detroit. But about the audio. Do you have a good stereo with HPF and LPF as well as a separate sub-out an all the goodies? Nice speakers and a good 4 way to power em too?
Thread Starter
Honda-Tech Member
Joined: Apr 2012
Posts: 83
Likes: 0
From: Oregon
***UPDATE*** - there is no update to my project, i've been sick as a dog the past two days.
As I said, through my years of installing, I've used Dynamat, Fatmat, Hushmat, & Peel & Seal. They're all pretty much the same except for how much you pay for their product and the brand name in your car.
Honestly, I don't know why Peel & Seal doesn't market to the car audio people; they could be charging more for their product. I have heard that their parent company DOES actually sell the same prouct with a different name as a sound-deadener, but I don't have anything to back that up.
Okay, so here's the tech specs... EVERYONE read this, because I don't want to answer this twice.
-There are two types of sound deadener products out there; asphalt-based, and butyl-based.
-95% of the products out there are asphalt based (including Dynamat).
Dynamat "Extreme" is butyl-based. That's what I'll be comparing. Now why have a butyl based sound deadener if the asphalt based ones have worked so well? There are two reasons.
1. Butyl has a higher melting point than asphalt.
2. Butyl is NOT IARC (International Agency for Reasearch on Cancer) listed.
Asphalt is stable to 180�, and butyl to 300�. When asphalt reaches this temperature, the fumes can be toxic. When butyl reaches 300�, there are fumes, but none that are IARC listed.
You should also be asking, what other differences are there between rubberized asphalt and butyl based adhesives? Well, not much. Butyl is better at maintaining adhesion under high-heat, and doesn't degrade over time the way asphalt does. Butyl based adhesives also cost more per pound than asphalt. Simply stated, Butyl stands up to elements better than asphalt. Not so much of a difference in sound-deadening.
Notice I'm calling it an adhesive. These products both came from the roofing industry, they are both adhesives. The company I work for sells Butyl, as well as Asphalt tape to contractors to use on roofing jobs. That's what we're talking about by the way. Thick, expensive tape.
Look up the MSDS (Material Safety Data Sheet) for each product and see for yourself. They aren't that different.
So here's my question to you, looking at which product to install...
Will any part of the INSIDE of your car EVER get over 180�? No. If you park your car in Death Valley all day, maybe the temp could get up to 140-150� for an hour or two. There just aren't enough hot hours in the day, and your "hot" exhaust will make even less of a difference than the sun.
If your exhaust IS getting the floorboard of your car over 180�, sound deadening can wait. You have other issues.
So I'll say it again, I've used them all, they're all pretty much the same. I didn't feel like Dynamat or Dynamat Extreme worked any better than the others. BUT... If both products cost the same, I would buy Dynamat. Buy what you want.
Here's a link about inside car temps if you're interested...
http://www.mydogiscool.com/x_car_study.php#.T7rWWcWO6fY
umm... yes? idk man
It's not done yet, but thanks man!
Yes I did, cuz I'm **** like that. The rolls weigh in @ 3lbs 10oz including wrapping, paper backing, and the cardboard roll. so I'd say about 3lbs per roll installed. Will be using 3 rolls in the rear of the hatch, and probably a 4th to do the doors. Good question, thanks!
What's in the car is pretty much worthless, but hey I just bought it. It's got a cheapo Sony head unit, and low-end Pioneer Door speakers. Naturally, I'll be replacing both the head unit and speakers.
Will be putting in Kicker K-series door speakers, and whatever I get a good deal on for the head-unit - probably a Pioneer in the $200-250 range. For the door speakers I will also be running a 4-channel 300-400W amp, either JL Audio or Soundstream.
I already have my subs and amp though. I have two JL Audio 12W7's. To run them, I have a Soundstream 2500.1 Rubicon Class D amp. I will be getting another one later, and plan on running them together for a total of 5k watts.
yezzir!
Honestly, I don't know why Peel & Seal doesn't market to the car audio people; they could be charging more for their product. I have heard that their parent company DOES actually sell the same prouct with a different name as a sound-deadener, but I don't have anything to back that up.
Okay, so here's the tech specs... EVERYONE read this, because I don't want to answer this twice.
-There are two types of sound deadener products out there; asphalt-based, and butyl-based.
-95% of the products out there are asphalt based (including Dynamat).
Dynamat "Extreme" is butyl-based. That's what I'll be comparing. Now why have a butyl based sound deadener if the asphalt based ones have worked so well? There are two reasons.
1. Butyl has a higher melting point than asphalt.
2. Butyl is NOT IARC (International Agency for Reasearch on Cancer) listed.
Asphalt is stable to 180�, and butyl to 300�. When asphalt reaches this temperature, the fumes can be toxic. When butyl reaches 300�, there are fumes, but none that are IARC listed.
You should also be asking, what other differences are there between rubberized asphalt and butyl based adhesives? Well, not much. Butyl is better at maintaining adhesion under high-heat, and doesn't degrade over time the way asphalt does. Butyl based adhesives also cost more per pound than asphalt. Simply stated, Butyl stands up to elements better than asphalt. Not so much of a difference in sound-deadening.
Notice I'm calling it an adhesive. These products both came from the roofing industry, they are both adhesives. The company I work for sells Butyl, as well as Asphalt tape to contractors to use on roofing jobs. That's what we're talking about by the way. Thick, expensive tape.
Look up the MSDS (Material Safety Data Sheet) for each product and see for yourself. They aren't that different.
So here's my question to you, looking at which product to install...
Will any part of the INSIDE of your car EVER get over 180�? No. If you park your car in Death Valley all day, maybe the temp could get up to 140-150� for an hour or two. There just aren't enough hot hours in the day, and your "hot" exhaust will make even less of a difference than the sun.
If your exhaust IS getting the floorboard of your car over 180�, sound deadening can wait. You have other issues.
So I'll say it again, I've used them all, they're all pretty much the same. I didn't feel like Dynamat or Dynamat Extreme worked any better than the others. BUT... If both products cost the same, I would buy Dynamat. Buy what you want.
Here's a link about inside car temps if you're interested...
http://www.mydogiscool.com/x_car_study.php#.T7rWWcWO6fY
umm... yes? idk man
good job on that sound deadening daaaam. looks like it should have been factory man keep it up. i like the strips that travel along the top of the wheel wells next to the rear shock towers, that is gonna drown out all the noise from the tires kicking up lil rocks/debris.
keep it up. i like the strips that travel along the top of the wheel wells next to the rear shock towers, that is gonna drown out all the noise from the tires kicking up lil rocks/debris.Nice job on the sound deadening. Looks pro actually. My brother works part time in a custom audio shop here in Detroit. But about the audio. Do you have a good stereo with HPF and LPF as well as a separate sub-out an all the goodies? Nice speakers and a good 4 way to power em too?
Will be putting in Kicker K-series door speakers, and whatever I get a good deal on for the head-unit - probably a Pioneer in the $200-250 range. For the door speakers I will also be running a 4-channel 300-400W amp, either JL Audio or Soundstream.
I already have my subs and amp though. I have two JL Audio 12W7's. To run them, I have a Soundstream 2500.1 Rubicon Class D amp. I will be getting another one later, and plan on running them together for a total of 5k watts.
yezzir!
Honda-Tech Member
Joined: May 2012
Posts: 5
Likes: 0
From: Kitchener, Ontario
Thanks for that info, glad to know there is someone with proof not just talking out there a** going to pick up my peel and seal tomorrow

Honda-Tech Member
Joined: Apr 2012
Posts: 17
Likes: 0
Man, you've inspired me to do this to my Del Sol trunk. I was going to just use some primer and go over the old paint to look nice for my spare tire removal/sub install there. Those kickers will kick some major butt in that. Do you have a db meter to read how quiet you make the car versus stock? Thats my major issue. My del sol D16A has a fart can on it with pretty much stock exhaust and I'd really like to keep it loud, but it's impossible to hear anything unless the radio is completely cranked.
Thread Starter
Honda-Tech Member
Joined: Apr 2012
Posts: 83
Likes: 0
From: Oregon
If you're serious about staying lightweight, forget sound-deadening. If you're serious about sound, forget about being light. Most people aren't serious about either, and just want their car to buzz and rattle less. That's cool too.
Man, you've inspired me to do this to my Del Sol trunk. I was going to just use some primer and go over the old paint to look nice for my spare tire removal/sub install there. Those kickers will kick some major butt in that. Do you have a db meter to read how quiet you make the car versus stock? Thats my major issue. My del sol D16A has a fart can on it with pretty much stock exhaust and I'd really like to keep it loud, but it's impossible to hear anything unless the radio is completely cranked.
Think of an empty room with hardwood floor... everything echoes like a concert hall. Put in carpet and furniture and the rooms acoustics change completely.
Honda-Tech Member
Joined: Apr 2012
Posts: 17
Likes: 0
That's a great way of putting it with the hall thing. Have you done any comparison in db between Dynamat and the peal and seal? Or is there a huge difference in noise level? I'd like to keep my interior extremely quiet.
Thread Starter
Honda-Tech Member
Joined: Apr 2012
Posts: 83
Likes: 0
From: Oregon
This weekends' project; Budget Tune-Up
I had $60 to put toward a tune up, and this is what I picked up.


1 gallon Valvoline Full Synthetic $15.99
Bosch Oil Filter $6.99
NGK Iridium spark plugs $28.40
Spark plug gap tool $2.49
Gunk Motor Flush $3.89
Total: $57.76
(also got turn-signal bulbs, but not part of the tune-up)
The Motor Flush was a product I've been reading about for a bit and wanted to try it out on my first service of my new car. The engine meets the mileage requirements, and could use some internal cleaning.
Instructions say to add directly to the oil while the engine is cold. After I added it, per the instructions I allowed the engine to idle for 5 minutes, which is to be followed immediately by changine the oil. The fluid had an odor similar to gasoline. During the idle time, I noticed the engines idle speed drop slightly a few times in cycles as if it were about to stall, but it never did. It did this only for a minute or so, and then began idling normally again. I didn't notice any other smells, or smoking from the engine or exhaust.

After the Motor Flush had run it's course, I stopped the engine and prepared for the oil change. Got her up on jacks, dropped the old oil, and in with the new. The oil was pretty murky, and I was glad to be putting some good stuff back in.

I gapped the new Iridium plugs to .044 and took a comparison picture. Here you can see how burnt down and out of gap the old one is compared to the new one. Also note the much thinner wire on the Iridium plug. I've been using Iridium plugs for as long as I've been doing performance work on cars, and have never experienced any of the problems that are associated with Platinum plugs.
Changing the plugs was painless as could be, I really love having them so accessible.
I had $60 to put toward a tune up, and this is what I picked up.
1 gallon Valvoline Full Synthetic $15.99
Bosch Oil Filter $6.99
NGK Iridium spark plugs $28.40
Spark plug gap tool $2.49
Gunk Motor Flush $3.89
Total: $57.76
(also got turn-signal bulbs, but not part of the tune-up)
The Motor Flush was a product I've been reading about for a bit and wanted to try it out on my first service of my new car. The engine meets the mileage requirements, and could use some internal cleaning.
Instructions say to add directly to the oil while the engine is cold. After I added it, per the instructions I allowed the engine to idle for 5 minutes, which is to be followed immediately by changine the oil. The fluid had an odor similar to gasoline. During the idle time, I noticed the engines idle speed drop slightly a few times in cycles as if it were about to stall, but it never did. It did this only for a minute or so, and then began idling normally again. I didn't notice any other smells, or smoking from the engine or exhaust.
After the Motor Flush had run it's course, I stopped the engine and prepared for the oil change. Got her up on jacks, dropped the old oil, and in with the new. The oil was pretty murky, and I was glad to be putting some good stuff back in.
I gapped the new Iridium plugs to .044 and took a comparison picture. Here you can see how burnt down and out of gap the old one is compared to the new one. Also note the much thinner wire on the Iridium plug. I've been using Iridium plugs for as long as I've been doing performance work on cars, and have never experienced any of the problems that are associated with Platinum plugs.
Changing the plugs was painless as could be, I really love having them so accessible.
Last edited by childishthing; May 27, 2012 at 03:30 PM.
Thread Starter
Honda-Tech Member
Joined: Apr 2012
Posts: 83
Likes: 0
From: Oregon
Now this next project is still underway...
but I'll let you peek at where I'm at with it

THIS is my Formula D shift ****. I love it, and I'm probably going to keep it forever. Let me start off by saying, IT IS HEAVY AS ****.
New, this shift **** came as bare metal with a protective coating. The previous owner spray-painted it gold, and besides being gold, it looked like crap. Take a look at my valve cover and headers for reference. Anyway, I stripped off the gold a couple weeks ago and left it bare until I was ready to paint it. This weekend, it gets a proper paint job.
As you see it in the picture above, I sanded it to a smooth finish ready for paint. I should finish the project this evening.

This is after the first coat of white.
I'll be back with pics of the finished product tomorrow.
but I'll let you peek at where I'm at with it
THIS is my Formula D shift ****. I love it, and I'm probably going to keep it forever. Let me start off by saying, IT IS HEAVY AS ****.
New, this shift **** came as bare metal with a protective coating. The previous owner spray-painted it gold, and besides being gold, it looked like crap. Take a look at my valve cover and headers for reference. Anyway, I stripped off the gold a couple weeks ago and left it bare until I was ready to paint it. This weekend, it gets a proper paint job.
As you see it in the picture above, I sanded it to a smooth finish ready for paint. I should finish the project this evening.
This is after the first coat of white.
I'll be back with pics of the finished product tomorrow.
Honda-Tech Member
Joined: May 2012
Posts: 10
Likes: 0
From: Temecula, So. Cal
I almost bought an EF hatchback out here in Cali last weekend. The owner did the same thing with the engine bay in interior parts and a can of gold paint. it kind of saddened me. Keep up the good work.
Honda-Tech Member
Joined: Feb 2012
Posts: 126
Likes: 0
From: Michigan
Hey I'm planning on doing a similar tune up. I'll go with Iridium tips as well. However, I'm not too sure on the gapping subject. Any particular reason you did 0.044 or what?
Thread Starter
Honda-Tech Member
Joined: Apr 2012
Posts: 83
Likes: 0
From: Oregon
I may choose to change the gap to .030 in the future, but .044 is a good baseline to start from - I will also get good fuel economy and performance here.
I have this website bookmarked; you may find it has useful information. I linked the section on spark plug gap for you.
http://www.custom-car.us/ignition/spark-plug/gap.aspx
Honda-Tech Member
Joined: Feb 2012
Posts: 126
Likes: 0
From: Michigan
A stock D15B specifies a gap of .039 - .043 - a rule of thumb is you can increase or decrease the gap by .010 without making any changes to your electrical system.
I may choose to change the gap to .030 in the future, but .044 is a good baseline to start from - I will also get good fuel economy and performance here.
I have this website bookmarked; you may find it has useful information. I linked the section on spark plug gap for you.
http://www.custom-car.us/ignition/spark-plug/gap.aspx
BTW that is an awesome website. I bookmarked it as well. Thanks for sharing.
Last edited by gnarlycs; May 27, 2012 at 10:05 PM.
Thread Starter
Honda-Tech Member
Joined: Apr 2012
Posts: 83
Likes: 0
From: Oregon
My D16Y7 has the same spec for a gap between 0.039 - 0.043. So according to that article I should set my gaps to 0.030 for better performance since I drive around at full throttle most of the time? :p
BTW that is an awesome website. I bookmarked it as well. Thanks for sharing.
BTW that is an awesome website. I bookmarked it as well. Thanks for sharing.
***UPDATE***
Well, here's the finished shift-****. Sorry about the picture quality, I'm not using a real camera. The white looks super clean, and I've got a few coats of clear on also... very glossy.


I was really disappointed with the picture quality, I'll try and take better pics later.

Honda-Tech Member
Joined: Mar 2012
Posts: 15
Likes: 0
As soon as I clicked on this link I recognized that car from Craigslist. Then I looked at your location and saw Oregon. I knew it looked familiar. I'm from Salem, good job on the car