

95 Supercharged hatch project

Thread Starter
Honda-Tech Member
Joined: May 2012
Posts: 57
Likes: 0
From: Ohio
Hey guys this is my first time posting so hang in there. I am curios of what you all think and open to suggestions. I had just recently came to the Honda world so this is my fist Honda i have ever owned along with my first Honda build. I have a good mechanical background but not with foreign.
Goal of 250+ WHP on pump gas
SO what I have so far is a 95 civic DX hatch with a d15b7.
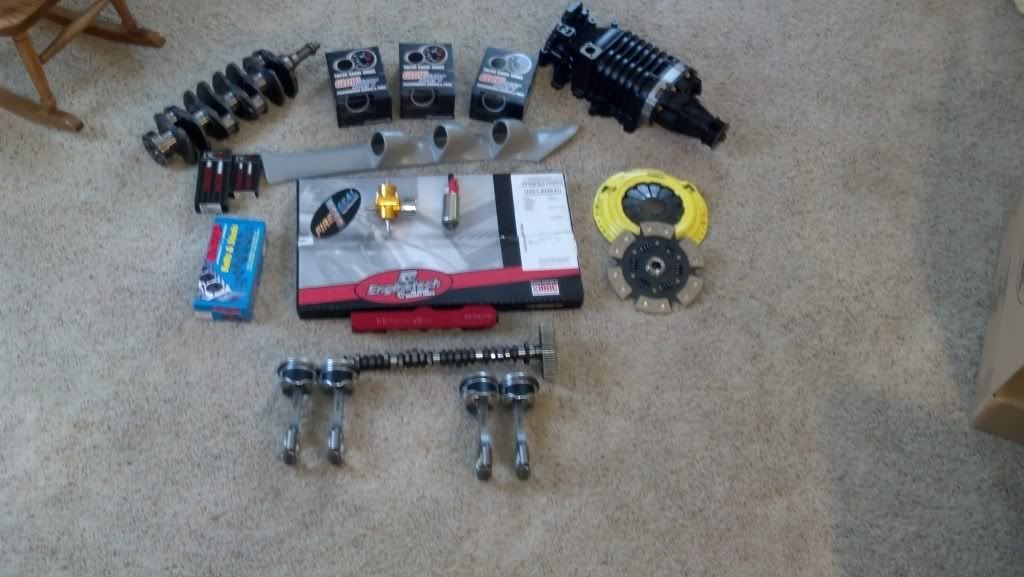
My swap is
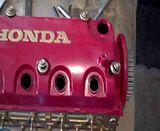
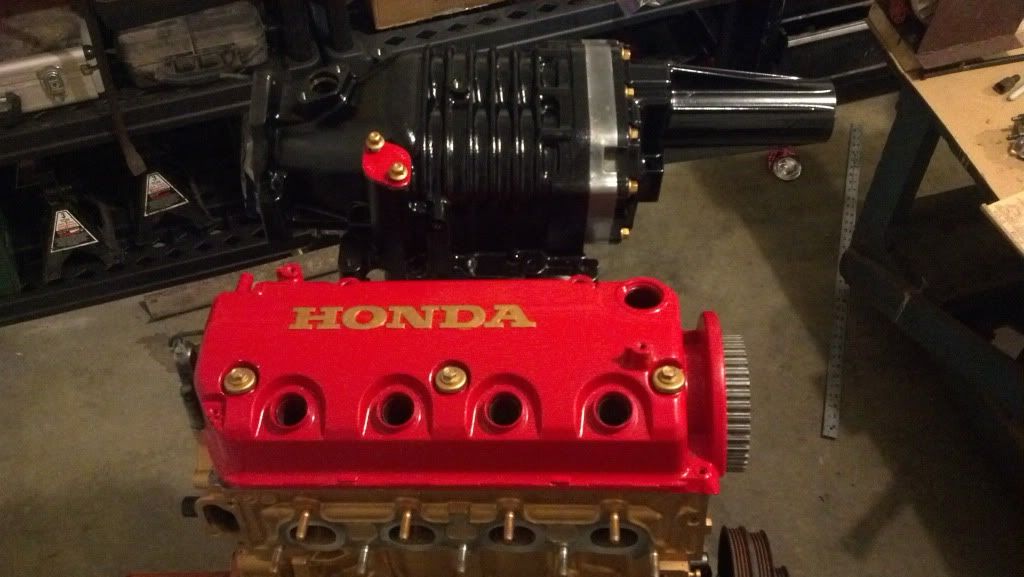
D16y8 block standard bore Z6 head
aqua monster 560cc injectors
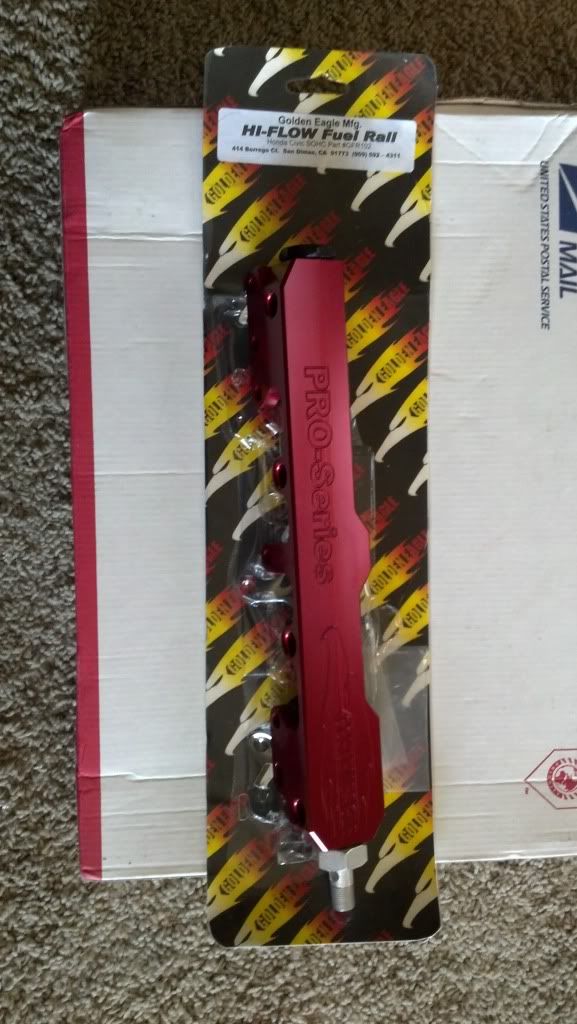
Golden Eagle pro fuel rail
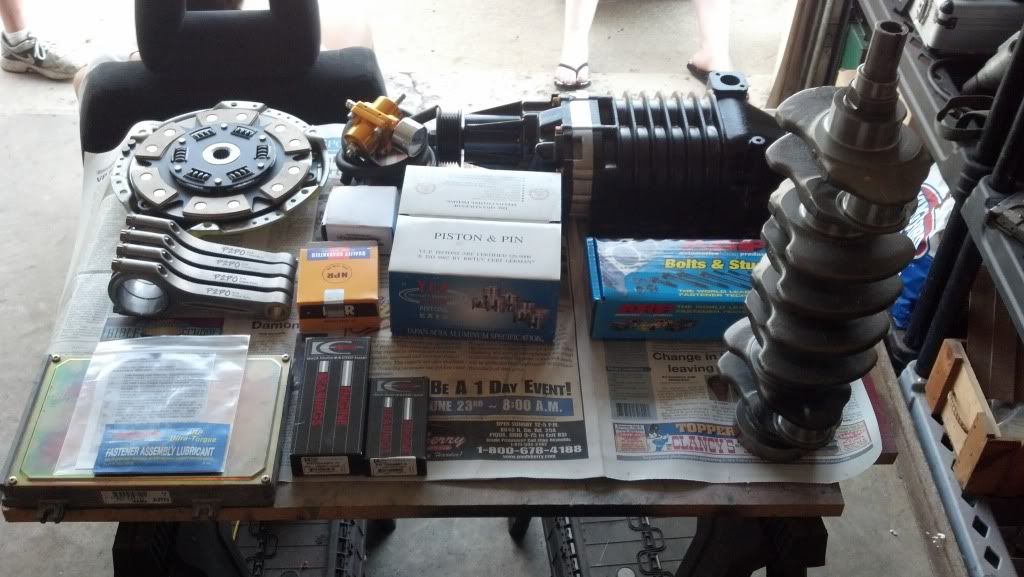
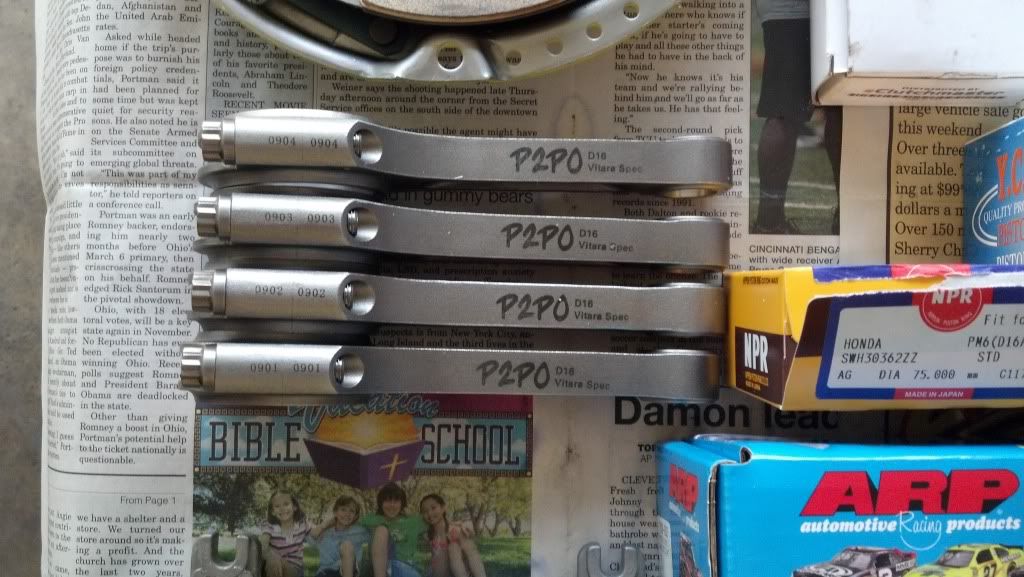
Vitaras with performance 2 point 0 custom length rods
Clegg engineering crank shaft with king bearings
ARP head studs and ARP 2000 rod bolts
Clutchmasters 6 puck ceramic disk and 2500# pressure plate
ex trans
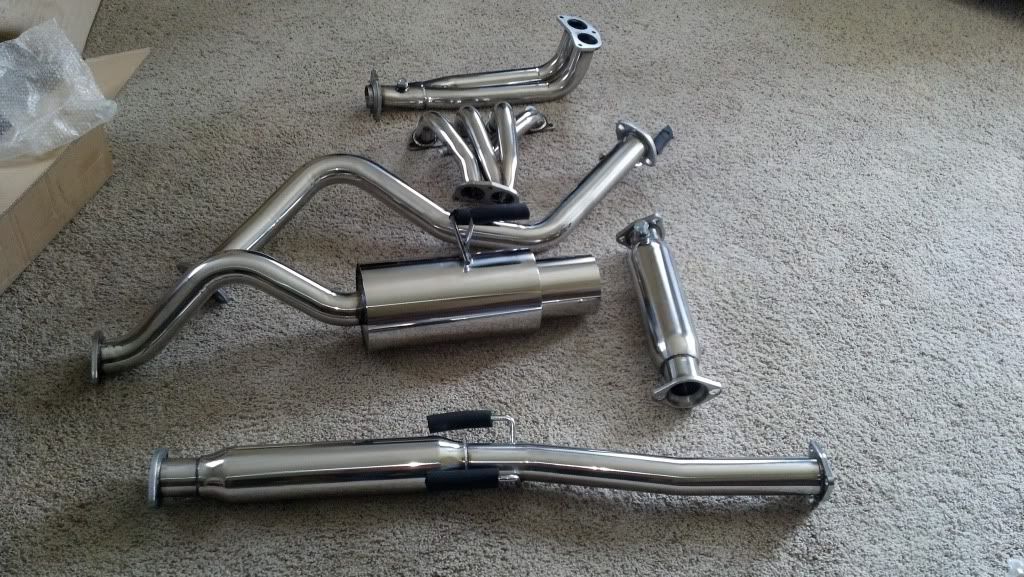
4-2-1 header to 2.5 inch stainless pipe with test pipe to the tip (ebay kit)
P28
GSR fat 5s mirror pollished.
Most important thing is a bonneville ssei Eaton M62 supercharger thats has been rebuilt and built to run in CCW rotation and also has been ported.
Goal of 250+ WHP on pump gas
SO what I have so far is a 95 civic DX hatch with a d15b7.
My swap is
D16y8 block standard bore Z6 head
aqua monster 560cc injectors
Golden Eagle pro fuel rail
Vitaras with performance 2 point 0 custom length rods
Clegg engineering crank shaft with king bearings
ARP head studs and ARP 2000 rod bolts
Clutchmasters 6 puck ceramic disk and 2500# pressure plate
ex trans
4-2-1 header to 2.5 inch stainless pipe with test pipe to the tip (ebay kit)
P28
GSR fat 5s mirror pollished.
Most important thing is a bonneville ssei Eaton M62 supercharger thats has been rebuilt and built to run in CCW rotation and also has been ported.
Last edited by Sammie.07; Jul 15, 2012 at 08:21 PM.
Thread Starter
Honda-Tech Member
Joined: May 2012
Posts: 57
Likes: 0
From: Ohio
Finally...someone cnc'ing a blower PROPERLY
Edit: Mrgrim is right, i was careless by neglecting to mention that step 2 of a proper cut there, is you have to angle the inside edge of the blower case to match the rotor curve. A straight vertical rise of the outlet is not conducive of smooth airflow out of the port.
Edit: Mrgrim is right, i was careless by neglecting to mention that step 2 of a proper cut there, is you have to angle the inside edge of the blower case to match the rotor curve. A straight vertical rise of the outlet is not conducive of smooth airflow out of the port.
Last edited by Spawne32; Jun 25, 2012 at 08:53 PM.
Trending Topics
Thread Starter
Honda-Tech Member
Joined: May 2012
Posts: 57
Likes: 0
From: Ohio
Thread Starter
Honda-Tech Member
Joined: May 2012
Posts: 57
Likes: 0
From: Ohio
Remember, runner length is not going to be as important here as is plenum volume. JRSC manifolds come with runners that are about 1" long.
Thread Starter
Honda-Tech Member
Joined: May 2012
Posts: 57
Likes: 0
From: Ohio
I'm going to have about 2 inch runners because my fuel rail is so big, but about the Plenum volume I am going to have to crunch some numbers to figure an efficient volume for it, I am hoping to run 15 to 18 psi ( hopefully)
Last edited by Sammie.07; Jun 27, 2012 at 01:13 AM.
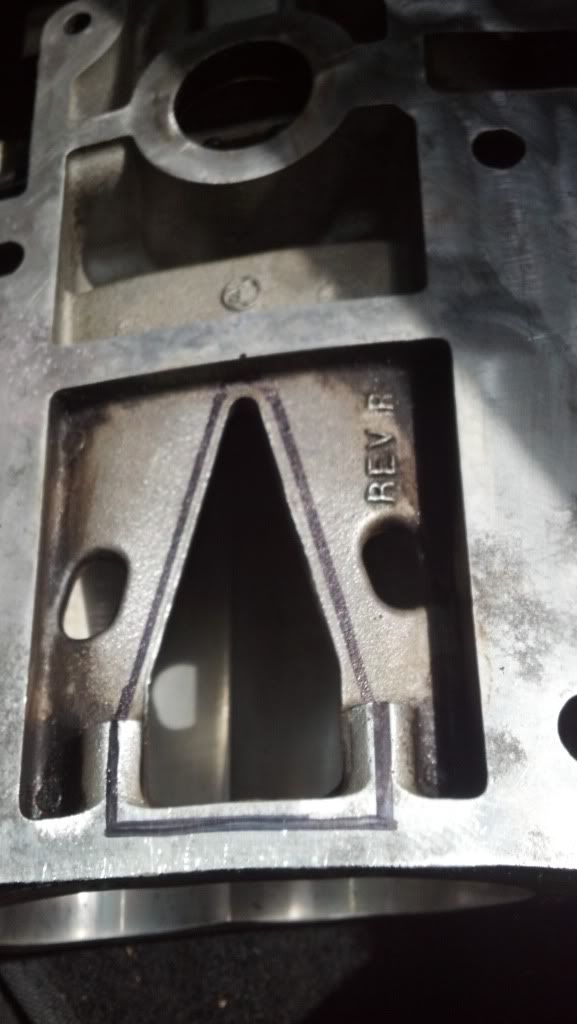
ok ill explain.. ( Black art / VooDoo supercharger porting)
1st you will align the rotors from the inlet
looking through the inlet align a left rotor tip at 60Deg as per the diagram
this is mesured from the center vertical and 60Deg through the center of the bearing
pic is not accurate just a drawing
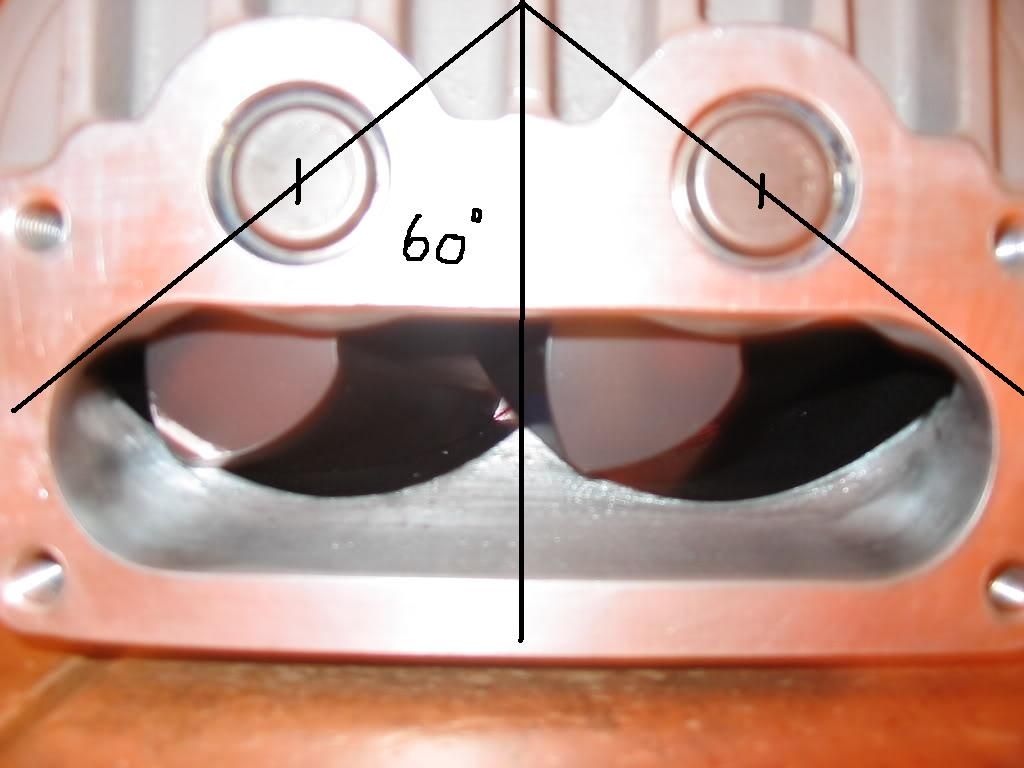
then while in the position you can use either blu-tack or plasticine to hole the rotors still
now looking through the outlet you will see where the same rotor has aligned up to the opening.
You will also notice the the relation of the rotor to the opening is not straight but has a
gentle curve following this curve gives the porting shape for that side of the V outlet
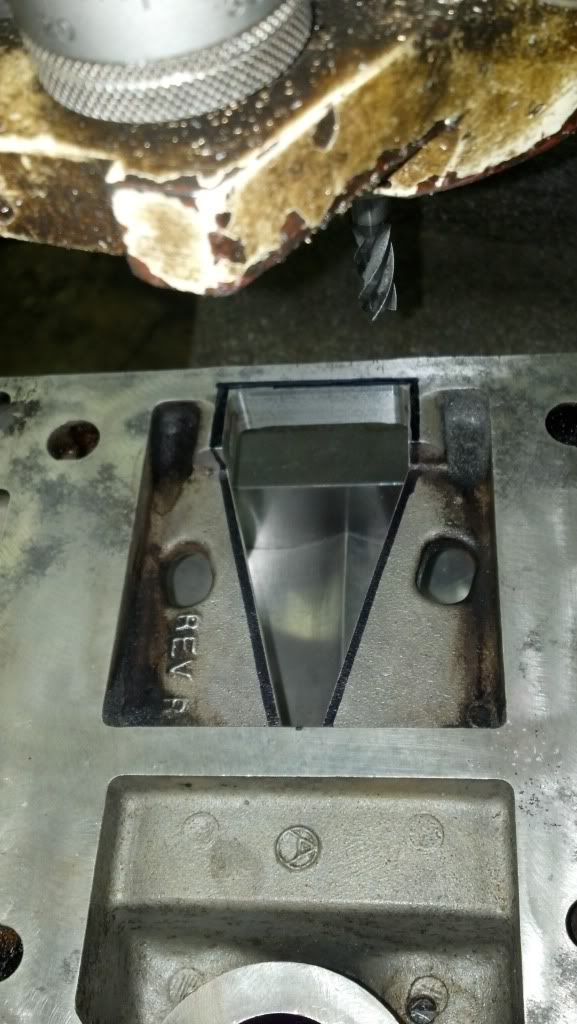
Now where to open this up to is at 2mm away from the edge of the rotor to
housing meeting point ..when done it will leave you a lip with the rotor just tucked behind it
hiding
The reason for the 2mm is to allow room for a small shamfer or rounding of the sharp edges after port shape has be machined
the whole process is repeated again for the oposite rotor
after both have been done in this manner you have now maximised you port flow of the outlet...with all relavant results lower IAT, raised flow efficiency
I will explain the inlet in the next post
1st you will align the rotors from the inlet
looking through the inlet align a left rotor tip at 60Deg as per the diagram
this is mesured from the center vertical and 60Deg through the center of the bearing
pic is not accurate just a drawing
then while in the position you can use either blu-tack or plasticine to hole the rotors still
now looking through the outlet you will see where the same rotor has aligned up to the opening.
You will also notice the the relation of the rotor to the opening is not straight but has a
gentle curve following this curve gives the porting shape for that side of the V outlet
Now where to open this up to is at 2mm away from the edge of the rotor to
housing meeting point ..when done it will leave you a lip with the rotor just tucked behind it
hiding
The reason for the 2mm is to allow room for a small shamfer or rounding of the sharp edges after port shape has be machined
the whole process is repeated again for the oposite rotor
after both have been done in this manner you have now maximised you port flow of the outlet...with all relavant results lower IAT, raised flow efficiency
I will explain the inlet in the next post
to port the inlet ( Black art / VooDoo supercharger porting) cont...
looking at the inlet port as per the above pic you can see where the rotors meet the housing @ 60Deg
the main inlet porting is to smooth out any casting marks
further porting can be done at the bottom center of each half of the rotor swept area
as you can tell from my explaination there is not to much that can be done to the inlet
apart from a little mild porting and smoothing out casting faults
you can open up the inlet to the the S-tube further to allow flow
and match the ports
hope this helps
Thread Starter
Honda-Tech Member
Joined: May 2012
Posts: 57
Likes: 0
From: Ohio
to port the inlet ( Black art / VooDoo supercharger porting) cont...
looking at the inlet port as per the above pic you can see where the rotors meet the housing @ 60Deg
the main inlet porting is to smooth out any casting marks
further porting can be done at the bottom center of each half of the rotor swept area
as you can tell from my explaination there is not to much that can be done to the inlet
apart from a little mild porting and smoothing out casting faults
you can open up the inlet to the the S-tube further to allow flow
and match the ports
hope this helps
looking at the inlet port as per the above pic you can see where the rotors meet the housing @ 60Deg
the main inlet porting is to smooth out any casting marks
further porting can be done at the bottom center of each half of the rotor swept area
as you can tell from my explaination there is not to much that can be done to the inlet
apart from a little mild porting and smoothing out casting faults
you can open up the inlet to the the S-tube further to allow flow
and match the ports
hope this helps
when porting the biggest tip is look at it from the point of veiw of water
which way would you go and how ..what would slow you down
area mass volume should also be looked at re going from big to small
and vise versa, is there a slow point or turn
or somthing that you might get hung up on
which way would you go and how ..what would slow you down
area mass volume should also be looked at re going from big to small
and vise versa, is there a slow point or turn
or somthing that you might get hung up on
Thread Starter
Honda-Tech Member
Joined: May 2012
Posts: 57
Likes: 0
From: Ohio
when porting the biggest tip is look at it from the point of veiw of water
which way would you go and how ..what would slow you down
area mass volume should also be looked at re going from big to small
and vise versa, is there a slow point or turn
or somthing that you might get hung up on
which way would you go and how ..what would slow you down
area mass volume should also be looked at re going from big to small
and vise versa, is there a slow point or turn
or somthing that you might get hung up on


Honda-Tech Member
Joined: Jan 2011
Posts: 345
Likes: 0
From: ny
how do you build the supercharger to run counter clock wise?
sweet build too im am subscribing.
also how much boost do you plan on running? or blower rpm?
also why do you want lower compression?
sweet build too im am subscribing.
also how much boost do you plan on running? or blower rpm?
also why do you want lower compression?
Who is Mr Robot?
iTrader: (2)
Joined: Jul 2004
Posts: 21,474
Likes: 10
From: ATL - Where the Pimps and Players dwell
How was it converted for ccw use? It looks like they flipped the rotors around and rotated the snout from the right side of the blower to the left. I have a y8 with rod knock that I've been debating about pulling apart to run a supercharger, however i would run it in place of the ac compressor as to facilitate the use of an intercooler. A company makes a phenolic intercooler kit that bolts to the outlet of the m62 but they aren't really cheap.
To answer both the above questions
to make it CCW the only parts changed are as follows
the snout is flipped and the rotor drive gears inside are pulled off
and then they are swaped left to right
so the driven gear is now on the same side as the flipped snout
rotors stay as they where
sounds easy but it isnt
to make it CCW the only parts changed are as follows
the snout is flipped and the rotor drive gears inside are pulled off
and then they are swaped left to right
so the driven gear is now on the same side as the flipped snout
rotors stay as they where
sounds easy but it isnt