

SHG_Felliphe's EG Hatch Build Thread

Thread Starter
Honda-Tech Member
Joined: Nov 2007
Posts: 6,334
Likes: 1
From: MA
haha fair enough 
Yeah I know what you mean, I haven't worked for 11 months so it will be very tight for me to go, as of now I'm not sure if I'll be able to but Im counting on my good graces that I can get a job before then! Best of luck to us!
Yeah I know what you mean, I haven't worked for 11 months so it will be very tight for me to go, as of now I'm not sure if I'll be able to but Im counting on my good graces that I can get a job before then! Best of luck to us!


Thread Starter
Honda-Tech Member
Joined: Nov 2007
Posts: 6,334
Likes: 1
From: MA
I had an NRG setup for my DB but sold the hub and never found a used EK one for a reasonable price. I was looking at the eBay ones (I know, shameful) and they didn't look too bad. I just wanna throw my wheel on!
Honda-Tech Member
Joined: Dec 2003
Posts: 12,680
Likes: 1
From: True Honda Enthusiast
Thread Starter
Honda-Tech Member
Joined: Nov 2007
Posts: 6,334
Likes: 1
From: MA

For sure, it looks real nice. Sorta like the one you had, that was custom right? I don't know if I would like having the steering wheel closer to me like that but I could still use a quick release and all, just it would push the wheel too close for my liking.
I'll post an update later on tonight if its not too late or tomorrow. Finishing something up now and I might start the next project tonight still. You guys are gonna like it. I still have a lot of things to do still.
I plan on taking out my coilovers to clean them up sometime next week as well. Lets see how that goes!
Thread Starter
Honda-Tech Member
Joined: Nov 2007
Posts: 6,334
Likes: 1
From: MA
Yeah see, I already like that one better because its not as long. I wouldn't mind having it a bit closer but not too close. Quick release+lock is a must.
So sick!

So sick!
Thread Starter
Honda-Tech Member
Joined: Nov 2007
Posts: 6,334
Likes: 1
From: MA
Update:

After driving around at my hometown a couple of weeks ago with some friends who were home from college, I realized how urgent it was to take my interior apart.
My hometown is undergoing serious renovation in their water and sanitation infrastructure along with some other things and well, the roads are garbage. All main roads have been completely torn up and is mostly patched with uneven dips, bumps and potholes. There isn't a decent street anywhere to be found.
My interior was shaking really bad, just violent rattles and all kinds of noises like squeaks, thuds and everything in between. I was sorta embarrassed, its like all this hard work that I put into it and it feels like the biggest POS :angry:
My friend asked me how to downshift coming to a stop and I couldn't even show him what a downshift rev match is because the car was bouncing all around.
At least the town has the money to fix it and are doing something about it but even so, it has always been bad. Doesn't help that everyone is in a hurry and try to pass when you're dodging holes
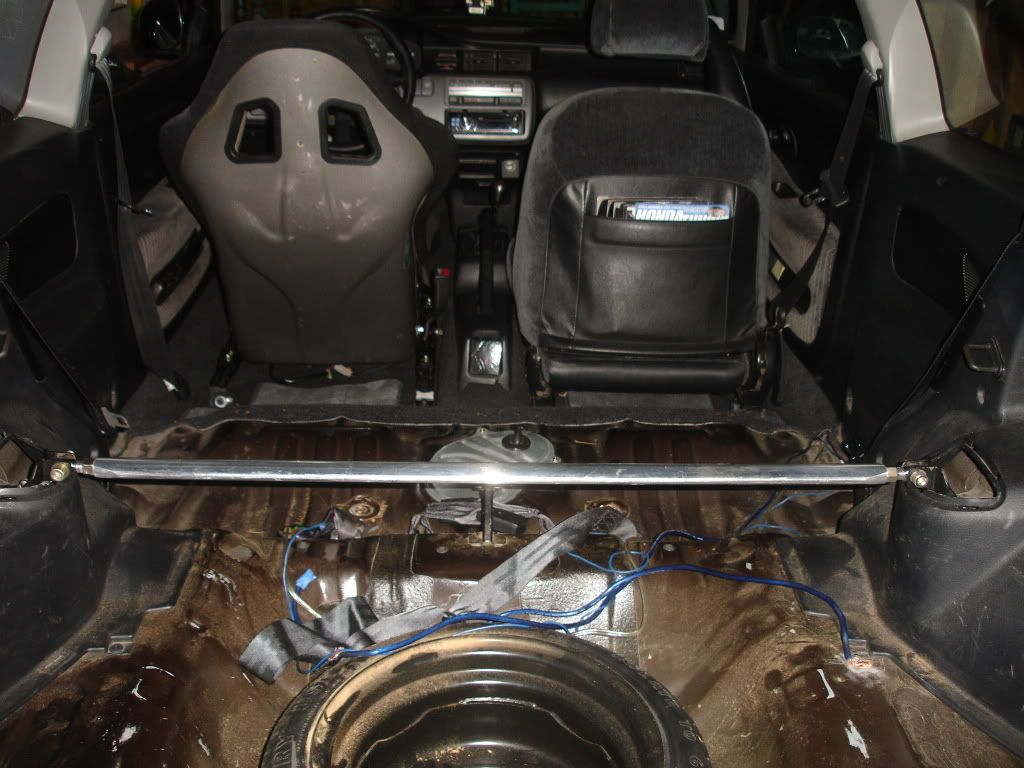
So I got really fed up with all that noise and decided to do something about it.
Its pretty easy to remove it if you know how, otherwise it can be frustrating.
Start by folding the rear seats down and there will be a clip on the sides of the seat near the windows, use a plier and just pull it out, comes off easy. Then slide the backs to the windows and it will get off from the middle hinge. After that there is 1 10mm bolt holding the bottoms in. Lift up the bottoms and pull the front by the hinges that go in the chassis. Done!
Seats are pretty mint for their age.
"May 7 1992" "Shift C" "Inspected by John Shaw" I would like to shake this guy's hand if hes still alive!
Notice all the dust, that is mainly from the flimsy spare tire cover the 5th gens came with.
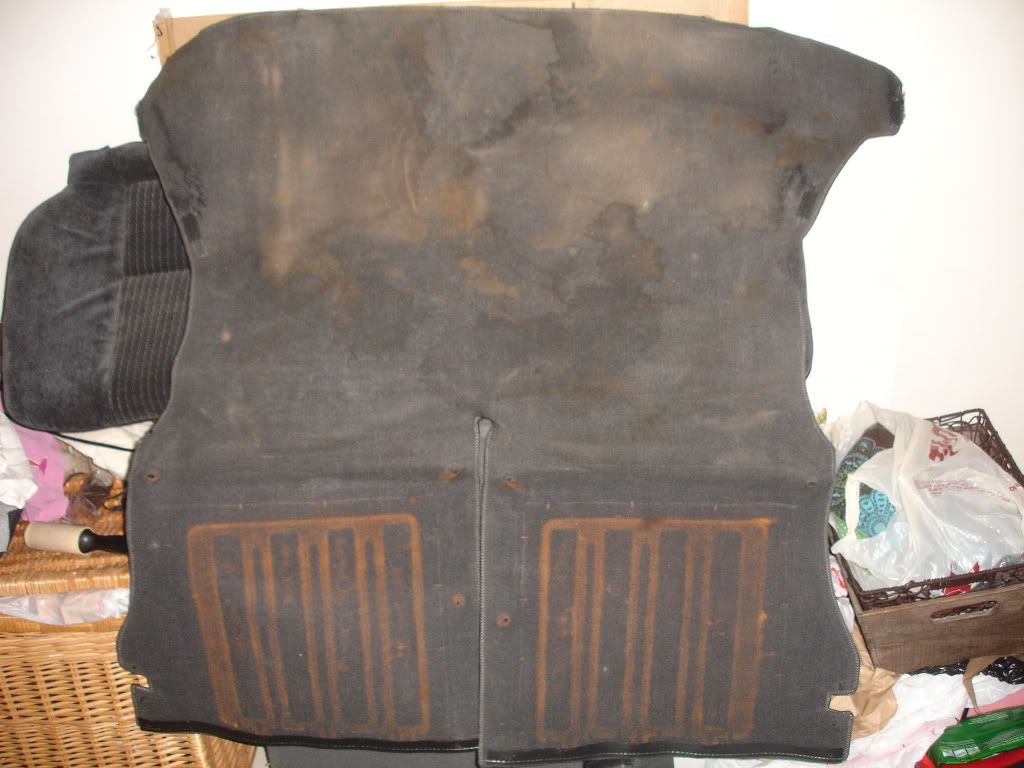
The trunk carpet that attaches to the rear seats were filthy underneath. The surface rust is not a big deal though, every seat has that. I will coat the backs in the future so that they don't rust but for now, no reason to clean as it will get rusted right back.
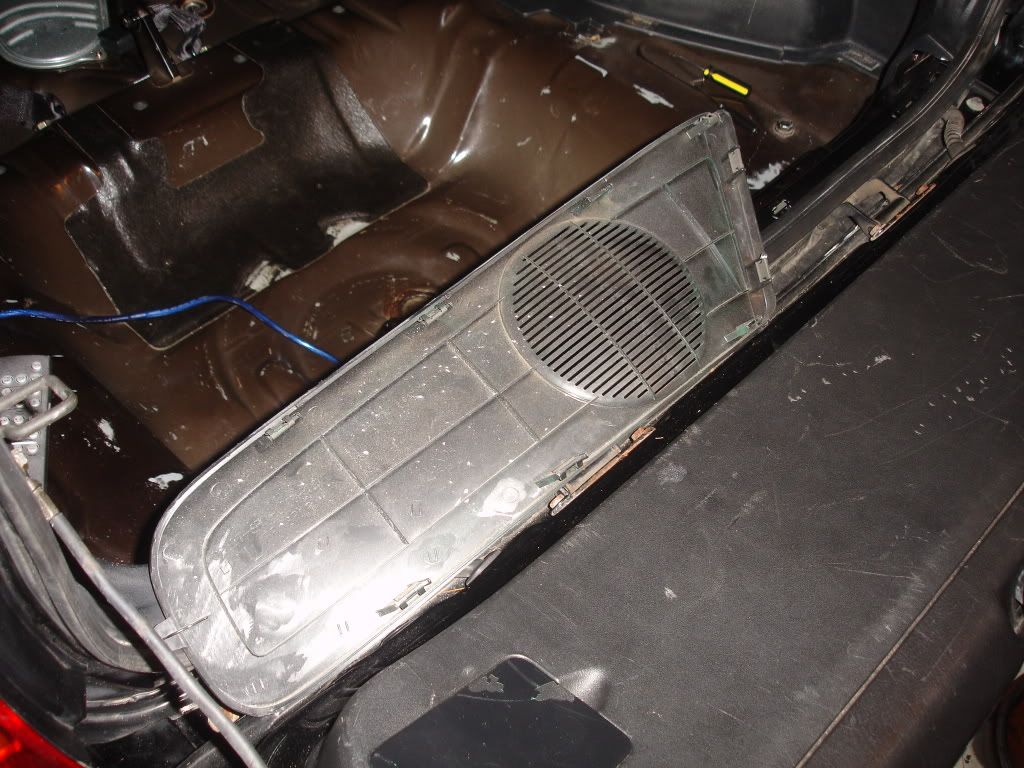
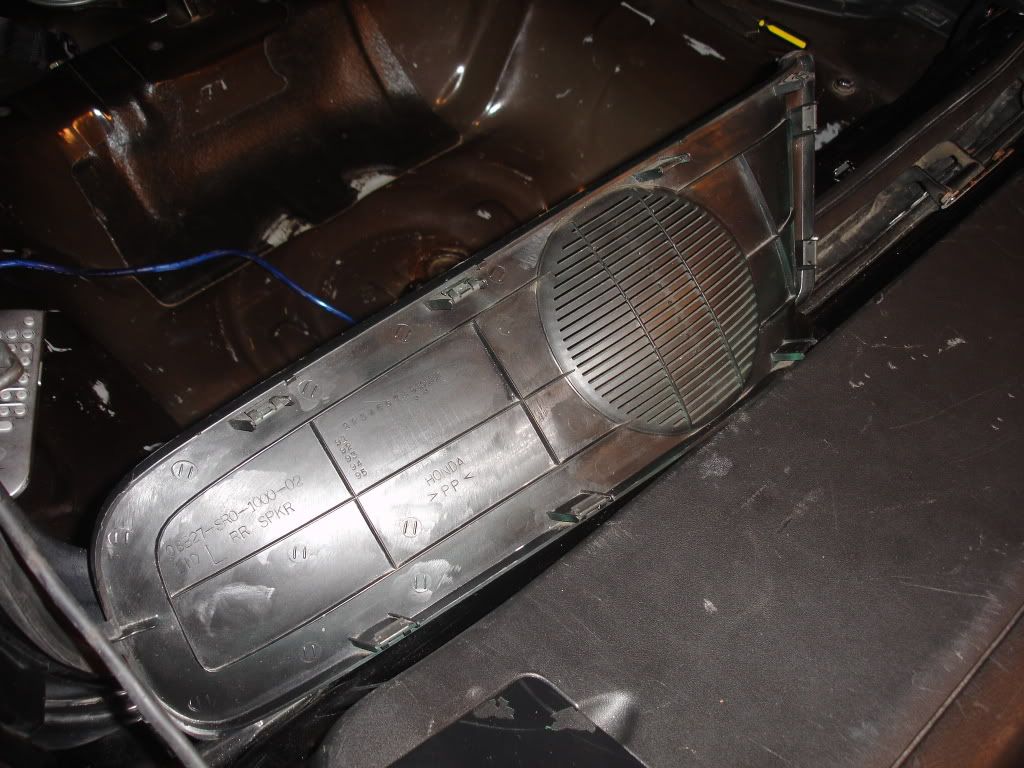
Remove all the bolts and grommets from the panel as well as the screws that support the speakers and pull the panel out.
Heres how dirty it was after all those years. Gave it a quick wipe for reference.
Floor super filthy
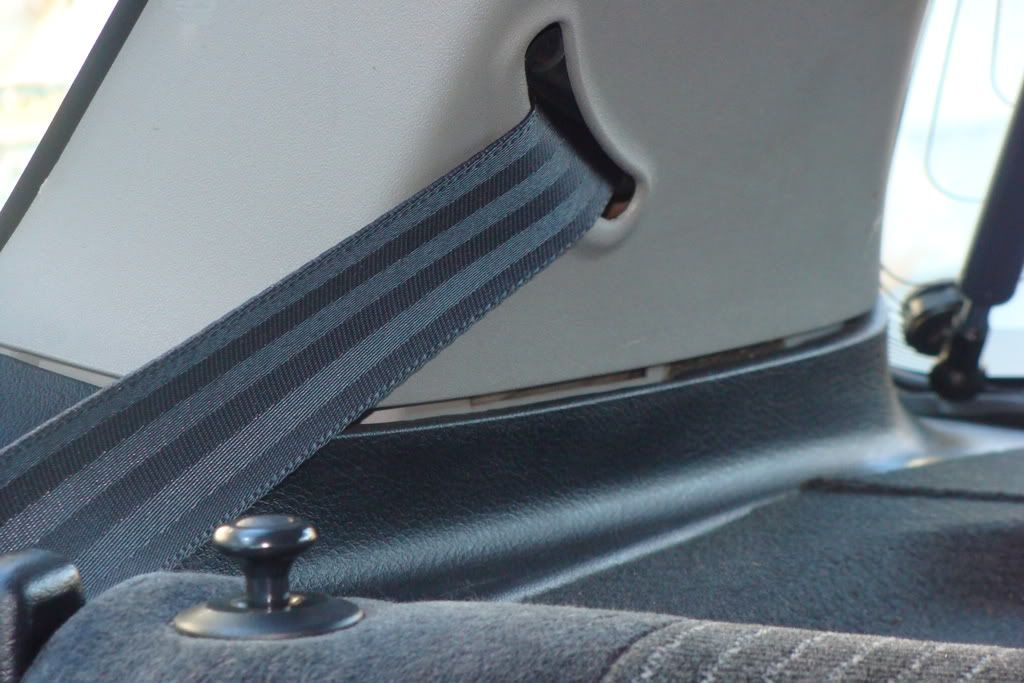
Not sure if you guys remember but I had new front seatbelts installed at Honda about 2 years ago during the winter because they weren't retracting well. If your belts have trouble retracting or anything of the sort, Honda replaces it under their lifetime warranty

Cleaning as I go, realized I was missing a lot of spots after looking at these pictures and completely wiped everything down with a wet and dry towel and did a pretty meticulous job I think.
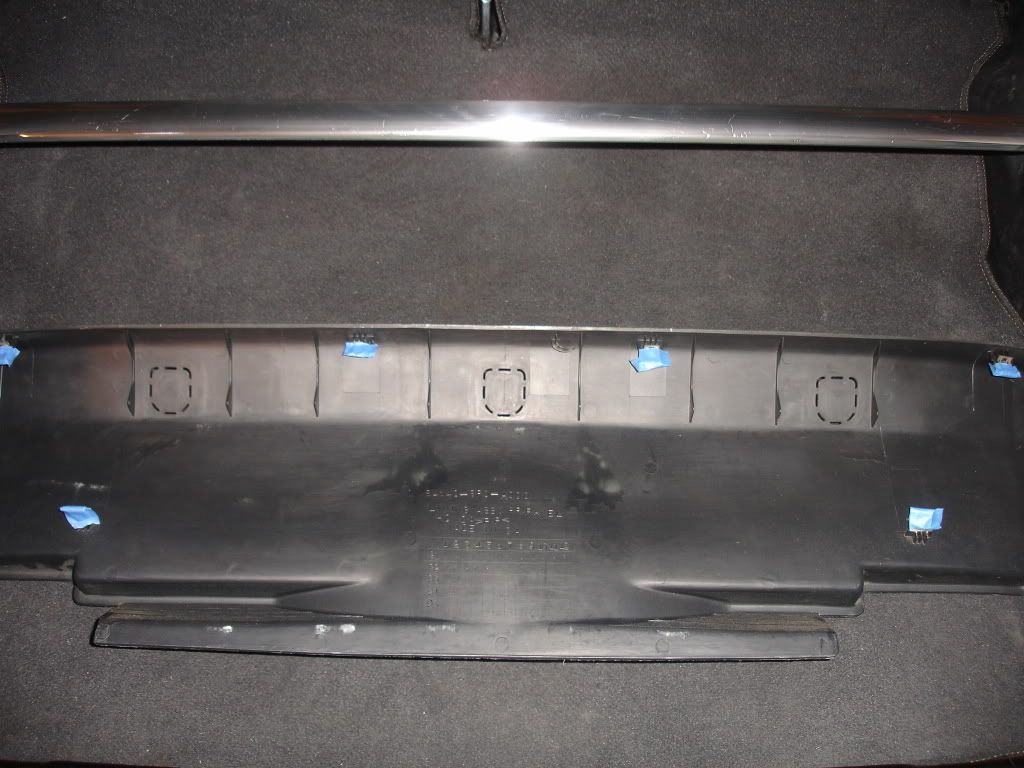
The OEM panels had this foam strip that was super baked from being in the hot sun and freezing winter that it wouldn't even come back up after I pinched it lol!
Used nail polish remover to get rid of the glue it left but it didn't remove everything which is fine because I didn't want to scratch it either for no reason, afterall the sticky stuff was gone and it only left dry non sticky residue.
Other side
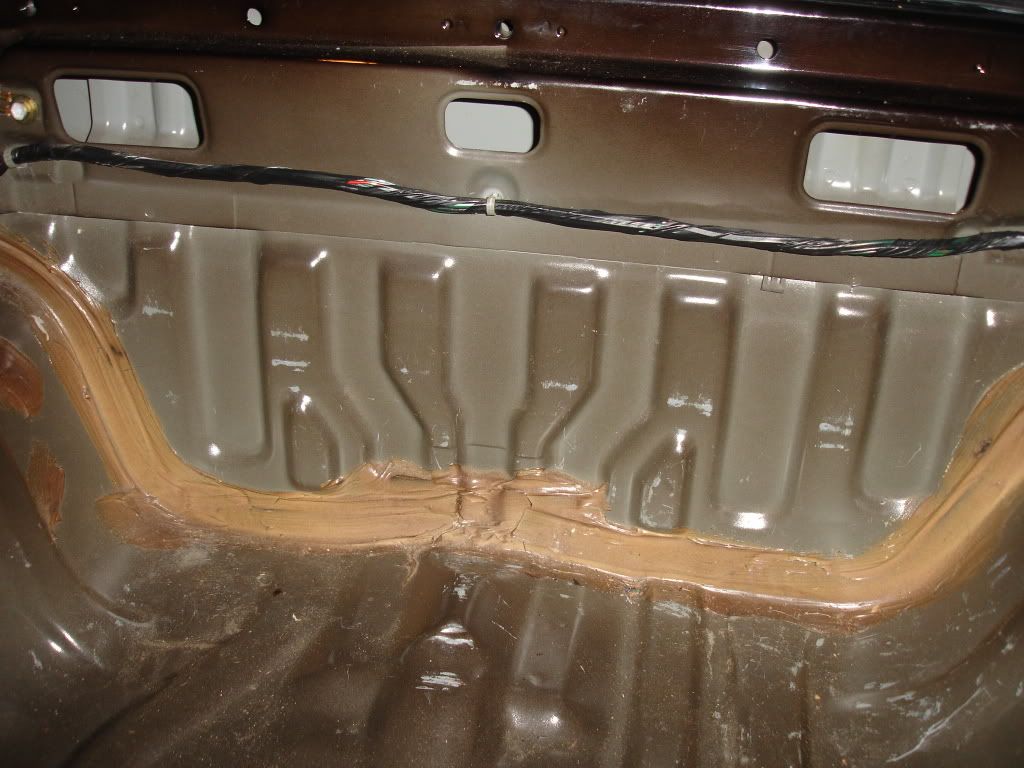
Applied this nice foam pad I had that came with my A/C to insulate the window borders It sticks really good too with the adhesive that it comes with that gets peeled off. Bigger foam pads than OEM because they probably used as little possible to cut costs so a little more won't hurt, plus it will help for sure.
Other side
The rear pillar garnish also had the foam pads in them, the glue came off completely on these.
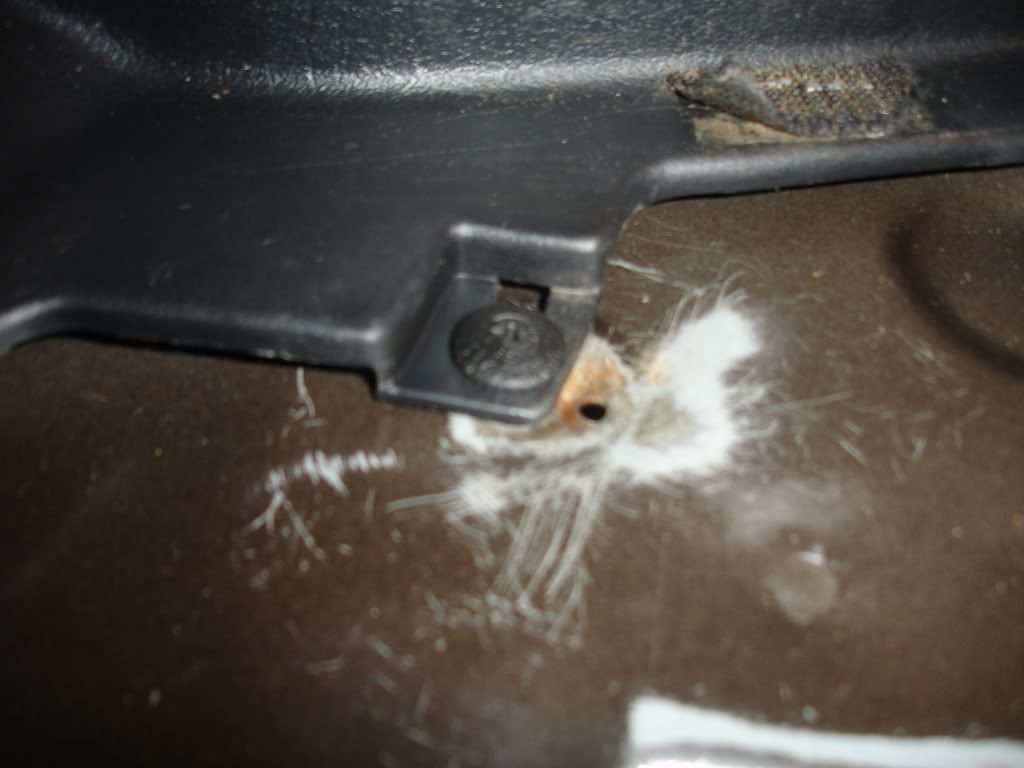
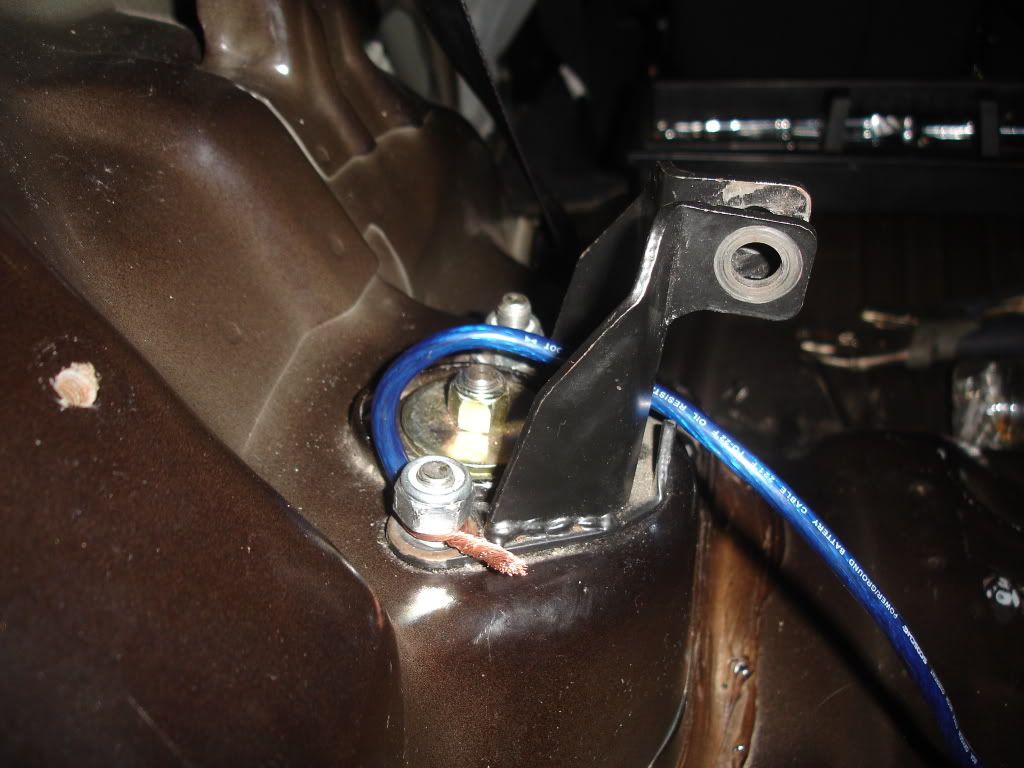
Previous owner made a hole here to ground the sub and it is just weak I would hear the subs buzz everytime they turned on, super annoying, even picked up exhaust noise which was really annoying
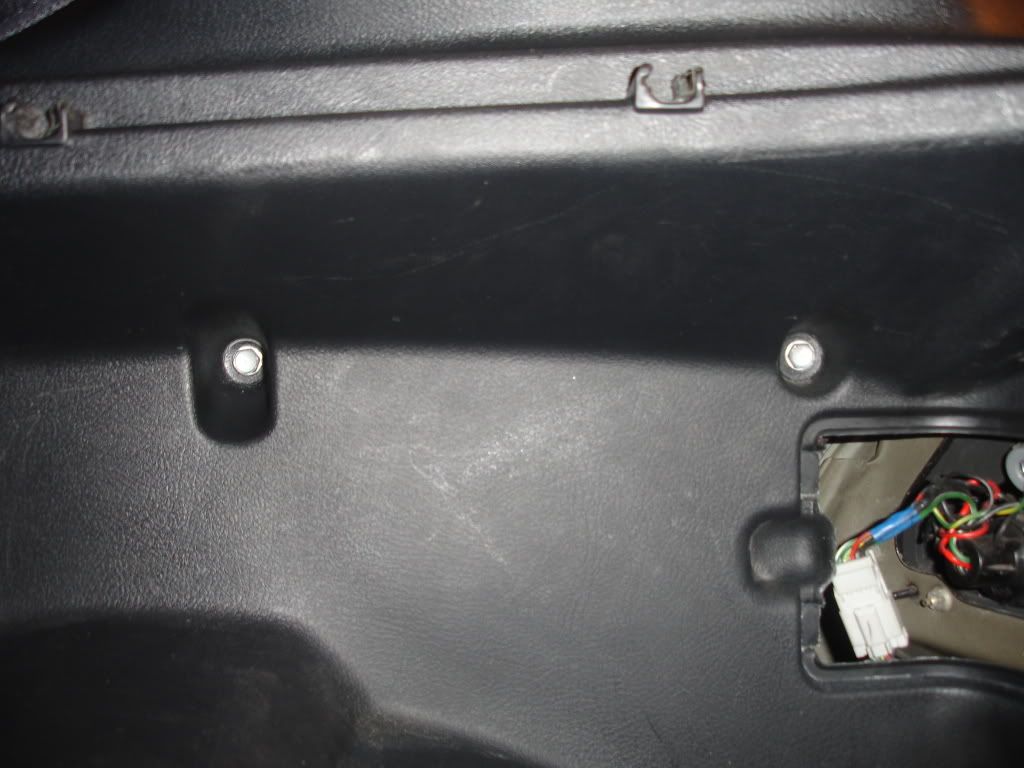
After completely cleaning the rear interior panels and and the insides of the body including the 1/4s, I got to putting back the panels with hardware that I believe is OEM. It is missing a few bolts and grommets but not really needed and they won't line up either. More on that below.
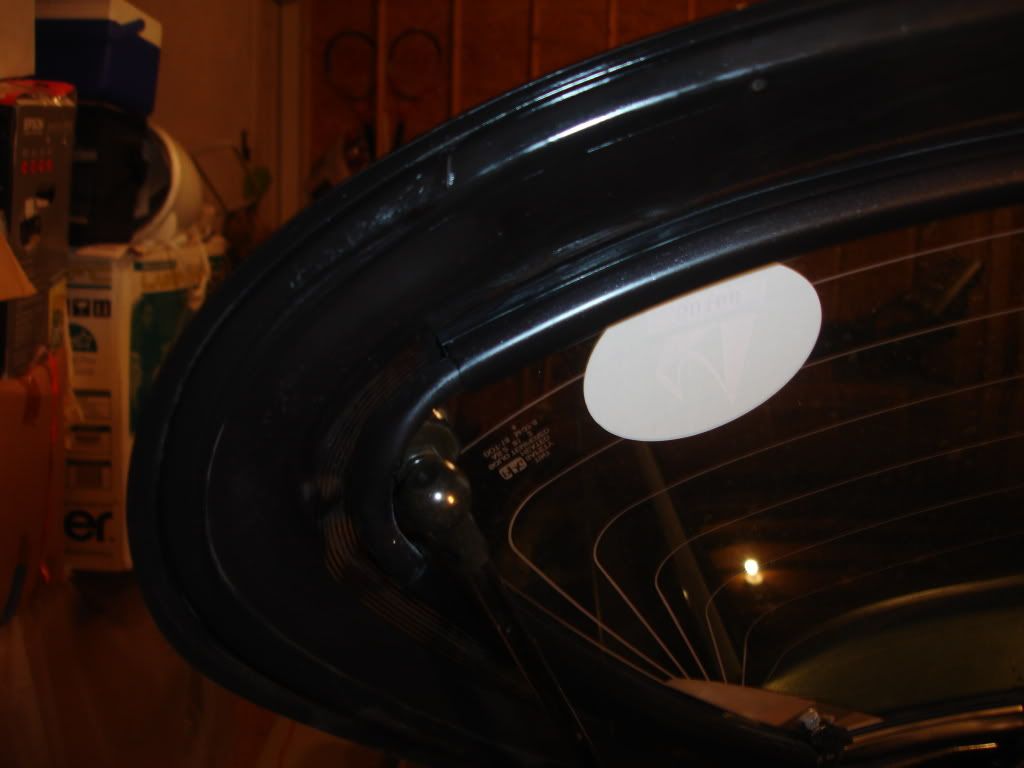
Cleaned this up and got it back on.
Did the weather stripping too.
The new ground location is the stud. The studs are cadmium plated which conducts electricity so IMO this should ground properly, lmk what you guys think (Note: I did tighten it down all the way after the pic)
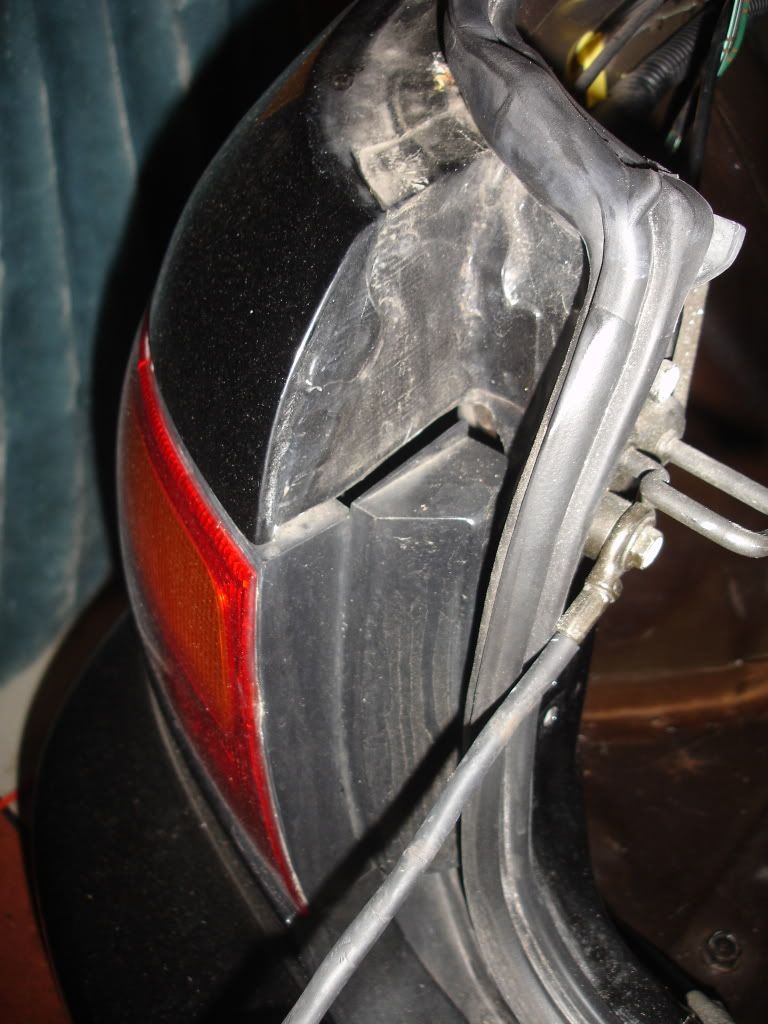
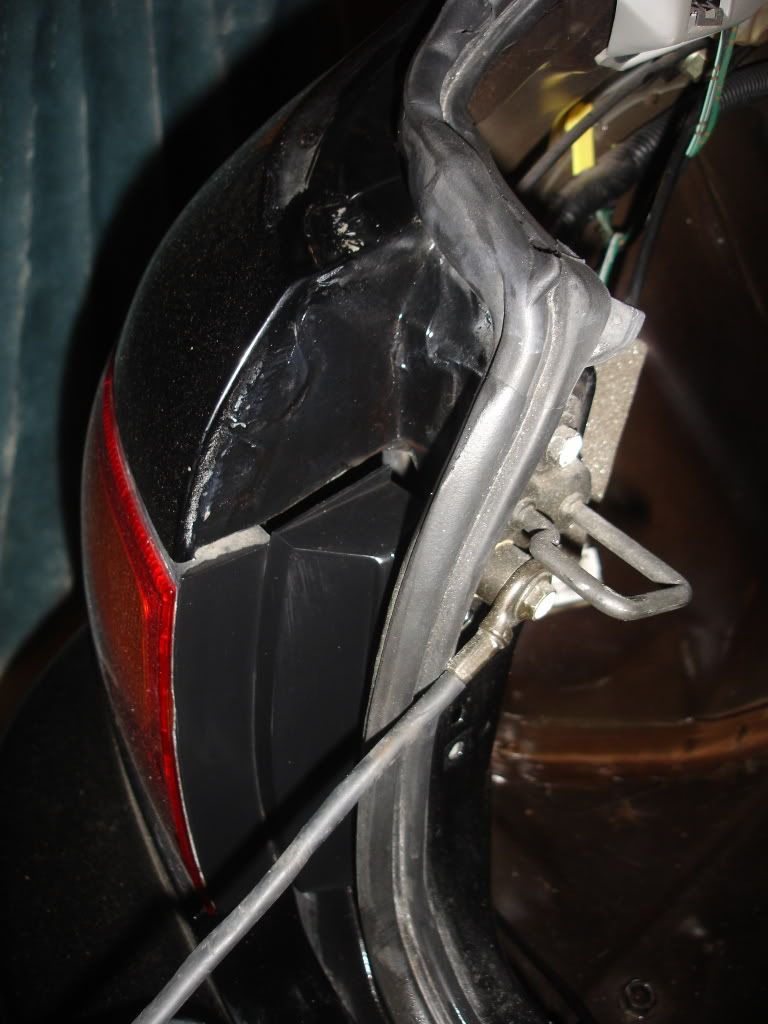
Also, this bracket for the strut bar is the reason why I'm not able to line up the hardware for the panels. It pushes the panel just a tiny bit enough for it to also be the cause of that gap in the garnish to panel. If I trimmed the panel, it would have no gaps and would fit right but I won't ruin the panel because my strut bar isn't permanent but the panel is you know? This is what that gap looks like in the garnish to panel. Its still there, but now I know why it fits wrong and its just a simple issue no biggie at this stage of the build.
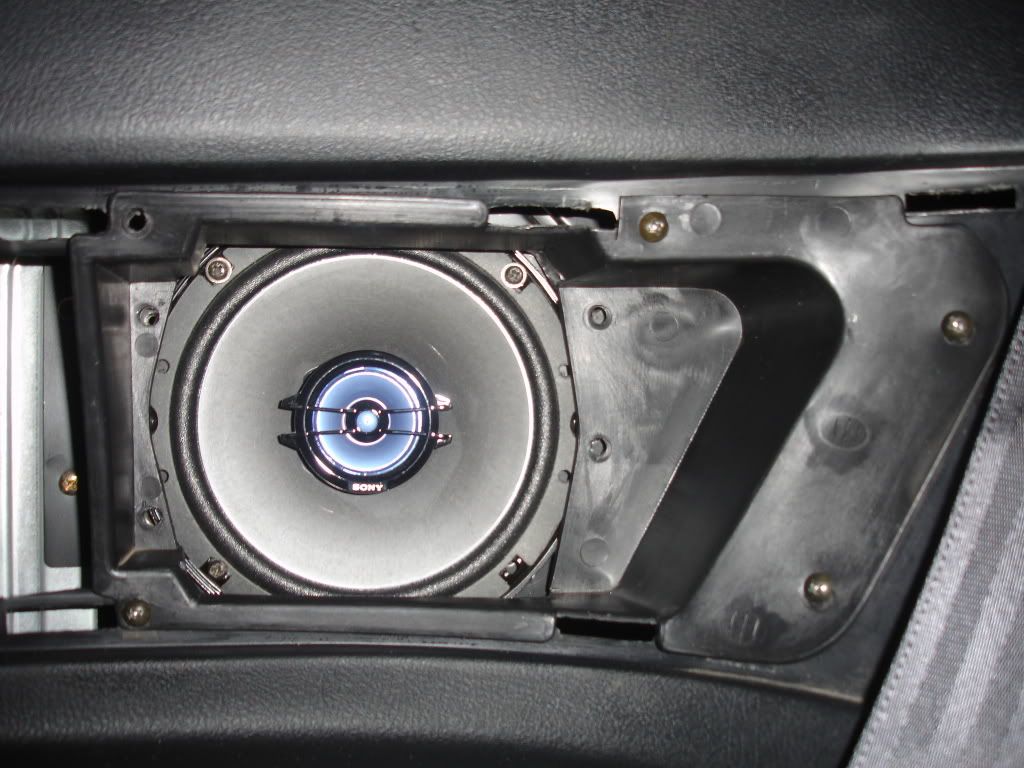
Couldn't leave the speaker covers out either! No panel left behind haha
More cleaning
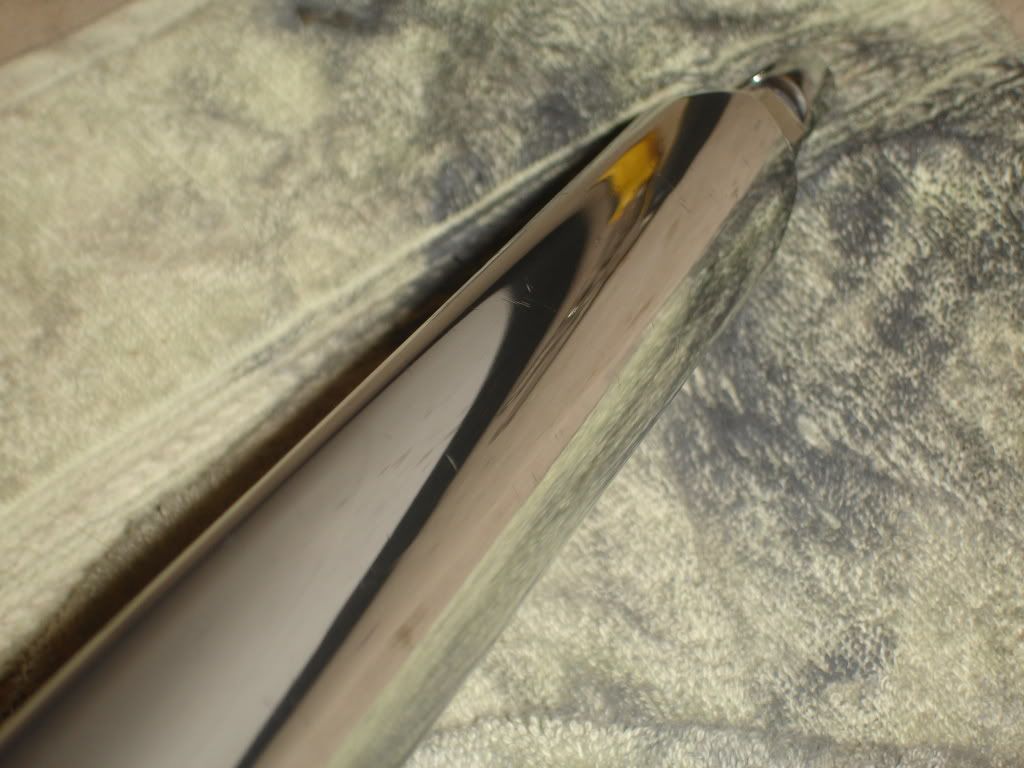
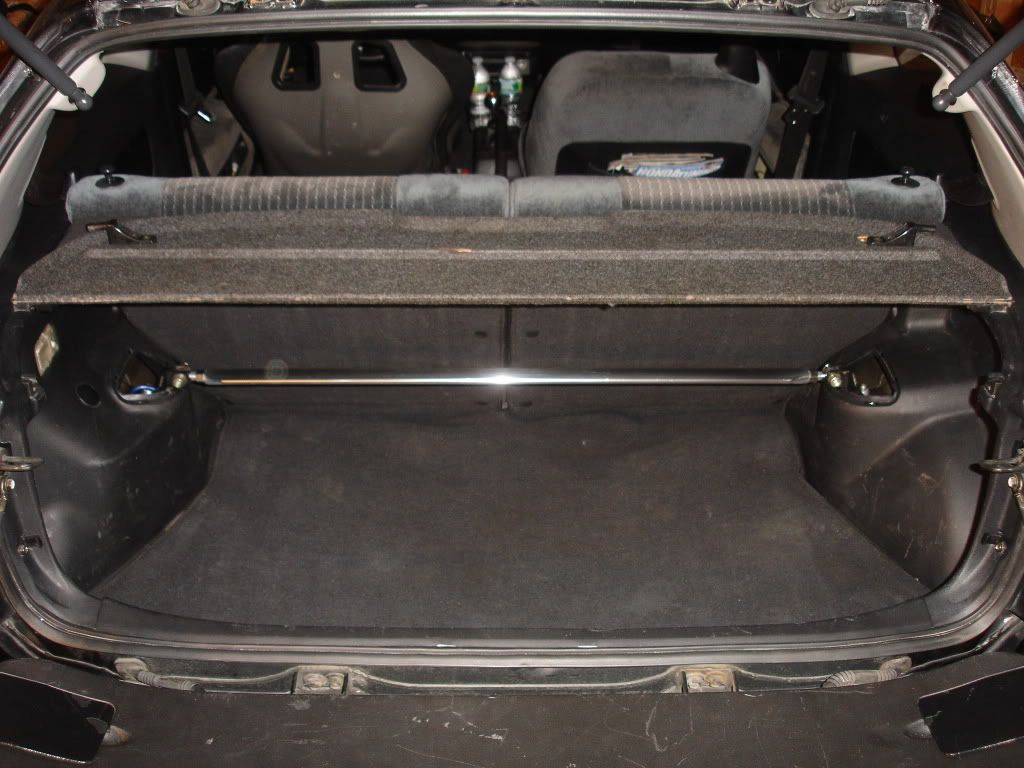
Took out the rear strut bar and polished it up! Came out fresh. Polishing takes effort though let me tell you, I spent some good time on this. Wetsanded with 600 and 1000 grit and the polished with Mother's Mag and Aluminum polish over and over and over again.
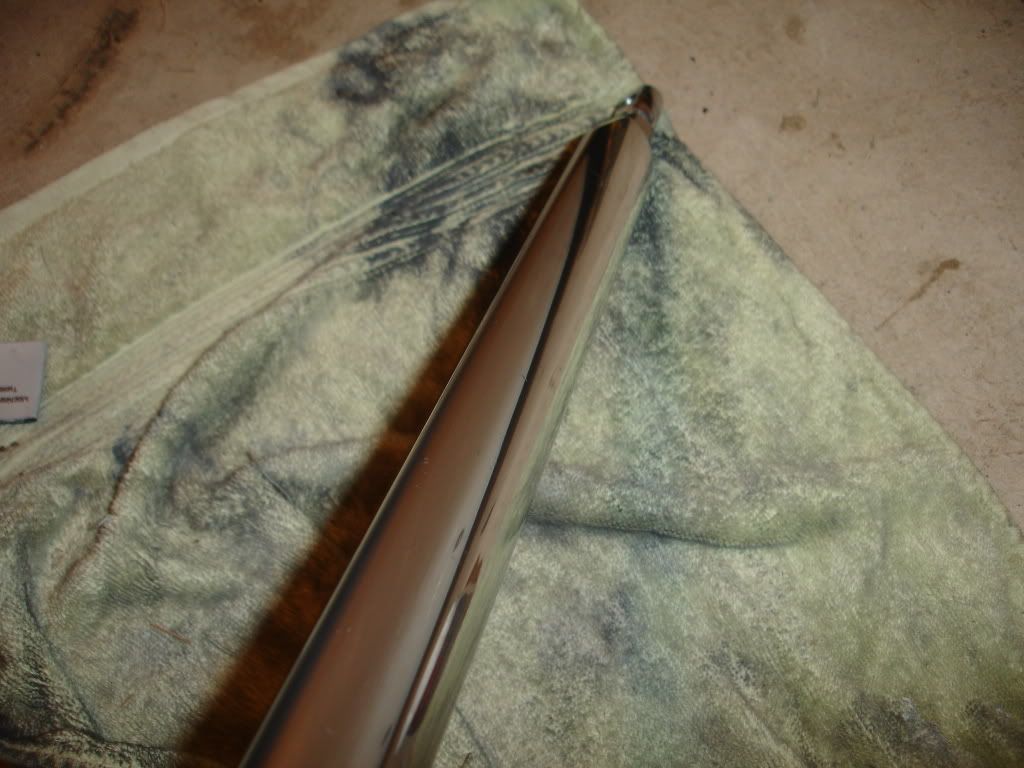
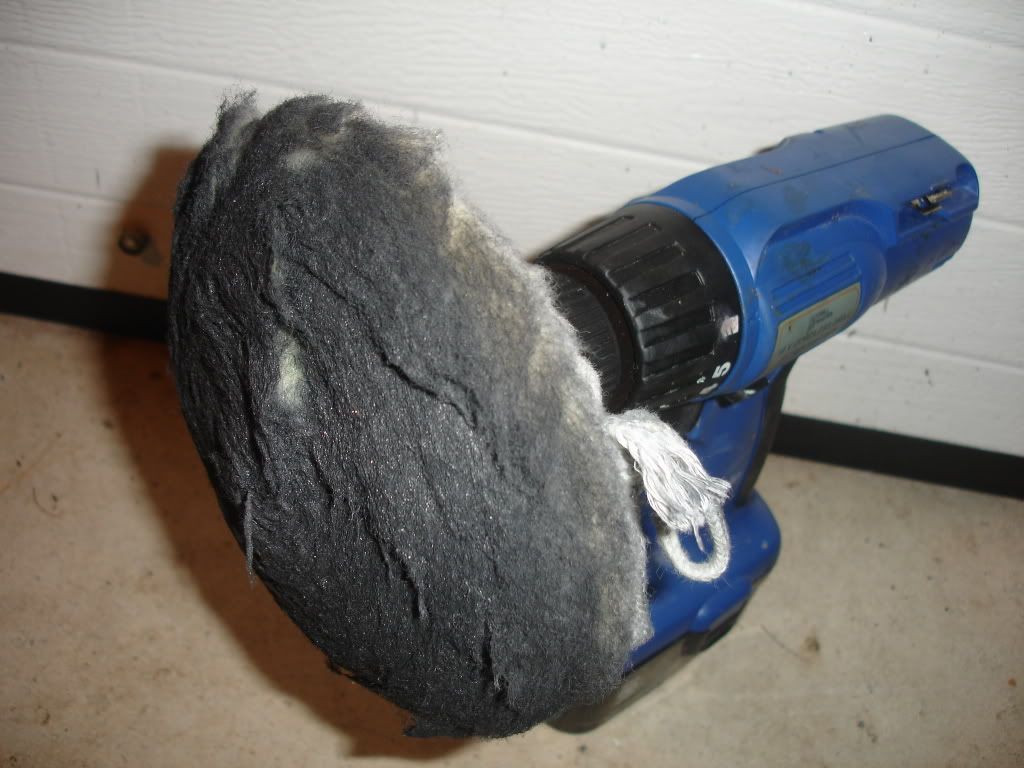
Remembered I had this after I had one side done so it helped my arm take a break lol.
Got the trunk latch cover to sit right, it was sitting with a gap before. I took out the screw and it fixed it. For some reason it doesn't line up, I'll have to look at it in the future but for now, better fit>having a screw.
One of the ricey things that the previous owner had done was paint all the seat belt buckles green and even the dome light had a bulb with a green cap on it haha, the theme was green lol.
As soon as I brought it home I stripped it with my nails but now was the time to get it over with completely. Taped up!
Used gel Aircraft Stripper to cake off the green that was in the letters.
SO much win!!
Washed the rear trunk carpet with hot soapy water and a brush, managed to clean it up pretty good and left it to dry overnight. It might not look perfect but I didn't want to ruin the fabric but its clean nonetheless. I'll re do it along when I coat the rear seats to get rid of the surface rust. I'm pretty happy with this though!
*EpicMealTime Voice* Of course I had to trim the pubes, Hater ! haha

Put some painters tape on the tabs to help any squeaks coming from them. As well as a bunch of square pieces of foam under this piece, it makes a lot of noise when I push down on it but not anymore! Also put some tape in the hinges for the seat bottoms as I noticed that makes a lot of noise too.
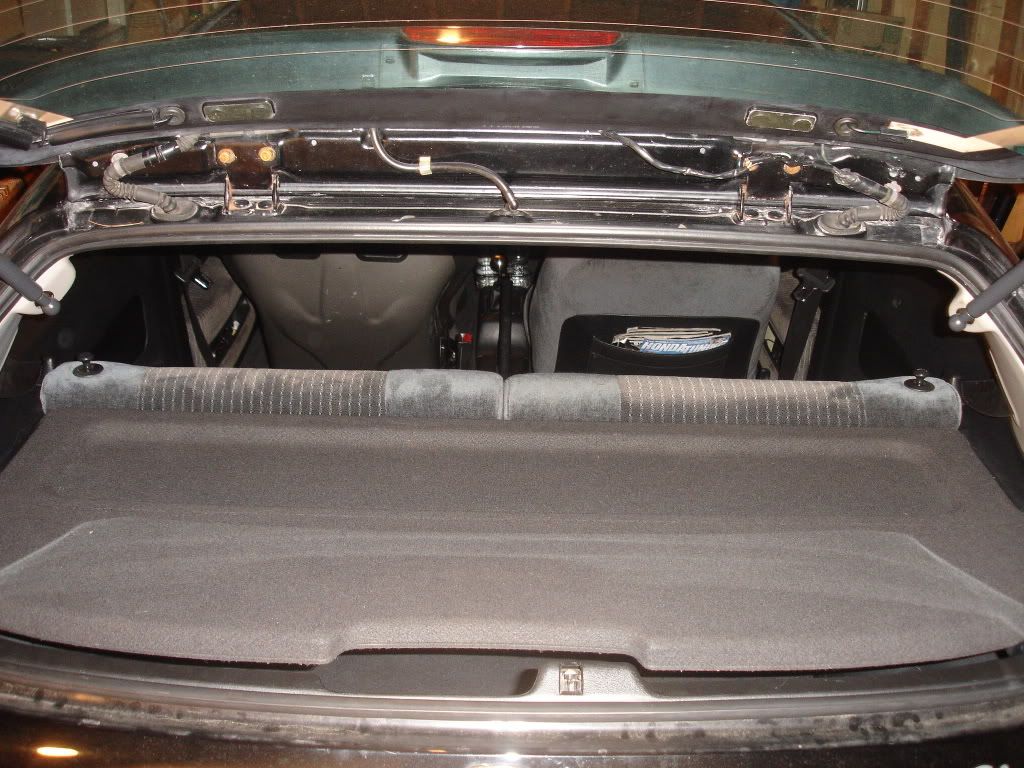
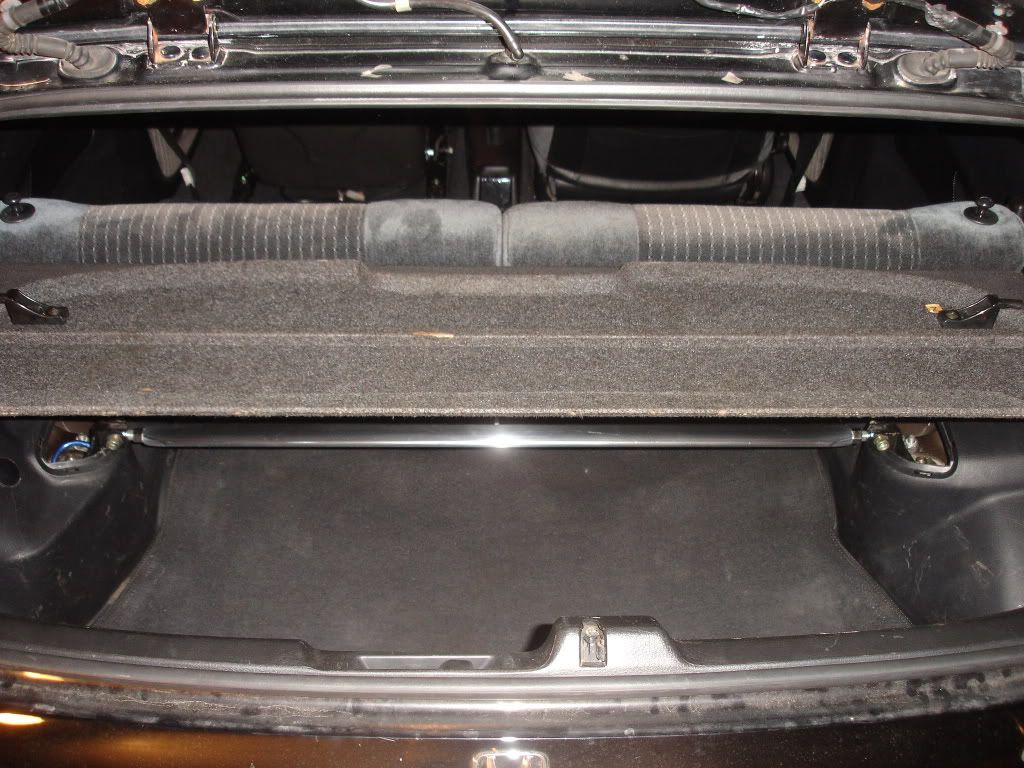
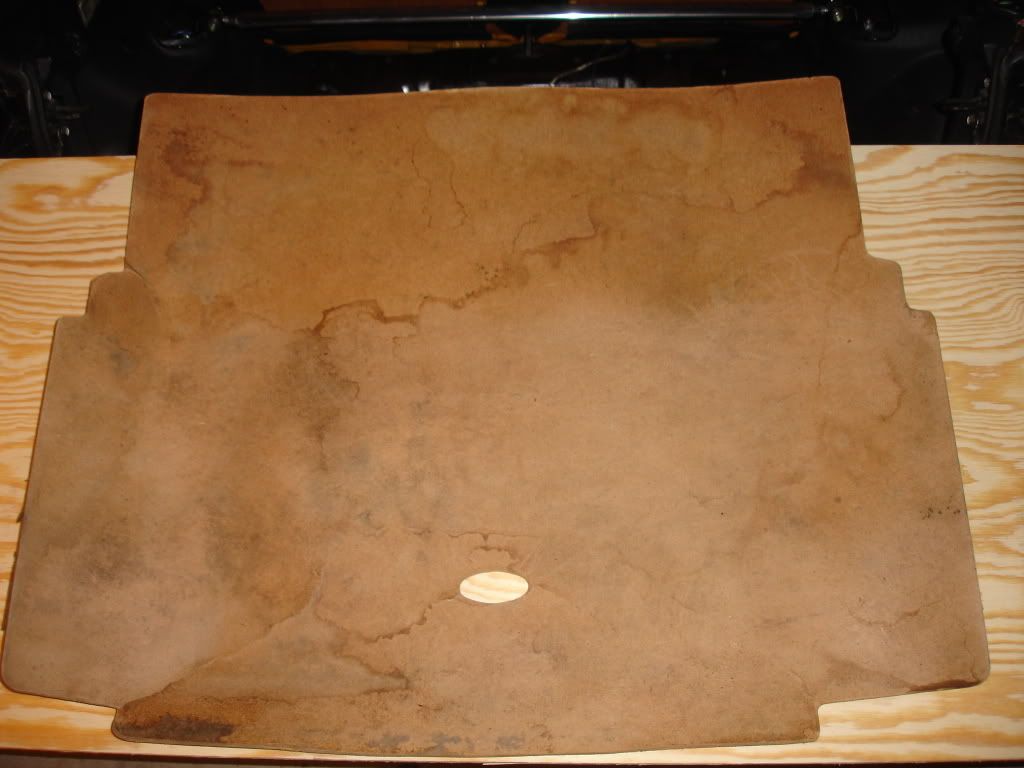
Next up is the rear trunk board. POS was all cracked from being so weak and dirty. Even the light 10'' sub I got the car with was enough to crack the damn thing. My dual subs sit crooked too so I had to do something about it. If you look to the left, you can see how it doesn't line up with the panel. It would if it was it straight.
At the intended placement, it has a gap here.

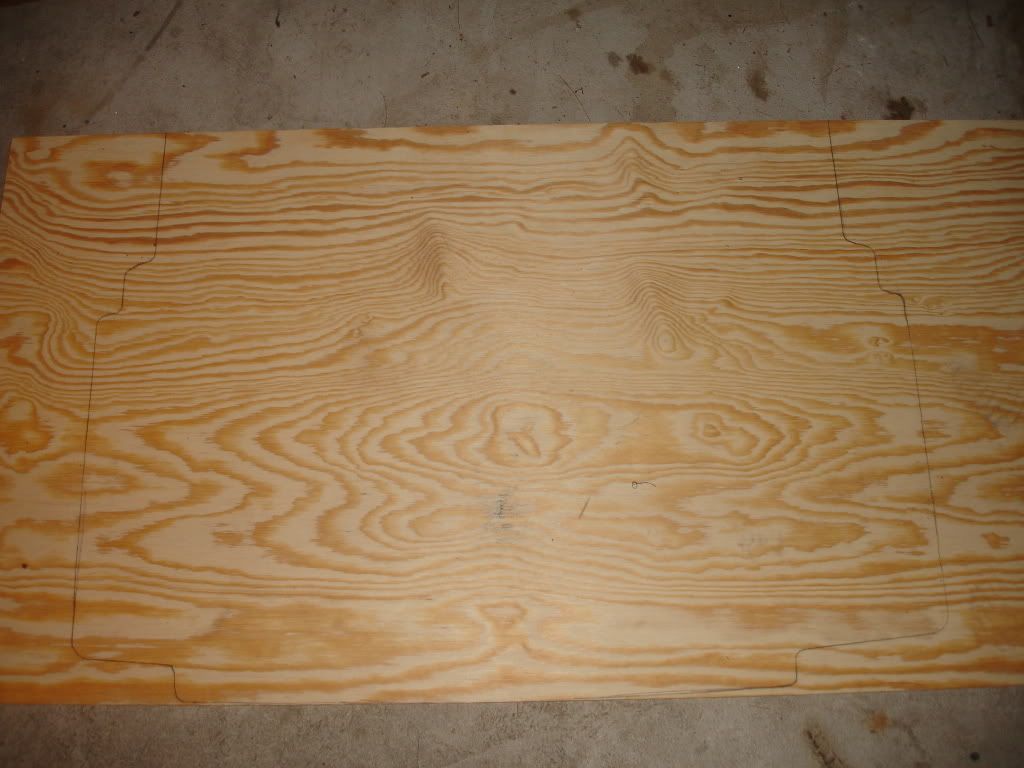
Went to Lowe's and picked up a 1/2'' 4ft x 2ft piece of plywood for about $10 and change. Also got a Kobalt handknife that has a blade for wood and metal.
Traced the old board on it. The rear part as you can see is longer than 2ft but that section isn't on a hole so it has no effect really. Plus the whole thing is a lot stiffer so there will be no problems. I would of modified the shape of the new board to cover all around the trunk but I'm trying to keep this as light as possible and theres no need for that.
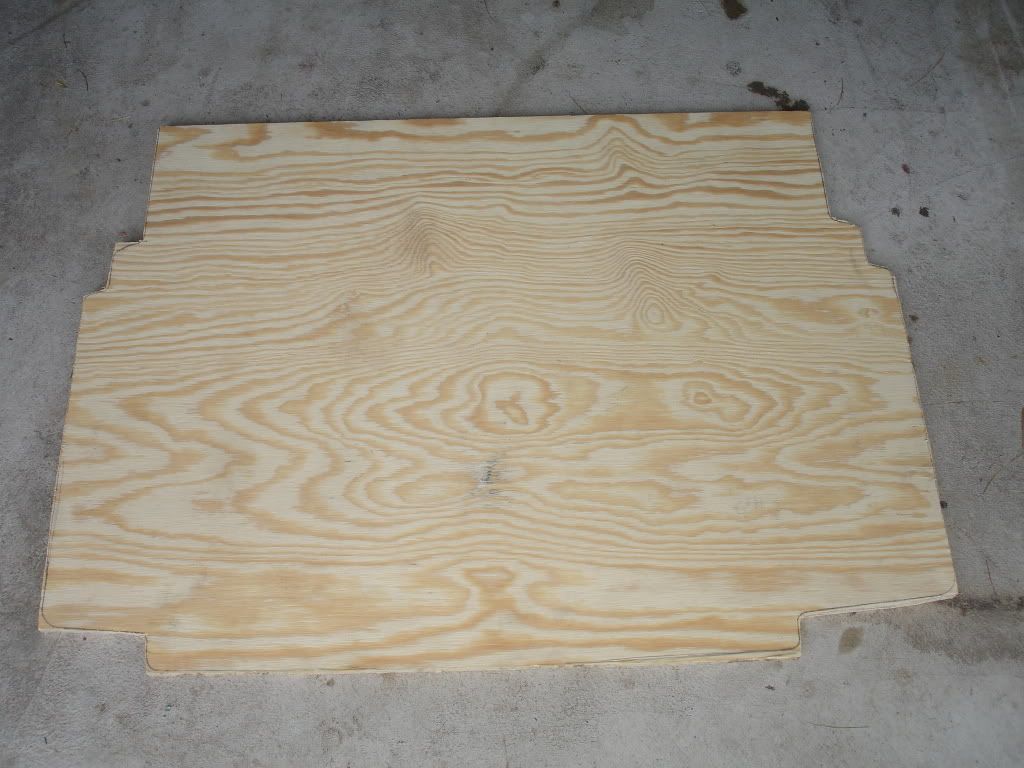
Today I cut the main shape of it, took a good bit of effort too but progress was noticeable so it wasn't that. Sections at a time and taking breaks is key
I will be cutting it more and sanding the edges so that its an exact replica of the OEM one. I weighed them both using a regular personal scale so its not too accurate but its roughly 2lbs for the OEM one and the one I'm making is at about 4lbs now. I will get a better figure once its all said and done. I might also wrap the board with fabric or carpet somehow if I can, we'll see.
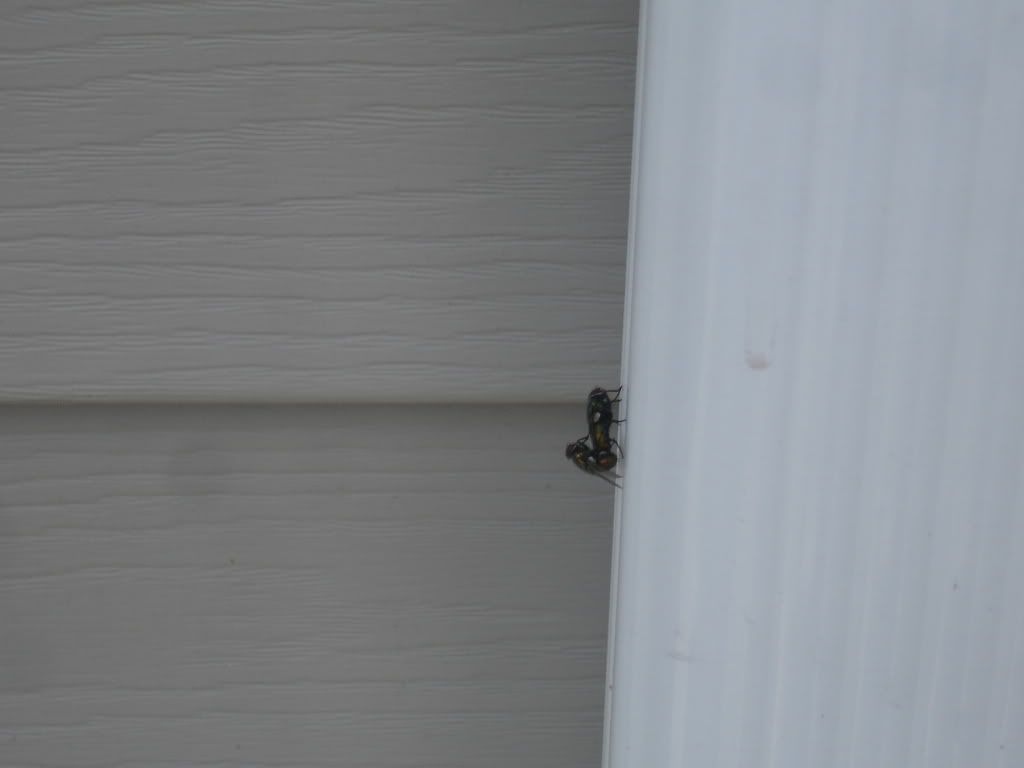
Caught 2 mosquitoes doing the dirty dirty lol!
I was over at Migz place on Tuesday to try and help him get his car running but so far it's still not starting. He's not getting spark and so I got a helms manual for the DA but it didn't really cover troubleshooting it very well (most don't).
I followed a couple of tips in there to check the voltage in a few wires near the distributor and they weren't getting voltage on some of them and so we took out the main harness and tore that bitch up with the help of Cd7 Joseph.
It was super dirty and had lots of oil in some spots so we cracked all of the old sleeving and tape off and proceeded to spray the harness with tb cleaner I believe it was ( in the bathroom of course, that's how Migz gets down!) and that bish was clean after that.
We then started taping it just to organize the wires a bit. This is what it looked like.
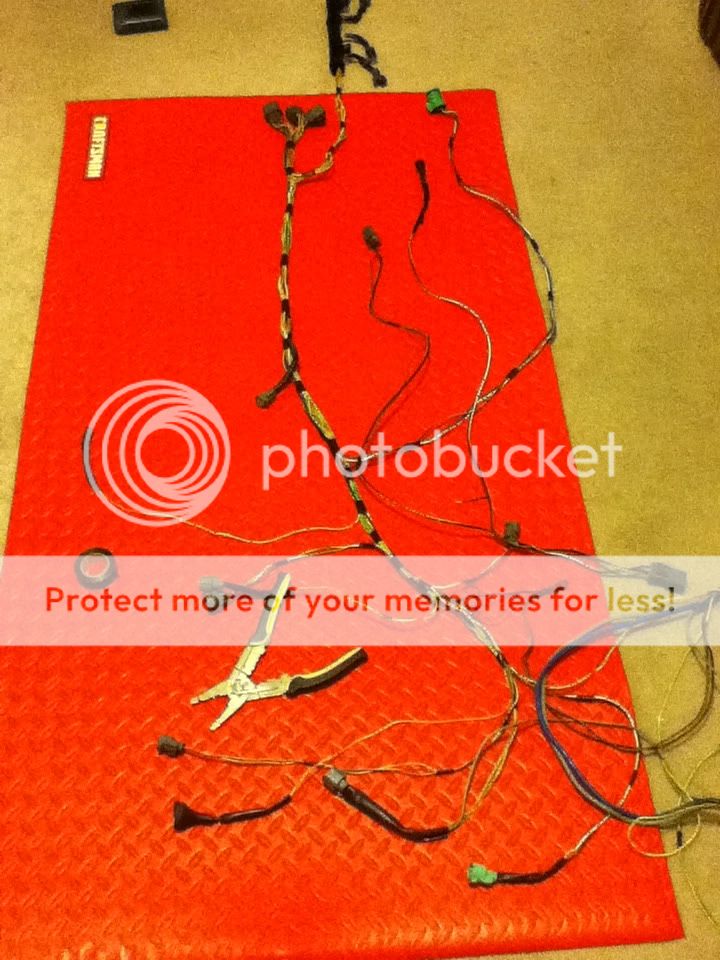
Migz still has to cut some of those taped spots and
route them around the motor and then retape a few spots and heat shrink it/sleeve it. So those spots of tape are just temporary to guide the wires more or less.
We threw it on but it still wasnt starting. However it was now getting strong voltage all across in diff wires so that's def good bc it wasn't doin that before.
Were not sure what it is but I gave him a link that has great info and he should be able to troubleshoot it from there. I'm guessing he's not getting the starter signal bc it had power and is grounded right.
Hope you get it running soon homie!
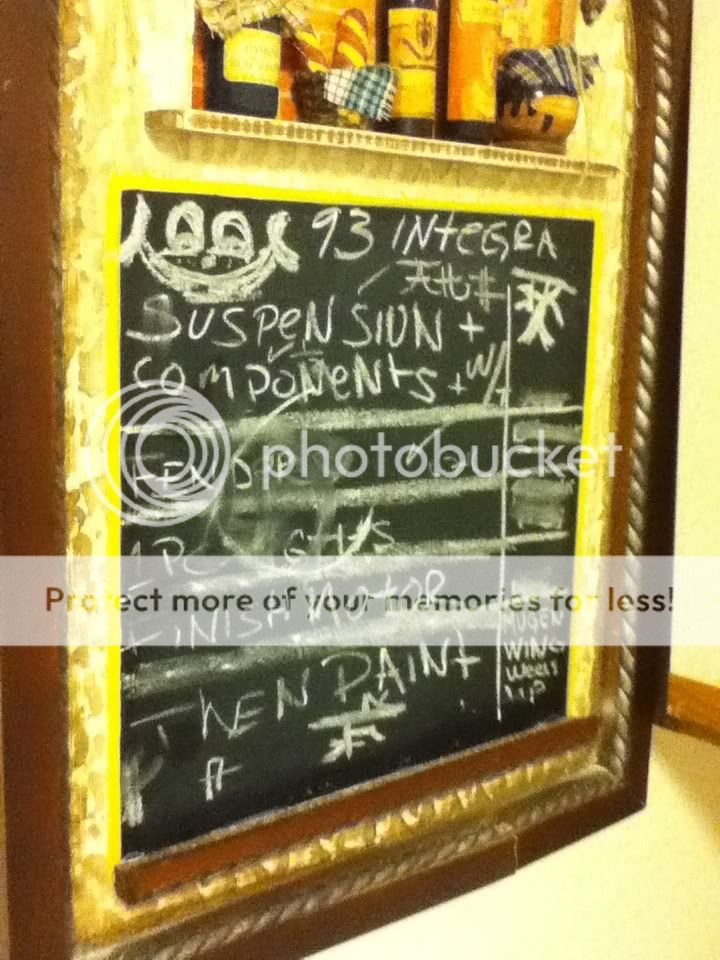
Soo I managed to get a hold of the master plans! Oh chit!
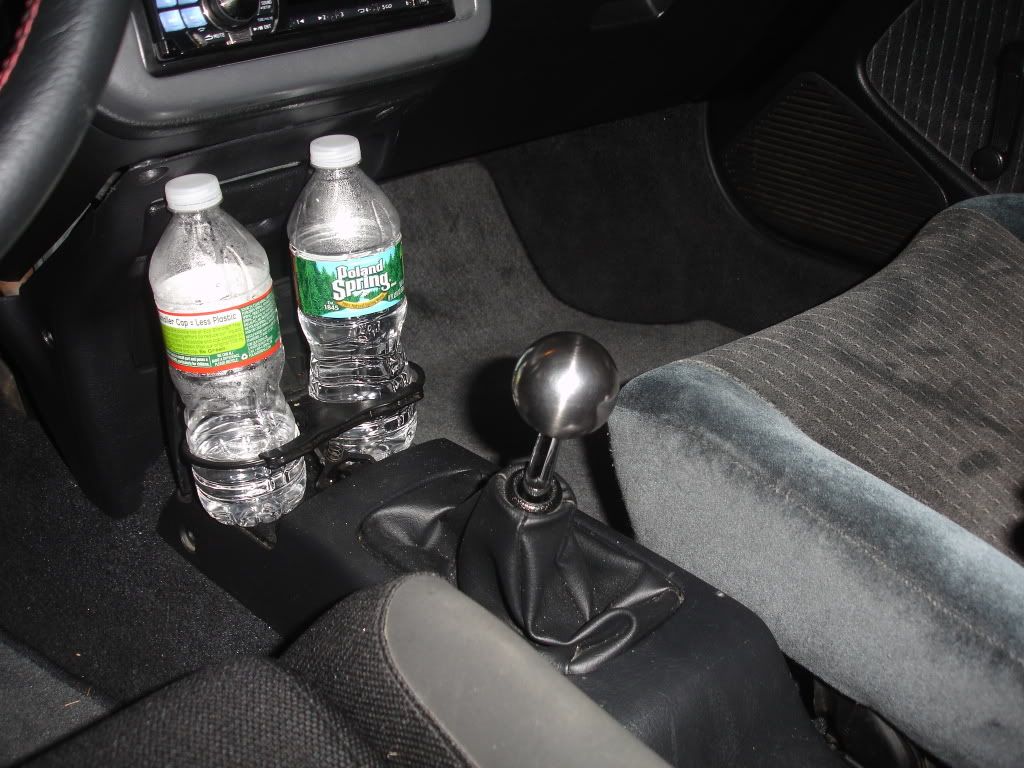
He also lent me his Circuit Hero shift **** for the mean time, man this thing feels awesome!!!
Thoughts and initial impressions:
The car feels like it rides better because it is SO much quieter. Now on bumps, it sounds like a solid thud that is dampened and not like I got a rattle snake back there somewhere lol. Seriously though, now the noise feels a lot more like how it should be. There aren't random noises like before, it feels solid. Its hard to explain but its like clapping vs pounding your fist into an open hand.
Ill try and get some video footage to compare before and after, but all I can say it was very worth all the hours I spent. It should of had been done a lot quicker but I was listening to music and IM'ing just chillin so it wasn't bad at all, just took a few days to get it done. Once I put the subs back in the ride will be a lot nicer. I still have to tackle the front door panels but thats for another day.
Well thats it for this update, I've got some other stuff in the works, hope you enjoyed and sorry for making this a bit pic heavy and long to read but I just want to document everything and whatnot. Till next time!
After driving around at my hometown a couple of weeks ago with some friends who were home from college, I realized how urgent it was to take my interior apart.
My hometown is undergoing serious renovation in their water and sanitation infrastructure along with some other things and well, the roads are garbage. All main roads have been completely torn up and is mostly patched with uneven dips, bumps and potholes. There isn't a decent street anywhere to be found.
My interior was shaking really bad, just violent rattles and all kinds of noises like squeaks, thuds and everything in between. I was sorta embarrassed, its like all this hard work that I put into it and it feels like the biggest POS :angry:
My friend asked me how to downshift coming to a stop and I couldn't even show him what a downshift rev match is because the car was bouncing all around.
At least the town has the money to fix it and are doing something about it but even so, it has always been bad. Doesn't help that everyone is in a hurry and try to pass when you're dodging holes
So I got really fed up with all that noise and decided to do something about it.
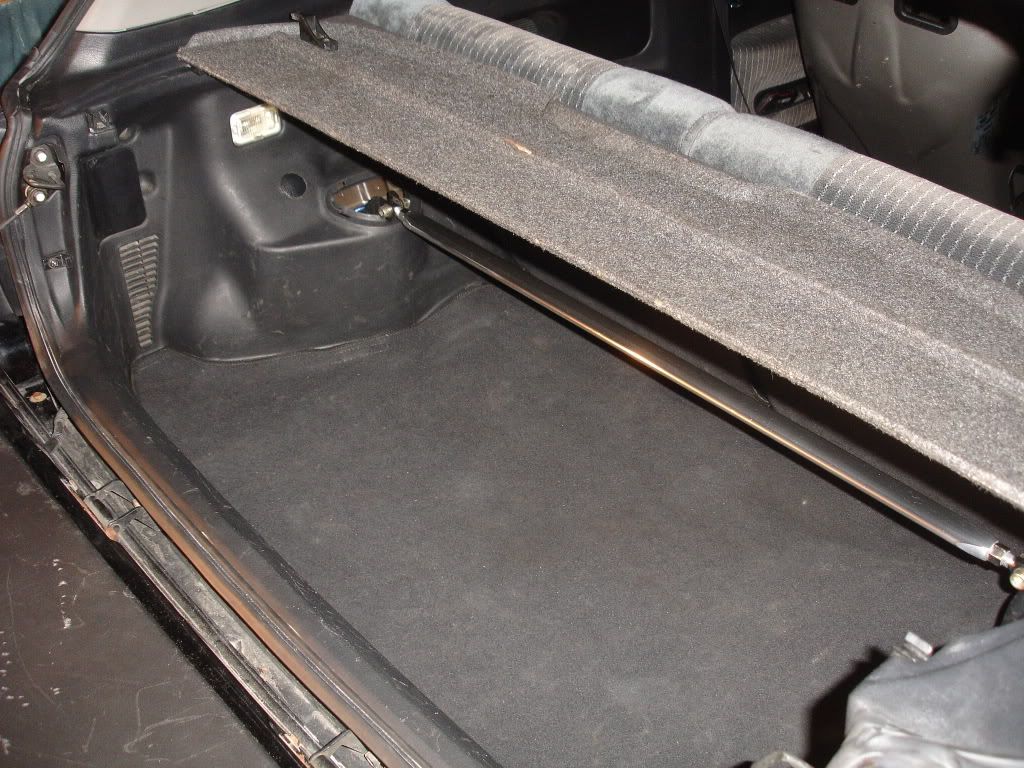
Its pretty easy to remove it if you know how, otherwise it can be frustrating.
Start by folding the rear seats down and there will be a clip on the sides of the seat near the windows, use a plier and just pull it out, comes off easy. Then slide the backs to the windows and it will get off from the middle hinge. After that there is 1 10mm bolt holding the bottoms in. Lift up the bottoms and pull the front by the hinges that go in the chassis. Done!
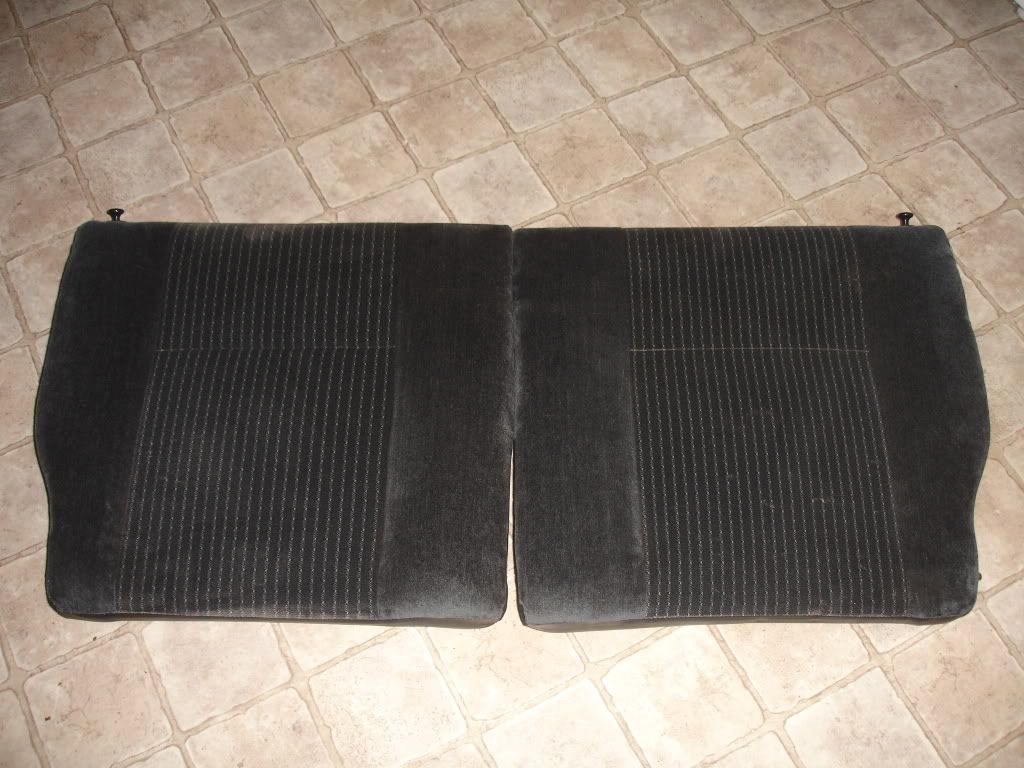
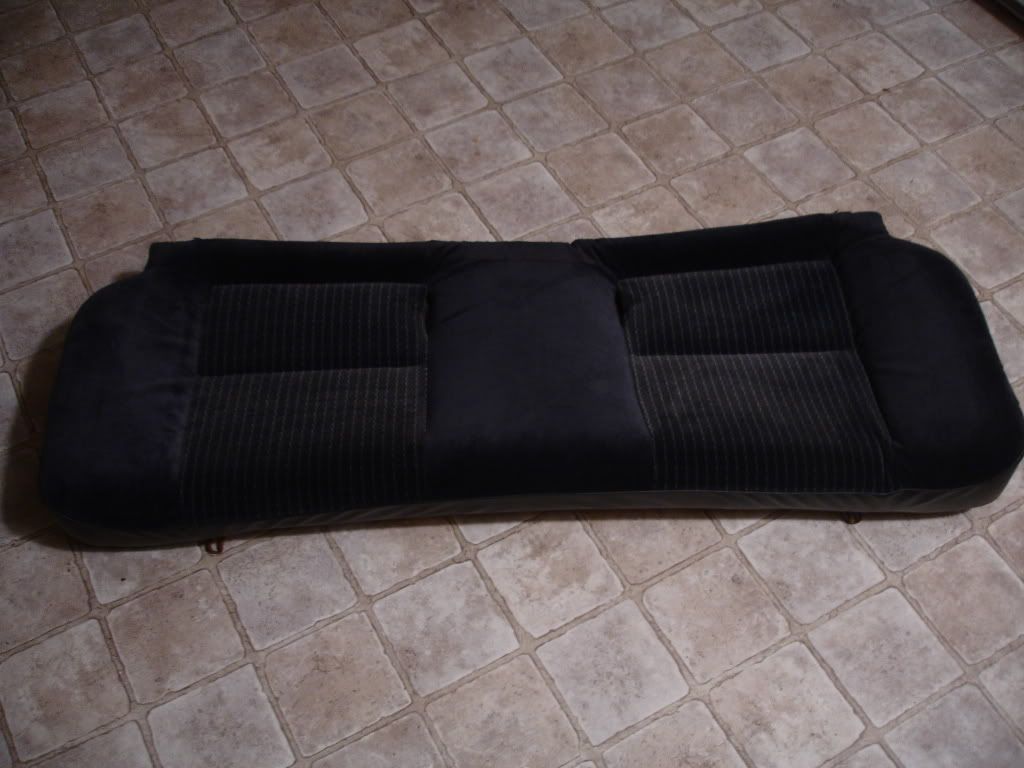
Seats are pretty mint for their age.
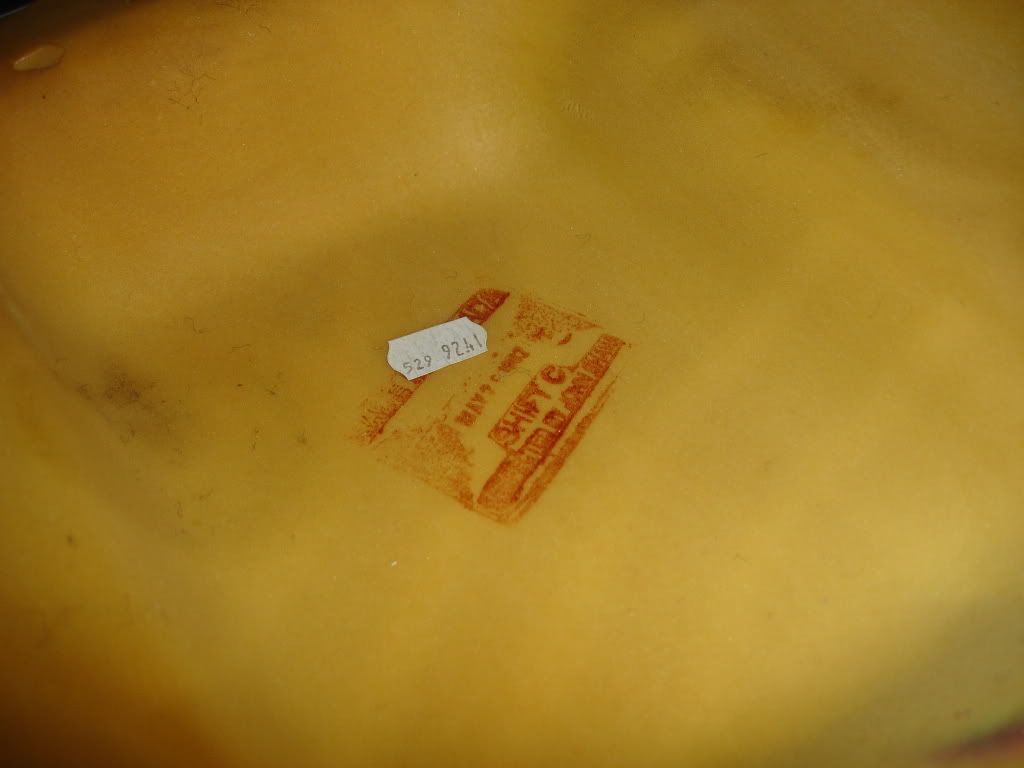
"May 7 1992" "Shift C" "Inspected by John Shaw" I would like to shake this guy's hand if hes still alive!
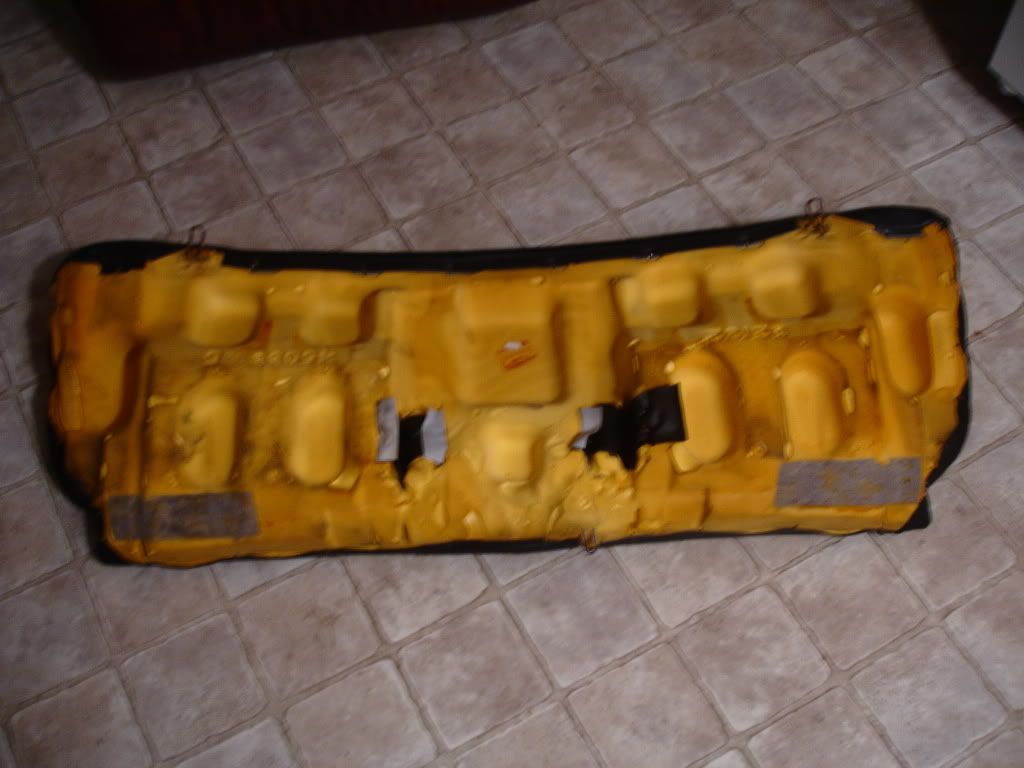
Notice all the dust, that is mainly from the flimsy spare tire cover the 5th gens came with.
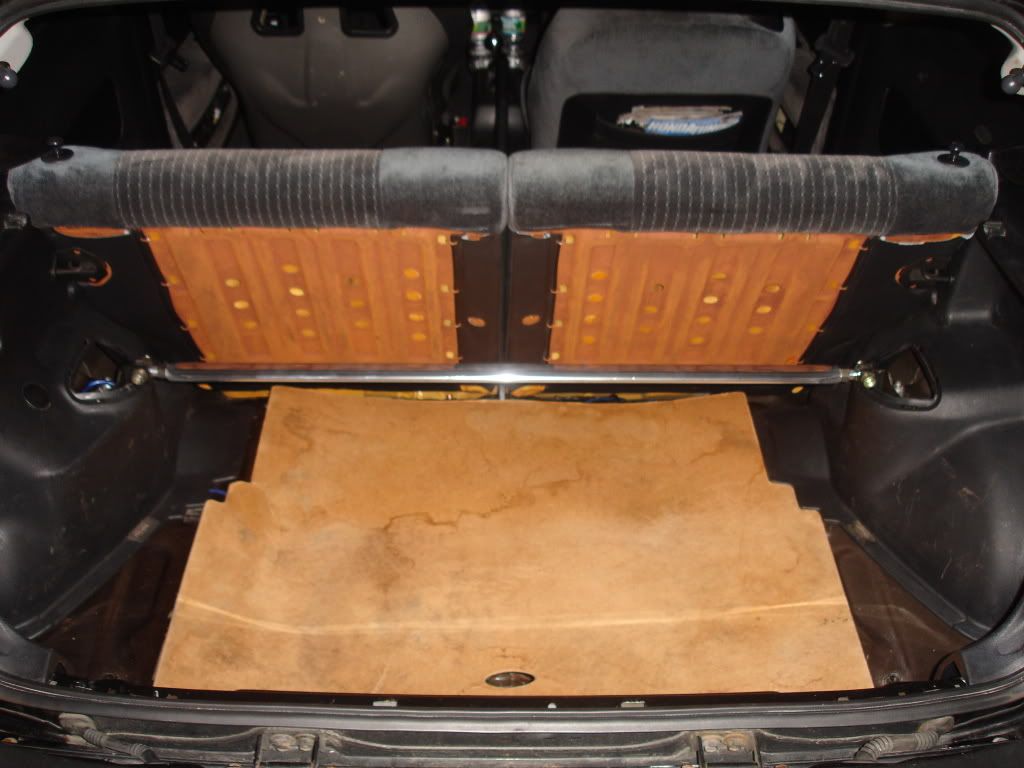
The trunk carpet that attaches to the rear seats were filthy underneath. The surface rust is not a big deal though, every seat has that. I will coat the backs in the future so that they don't rust but for now, no reason to clean as it will get rusted right back.
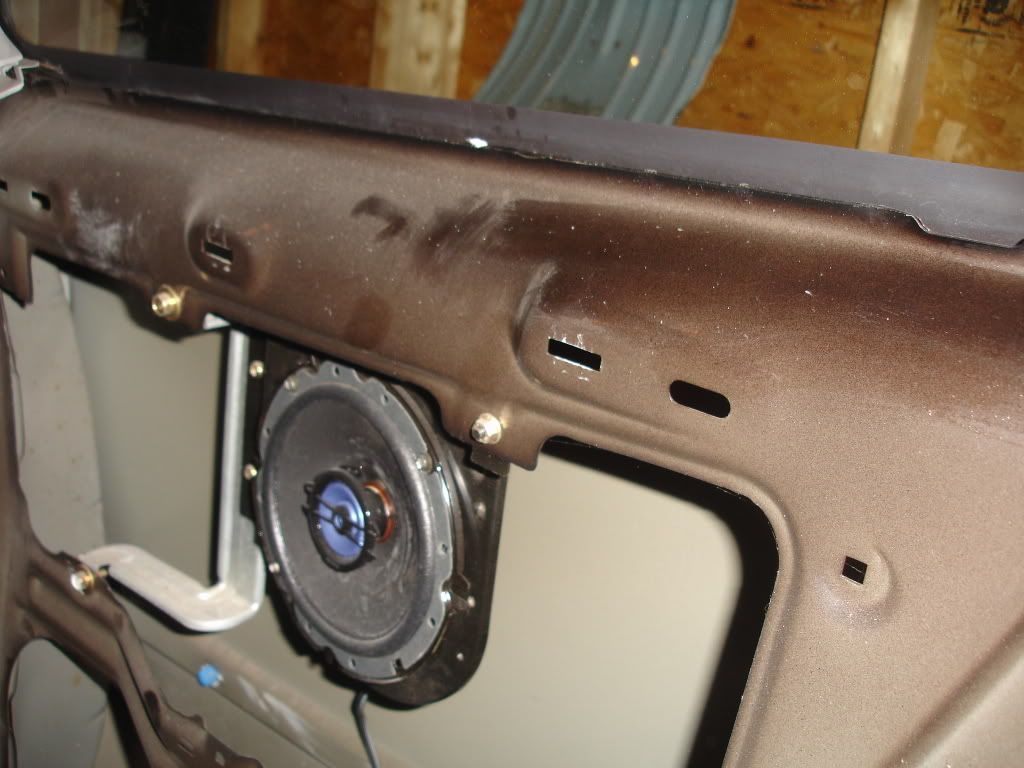
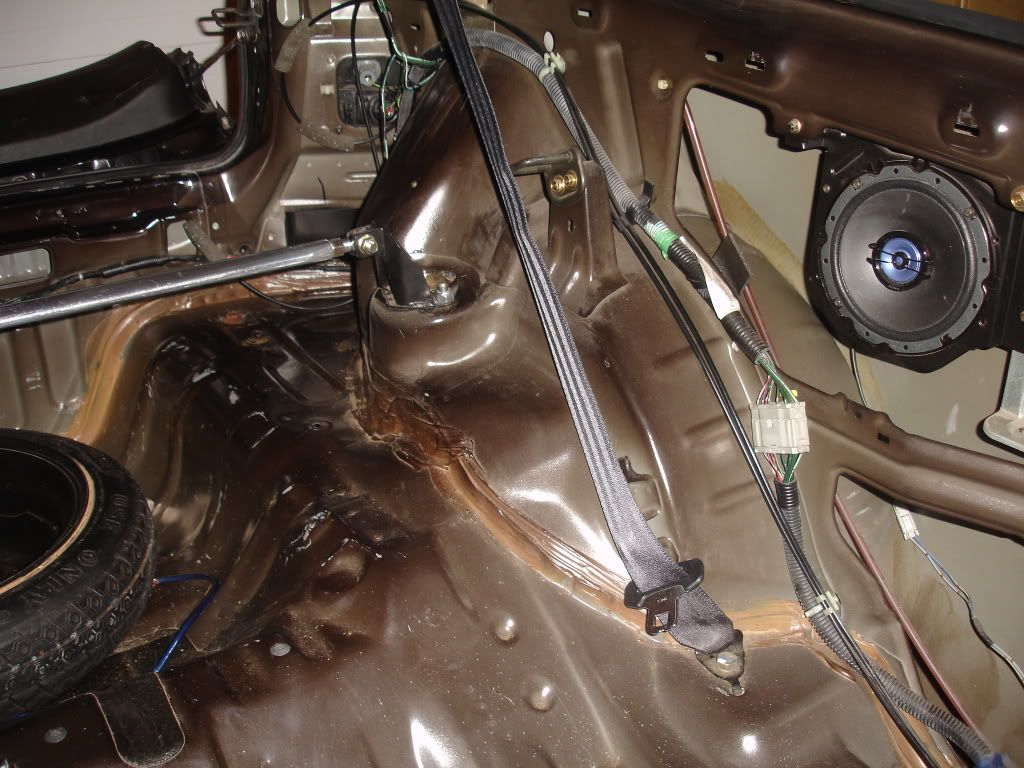
Remove all the bolts and grommets from the panel as well as the screws that support the speakers and pull the panel out.
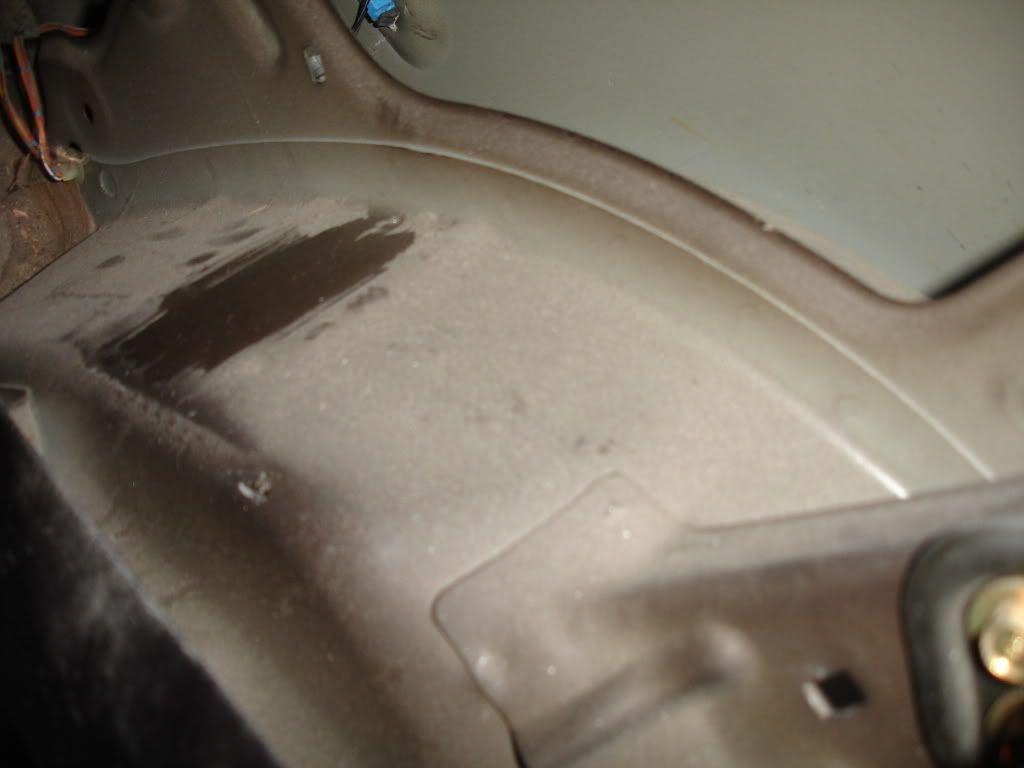
Heres how dirty it was after all those years. Gave it a quick wipe for reference.
Floor super filthy
Not sure if you guys remember but I had new front seatbelts installed at Honda about 2 years ago during the winter because they weren't retracting well. If your belts have trouble retracting or anything of the sort, Honda replaces it under their lifetime warranty
Cleaning as I go, realized I was missing a lot of spots after looking at these pictures and completely wiped everything down with a wet and dry towel and did a pretty meticulous job I think.
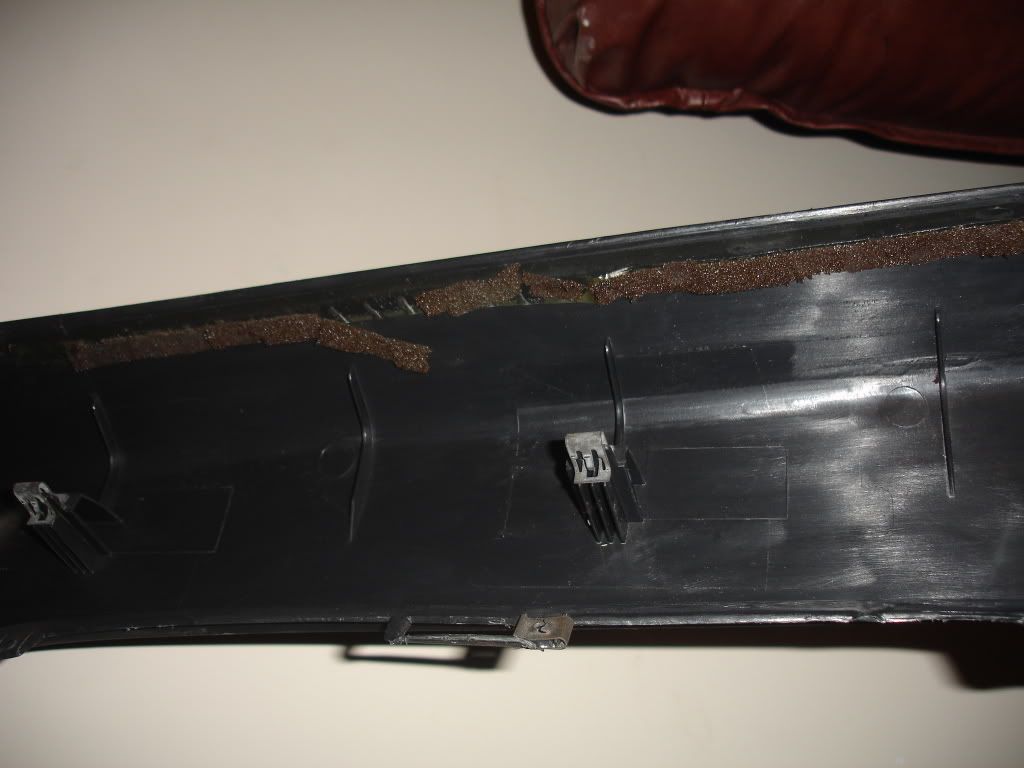
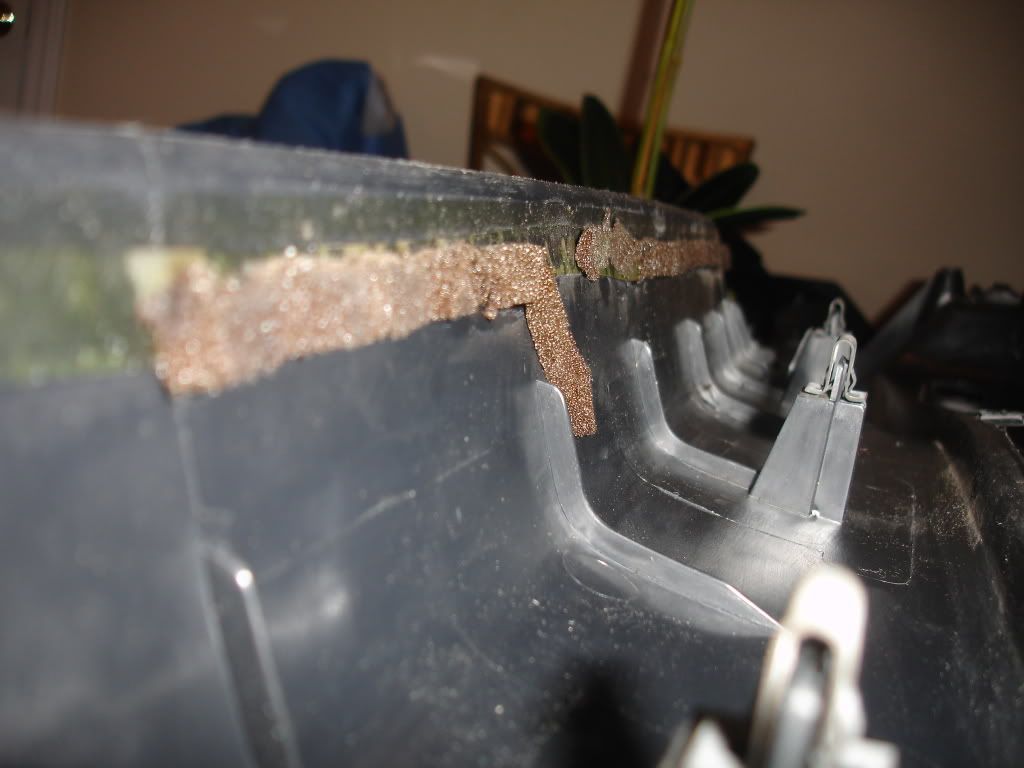
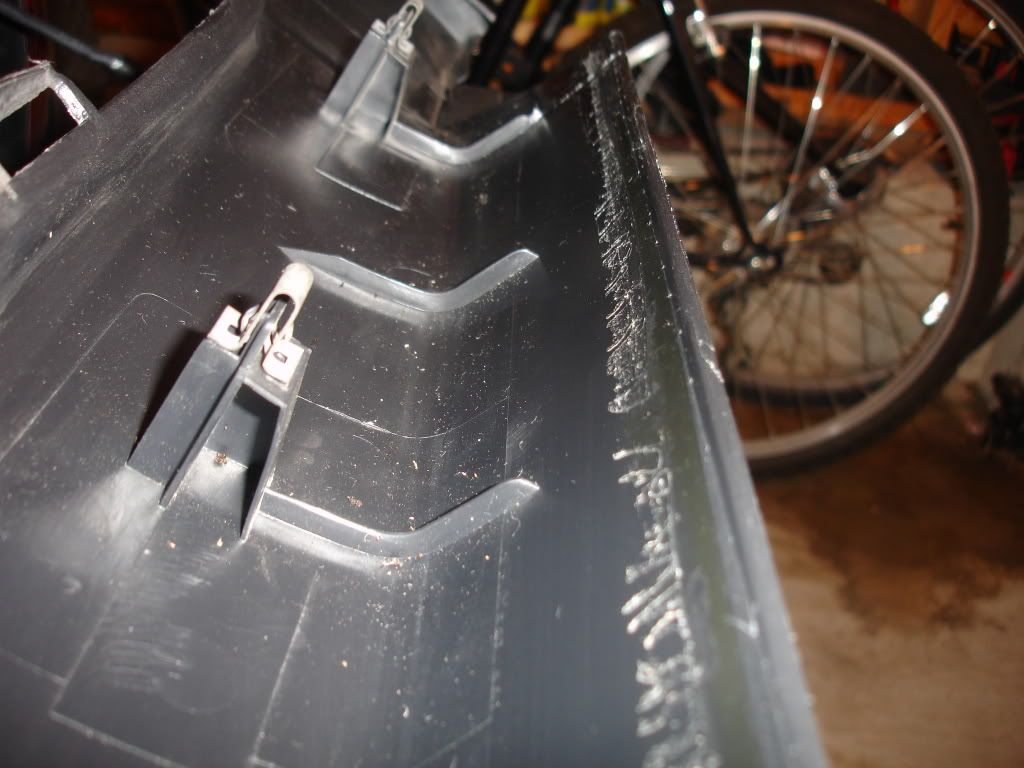
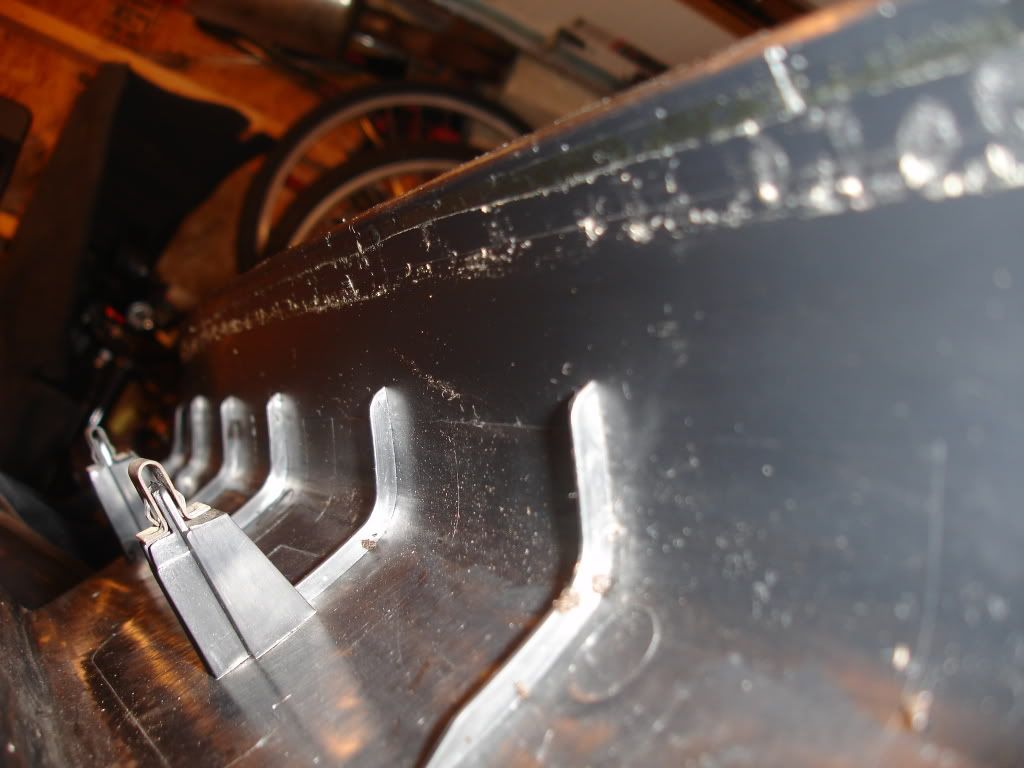
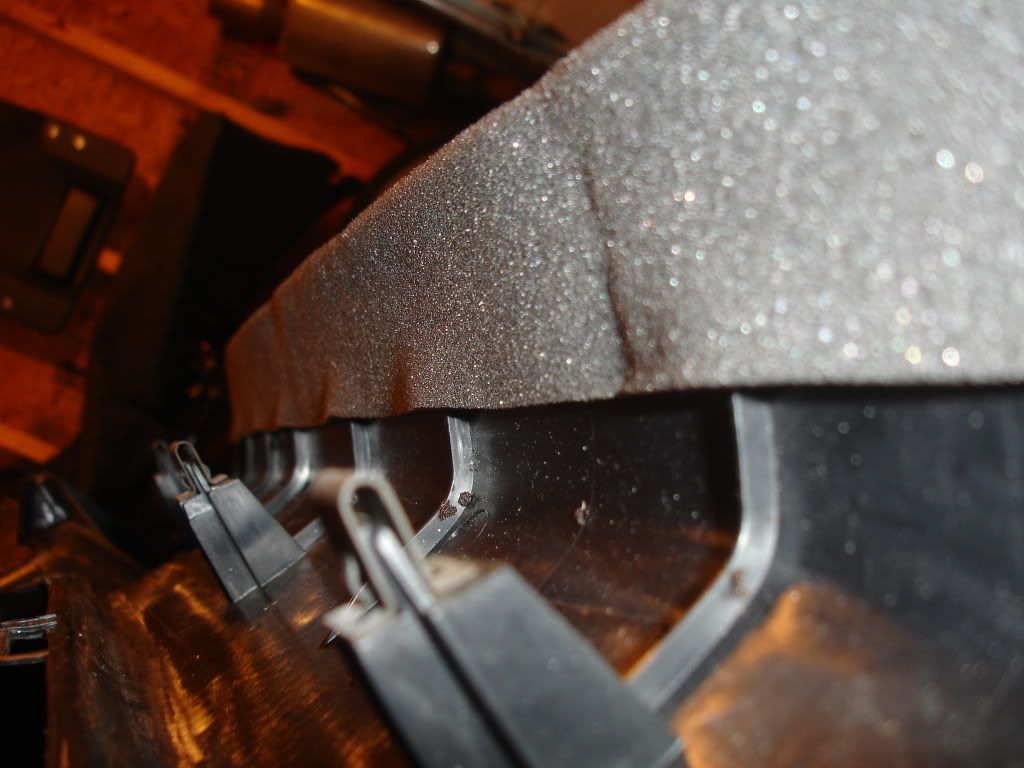
The OEM panels had this foam strip that was super baked from being in the hot sun and freezing winter that it wouldn't even come back up after I pinched it lol!
Used nail polish remover to get rid of the glue it left but it didn't remove everything which is fine because I didn't want to scratch it either for no reason, afterall the sticky stuff was gone and it only left dry non sticky residue.
Other side
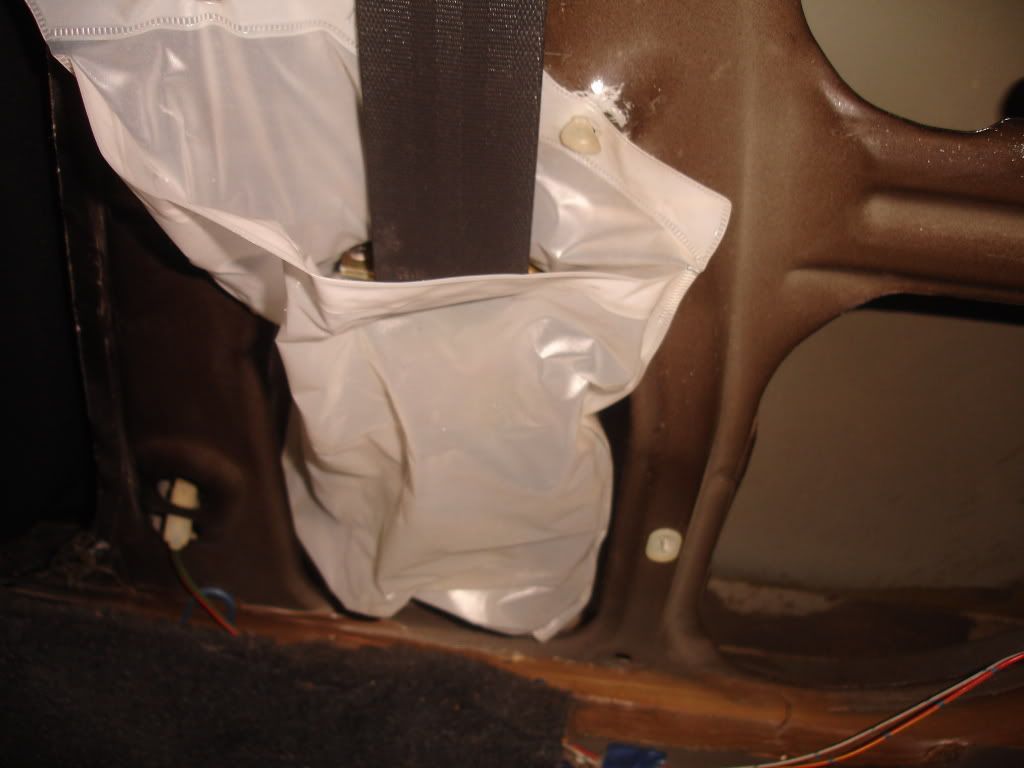
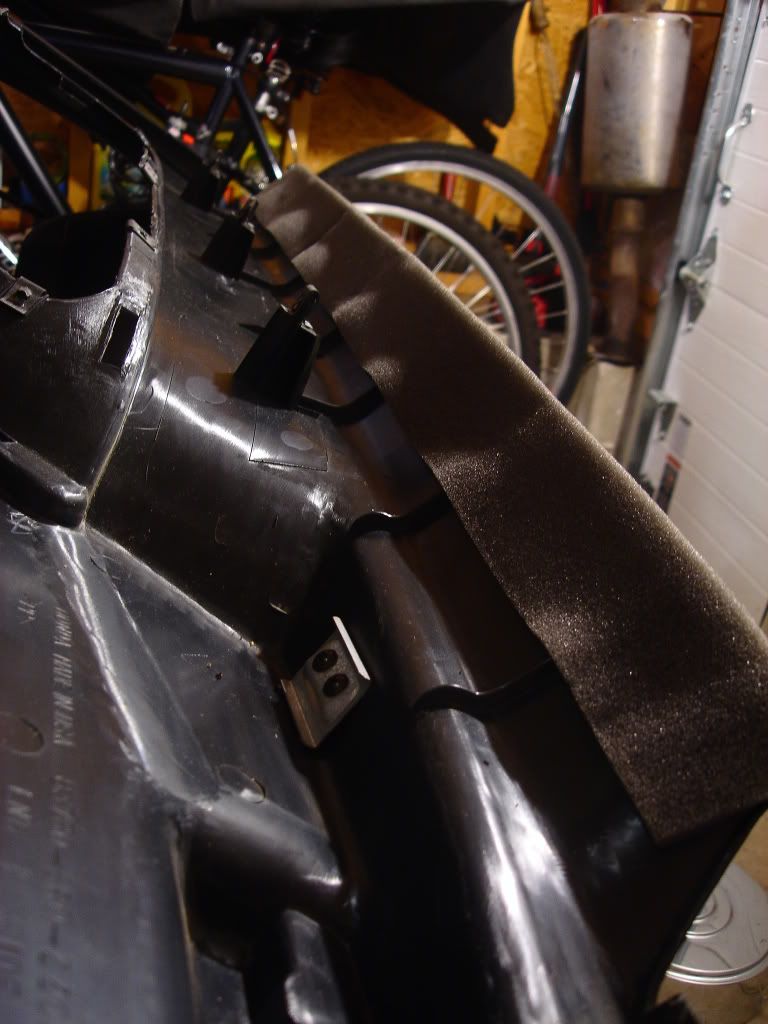
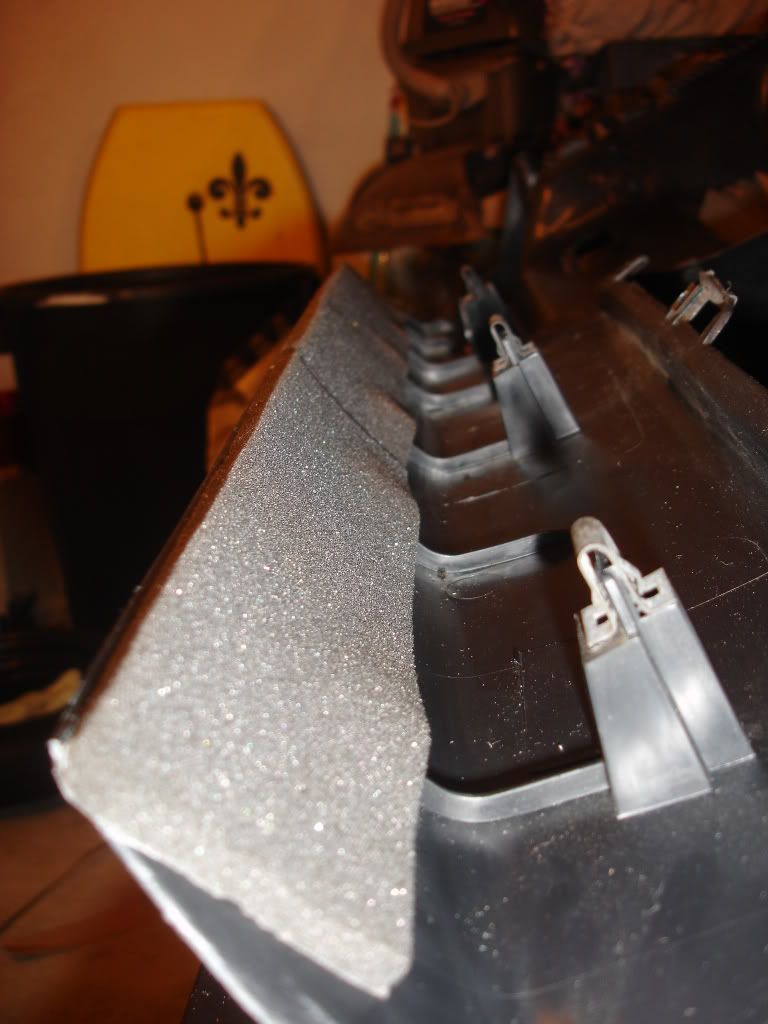
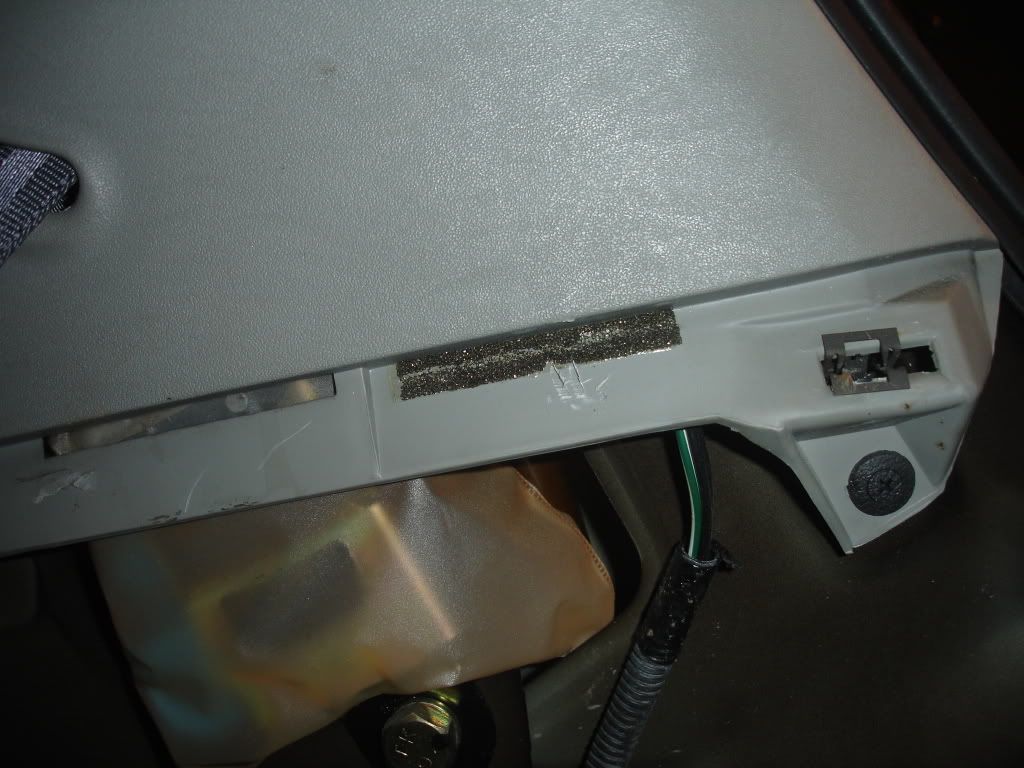
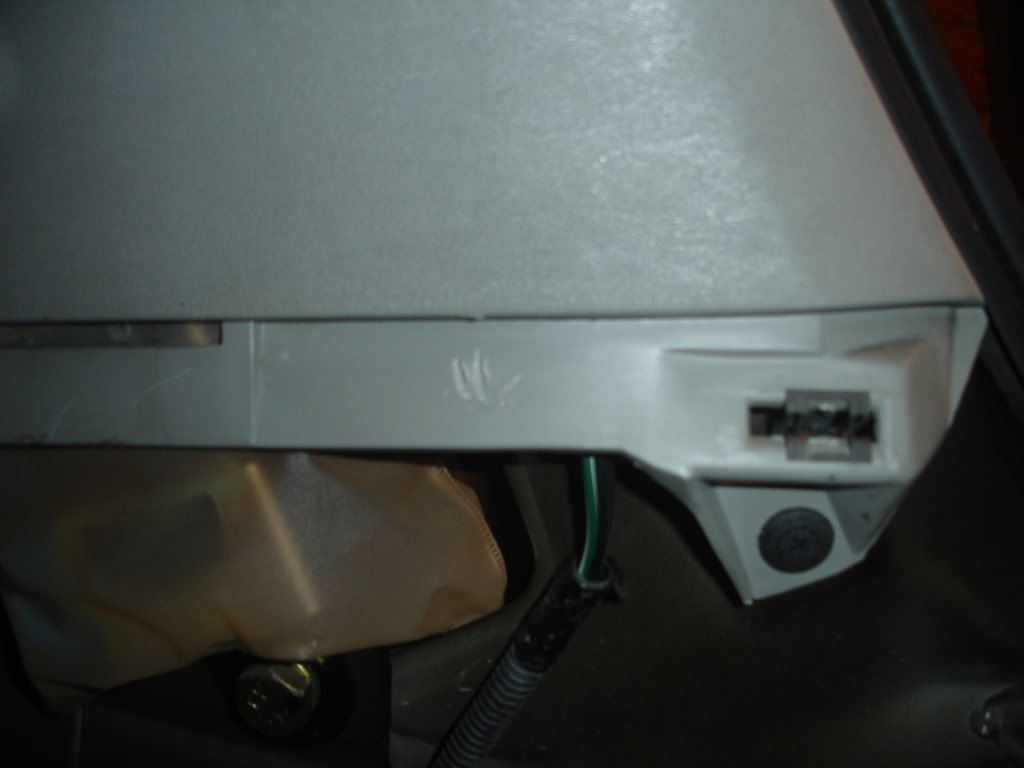
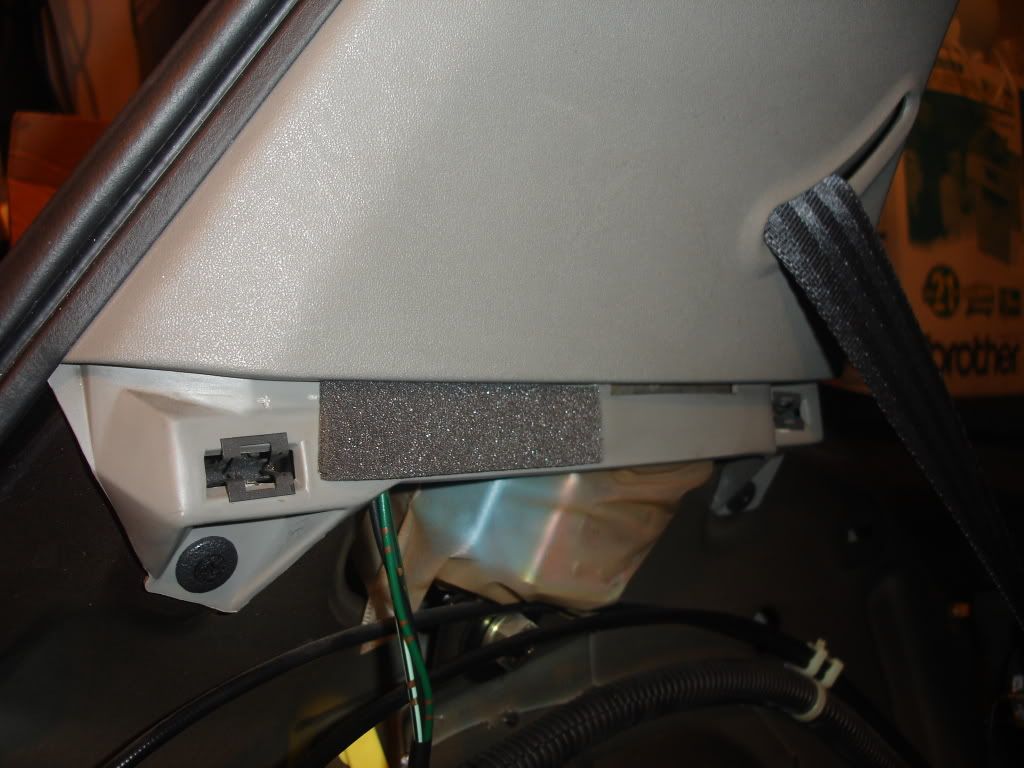
Applied this nice foam pad I had that came with my A/C to insulate the window borders
It sticks really good too with the adhesive that it comes with that gets peeled off. Bigger foam pads than OEM because they probably used as little possible to cut costs so a little more won't hurt, plus it will help for sure.Other side
The rear pillar garnish also had the foam pads in them, the glue came off completely on these.
Previous owner made a hole here to ground the sub and it is just weak I would hear the subs buzz everytime they turned on, super annoying, even picked up exhaust noise which was really annoying
After completely cleaning the rear interior panels and and the insides of the body including the 1/4s, I got to putting back the panels with hardware that I believe is OEM. It is missing a few bolts and grommets but not really needed and they won't line up either. More on that below.
Cleaned this up and got it back on.
Did the weather stripping too.
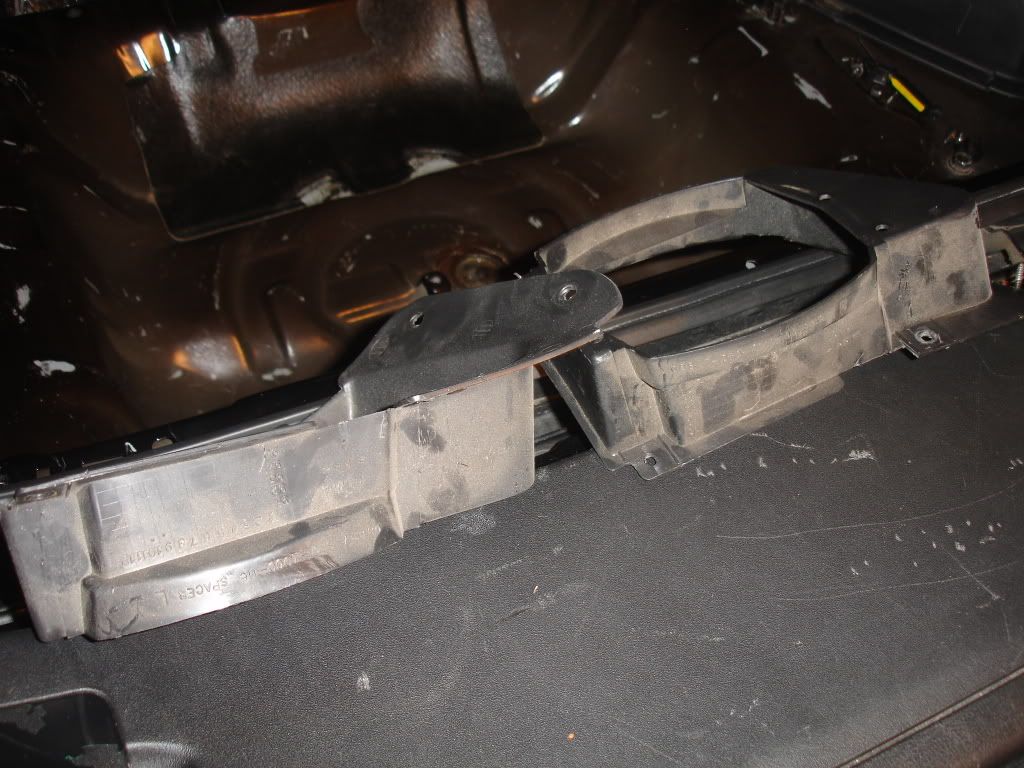
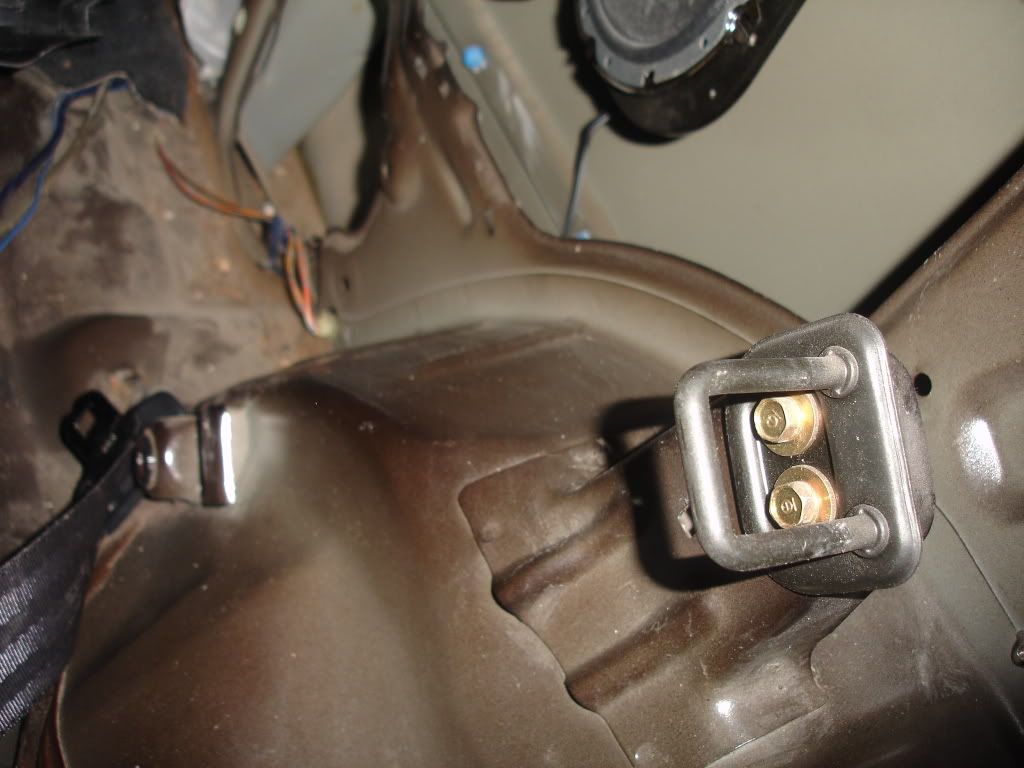
The new ground location is the stud. The studs are cadmium plated which conducts electricity so IMO this should ground properly, lmk what you guys think
(Note: I did tighten it down all the way after the pic)Also, this bracket for the strut bar is the reason why I'm not able to line up the hardware for the panels. It pushes the panel just a tiny bit enough for it to also be the cause of that gap in the garnish to panel. If I trimmed the panel, it would have no gaps and would fit right but I won't ruin the panel because my strut bar isn't permanent but the panel is you know? This is what that gap looks like in the garnish to panel. Its still there, but now I know why it fits wrong and its just a simple issue no biggie at this stage of the build.
Couldn't leave the speaker covers out either! No panel left behind haha
More cleaning
Took out the rear strut bar and polished it up! Came out fresh. Polishing takes effort though let me tell you, I spent some good time on this. Wetsanded with 600 and 1000 grit and the polished with Mother's Mag and Aluminum polish over and over and over again.
Remembered I had this after I had one side done so it helped my arm take a break lol.
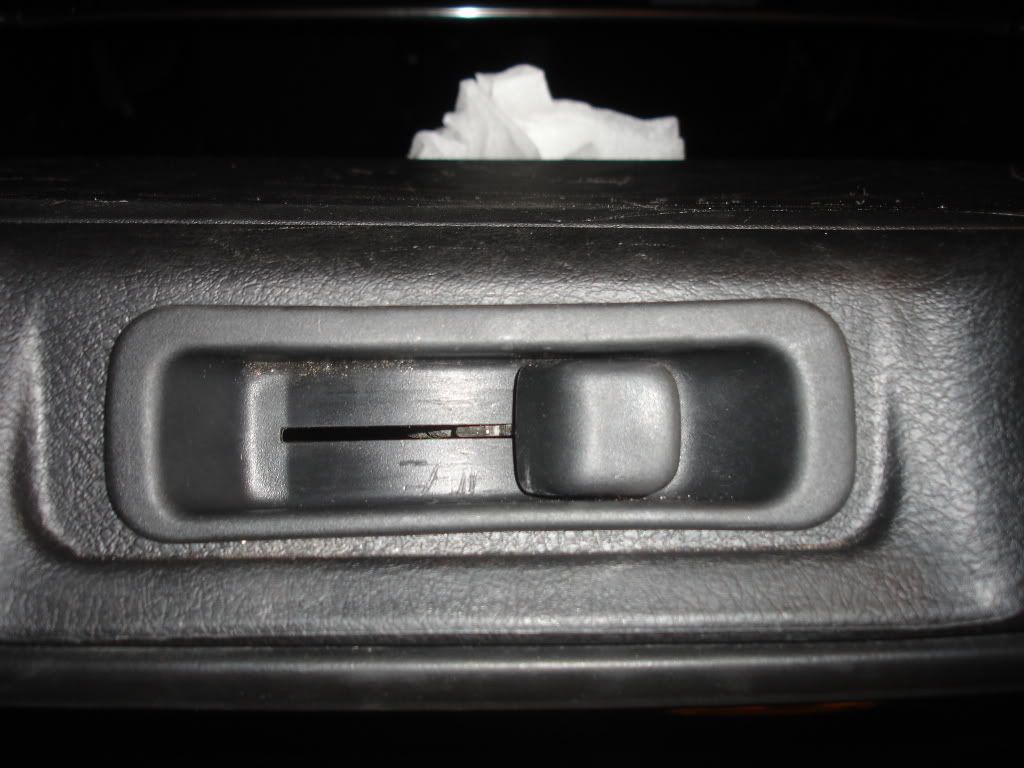
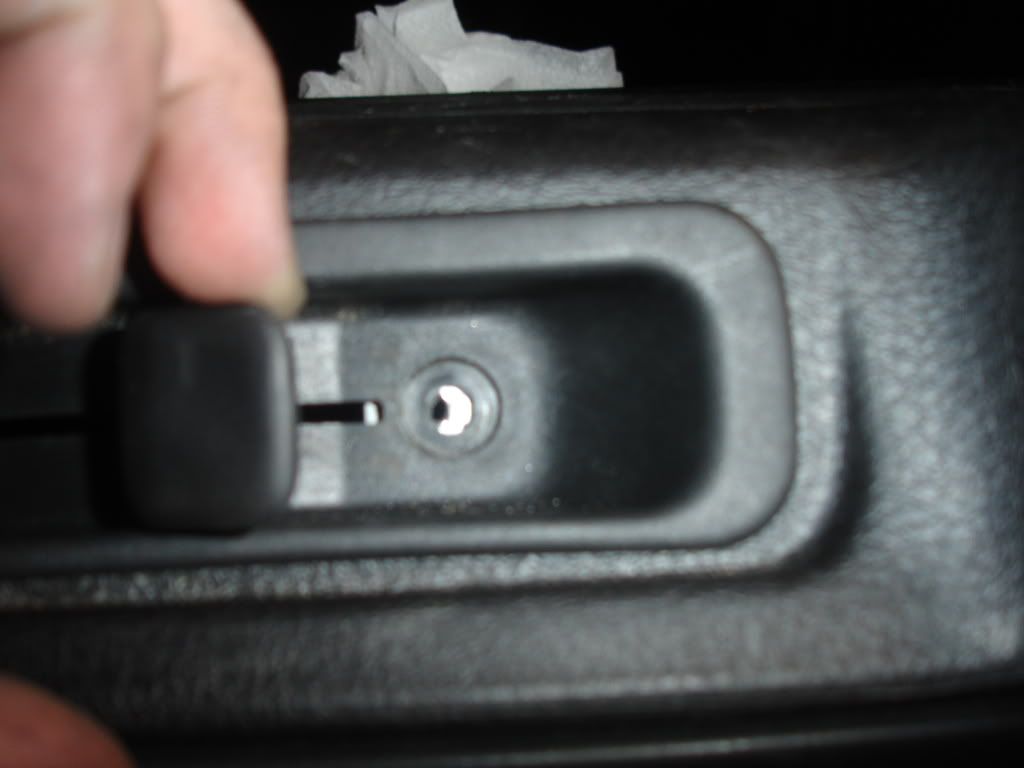
Got the trunk latch cover to sit right, it was sitting with a gap before. I took out the screw and it fixed it. For some reason it doesn't line up, I'll have to look at it in the future but for now, better fit>having a screw.
One of the ricey things that the previous owner had done was paint all the seat belt buckles green and even the dome light had a bulb with a green cap on it haha, the theme was green lol.
As soon as I brought it home I stripped it with my nails but now was the time to get it over with completely. Taped up!
Used gel Aircraft Stripper to cake off the green that was in the letters.
SO much win!!
Washed the rear trunk carpet with hot soapy water and a brush, managed to clean it up pretty good and left it to dry overnight. It might not look perfect but I didn't want to ruin the fabric but its clean nonetheless. I'll re do it along when I coat the rear seats to get rid of the surface rust. I'm pretty happy with this though!
*EpicMealTime Voice* Of course I had to trim the pubes, Hater ! haha
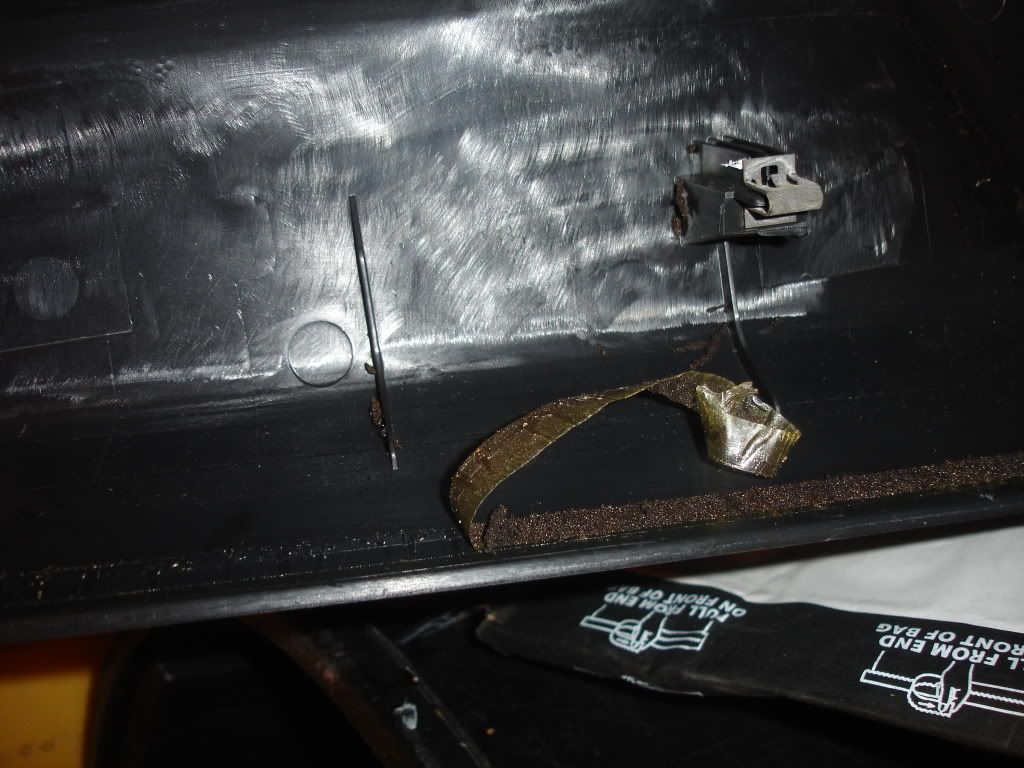
Put some painters tape on the tabs to help any squeaks coming from them. As well as a bunch of square pieces of foam under this piece, it makes a lot of noise when I push down on it but not anymore! Also put some tape in the hinges for the seat bottoms as I noticed that makes a lot of noise too.
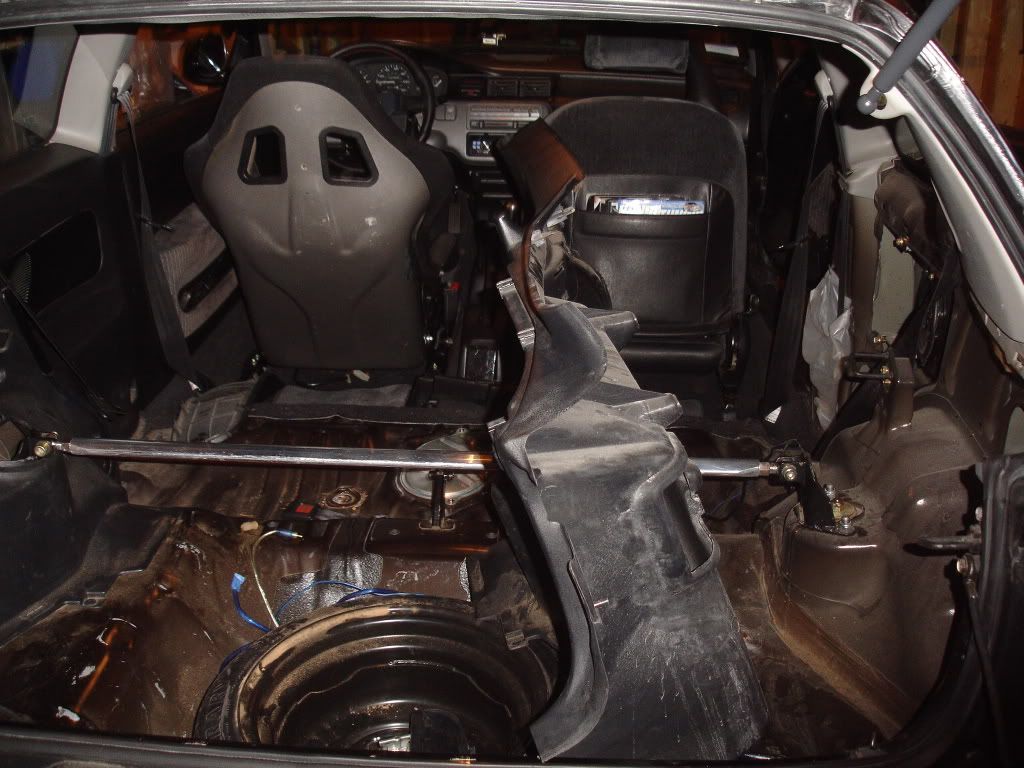
Next up is the rear trunk board. POS was all cracked from being so weak and dirty. Even the light 10'' sub I got the car with was enough to crack the damn thing. My dual subs sit crooked too so I had to do something about it. If you look to the left, you can see how it doesn't line up with the panel. It would if it was it straight.
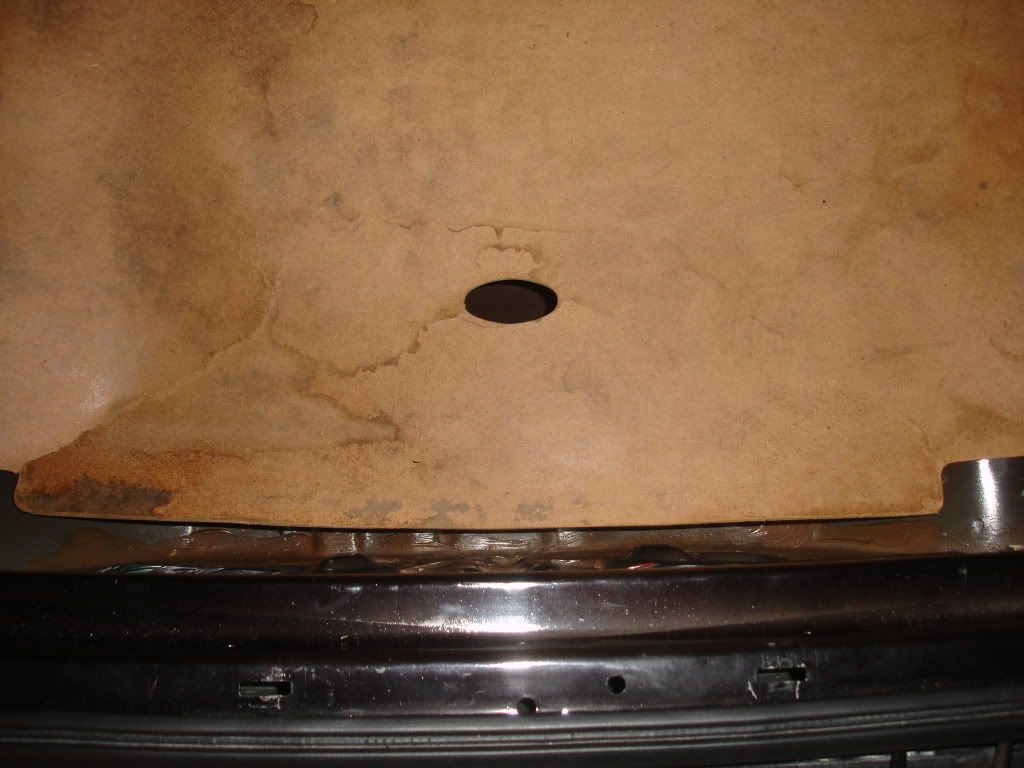
At the intended placement, it has a gap here.
Went to Lowe's and picked up a 1/2'' 4ft x 2ft piece of plywood for about $10 and change. Also got a Kobalt handknife that has a blade for wood and metal.
Traced the old board on it. The rear part as you can see is longer than 2ft but that section isn't on a hole so it has no effect really. Plus the whole thing is a lot stiffer so there will be no problems. I would of modified the shape of the new board to cover all around the trunk but I'm trying to keep this as light as possible and theres no need for that.
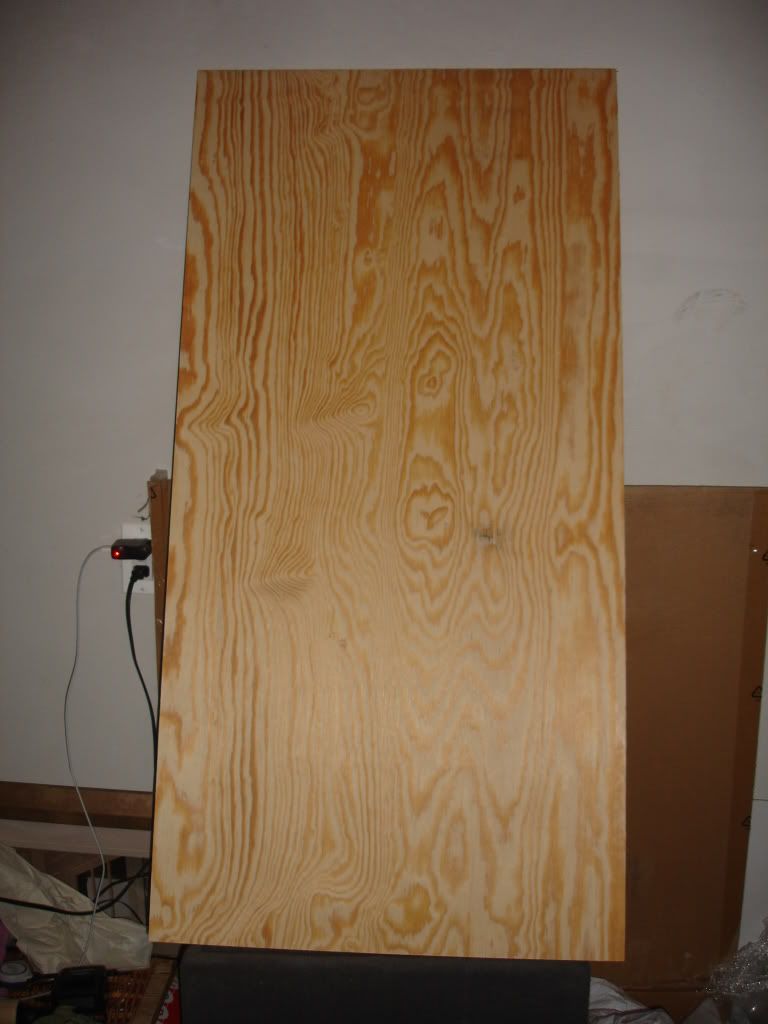
Today I cut the main shape of it, took a good bit of effort too but progress was noticeable so it wasn't that. Sections at a time and taking breaks is key
I will be cutting it more and sanding the edges so that its an exact replica of the OEM one. I weighed them both using a regular personal scale so its not too accurate but its roughly 2lbs for the OEM one and the one I'm making is at about 4lbs now. I will get a better figure once its all said and done. I might also wrap the board with fabric or carpet somehow if I can, we'll see.
Caught 2 mosquitoes doing the dirty dirty lol!
I was over at Migz place on Tuesday to try and help him get his car running but so far it's still not starting. He's not getting spark and so I got a helms manual for the DA but it didn't really cover troubleshooting it very well (most don't).
I followed a couple of tips in there to check the voltage in a few wires near the distributor and they weren't getting voltage on some of them and so we took out the main harness and tore that bitch up with the help of Cd7 Joseph.
It was super dirty and had lots of oil in some spots so we cracked all of the old sleeving and tape off and proceeded to spray the harness with tb cleaner I believe it was ( in the bathroom of course, that's how Migz gets down!) and that bish was clean after that.
We then started taping it just to organize the wires a bit. This is what it looked like.
Migz still has to cut some of those taped spots and
route them around the motor and then retape a few spots and heat shrink it/sleeve it. So those spots of tape are just temporary to guide the wires more or less.
We threw it on but it still wasnt starting. However it was now getting strong voltage all across in diff wires so that's def good bc it wasn't doin that before.
Were not sure what it is but I gave him a link that has great info and he should be able to troubleshoot it from there. I'm guessing he's not getting the starter signal bc it had power and is grounded right.
Hope you get it running soon homie!
Soo I managed to get a hold of the master plans! Oh chit!
He also lent me his Circuit Hero shift **** for the mean time, man this thing feels awesome!!!
Thoughts and initial impressions:
The car feels like it rides better because it is SO much quieter. Now on bumps, it sounds like a solid thud that is dampened and not like I got a rattle snake back there somewhere lol. Seriously though, now the noise feels a lot more like how it should be. There aren't random noises like before, it feels solid. Its hard to explain but its like clapping vs pounding your fist into an open hand.
Ill try and get some video footage to compare before and after, but all I can say it was very worth all the hours I spent. It should of had been done a lot quicker but I was listening to music and IM'ing just chillin so it wasn't bad at all, just took a few days to get it done. Once I put the subs back in the ride will be a lot nicer. I still have to tackle the front door panels but thats for another day.
Well thats it for this update, I've got some other stuff in the works, hope you enjoyed and sorry for making this a bit pic heavy and long to read but I just want to document everything and whatnot. Till next time!
Last edited by SHG_Claudio; Jun 21, 2011 at 06:34 AM.
Honda-Tech Member
Joined: Jan 2004
Posts: 10,475
Likes: 0
From: Working in the NRBG, Garage
Honda-Tech Member

Joined: Apr 2004
Posts: 6,808
Likes: 4
From: OKC,OK
Damn, thought you were doing a black widow kit and all you did was clean your interior and fix all the rattles.....
Nice attention to detail. I think you have just inspired me to track down and fix some of the rattles I have in my car.
Nice attention to detail. I think you have just inspired me to track down and fix some of the rattles I have in my car.
Thread Starter
Honda-Tech Member
Joined: Nov 2007
Posts: 6,334
Likes: 1
From: MA

That foam stuff is working great so far, I put it in the rear cover by the tailgate and that solved a lot of it alone, then the panels too so overall I would def say it helps. Plus they had them there OEM so you know that it needs foam pads there, funny thing is I was planning on doing the foam before I even realized they came with foam lol. Weather stripping would be too rigid and heavy, foam is dumb light and holds its shape well, rubber things tend to squeak anyway. Plus it would cost more I think.
I think you should def address the noises, it can be done quickly if you're not goofing around and costs essentially nothing. Plus its a good way to clean up dirt that you don't get to see but you know is there.
There is a thread about this, heres the link for it, Ill be posting there soon once I do the fronts.
https://honda-tech.com/forums/honda-civic-del-sol-1992-2000-1/various-rattle-annihilation-thread-2881208/
I edited the update to fix some errors and add more info I left out, might want to give it a quick run down to get anything you missed.
Honda-Tech Member
Joined: Apr 2004
Posts: 6,808
Likes: 4
From: OKC,OK
I have a mean rattle that seems to be coming from the passenger C-Pillar and it is driving me bonkers. I bet it is that foam between the side panels and the c-pillar cover. I think I'll be taking that apart tonight and checking it out.


Thread Starter
Honda-Tech Member
Joined: Nov 2007
Posts: 6,334
Likes: 1
From: MA
The picture you quoted isn't a checkered sports product, rather a Splash Sports product.
I get where you're coming from, all these companies coming out of the woodwork trying to sell race inspired parts and whatnot, yes I see why you think its a joke.
I'm picky about stickers and the only ones I have are checkerd and circuit hero but honestly I have them because I want to support a company I like from the beginning to help if I like what they're doing and because the stickers are clean and simple, which also look pretty neat IMO.
I can't really say they're blatantly ripping off the design of real deal parts. I'm all for real deal parts and avoid getting cheap stuff and as you can see, the non-brand name parts I have are mostly stuff that I got the car with that works fine for the time being or something that didn't need to be brand name but rather just do the job like the window visors ($40 vs $160). Either way I'm too broke to change it.
This industry is much like the fashion industry, which btw doesn't have copyright restrictions. They can only copyright brand logos. So there are a lot of knockoffs but then again theres so many ideas floating around for designs and inspiration is everywhere so if you try to pin point something that is seen to be authentic, you will realize that somewhere somehow it came off a design that was ripped off.
Volks themselves copied the design of a few wheels, does that make them knockoffs? Basically thats like someone trying to copyright the wheel and anyone that makes a wheel is infringing that and therefore a knockoff. Not really how it works. If I want an extended hub, it has to be Mugen otherwise its a knockoff idea? Well ****, why am I even using this replica Windows 7? Macintosh had the concept of windows before

Not arguing with you, just having a thoughtful debate and saying whats on my mind right now. This is too complex of a subject to tackle head on, there isn't just one logic. Its nice that you go the extra mile to get the real parts like the Works hub instead of the "knockoff" NRG and those things show, your car is on another level way above 90% of the scene. I like that you express your views though and I have no problem with that, too many choose to go silent.

Try pushing down on it, I found a lot of squeaks that way. Its nice being able to hear yourself think when you drive.
The picture you quoted isn't a checkered sports product, rather a Splash Sports product.
I get where you're coming from, all these companies coming out of the woodwork trying to sell race inspired parts and whatnot, yes I see why you think its a joke.
I'm picky about stickers and the only ones I have are checkerd and circuit hero but honestly I have them because I want to support a company I like from the beginning to help if I like what they're doing and because the stickers are clean and simple, which also look pretty neat IMO.
I can't really say they're blatantly ripping off the design of real deal parts. I'm all for real deal parts and avoid getting cheap stuff and as you can see, the non-brand name parts I have are mostly stuff that I got the car with that works fine for the time being or something that didn't need to be brand name but rather just do the job like the window visors ($40 vs $160). Either way I'm too broke to change it.
This industry is much like the fashion industry, which btw doesn't have copyright restrictions. They can only copyright brand logos. So there are a lot of knockoffs but then again theres so many ideas floating around for designs and inspiration is everywhere so if you try to pin point something that is seen to be authentic, you will realize that somewhere somehow it came off a design that was ripped off.
Volks themselves copied the design of a few wheels, does that make them knockoffs? Basically thats like someone trying to copyright the wheel and anyone that makes a wheel is infringing that and therefore a knockoff. Not really how it works. If I want an extended hub, it has to be Mugen otherwise its a knockoff idea? Well ****, why am I even using this replica Windows 7? Macintosh had the concept of windows before
Not arguing with you, just having a thoughtful debate and saying whats on my mind right now. This is too complex of a subject to tackle head on, there isn't just one logic. Its nice that you go the extra mile to get the real parts like the Works hub instead of the "knockoff" NRG and those things show, your car is on another level way above 90% of the scene. I like that you express your views though and I have no problem with that, too many choose to go silent.
")
Thread Starter
Honda-Tech Member
Joined: Nov 2007
Posts: 6,334
Likes: 1
From: MA
Only if I knew. I remember someone said that and I remember them being credible, I don't know enough about the subject but I'll go with it because I find it to be pretty hard for their wheels not to be similar to other designs that were made prior. That'd just one example though.
What if I fabbed up a simple radiator stay and then come to find out that a spoon one looks exactly like that, just a piece of metal with 2 bends and 2 holes. Knockoff? Just trying to get at the fact that some things are always going to be similar and not necessarily real or fake.
What if I fabbed up a simple radiator stay and then come to find out that a spoon one looks exactly like that, just a piece of metal with 2 bends and 2 holes. Knockoff? Just trying to get at the fact that some things are always going to be similar and not necessarily real or fake.