

SHG_Felliphe's EG Hatch Build Thread

Honda-Tech Member
Joined: Feb 2004
Posts: 13,716
Likes: 2
From: DSM, IA
1. Wheels/Tires out of balance.
2. Inner or outer tie rods are worn.
3. Upper control arm ball joints are worn.
4. Lower ball joints are worn.
5. Lower control arm bushings are worn.
6. Axles/Half Shafts are worn.
Thread Starter
Honda-Tech Member
Joined: Nov 2007
Posts: 6,334
Likes: 1
From: MA
Update:
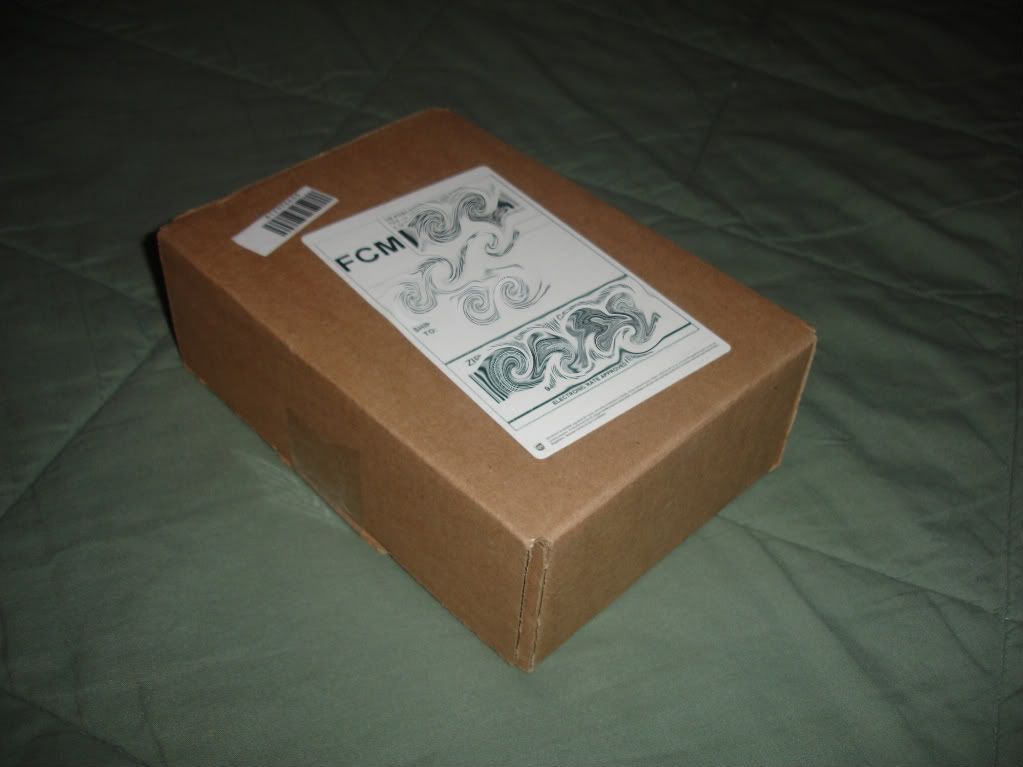
My Signal repair kit finally came in today, was supposed to be here last Thursday lol. I will be using it to do my climate control in amber. Just need to get the bulbs now but I'm waiting on a friend to get me them and hes slackin!


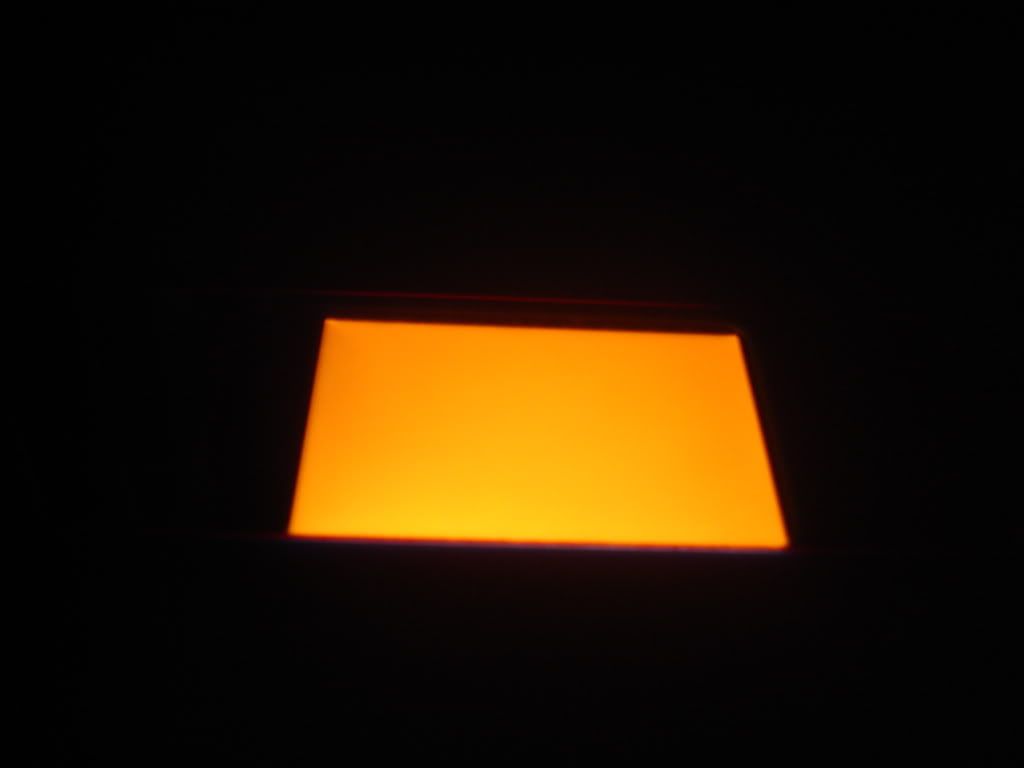
I put my iPod on the brightest setting and opened the flashlight app and took a pic of how the light looks with the strip on top. The pic looks close to what it really looks like.
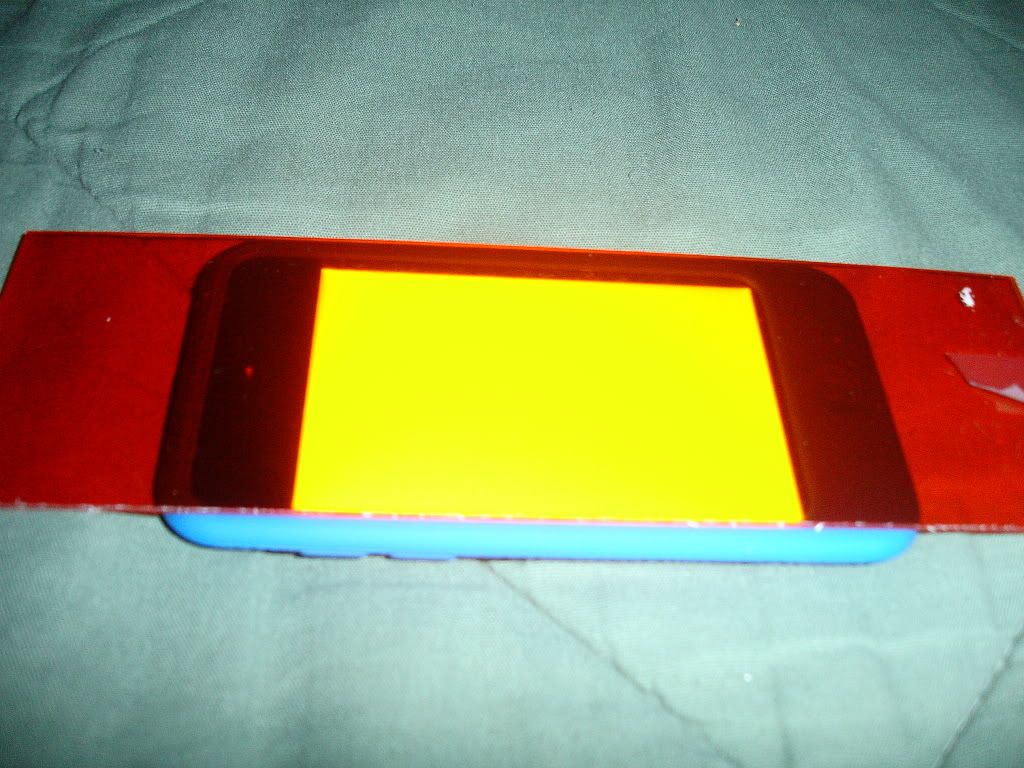
Even red would look good, I just want amber though.

Thread Starter
Honda-Tech Member
Joined: Nov 2007
Posts: 6,334
Likes: 1
From: MA
I'll do a DIY another day so that it comes out good but for now, Ill just skip onto the pics!
First off, I am really satisfied with how it came out and it was def worth the trouble.
I still have to finish hooking up the heater cable because it went through the wrong hole somehow so I'll do that tomorrow.
Enjoy fellas!
.
.
.
.
.
.
.
.
.
.
.
.
.
.
.
.
.
.
.
.
.

First off, I am really satisfied with how it came out and it was def worth the trouble.
I still have to finish hooking up the heater cable because it went through the wrong hole somehow so I'll do that tomorrow.
Enjoy fellas!
.
.
.
.
.
.
.
.
.
.
.
.
.
.
.
.
.
.
.
.
.
Thread Starter
Honda-Tech Member
Joined: Nov 2007
Posts: 6,334
Likes: 1
From: MA
Hahaha hell yeah glad you like it. SHG certified:check!

Its going to match the JDM cluster well
I kinda of want to do my whole interior lighting first and then do 1 massive DIY but I'll post the climate DIY here tonight
Amber clock is next!
Its going to match the JDM cluster well
I kinda of want to do my whole interior lighting first and then do 1 massive DIY but I'll post the climate DIY here tonight
Amber clock is next!
Thread Starter
Honda-Tech Member
Joined: Nov 2007
Posts: 6,334
Likes: 1
From: MA
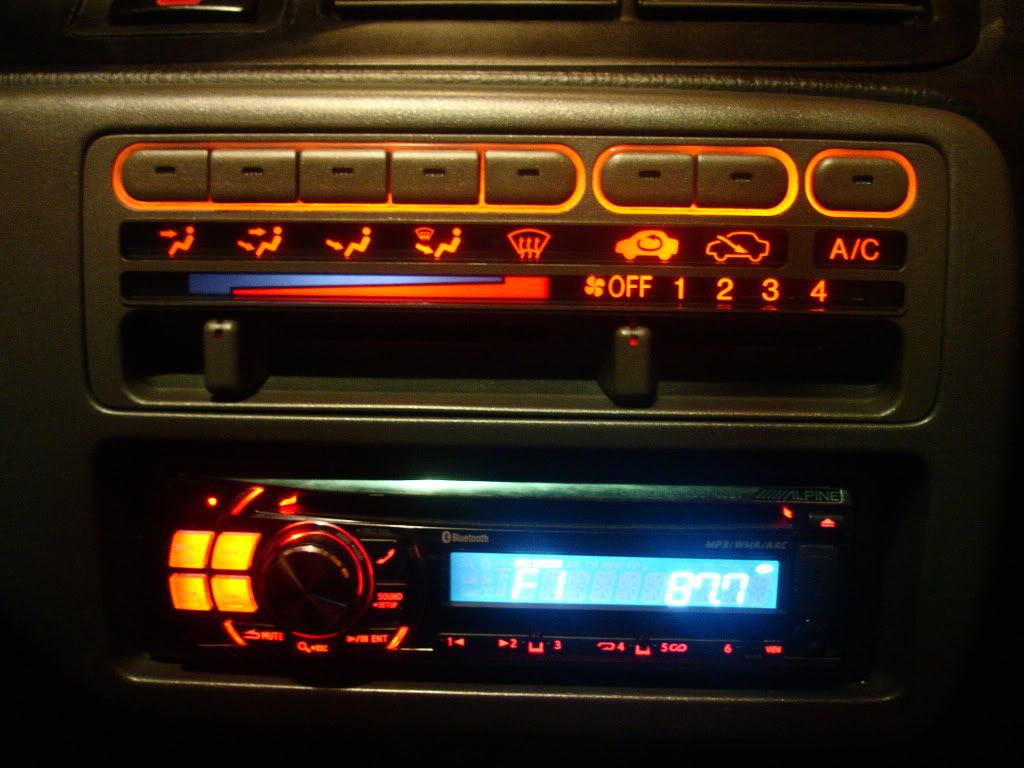
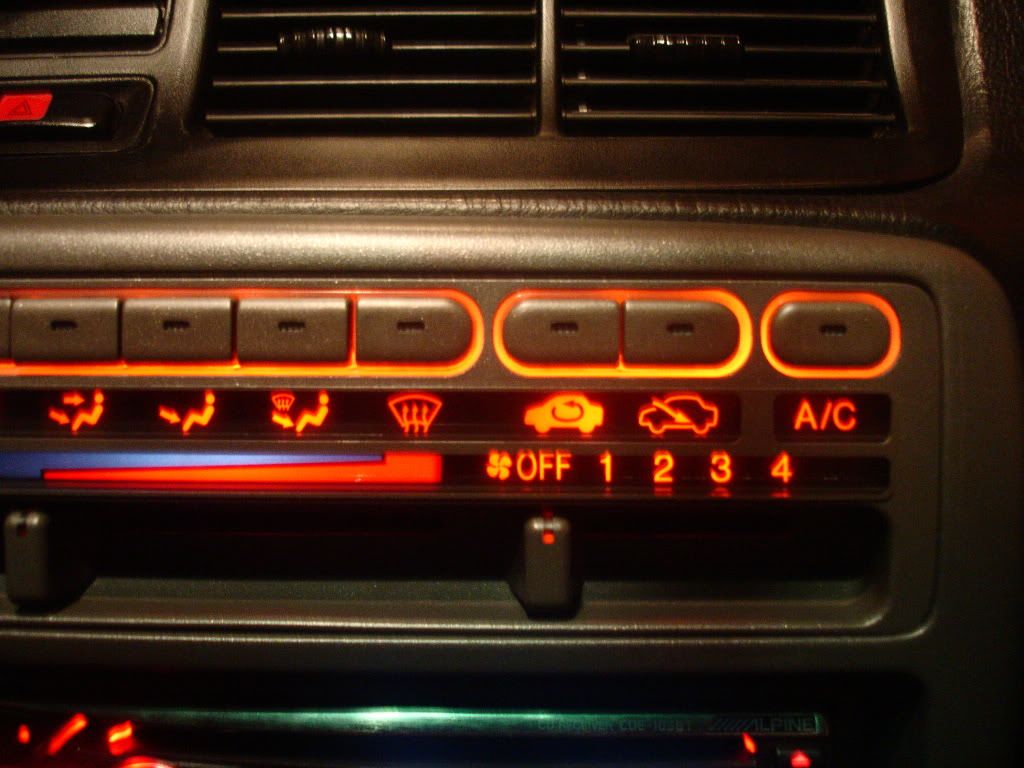
Here is the DIY guide to make your climate control amber:
Tools:
Mini screwdrivers
Regular flathead
Regular phillips
2 #74 Sylvania bulbs (Got mine from Autozone for $5)
CarGO Fix-a-Lens Repair kit $12 shipped from Amazon. Seller's company is Autobarn. Comes with 2 red strips, 1 clear and 1 amber.
Optional:
Tylenol, being upside down looking up can give a headache so take breaks!
1. Begin by taking out the center console. There are 4 screws, 2 up top and 2 on the sides.
2. Next pull the center console and it will pop out, don't take it out completely, you have to unplug this first. You can use a flathead and just pull the plug with the other hand.
3. Unclip the cable from the bracket and then unhook it from the heater core.
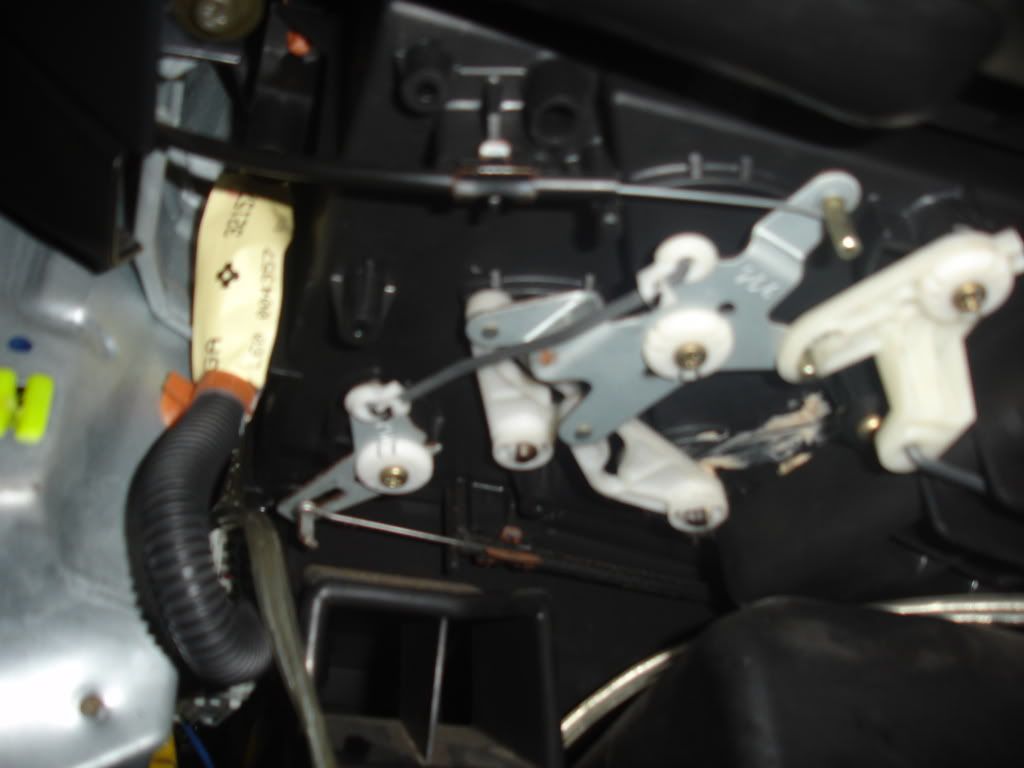
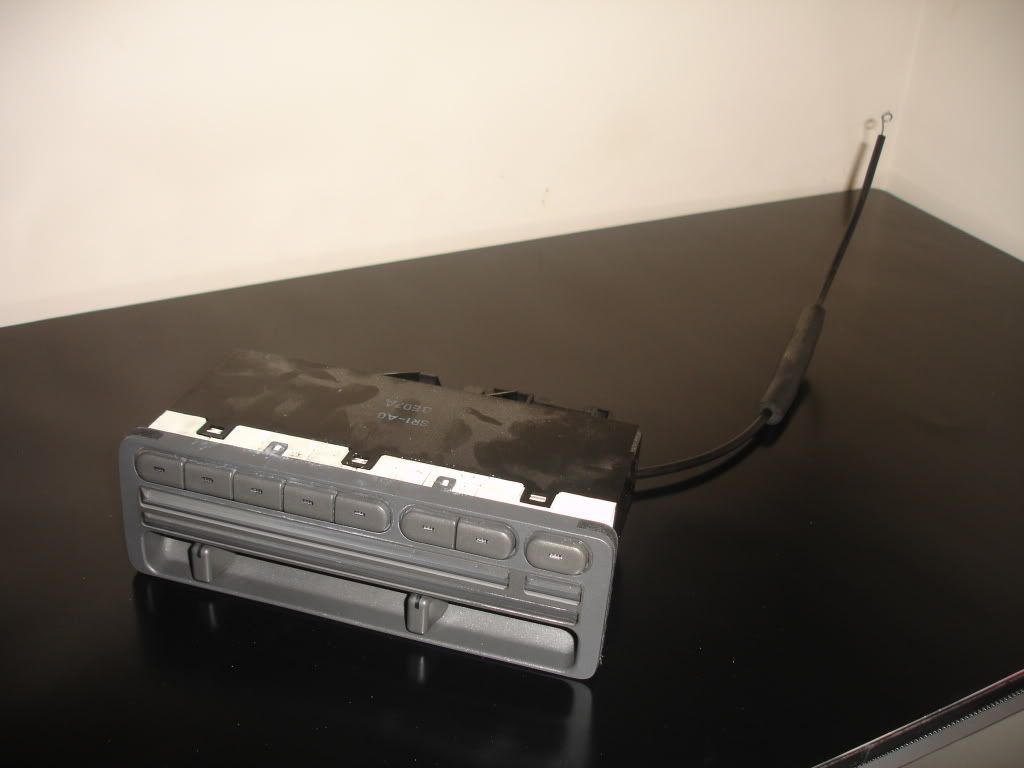
4. Next remove your radio. I won't get into that since it is different for everyone but its pretty straight forward.
5. Next there are 2 bolts holding the climate up front that you must take off; one on each side. They are tricky to get to and not really necessary to put back in once you're done.
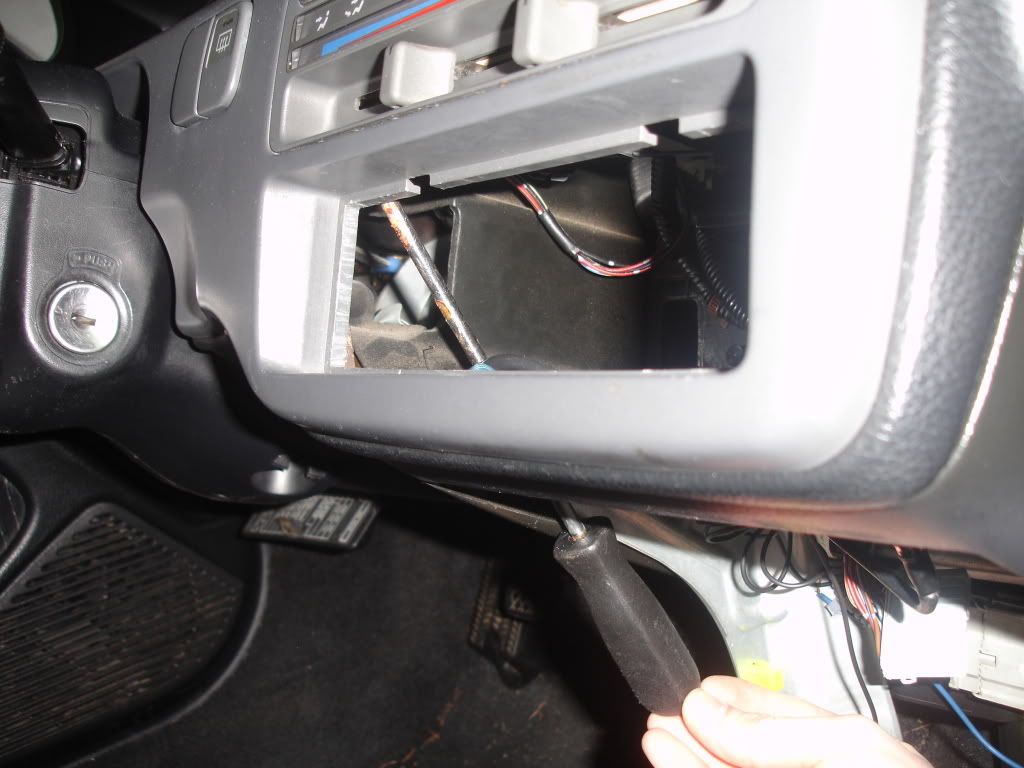
Put the screwdriver through here for this side, it works best.

Then get the one on the other side.
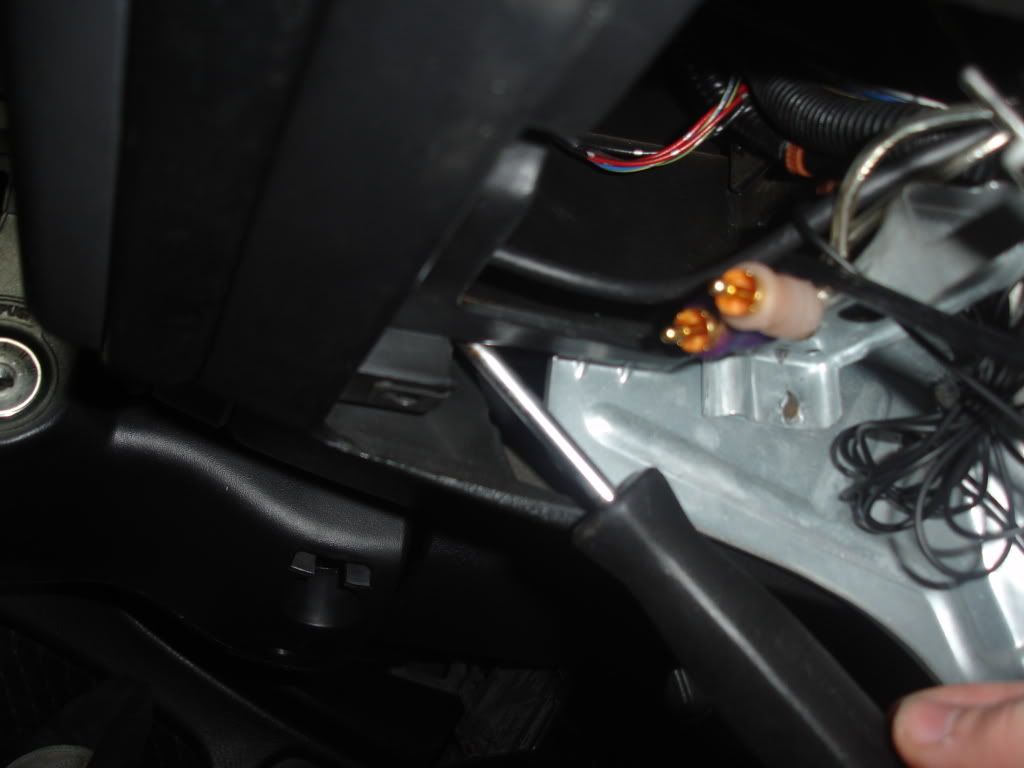
6. Now there is 1 screw right in the middle, unscrew that.
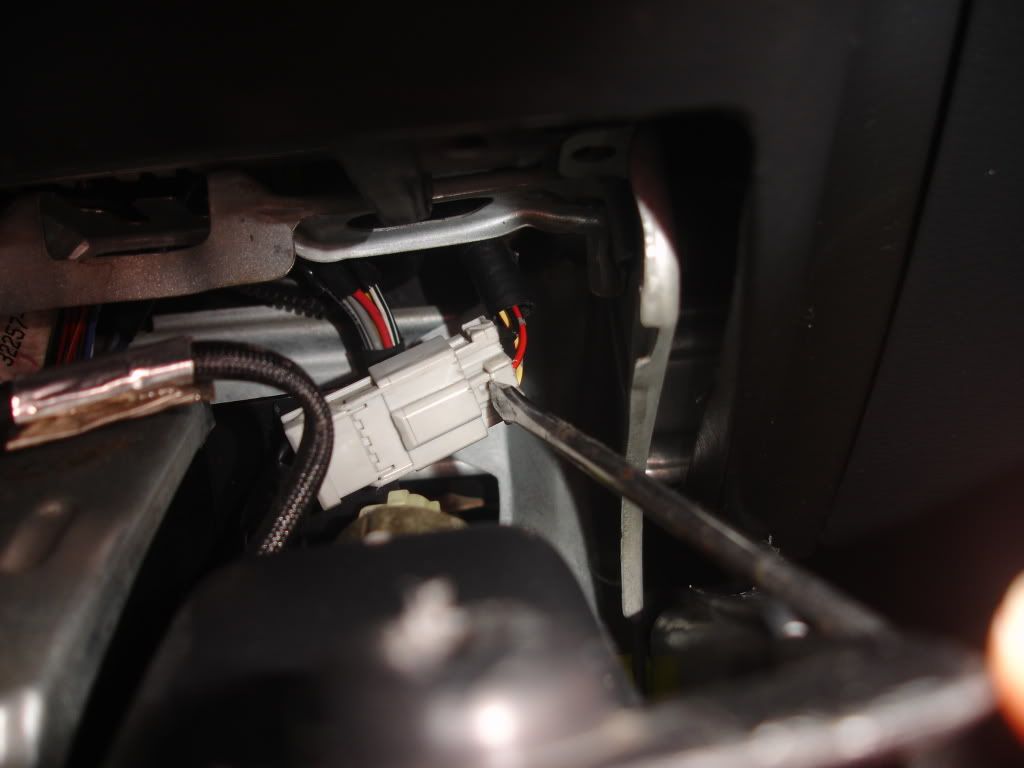
7. Remove this tan plug, just push the release with a flathead with some force and then pull it back with your other hand.
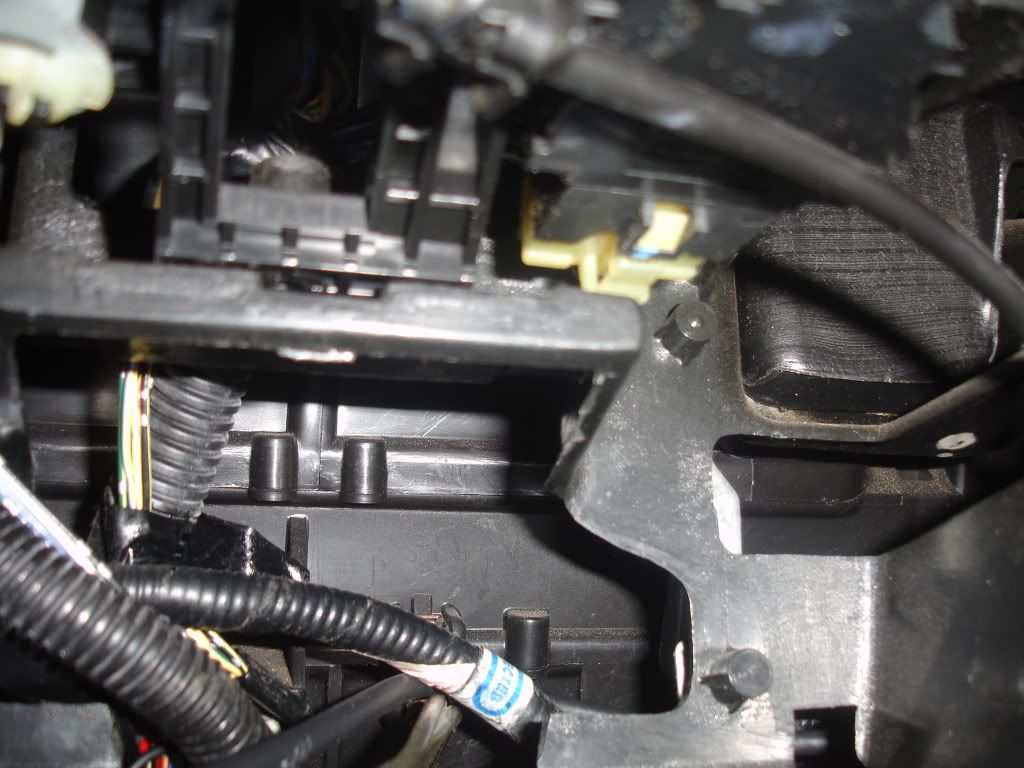
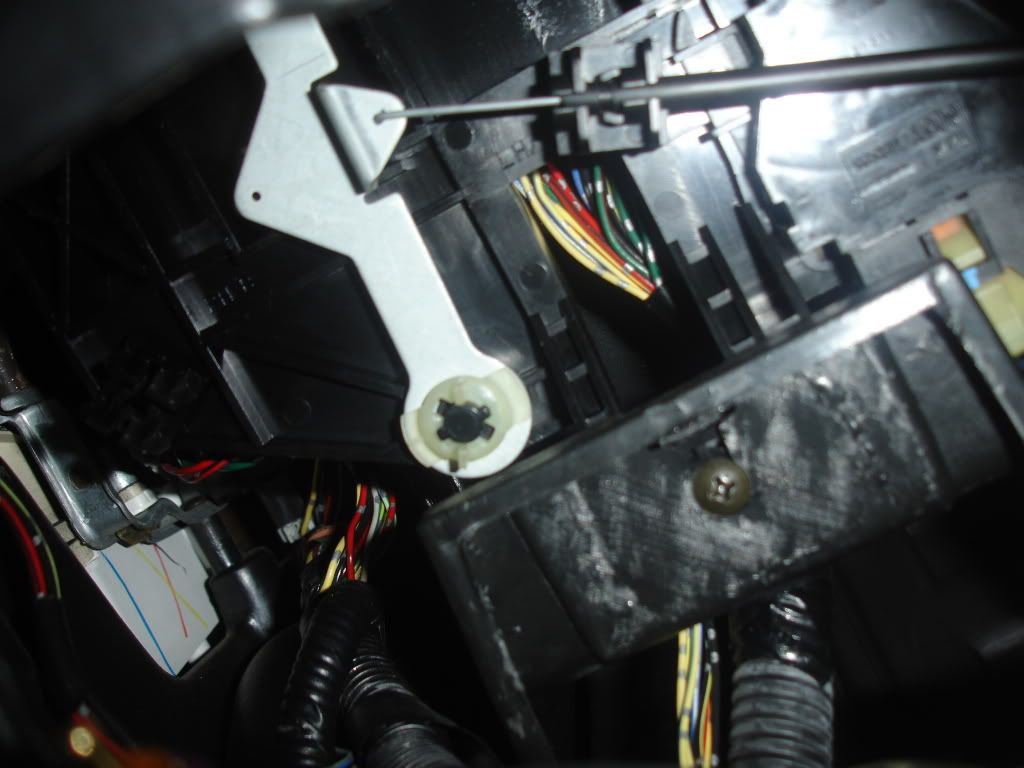
8. Up next is this green plug. It is a bit tricky so keep tinkering with it. Its hard to reach and you have to figure out where to press it. I used a flathead and just pushed and pried it out while holding the climate control from outside. Try to put it in deep where you can't see, thats where the release is, not right at the end like it seems.
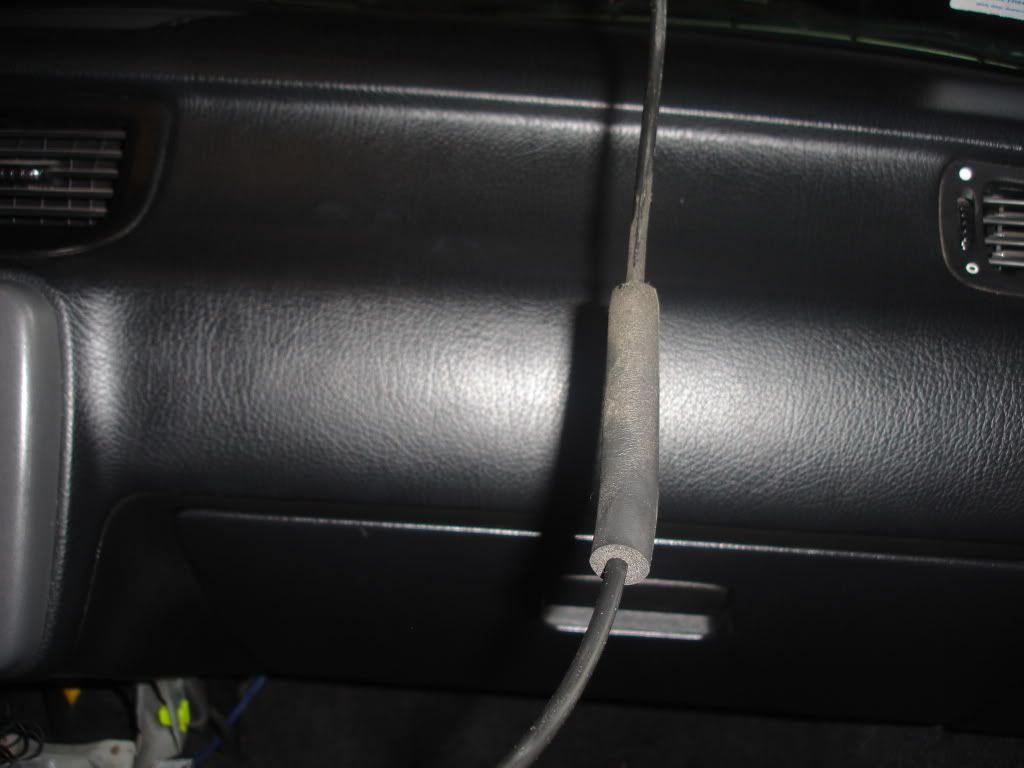
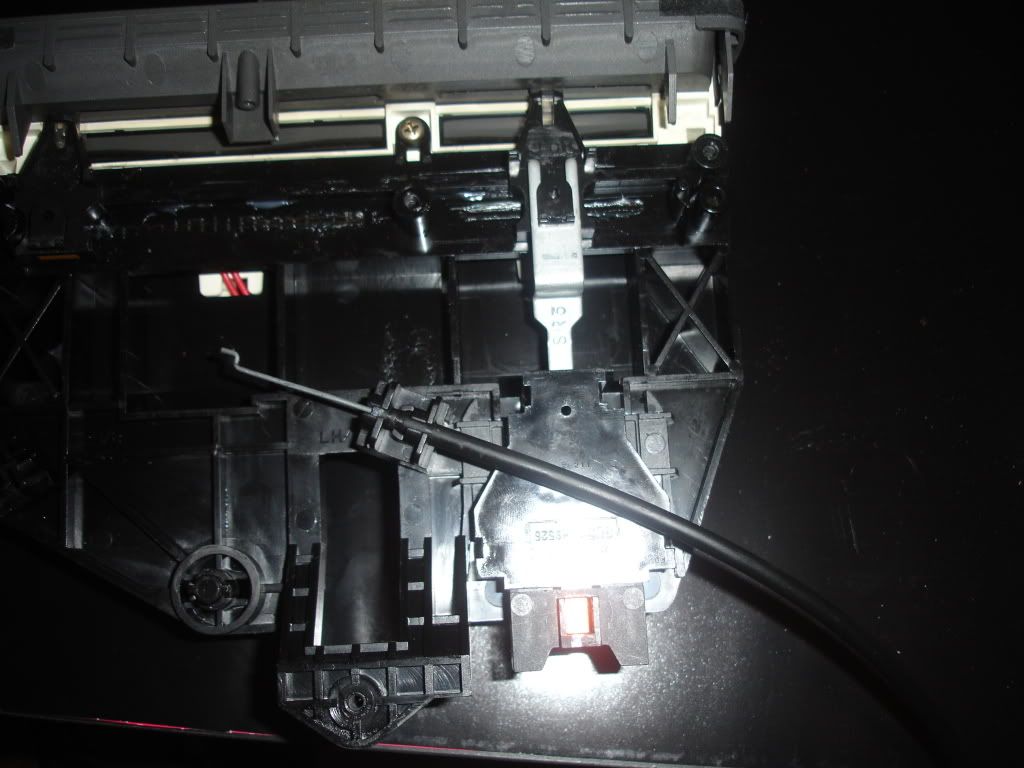
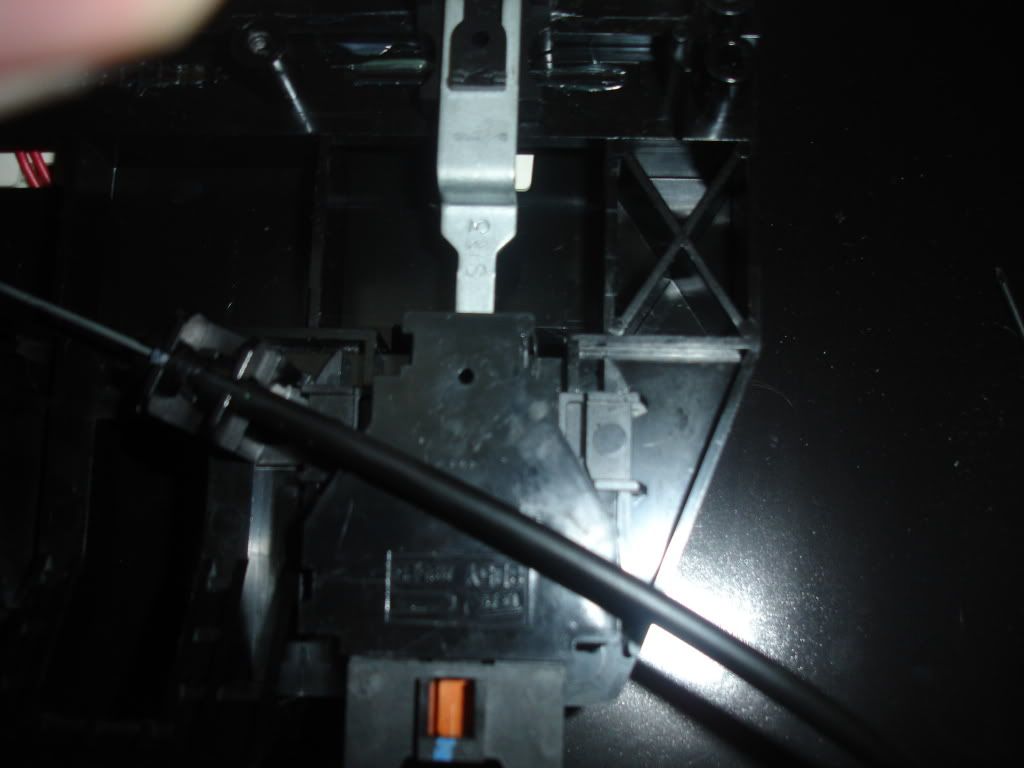
9. Now the climate is ready to come out but the spongy part gets hooked insided so remember to guide the line out.
10. Enjoy your hard work for a minute. Whenever you're taking apart parts, its always a good idea to wipe the dust off =]
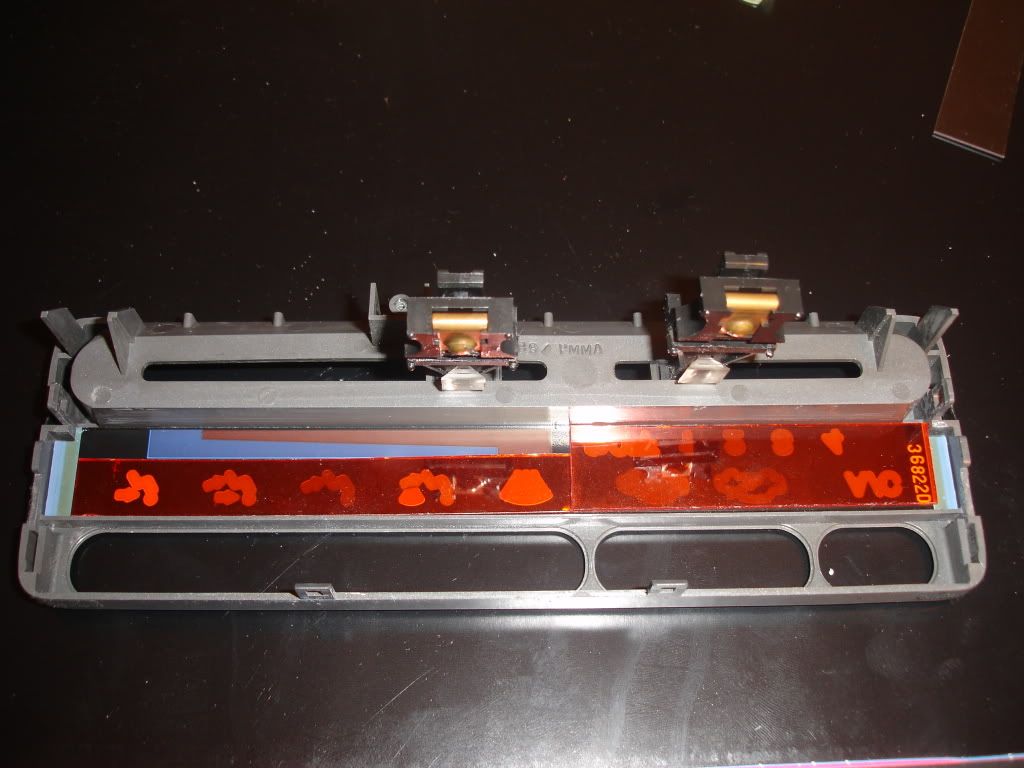
11. Now you must remove the 6 screws to remove that tab. I'm OCD at times so I keep them lined up so that every bolt goes back in the hole it came from even if its the same type.
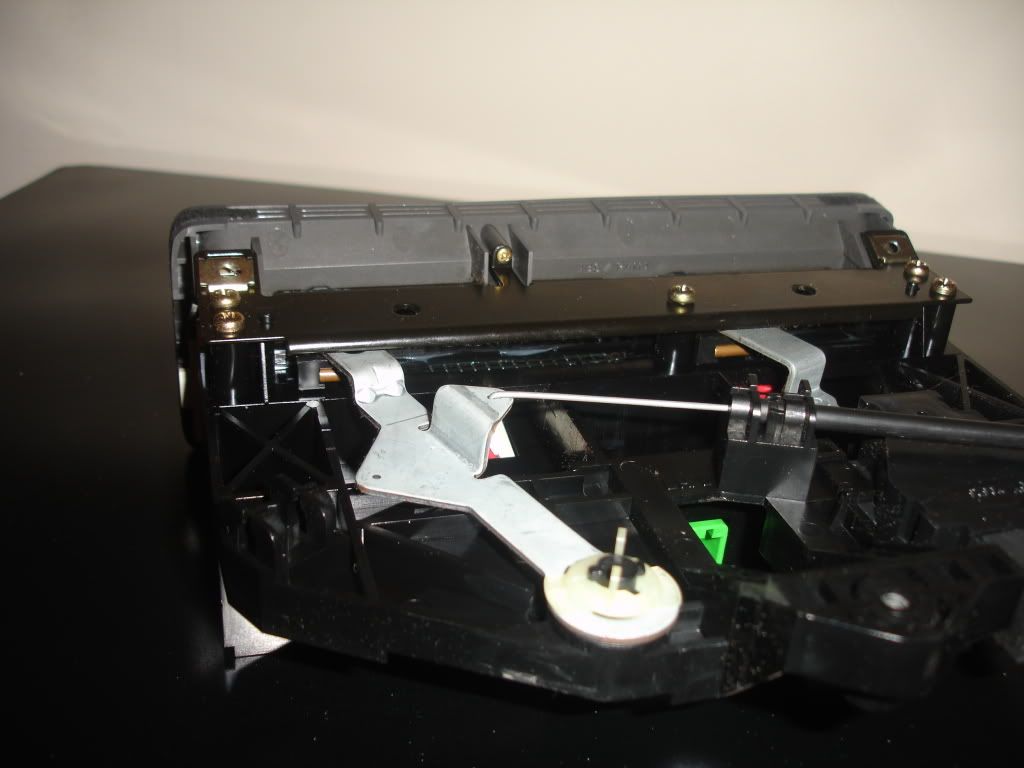
12. Twist this plastic cap and pull the fork our and out of the line.
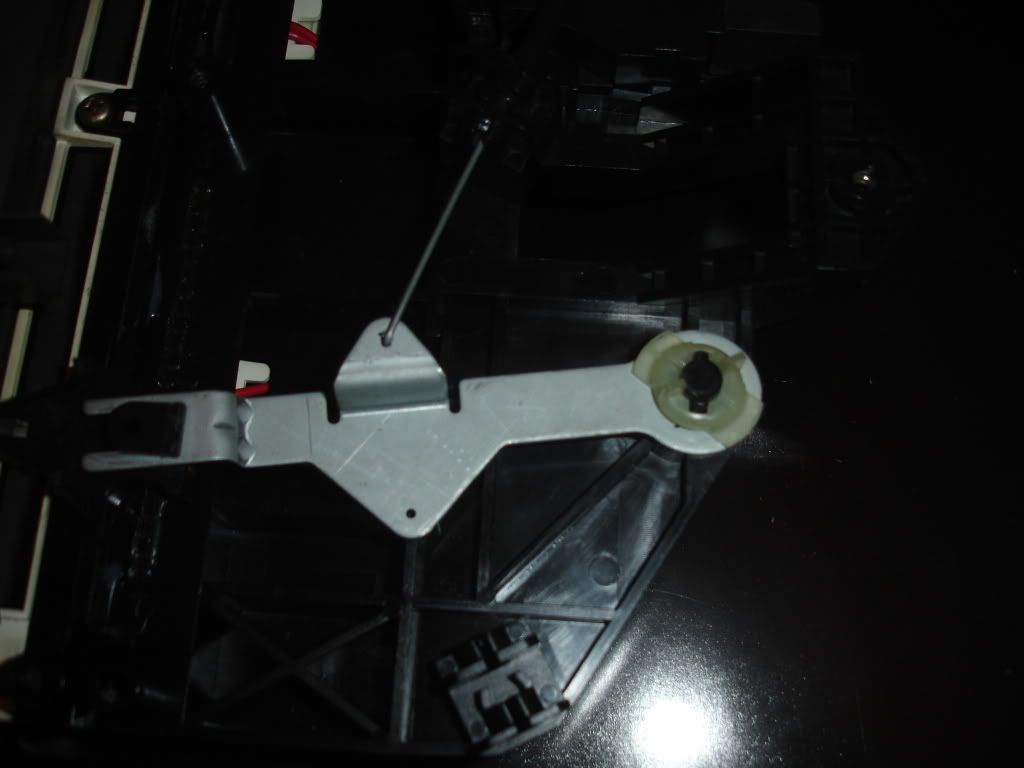
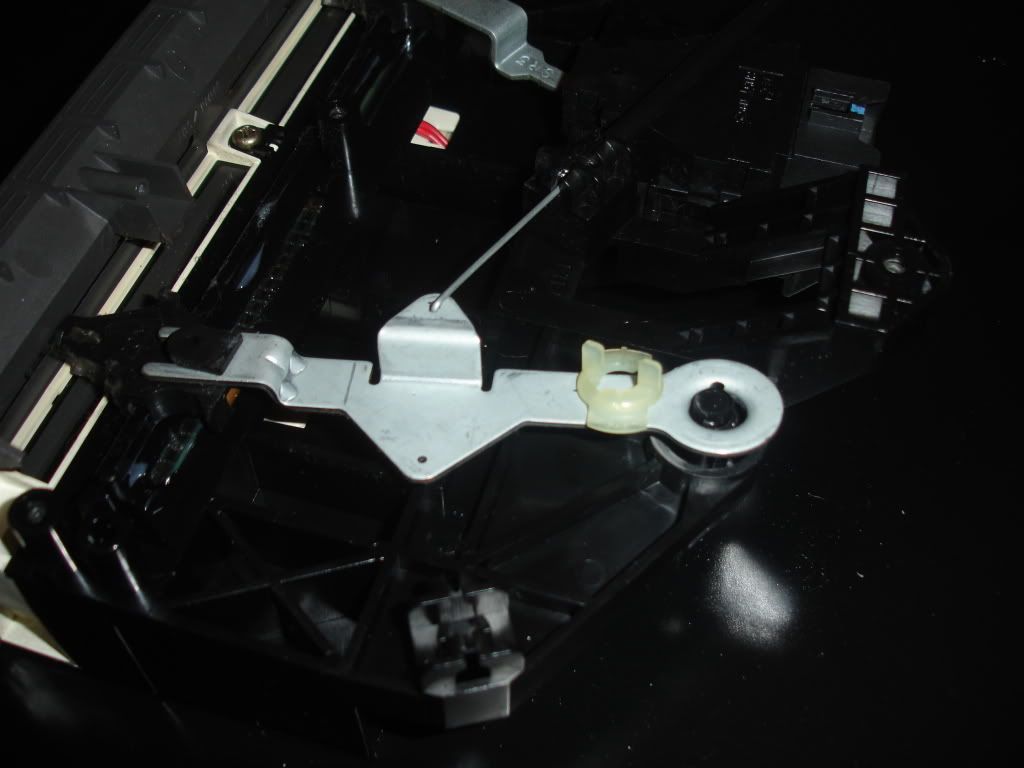
13. Now you need 2 screwdrivers to press together the tabs and the switch will pop out along with the fork.
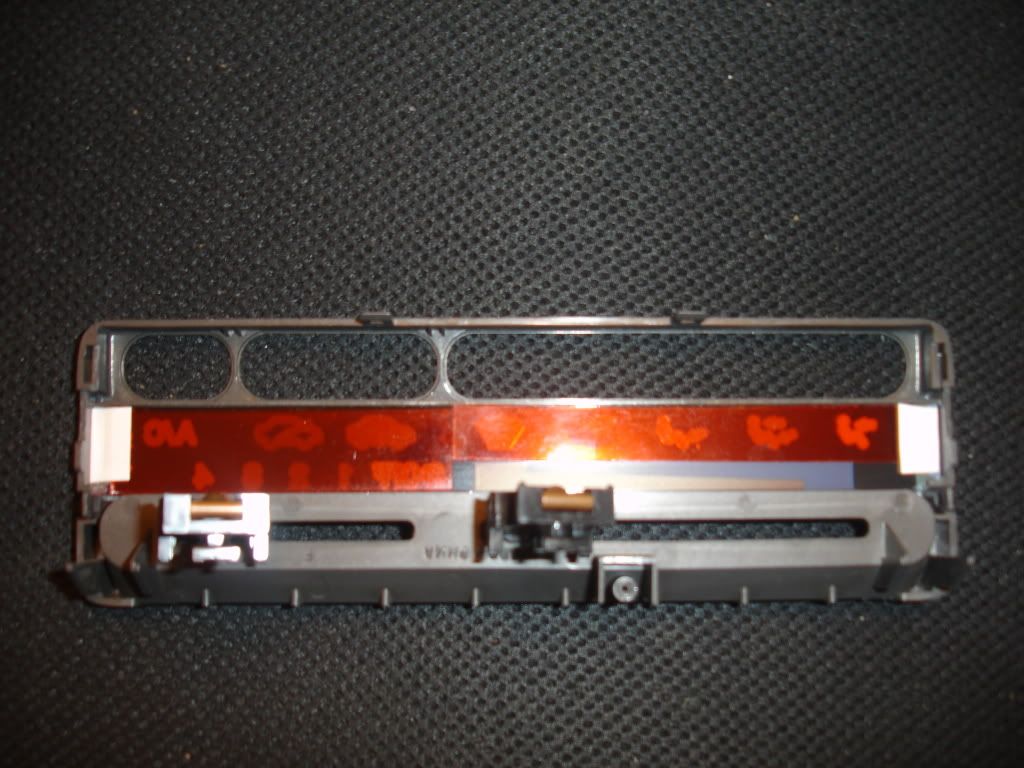
14. Next up is the faceplate. There are 2 tabs up top, 2 on the sides. Lift them and pull it out. Just make sure you lift the control ***** because they move in a track/rail.
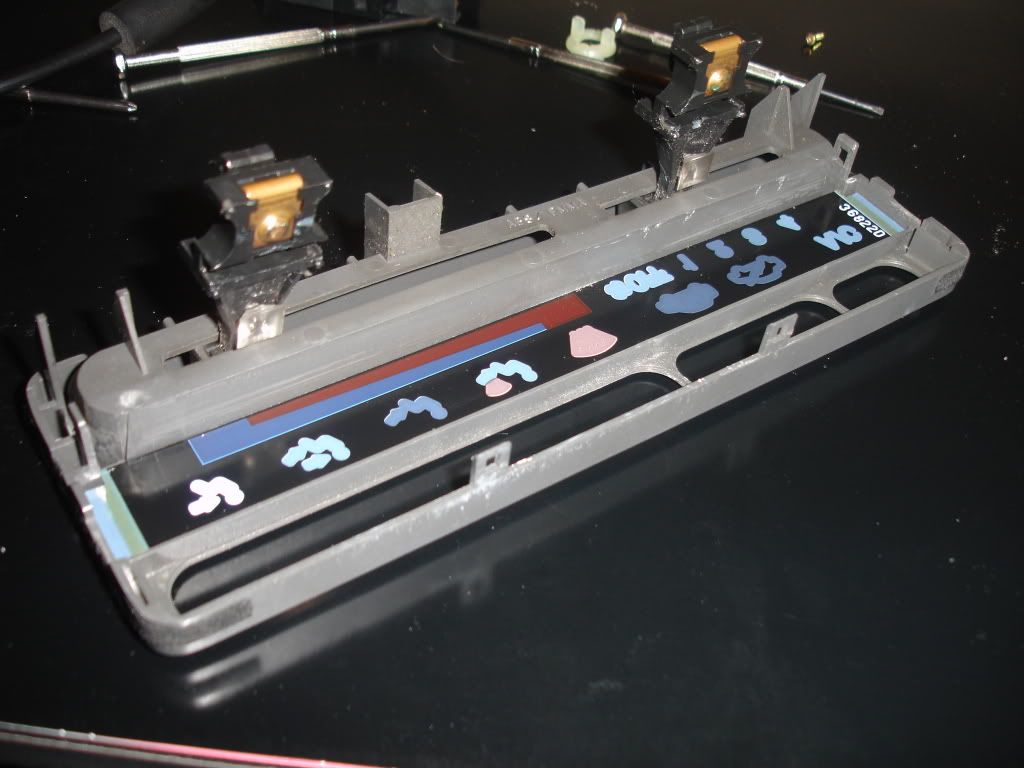
*The rails have grease on them so try to avoid putting your finger all over it.
*Also notice how the 2 defrost symbols are brown, that is a film that makes it light up amber, so those spots will have a hint of red which is nice and subtle.
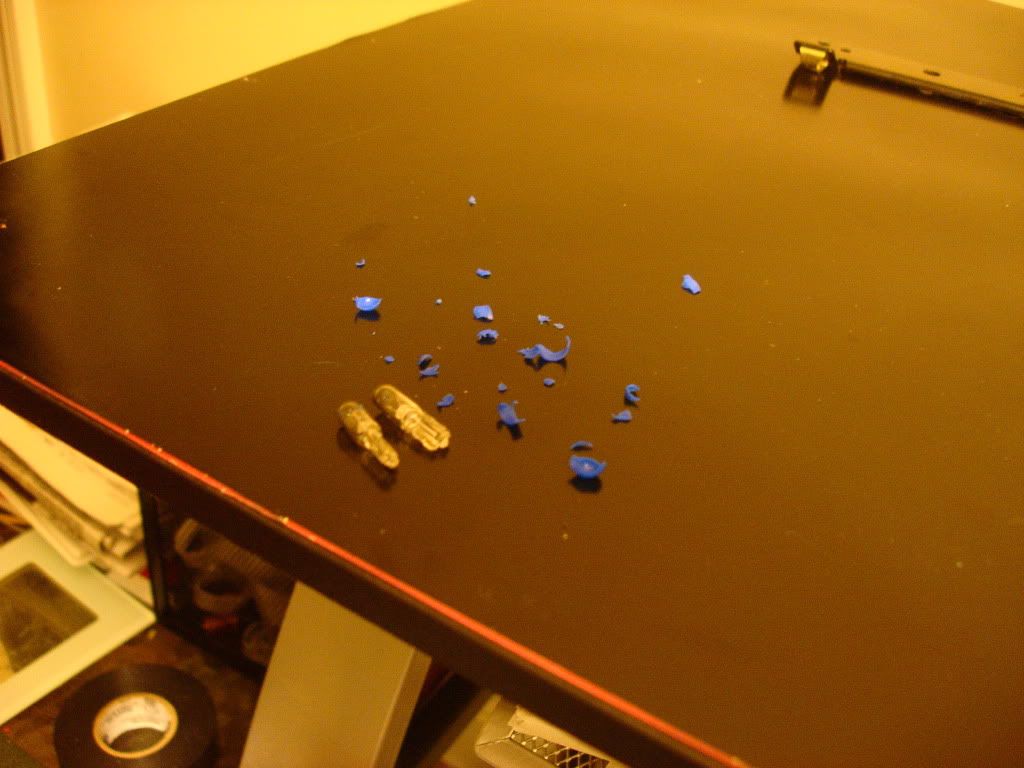
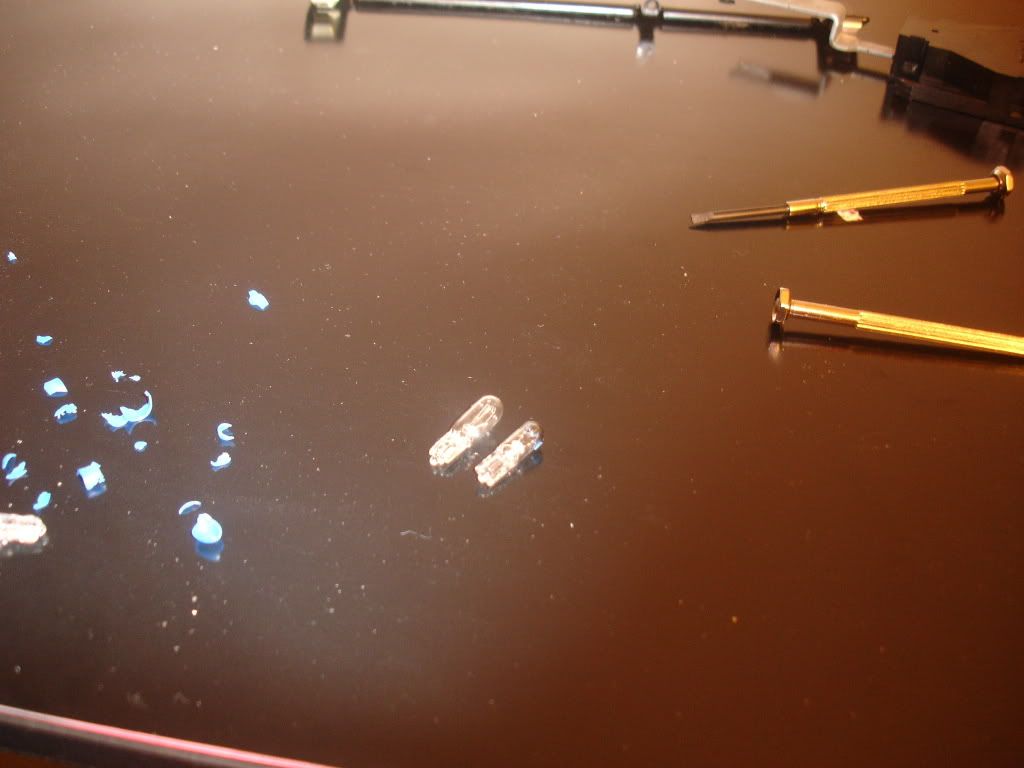
15. Remove your old bulbs, I took off the blue cap for kicks and it was so old that it cracked!
16. OEM(right) vs Sylvania #74 (left).
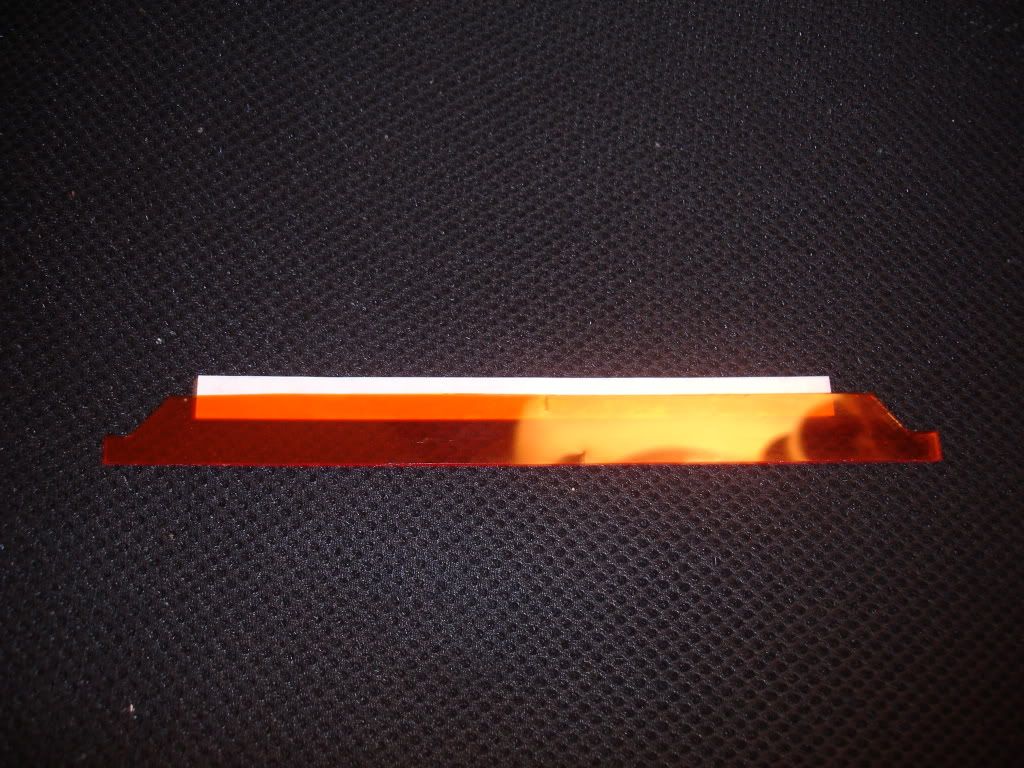
17. You must now cut up the amber strips to the correct sizes, I used a paper cutter as it gave pretty good straight cuts. I practiced cutting the right sizes in the clear and red strips and would adjust as needed. By the time I ran out of red I had an exact sized pieces that I just had to duplicate in amber so it was easy to line it up in the paper cutter to get the right sizes. You only get 1 amber strip so take your time and don't mess it up!!!
From top to bottom: passenger side amber strip, driver side amber strip (without covering the temp graphic!), bottom drivers side and bottom passengers side.
Each block=1cm
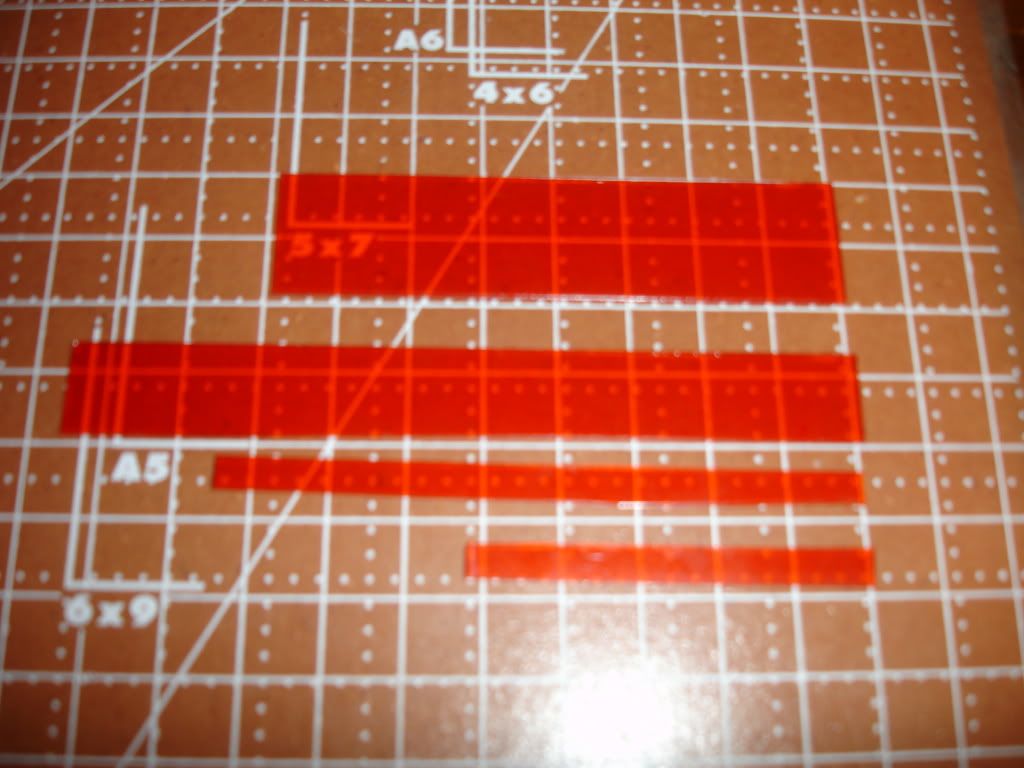
Be very careful cutting this top piece that will illuminate the button rings. Trim it little by little. It will be placed at a 45 degree angle. Use the little bump in the middle, it works perfect that way because it supports the weight and angle of the strip.
18. Use the tape provided and secure the strips however you like without covering it. I was able to lay a piece in the middle and remove the white so only the glue stayed haha.
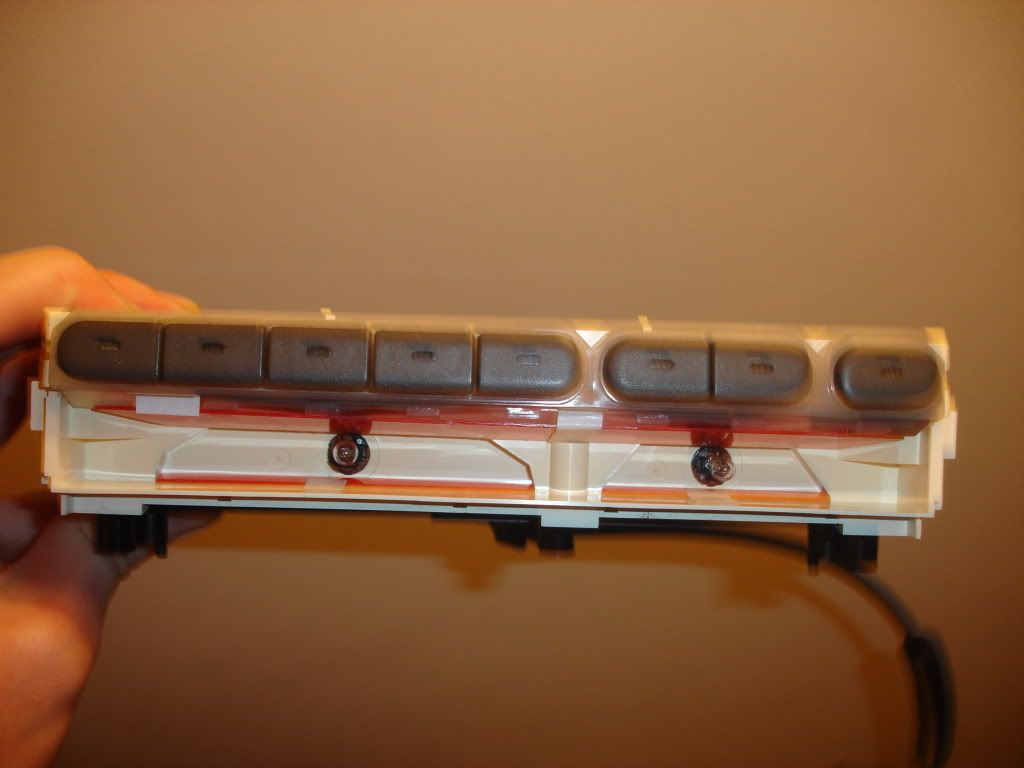
19. Now here is the hard part IMO. I recommend you use gloves while handling bulbs because if you don't oils will get in the bulb from your hands which will cause them to burn early. Sylvania #74 bulbs are a bit wider than OEM so they were hard to get in. I used a roll of tape to push the bulb in the socket, it took a lot of force but it went right in. I popped the bases out so that I could hold it in one hand and push the bulb with the other, theres no way you can do this with the bases still inside the climate face. You'll know its in once it slides in like butter, otherwise its not in. Make sure to clean them after to ensure they have no oils on them. Like so:
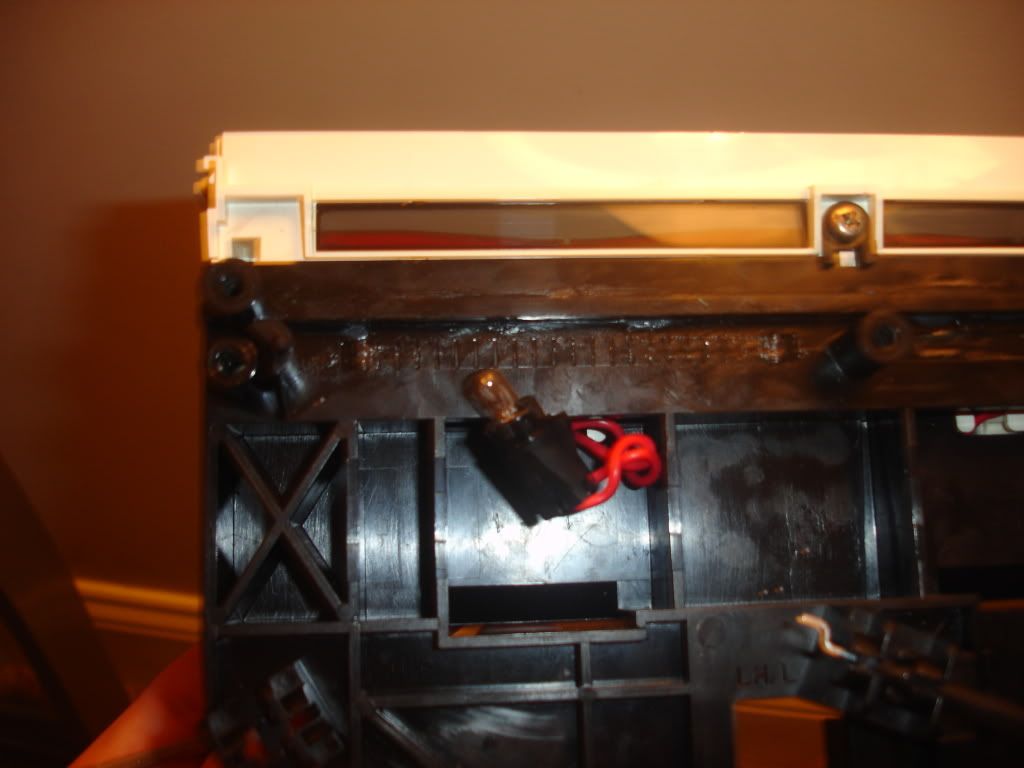
I also had a hard time putting the bases back in the face once both bulbs were in, this is because the bulbs widened the base just enough to not fit. I used a nail trimmer and cut off 2 legs off the base and it went in nice and snug =] Please do this or you will hurt your fingers trying to push it in. The bases have a leg sticking out so that it goes in the correct orientation, either on the left or the right will work. Not facing up or down though. Look inside, you will see what I mean.
20. Look over your work, clean the bulbs, make sure the tape is well in place and put it all back together in the same order as removal. Double check you're not missing anything!
21. I suggest pulling your 2 plugs down into below the radio area so that way you can test your climate without being inside because you don't want to have to remove them again since they are not easy to access. If it works, then move your plugs back up to their original place and put the climate back in. Make sure the mixer line goes in the right hole so that it will bend properly at the heater core. Extra emphasis on this one, I put mine in wrong the first time and had to take it out again.
22. Hook up your plugs, screw everything back in (maybe leave those 2 that hold the climate out, they're useless and hard to get to) and plug your mixer cable in. Hook up the radio once again and re attach the center console.
23. Grab your preferred beer and enjoy your new fresh amber climate control that looks great and isn't halfassed. Cheers!


This was a bit of an extensive mod but very worth it and would do it again in a heartbeat. The results speak for themselves. Total cost is under $17.
Thread Starter
Honda-Tech Member
Joined: Nov 2007
Posts: 6,334
Likes: 1
From: MA
Cool, let me know if you have any questions.
Probably, I have Photobucket Pro but it appears I got HELLA hotlinked so I think it might of exceeded sometime right b4 the month ended. I checked it before I slept, after I woke up and at school and didn't see it down though.
Yes sir
")
Probably, I have Photobucket Pro but it appears I got HELLA hotlinked so I think it might of exceeded sometime right b4 the month ended. I checked it before I slept, after I woke up and at school and didn't see it down though.
Yes sir

Thread Starter
Honda-Tech Member
Joined: Nov 2007
Posts: 6,334
Likes: 1
From: MA
Yes I do, but screw paying $250 for one. I'll prob get an EDM to rock for a while 
Thx, yeah it can be applied to other climates as well. Will do. PM'd back.
Update:
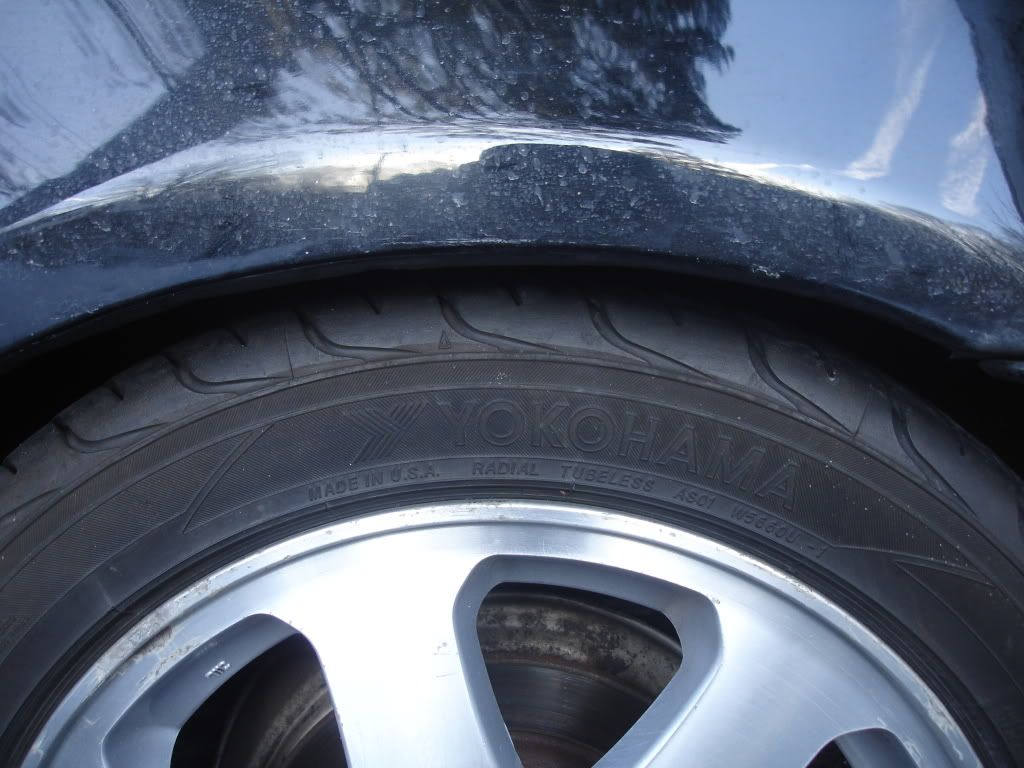
I found this really nice air pump at the gas station that I usually go to sometimes on my way back home and I filled up all my tires. My front left was at 15psi so I'm going to keep an eye on it to make sure there are no leaks or anything.
This air pump is hella nice, I've never seen anything like it. Its cheaper than most gas stations around here at 75 cents and it lasts foreverrr. Theres enough time to do 2 cars without rushing lol. Its pretty new and you can set the pressure that you want on the monitor and when its inflating there is no hissing from air escaping, its solid. Then once it hits the selected PSI, it beeps. Then I can go and change the desired pressure and do the rears. The other added bonus is the hose is plenty long and it doesn't auto retract which is awesome. Its like a coil and I can just use the other hand to stretch it over the car, very light to move around without my your car. The floor is painted with white lines to indicate no parking so thats awesome, just yesterday I was going to inflate my tires at this other station and someone had parked next to the machine So yeah just wanted to share that haha, I'll have to take a pic! Its also on the way to where the Auto-x events will be held so its convenient. 36psi up front and 34psi in the rear.
It hit 40* today so I took advantage to do some things.
Salt all over the floor
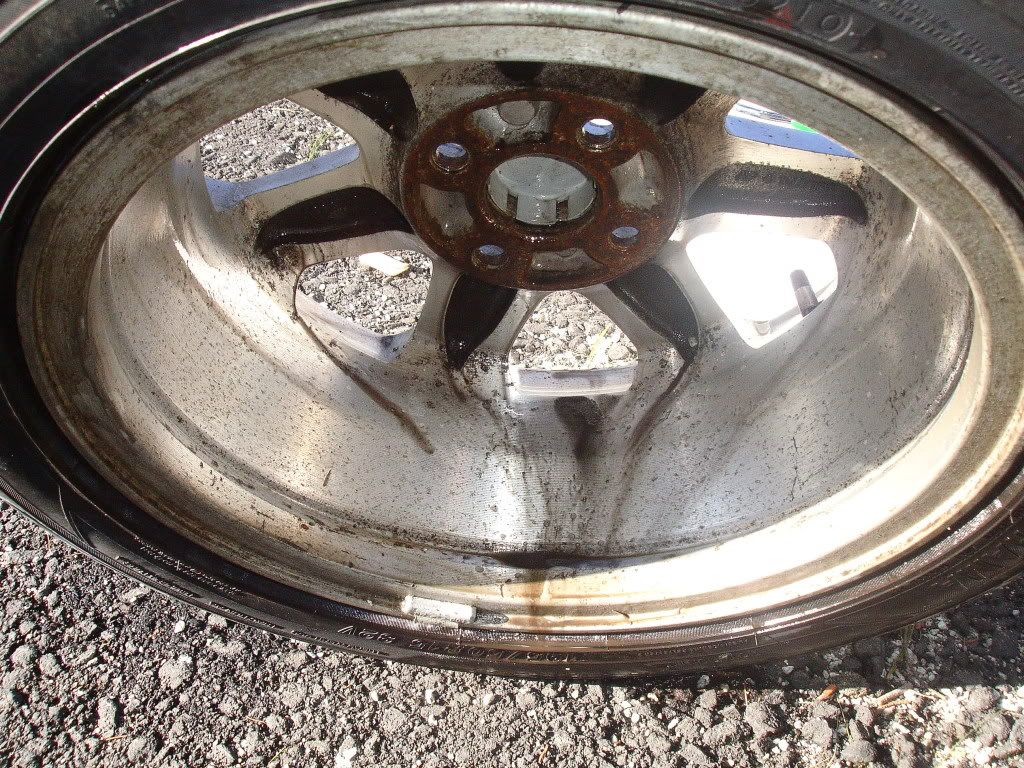
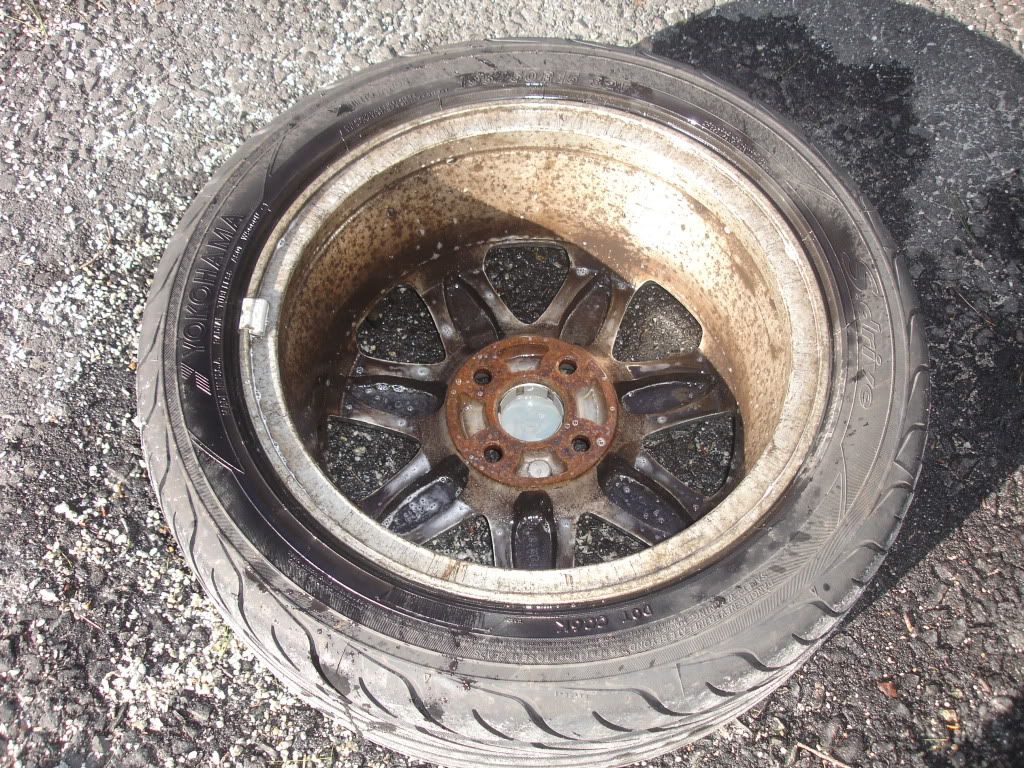
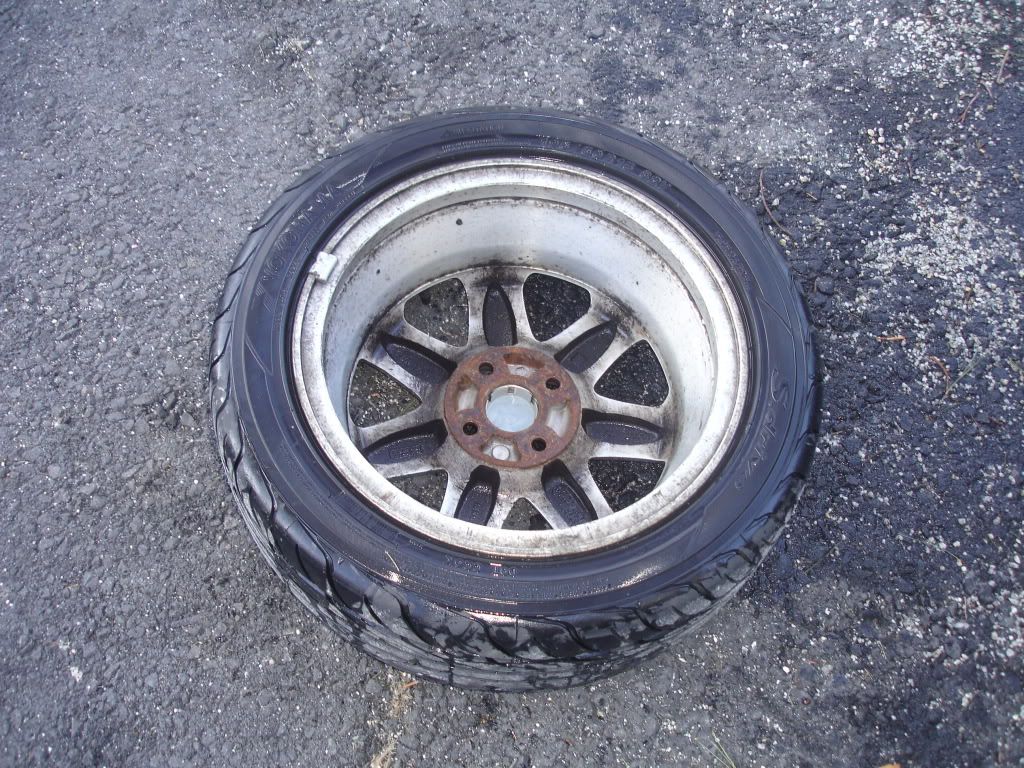
Took off the rear left tire to clean it up.
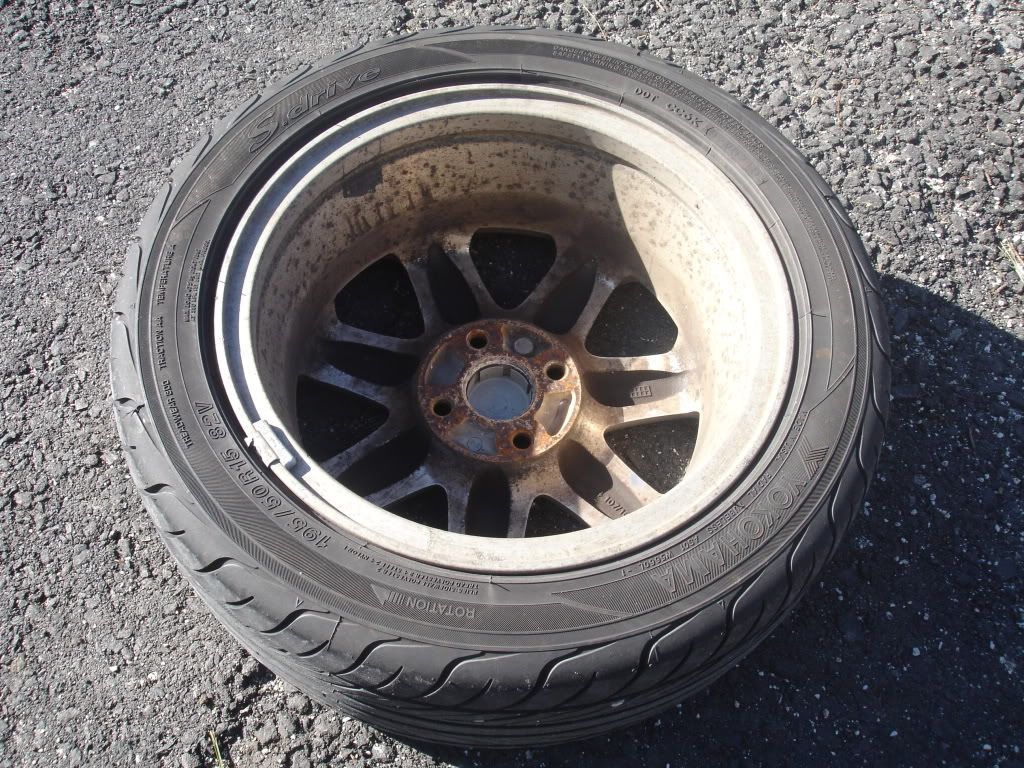
Simple green works wonders.
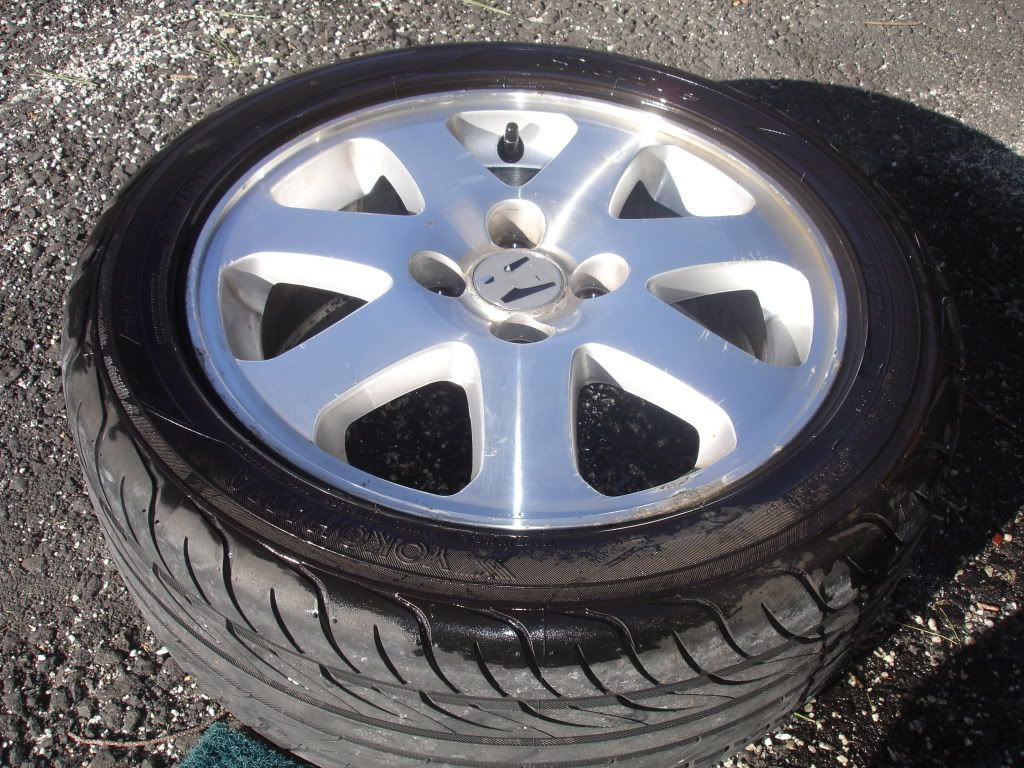
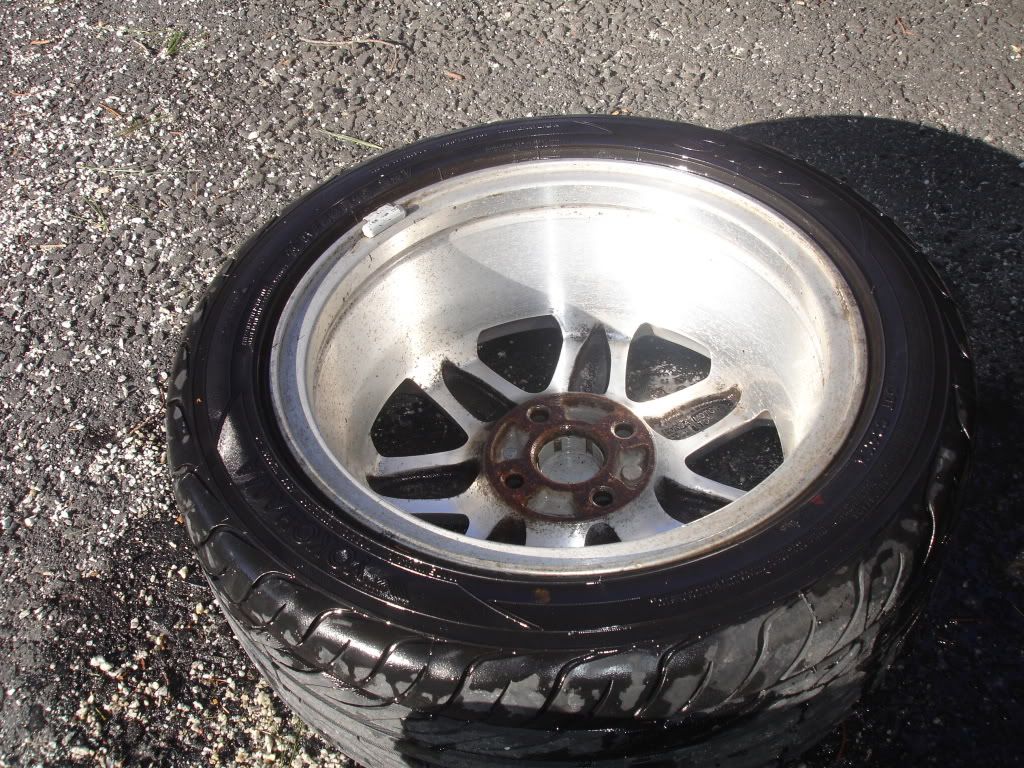
Then the passenger side rear.

Then it was getting pretty cold so I just wrapped it up.
Next I adjusted the ride height in the back since it was raised for winter, funny thing is it was still too low for all the snow that we got and I still got stuck a lot. I miss being low, the car just handled better then and looked better.
The left rear side came out good in height and had no problems. I cleaned the coilovers up since there was salt everywhere and applied some WD-40 to lubricate and prevent seizing. I used a toothbrush as well to get the threads.
The right side was being stubborn and the lower perch just wouldn't loosen. I applied WD-40 and that didn't help. So I applied PB blaster and used my heat gun around it and bam, came right off haha. I put WD-40 afterwards and made sure it was clean of salt as well. I ended up setting it too low so now it has a gangsta lean haha
I have to finish cleaning that wheel so I'll adjust the height too.
Thought this was interesting as well, my LCA bushing, or should I say, lack thereof!

Just enough to stick a sheet of paper in there =] Not bad for a first try, its hard to see but if you look closely the top of the tire is higher than what it seems.
Update:
I found this really nice air pump at the gas station that I usually go to sometimes on my way back home and I filled up all my tires. My front left was at 15psi so I'm going to keep an eye on it to make sure there are no leaks or anything.
This air pump is hella nice, I've never seen anything like it. Its cheaper than most gas stations around here at 75 cents and it lasts foreverrr. Theres enough time to do 2 cars without rushing lol. Its pretty new and you can set the pressure that you want on the monitor and when its inflating there is no hissing from air escaping, its solid. Then once it hits the selected PSI, it beeps. Then I can go and change the desired pressure and do the rears. The other added bonus is the hose is plenty long and it doesn't auto retract which is awesome. Its like a coil and I can just use the other hand to stretch it over the car, very light to move around without my your car. The floor is painted with white lines to indicate no parking so thats awesome, just yesterday I was going to inflate my tires at this other station and someone had parked next to the machine
So yeah just wanted to share that haha, I'll have to take a pic! Its also on the way to where the Auto-x events will be held so its convenient. 36psi up front and 34psi in the rear.It hit 40* today so I took advantage to do some things.
Salt all over the floor
Took off the rear left tire to clean it up.
Simple green works wonders.
Then the passenger side rear.
Then it was getting pretty cold so I just wrapped it up.
Next I adjusted the ride height in the back since it was raised for winter, funny thing is it was still too low for all the snow that we got and I still got stuck a lot. I miss being low, the car just handled better then and looked better.
The left rear side came out good in height and had no problems. I cleaned the coilovers up since there was salt everywhere and applied some WD-40 to lubricate and prevent seizing. I used a toothbrush as well to get the threads.
The right side was being stubborn and the lower perch just wouldn't loosen. I applied WD-40 and that didn't help. So I applied PB blaster and used my heat gun around it and bam, came right off haha. I put WD-40 afterwards and made sure it was clean of salt as well. I ended up setting it too low so now it has a gangsta lean haha
I have to finish cleaning that wheel so I'll adjust the height too.
Thought this was interesting as well, my LCA bushing, or should I say, lack thereof!
Just enough to stick a sheet of paper in there =] Not bad for a first try, its hard to see but if you look closely the top of the tire is higher than what it seems.
Honda-Tech Member
Joined: Nov 2008
Posts: 808
Likes: 1
Damn man, go and buy a proper jack! Those cheap aftermarket LCAs are all rubbish, grab some oem ones with the swaybar hole, should be real cheap.
If you really want to clean up the threads on the coils, pull them out and disassemble them from the bottom (bottom bracket off, 3 collars off, spring off) and hit the threads with a wire wheel. Should come up like new.
If you really want to clean up the threads on the coils, pull them out and disassemble them from the bottom (bottom bracket off, 3 collars off, spring off) and hit the threads with a wire wheel. Should come up like new
.
Thread Starter
Honda-Tech Member
Joined: Nov 2007
Posts: 6,334
Likes: 1
From: MA
I got them along with the Type 1s, however I knew about the bushings. I was going to replace them but the holes on them are smaller than OEM. I plan on getting a PIC bushing kit but it won't fit the blox.
I want to do the sway bar, brace and LCAs at the same time so I still have to decide. I might just put the PIC bushing in the OEM arms and then when it comes time for a sway bar and brace, I will get some nice LCAs.
Yeah I need a good jack, it will be one of the first things I'll get once I start working again. It keeps me from doing work not having a decent one 
5th gens dont come with OEM LCAs with sway bar holes. 6th gens do however. I wasn't planning on keeping the blox lcas this long but oh well.
Thats a good idea, I was contemplating switching my shocks so that would be a good time to do. The roads are still salty so I might just do that when it warms up and the roads get cleaned
Thats a great pic, thanks Alex.
I gotta say, its great to get back in the swing of things doing work again. Plus all the support is motivating =]
I want to do the sway bar, brace and LCAs at the same time so I still have to decide. I might just put the PIC bushing in the OEM arms and then when it comes time for a sway bar and brace, I will get some nice LCAs.
Damn man, go and buy a proper jack! Those cheap aftermarket LCAs are all rubbish, grab some oem ones with the swaybar hole, should be real cheap.
If you really want to clean up the threads on the coils, pull them out and disassemble them from the bottom (bottom bracket off, 3 collars off, spring off) and hit the threads with a wire wheel. Should come up like new.
If you really want to clean up the threads on the coils, pull them out and disassemble them from the bottom (bottom bracket off, 3 collars off, spring off) and hit the threads with a wire wheel. Should come up like new
.5th gens dont come with OEM LCAs with sway bar holes. 6th gens do however. I wasn't planning on keeping the blox lcas this long but oh well.
Thats a good idea, I was contemplating switching my shocks so that would be a good time to do. The roads are still salty so I might just do that when it warms up and the roads get cleaned
Thats a great pic, thanks Alex.
I gotta say, its great to get back in the swing of things doing work again. Plus all the support is motivating =]
Honda-Tech Member
Joined: Nov 2008
Posts: 808
Likes: 1
Yea do it after the roads are cleaned for sure, doesnt take long.
Thats interesting - local EG5 hatches (si's and vti's) here came with little factory rear swaybars (14mm I think), so the LCAs do come with the holes. Thats pretty lame if none of the usdm 5th gens came with a rear swaybar from the factory
Thats interesting - local EG5 hatches (si's and vti's) here came with little factory rear swaybars (14mm I think), so the LCAs do come with the holes. Thats pretty lame if none of the usdm 5th gens came with a rear swaybar from the factory
Thread Starter
Honda-Tech Member
Joined: Nov 2007
Posts: 6,334
Likes: 1
From: MA
Yeah I've heard that certain foreign trims have them, have never actually seen them though. Here they don't have them. My Si came with a front sway bar and thats it.
Honda-Tech Member
Joined: Nov 2008
Posts: 808
Likes: 1
Ahh that sucks. Honda america being tightasses
I never bothered changing them on my old EG, they did everything I wanted them to do. You can see the threaded hole on the top side of the arm - link
Anyway will stop spamming, keep up the good work man
I never bothered changing them on my old EG, they did everything I wanted them to do. You can see the threaded hole on the top side of the arm - link
Anyway will stop spamming, keep up the good work man