

'96 Midori hatch by willimo

Thread Starter
Honda-Tech Member
Joined: Nov 2005
Posts: 202
Likes: 0
From: Albuquerque, NM, USA
I have made an order from McMaster-Carr, and am waiting to make another (I kind of want to have a list because shipping boxes of metal is understandably expensive). For odds and ends I go down to my local Ace Hardware; they have a great fastener selection and know me on sight now.
Thread Starter
Honda-Tech Member
Joined: Nov 2005
Posts: 202
Likes: 0
From: Albuquerque, NM, USA
Not much of an update, but I decided this last weekend to do something I've meant to do for a long time. When I had the silver car, I used a Wink mirror because I mostly like the look, but it's also supposed to be great on the track (I never did take that car to the track before selling it, though). It left some pretty ugly holes in the headliner, and I kinda left it be on that car, and am a little embarrassed about that. This car will have the headliner recovered, but the Wink would still mount with some pretty less than attractive bent sheet metal brackets.
(This picture stolen from the interwebs, let me know if it's yours and I'll remove it).
The mirror is about as wide as the distance between the mounting points for the sun visors. So I dug an old messed up visor up out of my spares, and cut the sun off of the mounting trim.
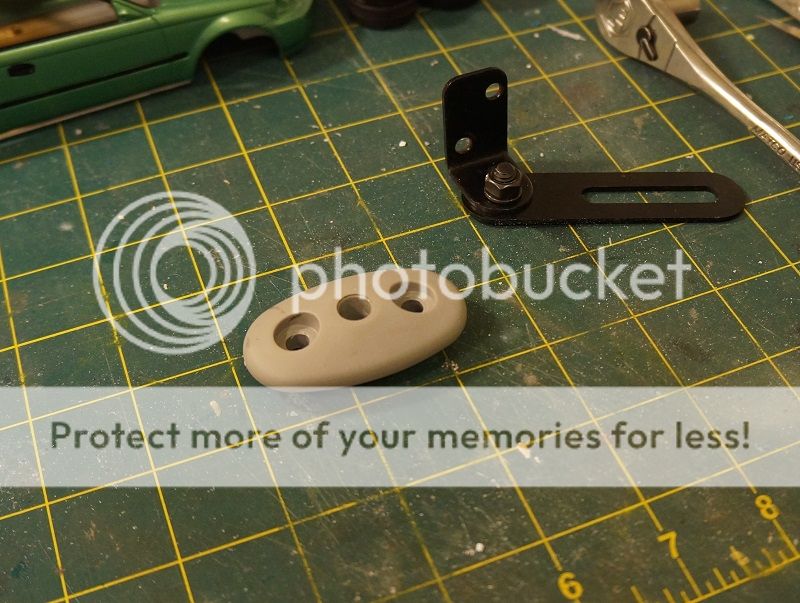
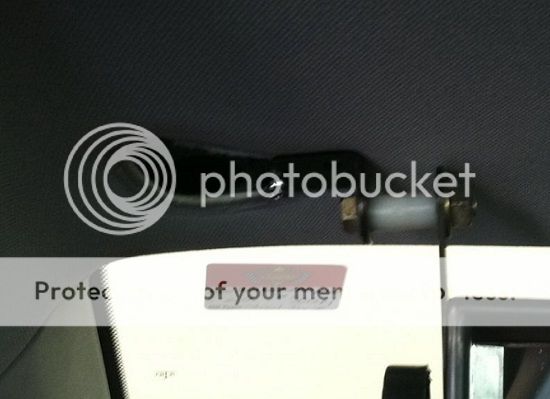
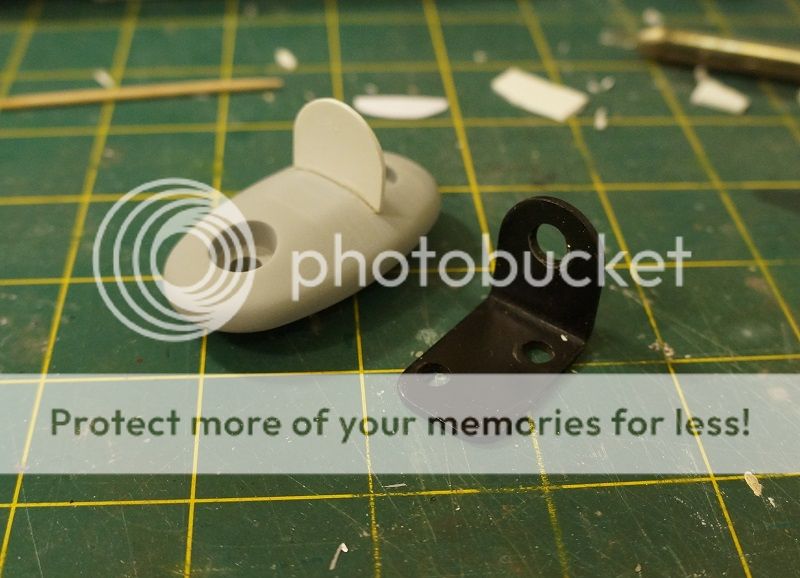
You can see the boring, not so pretty metal bracket that came with the mirror to the upper left.
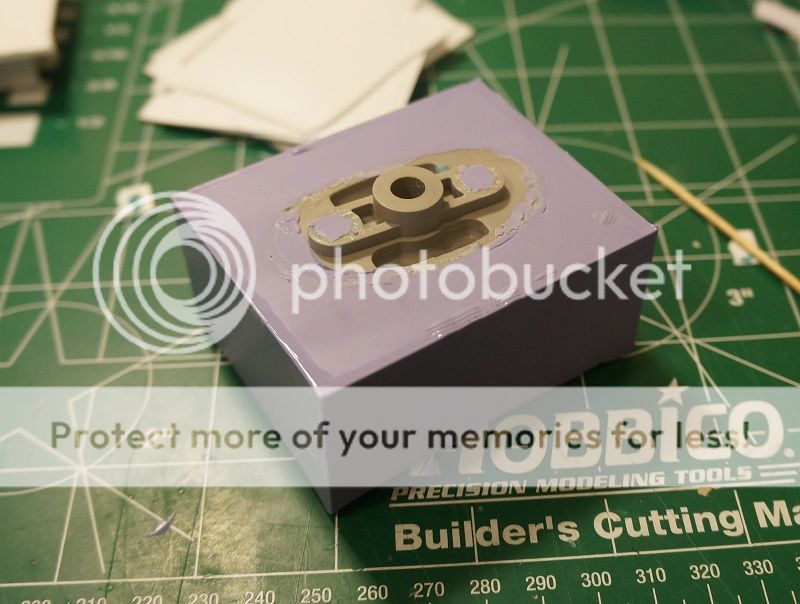
I used some 1:24 model car parts and supplies to fill the hole in the part, sanded it smooth, primed it and checked for defects.
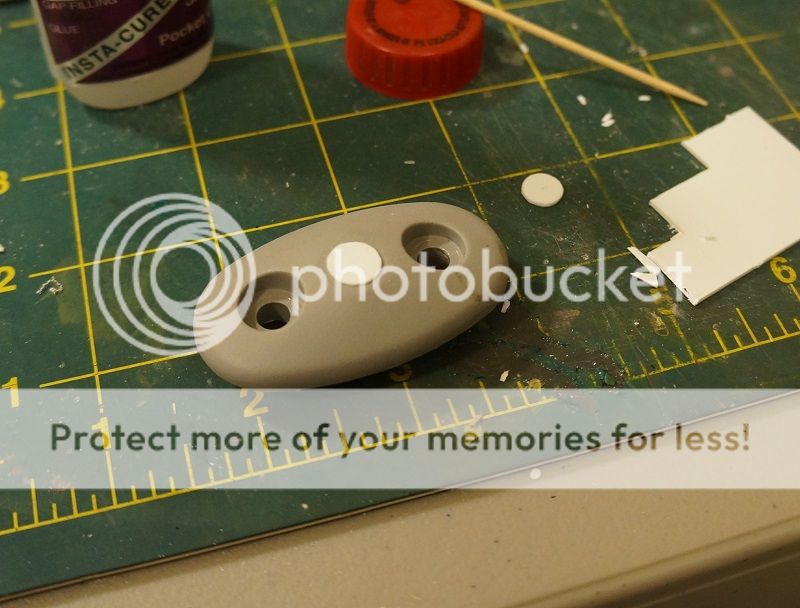
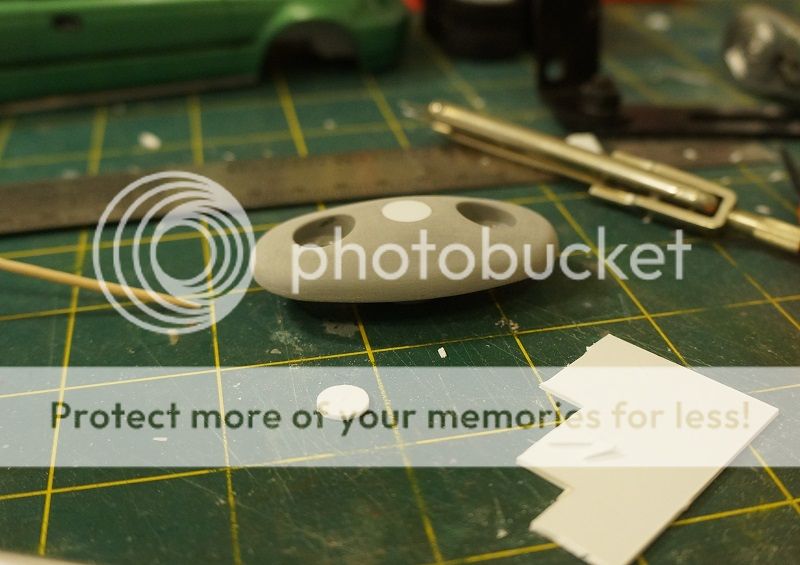
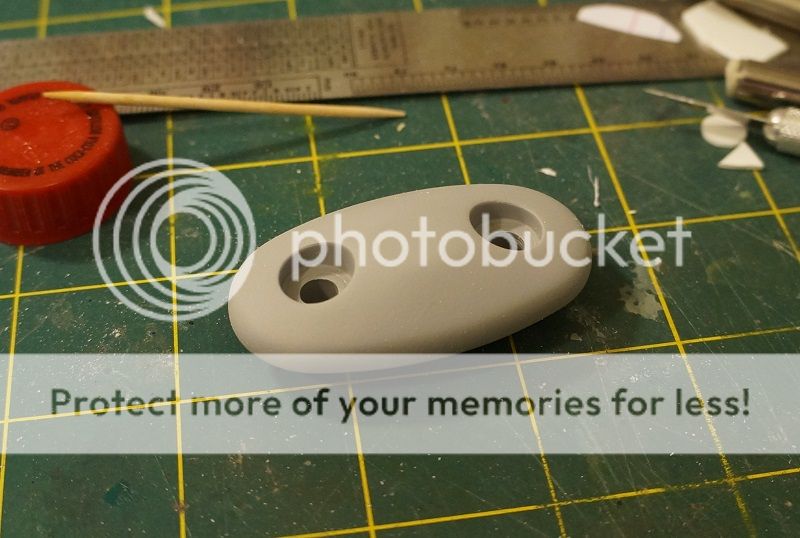
I used the same sheet plastic that I used to fill the hole to make space for the metal bracket in the mold.
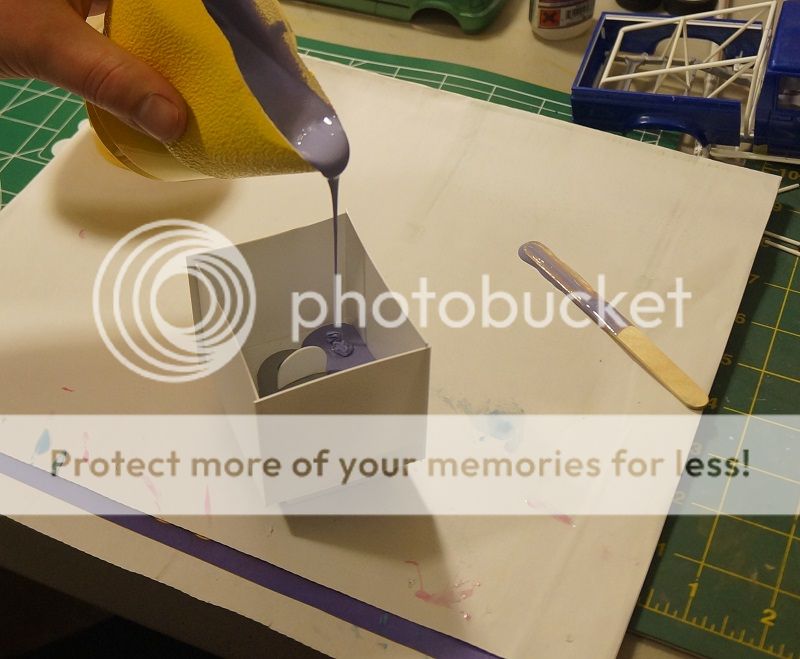
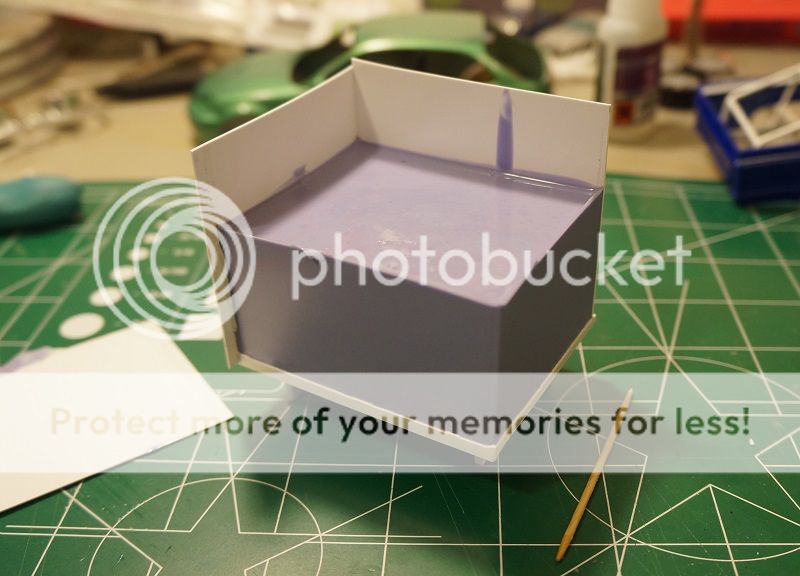
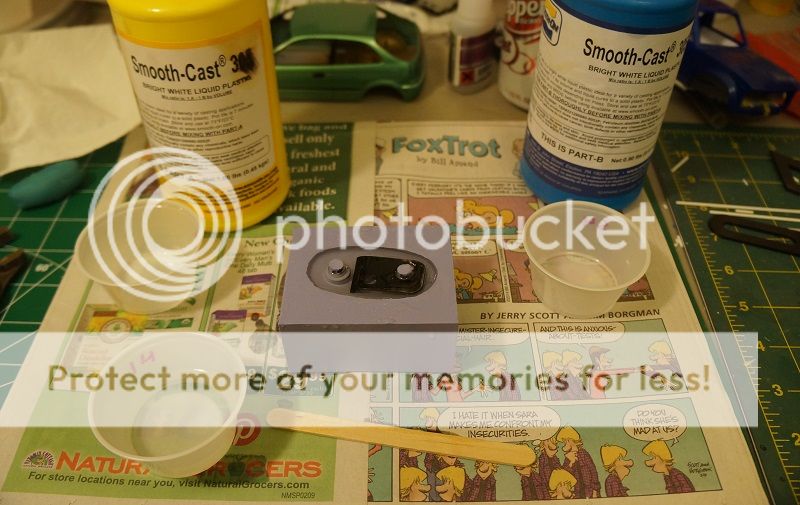
Then I made a box to pour the silicone rubber mold into. I mixed up the rubber and poured it in.
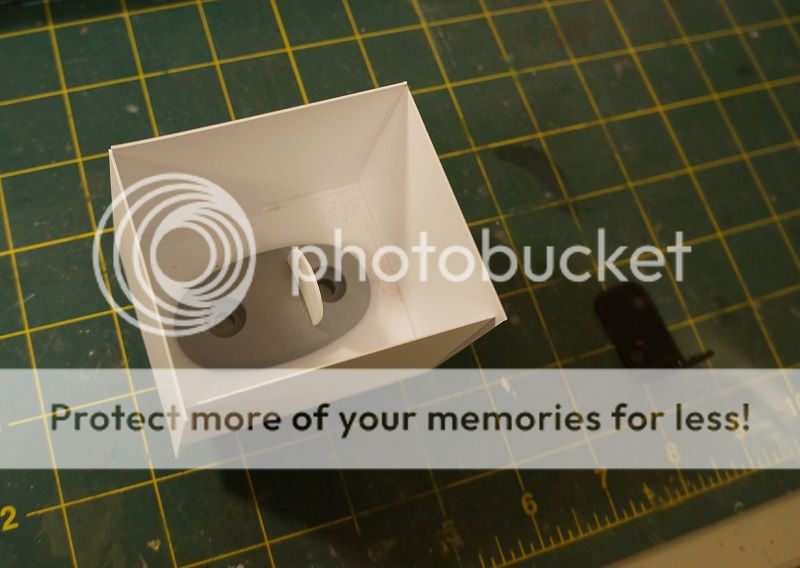
I took the box apart from around the mold.
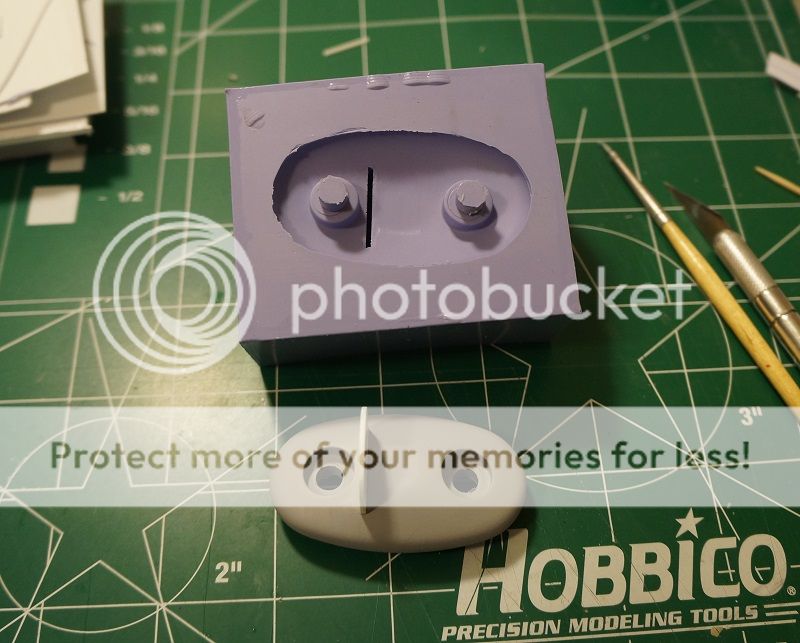
I put a couple of pieces of aluminum tube to help reinforce the resin around the bolt holes in the mold, and then slipped the metal bracket into place. Then I poured the resin into the mold. The resin sets up and is ready to demold in about thirty minutes.
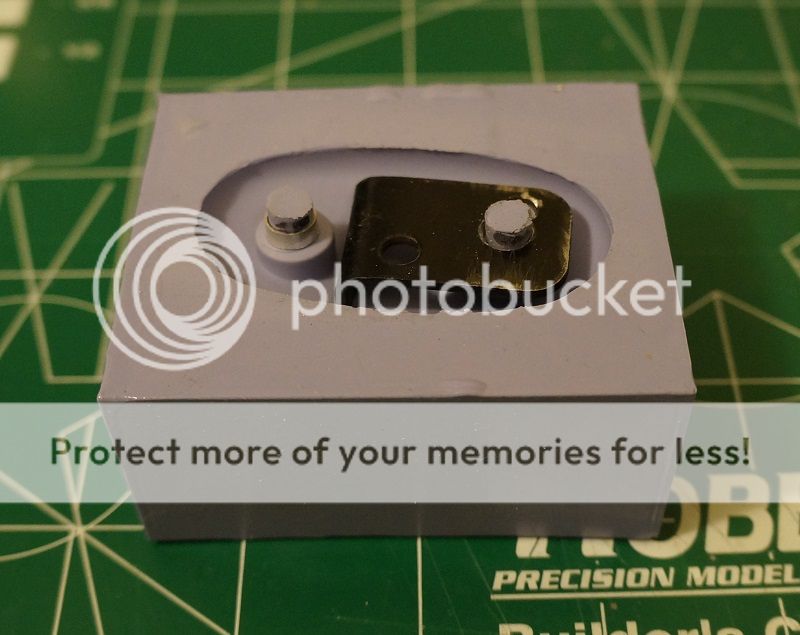
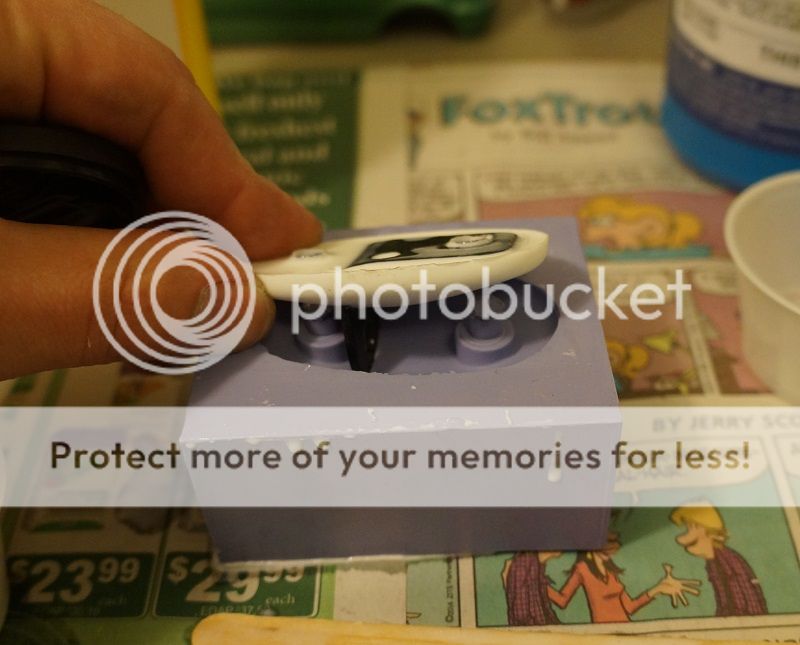
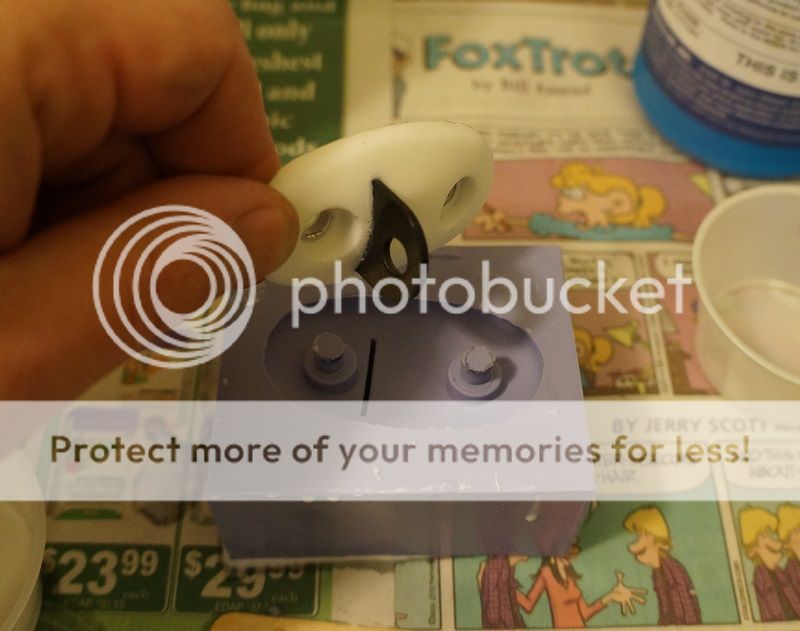
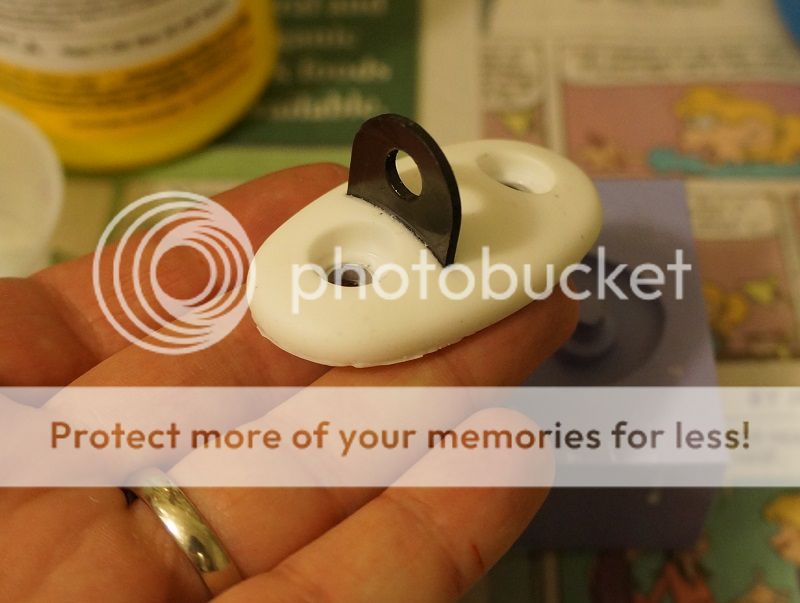
Once it was out of the mold I painted the the part in primer and black - the primer is a plenty good match for the gray interior parts Honda uses. I tried regular socket head bolts, but didn't like them in the bracket. So I changed them to button head socket bolts.

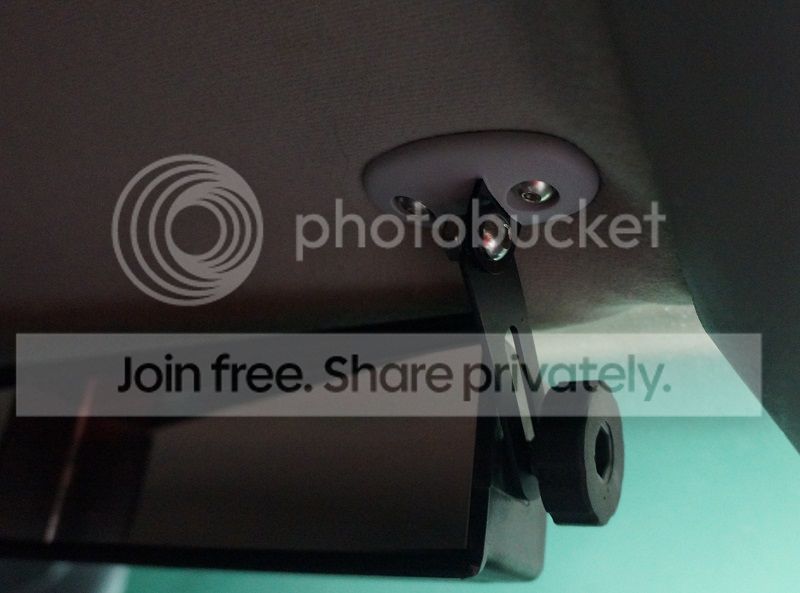
So now I have a much better mount for my Wink mirror, and I'm pretty happy about it.
(This picture stolen from the interwebs, let me know if it's yours and I'll remove it).
The mirror is about as wide as the distance between the mounting points for the sun visors. So I dug an old messed up visor up out of my spares, and cut the sun off of the mounting trim.
You can see the boring, not so pretty metal bracket that came with the mirror to the upper left.
I used some 1:24 model car parts and supplies to fill the hole in the part, sanded it smooth, primed it and checked for defects.
I used the same sheet plastic that I used to fill the hole to make space for the metal bracket in the mold.
Then I made a box to pour the silicone rubber mold into. I mixed up the rubber and poured it in.
I took the box apart from around the mold.
I put a couple of pieces of aluminum tube to help reinforce the resin around the bolt holes in the mold, and then slipped the metal bracket into place. Then I poured the resin into the mold. The resin sets up and is ready to demold in about thirty minutes.
Once it was out of the mold I painted the the part in primer and black - the primer is a plenty good match for the gray interior parts Honda uses. I tried regular socket head bolts, but didn't like them in the bracket. So I changed them to button head socket bolts.
So now I have a much better mount for my Wink mirror, and I'm pretty happy about it.
Thread Starter
Honda-Tech Member
Joined: Nov 2005
Posts: 202
Likes: 0
From: Albuquerque, NM, USA
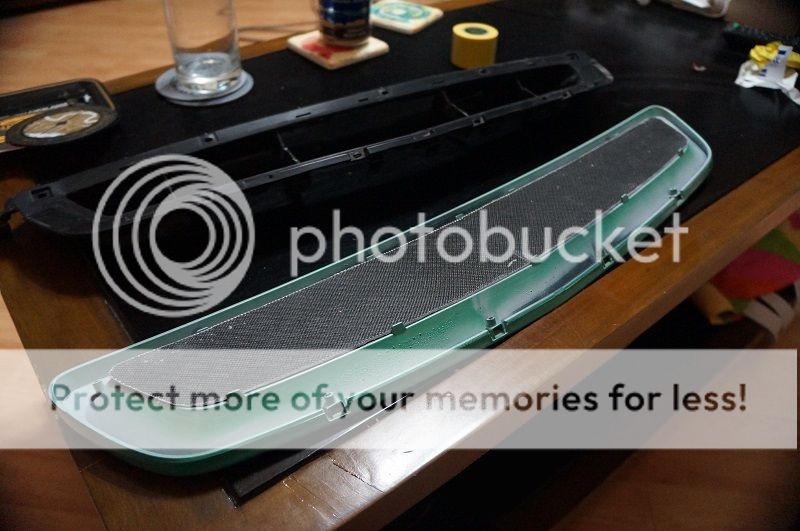
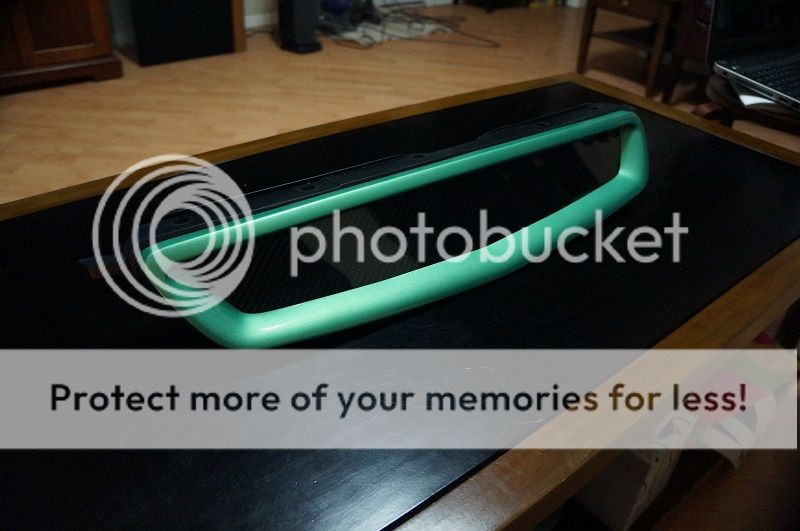
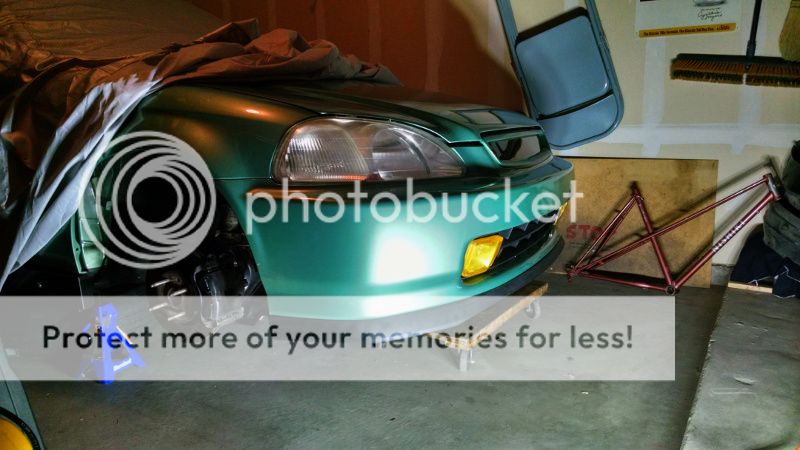
A couple weekends prior I did another little project. I was unhappy with how the eBay Type R style grill fit, so I wanted a replacement. The Honda Type R grill for the 96-98 has the metal wire mesh, which I don't like so much, so I decided it was time for a DIY.
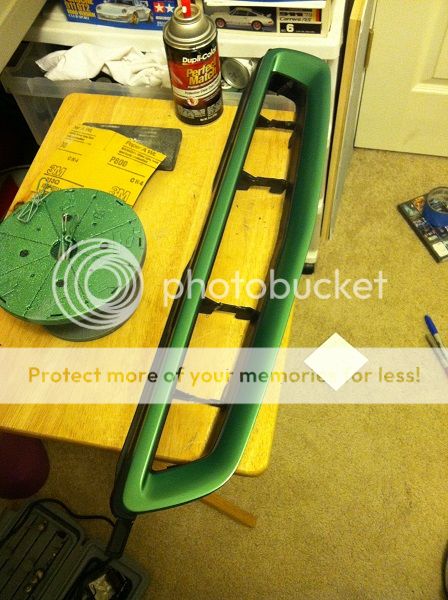
I bought a new-used grill from a 1996 Civic, a sheet of carbon fiber, and some Midori paint.
I took the grill apart, sanded the paint off the old grill garnish, and primed it to check for defects.

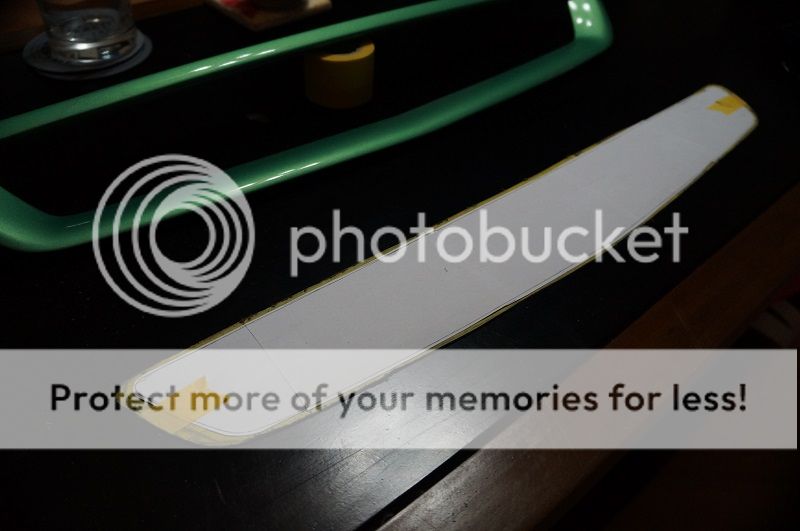
To make the grill area flat enough for the carbon I intended to put in the middle, I had to cut out everything in the middle. Then I painted the garnish Midori (Forgive my phone pictures and the messy hobby room)

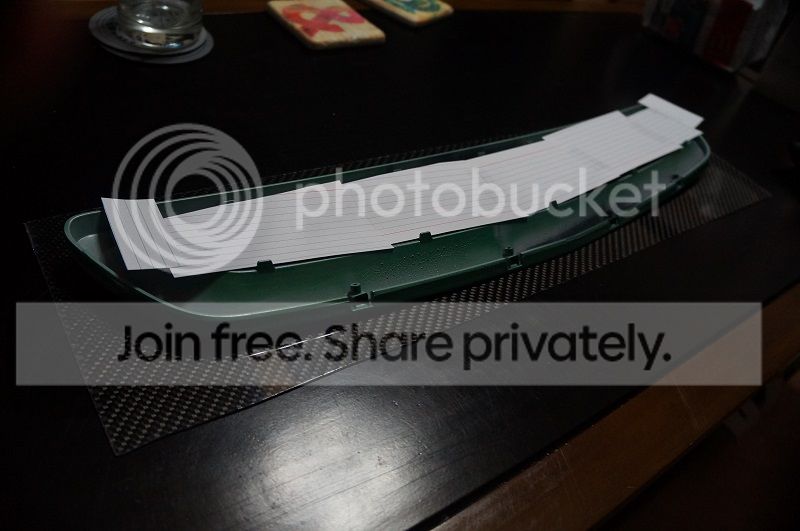
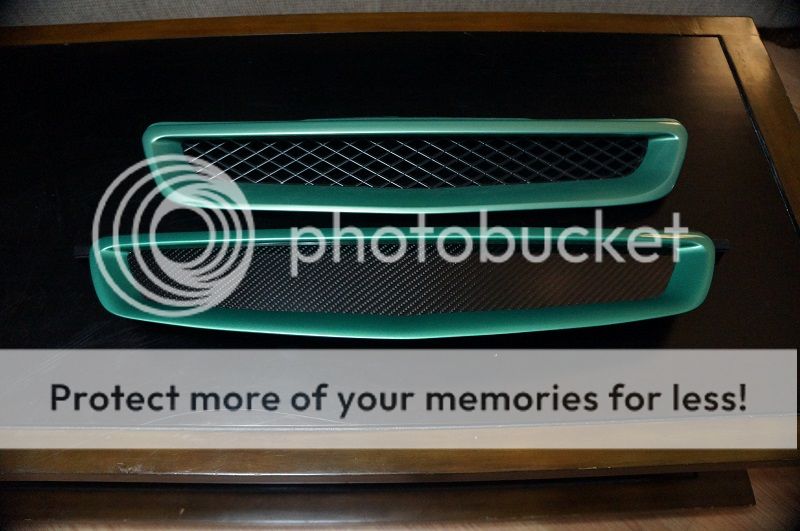
It was time to cut the carbon. So I used some note cards to make a template, and transferred it to the carbon.

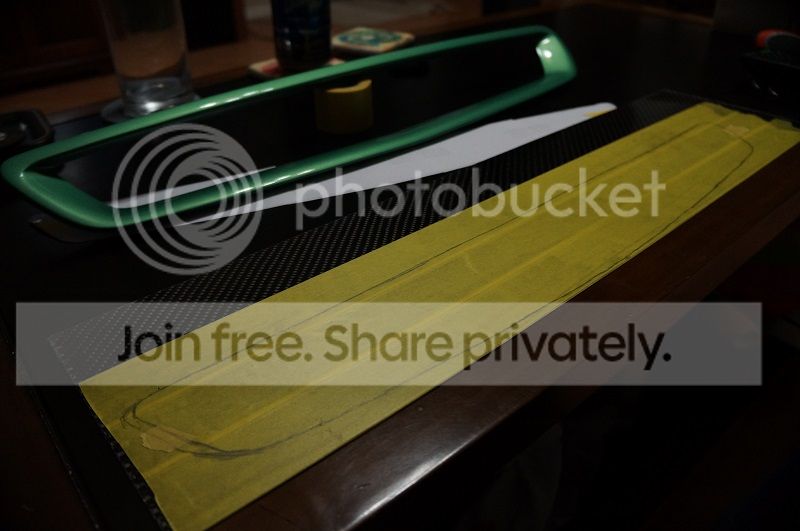
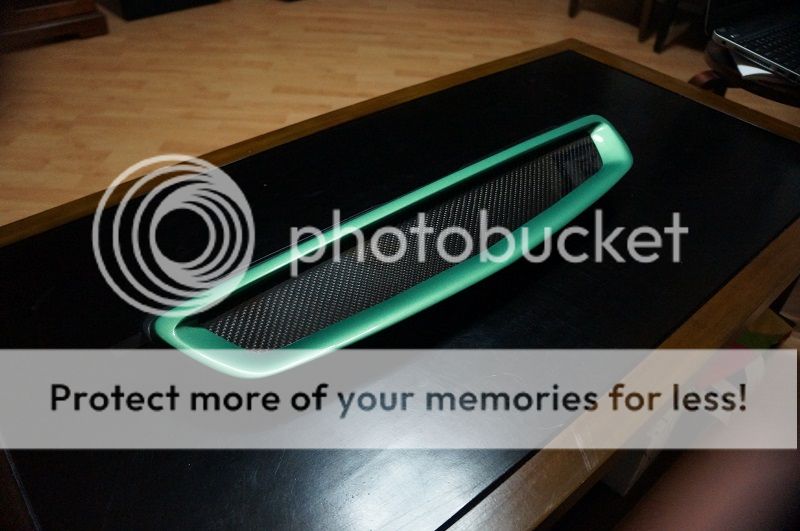
Then I trimmed up the carbon fiber sheet, and put it in place. It sandwiches between the grill and the garnish.
And put all together.... No pics on the car, because the front bumper isn't even on the car right now.
Before:
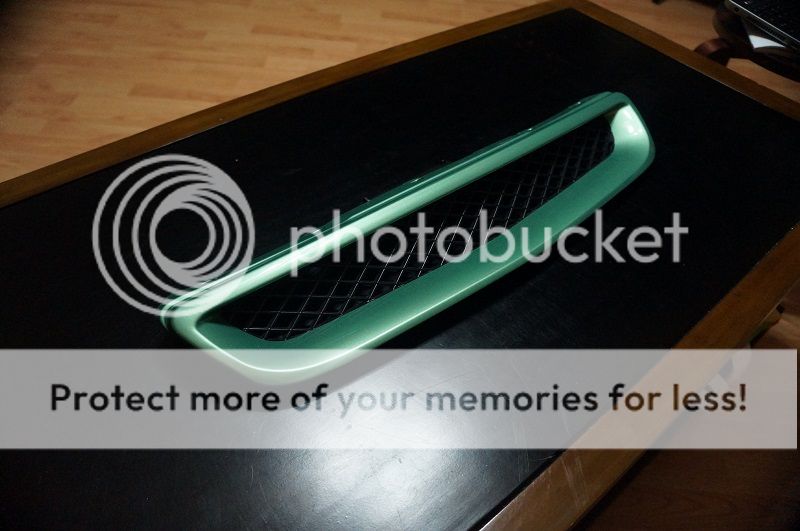
After:
Two little projects. Thanks for looking y'all.
I bought a new-used grill from a 1996 Civic, a sheet of carbon fiber, and some Midori paint.
I took the grill apart, sanded the paint off the old grill garnish, and primed it to check for defects.
To make the grill area flat enough for the carbon I intended to put in the middle, I had to cut out everything in the middle. Then I painted the garnish Midori (Forgive my phone pictures and the messy hobby room)
It was time to cut the carbon. So I used some note cards to make a template, and transferred it to the carbon.
Then I trimmed up the carbon fiber sheet, and put it in place. It sandwiches between the grill and the garnish.
And put all together.... No pics on the car, because the front bumper isn't even on the car right now.
Before:
After:
Two little projects. Thanks for looking y'all.


 x10
x10
Thread Starter
Honda-Tech Member
Joined: Nov 2005
Posts: 202
Likes: 0
From: Albuquerque, NM, USA

The reverse engineering in the bracket was amazing. Honestly one of the most trick things i've seen done in a long time! The car looks great and I hope you and your wife are doing well after the recent break in. Good luck with everything!

Thread Starter
Honda-Tech Member
Joined: Nov 2005
Posts: 202
Likes: 0
From: Albuquerque, NM, USA
It's a relatively small opening, and behind it there's a pretty convoluted path before any air can get to the radiator. If anything, it ventilates the hood latch. I intend to run a full width radiator, so I don't foresee any cooling problems. If I do run into any issues, it won't be hard to set it back to the way it was.
Down Since Day 1


Joined: Sep 2004
Posts: 6,795
Likes: 1
From: Gilbert, AZ
You sir, win the DIY award. The grill is dope, I would make a few vent slits to break it up a little bit. Maybe like 3 rounded rectangle slits offset to the left or something. Either way, its legit!
Thread Starter
Honda-Tech Member
Joined: Nov 2005
Posts: 202
Likes: 0
From: Albuquerque, NM, USA
Thanks! I really like it simple how it is, but the fun thing is that changes are always just a whim away.
It's been a while but I did do a little work recently. I never said this would be fast.
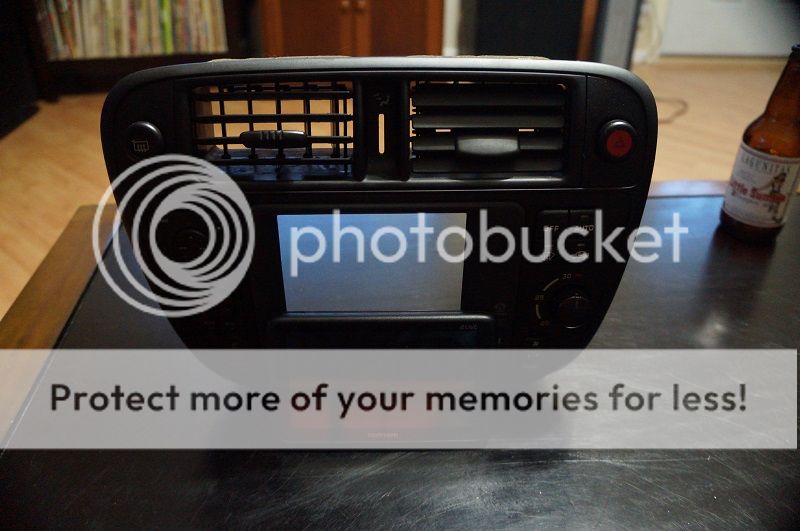
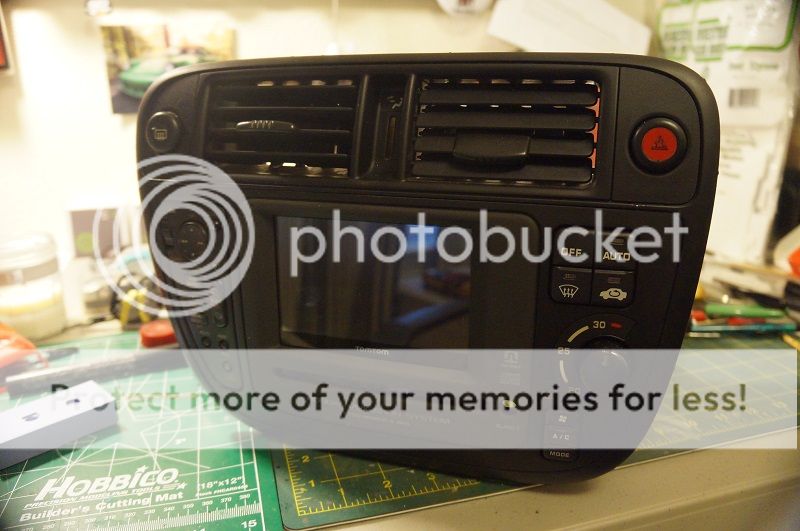
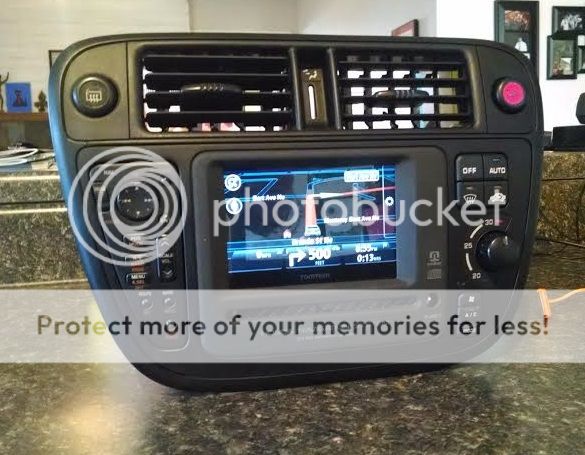
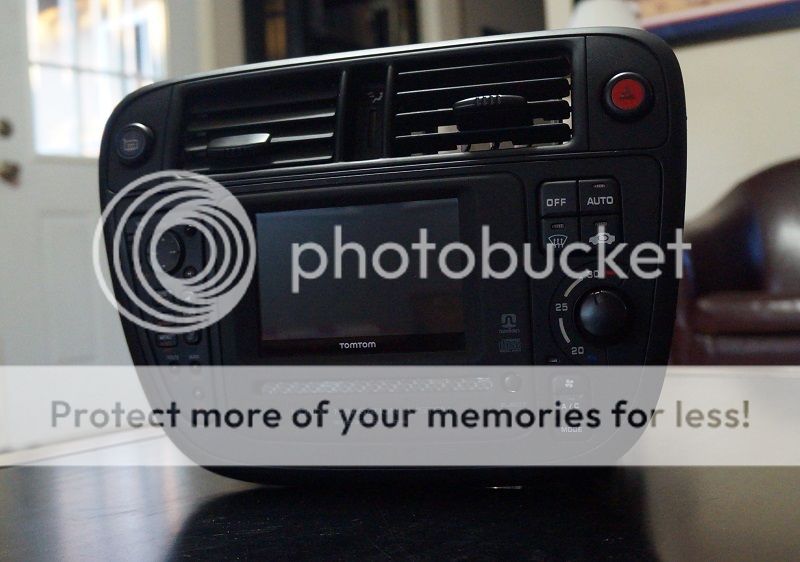
I got a super cool (to me) JDM center garnish with navigation and auto climate control.
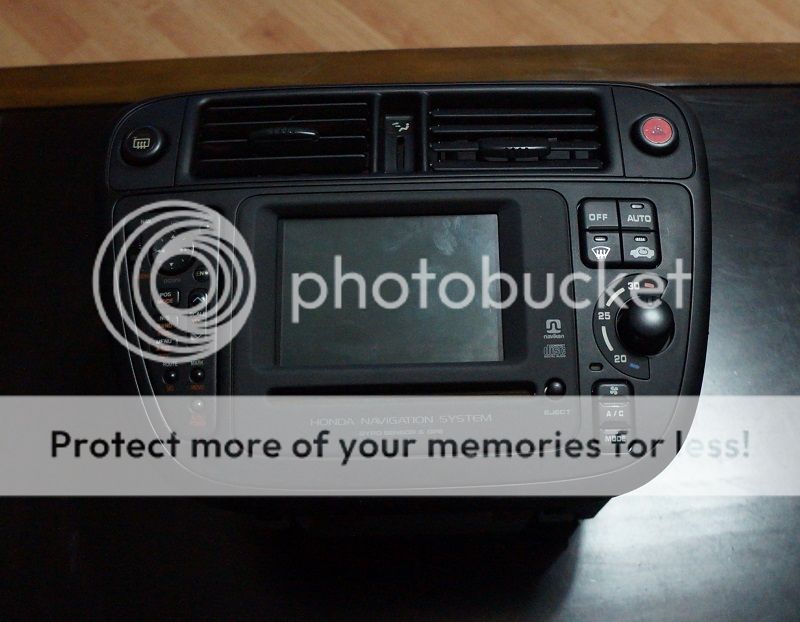
Awesome! Though I know most of you know the problem with this setup. The navigation won't work here in the US, the radio does not share the same band as US radios, and the auto climate control is, well, an auto climate control. The guy who had the car before me was putting in '99 spec everything on it, so the HVAC setup is electric instead of manual, so I think the hard work for the auto climate control is done, and I'll have to just get a sunlight sensor and ambient air temperature sensor from a 2000 Insight and wire it all in. I really hope I'm right. I intend to put a new stereo down in the auxiliary single DIN slot anyway, so no biggie about the built in radio. But what to do with the big blank screen staring me in the face? I came up with a devious little plan.
First I took out the 450lb navigation/radio unit.
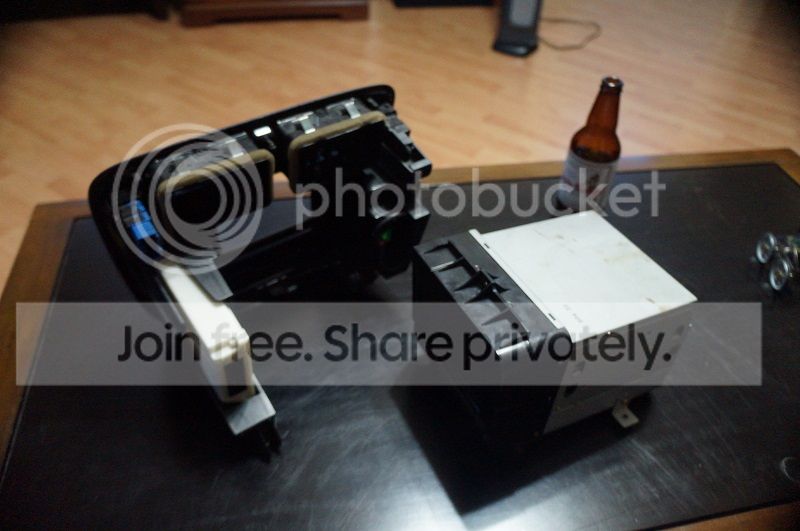
And threw it in the trash!
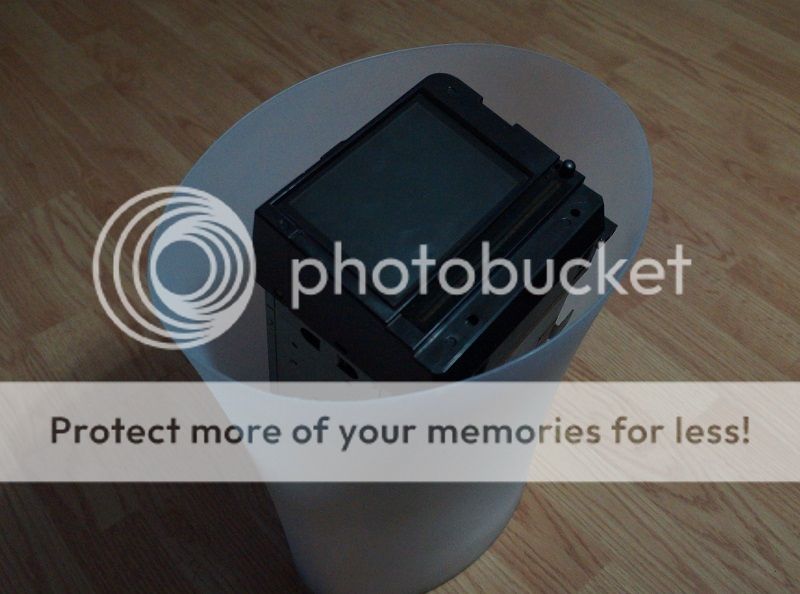
(Psych, I still have it of course. I am loath to throw away any parts, especially anything cool and Japanese and a little bit rare - plus, why do anything irreversible if you can avoid it?)
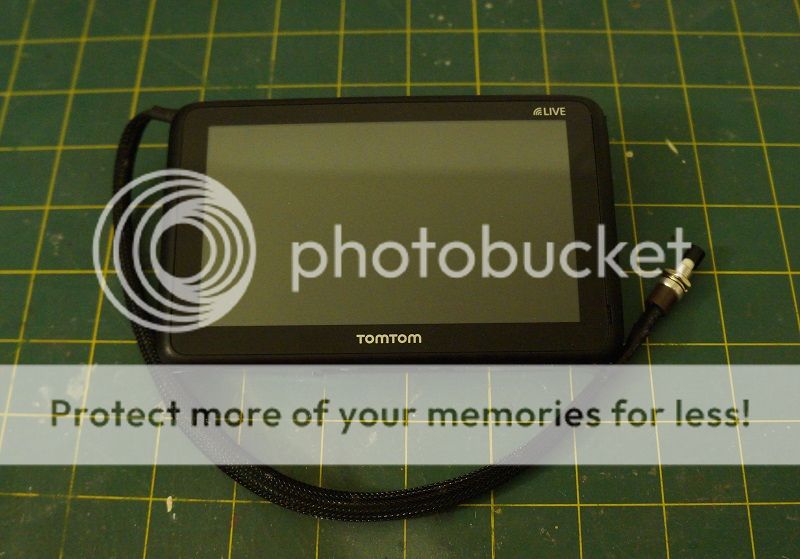
My wife had an archaic little TomTom that was mostly gathering dust since she uses her phone for directions anymore, and it was just about the right size. A quarter inch too short in the screen, but only a few pixels too wide.
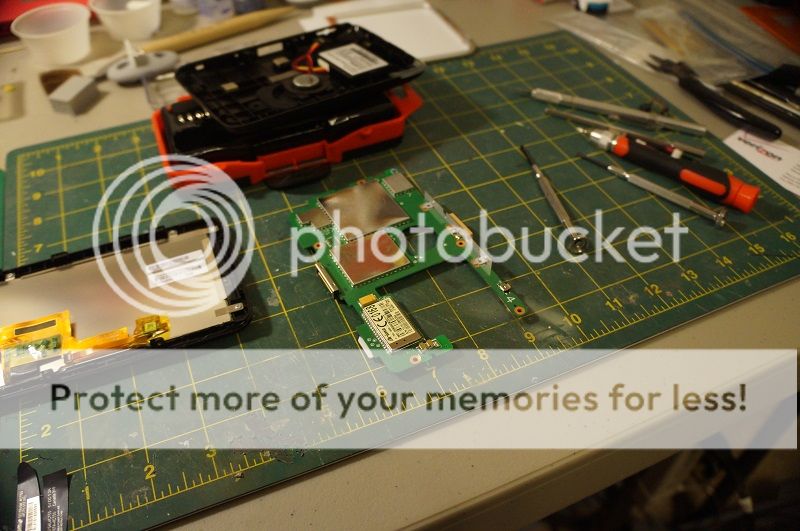
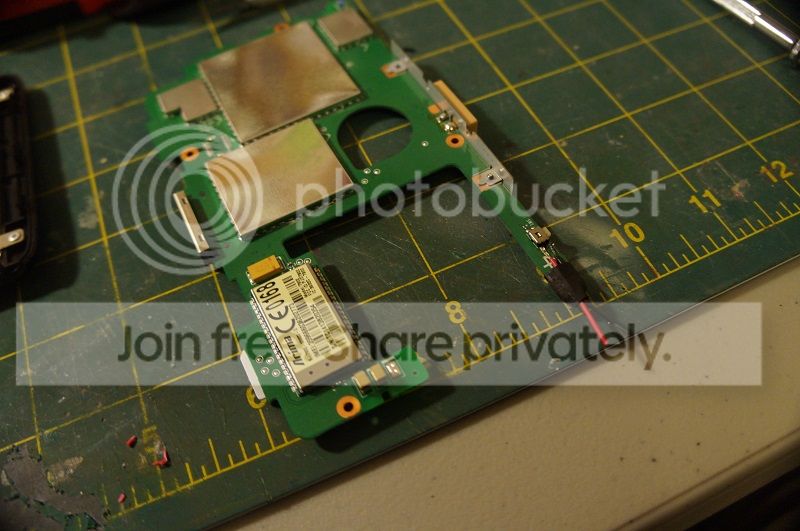
To make this work, I had to install a remote switch since the button on the TomTom would be inaccessible mounted behind the Honda garnish. I took the TomTom apart, soldered some wire to the switch, then loomed it and put it all back together.
If anyone is foolish enough to try something similar, be warned! Radio shack sells these buttons, for cheap, but they are in a bin right next to buttons that look exactly the same but are normally closed instead of normally open. Figuring out why my remote switch didn't work at first caused me a lot of heartburn, but the fix was simple.
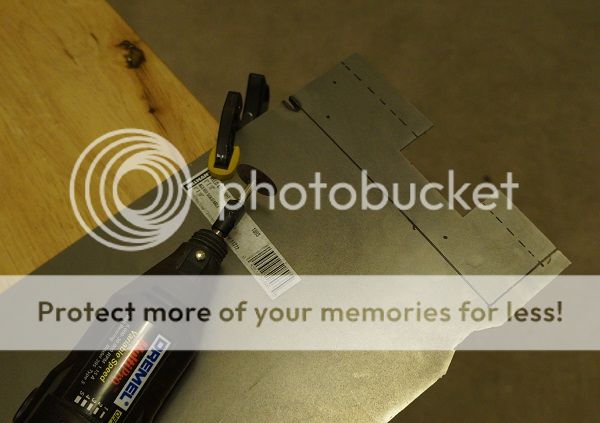
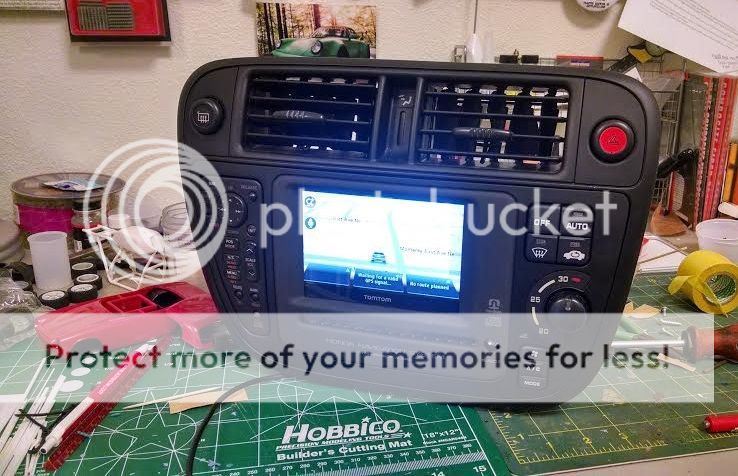
Moving on. I made brackets to hold my TomTom firmly in place. I had to use cardboard as template, and cut them out of steel. I originally intended to make some insane steel contraption to hold it together, but I found these cool Velcro straps that hold the whole thing together firmly and only semi-permanently. I painted my amateurish steel pieces and put it all together.
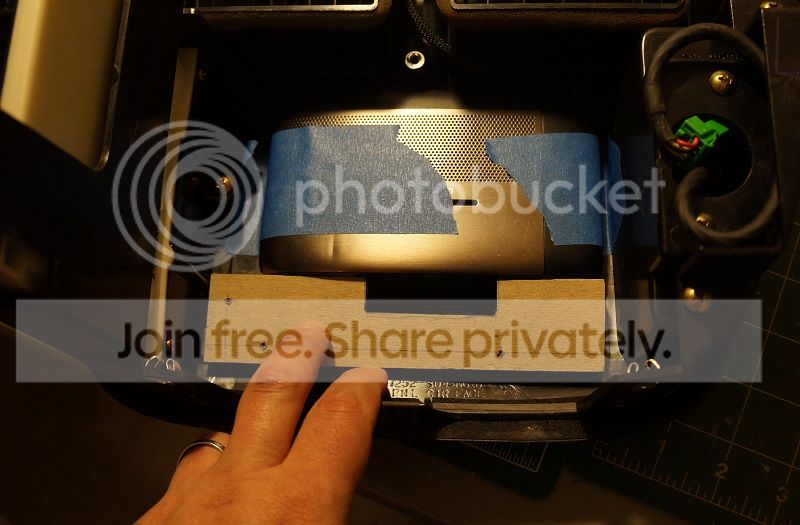
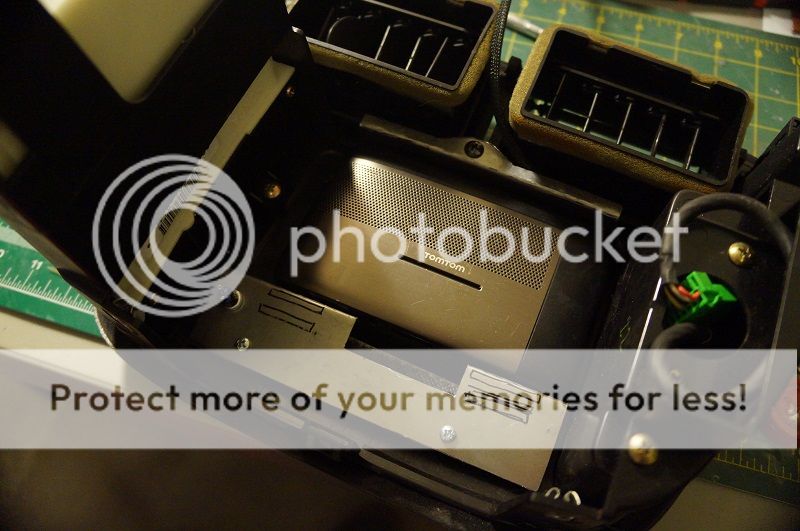
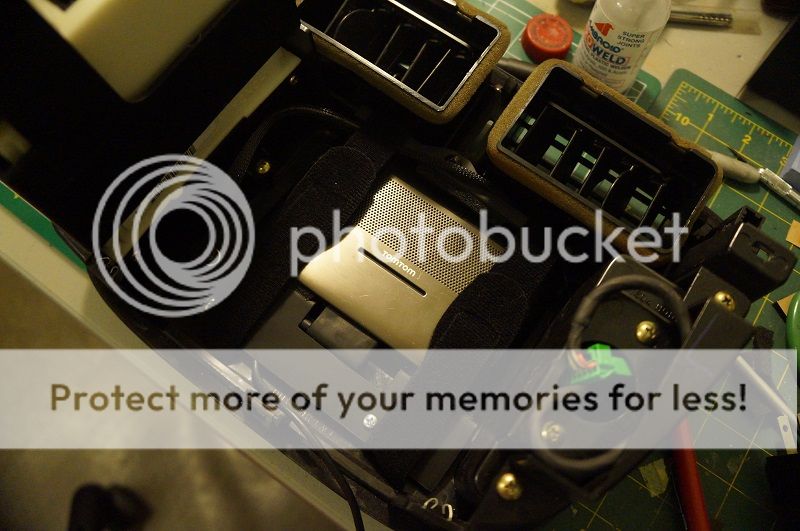
I added a piece of carbon fiber to cover the CD slot, and here we have it.
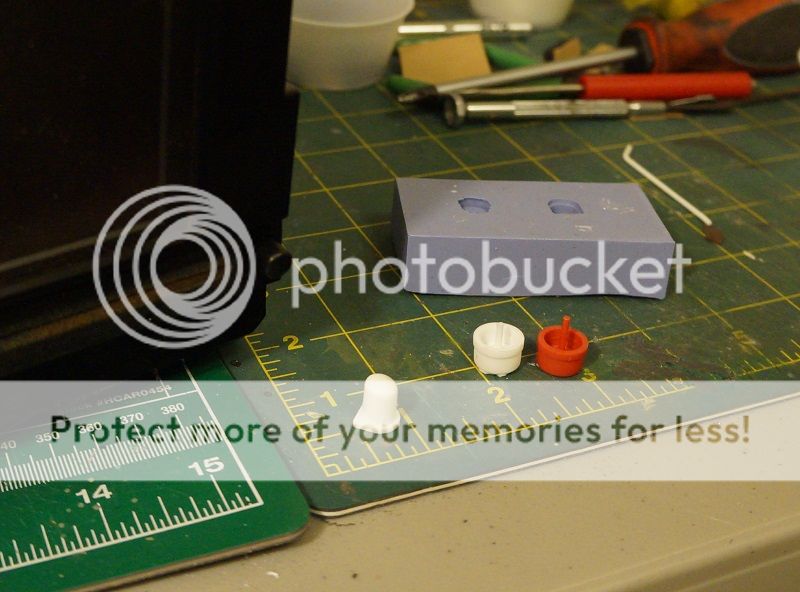
Like I said, I hate doing anything irreversable, which usually comes to cutting stuff up. So I cast a copy of the OE button from the navigation unit in resin, just like I did my mirror brackets, painted it black and installed it. Success!
Remember how I said the previous owner was swapping everything to '99 spec? That means the vents were off center in the car, so the center garnish will not line up. Fortunately, I liberated a '96 dash at some point in my life, and it's sitting in the garage.
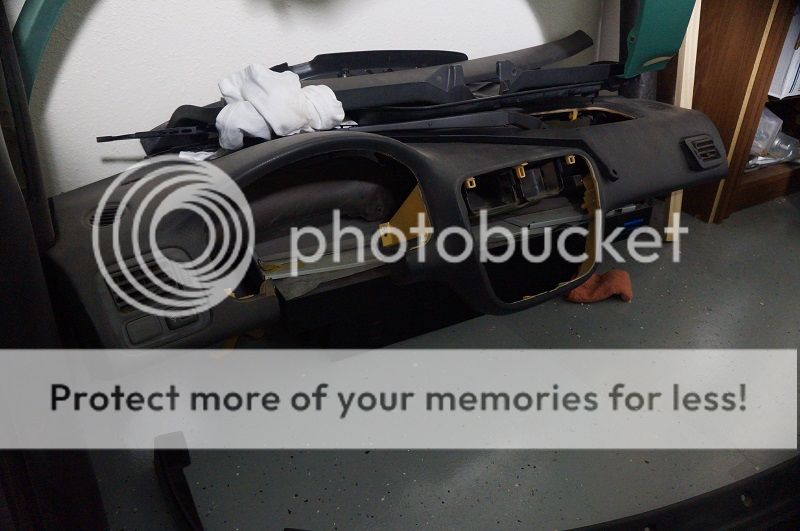
So that's under control. This should motorvate me to get the old dash out, and the new one in, and get the chassis electrical finally sorted. Should. I sure hope so.
Thanks for looking y'all.
It's been a while but I did do a little work recently. I never said this would be fast.
I got a super cool (to me) JDM center garnish with navigation and auto climate control.
Awesome! Though I know most of you know the problem with this setup. The navigation won't work here in the US, the radio does not share the same band as US radios, and the auto climate control is, well, an auto climate control. The guy who had the car before me was putting in '99 spec everything on it, so the HVAC setup is electric instead of manual, so I think the hard work for the auto climate control is done, and I'll have to just get a sunlight sensor and ambient air temperature sensor from a 2000 Insight and wire it all in. I really hope I'm right. I intend to put a new stereo down in the auxiliary single DIN slot anyway, so no biggie about the built in radio. But what to do with the big blank screen staring me in the face? I came up with a devious little plan.
First I took out the 450lb navigation/radio unit.
And threw it in the trash!
(Psych, I still have it of course. I am loath to throw away any parts, especially anything cool and Japanese and a little bit rare - plus, why do anything irreversible if you can avoid it?)
My wife had an archaic little TomTom that was mostly gathering dust since she uses her phone for directions anymore, and it was just about the right size. A quarter inch too short in the screen, but only a few pixels too wide.
To make this work, I had to install a remote switch since the button on the TomTom would be inaccessible mounted behind the Honda garnish. I took the TomTom apart, soldered some wire to the switch, then loomed it and put it all back together.
If anyone is foolish enough to try something similar, be warned! Radio shack sells these buttons, for cheap, but they are in a bin right next to buttons that look exactly the same but are normally closed instead of normally open. Figuring out why my remote switch didn't work at first caused me a lot of heartburn, but the fix was simple.
Moving on. I made brackets to hold my TomTom firmly in place. I had to use cardboard as template, and cut them out of steel. I originally intended to make some insane steel contraption to hold it together, but I found these cool Velcro straps that hold the whole thing together firmly and only semi-permanently. I painted my amateurish steel pieces and put it all together.
I added a piece of carbon fiber to cover the CD slot, and here we have it.
Like I said, I hate doing anything irreversable, which usually comes to cutting stuff up. So I cast a copy of the OE button from the navigation unit in resin, just like I did my mirror brackets, painted it black and installed it. Success!
Remember how I said the previous owner was swapping everything to '99 spec? That means the vents were off center in the car, so the center garnish will not line up. Fortunately, I liberated a '96 dash at some point in my life, and it's sitting in the garage.
So that's under control. This should motorvate me to get the old dash out, and the new one in, and get the chassis electrical finally sorted. Should. I sure hope so.
Thanks for looking y'all.


Honda-Tech Member
Joined: Jul 2002
Posts: 607
Likes: 0
From: Manitoba, Canada
I have to say, not only am I highly impressed by all the small attentions to detail, but as many have already said, your DIYs are insanely impressive. That front lip needs to burn in hell though, as it's horrible fitment just ruins all the detail you've currently set forth. lol
that lip will scratch up your bumper paint all to hell. buy a sir replica off ebay. it uses oem mounting points and you just need to buy some hardware at home depot. fitment is 9/10. i have oem and the ebay one and it's a damn good buy for under $60 shipped.
love the modori since i have one to. i'm actually turning mine pretty much back to stock after many different stages. i love how you do things you can reverse also. great work on everything! can't wait for it to hit the streets. i don't think i can ever sell my midori... i've driven it over 350k miles and had it since 2003. i still wish i would have purchased the one off the lot brand new in 1997 instead of VSM. i really thought it was the ugliest color back then though. now i love it more than any other color on the hatches. i do still love my 00 taffeta hatch though. white will always be in my top 3 colors.
i always loved these stock photos. subscribed!


Thread Starter
Honda-Tech Member
Joined: Nov 2005
Posts: 202
Likes: 0
From: Albuquerque, NM, USA
Tiny, minuscule, insignificant update, but merry Christmas to me.
After a lot of handwringing and gnashing of teeth, I decided to go ahead and get the OEM Honda SiR lip. Well, I decided to get it a long time ago, but have been really put off by the price. Finding them on eBay was all but impossible, finding them locally or from private sellers was sketchy at best. A couple of well-known websites had them for sale, but for pretty outrageous prices, and the hardware was $30-40 extra.
JDMgoodie.com had it listed for a great price, including hardware, but had it listed as long sold out. I sent them an email and Kevin offered to put me on a list to receive an email when it came back in stock. I had pretty much given up hope, and was very close to ready to pull the trigger at another site, for very much more money, when lo-and-behold, an email popped into my inbox. Within an hour I had my order placed, within a week I had the lip in my hands, ten minutes after that it was on my car.
A trick I've seen and like is to get a couple of the rubber fender pads from Toyota trucks to run along the lip's edge to protect the bumper. The OEM part fits so well and easily that I will be able to do that easily later. I am bummed that the lip doesn't hang down quite as far as the PCI side skirts, but I'll live. When it's on the ground it will look better.
I am REALLY excited, as you can probably guess from me making a whole post over essentially nothing. OEM is best, and I have had a super hard time finding a front lip I like better than the OEM part. Even the Spoon or Mugen parts are starting to seem a little dated anymore.
Thanks for looking, and Happy Holidays, y'all.