Honda: Why Won't My Radiator Fan Work?
This article will give you some step-by-step solutions on how to repair your radiator. By a quick process of elimination, you can solve the problem and get back on the road without fear of the engine overheating.
This article applies to the Honda Civic/Del Sol (1992-2000), and Accord (1990-2002).
Your engine runs well, but you notice the temperature reading is running a bit higher than normal on your temperature gauge. You also no longer hear the reassuring sound of the radiator fan kicking in when you pull into your garage. If this is the case, it might be time to check if the fan is working properly, and is cooling things down under the hood. Follow these steps to figure out why your radiator has stopped working, and what you can do to repair it.

Materials Needed
- Metric socket and wrench set
- New radiator fan switch relay (if necessary)
- New thermo switch (if necessary)
- New ECT sensor (if necessary)
- New radiator fan (if necessary)
- Ohmmeter
- Regular and fused jumper wires
- Owner's manual
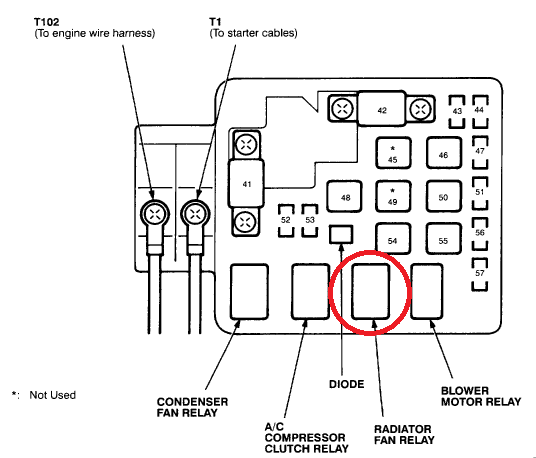
Step 1 – Check the fan switch relay
The radiator fan switch relay may not be supplying power to the fan. If necessary, a replacement relay costs around $20.
There are three ways to check for a bad terminal. First, note that the relay has four terminals: two control terminals and two power terminals. Refer to the top or side of the relay to locate these terminals. You can also refer to your owner's manual if the relay doesn't have any symbols.
Resistance Test:
- Set the ohmmeter to the lowest range.
- Then, connect the meter's probes to the fan switch relay's two power terminals.
- If you do not get a reading of infinite resistance, the relay's inner contacts are stuck in the closed position.
- In this is the case, you will need to replace the relay.
Contact Test:
- Place one end of a fused jumper wire on one of the relay's control terminals.
- Place the other end of the fused jumper wire on the car's positive (red) terminal of the battery.
- Then, touch one end of a regular jumper wire to the other relay's control terminal.
- Ground the other end of the regular jumper wire to the vehicle.
- When you touch the ground, the relay should make a clicking sound, indicating that the contacts inside the relay are working.
- If you don't hear the clicking sound, the relay is not working properly and will need to be replaced.
Continuity Test:
If you heard the clicking sound from the previous test, you can use the ohmmeter to check the relay's power terminals.
- Leave the fused and regular jumpers connected.
- Touch the probes to the relay's power terminals. The ohmmeter should read zero.
- If it reads infinite resistance, the relay's contact points are not allowing current to pass through.
- If this is the case, you will need to replace the relay.
Pro Tip
Another easy way you can check if the radiator fan switch relay is bad is to swap the radiator fan relay with the condenser fan relay. If the radiator fan begins working, this is an indication that the fan relay is bad.
If the fan switch relay is giving off the appropriate readings and is in working condition, move on to the next step.
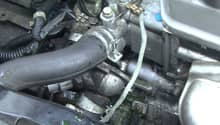
Step 2 – Check the thermo switch
The thermo switch (also called the cooling fan switch) sends a signal to the cooling fan, so the fan turns on if the coolant gets too hot. If necessary, a replacement thermo switch costs between $10 to $40.
- Locate the thermo switch in the thermostat housing, and unplug the two-point connector.
- Run the jumper wires between the connector's two electrical terminals. See Contact Test in Step 1.
- With the jumper attached, the fan should run continuously when the ignition is in the "ON" position.
- If the fan does not run, this is an indication that the thermo switch is faulty.
- If this is the case, you will need to replace the thermo switch.

Pro Tip
The connector has four holes: two are for the electrical wires of the thermo switch plug and the other two are for the plug's locking mechanism. Make sure to test the electrical holes and not the locking holes.
If the thermo switch is in working condition, move on to the next step.
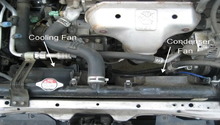
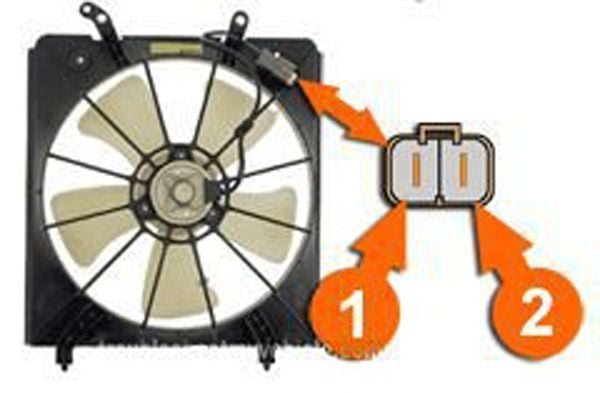
Step 3 – Test the radiator fan
The radiator fan itself may be faulty. If so, a replacement fan costs upwards of $45. Here is how to test if the fan is functioning properly:
- Unplug the radiator fan connector.
- Run jumper wires between the connector's two electrical terminals. See Contact Test in Step 1.
- If the fan does not turn on, you will need to replace it.
If the radiator fan is in working condition, move on to the next step.
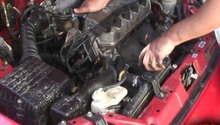
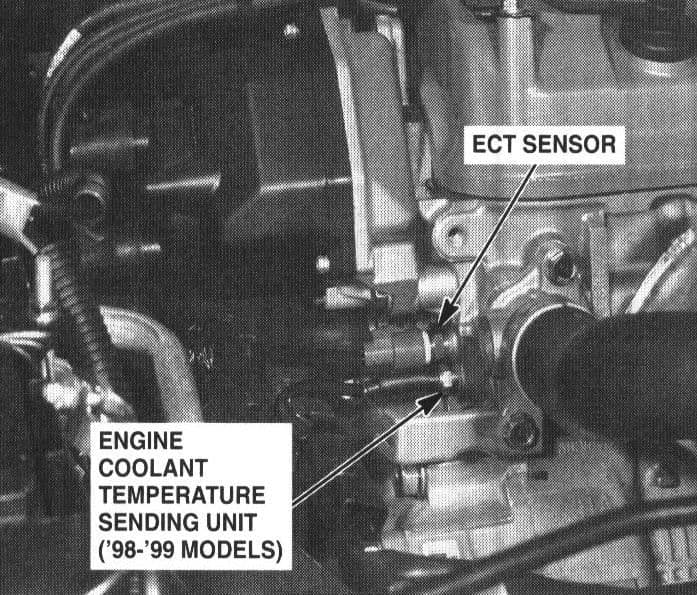
Step 4 – Check the engine coolant temperature (ECT) sensor
The ECT sensor monitors the coolant temperature, and allows the fan to turn on if the coolant is too hot. If this sensor is faulty, a replacement costs around $25 to $45. Follow these steps to test it:
- Locate the ECT sensor, which is just below the distributor.
- Unplug the sensor.
- Bridge the gap in the sensor connector with jumper wires. See Contact Test in Step 1.
- If the radiator fan does not come on, you will need to replace it.
Featured Video: Diagnosing a Non-Working Radiator
Related Discussions
- Civic: Radiator Fan Not Working - Honda-Tech.com
- Accord: Radiator Fan Not Working - Honda-Tech.com