Honda: How to Replace Windshield Molding
Keep your windshield molding looking new. Continue reading to discover how to replace a worn-out molding on your Honda.
This article applies to the Honda Accord (1990-2002), and Civic (1992-2000).
An annoying rattling noise—or rain water seeing through the windshield gaps—is an indication of a worn-out molding, and it needs to be replaced. The molding is a rubber strip that protects the edges of the windshield from constant exposure to the sun or rain. This article will outline the steps needed to replace your Honda's windshield molding, which is an inexpensive DIY job.

Materials Needed
- OEM or compatible windshield molding
- Windshield trim removal tool
- Glass scraper or utility tool
The are two types of windshield moldings: universal and custom. Universal moldings are long strips of rubber, so you will need to cut it to the appropriate fit. On the other hand, the custom molding is manufactured to fit your car's model, but it is pricier. Clips may also need to be replaced. The price of the clips depend on the car's make and model.
Step 1 – Loosen the clips
Insert the windshield trim removal tool under the molding, and carefully slide it along the glass until you hit a windshield clip. Gently twist the trim tool to loosen the clips from the car's trim and be careful not to graze or damage the windshield. Do not complete remove the clips from the trim as they will be used to secure the new molding into place.

Pro Tip
Before removing the windshield molding, check the owner's manual for information on the clips' number and locations.
Step 2 – Pull out the molding
With the windshield clips loose, gently pull out the molding. Using a glass scraper or utility knife, scrape off the pieces of molding stuck to the windshield trim. Avoid damaging the windshield and the body paint. Make sure the grooves are flat and smooth for the new molding to be installed. If you install the new molding without scraping off the old pieces, water is likely to leak through.
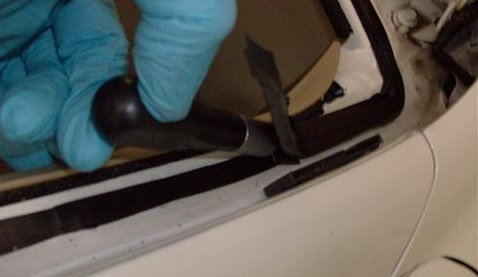
Figure 2. Scrape off the remaining bits of molding. 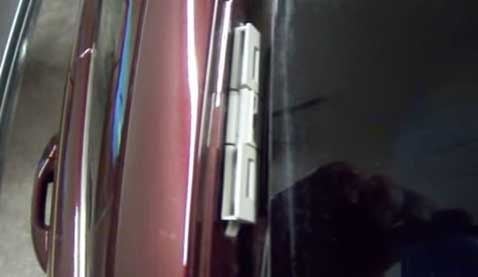
Figure 3. After removing the molding, you can see the loosened clips.
Step 3 – Install the new windshield molding
Place one end of the new windshield molding into the groove and firmly push it in. Work your way around the windshield's trim. Relocate each clip from under the new molding and lock them back into place to completely secure the molding.

Step 4 – Test the windshield
Lightly push down and shake the edges of the windshield to check for any rattles. Also, you will need to take your vehicle out for a test drive. If the windshield rattles while you're driving, you will need to re-install the molding.
Featured Video: How to Replace Windshield Molding on Civic
Related Discussion and Site
- Windshield Molding Questions - Honda-Tech.com
- How to Remove & Re-install Windshield Trim - Honda-Tech.com
- Molding Buying Guide - AutoPartsWarehouse.com