Honda: How to Install an Aftermarket Amplifier
If you're not satisfied with the sound output of your Honda's stock stereo system, you can improve it with an amplifier. Learn how to do it yourself and save money.
This article applies to the Honda Civic/Del Sol (1992-2000) and Accord (1990-2000).
If you want more sound from your Honda's stock audio system, then an aftermarket amplifier is a welcoming upgrade. Even if you upgrade your audio system with better speakers or head units—without adding an amplifier—the sound quality won't improve. When considering which aftermarket amplifier to buy, make sure to get one compatible to your Honda's stereo head unit. This how to will help you install an aftermarket amplifier to your stereo system.

Materials Needed
- 10 mm socket wrench
- Power drill with drill bits
- Flat head screwdriver
- 1/4" screws
- Pry bar
Step 1 – Disconnect the battery and access bottom step panel
Disconnect the negative (black) terminal of the battery, and then disconnect the positive terminal. Ensure that the terminals don't come into contact with the metal conductor. Gently pry out the bottom step panel from the driver's and passenger's side. This is where the amplifier's power supply and remote wires will run through.
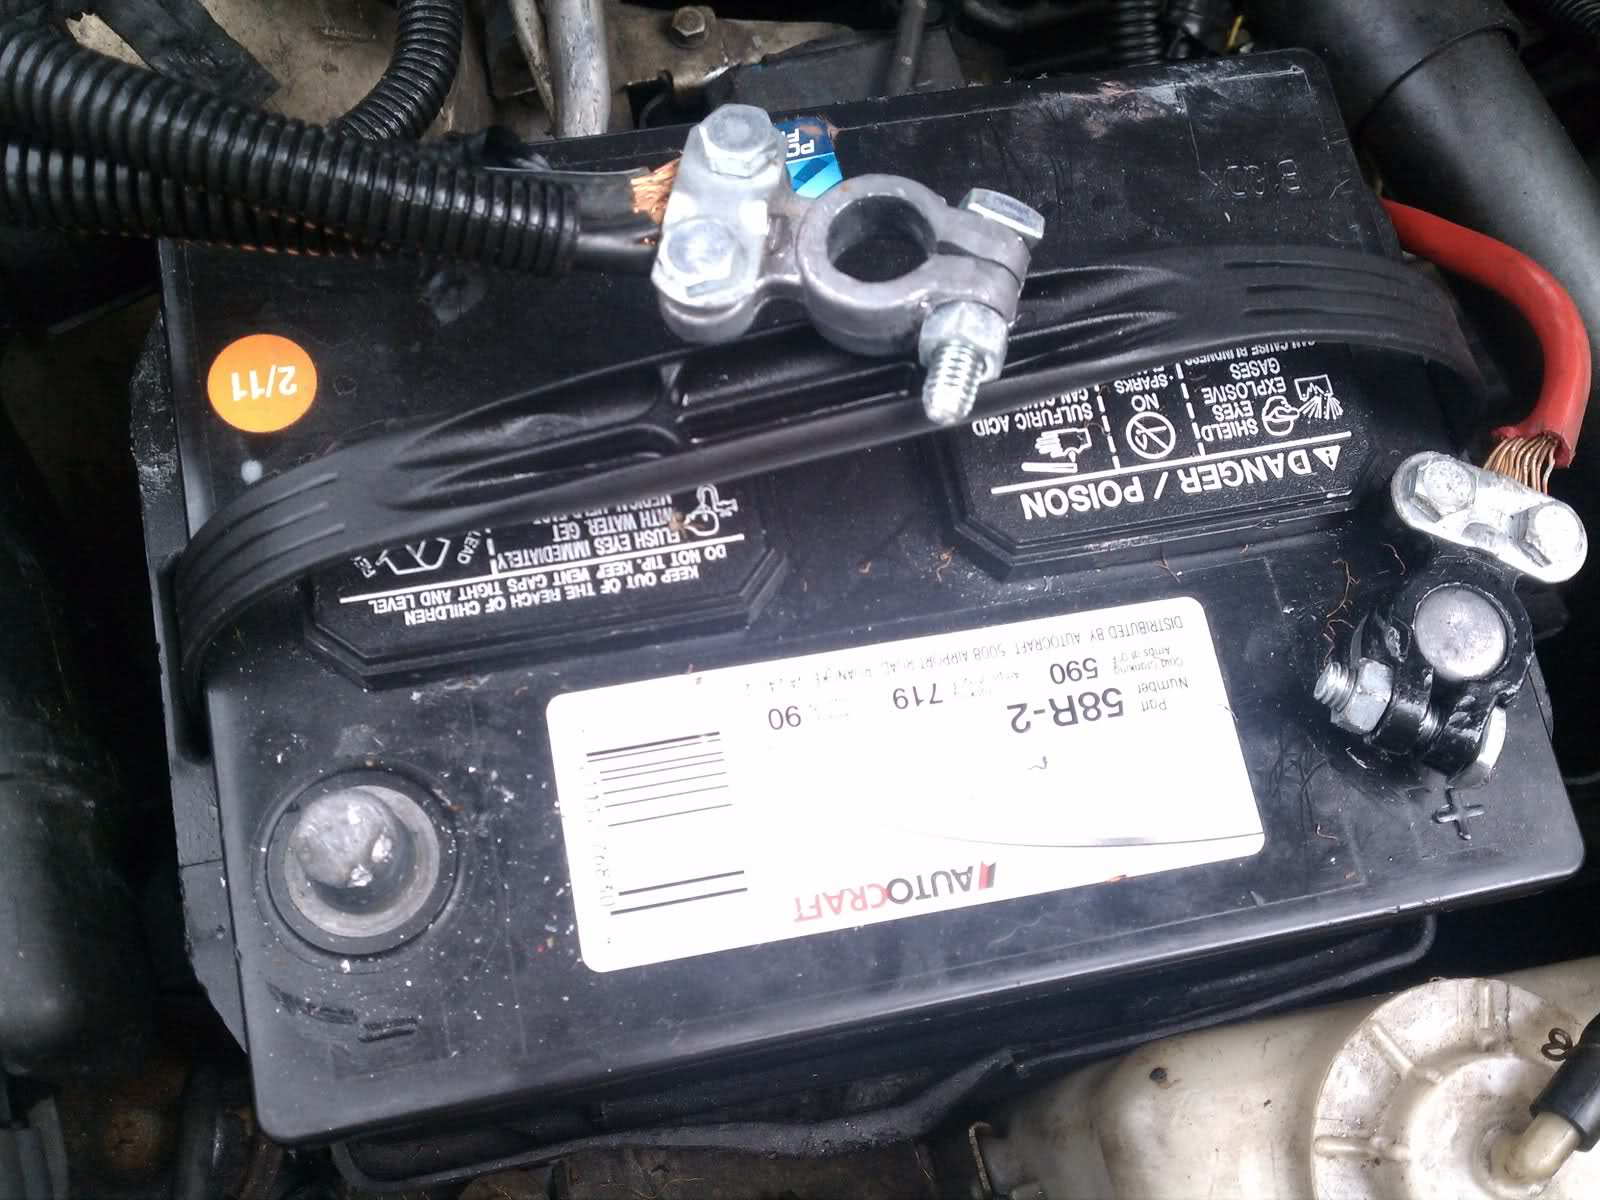
Figure 1. Disconnect the battery. 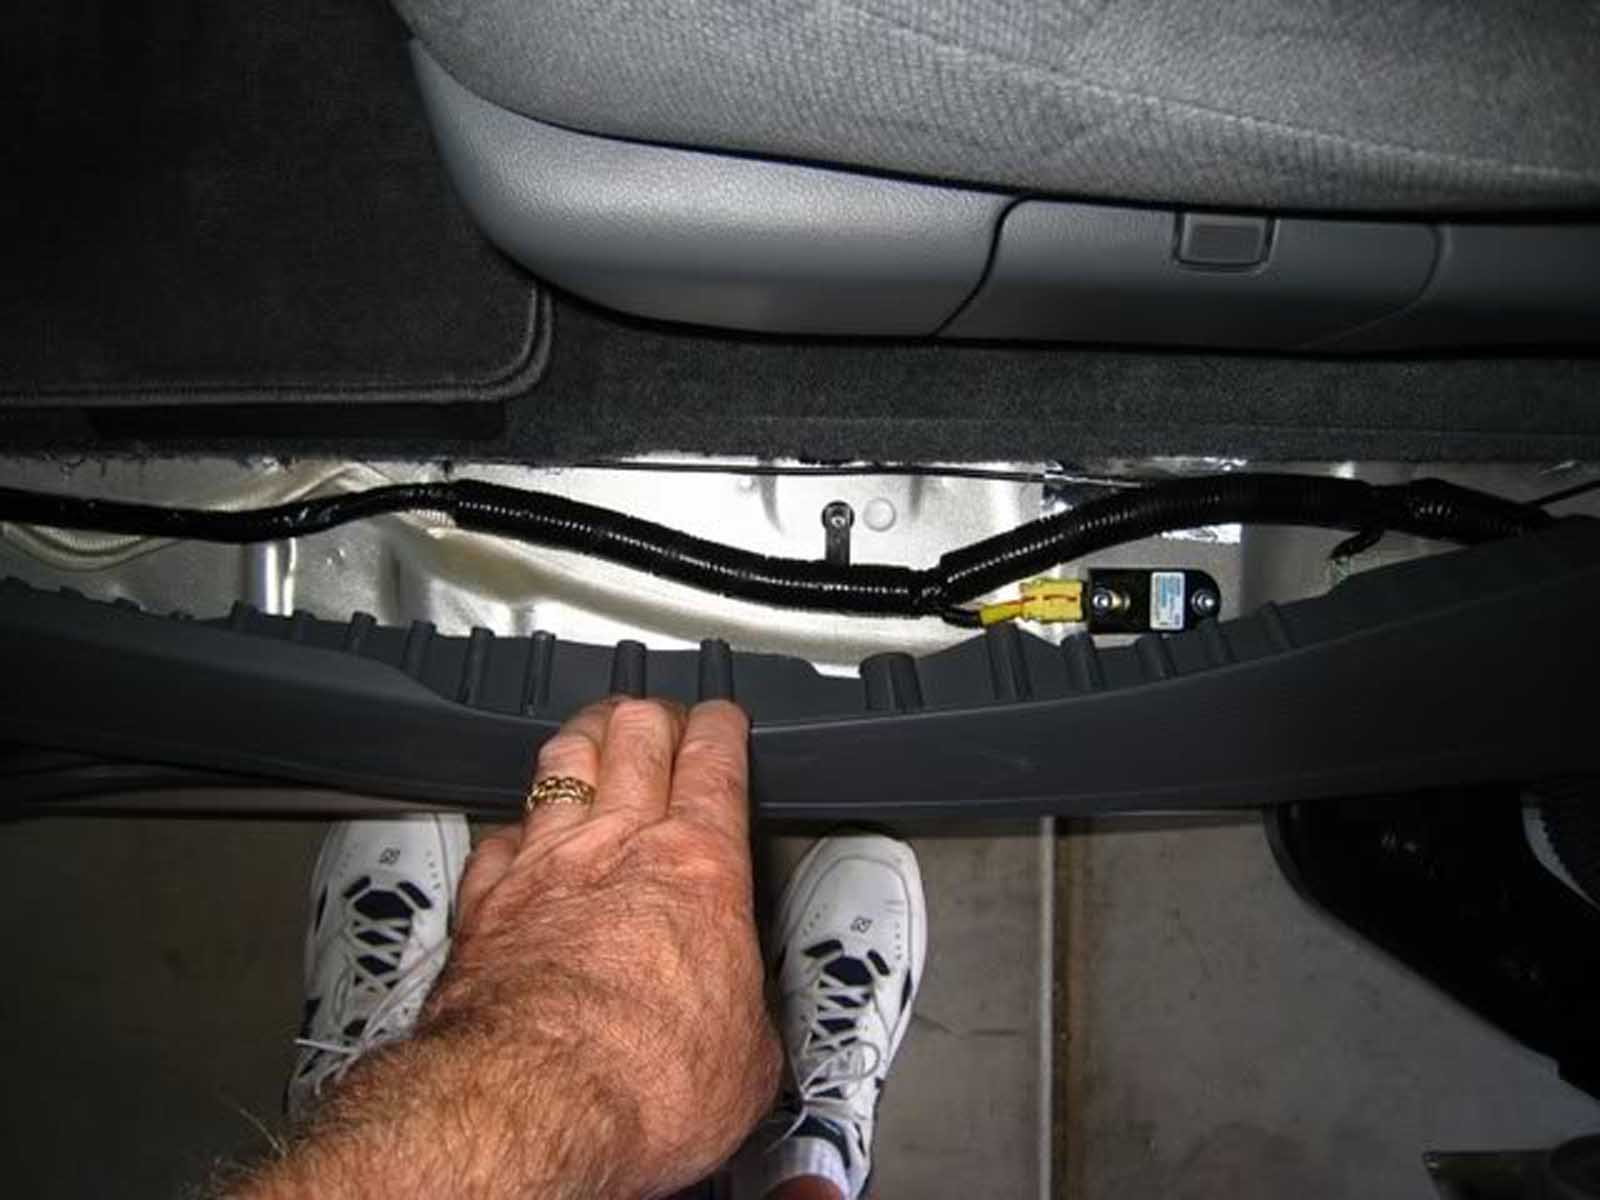
Figure 2. Wiring underneath step panel.
Step 2 – Mount the amplifier
With the 1/4" screws, mount the amplifier to the rear seat of your vehicle or to a spot that is more reinforced. Connect the ground terminal of the amplifier to an open metal piece of your car.
Pro Tip
Most prefer that their amplifier be mounted in the trunk, as they tend to get warm. So make sure your amp is located in a place where it can cool down.
Step 3 – Connect power supply wire to amplifier
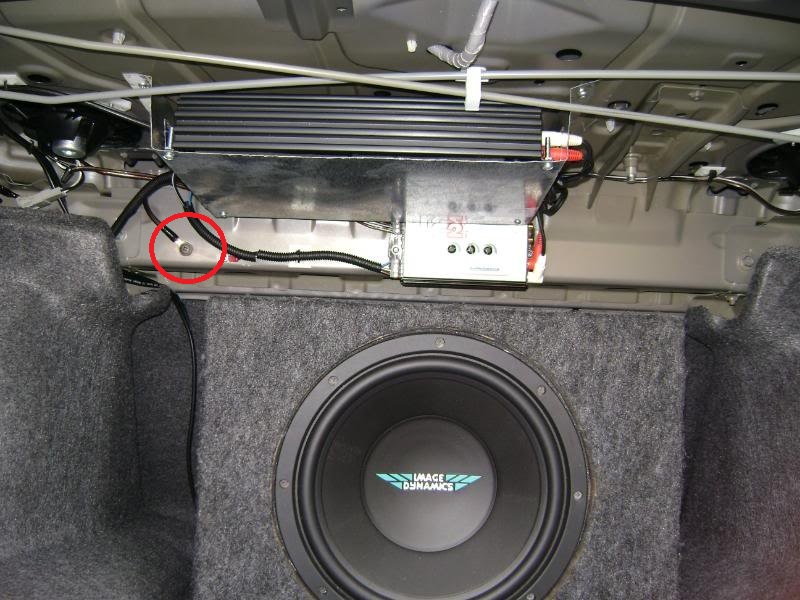
Connect your amplifier's power supply to the positive terminal of the battery. Run the wire through a pre-drilled firewall hole, connecting the car's engine to the cabin. The wire should run into the cabin from underneath the steering wheel and near the gas pedal. Attach a fuse to the fuse box underneath the steering wheel for both the battery and the amplifier. With the socket wrench, remove the bolts securing the rear seats in order to access the trunk from the cabin. Run the amplifier's power supply wire from the driver's and rear passenger's step panel to the trunk. Connect it to the mounted amplifier.
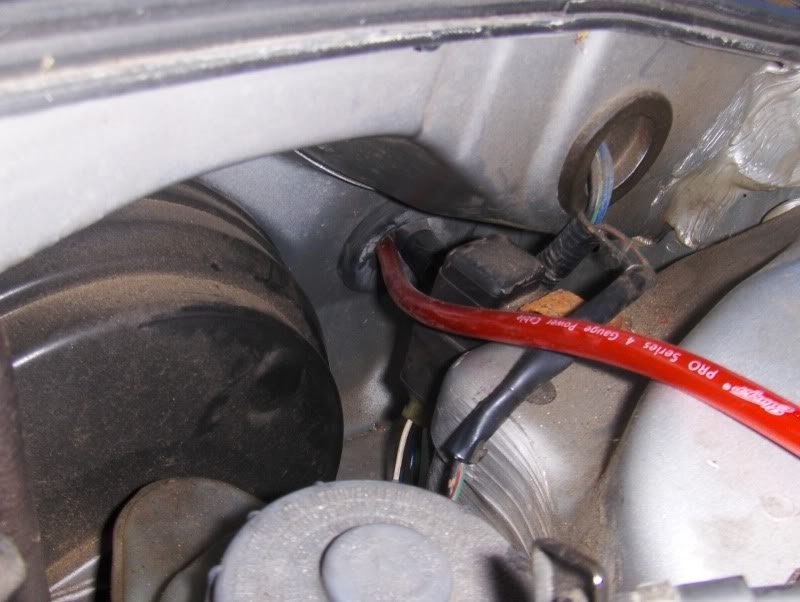
Figure 4. Firewall hole to cabin. 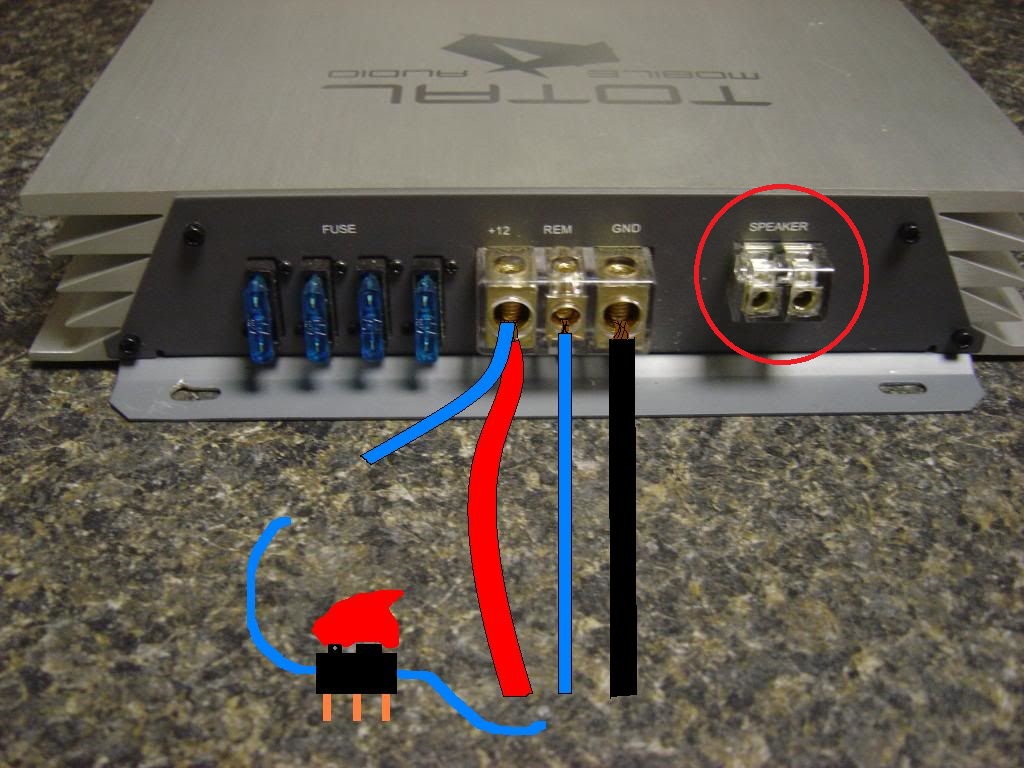
Figure 5. Power supply wire (red), remote wire (blue), and speaker ports (circled in red).
Pro Tip
Installing a fuse protects the battery and amplifier from shorting out, which can cause serious electrical damage.
Step 4 – Connect remote wire to head unit
Connect the amplifier's remote wires to the corresponding ports behind the stereo's head unit. As with the power wire, run the remote wire from the step panels to the amplifier in the trunk. If necessary, connect a remote wire (with a switch) from the amp to the +12V port of the amplifier. This should allow you to control the subwoofers if you have them.
Pro Tip
The remote wire also enables the amplifier to power the speakers and itself.
Step 5 – Connect speaker wires to amplifier
Run and connect the speaker wires from the stereo to the amplifier. Ensure the positive and negative ends of the speaker wires are plugged into the corresponding ports on the amplifier. Reassemble all of the detached parts, and reconnect the battery terminals one you have ensured all the connections are properly secured.
Related Discussions and Site
- Install an Amplifier - WikiHow.com
- Installing Amp to Stock Stereo - Honda-Tech.com
- Power Supply Wire Through Firewall - Honda-Tech.com