Honda Civic: Why Won't My Windshield Wipers Work?
There are a number of components that can prevent your wipers from working. Diagnosing and resolving the potential problems may take five minutes or one hour, depending on what the problem is.
This article applies to the Honda Civic/Del Sol (1992-2000).
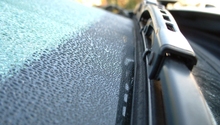
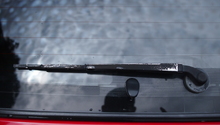
Windshield wipers fail for a number of reasons, from something as simple as a blown fuse to something a bit more complex, like a faulty motor or drive link. Diagnosing the problem could take you more than one search attempt, but resolving the problem isn't difficult, even for the novice DIY'er. Of course, if the problem is that they're not wiping away water from your windshield, then you probably just need new wiper blades. You can find these at most auto parts stores, and they cost between $10 and $25 per blade. Installation is simple: just unsnap the old blades and snap the new blades into place. If the problem is that the wipers simply aren't working, then here are a few steps to to diagnose and resolve the problem.

Materials Needed
- 10, 14, and 22mm socket and ratchet
- Flat head screwdriver
- Needle-nose pliers
- Multi-meter
- Fuse
- New wiper motor
- New drive link
Step 1 – Check for a blown fuse
A blown fuse could prevent your Civic's wipers from working. Before moving on to more time-consuming (and potentially more expensive) repairs, open the fuse box under the dashboard of the driver side foot well. Your owner’s manual will include information about the specific fuse that controls your windshield wipers, but in most Civics, the fuse is #26. Simply pull out the old fuse with needle-nose pliers and inspect if the thin wire inside has split apart. If the fuse is blown, replace it with a new one. Then, start your car and test the wipers.
There may be an extra fuse in the fuse box you can use. If not, you can find fuses at any auto parts store. Fuse sets cost between $8 and $18, and single fuses (if you can buy them on their own) cost between $2 and $5. Be sure to use a fuse that has the exact ampere rating. This information is also in your owner’s manual.
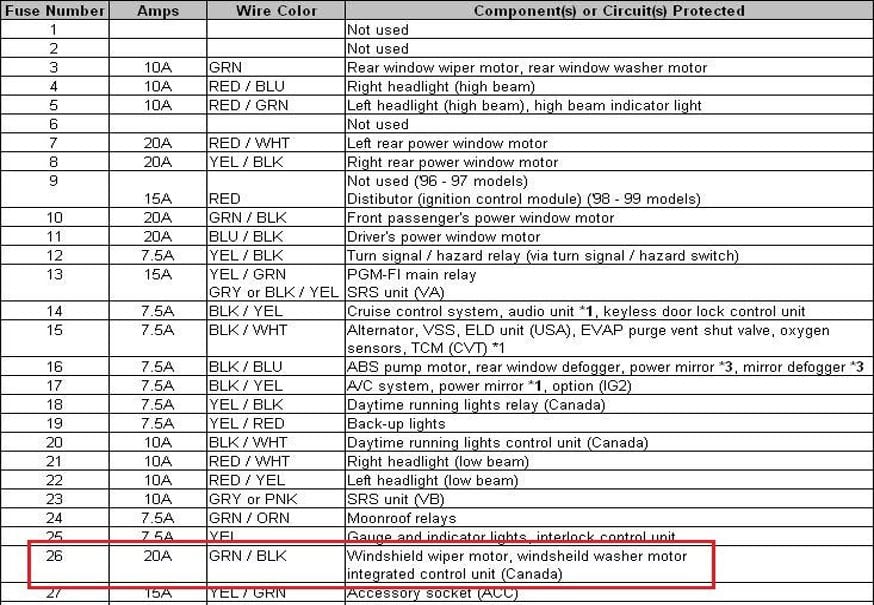
Figure 1. Fuse numbers and descriptions for the Honda Civic under-dash fuse box. 
Figure 2. Diagram of Honda Civic under-dash fuse box with windshield wiper fuse location (circled in red).
If the wipers don't work after you've replaced the fuse, move on to Step 2.
Step 2 – Check the wiper motor
If you do not hear the wiper motor humming when you try to use the windshield wipers, then there is likely something wrong with the motor; this will cause your windshield wipers to stop working. To check if this is the source:
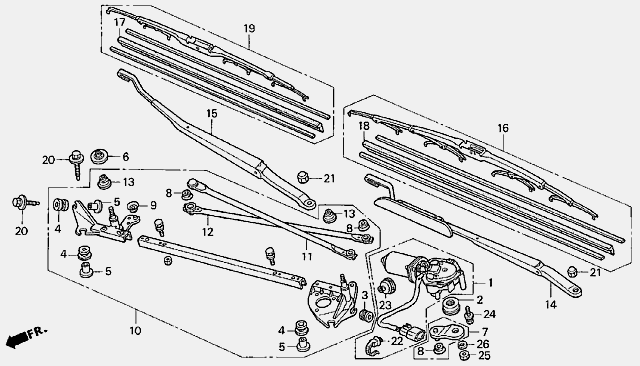
- Open the hood and use a 14mm socket and ratchet to remove the cap nuts of the wiper arms. Then, remove the wiper arms and do not let them touch the hood.
- Pry out the trim clips from hood's heat shield and cowl, and remove them both.
- Disconnect the wiper motor assembly’s 5P connector and test the motor with the battery.
- To test low speed, connect the battery power to the B terminal (green/black) and connect the ground to the Lo terminal (blue).
- To test high speed, connect the battery power to the B terminal (green/black) and connect the ground to the Hi terminal (blue/yellow).
- If the wipers do not work on one or both speeds, you should replace the wiper motor assembly.
If you replace it yourself, a new motor assembly costs between $140 and $240. The cost of labor for an automotive mechanic to do the job is between $75 and $100, plus the cost of parts.
If you’ve identified a problem with the wiper motor:
- Remove the three 10mm mounting bolts holding the wiper linkage assembly in place.
- Remove the wiper motor by removing the three 10mm mounting bolts and one 22mm nut from the wiper linkage.
- Install new motor by installing mounting bolts; then, reconnect the 5P connector.
- Test the new motor before completing re-assembly:
- Connect the mult-imeter to the A (blue/white) and E (black) terminals. Turn on the wipers and test both low and high speeds. The multimeter should read between 0 and 4 volts.
- Replace the hood's head shield, cowl, and cap nuts. Then, re-install the wiper arms.
- Start the engine and confirm that the wipers work.

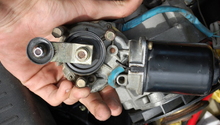
Figure 3. Remove the heat shield and cowl to access the wiper motor assembly. 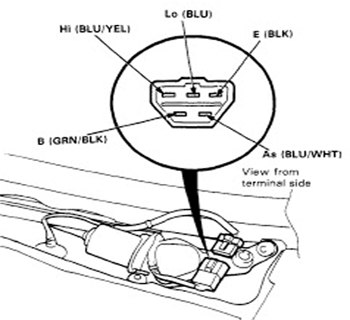
Figure 4. Test wiper motor with the car battery or multi-meter. 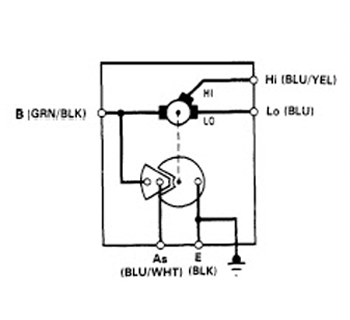
Figure 5. Remember to test the wiper motor after installation (before re-installing the wipers).
If the window wipers still do not work after replacing the wiper motor, continue on to the next step.
Step 3 – Replace the drive link(s)
To check for a broken or faulty drive link, manually move one wiper across the windshield. If both wipers move, the drive links are most most likely the cause of the problem. Replacing the drive links is fairly simple to do yourself and should cost around $25. Follow these steps to replace it:
- Open the hood and use a 14mm socket and ratchet to remove the cap nuts. Then, remove the wiper arms and do not let them touch the hood.
- Use a small flat head screwdriver to remove the screws holding the cowl in place. You will gain access to the wiper motor assembly.
- Remove the three 10mm mounting bolts securing the wiper linkage assembly in place.
- Unhook the motor wire, which is located in the firewall of the driver side foot well and under a silver box.
- Remove the drive link assembly (sometimes called the wiper transmission); it looks like a rod.
- Install the new drive link assembly and reconnect motor wire.
- Then, re install the wiper linkage assembly, re-install the black cover, replace cap and nuts, and re-install wiper arms.
- Start the car and confirm that the wipers work.
Featured Video: Why Won't Windshield Wipers Work?
Related Discussions
- Windshield Wipers Won't Work: Blown Fuse - Honda-Tech.com
- Windshield Wipers Stopped Working - Honda-Tech.com
- Windshield Wipers Aren't Working - Honda-Tech.com
- Windshield Wipers Not Moving: Clicking Sound - Honda-Tech.com
- Windshield Wipers Aren't Working - Honda-Tech.com