Honda Civic: Why am I Losing Coolant?
For the engine to run properly, it needs coolant. So the last thing you need is a coolant leak. Here is what you can do to correct the problem.
This article applies to the Honda Civic (1992-2000).
If you find a big puddle of green-yellowish liquid underneath the front end of your car, then you might have a coolant leak. Leaks are caused by corroded hardware such as hose clamps, old rubber hoses, and radiator caps. This guide will explain how to identify the source.
Step 1 – Check for leaks
Depending on the severity of the damage, leaks could range from barely visible to a huge puddle underneath your car.
Visually inspect the radiator in the engine bay, and for any liquids on the floor. Also, identify the color, smell or viscosity of the liquid. This will help you determine if you are either leaking coolant, oil, water, transmission, or brake fluid.

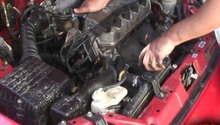
Figure 1. Severe coolant leak. 
Figure 2. As opposed to a coolant leak, oil leaks have a darker, thicker look.
Step 2 – Check hoses and joints
Be sure to visually inspect the most common areas for leaks, which are the hose ends and joints. A leak will most commonly occur where the two hoses connect, so check the hose joints first. If you don't find a leak there, inspect where the hoses or clamps bend because they can be prone to cracking and chaffing.
- To check the hoses and joints, first you will need to wait for the engine to cool down. Once the engine cools down, put on gloves and run your hand through the hose joints and connections.
- Look at your gloves for any signs of coolant, and then continue along different sections to find the leak.
- If this is the cause of the leak, you will need to replace the part of the hose or joint where the leak is originating from.
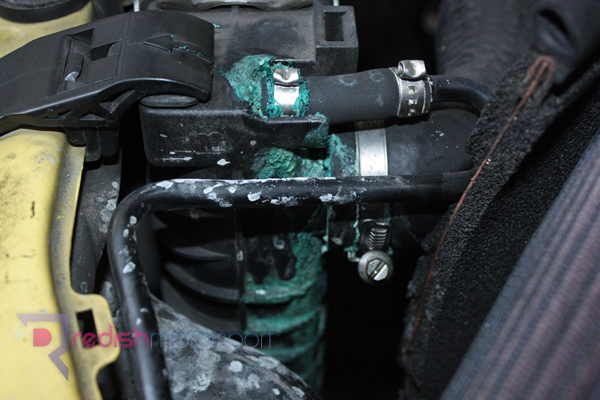
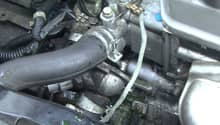
Figure 3. A leak caused by a faulty hose clamp. 
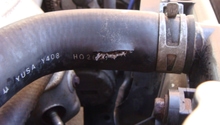
Figure 4. Most leaks occur at the hose junctions and fittings.
Pro Tip
Leaks can be sneaky and very difficult to detect, especially in places deep in the engine bay. If this is the case, you may want to have the cooling system inspected and repaired at an auto shop.
Step 3 – Check the radiator cap
A faulty radiator cap is also a common cause for coolant leaks.
- Again, let the engine cool down, and then remove the radiator cap.
- Inspect the perimeter of the rubber or fiber O-ring seal.
- Push on its spring loaded mechanism.
- If the seal is damaged or the spring mechanism doesn't exert the necessary pressure, the radiator cap may be the cause of your coolant leak.

Figure 5. A basic radiator valve and cap. 
Figure 6. A corroded radiator cap causing the coolant leak. 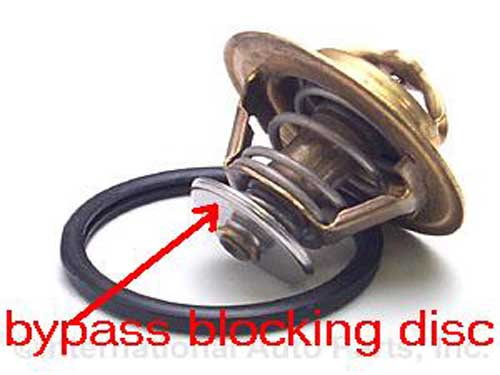
Figure 7. A radiator cap, O-ring, and spring loaded mechanism.
Step 4 – Check the head gasket
Coolant leaks in conjunction with blown head gaskets can be difficult to diagnose. The coolant can damage the engine if leaked into it.
These signs indicate that the head gasket may be the culprit:
- Your car overheats when driving at relatively low distances.
- A sweet or sour smell is coming from the engine bay.
- White smoke is constantly coming out of the exhaust.
- If you notice these symptoms, you will need to take your car to an auto shop to be diagnosed and repaired.
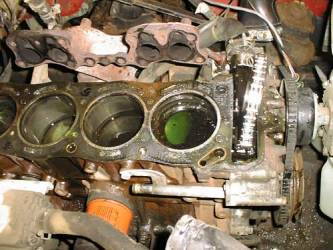
Figure 8. Coolant in the engine can cause irreversible damage. 
Figure 9. White smoke is a common sign of a blown head gasket.
Related Discussion and Site
- Civic Coolant Leak Discussion - Honda-Tech.com
- Head Gaskets and Coolant Leaks - AGCOAuto.com