Honda Civic: How to Replace Your Antenna
Few things can ruin a nice cruise. One of them being your favorite song cutting in and out because of bad reception. Read more to find out how to repair the antenna on your Honda Civic.
This article applies to the Honda Civic (1992-2000).
The radio antenna in your Civic performs one job only, and that is to provide you with a solid, clear transmission of your favorite AM/FM radio stations. Unfortunately, wear and tear can take its toll on the antenna wire. So if you are experiencing static or reception issues, it may be time to replace the antenna. This DIY installation is simple, but if you aren't familiar with interior panels or such components, it is recommended visiting a shop for the repair.

Materials Needed
- New antenna kit
- 16 gauge wire or thicker (at least six feet)
- Flat head screwdriver
- Phillips screwdriver
- Electrical tape
Step 1 – Remove the console
To access the interior antenna connection, you must first remove the center console's main panel. With a Phillips screwdriver, remove the four screws holding the panel in place.

Step 2 – Disconnect the harness
Disconnect the wiring harness that powers the cigarette and ashtray light by simply pushing down on the tab of the connector in order to pull the plug out. The wiring harness must be disconnected before the main panel can be completely removed.

Step 3 – Remove the dash panel
Remove the driver's side dash panel, which is located right below the steering column. Use the Phillips screwdriver to remove three screws holding it up.

Step 4 – Disconnect the antenna
Once the dash panel is removed, locate the antenna wire that is held in place by a white plastic clip. Then trace it to the back of the radio, and unplug it. Don't completely remove the antenna yet.

Figure 4. The antenna wire is held in place by a white clip. 
Figure 5. Disconnect the antenna.
Step 5 – Remove the antenna
Before removing the antenna base and wire from the roof, tape your 16 gauge guide wire to the end of the old antenna wire inside of the car. Use electrical tape to wrap them together. Then, use your flat head screwdriver to remove the two screws from the plastic antenna base on the roof, and pull the antenna along with the wire out until the guide wire reaches the roof.

Figure 6. Tape the guide wire to the end of the old antenna. 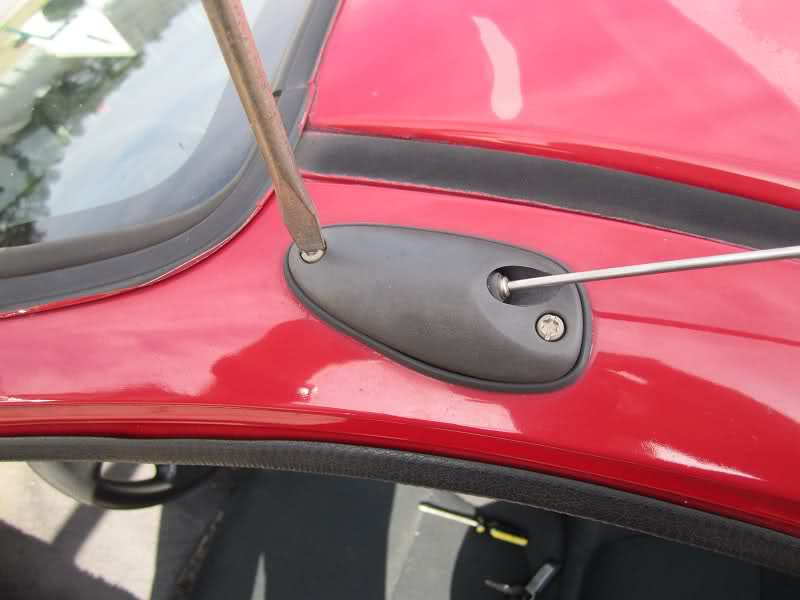
Figure 7. Remove the base of the antenna.
Pro Tip
The 16 gauge guide wire is used to snake the new antenna wire through the frame, and it makes the entire process easier.
Step 6 – Insert new antenna
Tape the new antenna wire to the end of the guide wire coming out of the roof. Pull the guide wire under the dash until you reach the end of the new antenna wire. Then, remove the tape connecting the two wires. Run the antenna wire through the white plastic clip, and connect it back to the radio. Test the radio before re-installing the panels.
Once you have properly installed the new antenna, re-install the dash panel, reconnect the cigarette and ashtray light wiring harness, then bolt the center console back into place. Finally, fasten the new plastic antenna mount to the roof with the two screws.

Related Discussion
- Civic Antenna Replacement How-to - Honda-Tech.com