Honda Civic: How to Replace Timing Belt and Water Pump
If the temperature gauge was pegged and the car shut off, your water pump likely died. If you water pump died, then your timing belt gave out. It is time to replace them both. Continue reading to replace the timing belt and water pump on your Civic.
This article applies to the Honda Civic/Del Sol (1992-2000).
There are many components to a vehicle's motor that requires service and maintenance. Timing belts and water pumps are two very crucial components. One works indirectly with the other, and both independently control important functions of your engine. Servicing these components on time and in proper procedure are tantamount to the longevity of your engine. No dimes should be spared, and special care should be taken when handling these maintenance procedures. One of the biggest challenges in servicing the timing belt and water pump is ensuring that the "timing" of the motor is within factory spec.

Materials Needed
- Ratchet set (metric) with extensions and assorted sockets
- Flat head screwdriver
- Pry bar
- Drain pan
- Impact wrench
Step 1 – Disconnect battery and remove spark plugs
- Disconnect the negative (black) terminal of the battery.
- Remove the spark plugs using a ratchet with a long extension and deep socket.
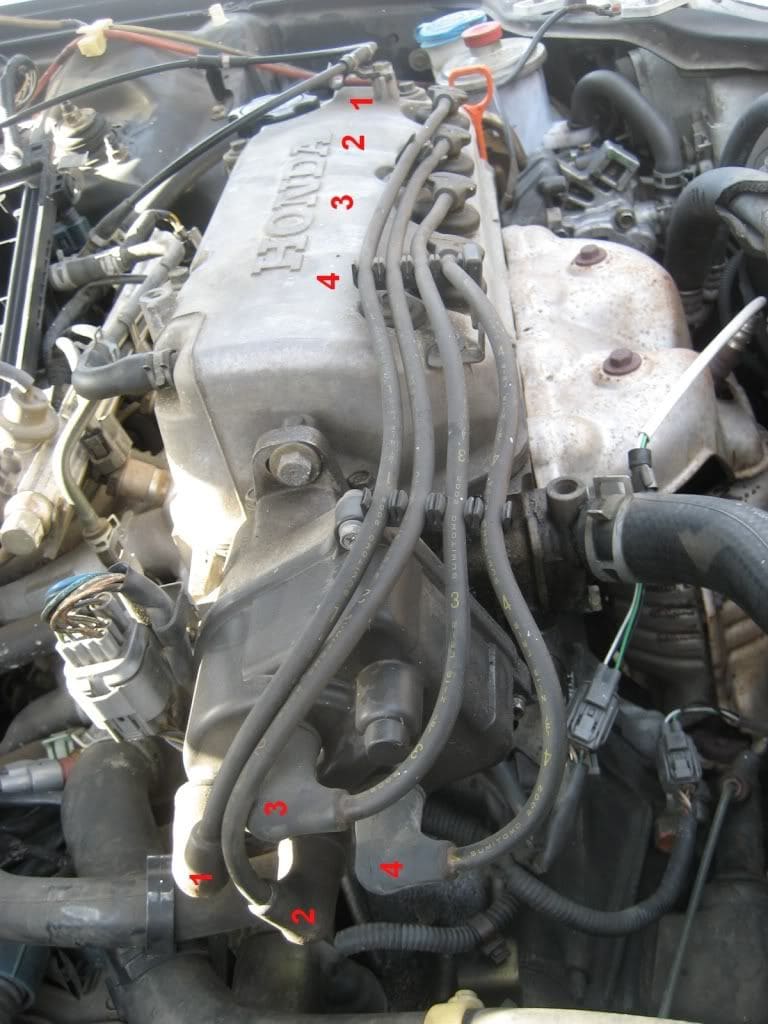
Figure 1. Remember your spark plug wire orientation. 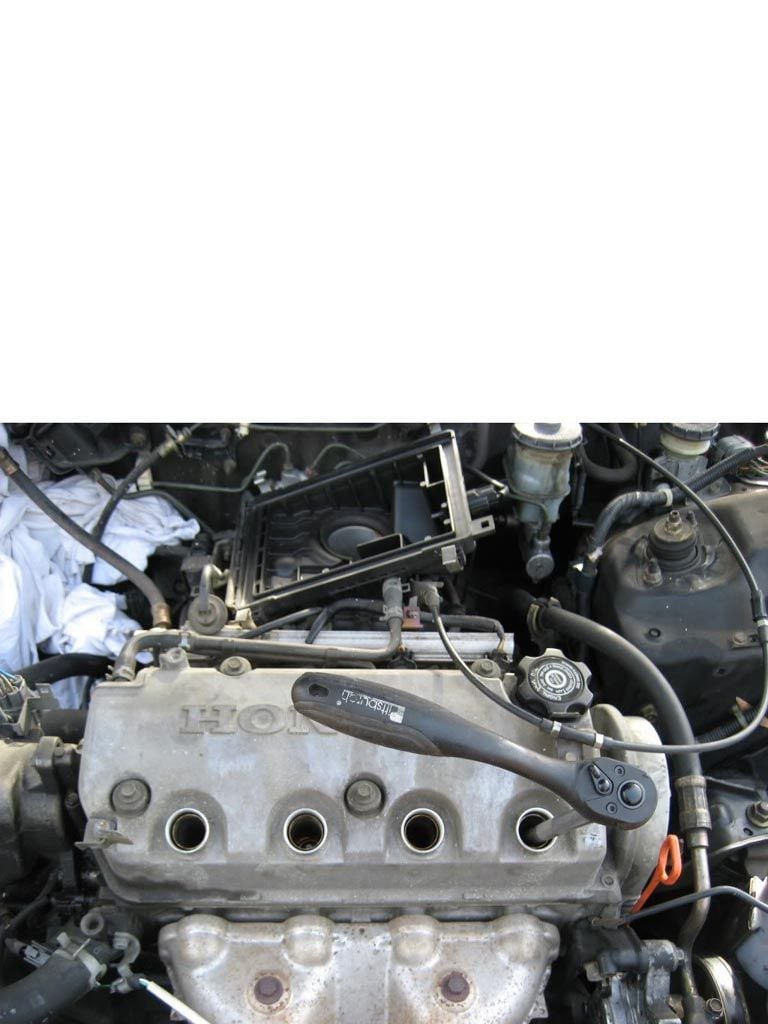
Figure 2. Spark plugs being removed.
Pro Tip
Note the order of the wires in Figure 1 for re-installation.
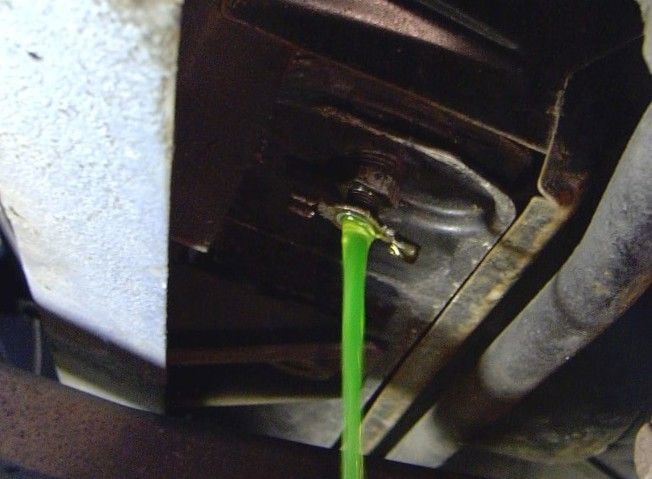
Step 2 – Drain the coolant
Because the water pump will be replaced, it's important to clear the system of the old coolant.
- Open the coolant cap on top of the radiator.
- Turn the petcock at the bottom of the radiator to drain the coolant into drain pan.
- Squeeze the rubber radiator hoses to remove any excess fluid that may be trapped.
Step 3 – Remove the valve and timing cover
To access the timing belt cover and related components, the cover needs to come off. There should be four 10mm bolts and one 12mm bolt. Then, you will need to remove the timing cover.
- Using the socket wrench, remove bolts.
- Then, you will need to remove the timing cover to access the belt and water pump.
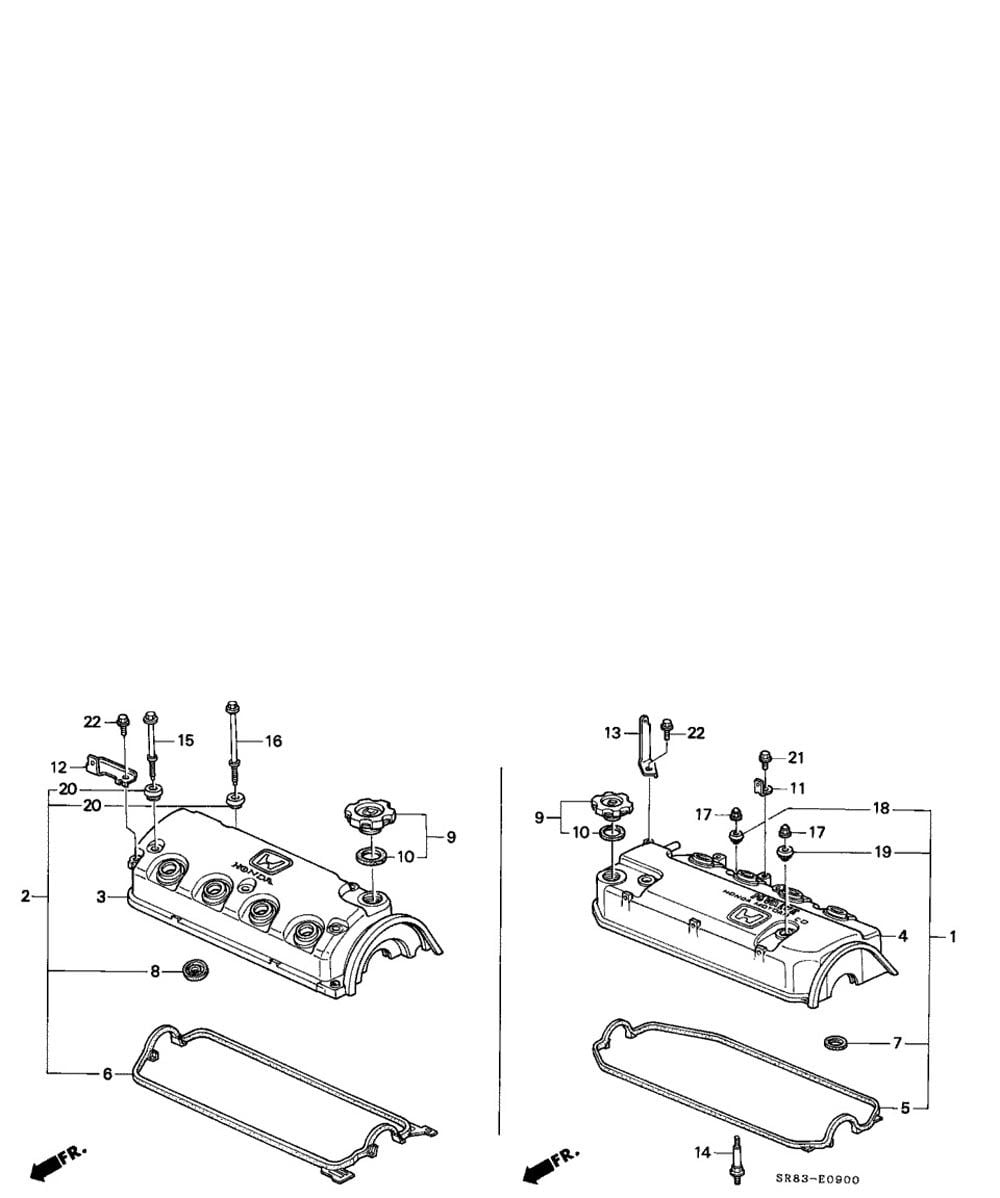
Figure 4. Valve cover removal diagram. 
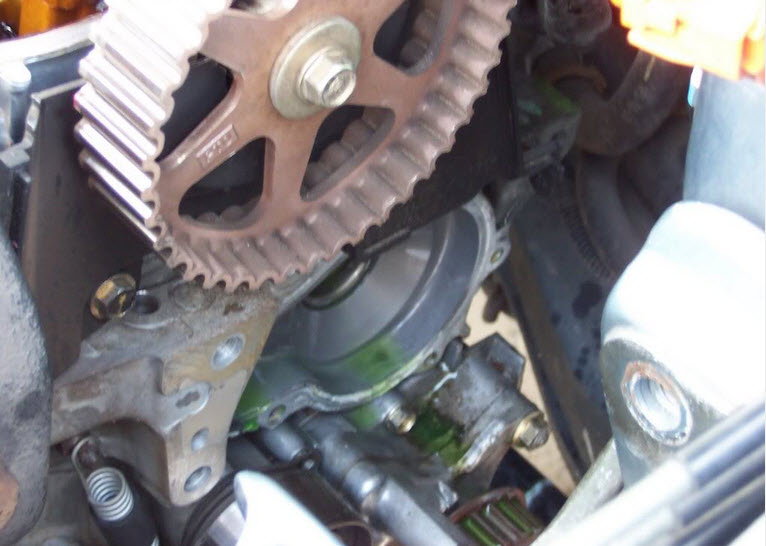
Figure 5. Timing belt assembly.
Pro Tips
- If the valve cover is stuck, it may be necessary to pry it off with a flat head. Also, before re-installing this component, it is wise to replace the gasket.
- The diagram in Figure 5 will be very useful in understanding how things are connected, and how they can be removed.
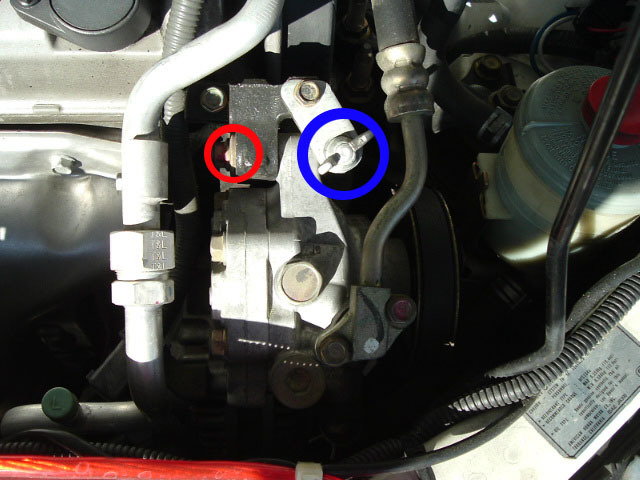
Step 4 – Remove the power steering pump
To gain more access, this pump must be removed.
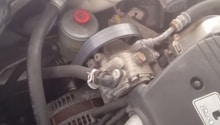
- Loosen the tensioner circled in blue.
- Remove the two 12mm bolts circled in red.
- Then, remove the belt.
Pro Tip
It is not necessary to drain the fluid from the pump if you're not disconnecting the lines.
Step 5 – Remove the A/C pulley and compressor belt
To gain further clearance, you will need to remove the A/C pulley and related compressor belt.
- Loosen the long 10mm bolt on the bottom bracket.
- Remove the 14mm bolt on the bracket to remove the belt.
Pro Tip
It might be necessary to loosen the lower motor mount in order to gain access, and then remove the belt as well as the pulley.
Step 6 – Remove the cruise control and alternator belt
If the car is equipped with cruise control, it is affixed to the chassis and needs to be removed to gain more clearance. For further clearance, you will also need to remove the alternator belt.
- To remove the cruise control, remove the three 10mm bolts.
- To remove the alternator belt, loosen the 12mm bolt that holds the tension to the belt.
- Then, loosen the 14mm bolt to pivot the alternator in order to remove belt.
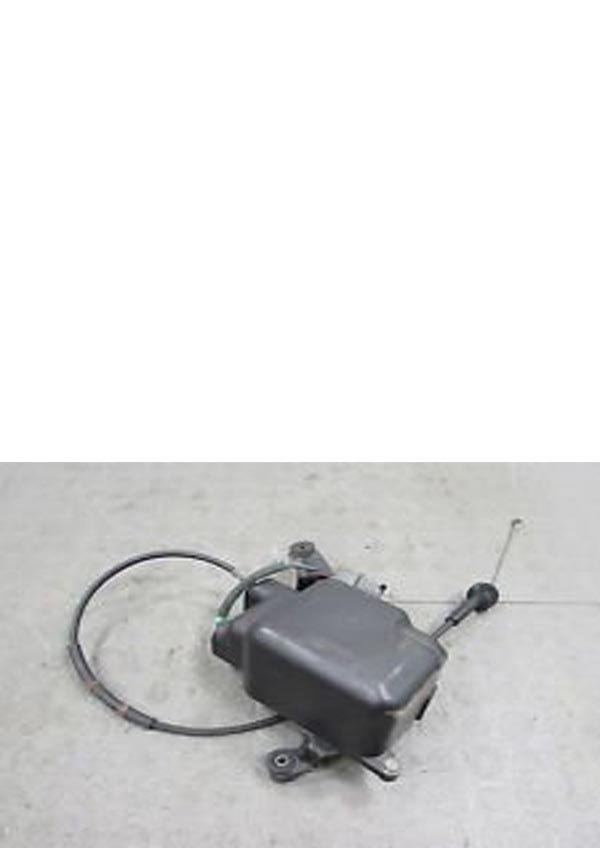
Figure 8. Cruise control module. 
Figure 9. Factory schematic of alternator belt with torque specs.
Pro Tip
The linkage of the cruise control doesn't need to be disconnected. You just need the unit disconnected from the chassis to gain clearance.
Step 7 – Remove the starter
To gain access to the flywheel and assist in removing the crank pulley, the starter will need to come off first.
- Remove the starter cable held on by bolts.
- Remove the large bolt holding the starter to the chassis.
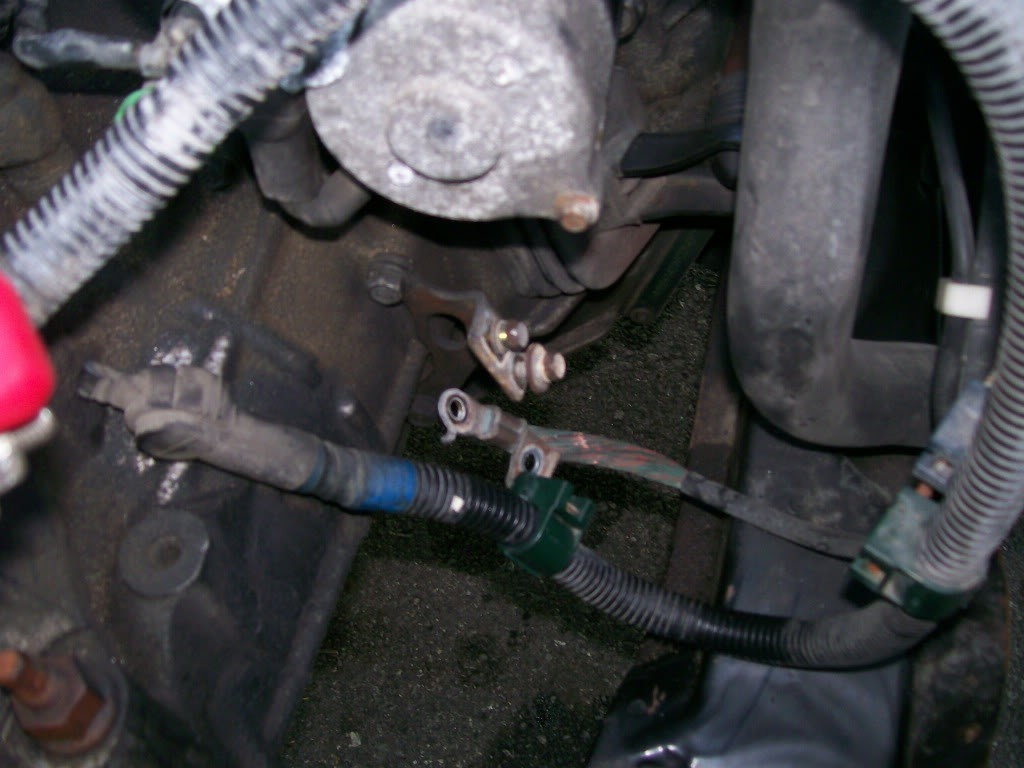
Figure 10. Starter cable undone. 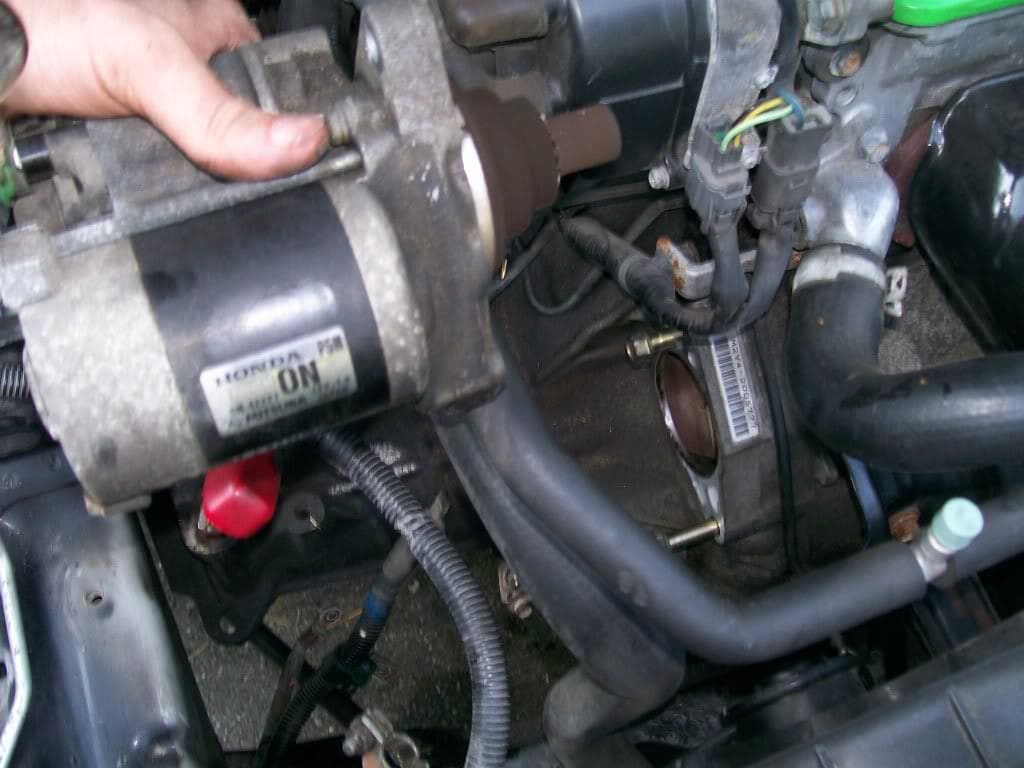
Figure 11. Starter being removed.
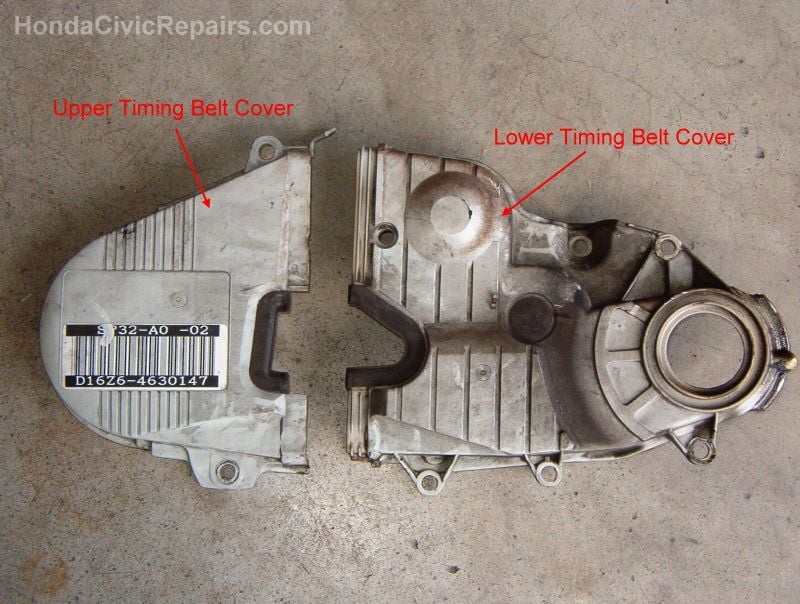
Step 8 – Remove crank pulley and upper timing belt cover
This bolt is held on with a lot of force because it is an integral central point. It will need to be removed in order to access the water pump and remove the timing belt.
- Remove the 19mm bolt holding on the crank pulley.
- Remove the driver's side motor mount 17mm long bolt. The belt loops around this.
- Remove the timing belt cover.
Pro Tip
There is a "key" as part of the crank pulley that should be safely secured. Take note of the timing marks before removing the pulley for easier re-installation. It might be necessary to have an extra set of hands to hold the flywheel from the spinning when trying to free the crank pulley bolt.
Step 9 – Remove the lower timing belt cover
This will need to be removed to gain complete access to the side where the belt and water pump will be replaced.
- Remove approximately five 10mm bolts.
- Loosen the tensioner's 14mm bolt.
- Remove the lower timing belt cover.
Step 10 – Remove the water pump
Now that the water pump is fully exposed, it can be removed.
- Remove the four 10mm bolts.
- Remove the single 14mm bolt.
Step 11 – Replace and re-install
Now you can replace the water pump and timing belt. The re-installation will be reverse of removal.
- Install new water pump with the new gasket.
- Install the new timing belt.
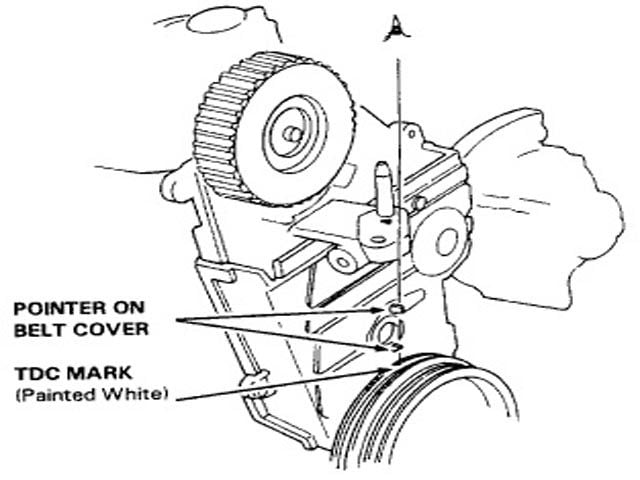
- Set the timing to TDC (Top Dead Center).
- Install the lower timing cover.
- Install the crank pulley and bolt. Check the "timing" again.
- Install the upper timing cover.
- Tighten the tensioner bolt.
- Re-install the motor mount(s).
- Re-install the valve cover with a new gasket.
- Re-install the spark plugs.
- Refill the coolant.
- Finally, reconnect the battery.
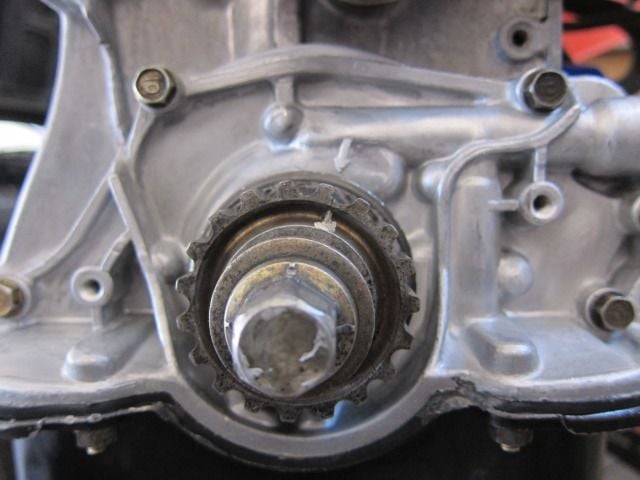
Figure 15. Marking TDC (see arrow) and setting timing. 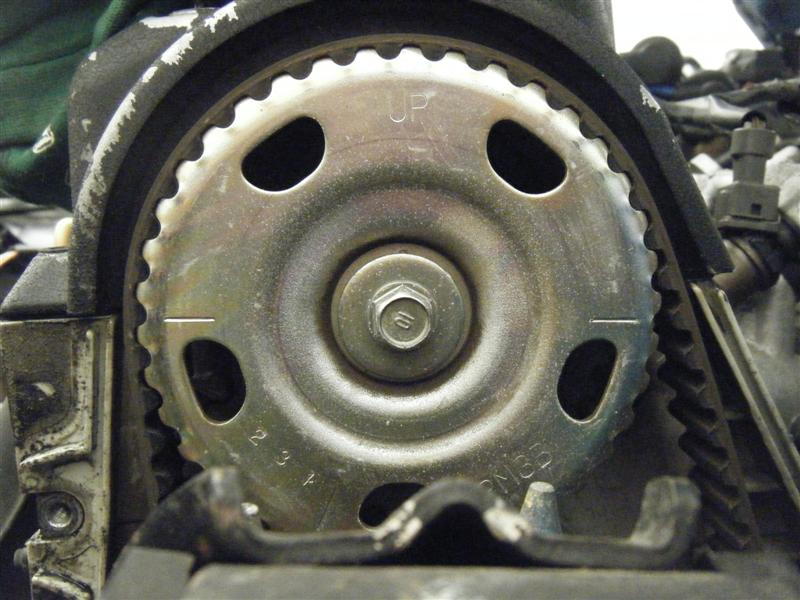
Figure 16. New timing belt installed, and sprocket showing "UP" for TDC.
Related Discussions, Site, and Video
- DIY: Tune up - Honda-Tech.com
- Power Steering Belt tips - Honda-Tech.com
- AC Belt Removal tips - Honda-Tech.com
- Alternator Removal advice - Honda-Tech.com
- Important information about TDC marks - Honda-Tech.com
- Timing belt installation - Honda-Tech.com
- Honda Civic Water Pump Change tips - JustAnswer.com
- Start Removal - YouTube.com