Honda Civic: How to Make Your Civic Faster
There are a ton of ways to make your Civic faster. Some modifications are simple, while others are more complex. Read on and we'll show you what's possible.
This article applies to the Honda Civic (1992-2000).
The types of modifications available to the Civic range from easy to extremely difficult. Some can add a few horsepower while others can double or triple your current horsepower output. In addition, some are easy on the wallet while others might take months of saving to be able to afford. Here we will go through the various modifications available to your Civic in order to make it go faster and achieve your speed goals.
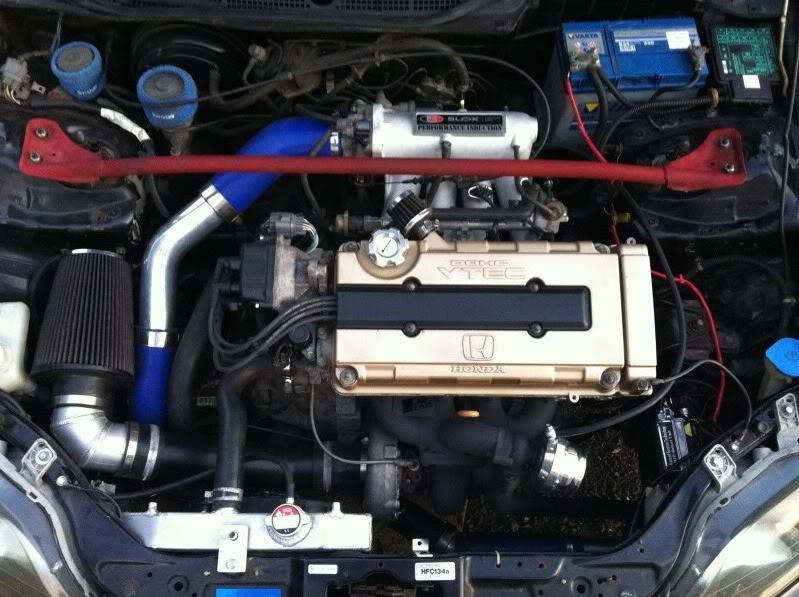
General Upgrades: Bolt-ons
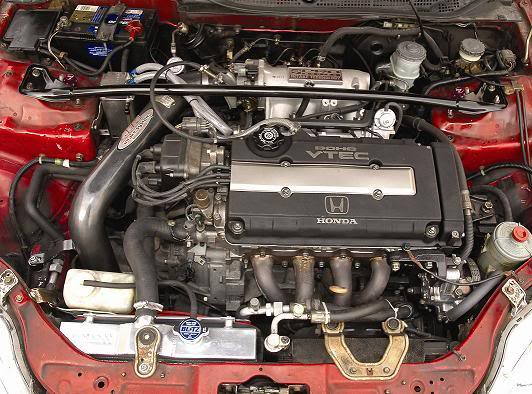
DIY Cost – Intake ($100), Exhaust ($250-$500), and Headers ($200-$500)
Professional Cost – Parts + labor, which can be $200 to $400
Skill Level – Easy; The job requires normally available tools (wrenches, sockets) and little to no experience. The header would be the most challenging.
These bolt-ons can add anywhere from 5 to 15 horsepower. It really depends on the specific part being used. It's highly recommended to stick to products from well known brands that have put time and development into their performance parts. It's not recommended to use 'cheap' parts. Your number one priority should be safety and reliability, which some 'cheap' parts can't promise. In addition, other common bolt-ons include throttle body, intake manifold, and test pipe. If passing smog check is not a concern, many opt to replace their catalytic converter with an aftermarket higher-flowing unit or a test pipe. This can yield a few additional horsepower. Consider a tuning solution like Hondata to optimize any performance gains that can be had.
It should be noted that before installing bolt-ons, it's recommended to have your engine's maintenance up to date. This includes engine oil, spark plugs/wires, transmission oil, coolant flush, and other general maintenance areas. A well-running engine will respond better to performance upgrades.
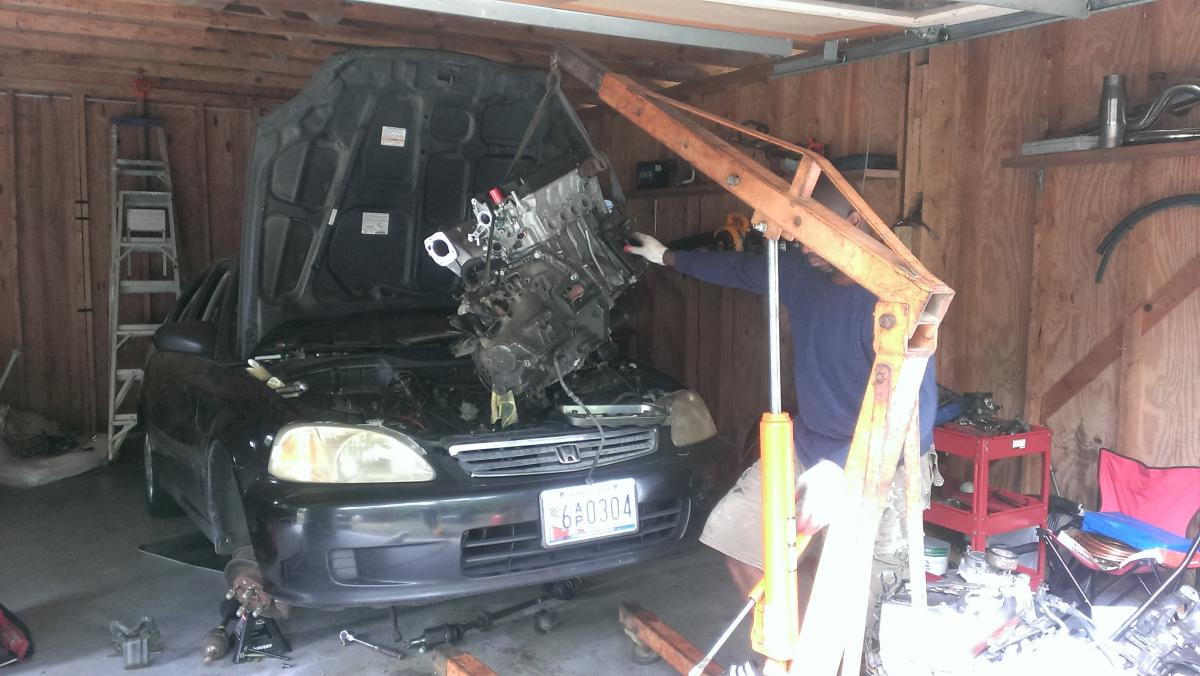
Engine Swaps
DIY Cost – $500 to $5,000
Professional Cost – Parts + an additional $1,000 - $2,000 for labor
Skill Level – Difficult; Requires extensive engine and chassis knowledge.
In some specific cases, engine swaps are the best chance of getting your Civic faster. If you do every bolt-on, you might find yourself a few hundred dollars short of just having a complete engine swap. This could yield you more horsepower than all the bolt-ons added together. Of course, if you're into racing, having a stock engine is best for reliability. In terms of reliability, have a higher horsepower engine in stock form is better than a heavily-modified, slower engine. This is the case even if the dyno numbers are identical. That's the benefit of engine swaps. The cons would include having issues legally performing the engine swap. It can be a pain when smog check requirements come around. In addition, there are transmission swaps. Generally, shorter-geared transmissions result in a quicker car than longer-geared transmissions. These transmission swaps can also be pricey. Fortunately, the market is quite saturated with options, from mild, such as the B16 from a Civic Si, to wild, like a K20 from an RSX-S or Integra Type-R; the only limitation is your budget.
Forced Induction
DIY Cost – $2,000 - $5,000
Professional Cost – Parts + an additional $1,000 - $2,000 for labor
Skill Level – Difficult; Requires extensive engine knowledge and know how.
Forced induction is another way to get big power results. There are two popular options: the turbo kit and the supercharger kit. There is also Nitrous, which is less popular within the Civic community. Each one has its individual pros and cons. The range of power you can gain is very broad. A turbocharger works by recycling exhaust gases into the turbine which creates boost. What this means is that there is some initial lag while the turbo scavenges for exhaust gases that have left the engine; this is referred to as turbo lag. In most instances while sacrificing some initial response, the exchange is a large rush of boost, although selecting the right size turbo for your goals can minimize this lag. A supercharger is effectively a belt-driven turbo that runs off the engine. As a supercharger is run directly off engine speed, there is no lag, but with smaller engines, there is an inherent limit to how much peak power can be generated. Nitrous relies on refillable bottles of Nitrous Oxide that tap into the intake stream (usually the throttle body) and shoot bursts of NO2 into the engine. More oxygen + more fuel = more power.
All of these solutions will be the most potent option if maximum power is your goal. However, all of these options require a tuning solution of some sort, or you will be experiencing improper fueling, ignition issues (knock!), and ultimately, blown engines.
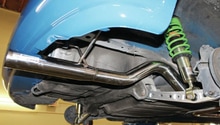
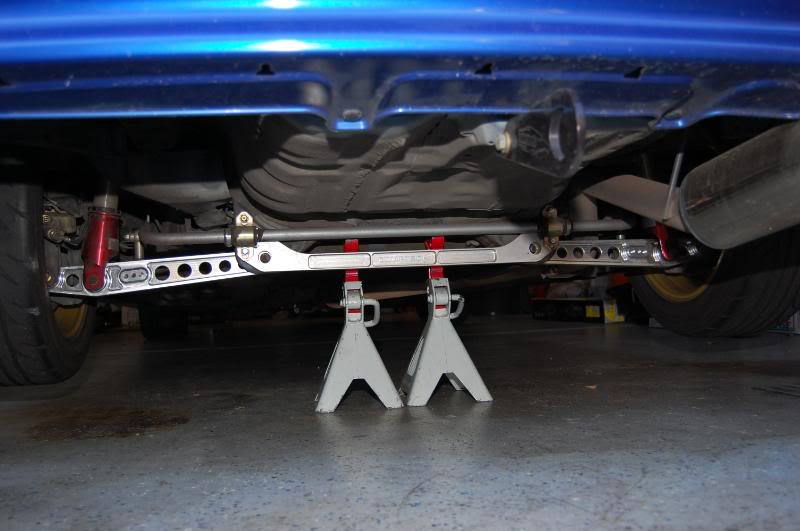
Suspension
DIY Cost – $200 - $3,000+ (high-end coilovers)
Professional Cost – Parts + labor, which can range from $200 - $1,000
Skill Level – Moderate; The job is complex but can be done without being a full, professional mechanic.
Suspension modifications can dramatically alter the way your Civic rides. The suspension system includes springs, shocks, full coil-overs, sway bars, and control arms. It is not recommended to use lowering springs on stock shocks because they will eventually blow and need replacing. The suspension has a ton of modification options. Every little adjustment will yield a noticeable difference. A quality spring and damper solution can sharpen handling, without compromising ride quality, or offer adjustable dampers, which can fine tune the compression and rebound of the shock to optimize the car for your specific preferences. Solid, entry-level adjustable dampers can be purchased from Koni, and can safely handle a lower and stiffer spring rate, without compromising handling. Chassis bracing can help counter chassis flex and offer more consistent handling and not allow the suspension geometry to change under heavy cornering. Sway bars (anti-roll bars) will help reduce side-to-side body roll ("sway") and allow for sharper cornering, often with minimal affect on day-to-day ride quality.
Cooling

DIY Cost – $200 - $1,000
Professional Cost – Parts + labor which can range from $200 - $1,000
Skill Level – Moderate; The job is complex but can be done without being a full, professional mechanic.
Heat is an engine's enemy if you're trying to make the most horsepower. Even if your car is stock, an overheating engine can be quickly ruined. An easy way to ensure that your engine is performing at its peak is by upgrading the cooling system. The water pump, thermostat, coolant/ water mix, radiator, radiator hoses, and radiator cap should all be in great-working order. It's common to upgrade the radiator and coolant hoses to higher-performing units. The other parts can be replaced with OEM units.
Having adequate cooling is extremely important for those of you upgrading to boosted setups, as those turbos and superchargers will generate a lot more heat than the motor would otherwise see while naturally-aspirated. In the same vein, if the race track is beckoning, proper cooling is vital to not overheat, and thus damage, the engine.
Related Discussions
- General Engine Upgrades - Honda-Tech.com
- Guide to Power Increases - Honda-Tech.com