Honda Civic: How to Install Headlight Washers
Headlight washers are a standard feature on some upscale models. The Civic doesn't come with headlight washers, but it's possible to install them on your own. Find out how to do that with this helpful guide.
This article applies to the Honda Civic (1992-2000).
Dirt or debris can quickly cloud headlights, leaving them dull and even unsafe in low light settings. This project isn't ideal for novice DIY-ers because you'll need to remove the car's bumper, and work with intricate wiring along the way. You will need to be cautious. Also, move as slowly as possible when handling older wiring and tubing because it is often quite fragile.

Materials Needed
- Headlight washer kit
- 7/8" hole saw
- Utility knife
- Plastic ties
- 10mm bolt
- Bullet connectors
- Wire tap/T-tap
- Owner's manual
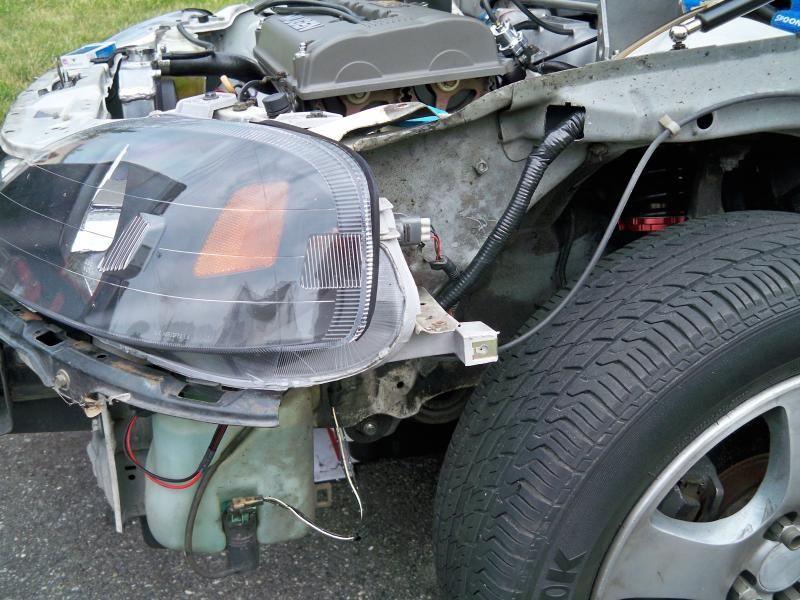
Step 1 – Remove existing washer bottle
Disconnect the car's battery by removing the negative (black) terminal first, and then remove the existing washer bottle. The new one should bolt on easily. Once the washer bottle is installed, attach the front and back wiring. Both of these wires are already there.

Step 2 – Weave wires through grommet
Poke the white/red wire through the big rubber grommet that's holding the wiring loom on the main driver's side. To hold it in place, you may need to cable tie it to the existing wiring in the engine compartment. Then, extend the black wire from the motor to the ground bolt near the washer bottle cap. Connect the pigtails with the bullet connectors.
Step 3 – Remove front bumper and create nozzle holes
Remove the front bumper according to your owner's manual or other guide. Now it's time to create the nozzle holes. To do this, outline the holes with your marker pen. There may be a small bump in the middle to help you identify where to outline is. Then, take your hole saw to create a hole by lining it up with the dot in the middle and the rounded bottom portion of the hole. Drill the hole.
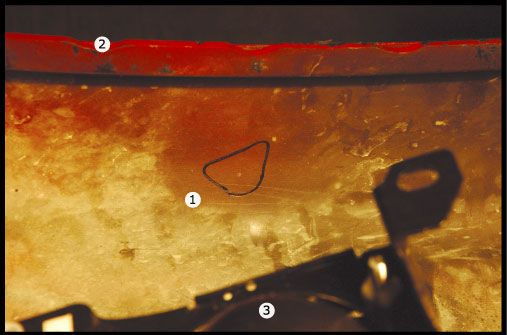
After drilling, create the triangle pieces on both sides, which requires a utility knife. You'll need these triangular pieces to properly fit the washer nozzle, and to help the nozzles properly line up with the bumper. When done correctly, the nozzles will be flush with the bumper. Figure 3 shows a nozzle cutout (number one), and a slight discoloration in the middle where the small bump may be. The number two indicates the top part of the bumper for orientation.
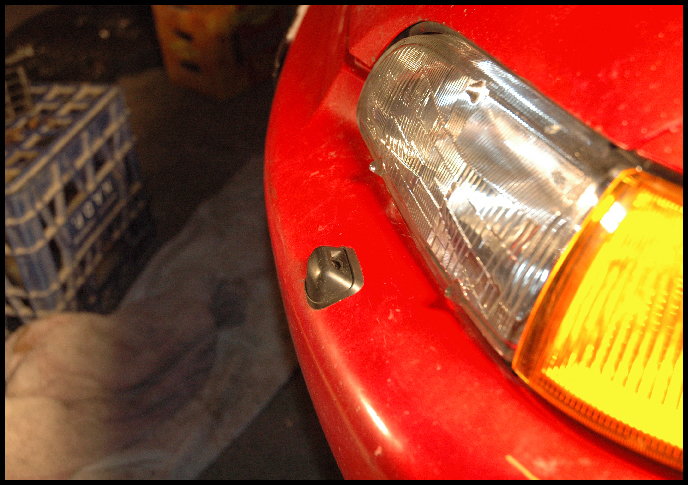
Step 4 – Insert retaining pawl
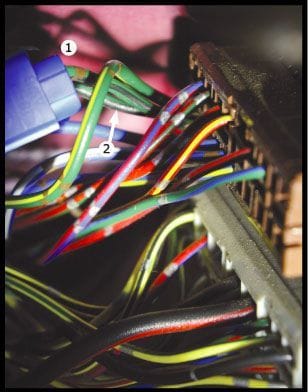
To insert the retaining pawl, slide it in from the front to the back to retain the washer nozzle in the bumper. In Figure 4 the number one shows underneath of the bumper with the retaining pawl, while number two indicates it is inserted correctly on the headlight washer nozzle.

Step 5 – Connect the headlight washer nozzles to the main tubing
Make sure that the one-way valves are properly directed. They should be following the direction of the arrow that's printed on the valve. Then, connect the headlight washer nozzles to the main tubing and the motor. Be sure each tubing crimp, along the length of the hose, is placed properly.

Step 6 – Remove the front end bumper gussets
The front end bumper gussets interfere with the headlight washer tubing, and needs to be removed. To do this, squeeze along the bottom part, and pull towards you.

Step 7 – Mount the headlight washer relay
First plug in the Number 11 (or 20A) fuse. Then, mount the headlight washer relay in its traditional location using a 10mm bolt. There will be a large bundle of wiring in the way, which you'll need to work around.
Pin one end of the white/black relay into slot Number 2 on the 5-pin C439 connector of the fuse box under the dash. Start counting from the top left corner as you're looking at the connector from the wire side. There's a release button on top. Trim the wire to the appropriate size, and then connect the pigtails with your bullet connectors.
Use a T-tap to tap the green/black wire off the junction connectors, and then trim it to size to connect the pigtails. Next, route the red/white wire towards the dashboard switch, and then trim to size to connect the pigtails. Then pass the white/red wire through the large rubber grommet (where the bundle of wiring enters the engine compartment) by poking a hole through the rubber. Ground the black wire.
Step 8 – Wire the dashboard headlight washer switch pigtail
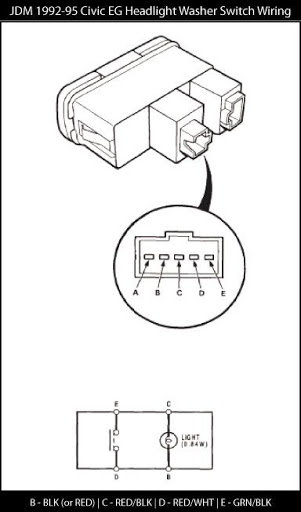
To wire the switch, connect the green/black wire to the green/black wire from PIN-E, and then route it towards the fuse box under the dash. Pin one end into slot 10 on 20-pin C501 connector in the fuse box under the dash. Next, connect the red/white wire to the red/white wire from PIN-D, and route it towards the headlight relay mounting location. Trim it to size, and connect the pigtails with bullet connectors.
Connect the red/black wire to the red/black wire from PIN-C, and then use T-taps to connect this wire to the existing red/black wiring. Connect the red wire to the black wire from PIN-B using T-taps to connect this red wire to the existing red wiring for the dimmer switch.
Set your dimmer switch to the desired setting, and mount it behind the dashboard switches in such a way that it doesn't rattle.
Step 9 – Test headlight washers and install front bumper
Reconnect the car's battery, and test the headlight washer system. If the headlight washers aren't working, then double check all of your connections. Once the system is up and running, replace the front bumper according to your owner's manual.
Related Discussions
- Civic EG/EH 92-95 JDM Headlight Washer/Rear Wiper/Trunk Light Install DIY - Honda-Tech.com
- Interest in JDM Headlight Washers? - Honda-Tech.com