Honda Civic: How to Install Cruise Control
Although fitting the cruise control feature into a car is a difficult job, there are some obvious benefits. This article demonstrates how to correctly install a cruise control into your Honda Civic.
This article applies to the Honda Civic (1992-2000).
Cruise control is often an overlooked luxury; however, over time, this luxury can save you during those consistent and long commutes to work. But if you want it in your car, you must know how to properly install it. Also, this is not a job not for the impatient. This installation requires customizing a cruise control harness, and splicing it into the stock dash, floor, as well as engine harnesses. The pedal assembly must also be replaced, and cruise actuator must be installed. Although the task may seem daunting, the process is bearable once broken down. Fortunately, the following instructions explain in detail how to properly retrofit the cruise control in your non-cruise Honda Civic.

Materials Needed
- Main cruise control harness from donor Honda Civic EX or Si
- Pedal assembly from donor Civic
- Steering wheel from donor Civic
- Charcoal canister from donor Civic
- Cruise control actuator assembly from donor Civic
- Wire stripper
- Metric socket set
- Electrical tape
- Phillips screwdriver
This article assumes that the driver's side dashboard panels have been removed to access the stock wire harness.
Step 1 – Mark the donor harnesses
The new main harness must be taken from a donor Honda Civic EX or Si with the cruise control feature.
- Lay out the main harness from the donor Honda Civic EX or Si.
- Use a razor blade to remove the wire looms and electrical tape from the wire harnesses.
- Strip and cut the appropriate wires, plugs, and connectors from the wire harnesses. Refer to Figure 2.
- Label all the plugs and connectors. Again, refer to Figure 2.
- Then, disconnect the negative terminal (black) of the battery.

Figure 1. Strip cruise control wires from the donor harness. 
Figure 2. Label the cruise control connectors accordingly.
Step 2 – Solder the brake light switch
The cruise control brake light has a 4-pin switch, while the non-cruise control brake light has a 2-pin switch.
- Cut the 2-pin male connector (black) from from your Civic's main harness.
- Solder a new 4-pin female connector in place of the 2-pin connector.
- Plug in the 4-pin male brake light switch to the 4-pin connector.

Step 3 – Wire the fuse box plugs
Strip these three wires from the donor harness:
- Black/Yellow: This wire is the power supply for the cruise control system.
- Light Green: This wire is the power supply to the cruise control module, which is the signal from the ON/OFF switch.
- Red/Blue: This sends a signal to the indicator lamp in the instrument panel.
Remove the blue and green connectors from the fuse box. Insert the stripped wire contacts from the donor harness into the blue and green connectors. Refer to Figures 5 and 6.
- Insert the Light Green and Red/Blue contacts into the blue connector.
- Insert the Black/Yellow contact into the green connector.

Figure 4. Insert Light Green and Red/Blue contacts into the blue fuse box connector. 
Figure 5. Insert Black/Yellow contact into the green fuse box connector.
Step 4 – Wire the cruise control switch and instrument panel
Wires from the dimmer switch connector must be spliced, and connected to the harness of the cruise control dash switch.
- Unplug the stock dimmer switch connector.
- Splice the Red, Black, and Red/Black wires. Then, snap the dimmer switch wires back into the dimmer switch connector.
- Connect the spliced dimmer switch wires to the harness of the cruise control switch.
The stock instrument panel wire harnesses must be swapped out with the donor Civic's wire harnesses. From the stock wire harnesses:
- Remove the Red/Back wire contacts from the blue instrument panel plug, and connect it to the donor wire plug.
- Remove the Yellow and Black wire contacts from the orange connector of the instrument panel plug. Then, connect it to the donor wire plug.
- Route the Red/Blue wire from the fuse block, and connect it to the instrumental panel plug.
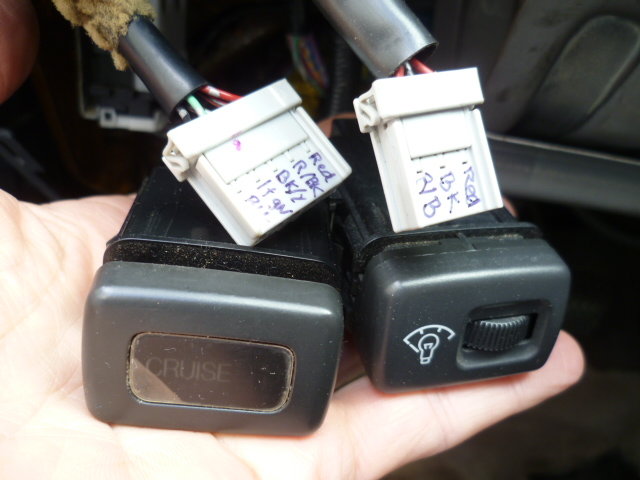
Figure 6. Wire cruise control with the dimmer switch. 
Figure 7. Splice the cruise control switch wires to the dimmer switch wires. 
Figure 8. Relocate a Red/Black wire to the green instrumental panel plug. 
Figure 9. Snake the new Red/Blue wire from the green plug to the connector on the fuse block.
Step 5 – Replace the pedal assembly
The cruise control system uses a special pedal assembly that has an extra lever for the actuator cable. To swap out the donor cruise pedal assembly with your Civic's stock pedals:
- Remove the driver's seat.
- Disconnect the brake switch assembly.
- Locate all of the 12mm mounting bolts, and remove them with your socket as well as your ratchet.
- Remove the old assembly.
- Install the new assembly, and tighten the 12mm mounting bolts.
- Reconnect the brake switch.

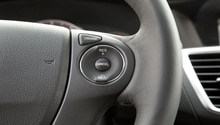
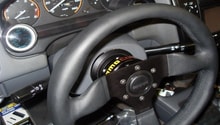
Step 6 – Replace the steering wheel
The stock steering wheel does not have the wiring required for a cruise control installation, so the SRS reel must be swapped out.
- Remove the three Phillips screws that hold the secure the horn cover.
- Use a socket, racket, and extension to remove the steering wheel mounting nut.
- Disconnect the SRS wire clip and horn wire clip.
- Loosen and remove the stock SRS reel.
- Replace the stock SRS reel with a cruise specific unit.
- Reconnect the SRS clip and horn wire clip.
- Install the new steering wheel with the cruise SET/RESUME switch.
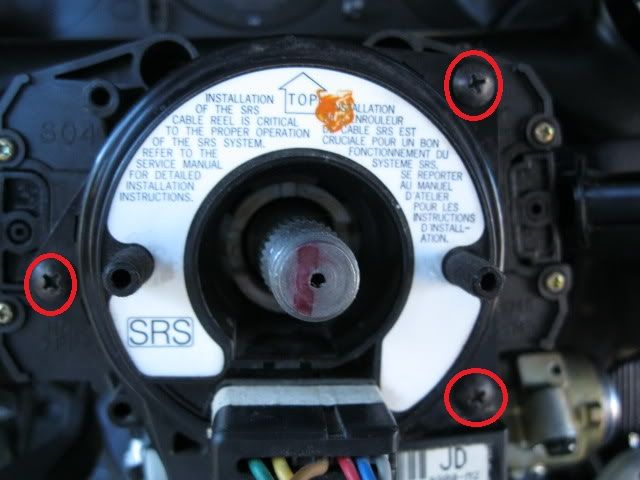
Figure 11. Loosen these screws to replace the SRS reel.
Step 7 – Connect the wire harnesses
- Take the completed cruise control sub-harness, and route it through dashboard of the car. Each harness plug should be labeled, so just match them with their corresponding plugs. Use Figures 2 and 12 for reference.
- Mount and connect the cruise control unit to the fuse box.
- Mount the brake and clutch switch to the pedal assembly.
- Connect the grounds.
- Splice the Blue/White wire of the vehicle speed sensor (VSS) an connect it to pin-22 on the C411 connector.
- Route the actuator wire harness through the firewall, and connect it to the fuse box.
- Plug the C411 and C501 connectors into the fuse box.
- Re-install the lower dash panels and trim pieces to hide the wiring.
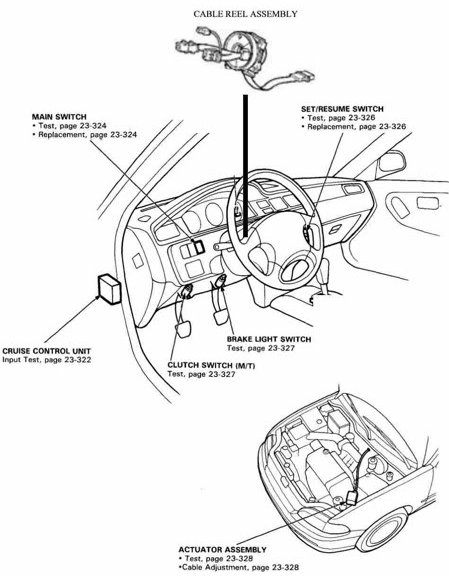
Figure 12. Cruise control wire harness diagram. 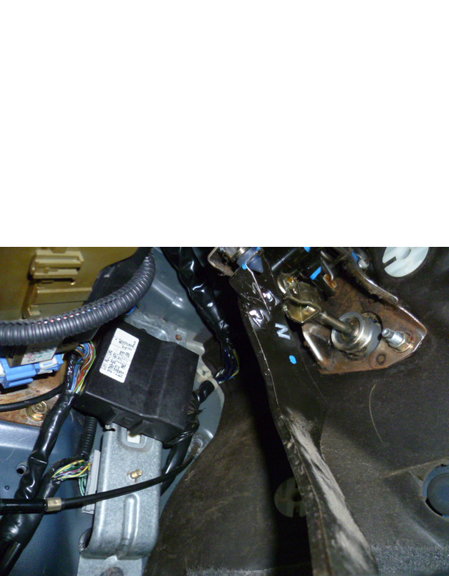
Figure 13. Mount the cruise control brain. 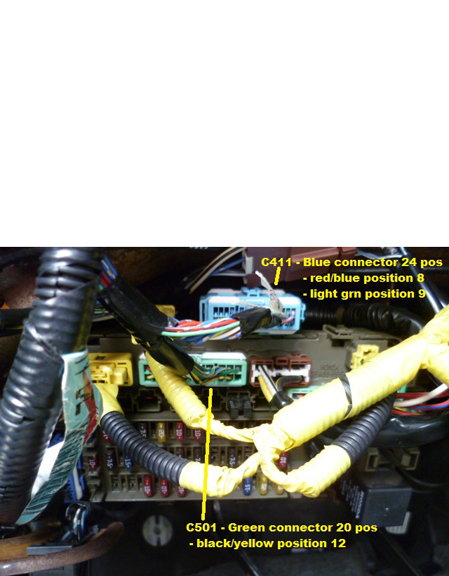
Figure 14. Connect the C411 and C501 fuse box plugs. 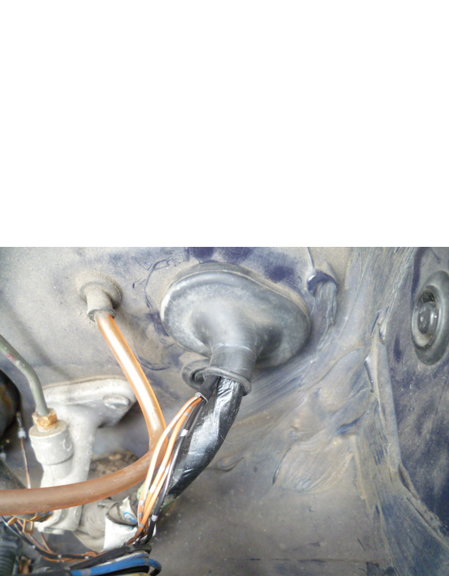
Figure 15. Route the actuator wires through the firewall.
Step 8 – Install the cruise control actuator
The actuator is a vacuum driven pump that sets the cruise control speed on and off. It uses a cable that connects to the gas pedal, sensing the vehicle's speed and adjusting the airflow inside the actuator to either increase or decrease the cruise level.
- Install a wire harness bracket for the charcoal canister.
- Mount the charcoal canister.
- Mount the actuator bracket.
- Secure the actuator assembly to the chassis with 10mm bolts.
- Route the actuator cable through the firewall, and into the new pedal assembly.
- Route charcoal canister vacuum lines to the actuator assembly as well as the intake manifold.
- Connect the actuator plug.

Figure 16. Install the cruise control actuator. 
Figure 17. Route the actuator cable to the pedal assembly. 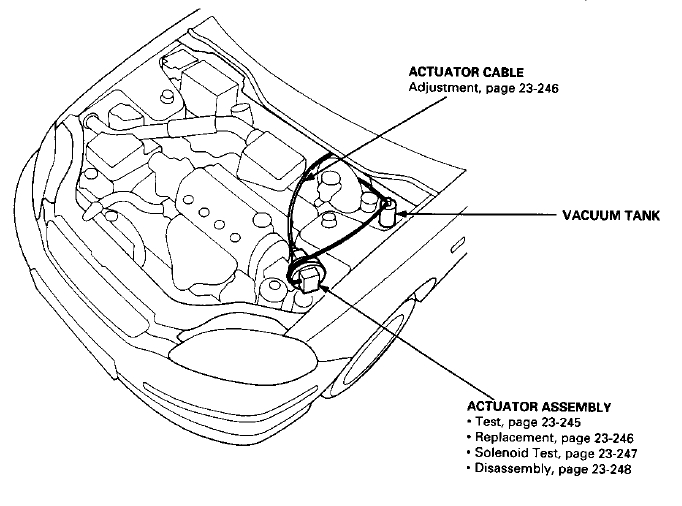
Figure 18. Route the cruise control vacuum lines. 
Figure 19. Connect the actuator plug.
Related Discussions
- DIY: Cruise Control into 6th Gen Honda Civic - Honda-Tech.com
- Why is My Honda Civic Cruise Control Not Working? - Honda-Tech.com
- Honda Civic (Manual): OEM Cruise Control Installation - Honda-Tech.com