Honda Civic: How to Install a Sway Bar
Stiffen up your ride by installing a sway bar into your Civic's suspension.
This article applies to the Honda Civic/Del Sol (1992-2000).
Has your steering responsiveness gone away? When you roll into a corner, do you feel like you are really going to roll into that corner? If so, it's time to add a sway bar onto your Civic. You will need to replace those lower control arms with ones that are compatible with a sway bar, but luckily, this is not a difficult job to do. The most difficult part may be locating a good used part at a salvage yard if you are really trying to pinch pennies. You will not need any special tools or equipment, just your time and a level garage floor.

Materials Needed
- Hydraulic jacks and jack stands
- 22 mm font sway bar
- Sway bar frame bushings and frame mounts
- Sway bar end link bushings
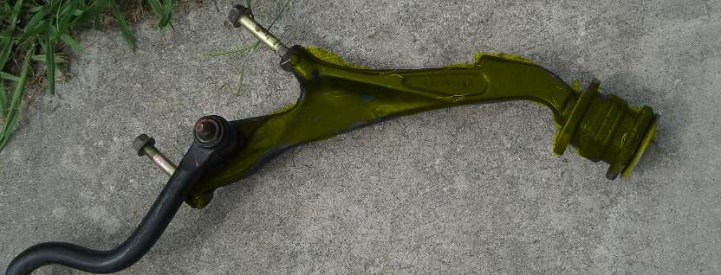
- Rear sections of front control arm
- Metric socket set and ratchet
- Torque wrench
- Silicone grease
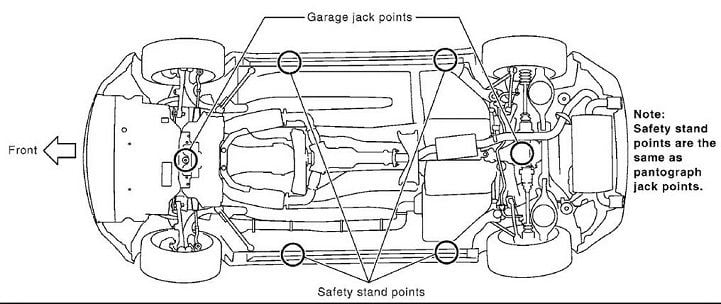
Step 1 - Jack up your car and remove your tires
- Break the lug nuts loose while the tires are still touching the ground.
- Lift the car using a hydraulic floor jack.
- Set the car onto jack stands and make sure they are in the correct stand points.
- If you do not have four jack stands, lifting the car from the front will suffice.
(Related Article: How to Jack Up Your Civic - Honda-tech.com)
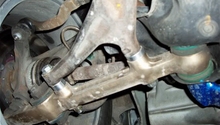
Step 2 - Remove rear section of the control arms
The sway bar is connected to two control arms. To replace the sway bar, the control arm does not need to be completely removed as it comes in sections; only the rear sections must be removed.
- There are five bolts securing each rear control arm in place.
- With sockets and a ratchet, remove the 17 and 19 mm bolts from the rear section of the control arm.
- Remove the old rear control arm section and replace it with a new one.
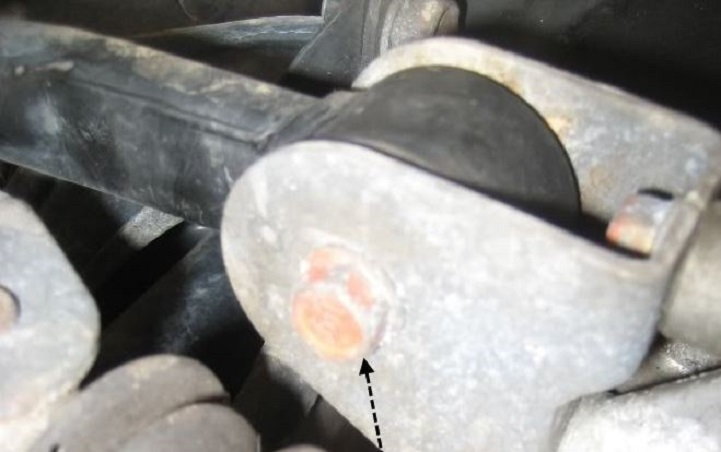
Step 3 - Remove the front stabilizer bolt
A few components will be in your way as you install the sway bar. These will be removed in Steps 3 through 5.
- First, on the front stabilizer section of the shift linkage, there is a 12 mm bolt.
- Remove the bolt from the stabilizer with your socket and ratchet.
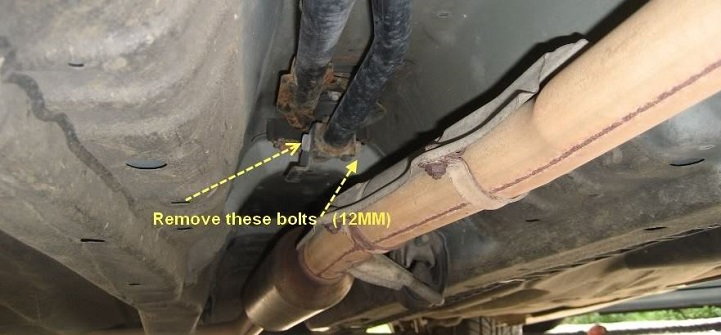
Step 4 - Unbolt rear section of the linkage
There are two bolts that secure the rear section of the shift linkage to the shifter itself.
- With your socket and ratchet, remove the two 12 mm bolts.
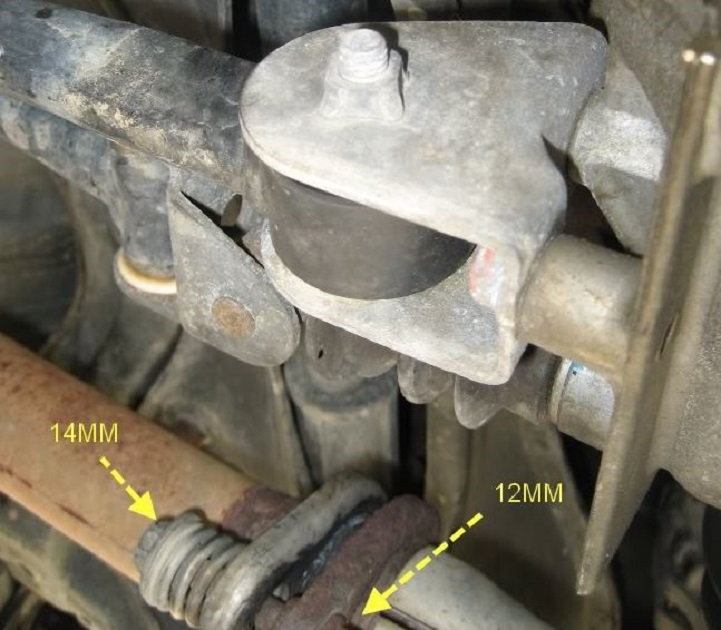
Step 5 - Remove the bolt from the bottom of the exhaust
There are two bolts securing the two front sections of the exhaust.
- With your sockets and ratchet, undo the 12 and 14 mm bolts.
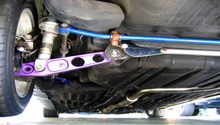
Step 6 - Place sway bar in the correct position
The sway bar has to snake around the objects that you have just unbolted for clearance.
- Place the sway bar above the exhaust and over the shifter sections.
- Make sure the hump in the center of the sway bar is pointing up.
- Make sure the end links of the sway bar are pointing forward as there is only one way to install them onto the control arms.

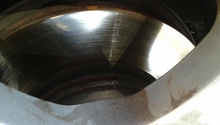
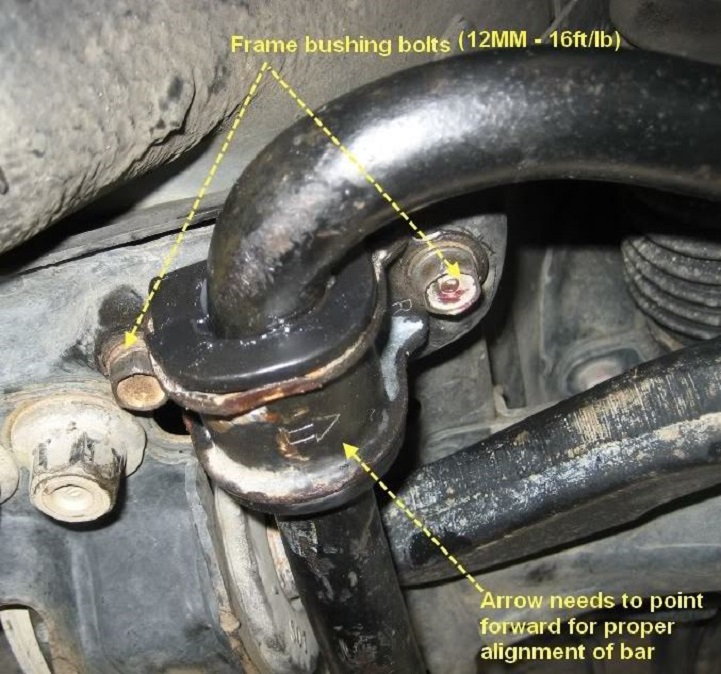
Step 7 - Install sway bar frame bushings
Before installing the sway bar, apply a large amount of silicone grease to the inside of each bushing.
- Place the frame bushing brackets over the bushings and line up the holes in the bracket with the holes on the sub-frame.
- Make sure the arrow on the brackets point toward the front of the car.
- Tighten the two 12 mm bolts to the proper 16 ft-lbs of torque.
- Re-install and tighten the stabilizer, shifter, and exhaust bolts that were removed in Steps 3, 4, and 5.
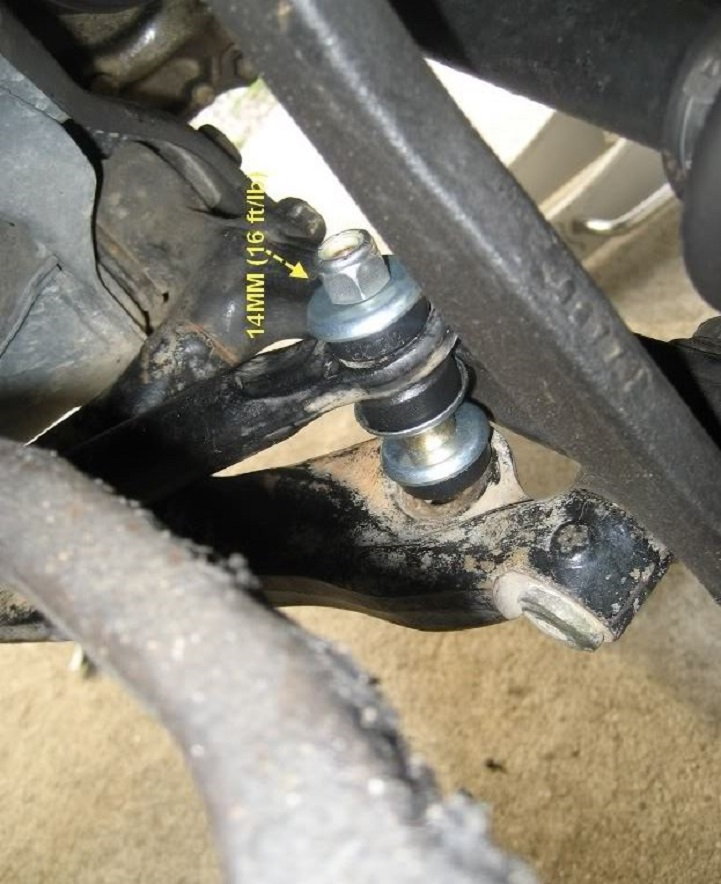
Step 8 - Install end link kits to the sway bar ends
- Place the end link kits onto the ends of the sway bar.
- Hand-tighten the 14 mm bolts only.
- Lower the car, install the wheels, and tighten the lug nuts.
- Then, tighten and torque down the end links bolts of the sway bar to 16 ft-lbs of torque.
Featured Video: How to Install Front Sway Bar
Related Discussion and Site
- DIY: Budget Swaybar Installation '96-'00 Civic - Honda-tech.Com
- EK Swaybar Compatibility - EK9.org