Honda Civic: How to Change Your Oil
Almost any driver can perform this on their own if they have the necessary materials and hydraulic jacks. Read on to learn how to change the oil on your Civic.
This article applies to the Honda Civic (1992-2000).
Honda recommends an oil change when the maintenance light comes on, or after one year—whichever comes first. In tough driving conditions with a lot of stop-and-go traffic, the maintenance light will come on after about 6,000 miles, which indicates 15 percent of oil life remaining.

Materials Needed
- Hydraulic jacks and jack stands
- 17 mm box end wrench
- 5W-30 engine oil (4 quarts)
- Funnel
- Oil drain plug gasket
- Oil drain pan
- Oil filter wrench
- Rags
- Engine flush
- Engine restore
Step 1 – Start the engine and jack up the car
Warm up the engine to the operating temperatures. This helps to suspend any engine contaminants in the old oil. While the engine is warmed up, prepare and position the hydraulic floor jack and three ton jack stands. Then, turn off the engine.
- To jack up your car, first you will need to pull the parking brake.
- Underneath the front passenger's side, place a jack under the jacking point of the frame, which is also called the pinch weld (the thicker metal part just behind the front wheel).
- Lever the jack until you have enough room to work comfortably under the car.
- Place a jack stand under the pinch weld behind the jack.
- Slowly lower the car onto the jack stand. Leave the hydraulic floor jack underneath the frame for added support, and be sure it is not lifting the car above the jack stand.
- Repeat these steps with the driver's side of the car.
Figure 1. Hydraulic floor jack under the pinch weld. Figure 2. Insert the jack stand next to the hydraulic jack.


Pro Tip
Look at your owner's manual for instructions to lift your car, and the jacking locations.
(Related Article: How to Jack Up Your Civic - Honda-Tech.com)
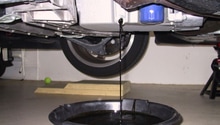
Step 2 – Drain the old oil
- Remove the oil cap on top of the engine. This will help the old oil to completely drain.
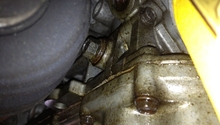
- Underneath the car (closer to the engine than the transmission) is a 17 mm hex oil drain plug, facing the rear of the car. Place the oil pan under this plug.
- Use a 17 mm box end wrench to loosen the drain plug 3/4 of a turn.
- Remove the drain plug by hand, and then allow the oil to drain into the pan.

Pro Tip
Observe the oil for shiny specks. Metal flakes in the oil indicates a serious problems with the internals of your engine.
Step 3 – Clean the oil drain plug and replace gasket
- While the oil is draining, wipe off the drain plug with a clean rag. Then, remove the old drain plug gasket.
- Place a new gasket onto the oil drain plug, and make sure it fits around the plug threads.
- Once the oil has slowed down to a drip, wipe off the area around the drain plug with a clean rag.
- Apply a light coat of fresh engine oil to the threads of the oil drain plug to ensure it seals properly.
- Using the box end wrench, re-install the oil drain plug tightened to a snug fit.

Pro Tip
Alternatively, you can use a torque wrench to verify that the plug is tightened to its correct specification.
Step 4 – Lower the car and replace oil filter
Jack up the car with the hydraulic jack, so it is no longer resting on the jack stand. Remove the jack stand, then slowly lower the car to the floor.
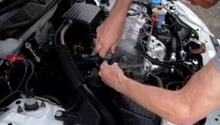
- To replace the oil filter, first locate it. On the firewall side (halfway down the engine block) is where the oil filter is located.
- Using the oil filter wrench, remove the old oil filter by rotating clockwise.
- Before re-installing the new oil filter, apply a light coat of fresh oil around the rubber ring and threads to ensure it seals properly.
- Install the new oil filter and tighten it to a snug fit.
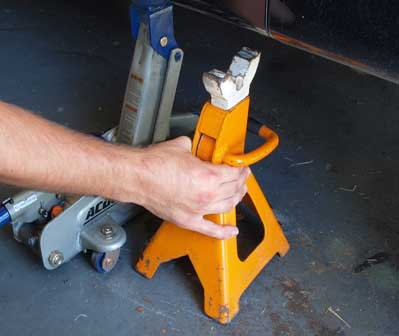
Figure 5. Removing the jack stand. 
Figure 6. Apply fresh engine oil to the oil filter. 
Figure 7. Install the new oil filter.
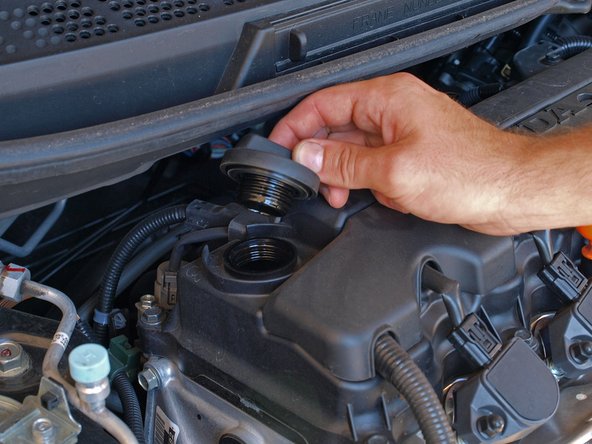
Step 5 – Pour in the new oil
- On top of the engine, remove the oil filter cap.
- insert the funnel into the filler hole to prevent spills.
- Pour 4 quarts of 5W-30 engine oil (preferably full-synthetic) into the funnel.
Figure 8. Remove the oil filler cap. Figure 9. Pour in the new engine oil. Figure 10. Check engine oil level.


Pro Tips
- Look in the owner's manual for the acceptable weights of engine oil for your car.
- Refer to the orange oil dipstick to determine the oil level in the engine. The top of the crosshatched area is the maximum amount of oil, while the bottom of the crosshatch is the minimum.
- Take your old oil and oil filter to a recycling facility. Most auto parts stores and repair shops accept these at no charge.
Related Discussions and Site
- DIY Oil Change - Honda-Tech.com
- DIY Magnetic Oil Change Plug - Honda-Tech.com
- Honda Motor Oil FAQs - Owners.Honda.com