Honda Accord: Why is My Car Leaking Oil?
Your car may be leaking for several reasons. Read on to diagnose the cause of an oil leak and what you can do to fix it.
This article applies to the Honda Accord (1990-2002).
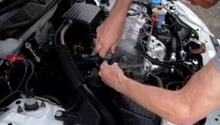
If you own a car, then you've already encountered—or will one day encounter—an oil leak. Most of the time, you can identify and fix the problem in under an hour, but in some cases it can take longer. Instead of taking your car to your mechanic after seeing a leak, consider trying to fix it yourself. It might not an easy fix, and how much you'll pay depends on why your car is leaking.

Materials Needed
- Car jack and jack stands
- Fluorescent leak detection dye and fluorescent light
- Oil catch pan
- Shop rags or towels
- Four or five quarts of oil
- Oil filter and wrench
- 10, 12, 14, and 17 mm sockets, extension, and ratchet
- 3/8" wrench
- 5/8" to 3/8" spark plug sockets
- Breaker bar
- Flat head and Phillips screwdriver
- Hondabond or RTV sealant
- Pliers
- PCV valve with gasket
- Torque wrench
- 5/8" to 3/8" spark plug sockets
- Valve cover gasket kit
- Distributor cap O-ring
Pro Tip
You won't need all of the materials for each of these potential fixes.
Find the Source of the Leak
- If you don't visibly see where the leak is coming from, add fluorescent dye to your oil reservoir and let the engine idle for 10 to 15 minutes. Shine a fluorescent light under the hood of your car and underneath the engine. The source(s) of the oil leak should glow.
- Another way to diagnose an internal oil leak is to spread baby powder on and around your engine. Drive for 10 to 20 minutes. Then park your car, turn the engine off, and open the hood. Leaking parts should stain the powder, and help you more easily identify where the leak is coming from.
Step 1 – Change the oil and oil filter
A leak beneath your car or an oil stain on the ground might indicate that your oil filter may need to be replaced. Fix this simply by changing your oil, and installing a new oil filter. Expect to pay between $20 to $30 for five quarts of oil and a new filter.
- Park your car on a flat surface, jack it up, and place it on the jack stands.
- Open the hood to remove the oil filler cap and dipstick.
- Position the oil catch pan under the drain plug.
- Using the 17 mm wrench, remove the oil pan drain plug. Make sure the oil is draining into the catch pan.
- Once the oil stops draining, replace the drain plug.
- Use the oil filter wrench to remove the old oil filter. Oil will spill out, so have a container ready.
- Lubricate the gasket of the new oil filter, and install it. Be sure to snugly tighten it with the oil filter wrench.
- Add the engine oil and insert the dipstick. Most Accords need between four to five quarts of oil.
- Lower the car, turn it on, and check for leaks.
Related Articles
- How to Change Your Oil - Honda-Tech.com
- How to Jack Up Your Accord - Honda-Tech.com
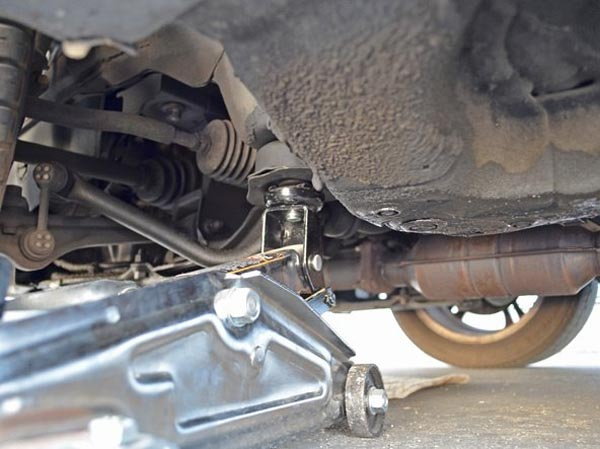
Step 2 – Replace the oil pan gasket
Not all leaks are visible on your driveway. A leaking oil pan gasket can make a car's undercarriage oily, but the oil may not be enough to leak to the ground. If you notice that the leak is coming from this gasket, it will need to be replaced. This solution will take the most amount of time because the entire oil pan underneath the engine block will need to be removed, cleaned, and re-installed just to replace the gasket. Expect to pay between $20 to $30 for a new oil pan gasket. The labor cost for replacing the oil pan can be between $90 to $150.
- Park your car on a flat surface, jack it up, and place it on the jack stands.
- Open the hood to remove the oil filler cap and dipstick.
- Position the oil catch pan underneath the drain plug.
- Using the 17 mm wrench, remove the oil pan drain plug. Make sure all of the oil drains into the catch pan.
- Attach a new washer to the drain plug and bolt it back on to the oil pan.
- Lubricate the six front and rear exhaust pipe nuts with WD-40.
- Use the 14 mm socket, extension, and breaker bar to remove these six nuts.
- Use the 12 mm socket and ratchet to remove the lower bracket nuts from the front exhaust pipe. You can find this just behind the oil pan.
- Remove the front exhaust pipe. You may need to use the flat head screwdriver to detach the pipe from the bracket.
- Use the 14 mm socket, extension, and breaker bar to remove the bolts from the front and rear beam.
- Use the 10 mm socket to remove the bolts from the flywheel cover. If your Accord has an automatic transmission, you also need to remove the three 12 mm bolts for the transmission shifter cable cover.
- Use the 10 mm socket, extension, and ratchet to remove the bolts and nuts on the oil pan. Once you remove these, the oil pan should easily detach. If not, it might require a little force to remove.
- Clean the oil pan and the block surface. The metal rings on the block should not stick out, but if they do, this may be cause for an oil leak.
- Spray adhesive to the edges of the block and on the gasket. Then, apply Hondabond to the curved edges and small flat sides of the gasket.
- Attach the gasket to the block, aligning all the holes.
- Apply Hondabond to the curved edges and small flat sides of the oil pan.
- Attach the oil pan. Tighten all nuts and bolts, torquing each to 10 foot-pounds.
- Reattach the front and rear beam, the flywheel cover and the automatic transmission shifter cable cover.
- Replace the front exhaust pipe, attaching the six front and rear nuts and the lower bracket nuts.
- Add four to five quarts of engine oil, and start the engine to confirm there is no leak.
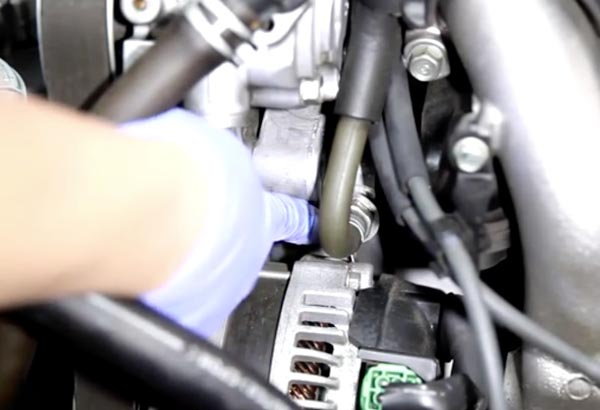
Step 3 – Replace the PCV valve
Not all leaks are visible under your car, so you should also check under the hood. A clogged PCV valve may not only cause the oil to leak, but it can also cause a variety of other problems from blue exhaust smoke to loss of power. It's a simple fix to do yourself, and the part costs between $20 to $30.
- Locate the PCV valve. It is next to the power steering pump.
- Use pliers to open the clamp. If the clamp does not open, use the pliers to break the seal on the hose connected to the PCV valve.
- Pull out the valve, and make sure the washer comes out with it.
- Replace it with a new PCV valve, putting the washer in first.
- Tighten by hand to prevent the threads from stripping. With the torque wrench, tighten to 33 foot-pounds. Make sure the washer is crushed.
- Reattach the hose to the PCV valve, and use a wrench to tighten the clamp.
- Make sure the hose isn't loose before closing the hood.
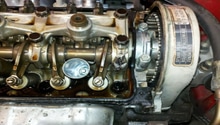
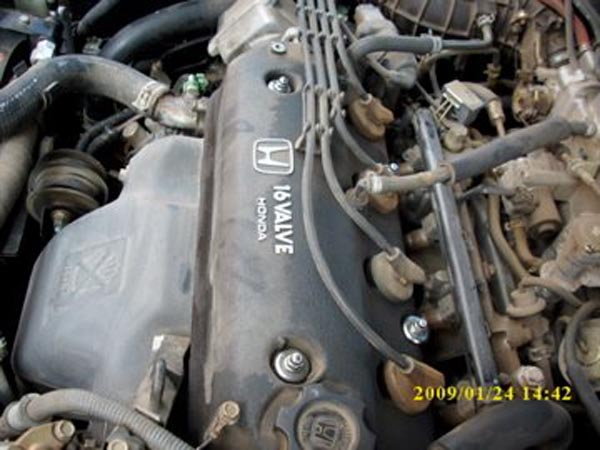
Step 4 – Replace valve cover gasket
If you see oil leaking from the valve cover, you may have a faulty gasket. If you choose to repair this yourself, expect to pay between $30 to $40 for a new gasket. If you take it to a repair shop, expect to pay over $200 for labor.
- Park your car and let the engine cool for 15 to 30 minutes.
- Open the hood and locate the valve cover.
- Disconnect everything mounted to the valve cover. This includes the PCV valve, hose, throttle cable, cruise control actuator, spark plugs, cables, breather hose, air clean assembly, exhaust gas recirculation connectors, variable valve timing, lift electronic control, solenoid switch connector, and harness. A 10 mm socket and ratchet could be used to disconnect most of these hoses and connectors.
- Remove the ignition coil wires and harness.
- Use a 10 mm socket to remove the nine cylinder head bolts. Then remove the valve cover.
- Remove the old gasket and replace it with a new one. Replace the valve cover and fasten the nine bolts.
- Reconnect everything you disconnected. This includes the ignition coil wires, harness, cylinder head bolts, the PCV valve, hose, throttle cable, cruise control actuator, spark plugs, cables, breather hose, air clean assembly, exhaust gas recirculation connectors, variable valve timing, lift electronic control, solenoid switch connector, and harness.
- Add oil and let the engine run. Observe the new gasket, and confirm that there are no more leaks.
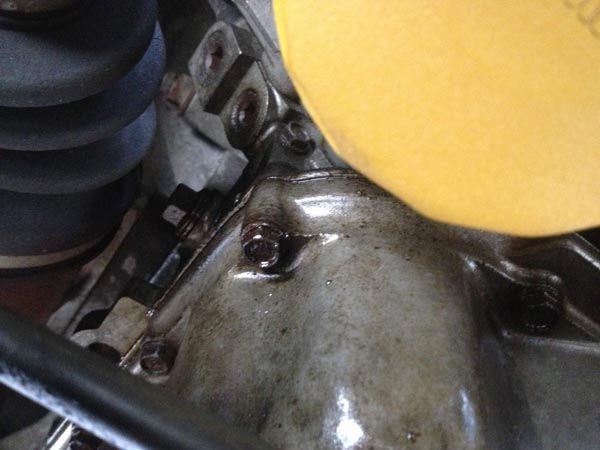
Step 5 – Replace the distributor cap O-ring
If the leak is coming from your distributor cap, this may indicate a faulty O-ring. Expect to pay less than $10 for a new one.
- Lift the hood, and follow the cables coming from the spark plugs to distributor on engine block.
- Remove the spark plug wires from distributor cap. Be sure to note where each wire goes before removal. This will help during re-installation.
- Disconnect the vacuum hoses, the primary wire, and the high-tension wire. Label each part before removal.
- Use a flat head screwdriver to disconnect the external wires.
- Use a wrench to remove the mounting bolt, and pull the distributor out of the cylinder head. Note that the number of mounting bolts varies depending on your car’s model year.
- Remove the O-ring from the distributor shaft.
- Grease the new O-ring with the engine oil, and install it.
- Replace the distributor in the cylinder head, attach the mounting bolts and use the wrench to tighten them.
- Reattach the external wiring, vacuum hose, and spark plugs.
- Tighten the distributor bolts. Start the engine and confirm that there are no more leaks.
Featured Video: How to Fix Engine Oil Leaks
Related Discussions, Video and Site
- 1996 Honda Accord Oil Leak - Honda-Tech.com
- Car Suddenly Leaking Oil - Honda-Tech.com
- 1999 Accord Oil Leak Near Dipstick - Honda-Tech.com
- Car Won't Hold Oil - Honda-Tech.com
- Oil Leak Near Distributor - Honda-Tech.com
- How To Resolve An Internal Oil Leak - Honda-Tech.com
- 1994 Honda Accord EX Slow Oil Leak - Honda-Tech.com
- Accord Leaks Oil After Shut-Off - Honda-Tech.com
- Possible Head Gasket Oil Leak - YouTube.com
- Honda Accord Porous Engine Block Casting May Cause Oil Leak - RepairPal.Com