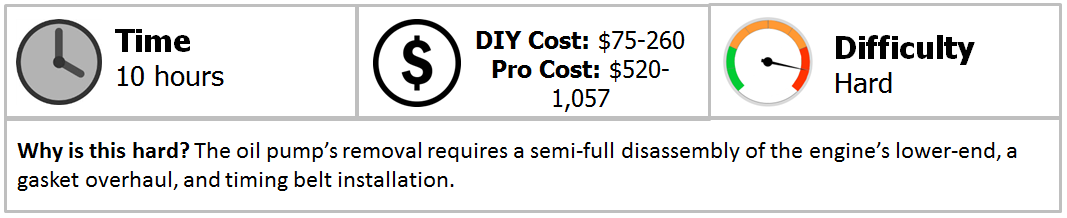
Honda Accord: How to Replace Your Oil Pump
The oil pump serves one purpose: to circulate lubrication inside the engine. When it fails, the entire engine can be damaged, resulting in a complete (and expensive) overhaul. Fortunately, when an oil pump fails, the car's computer will notify you and allow a chance to replace the pump. This article explains how to do just that.
This article applies to the Honda Accord (1990-2002).
When an oil light turns on, the right thing to do is to turn off the car immediately and tow the car home. Towing a car may sound like overkill, but when an engine is starved of oil, its life expectancy drops to near zero. The oil pump circulates oil around the engine's internal components, such as the pistons, connecting rods, and crankshaft. When the oil pressure drops, the metal parts begin to rub on top of each other, causing things to knock and clack. The sounds end with either a hole in a cylinder wall, fried piston rings, or bent valves.
Replacing an oil pump is no common task and involves removing the timing belt, balancer shaft, oil pan, and oil screen. Every component removed requires its gaskets to be replaced and sealed. This article provides the information required for those few who feel they can tackle an oil pump replacement on their Honda Accord.
Materials Needed
- Metric socket set with 3/8 inch ratchet
- Feeler gauge
- Handle driver w/attachments
- Breaker bar
- Balancer shaft lock-pin
- Oil pan
- Screw driver
- Gasket sealer
- Straightedge
Step 1 – Prepare the engine
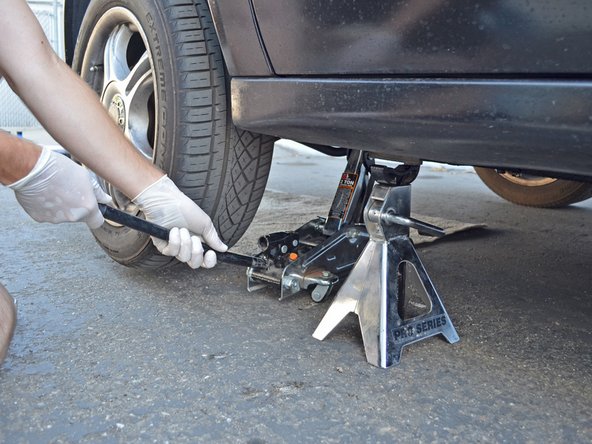
First, remove the engine oil. Place a pan under the engine and loosen the 17MM drain bolt. Wait ten minutes, then re-install the drain bolt. Safely raise the vehicle and be sure to use the proper jack points found under the chassis. Place a 19mm socket on the crankshaft pulley and spin it clockwise until the engine reaches top-dead-center.
(Related Article: How to Jack Up Your Accord - Honda-Tech.com)

Figure 1. Drain the oil. Figure 2. Raise and secure the car.
Pro Tip
To drain the oil faster, remove the oil cap from on top of the engine.
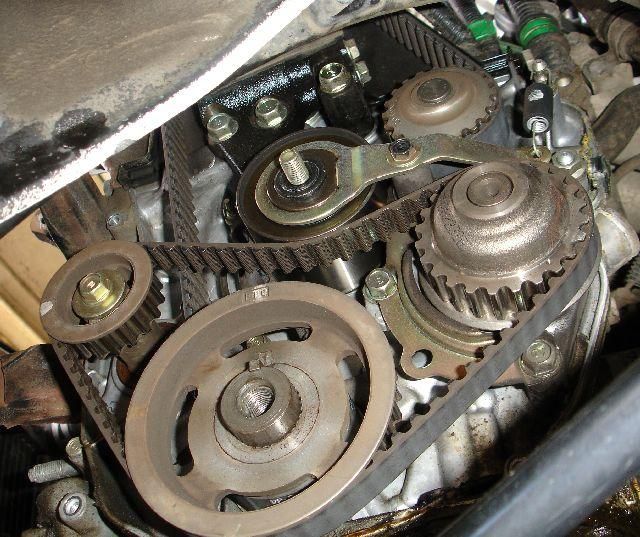
Step 2 – Remove the timing belt assembly
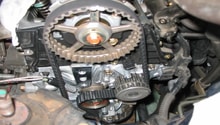
Carefully mark the proper timing location on the belt, then remove it along with the balancer belt, timing drive pulley, and balancer drive pulley.

Figure 3. Each of these pulleys will be removed. 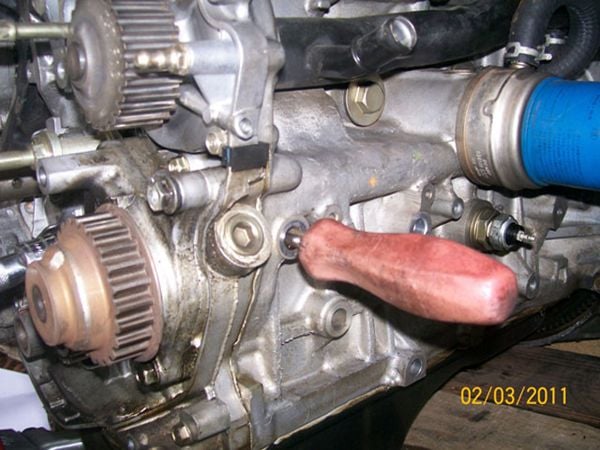
Figure 4. When removing the balancer, use a lock-pin tool to keep it in place.
Pro Tip
The engine's timing belt should have its location marked to avoid any ignition issues during re-installation.
Step 3 – Remove the oil pan and pump
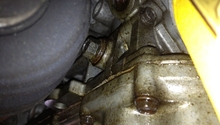
The oil pan has several 10MM nuts and bolts that secure it to the engine. Remove each one and carefully lower the oil pan. The oil pan gasket may be loose enough to fall off the mating area on the engine. If not, take a small pry bar and wedge it from the block. Remove the oil strainer, then locate all the mounting bolts on the pump. Loosen the hardware and remove the pump from the engine block.

Figure 5. Remove the oil screen and pan from the engine. 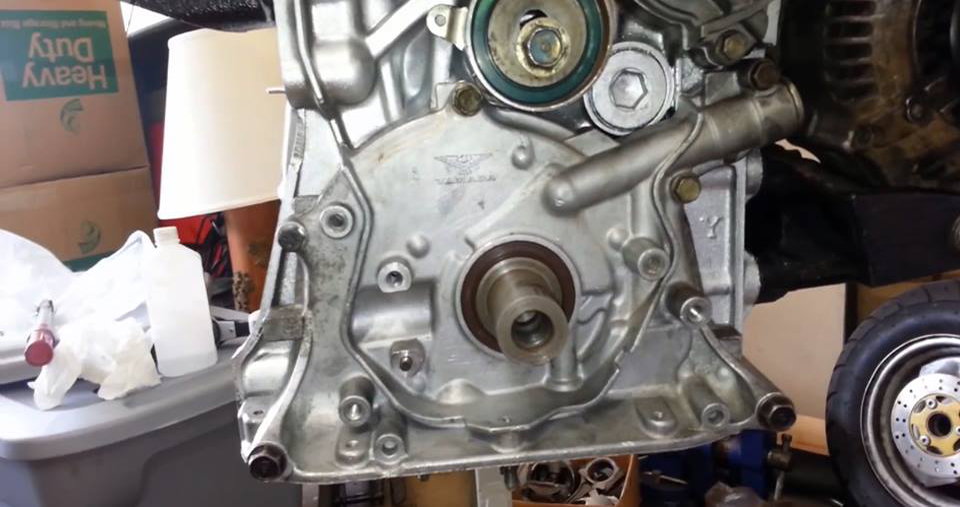
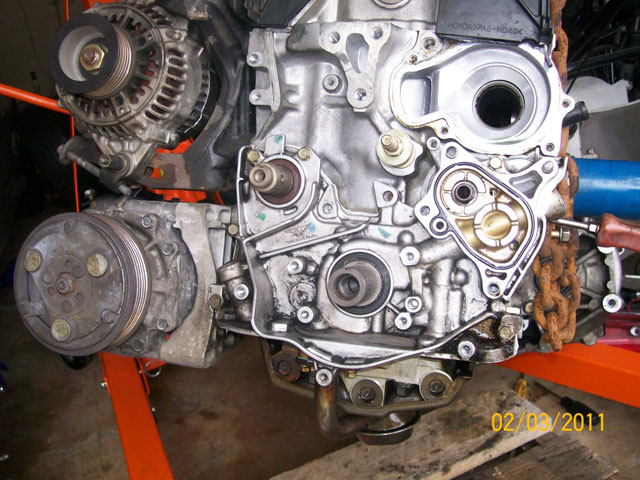
Figure 6. Remove the mounting bolts from around the pump.
Step 4 – Oil pump inspection
Unless you are certain the oil pump has failed, inspect the oil pump's inner and outer rotor-to-radial clearance. Verify that they are between .02 to .16MM. Check the housing-to-rotor axial clearance and make sure it falls in between .02 to .07MM. Also, check for scoring on the pump assembly. If one or more of these problems are apparent, continue with the oil pump replacement.

Figure 7. Check the clearance of the inner and outer rotors. 
Figure 8. Check the housing-to-rotor axial clearance.
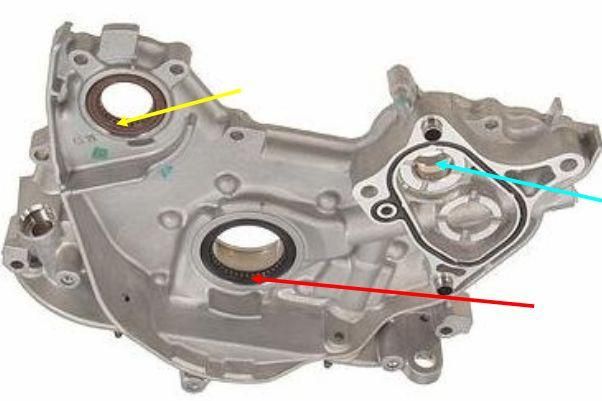
Step 5 – Install new gasket seals
Some oil pumps may have new gaskets pre-installed; if that is the case, then skip this step. If not, use a handle driver and hammer to install the new oil gaskets on the pump. Tap the driver with the hammer until every gasket sits flush on the pump.
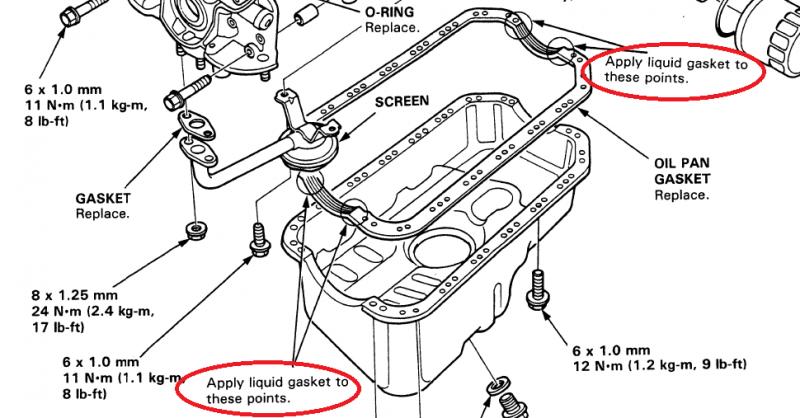
Step 6 – Apply liquid gasket to the pump
Locate the outer ridges of the oil pump and apply the liquid gasket.

Step 7 – Mount the oil pump to the engine
Before threading the bolts into the block, apply a thread-lock compound. Replace the O-rings that mount in between the pump and engine block. Then, replace the gasket for the oil strainer tube and mount it back onto the pump.
Step 8 – Install the timing balancer, driven gear and gear case
Hold the balancer shaft still and mount the timing balancer belt-driven pulley. Before mounting the balancer-driven gear to the pump, apply molybdenum disulfide to its thrust surfaces. Hold the rear balancer shaft with a lock-pin and install the driven gear. Align the gear case groove with the oil pump assembly. Continue to hold the rear balancer with a lock-pin and install the gear case onto the dowel pins. Check and make sure the groove on the pulley properly aligns with the pointer on the oil pump.
Step 9 – Install the oil pan
Clean the oil pan mating surface thoroughly to remove the older gasket material. Install a new oil pan gasket and apply an RTV sealer on the pump side of the gasket. Install the oil pan and tighten the bolts in a criss-cross pattern. Pour oil into the engine and turn the car on. Congratulations, you have successfully replaced your engine's worn-out oil pump!
Featured Video: Oil Pump Install Honda B-series
Related Discussions and Video
- Auto Repair & Maintenance: How to Check if an Oil Pump is Bad - Youtube.com
- Please Verify Oil Pump Replacement Steps - Honda-Tech.com
- Oil Pan Gasket Woes - Honda-Tech.com