Honda Accord: How to Replace Your Cat-Back
A cat-back exhaust is one of the easiest ways to upgrade and enhance your Accord's performance. Check out this step-by-step guide to walk you through the process of installing one.
This article applies to the Honda Accord (1990-2002).
Honda enthusiasts replace their stock exhausts for basically two reasons: either they want to add power to their ride, or they are looking for a more aggressive sound. A cat-back exhaust is popular because it's generally not too difficult to install or too expensive. It's also a must if you are serious about performance in general because it's less restrictive than a stock setup, and allows the engine to "breathe" more efficiently, adding power and speed to your car. Just as appealing, this is a job you can do yourself with basic tools and no extensive mechanical ability or know-how. Keep reading, and this article will show you how it is done.

Materials Needed
- Hydraulic jack and jack stands
- 10mm, 14mm sockets and ratchet
- Assistance from a friend
Step 1 – Prepare the car for exhaust removal
As a safety precaution, let the exhaust cool completely before installing a new one.
- Disconnect the negative terminal (black cover) of your car battery. This is to ensure the car reprograms itself to accommodate the new exhaust.
- Jack the car up on all four corners of the frame, and set it down with jack stands.
(Related Article: Honda Accord: How to Jack Your Car Up - Honda-Tech.com)
Step 2 – Remove the stock exhaust system
When removing your stock exhaust system, work your way from the back (exhaust tip, muffler, and rear exhaust pipe) to the front (catalytic converter, exhaust down pipe, and manifold).
- With a 10mm socket and ratchet, remove the three bolts securing the rear exhaust pipe to the muffler.
- Then, remove the muffler and rubber flange, which seals the connection between the exhaust muffler as well as the rear exhaust pipe. Set the rubber flanges aside as they will be used for the new exhaust.
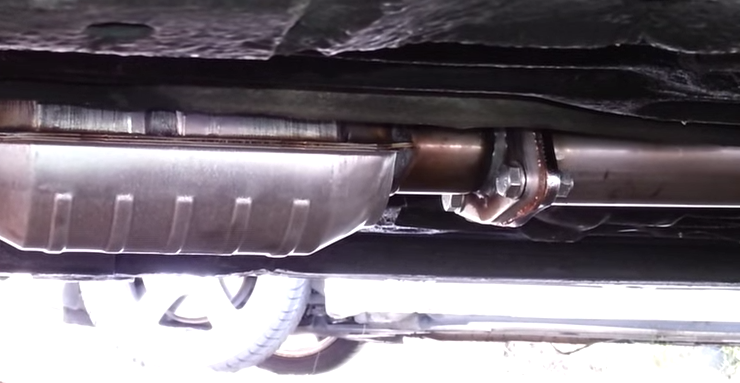
- With a 14mm socket and ratchet, remove the three bolts connecting the rear exhaust pipe to the converter.
- Remove the rubber flange in between the pipe and converter. Set it aside.
- Lift the exhaust system off the hangers if necessary, and set it aside for the new exhaust to be installed.
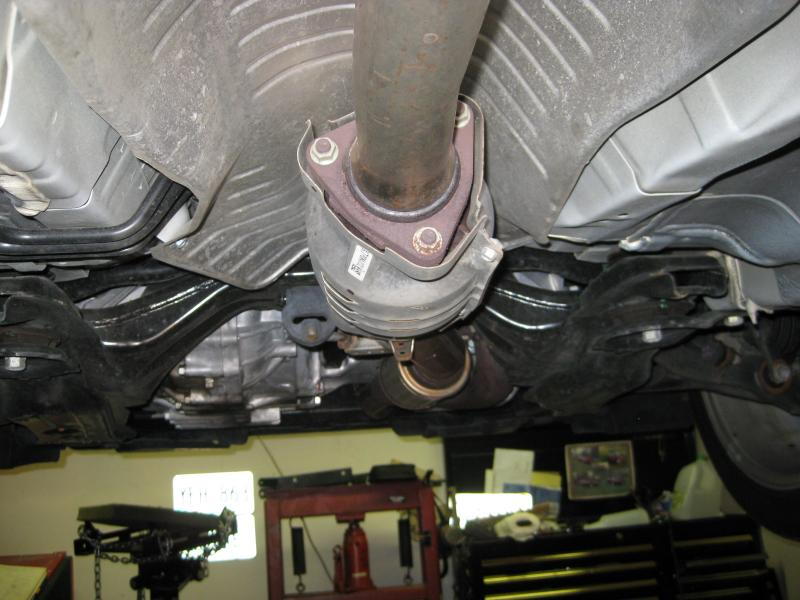
Figure 1. Three 14mm bolts connect the exhaust pipe to the catalytic converter. 
Figure 2. 1996 Honda Accord 4-door LX exhaust system diagram.
Pro Tip
Depending on your Accord's model year, the stock exhaust system may have various sizes for some parts and components. However, these steps are the same as most exhaust systems have the same components.
Step 3 – Install the new cat-back
To install the new cat-back exhaust, simply follow the steps above in reverse order. This time, work your way from the front of the car to the rear.
- Lift and rest the new rear exhaust pipe onto the hangers.
- Place the rubber flange in between the converter and exhaust pipe. Bolt them together with the 14mm socket and ratchet.
- Place the other rubber flange in between the rear exhaust pipe and the muffler. Bolt them together with the 10mm socket and ratchet.
- Re-inspect the cat-back, and make sure all bolts are fully secure.
- Lower the car. Finally, confirm that the exhaust sounds and runs smoothly.
Related Discussions
- Honda Accord MagnaFlow Cat-Back Exhaust - Honda-Tech.com
- Honda Accord Cat-Back Vs. Axle-Back Exhaust - Honda-Tech.com
- Labor Costs for Exhaust Installation - Honda-Tech.com