Honda Accord: How to Replace the Fuel Filter
If it is easier to walk up a hill than to drive up, you may have a bad fuel filter. Read on to learn how to replace the fuel filter on your Honda Accord.
This article applies to the Honda Accord (1990-2002).
For Honda owners who don't perform regular maintenance, one of the items that eventually needs to be replaced is the fuel filter. But it's not as bad as it sounds. If you are overdue for this task, you may notice that under tougher and steeper road conditions your Accord might feel sluggish. A professional can do this job pretty quickly, but at a price. It may take you a bit longer, but you can do it for a fraction of the cost. Choose either option, but remember that running with a bad fuel filter will eventually lead to clogged fuel injectors at best. At worst, it may lead to a destroyed fuel pump and fuel system.

Materials Needed
- New fuel filter
- 10, 14, and 17 mm flare nut wrenches
- Fluid catch pan
- Shop rags
Warning
Perform this job in a well-ventilated area because the gas fumes may be harmful.
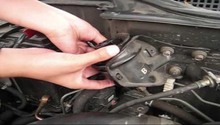
Step 1 – Disconnect battery and relieve the fuel system pressure
Disconnect the negative (black) terminal from the battery. Then, remove the gas cap to relieve gas pressure from the fuel system.

Figure 1. Disconnect negative battery terminal before starting. 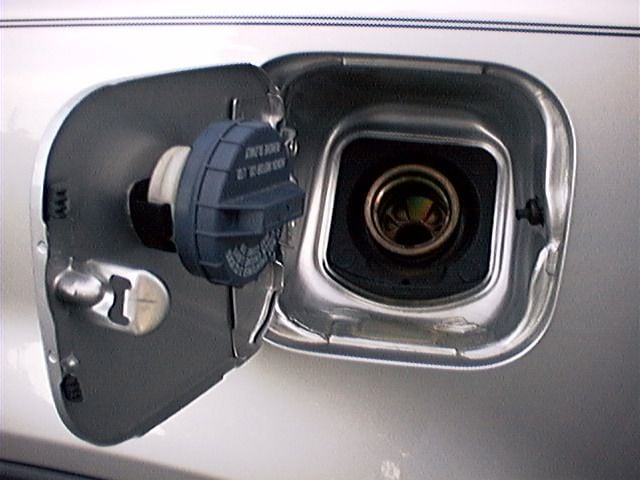
Figure 2. Remove gas cap to relieve fuel system pressure.
Pro Tips
- To relieve the fuel system pressure, you can also loosen the gas pressure bolt at the end of the fuel rail. If you use the bolt method, make sure that you re-tighten it once the job is finished.
- If you don't relieve the pressure before starting, it will be more difficult to remove or unplug all the necessary parts.
Step 2 – Locate the fuel filter
The fuel filter location is different on certain model years.
- 1990-1994: Accord fuel filters are located on the passenger's side firewall.
- 1995-2002: Accord fuel filters are located on the rear of the engine, near the brake master cylinder.
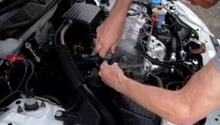
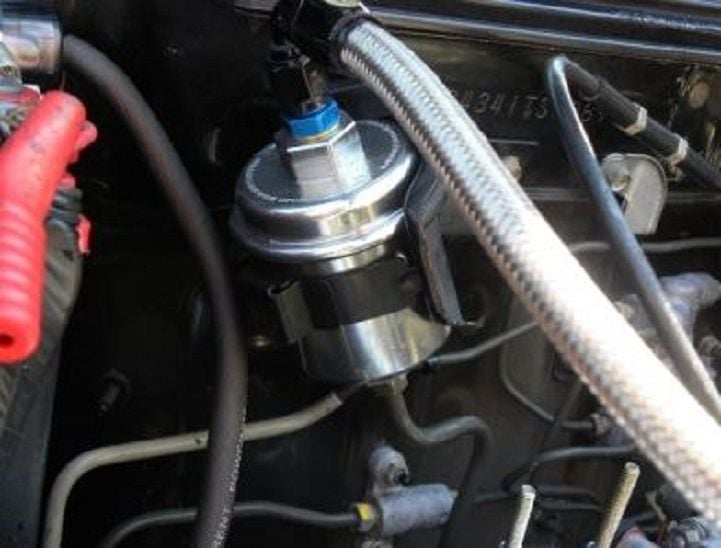
Step 3 – Remove the lower fuel line and the upper fuel line Banjo bolt
Once you have located the fuel filter, use the 14 mm wrench and rotate counterclockwise to loosen the nut from the lower fuel line. Place the fluid catch pan under this area to catch any spilled gas. Once the nut is removed, pull the lower fuel line off and set it aside. Then, use the 17 mm flare nut wrench to loosen the Banjo bolt on upper fuel line. Rotate the wrench counterclockwise to loosen the bolt, and then remove the fuel line by hand.
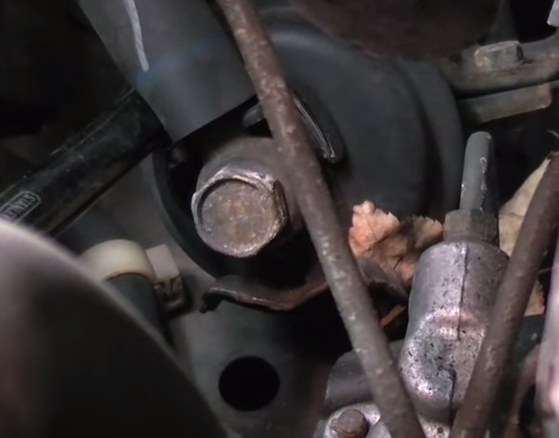
Figure 3. Remove 14 mm bolt from the bottom fuel line. 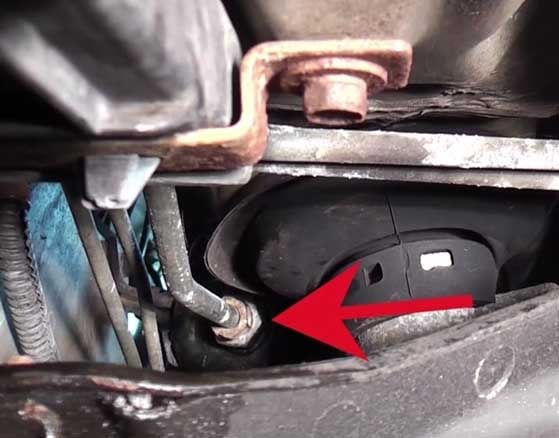
Figure 4. Remove 17 mm Banjo bolt from upper fuel line.
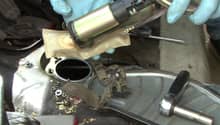
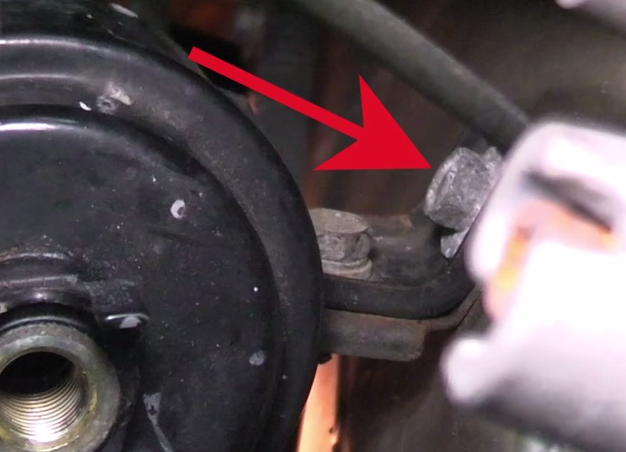
Step 4 – Remove the clamp bolts
Using the 10 mm flare nut wrench, unfasten two bolts from the clamp that hold the fuel filter in place.
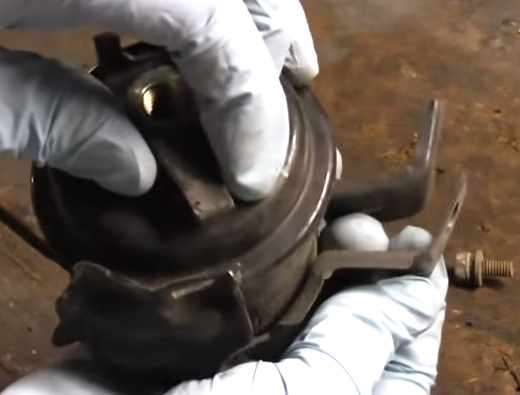
Step 5 – Replace the fuel filter and reattach the clamp
Unclip the alignment hole holding the top of the fuel filter in place, and then remove the fuel filter from the clamp. Dispose of the old filter and place the new fuel filter in the clamp. Then, insert the fuel filter clamp to its original location and secure it with the two 10 mm bolts.
Step 6 – Reconnect the upper and lower fuel lines
Before reconnecting the upper fuel line, insert two new washers. Then, tighten the 17 mm Banjo bolt to a snug fit. Reconnect the lower fuel line, and secure it with the the 14 mm bolt to a snug fit as well.

Pro Tip
Your replacement filter may have come with replacement washers. If not, you should replace the washers of the upper fuel line when you replace the filter.
Step 7 – Re-check the fuel lines and bolts
Double check that your fuel lines and bolts are properly secure.
Here are the bolts and corresponding fuel lines:
- One 14 mm bolt for the bottom fuel line
- One 17 mm Banjo bolt for the upper fuel line
- Two 10 mm bolts for the fuel filter bracket
Step 8 – Test the new fuel filter
Tighten the gas cap (or gas pressure bolt at the end of the fuel rail), and reconnect the negative (black) battery terminal. Turn the ignition to the "ON" position four times (without starting the engine). This is to prime the new fuel filter with gas. Turn the engine on for the fifth turn. With the car running, inspect the new fuel filter for any leaks. If you see any leaks, turn off the engine and re-tighten the fuel lines.
Featured Video: Honda Accord Fuel Filter Replacement
Related Discussions and Site
- Instructions to Remove Accord Fuel Filter - Honda-Tech.Com
- Fuel Filter Location '99 Accord - Honda-Tech.Com
- Fuel Filter Location '91 Accord - Honda-Tech.Com
- How to Change Fuel Filter in Honda Accord - eHow.Com