Honda Accord: How to Adjust Valves
Learn how to do a valve adjustment on your engine's intake and exhaust valves. This can drastically improve your engine's performance, so it is quieter while idling.
This article applies to the Honda Accord (1990-2002).
A valve adjustment is a fairly straightforward job, which you can do on your own; however, it does take practice because tightening the valves too tight could damage the engine. So unless you're confident in your abilities as a stay-at-home mechanic, you may want to leave it to a professional.

Materials Needed
- Feeler gauges (.010 inch and .012 inch)
- Combination wrench
- Flat head screwdriver
- 1/2 inch ratchet with 19 mm socket and extension
- Pliers
Pro Tip
Before starting, make sure the engine is cold. Also, the negative (black) terminal on the car battery needs to be disconnected.
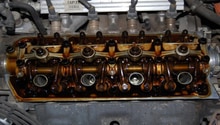
Step 1 – Remove the valve cover
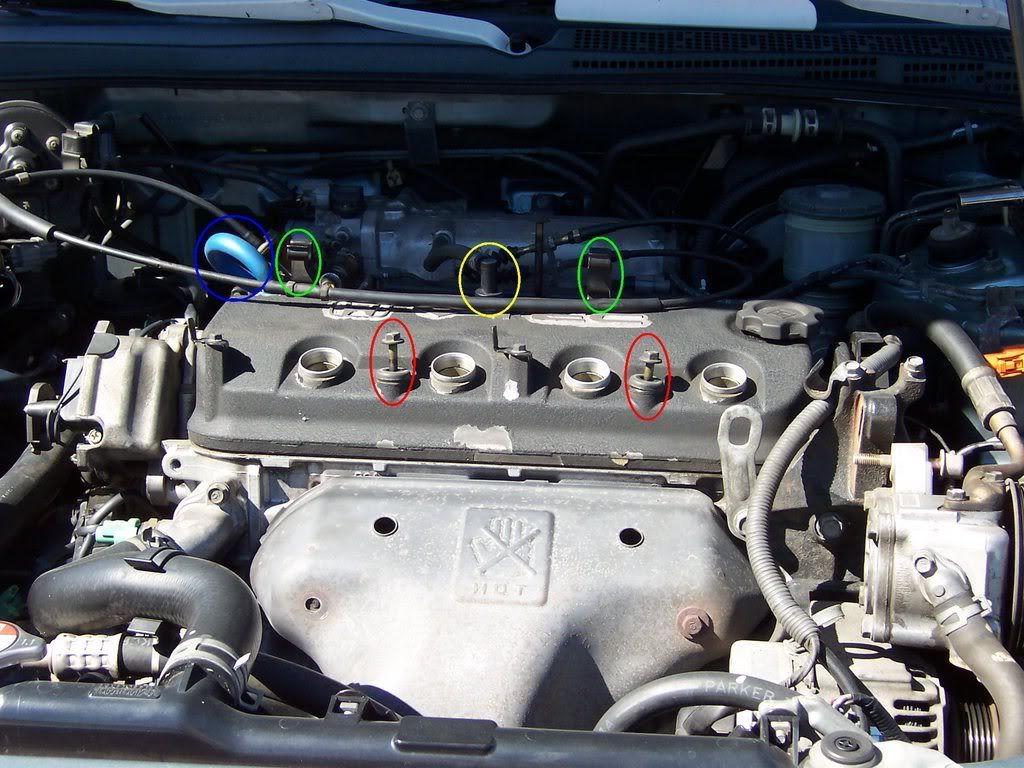
You will need to remove the spark plugs wires. Then, disconnect the PCV valve and the vacuum hose. Using the pliers, remove the hose clamps. Take out the ground wire near the oil fill cap. With a socket wrench, remove the bolts on the valve cover and pry the cover off.
Layout of Figure 1:
- Yellow: PCV valve and vacuum hose
- Blue: Oil fill cap
- Red: Valve cover bolts
- Green: Throttle body
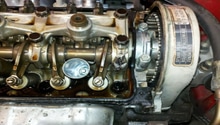
Step 2 – Remove the timing belt cover
Unscrew the two bolts of the timing belt cover, and remove the top half of the cover. Locate a star-shaped hole with a bolt inside under the driver's side wheel well. Attach the ratchet to the bolt in order to rotate the crank pulley.

Figure 2. Remove circled bolt and the one to the left of it. 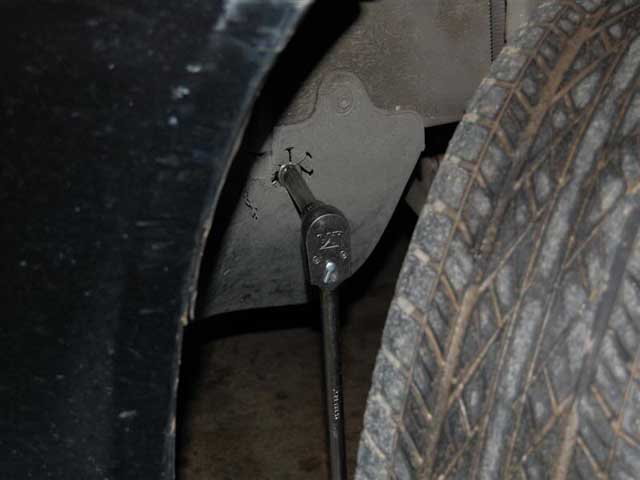
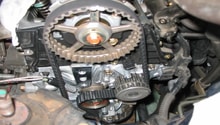
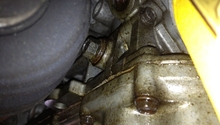
Figure 3. Rotating the crank pulley.
Step 3 – Adjust the exhaust valves
On the timing belt wheel, you should see an arrow. Rotate the crank pulley until the arrow points up. The valves on the right side of the first cylinder should be open.
Loosen the nuts of the two front exhaust valves on the rocker arm (first cylinder). Then, slip a .012 inch feeler gauge between the rocker arm and the valve stem. Adjust the valve by turning the bolt clockwise with a flat head screwdriver. It needs to be tight enough to create just a small amount of drag on the feeler gauge. After you adjust it, tighten the nut and move on to Step 4.
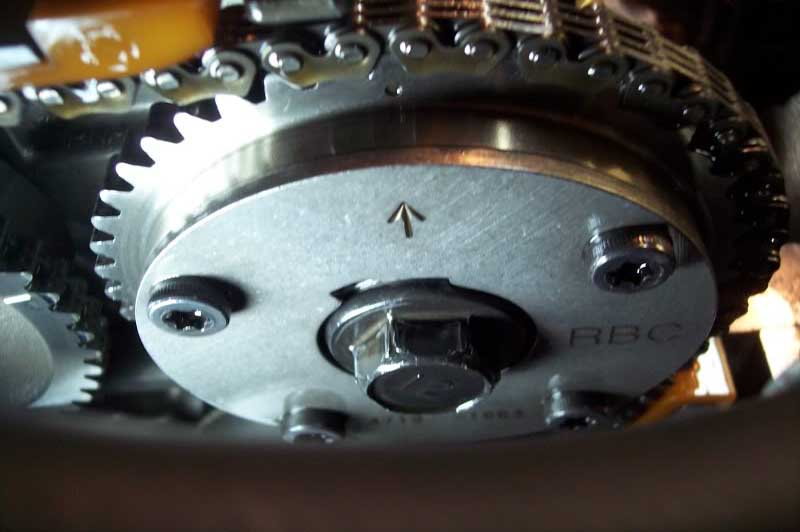
Figure 4. Arrow should point up. 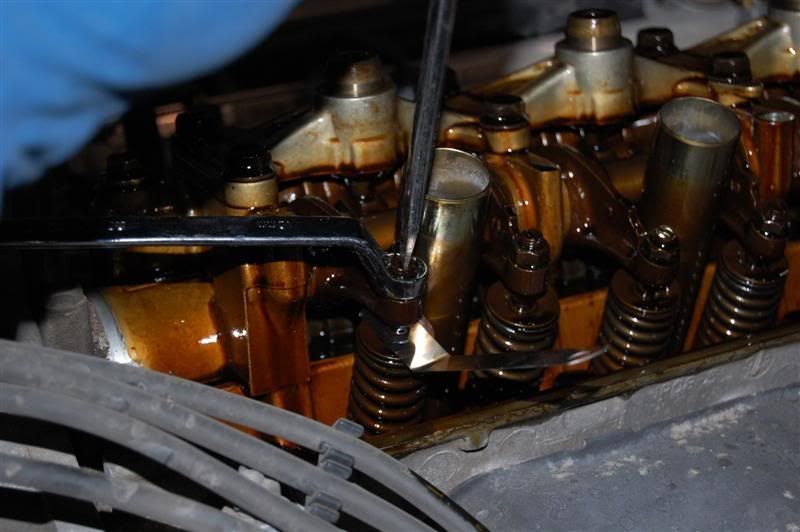
Figure 5. Adjust the exhaust valves. 
Figure 6. Feeler gauge.
Pro Tips
- After adjusting the valves of each cylinder, double check that the tension or positioning of each one hasn't been changed.
- A valve adjustment tool makes adjusting easier. it combines a screwdriver with the open socket of a combination wrench.
Step 4 – Adjust the intake valves
The intake valves require the .010 inch feeler gauge. Adjust them in the same way you did with the exhaust valves.
When you have finished the first cylinder, rotate the crank pulley a quarter-turn counterclockwise, so the arrow points to the front of the car. Adjust the intake—and the exhaust—valves on the third cylinder the same way you did with the previous valves. Then, rotate the crank pulley another quarter-turn to adjust the four valves on the fourth cylinder. Again, rotate the crank pulley another quarter-turn to adjust the four valves on the second cylinder.
If you get lost, just remember that the adjustment order follows the engine's firing order, which is 1-3-4-2. Also, remember that the exhaust valves are in the front, and the intake valves are in the back.

Featured Video: Honda Accord Valve Adjustment
Related Discussions
- Valve Adjustment - Why Do It? - Honda-Tech.com
- How to Adjust the Valves on Your F22 - Honda-Tech.com
- Tech Article: Valve Lash Adjustment - Honda-Tech.com