Beginners blog: fabrication life progression
 12-13-2014, 08:47 AM
#26
Honda-Tech Member

Join Date: Aug 2014
Posts: 391
Likes: 0
Received 0 Likes
on
0 Posts
i just now noticed this but:

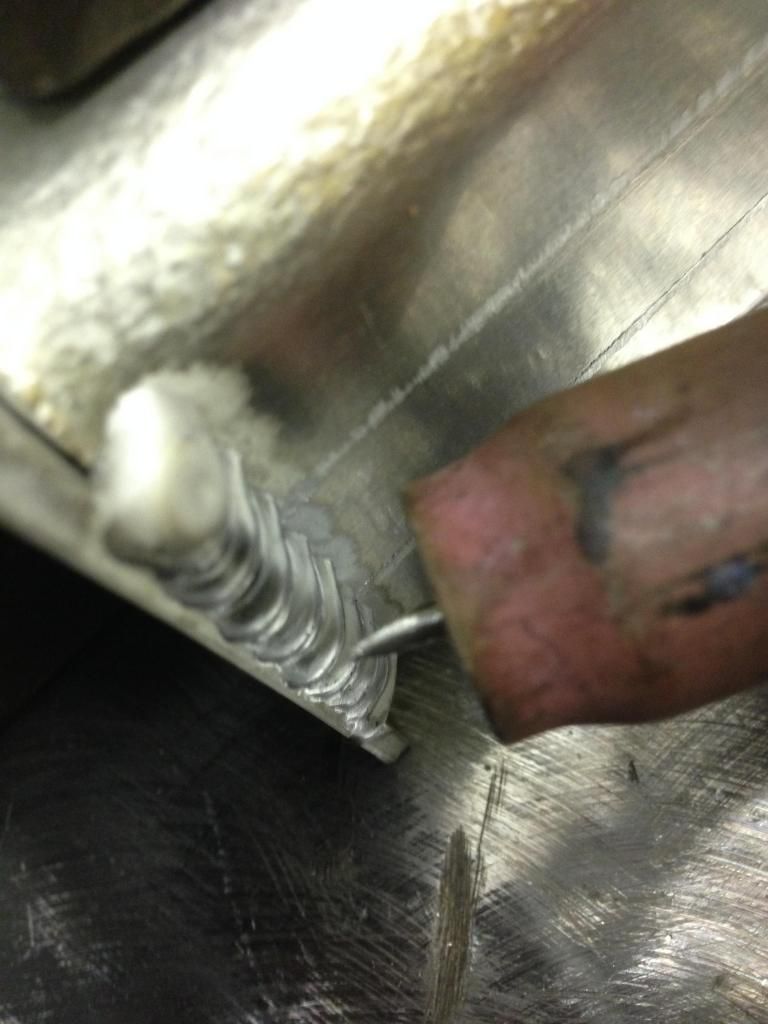
the cleaning action around the weld is incredibly narrow for the bead width and it just looks dirty. something i did not notice the first time glancing at the picture. I believe i had it set for max cleaning so im not really sure why its so narrow.
the cleaning action around the weld is incredibly narrow for the bead width and it just looks dirty. something i did not notice the first time glancing at the picture. I believe i had it set for max cleaning so im not really sure why its so narrow.
Taper amperage, roll cup away from edge and slow down. As you approach the edge your gas will wrap around the edge of the sheet metal and you will have a nice stop with no burn.
I think all in all you will get much better with practice and then when you use glass omg. Gets real pretty
 12-15-2014, 09:16 AM
#27
moderator emeritus
Thread Starter

dont use pulse. and for alum Id never even think of using it. alum cools way to fast it will leave areas with no penetration. trust me I know and Ive done it before. If you want to pulse pulse at 30-1000pps. thats the only way Id ever pulse.
your **** is contaminated, you are either dipping the tungsten without knowing or mixing it with filler, improper gas. The alum looks damn near clean I woulnt even touch it because what you are doing is probably contaminating it with the brush.
Let the machine do the cleaning and practice. almost 100% of the time my cleaning is at 80%. what tungsten are you using. with that dynasty I use a grey tungsten sharpened to a point then grind the point a bit flat and weld.
I use the same machine for alum but a bit bigger
your **** is contaminated, you are either dipping the tungsten without knowing or mixing it with filler, improper gas. The alum looks damn near clean I woulnt even touch it because what you are doing is probably contaminating it with the brush.
Let the machine do the cleaning and practice. almost 100% of the time my cleaning is at 80%. what tungsten are you using. with that dynasty I use a grey tungsten sharpened to a point then grind the point a bit flat and weld.

I use the same machine for alum but a bit bigger
I want to try the 2% lanthanted after seeing this video.
its going to come down to practice. I have been trying to back track and see where my problems started since my AL welds from the beginning were better than what I am putting out right now and its a bit agitating. I took a break from the AL for a minute and went back to stainless for now until i clear my head of what has been happening with AL.
I noticed you are using a large gas lens with what looks like a 8-10 cup. I've got a #8 cup coming to use on my large gas lens to see how that turns out.
I also welded a cabinet together that was incredibly thin sheet carbon steel and a pulse at 1pps really helped with heat control. Its just an old parts bin that was really unstable since its bolted together. Didn't feel comfortable putting any kind of weight on it so i decided to weld the corners up and it really helped strengthen it.
Also looks hot at the end there. I bet that black stuff is burn through from the bottom.
Taper amperage, roll cup away from edge and slow down. As you approach the edge your gas will wrap around the edge of the sheet metal and you will have a nice stop with no burn.
I think all in all you will get much better with practice and then when you use glass omg. Gets real pretty
Taper amperage, roll cup away from edge and slow down. As you approach the edge your gas will wrap around the edge of the sheet metal and you will have a nice stop with no burn.
I think all in all you will get much better with practice and then when you use glass omg. Gets real pretty
before taking a break, i ran into an instance where it just refused to puddle and there is no way it was burning through. just trying to start a bead, it would basically turn into silver mud. a very dull, dark silver under the arc. it was weird.
12-15-2014, 01:16 PM
#28
Honda-Tech Member
I didn't think you were suppose to use 2% lanthanted on a transformer machine? It's fine on the inverter machines.
12-15-2014, 01:18 PM
#29
Honda-Tech Member
Join Date: Apr 2002
Posts: 2,126
Likes: 0
Received 0 Likes
on
0 Posts
Just wanted to mention I was looking at his rule of 33 and it seems your machine has a fixed peak and background at 50% im not sure 33 would apply as a starting point you can see he is adjusting peak and background to 33. >> HTP Tig Welder Pulse Settings
keep up the good work looking forward to see how you like .045 filler
keep up the good work looking forward to see how you like .045 filler
12-15-2014, 01:21 PM
#31
moderator emeritus
Thread Starter
Just wanted to mention I was looking at his rule of 33 and it seems your machine has a fixed peak and background at 50% im not sure 33 would apply as a starting point you can see he is adjusting peak and background to 33. >> HTP Tig Welder Pulse Settings
keep up the good work looking forward to see how you like .045 filler
keep up the good work looking forward to see how you like .045 filler
12-15-2014, 05:43 PM
#32
Honda-Tech Member
I'd use a grey tungsten. Thats what I use on my dynasty inverter for everything stainless alum whatever. it works great. the gas lens is not needed at all in fact its just something to waste gas with, it was on my machine already and I didn't feel like taking it off, I dont pay for the gas so who cares. The only time id Even consider a gas lens is on something like paper thin stainless or sch10 pipe. Even then its not needed at all
and also pulse is a waste of time. especially under 30pps. It helps with arc control and heat but its not needed. Ill use pulse only when Im welding like in really tight spots at like 40pps never less than that though
and also pulse is a waste of time. especially under 30pps. It helps with arc control and heat but its not needed. Ill use pulse only when Im welding like in really tight spots at like 40pps never less than that though
12-16-2014, 05:25 AM
#33
moderator emeritus
Thread Starter
I'd use a grey tungsten. Thats what I use on my dynasty inverter for everything stainless alum whatever. it works great. the gas lens is not needed at all in fact its just something to waste gas with, it was on my machine already and I didn't feel like taking it off, I dont pay for the gas so who cares. The only time id Even consider a gas lens is on something like paper thin stainless or sch10 pipe. Even then its not needed at all
and also pulse is a waste of time. especially under 30pps. It helps with arc control and heat but its not needed. Ill use pulse only when Im welding like in really tight spots at like 40pps never less than that though
and also pulse is a waste of time. especially under 30pps. It helps with arc control and heat but its not needed. Ill use pulse only when Im welding like in really tight spots at like 40pps never less than that though
I went back to stainless last night and made a new video as well as taking a couple pictures of sch10 fit up, tungsten prep...etc
my wife walked out and took a picture of me before starting the arc. good thing I saw her and didnt blind her lol


anyway, here is the video. shows my progress on stainless from beginning to now and boy what a difference.
the 18g stainless pipe i welded last, i was just making a quick bead to see how i compared to the rest of the welds on that pipe and its night and day!
12-16-2014, 08:17 PM
#35
Honda-Tech Member
is that a #10 cup and big gas lens. Crank that gas up to like 20cfh. I run mine at 30cfh overkill but never hurts anything. Ive ran upwards of 100 just for the hell of it without any ill effects people mention.
looks like a 1/16 tungsten. would help with even smaller one.
looks like a 1/16 tungsten. would help with even smaller one.
12-17-2014, 04:56 AM
#36
moderator emeritus
Thread Starter
is that a #10 cup and big gas lens. Crank that gas up to like 20cfh. I run mine at 30cfh overkill but never hurts anything. Ive ran upwards of 100 just for the hell of it without any ill effects people mention.
looks like a 1/16 tungsten. would help with even smaller one.
looks like a 1/16 tungsten. would help with even smaller one.
3/32" tungsten, 2% thoriated. Once i get paid this week, i am ordering some .45 filler and some 2% lanthanated tungsten.
i tried AL again last night after receiving my 90* angle clamp and a #8 cup for large gas lens and i am honestly embarrassed to even post this but its what i made this thread for. this is .060 sheet, unprepped with same 2% thoriated tungsten, 1/16" 4043 filler, #8 cup and large gas lens, 25cfh and 3 sec post flow.


the tack was fine and I was a quite uncomfortable not having something to prop on plus moving vertical and too slow. you can see where i stopped and tried to restart and it turned into nastiness. Is this due to post flow being too short and the weld cooling sucking in oxygen or is it really necessary to clean after a bead run? Do I need to allow the machine to perform cleaning action on the end of the bead before starting a puddle again?
12-17-2014, 11:24 AM
#37
Honda-Tech Member
post flow has nothing to do with it. post flow on alum is not needed its more so for the tungsten so it doesn't get contaminated. 3sec post flow should be nice. try 3/32 filler, 1/16 is harder to work with.
Id stronger suggest to work on flat pieces and just weld after weld. you can weld alum beads over beads to get better. just let the piece cool and run right over the beads and mess with settings
and 3/32 tungsten is way to big for that stainless work. it will help you way more to switch to the smallest possible under 1/16
12-17-2014, 11:57 AM
#38
moderator emeritus
Thread Starter
post flow has nothing to do with it. post flow on alum is not needed its more so for the tungsten so it doesn't get contaminated. 3sec post flow should be nice. try 3/32 filler, 1/16 is harder to work with.
Id stronger suggest to work on flat pieces and just weld after weld. you can weld alum beads over beads to get better. just let the piece cool and run right over the beads and mess with settings
and 3/32 tungsten is way to big for that stainless work. it will help you way more to switch to the smallest possible under 1/16
Id stronger suggest to work on flat pieces and just weld after weld. you can weld alum beads over beads to get better. just let the piece cool and run right over the beads and mess with settings
and 3/32 tungsten is way to big for that stainless work. it will help you way more to switch to the smallest possible under 1/16
1/16" tungsten is on my list to purchase as well. working with a rather small budget considering everything else i have going on. I guess you are right though. go back to the basics and start over again on flat sheets.
12-17-2014, 05:53 PM
#39
moderator emeritus
Thread Starter
success from being stubborn!!
It looks like i simply ran into a batch of bad filler rod or the 4043 filler just didnt really like the type of aluminum i am using. the other thing was allowing the torch to do the cleaning action before starting a puddle. I didnt have to clean anything myself. But this is back to back to back, top to bottom, 5356 then 4043 then 5356. going to contact my supply and see if they will do something about it. Going to try some other rods in my batch and see if its the whole pile of just some.

allowing the machine to get to the really clean aluminum made everything go much smoother


metal started to warm up towards the end of that pass


This is where it got a little tricky for me and attempting to make a smooth transition without making it look like i stopped (dont know if thats possible). When i start to form another puddle, do i need to let the cleaning action do its thing first or can i start a puddle off the bat and go?
 12-18-2014, 05:36 PM
#40
moderator emeritus
Thread Starter
since last nights lap joints felt good, i wanted to test the demon on the corner edge joint where i was previously having problems. I prepped the edges a little different. I put a 25 degree cut on the edge and it appeared to help with fitup and something to fill.


next time i have some money laying around, im gong to order some 6061 sheet and build the catch tank again. i think i am ready now
next time i have some money laying around, im gong to order some 6061 sheet and build the catch tank again. i think i am ready now
12-18-2014, 06:50 PM
#41
-Intl Steve Krew
Why not use those scrap pieces and run overlapping beads on them, in different positions? I know it was helping me to burn a few rods in order to get in the zone/get comfortable with a certain position.
 12-22-2014, 05:31 AM
#42
moderator emeritus
Thread Starter
Made a couple tools over the weekend:
reused a couple h22 rod caps which just happen to fit a 1.5" SCH10 pipe perfectly. got tired of my old way of holding the pipe in place while trying to weld.
After making this, I was able to get a little more comfortable with my position
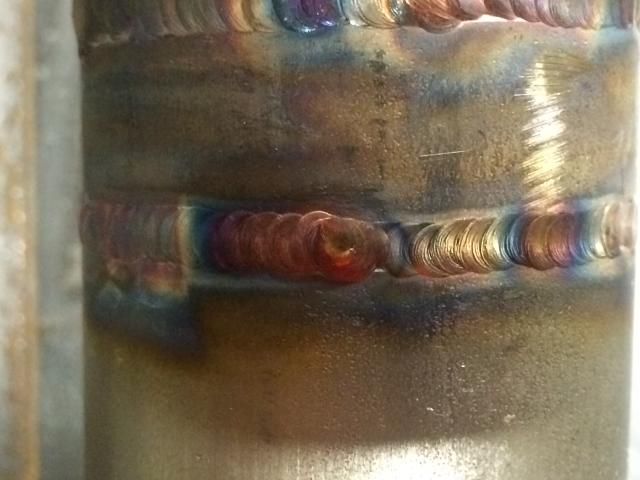
I am using a 12 bead count at the moment and increased the frequency of dipping.
I had some of my original welds on this pipe field dye tested and they all passed, surprisingly although I know they would not pass an xray due to some of them not getting full penetration and I have not been back purging to save gas.
Then i started on my collector jig for my saw. Not quite done with it but im hoping this will work good.
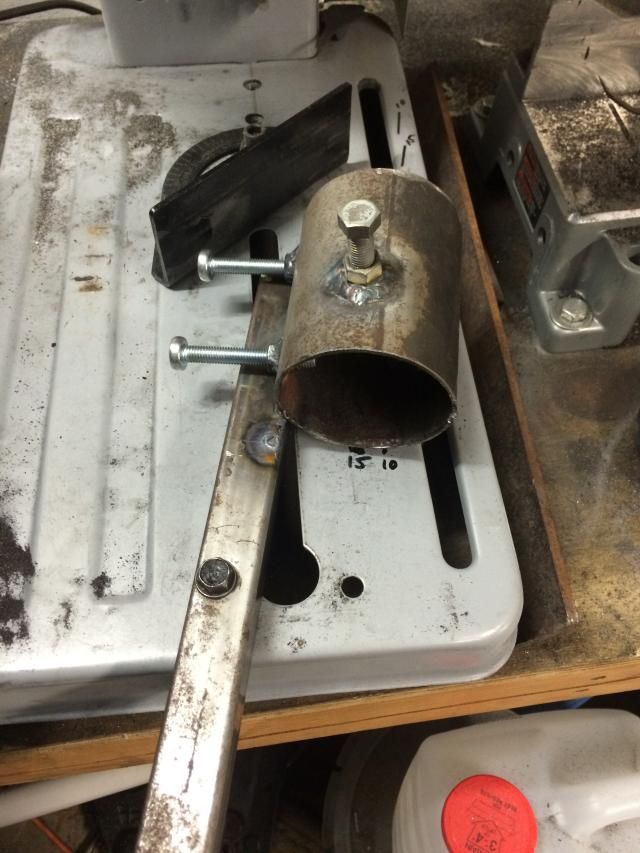
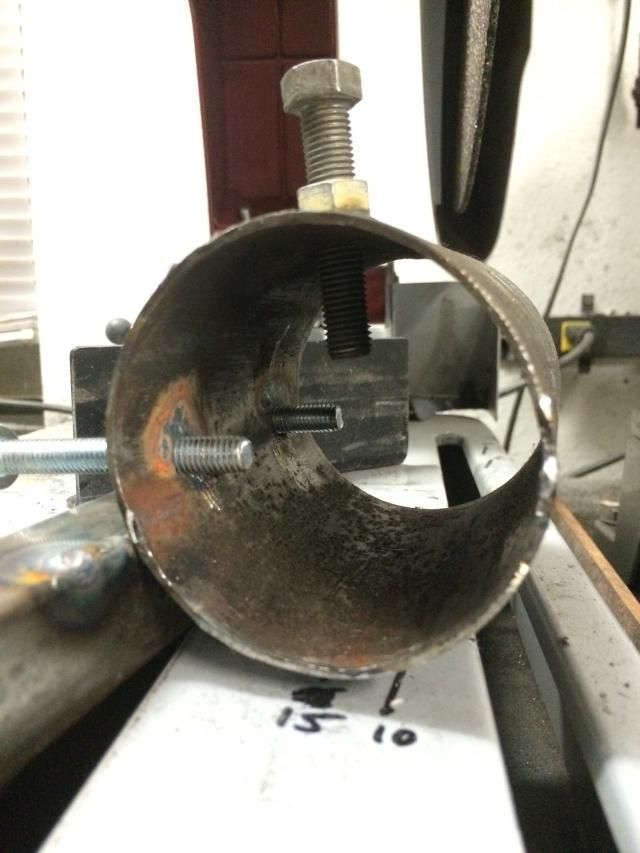
got it setup to allow for small changes in cutting angle. I have a couple things to add like a front mounting bolt and a back cap so the lengths are the same for every cut but ive put the pipe in it and its very secure.
 12-22-2014, 07:48 AM
#44
moderator emeritus
Thread Starter
12-29-2014, 05:30 AM
#46
moderator emeritus
Thread Starter
have not done much welding lately, been working on the collector "jig".
ended up making another one and it works much much better. the 3" tube i was using in my first one was just too big and kept getting in the way
In other news, i got my collector "jig" working after many many hours of figuring it out and getting the right cutting angle, length...etc
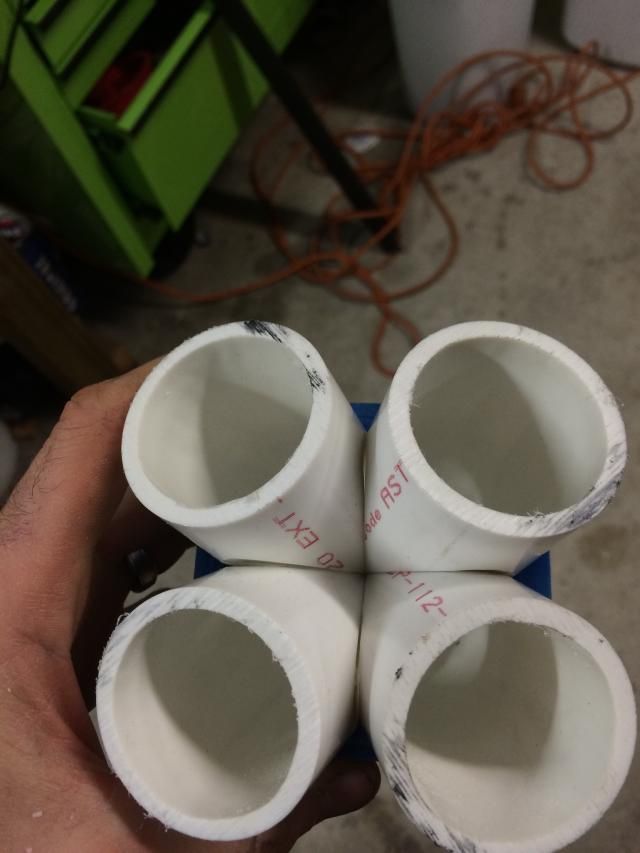
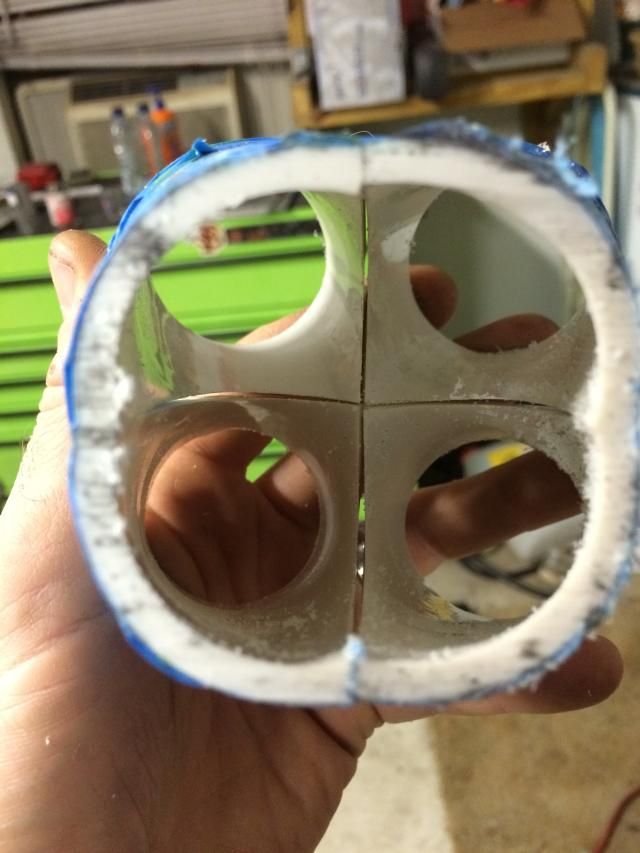
its a little crude cutting the pvc but it should end up perfect when cutting the steel pipe after bringing my cutting angle down a degree or 2
01-13-2015, 06:05 PM
#48
moderator emeritus
Thread Starter

Sorry I have not posted in the last week or so. I have been waiting on parts to arrive and really taking a break to spend some time with my 3 month old instead of be in the garage
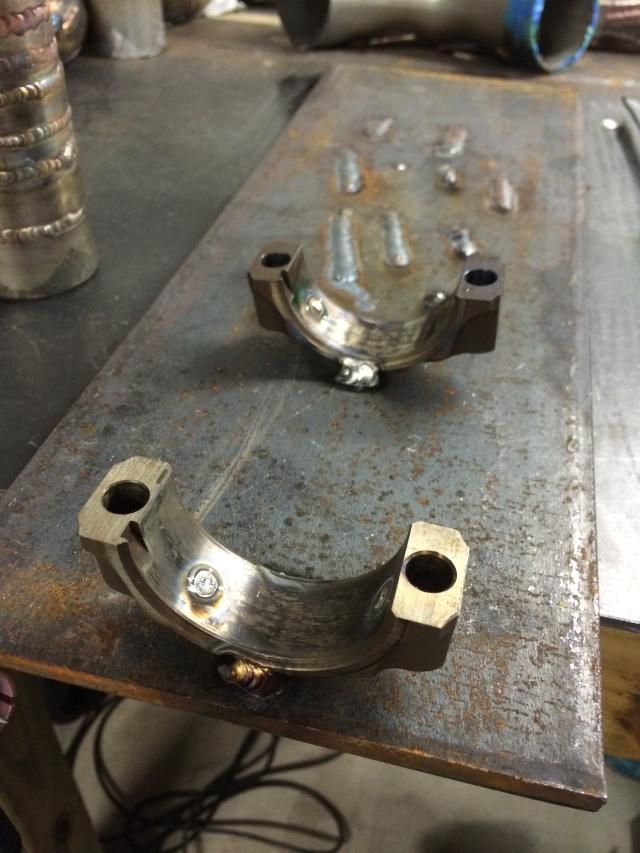
I received a majority of my parts to build the first manifold for my prelude build (it will eventually get remade in 321)

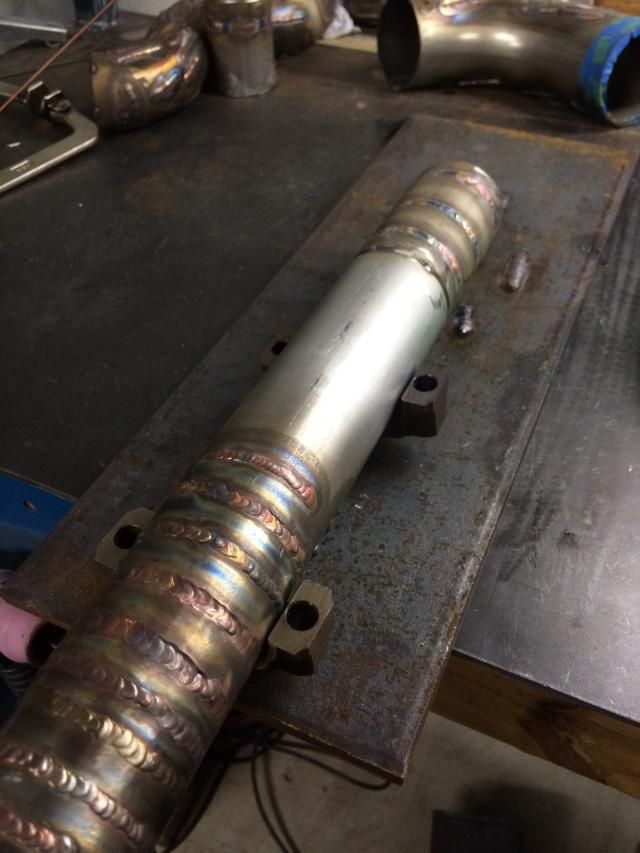
Immediately, i began to build my collector and it came out damn near perfect. I can only hope that if this is the beginning, I can't wait to get some experience under my belt!


And then semi-finished product. need to order the turbo form tube, weld it to the flange, and then begin building the manifold.
Thank you to everyone who has helped out thus far!