When you click on links to various merchants on this site and make a purchase, this can result in this site earning a commission. Affiliate programs and affiliations include, but are not limited to, the eBay Partner Network.
B-series How to install/run a Swirl Pot for cooling
Good day all.
My friend gave me this writeup that I am now using for my swirl pot setup. The idea of a swirl pot is to help eliminate hot spots or air bubbles in the cooling system. Anyway here is a how-to with cheap what will work parts. I'm sure this could be adapted for other setups as you see he did one on a sr20det prior.
Parts you need: the tank itself
some kind of blanking cap for the radiator hose adapter for the lower hose, 32mm is the size tubing and clamps
hose barbs for 1/2 hose, eg this and this
Bits/taps for 1/4 npt here and lookup this (4 dollars usually 8 dollars shipping)
1 x 1/4" Carbon Steel NPT Tap and 7/16" HSS Drill Bit, Qualtech
some sort of overflow bottle
Some sort of bracketry
The tank itself i think is the same as the one from pbm i had on s13, but 28 dollars instead of 80. the pbm setup comes with more of the parts you need to install but i figured it would be cheaper to piece together than just pay the 80.
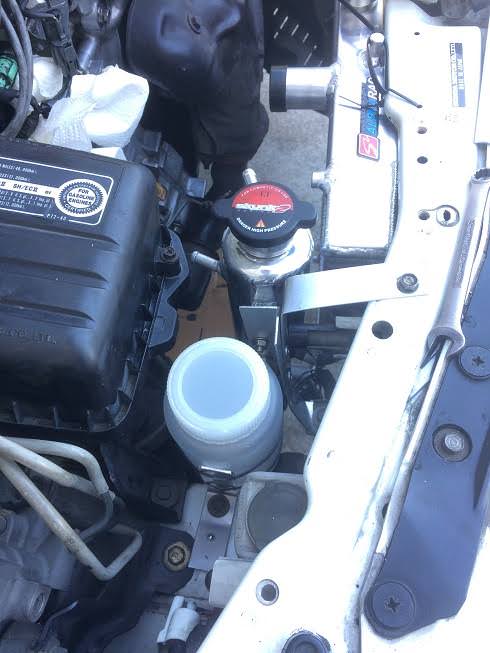
radiator caps, you may have heard theres a type A and B kind of deal with these hondas:
Type B is listed as the correct thing for anything post 93. I had a couple of these from before starting the install. However the skunk2 radiator (this radiator seems pretty nice, btw, the only thing that is not nice is the plastic drain thing) apparently takes a type A cap, and comes with the cap. this is a 1.1bar or standard cap. coincidentally the swirl pot requires and comes with the same style of cap, but 1.3bar.
the advantage of the PBM kit is it came with a blanking cap, which doesn't have the whole pressure mechanism and just caps the very top so coolant doesn't come out everywhere. you need to run this on the radiator or you are only getting half the benefit of the setup. the idea is it bleeds out bubbles from the top of the radiator and the bleed screw area on the block, then the bubble-free coolant rejoins the flow in the lower rad hose. with a regular non-blanking cap, the cap will never open because there is pressure on both sides, from the radiator and the breather tank. a lot of people run a regular cap on the radiator but they are wrong haha
Anyway it was impossible to find a blanking cap that would fit (hard to find any at all really) so I made one. Wanted to run the skunk2 cap on the breather since it seemed nicer than the cheapo one that came with tank. So I ended up dremeling off the whole pressure piece of the cheap cap. Tried to get it down so there wasn't much sticking out still to interrupt flow, but didn't want to make a hole in the plate that the gasket sits on:
Also I screwed up the gasket and ended up ordering this rubber material to cut a new one. Cut to size using old gasket as template, then smooshed onto the cap and cut out the center section where the post was.
Cap ended up working well, you just have to make sure the gasket piece centers when putting it on (since the pressure mechanism isn't there to center) or it will leak. To test, try squeezing the hose with caps on both the rad and the breather tank, it'll be super obvious if it's leaking.
The hose adapter is sposed to go low down in the lower hose, I put it right above the bottom bend in the hose. Also the supplied clamps are garbage so nicer ones are a good idea. That link is for 10 clamps, I used 2 for lower hose adapter, 2 for upper hose adapter (for future temp gauge) and 4 for where the hoses meet block and rad. don't really trust constant tension haha
Tubing, again this is something PBM did nicely, the cheap breather tank has inferior tubing and literally like one foot of it, so you def need more. The silicone stuff (linked above) is similar to what PBM supplied and you can see the coolant thru it. Mine intermittently has small bubbles at the higher points, probably should've routed under upper rad hose - I think they are higher than the cap on the breather tank.
Also got those small hose clamps (also linked above), the tank comes with constant tension type clamps but the screw type are more trustworthy haha
The hose barbs, both are for 1/4 ID hose to match the silicone hose. one is 1/8npt, this threads into the adapter in the lower hose, other is 1/4npt. this guy you have to drill out and tap the bleed screw. you could probably get away with 1/8npt here as well, but drilling it out for the 1/8 tap still leaves a good amount of visible thread which seems bad for strength/sealing. also, obvs teflon tape is needed for these. (it was also needed for the fitting under the cap on the breather tank, which on mine was loose/unsealed)
(also when drilling out the bleed hole, you'll notice it gets way smaller at the end. good idea to drill the whole thing out to whatever size you are tapping)
here's the guy in the bleed screw. I took the water neck piece off so as to not get a bunch of shavings in there when drilling/tapping. goes back on with rtv, no gasket or anything:
The overflow bottle is just a plain bottle, linked above, depending on your mounting it's probably easier to re-use the original, mine wouldn't fit tho. Or you can use an empty diet coke bottle or whatever, really doesn't matter haha
Brackets are the pita part. Mine are mostly 1/16 x 1" aluminum bar, with a small piece of 1/16" angle thrown in:
Took out the factory overflow tank and started with the assumption of putting these things in basically the same space. Not sure how similar this area would be on yours. There's not a lot of wiggle room - these can basically only fit in the one way, so just set them in there and try to make it work. I started with the breather mount, there's an unused tapped hole (might've been from AC? idk) on the top core support, then a bolt holding some sort of other bracket on below. First bracket piece was made by eyeballing, bending in vise, holding up to test, cutting off the ends, re-bending to correct, etc. Then drilled some holes for bolts, bolted on top with random bolt, sandwiched between brackets and existing bolt below. This resulted in a bracket in the basic correct area. Needed to mount 90 degrees to the way it came out though, so attached a small piece of angle aluminum to turn the corner.
(I used rivets to attach the angle piece, bought this set, cheap and easy way to quickly attach things)
The overflow bottle, this was easier - this guy mounts to the hole where the stock overflow tank bracket attaches. Super simple and made from the same 1/16 x 1" aluminum. There's a second piece you can't see sandwiched with it, that goes under the bottle and bends up on the other side to keep it in place.
Drilled a hole in the lid for the overflow tube, then a tiny vent hole too. Put on rad fan (had to buy em1, aghhh $$$ but integra one won't fit rad, em1 fan plugs right in tho) installed beather and overflow bottle and time to hook it up. This diagram explains it:
Basically under breather cap goes to overflow, bottom of breather goes to fitting on lower hose, rad cap fitting goes to lower fitting on tank, breather screw goes to upper fitting on tank. Used that silicone hose for this and secured with the screw type clamps. Here is
the final deal:
Idk about the proper way to bleed, but I filled at rad, filled tank to within say 1" from the top, then ran it with the cap off the breather til it got way up to the top. Then capped breather. Obviously radiator has to be capped before bleeding.
You can see into the silicone hoses to see how it's doing. Mine went from having a bunch of bubbles to having small bubbles at the high points over several drives. I think these are higher than the cap, also the routing of the breather-to-overflow is kind of unavoidably stupid. All the bubbles never get out of that hose, it is pretty long. BUT the coolant level has stabilized and running temps are good.
I want to re-mount it eventually. Going to delete ABS, my ABS pump is not doing well and weighs a ton, it should be easier to fit in that space with good hose routing.
This tank was 28 dollars, had to buy the silicone tubing (22) + rad cap (mine was actually free with rad) + rad cap gasket material (12) so you're looking at 62 plus the cost of the cap, for basically the stuff PBM gives you. It might actually be easier to get the PBM and skip the rad cap modifications hahaha oh well

 07-23-2018, 06:09 AM