The Ultimate Guide to Composites part 2- Part making (carbon trunk)
#1
Honda-Tech Member
Thread Starter
Join Date: Nov 2009
Posts: 118
Likes: 0
Received 0 Likes
on
0 Posts
Hey all,
I figured I would post this here for all the people who have older cars that want to save some weight. I am just continuing my previous thread about composites seen here:
https://honda-tech.com/forums/road-racing-autocross-time-attack-19/composites-ultimate-guide-2530175/
Read this thread first before asking any technical questions in this one
I will try to keep this simple enough for new people to understand while throwing in some technical stuff. It is kinda backwards because I should have a how to build a mold thread first but I will go straight to this. Simple reason for the lack of the mold building thread, I rarely take my camera to the shop with me. I am making another mold for a trunk this week so it should come soon.
So in today’s lesson, how to make a 6lb trunk. Keep that 6lb weight in mind when reading this. I am making a cosmetic piece for the 90-91 Acura Integra 4 door in this tutorial. So essentially it will be a carbon fiber and fiberglass hybrid trunk. Seen below

So here we go: Assuming you start with a mold, the first thing to do is gel coat it. The gel coat simply protects the carbon and resin from the elements. If you are making a full race part this step can be simply eliminated. That is what some companies forgo when using pre-preg carbon or glass.

the 2 molds used for the trunk are seen here
Next we add the carbon and glass to the mold. The carbon is the by far the most important part, simply because people hate weaves that are not straight. What we have here is some T300 4X4 3k tow twill weave carbon fiber. It is a good standard modulus carbon fiber, a little stiffer than some fibers such as AS4 carbon. This is getting a little technical so back to making the part.
Some info on the carbon can be found here
http://www.toraycfa.com/pdfs/T300DataSheet.pdf

Rolling out the 4x4 twill weave carbon onto the cutting table

Ready to cut
Stock trunks are made in 2 parts, the skin and the skeleton. The composite one will be done the same way. 2 pieces will be made and bonded together to make a complete trunk.
In this part we are “rolling” the edges, again it is a cosmetic piece and carbon parts are meant to look good while reducing weight.

Starting to lay the carbon in the mold

more placing the carbon in, this is the hardest part, getting the weave straight


First layer layed up.

All the carbon and glass laid into the mold
This whole trunk is going to be a vacuum infused part, so we are setting up to with all of the materials you need to infuse. We have Peel Ply and flow media and spiral wrap and bagging material to make it all work. Notice the bag is huge for such a part. Bags are generally 30-40% bigger than the mold they are going over.

making the bag

peel ply

peel ply spray adhered into the mold

putting in the flow media
Once my girl bags it, I step in to check the bag for leaks, and to ensure all the fabric is placed correctly and there are no leaks. The material is left under vacuum for about an hour to debulk and to ensure there will be no surprises during the infusion.

Fully bagged and under vacuum

Infusion finished
After the infusion is done, the bag is removed and the skin is removed from the mold. This skin weighs about 2 lbs, maybe less not sure.

Bag pulled off the part

peel ply and flow media pulled off, and removing the skin from the mold (say hi to Jessica Simpson)

the skin as it comes out of the mold
The next part is the underside of the trunk. This is the tricky part of the trunk. It is complicated and needs to have things bolt into it etc.. if it is going to be useful to someone.
You can see the mold is fairly complicated as well, and it is a replica of the stock piece with all the wholes filled in.
An engineering note: If this trunk skeleton was designed to be made out of composite materials from the factory it would look nothing like this. Essentially it would have only an out part and the middle would be empty. The skin would be a foam core and there would be no need for all the curves to get stiffness out of the skeleton.

skeleton mold with gel coat on it

laying in the glass (7783 twill weave)

First layer of the glass (I think I was not there when this was laid up)

another view, notice the rolls of carbon in the back! that is why I am so poor right now
The skeleton is all fiberglass and is laid in sections to make sure the material comes into contact with the mold/gel coat. The same infusion process follows and the skeleton is removed from the mold a day later.

under vacuum

Starting the infusion

closeup of the resin moving along the part

fully infused

next day removing the bag
After the skeleton comes out of the mold it is given a rough trim and it gets prepped for adding the latch and mounts.

peel ply and flow media removed

removed fro the mold, Ugly as hell some carbon reinforcement where it needs it

Rough trim
All for now, long day, enjoy
I figured I would post this here for all the people who have older cars that want to save some weight. I am just continuing my previous thread about composites seen here:
https://honda-tech.com/forums/road-racing-autocross-time-attack-19/composites-ultimate-guide-2530175/
Read this thread first before asking any technical questions in this one
I will try to keep this simple enough for new people to understand while throwing in some technical stuff. It is kinda backwards because I should have a how to build a mold thread first but I will go straight to this. Simple reason for the lack of the mold building thread, I rarely take my camera to the shop with me. I am making another mold for a trunk this week so it should come soon.
So in today’s lesson, how to make a 6lb trunk. Keep that 6lb weight in mind when reading this. I am making a cosmetic piece for the 90-91 Acura Integra 4 door in this tutorial. So essentially it will be a carbon fiber and fiberglass hybrid trunk. Seen below

So here we go: Assuming you start with a mold, the first thing to do is gel coat it. The gel coat simply protects the carbon and resin from the elements. If you are making a full race part this step can be simply eliminated. That is what some companies forgo when using pre-preg carbon or glass.

the 2 molds used for the trunk are seen here
Next we add the carbon and glass to the mold. The carbon is the by far the most important part, simply because people hate weaves that are not straight. What we have here is some T300 4X4 3k tow twill weave carbon fiber. It is a good standard modulus carbon fiber, a little stiffer than some fibers such as AS4 carbon. This is getting a little technical so back to making the part.
Some info on the carbon can be found here
http://www.toraycfa.com/pdfs/T300DataSheet.pdf

Rolling out the 4x4 twill weave carbon onto the cutting table

Ready to cut
Stock trunks are made in 2 parts, the skin and the skeleton. The composite one will be done the same way. 2 pieces will be made and bonded together to make a complete trunk.
In this part we are “rolling” the edges, again it is a cosmetic piece and carbon parts are meant to look good while reducing weight.

Starting to lay the carbon in the mold

more placing the carbon in, this is the hardest part, getting the weave straight


First layer layed up.

All the carbon and glass laid into the mold
This whole trunk is going to be a vacuum infused part, so we are setting up to with all of the materials you need to infuse. We have Peel Ply and flow media and spiral wrap and bagging material to make it all work. Notice the bag is huge for such a part. Bags are generally 30-40% bigger than the mold they are going over.

making the bag

peel ply

peel ply spray adhered into the mold

putting in the flow media
Once my girl bags it, I step in to check the bag for leaks, and to ensure all the fabric is placed correctly and there are no leaks. The material is left under vacuum for about an hour to debulk and to ensure there will be no surprises during the infusion.

Fully bagged and under vacuum

Infusion finished
After the infusion is done, the bag is removed and the skin is removed from the mold. This skin weighs about 2 lbs, maybe less not sure.

Bag pulled off the part

peel ply and flow media pulled off, and removing the skin from the mold (say hi to Jessica Simpson)

the skin as it comes out of the mold
The next part is the underside of the trunk. This is the tricky part of the trunk. It is complicated and needs to have things bolt into it etc.. if it is going to be useful to someone.
You can see the mold is fairly complicated as well, and it is a replica of the stock piece with all the wholes filled in.
An engineering note: If this trunk skeleton was designed to be made out of composite materials from the factory it would look nothing like this. Essentially it would have only an out part and the middle would be empty. The skin would be a foam core and there would be no need for all the curves to get stiffness out of the skeleton.

skeleton mold with gel coat on it

laying in the glass (7783 twill weave)

First layer of the glass (I think I was not there when this was laid up)

another view, notice the rolls of carbon in the back! that is why I am so poor right now
The skeleton is all fiberglass and is laid in sections to make sure the material comes into contact with the mold/gel coat. The same infusion process follows and the skeleton is removed from the mold a day later.

under vacuum

Starting the infusion

closeup of the resin moving along the part

fully infused

next day removing the bag
After the skeleton comes out of the mold it is given a rough trim and it gets prepped for adding the latch and mounts.

peel ply and flow media removed

removed fro the mold, Ugly as hell some carbon reinforcement where it needs it

Rough trim
All for now, long day, enjoy
#4
Honda-Tech Member
iTrader: (1)
Join Date: Sep 2000
Location: Memphis, TN, USA
Posts: 203
Likes: 0
Received 0 Likes
on
0 Posts
good to see you're following protocol
jk
What a great write up though. I'm definitely interested in a molding article as well if you've got the time.
Aside from time and labor about how much would you say the raw materials cost you to make this?
jk
What a great write up though. I'm definitely interested in a molding article as well if you've got the time.
Aside from time and labor about how much would you say the raw materials cost you to make this?
Trending Topics
#8
Ok. I'm doing the body for our fsae team at school. it will also be made out of carbon fiber. We use alittle different method though. I am currently building a plug and then we will make a mold using foam, I think. How do you keep the vacuum bag from sticking to the resin in the carbon? Also, is that the original trunk and you just mold off of that? I would like to do something for my car eventually, because it isn't too bad. Do you know what the cost difference would be if you were to make your own trunk, versus buying one?
Sorry for all the questions.

Sorry for all the questions.

#9
Honda-Tech Member
Thread Starter
Join Date: Nov 2009
Posts: 118
Likes: 0
Received 0 Likes
on
0 Posts
Ok. I'm doing the body for our fsae team at school. it will also be made out of carbon fiber. We use alittle different method though. I am currently building a plug and then we will make a mold using foam, I think. How do you keep the vacuum bag from sticking to the resin in the carbon? Also, is that the original trunk and you just mold off of that? I would like to do something for my car eventually, because it isn't too bad. Do you know what the cost difference would be if you were to make your own trunk, versus buying one?
Sorry for all the questions.

Sorry for all the questions.

The bagging material never actually touches the carbon, it touches the peel ply and flow media.
It is almost always easier to make something yourself, but in the case of composites that is not always the case. You need some pretty specific tools like a vacuum pump to make a real light piece like this
#10
Honda-Tech Member
Join Date: Mar 2008
Location: Melbourne, Australia
Posts: 38
Likes: 0
Received 0 Likes
on
0 Posts
I am dieing to know how you make the mold...
Also is the trunk fairly sturdy without the skeleton? Looking at making some parts for the track car
Also is the trunk fairly sturdy without the skeleton? Looking at making some parts for the track car
#11
Honda-Tech Member
Thread Starter
Join Date: Nov 2009
Posts: 118
Likes: 0
Received 0 Likes
on
0 Posts
Take a plastic tube for example, it is hard to twist and bend. but make one cut in it along the length and it becomes very flimsy.
The solution for this would be to use a foam core for just the lid. Or make the skeleton out of pure carbon and cut out the middle part of it.
#12
Honda-Tech Member
Join Date: Mar 2008
Location: Melbourne, Australia
Posts: 38
Likes: 0
Received 0 Likes
on
0 Posts
Would you need to use a replica of the oem skeleton to keep it stiff or could you reinforce it in some places with more CF?
#14
Honda-Tech Member
Thread Starter
Join Date: Nov 2009
Posts: 118
Likes: 0
Received 0 Likes
on
0 Posts
A large flat surface is terrible for stiffness, the skeleton allows the design to be lighter than if you just "beefed" up the skin.
Now if you are using this on a pure race car, then you probably get by with just a skin and use hood pins with nuts on the lower half of them that raise the skin to the correct height. If you did this and had no wing, you could make a 1.5 lb lid
#15
Honda-Tech Member
Join Date: Mar 2008
Location: Melbourne, Australia
Posts: 38
Likes: 0
Received 0 Likes
on
0 Posts
Wouldn't really be any reason as to why one couldn't make their own skeleton to just reinforce the areas they need?
Really cant wait till you share with us how to make the mold for it so I can have a bit of a play with it.
Really cant wait till you share with us how to make the mold for it so I can have a bit of a play with it.
#16
Honda-Tech Member
Thread Starter
Join Date: Nov 2009
Posts: 118
Likes: 0
Received 0 Likes
on
0 Posts
And I should have the mold post up soon I took the camera to the shop with me yesterday so I have pictures of the mold making process
#17
Honda-Tech Member
Join Date: Mar 2008
Location: Melbourne, Australia
Posts: 38
Likes: 0
Received 0 Likes
on
0 Posts
Happy days ^_^
Really can't wait to give this a go, were moving from a 110sqm workshop to something 250-300sqm which will be awesome
Really can't wait to give this a go, were moving from a 110sqm workshop to something 250-300sqm which will be awesome

#19
Honda-Tech Member
hey my car, lol. my apologies to everyone that my car was filthy but you can see my daughters recaro in the back, lol. the prototype trunk was unbelievably light and pretty rigid with the skeleton underneath.
 brian. i saw you got a deposit for the 92-93 lid!!!!!!
yuri
 brian. i saw you got a deposit for the 92-93 lid!!!!!!
yuri
#22
Honda-Tech Member
Thread Starter
Join Date: Nov 2009
Posts: 118
Likes: 0
Received 0 Likes
on
0 Posts
#25
FSAE
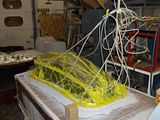
Start with a CAD model of your geometry with hard points and scribe lines. Use this to export surfaces to a router or mill.
Sand/prep:

Infuse master tool:
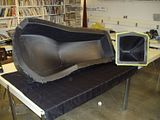
Master tool (notice the scribes that will transfer to the part for trim line and hardpoint mounts):
User master tool to lay-up chassis parts:
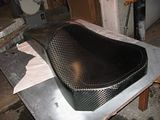
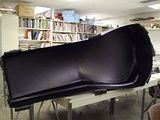
We used infusion tooling resin for the master tools, and oven-vacuum cure prepreg for the chassis components. It is a cored laminate, total chassis weight of ~25lbs.
Finished product:

Sorry for the threadjack...


