KZO-513 = Build Part 2
 06-10-2013, 03:06 AM
#1
Honda-Tech Member
Thread Starter
Join Date: Nov 2007
Location: Australia
Posts: 216
Likes: 0
Received 0 Likes
on
0 Posts
hey guys, I have copy pasted all our updates for BUILD PART 2, & from now on, it will be updated here as per every other website we have this on
cheers
First up. Primal private drift day at calder took its toll on the car. Finally the gearbox decided to break..
Doing limiter launches off the line and going throu the gears wheel spining, put the box on edge. A few too many times and second said goodbye.
I finished out the day using 1st to 3rd, which was still awsome fun. By the end of the night the box was making some seriously funky noises...
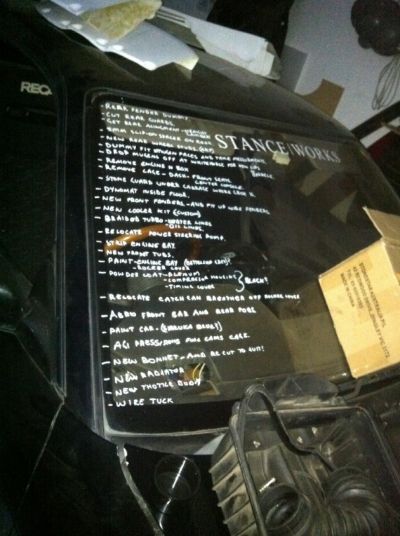
Ok, well since that happended and id have the engine and gearbox out. before anything, i made a list on the windscreen.
Withing not even 10mins this is what the list was....
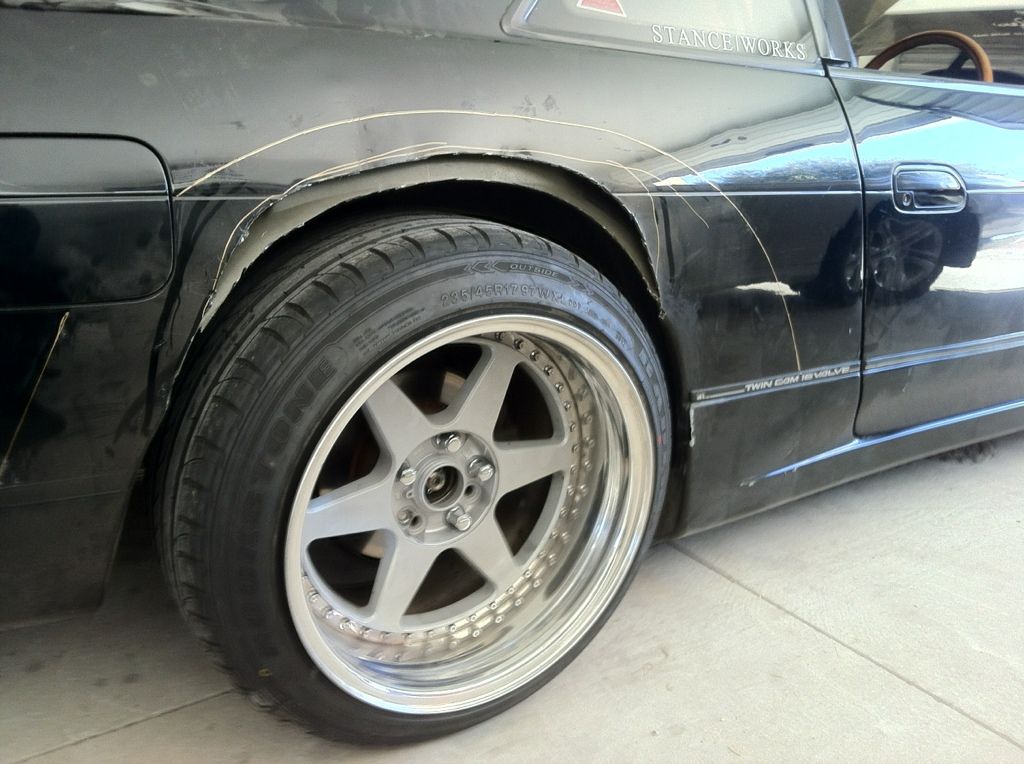
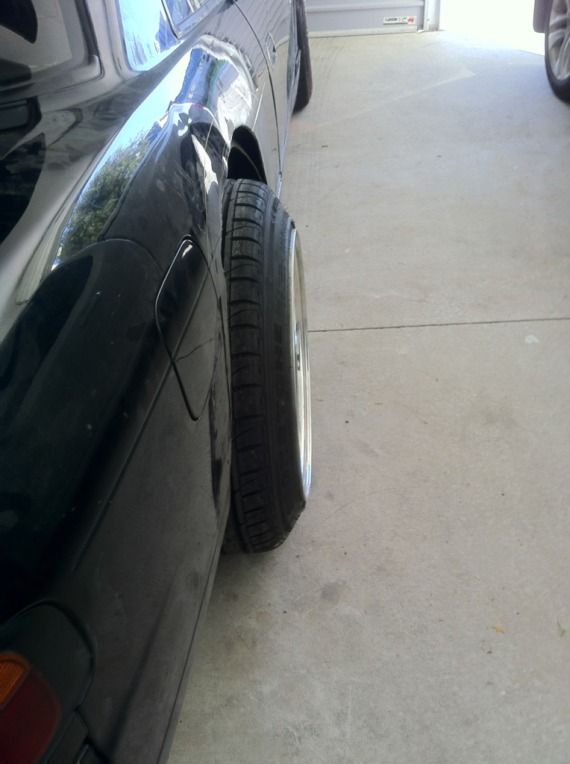
This is the wide body i first took to try on....

This wide body looked good. but the rear wheels were simply not big enough to fill the 100mm wider over fender.
so off they came and bak to the drawing board i went...
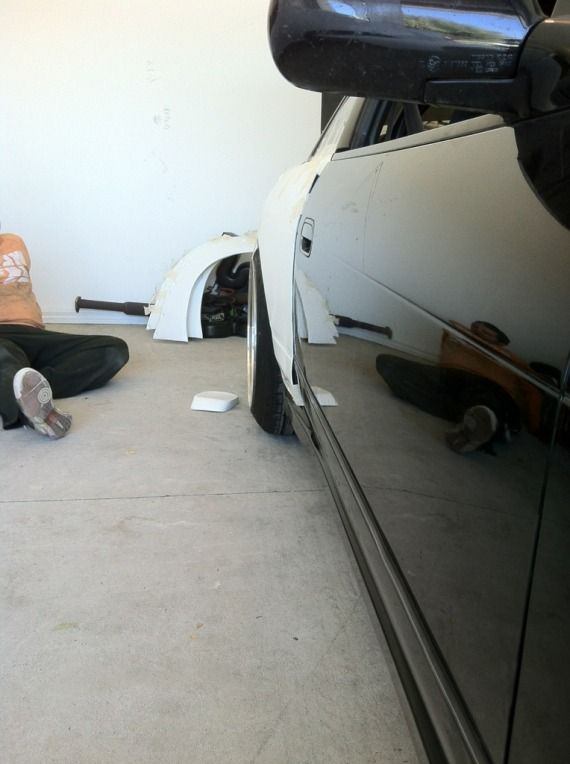
In the mean time i got goin with the angle grinder ;-)
The whole point of the wide body option was to be able to straighten out the camber. My aim was for a straight zero camber setting. After cutting the guard out, i towed to car to the alingners and the most we could get out of the camber arms was 0.5 degrees. I was happy with that, considering i used to run 2 degrees. with a 0.5 positive toe.
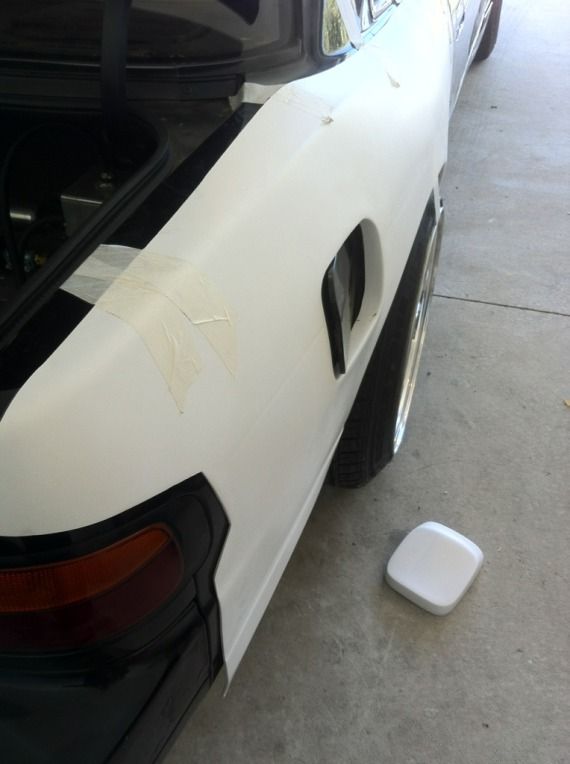
Then yesterday i went for a drive down to Viva Garage in Mordialic. Picked up some 50mm wide body rear guards.
I think this setup is alot cleaner and sleeker look. Still makes the car mega agressive but still gives me the fitment im alfter :-)
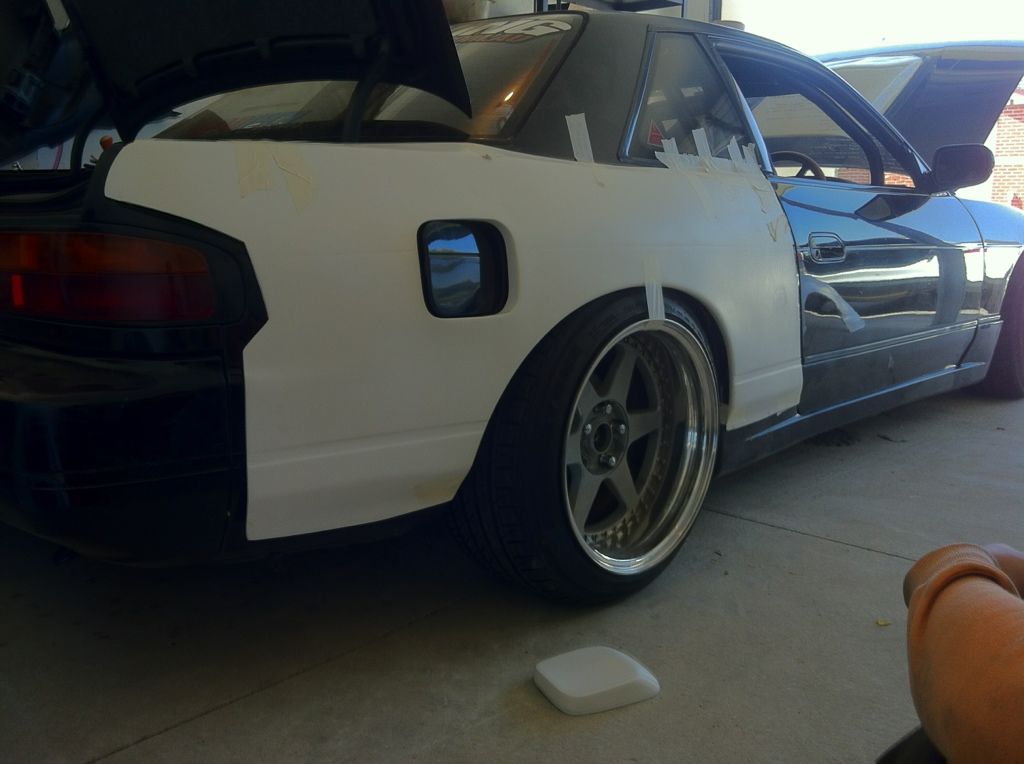
Well thats the updates atm.. There are lots more to come as the car is undergoing major changes..
enjoy!!
cheers
First up. Primal private drift day at calder took its toll on the car. Finally the gearbox decided to break..
Doing limiter launches off the line and going throu the gears wheel spining, put the box on edge. A few too many times and second said goodbye.
I finished out the day using 1st to 3rd, which was still awsome fun. By the end of the night the box was making some seriously funky noises...
Ok, well since that happended and id have the engine and gearbox out. before anything, i made a list on the windscreen.
Withing not even 10mins this is what the list was....
This is the wide body i first took to try on....
This wide body looked good. but the rear wheels were simply not big enough to fill the 100mm wider over fender.
so off they came and bak to the drawing board i went...
In the mean time i got goin with the angle grinder ;-)
The whole point of the wide body option was to be able to straighten out the camber. My aim was for a straight zero camber setting. After cutting the guard out, i towed to car to the alingners and the most we could get out of the camber arms was 0.5 degrees. I was happy with that, considering i used to run 2 degrees. with a 0.5 positive toe.
Then yesterday i went for a drive down to Viva Garage in Mordialic. Picked up some 50mm wide body rear guards.
I think this setup is alot cleaner and sleeker look. Still makes the car mega agressive but still gives me the fitment im alfter :-)
Well thats the updates atm.. There are lots more to come as the car is undergoing major changes..
enjoy!!


 06-10-2013, 03:08 AM
#5
Honda-Tech Member
Thread Starter
Join Date: Nov 2007
Location: Australia
Posts: 216
Likes: 0
Received 0 Likes
on
0 Posts
Small update...
Interior completly stripped...
All glass has been removed
And we just received a pic of our freshly spun lips & barrels for our Mugen M7's...
Specs will b
16 x 10 +5 (front pair only)

Interior completly stripped...
All glass has been removed
And we just received a pic of our freshly spun lips & barrels for our Mugen M7's...
Specs will b
16 x 10 +5 (front pair only)
06-10-2013, 03:08 AM
#6
Honda-Tech Member
Thread Starter
Join Date: Nov 2007
Location: Australia
Posts: 216
Likes: 0
Received 0 Likes
on
0 Posts
I give you the start of part two.
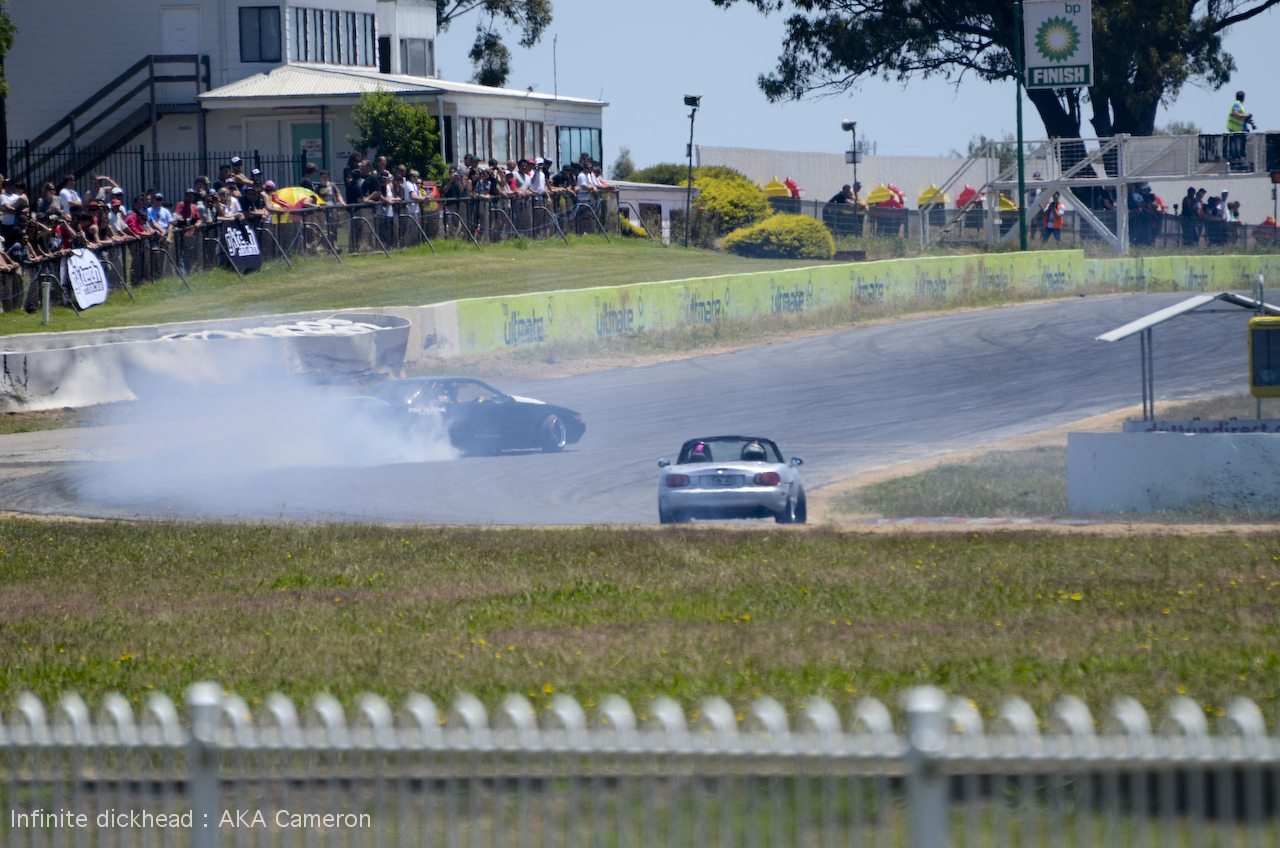
After two years of the car being tuned and tracked without any major issues, second gear decided it needed a permanent vacation (as u already know), and shat itself at a drift day. That didnt stop Toli finishing the day smashing from first to third.

And so part two was decided. Toli to this day had thought "it would have been as simple as pulling the box out and swapping it" but alas as many of us know, decisions and cars are never a simple combination. One thing leads to another, and things blow out of proportion.
As of yesterday, we loaded it up, and took it to oxers place.
http://www.flickr.com/photos/oxerdan/8997181692/
The bonnet latch had been removed, so Toli secured it.
http://www.flickr.com/photos/oxerdan/8997262716/
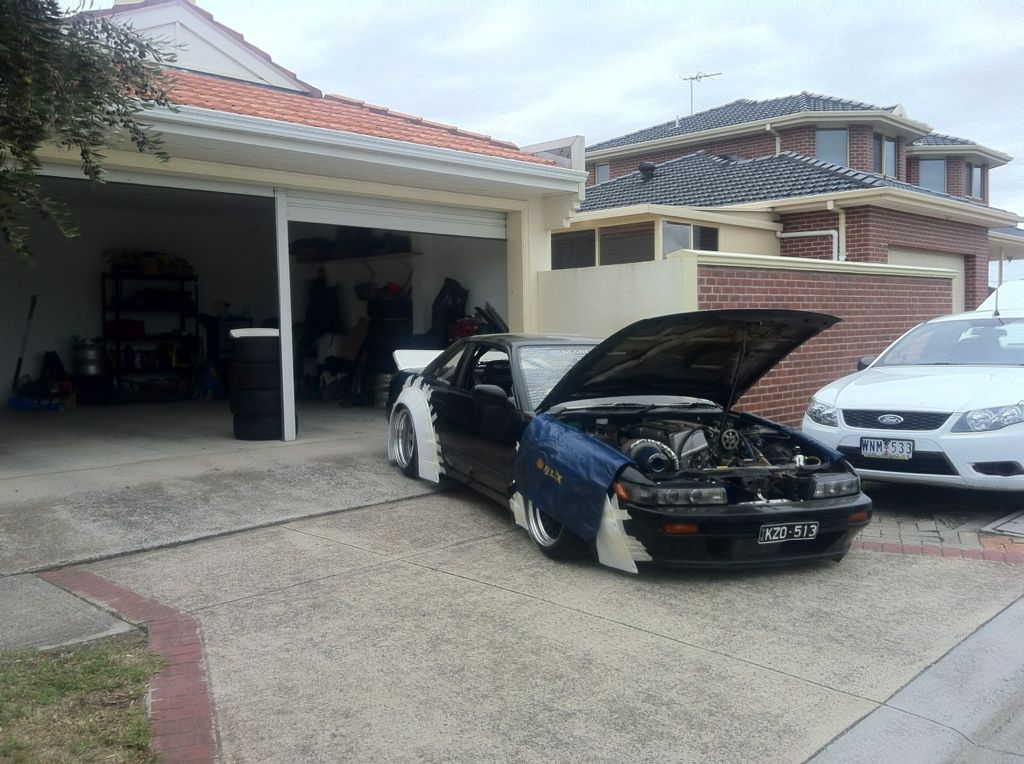
And this is where its going to live for the next couple of months.
http://www.flickr.com/photos/oxerdan/8997262844/
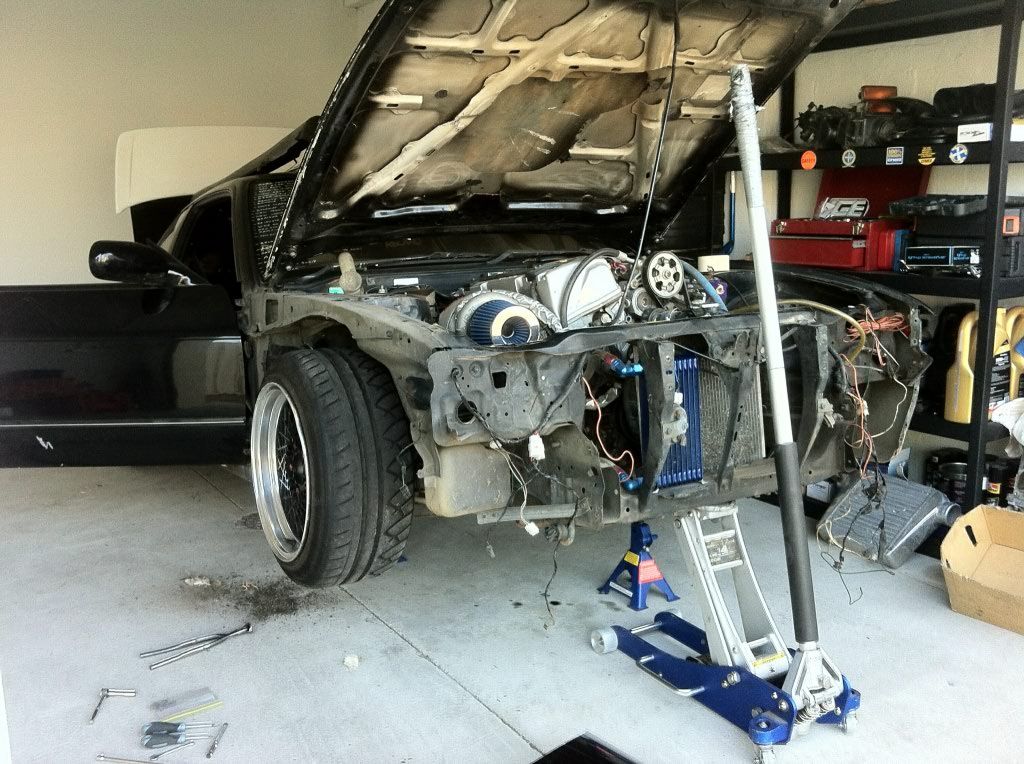
Toli and I have already stripped the shell bare, and the motor and box are just sitting in there on the mounts ready to come out. We're waiting for a bunch of parts to come over from japan, along with some other little bits and pieces. Basically, we're re-doing all the body with origin overfenders on the rear, no bonnet scoop as it had previously, the B-Wave wing has been removed and will be replaced with something else etc etc.
Another new addition will be the front wheels. Toli was in America last year, he joined Oxer for a week in SoCal and they basically did hoodrat car ****. While over they dropped by to visit some of oxer's good friends at APT.9 and as oxer did the previous year, they fell in love with some of their stock. In 2011 whilst visiting and meeting the guys, Oxer saw in person and later purchased the Mugen M7's youve seen on his Legend. Last year when they went, they saw yet another set of M7's they had. Unfortunately two were destroyed in an accident, but the other pair's centers were unscaved. they purchased them immediately. They were originally 16" NSX M7's, so they knew they'd fit. Recently Toli dropped them off at Whitehorse industies where our friend Craig started making the new lips and barrels. The final specs will be roughly 16x10 +5. Craig recently sent toli this teaser, so Im not teasing you guys, since we're being teased just as much.

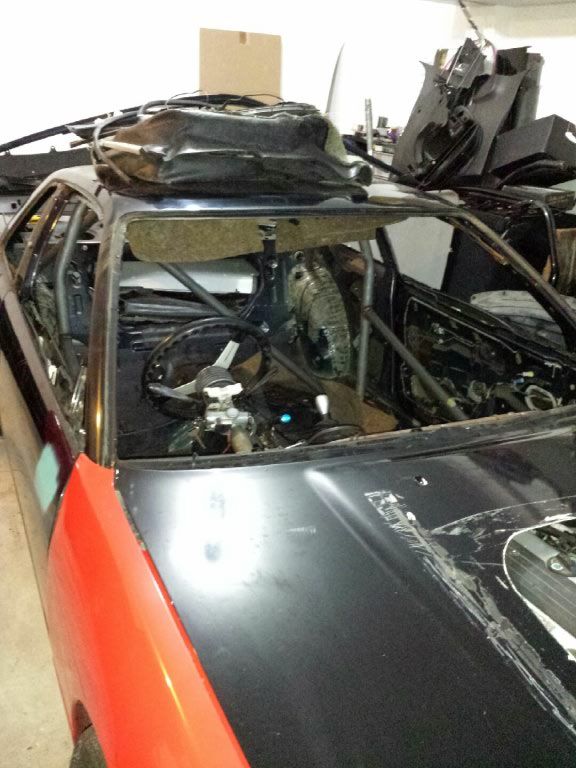
The car was recently fitted with a racing approved roll cage thanks to Brett Shears from dropdead customs. It needs paint, but that comes in due time.
http://www.flickr.com/photos/oxerdan/8997263436/
And recently picked up an s15 dash which we will be fitting.
http://www.flickr.com/photos/oxerdan/8997263306/
http://www.flickr.com/photos/oxerdan/8997263000/
But for now, Oxer has his work cut out. To give a brief insight, with Toli's assistance, Oxer will be making a new transmission tunnel, tubbing the front guards, making a removable radiator support out of tube, shaving the bay, painting the bay and prepping the car for paint. it will be a long couple of months ahead.
Also, I thought about removing the rear window and mounting a seat to make a dicky seat. Thoughts?
http://www.flickr.com/photos/oxerdan/8997263180/
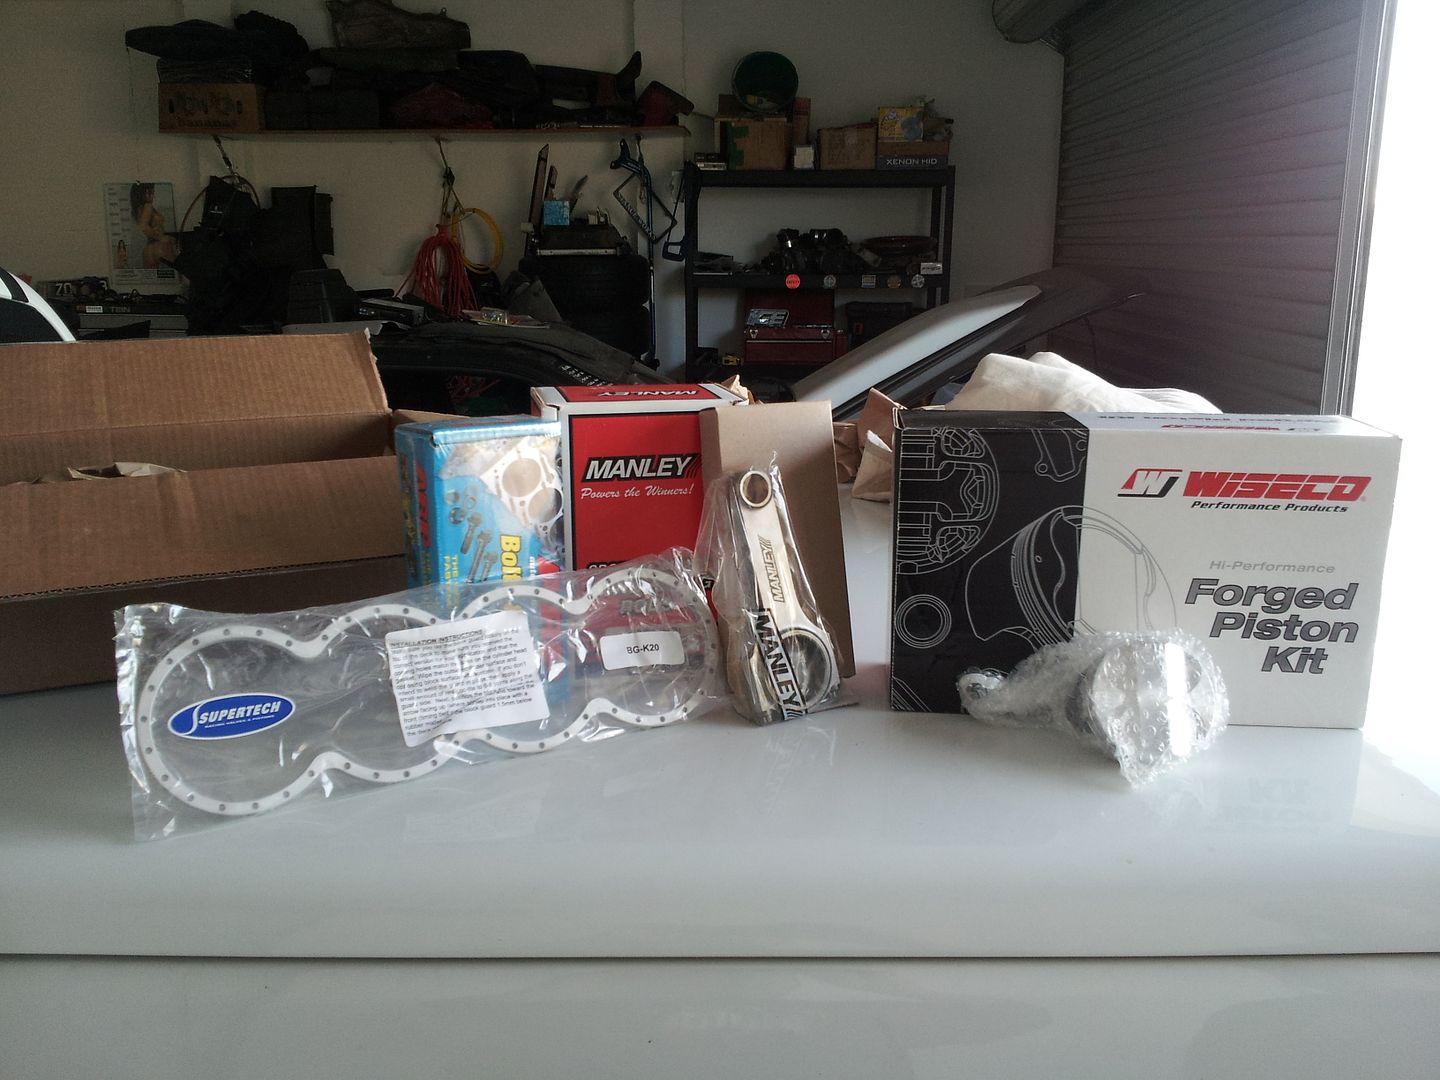
But in all seriousness, We have a lot to do. Did we mention when the motor comes out its getting a full forged rebuild? Aim is to make 350kw at the rears on pump fuel. Considering it made 300kw on 12psi boost on the standard motor, I dont see 350kw being an issue.
For now, a couple more pics, untill we get some progress happening.
http://www.flickr.com/photos/oxerdan/8996087071/
http://www.flickr.com/photos/oxerdan/8996087191/
After two years of the car being tuned and tracked without any major issues, second gear decided it needed a permanent vacation (as u already know), and shat itself at a drift day. That didnt stop Toli finishing the day smashing from first to third.
And so part two was decided. Toli to this day had thought "it would have been as simple as pulling the box out and swapping it" but alas as many of us know, decisions and cars are never a simple combination. One thing leads to another, and things blow out of proportion.
As of yesterday, we loaded it up, and took it to oxers place.
http://www.flickr.com/photos/oxerdan/8997181692/
The bonnet latch had been removed, so Toli secured it.
http://www.flickr.com/photos/oxerdan/8997262716/
And this is where its going to live for the next couple of months.
http://www.flickr.com/photos/oxerdan/8997262844/
Toli and I have already stripped the shell bare, and the motor and box are just sitting in there on the mounts ready to come out. We're waiting for a bunch of parts to come over from japan, along with some other little bits and pieces. Basically, we're re-doing all the body with origin overfenders on the rear, no bonnet scoop as it had previously, the B-Wave wing has been removed and will be replaced with something else etc etc.
Another new addition will be the front wheels. Toli was in America last year, he joined Oxer for a week in SoCal and they basically did hoodrat car ****. While over they dropped by to visit some of oxer's good friends at APT.9 and as oxer did the previous year, they fell in love with some of their stock. In 2011 whilst visiting and meeting the guys, Oxer saw in person and later purchased the Mugen M7's youve seen on his Legend. Last year when they went, they saw yet another set of M7's they had. Unfortunately two were destroyed in an accident, but the other pair's centers were unscaved. they purchased them immediately. They were originally 16" NSX M7's, so they knew they'd fit. Recently Toli dropped them off at Whitehorse industies where our friend Craig started making the new lips and barrels. The final specs will be roughly 16x10 +5. Craig recently sent toli this teaser, so Im not teasing you guys, since we're being teased just as much.
The car was recently fitted with a racing approved roll cage thanks to Brett Shears from dropdead customs. It needs paint, but that comes in due time.
http://www.flickr.com/photos/oxerdan/8997263436/
And recently picked up an s15 dash which we will be fitting.
http://www.flickr.com/photos/oxerdan/8997263306/
http://www.flickr.com/photos/oxerdan/8997263000/
But for now, Oxer has his work cut out. To give a brief insight, with Toli's assistance, Oxer will be making a new transmission tunnel, tubbing the front guards, making a removable radiator support out of tube, shaving the bay, painting the bay and prepping the car for paint. it will be a long couple of months ahead.
Also, I thought about removing the rear window and mounting a seat to make a dicky seat. Thoughts?
http://www.flickr.com/photos/oxerdan/8997263180/
But in all seriousness, We have a lot to do. Did we mention when the motor comes out its getting a full forged rebuild? Aim is to make 350kw at the rears on pump fuel. Considering it made 300kw on 12psi boost on the standard motor, I dont see 350kw being an issue.
For now, a couple more pics, untill we get some progress happening.
http://www.flickr.com/photos/oxerdan/8996087071/
http://www.flickr.com/photos/oxerdan/8996087191/
Trending Topics
06-10-2013, 05:44 AM
#8
Honda-Tech Member
Thread Starter
Join Date: Nov 2007
Location: Australia
Posts: 216
Likes: 0
Received 0 Likes
on
0 Posts
06-11-2013, 09:08 AM
#9
Honda-Tech Member
Sorry ya that was a typo.
That's an interesting setup.
Although, I'm surprised you aren't using an f20c or f22c and v160...
What rear end? Q45?
That's an interesting setup.
Although, I'm surprised you aren't using an f20c or f22c and v160...
What rear end? Q45?
06-11-2013, 12:17 PM
#10
Honda-Tech Member
Thread Starter
Join Date: Nov 2007
Location: Australia
Posts: 216
Likes: 0
Received 0 Likes
on
0 Posts
Originally, it was supposed to b a NA setup so we prefered K series engine for obvious aftermarket support...
But due to lack of space for some killer headers, we decided nwxt best thing was turbo...
And f20 /22 at the time was nearly 3 times the price of a K20
Rear end is stock r200 s13...
06-11-2013, 12:27 PM
#11
Honda-Tech Member
I like it.
Keep up the good work.
I think the s2k tranny just can't hold up to drifting abuse though - maybe a K-to-V160 adapter is in your future...
Are LSX's cheap over there?
Keep up the good work.
I think the s2k tranny just can't hold up to drifting abuse though - maybe a K-to-V160 adapter is in your future...
Are LSX's cheap over there?
06-11-2013, 04:50 PM
#13
Honda-Tech Member
Thread Starter
Join Date: Nov 2007
Location: Australia
Posts: 216
Likes: 0
Received 0 Likes
on
0 Posts
My brother driving style and the way the car is setup...it doesnt really abuse the box...
No clutch kicking at all...
The box broke 2nd gear coz.my bro was being.a dumb ****...lol
We might.b looking to ppg synchro gear set for s2k...
Lsx here are everywhere...
Thanx champ
06-23-2013, 11:58 PM
#14
Honda-Tech Member
Thread Starter
Join Date: Nov 2007
Location: Australia
Posts: 216
Likes: 0
Received 0 Likes
on
0 Posts
So at the start of last week Toli pulled the old tunnel off which consisted of some thin alloy that he originally pop-riveted on and sealed up with silicone.
http://www.flickr.com/photos/oxerdan/9065283017/
He also brought the rear quarters to bare metal. Oxer originally told him the idea of cutting and folding the inner skin over the outter, so he did it whlie it was still painted. Oxer Made him do it all over again :stickoutt
http://www.flickr.com/photos/oxerdan/9065283105/
Oxer welding the rears up, photo thanks to Tranz.
http://www.flickr.com/photos/oxerdan/9065283207/
all welded, the remainging holes will be filled with seam sealer. Photo by Tranz.
http://www.flickr.com/photos/oxerdan/9065283293/
Toli cleaning the welds up and prepping it for etch primer. Photo by Tranz
http://www.flickr.com/photos/oxerdan/9065283357/
Then next was to start fabrication the new tunnel. Oxer decided to make the main part of it with a tube frame to add a little more strength. Initially there was a whole lot of flex through the tunnel having such a large section being cut out. Ideally Oxer would have liked to have folded up the whole tunnel from one large sheet, but since Oxer no longer has access to the sheet metal tools he once had, and is doing this in his garage, he has to make do with what he has.
http://www.flickr.com/photos/oxerdan/9065283521/
To make the sheet sections up, Oxer made a makeshift sheet folder. Improvisation; The key to all great builds.
http://www.flickr.com/photos/oxerdan/9065303863/
For the sides, a little more metal work was in order. To try match the shape of the factory floor/firewall, Oxer tapped up a section with a hammer and dolly on the floor. Toli said that night I should have just folded a section. Part of the reason for doing it this way which takes a little longer was to make sure Oxer still had it. He hasnt done any serious fabrication for quite a few years, but to be honest, its like riding a bike. If he had the proper tooling and an english wheel, it would have come out better, but considering no one will ever see it apart from here, We not worried in the least.
http://www.flickr.com/photos/oxerdan/9065303953/
http://www.flickr.com/photos/oxerdan/9065304081/
Mohsen came past, this was his contribution
http://www.flickr.com/photos/oxerdan/9065304159/
Then Toli arrived and we decided it was time for the motor to come out. We went to our friends to pick up Oxer's engine crane. The crane itself has been through a hard life, having bein lent to supposed mates, and sitting in the weather for years on end.
http://www.flickr.com/photos/oxerdan/9065304345/
the release valve used to have little tabs on it to assist the release of the hydraulic fluid. Over the years though, somewhere along the line, someone stripped it.
http://www.flickr.com/photos/oxerdan/9065320329/
so Oxer fixed it.
http://www.flickr.com/photos/oxerdan/9067559096/
Meanwhile, Toli was doin work strapping the engine up.
http://www.flickr.com/photos/oxerdan/9065320409/
so we pulled it.
http://www.flickr.com/photos/oxerdan/9065320489/
http://www.flickr.com/photos/oxerdan/9065320583/
http://www.flickr.com/photos/oxerdan/9065320699/
http://www.flickr.com/photos/oxerdan/9065320845/
Before the motor came out, Oxer made up a guide so he know where the Turbo sits in the engine bay. Because we are tubbing it, when oxer does the sheet metal in the bay his going to have to modify this side to make clearance for the turbo. That means he'll get to tap up more sheet, Oxer dont know why, "but theres something satisfying about shaping a piece of metal with a hammer and dolly. Its soothing, no matter how long it takes, its enjoyable. "says Oxer
.http://www.flickr.com/photos/oxerdan/9067559192/
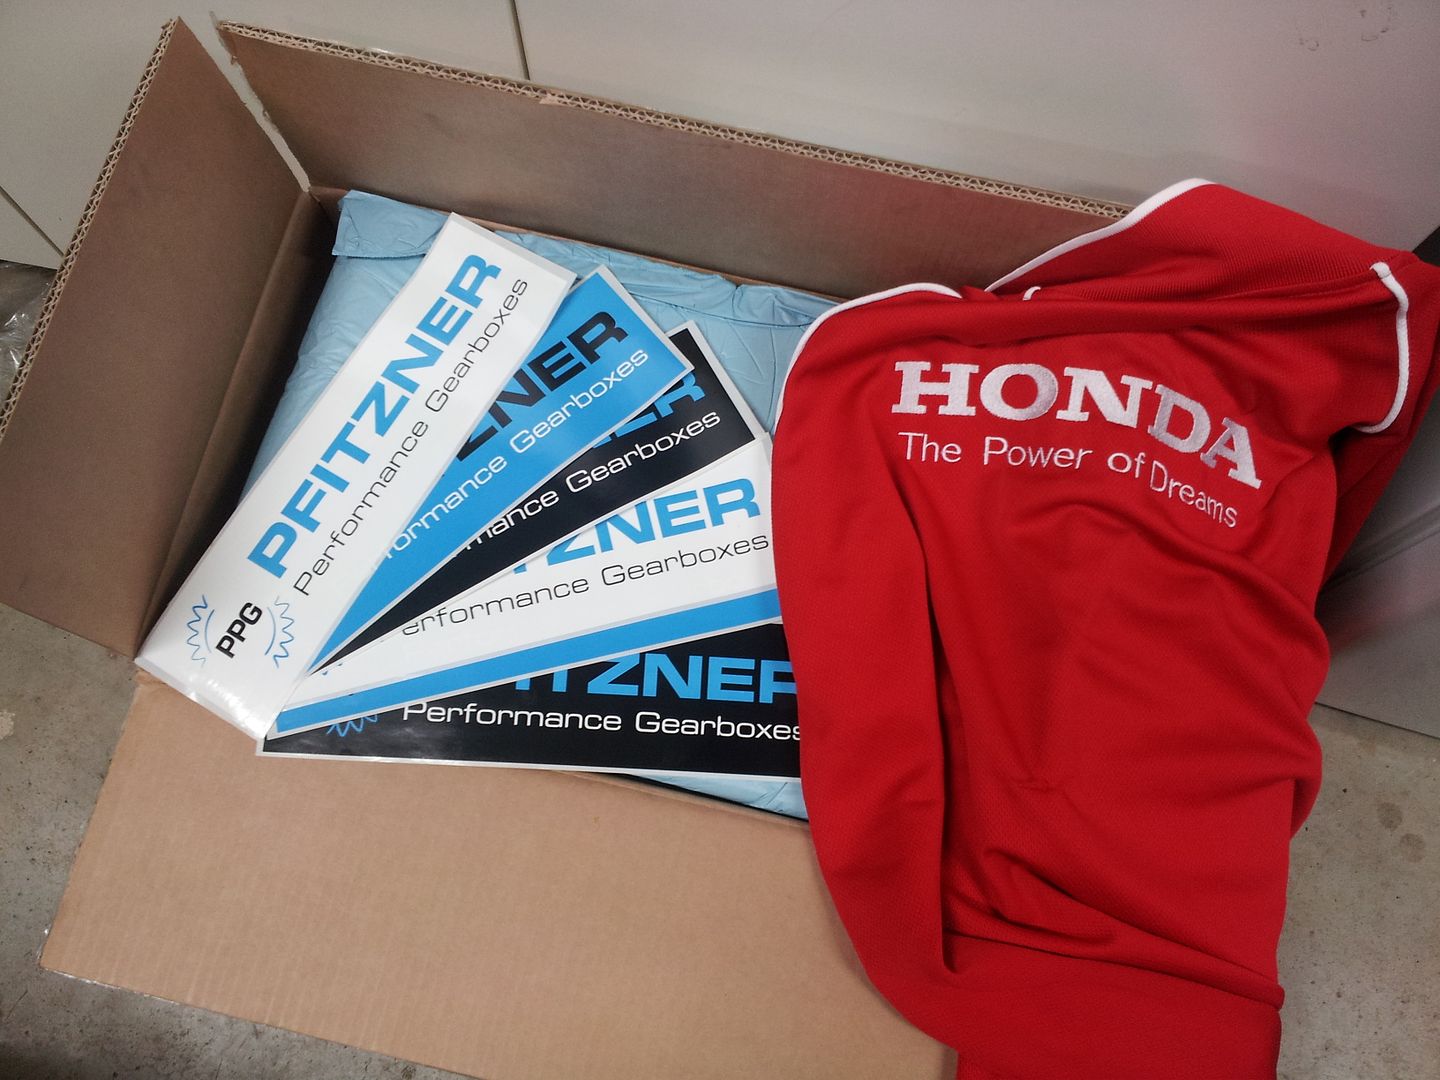
Since the motor was out, we decided it was time for a break, as we reminisced about 'Murica.
http://www.flickr.com/photos/oxerdan/9067559348/
And we hung this up.
http://www.flickr.com/photos/oxerdan/9067559282/
Then Oxer wire wheeled under the tunnel and started welding in the sheets he had made up. Photos by Toli.
http://www.flickr.com/photos/oxerdan/9067559418/
http://www.flickr.com/photos/oxerdan/9067559494/
Welding is also like riding a bike.
http://www.flickr.com/photos/oxerdan/9067617184/
http://www.flickr.com/photos/oxerdan/9067617284/
At that point we called it a night. During this week Oxer will make up the remainder of the tunnel, finish the welding, etch prime it, seal it up. Then we can start cutting the front tubs out and working in the bay. Until then....
http://www.flickr.com/photos/oxerdan/9065283017/
He also brought the rear quarters to bare metal. Oxer originally told him the idea of cutting and folding the inner skin over the outter, so he did it whlie it was still painted. Oxer Made him do it all over again :stickoutt
http://www.flickr.com/photos/oxerdan/9065283105/
Oxer welding the rears up, photo thanks to Tranz.
http://www.flickr.com/photos/oxerdan/9065283207/
all welded, the remainging holes will be filled with seam sealer. Photo by Tranz.
http://www.flickr.com/photos/oxerdan/9065283293/
Toli cleaning the welds up and prepping it for etch primer. Photo by Tranz
http://www.flickr.com/photos/oxerdan/9065283357/
Then next was to start fabrication the new tunnel. Oxer decided to make the main part of it with a tube frame to add a little more strength. Initially there was a whole lot of flex through the tunnel having such a large section being cut out. Ideally Oxer would have liked to have folded up the whole tunnel from one large sheet, but since Oxer no longer has access to the sheet metal tools he once had, and is doing this in his garage, he has to make do with what he has.
http://www.flickr.com/photos/oxerdan/9065283521/
To make the sheet sections up, Oxer made a makeshift sheet folder. Improvisation; The key to all great builds.
http://www.flickr.com/photos/oxerdan/9065303863/
For the sides, a little more metal work was in order. To try match the shape of the factory floor/firewall, Oxer tapped up a section with a hammer and dolly on the floor. Toli said that night I should have just folded a section. Part of the reason for doing it this way which takes a little longer was to make sure Oxer still had it. He hasnt done any serious fabrication for quite a few years, but to be honest, its like riding a bike. If he had the proper tooling and an english wheel, it would have come out better, but considering no one will ever see it apart from here, We not worried in the least.
http://www.flickr.com/photos/oxerdan/9065303953/
http://www.flickr.com/photos/oxerdan/9065304081/
Mohsen came past, this was his contribution
http://www.flickr.com/photos/oxerdan/9065304159/
Then Toli arrived and we decided it was time for the motor to come out. We went to our friends to pick up Oxer's engine crane. The crane itself has been through a hard life, having bein lent to supposed mates, and sitting in the weather for years on end.
http://www.flickr.com/photos/oxerdan/9065304345/
the release valve used to have little tabs on it to assist the release of the hydraulic fluid. Over the years though, somewhere along the line, someone stripped it.
http://www.flickr.com/photos/oxerdan/9065320329/
so Oxer fixed it.
http://www.flickr.com/photos/oxerdan/9067559096/
Meanwhile, Toli was doin work strapping the engine up.
http://www.flickr.com/photos/oxerdan/9065320409/
so we pulled it.
http://www.flickr.com/photos/oxerdan/9065320489/
http://www.flickr.com/photos/oxerdan/9065320583/
http://www.flickr.com/photos/oxerdan/9065320699/
http://www.flickr.com/photos/oxerdan/9065320845/
Before the motor came out, Oxer made up a guide so he know where the Turbo sits in the engine bay. Because we are tubbing it, when oxer does the sheet metal in the bay his going to have to modify this side to make clearance for the turbo. That means he'll get to tap up more sheet, Oxer dont know why, "but theres something satisfying about shaping a piece of metal with a hammer and dolly. Its soothing, no matter how long it takes, its enjoyable. "says Oxer
.http://www.flickr.com/photos/oxerdan/9067559192/
Since the motor was out, we decided it was time for a break, as we reminisced about 'Murica.
http://www.flickr.com/photos/oxerdan/9067559348/
And we hung this up.
http://www.flickr.com/photos/oxerdan/9067559282/
Then Oxer wire wheeled under the tunnel and started welding in the sheets he had made up. Photos by Toli.
http://www.flickr.com/photos/oxerdan/9067559418/
http://www.flickr.com/photos/oxerdan/9067559494/
Welding is also like riding a bike.
http://www.flickr.com/photos/oxerdan/9067617184/
http://www.flickr.com/photos/oxerdan/9067617284/
At that point we called it a night. During this week Oxer will make up the remainder of the tunnel, finish the welding, etch prime it, seal it up. Then we can start cutting the front tubs out and working in the bay. Until then....
06-23-2013, 11:59 PM
#15
Honda-Tech Member
Thread Starter
Join Date: Nov 2007
Location: Australia
Posts: 216
Likes: 0
Received 0 Likes
on
0 Posts
So this past week Oxer has been a little lazy. He finished off the tunnel, fully welded it up and put it in etch primer. I wont go into great detail, ill let the pics do the talking.
http://www.flickr.com/photos/oxerdan/9115624178/
http://www.flickr.com/photos/oxerdan/9115624264/
http://www.flickr.com/photos/oxerdan/9115624362/
http://www.flickr.com/photos/oxerdan/9115624494/
http://www.flickr.com/photos/oxerdan/9115624550/
http://www.flickr.com/photos/oxerdan/9115624682/
The tab at the back of the opening will be trimmed down once the g-box is back in. Next is to seal it with seam sealer, then oxer will paint it with enamel. Once thats done he will start on the bay, I might do a mid week update depending on how much gets done. I still need to get some pics up of the new wheels for the front, and progress has been made with the engine. The power steering pump has been relocated so the opening in the bonnet will be smaller and only the rocker cover will poke through.
Another reason not much progress has been made is due to my wife having our first child. Family is more important then cars
 07-01-2013, 12:32 AM
#22
Honda-Tech Member
Thread Starter
Join Date: Nov 2007
Location: Australia
Posts: 216
Likes: 0
Received 0 Likes
on
0 Posts
Oxer finally started on the front tubs.
http://www.flickr.com/photos/oxerdan/9180242406/
http://www.flickr.com/photos/oxerdan/9180242522/
As you can see the passenger side had a bit of damage from a previous owner...
http://www.flickr.com/photos/oxerdan/9180242602/
http://www.flickr.com/photos/oxerdan/9180242678/
http://www.flickr.com/photos/oxerdan/9180242772/
Cut out.
The rad support will be removed eventually, but before Oxer does that, he had to make the right hand side tub up with the clearance for the turbo's compressor housing.
http://www.flickr.com/photos/oxerdan/9180242880/
http://www.flickr.com/photos/oxerdan/9180254186/
http://www.flickr.com/photos/oxerdan/9180254246/
http://www.flickr.com/photos/oxerdan/9180254308/
http://www.flickr.com/photos/oxerdan/9180254384/
http://www.flickr.com/photos/oxerdan/9180254450/
And thats as far as he got with it. He will get to the same point on the other side during the week, then with any luck next sat he can remove the rad support and make the skirts up. The radiator is here (MK1 VW GOLF), just waiting on the cooler and then we can start doing the removable tube rad support.
And for good measure, Oxer went to take photos of a friends car, so he snapped this of toli's RX7 with wheels thanks to Kriss.
http://www.flickr.com/photos/oxerdan/9180254534/
07-16-2013, 12:44 PM
#23
Honda-Tech Member
Thread Starter
Join Date: Nov 2007
Location: Australia
Posts: 216
Likes: 0
Received 0 Likes
on
0 Posts
Havent made much progress lately...
http://www.flickr.com/photos/oxerdan/9298506799/
http://www.flickr.com/photos/oxerdan/9298506877/
Now to make the inner skitrs. The factory ones oxer cut out as you will see in the following pic arent straight, its a bit of a pain in the *** to fold and bend sheet to make them suit the factory piece with his limited tools.
http://www.flickr.com/photos/oxerdan/9298506961/
To make it easier Oxer made up a tube section which he will also use to reinforce the mount for the removable radiator support.
http://www.flickr.com/photos/oxerdan/9298507053/
http://www.flickr.com/photos/oxerdan/9298507169/
Lots of grinding to make it silky smooth
http://www.flickr.com/photos/oxerdan/9298507269/
http://www.flickr.com/photos/oxerdan/9298513873/
Then to start making the rad support mount...
http://www.flickr.com/photos/oxerdan/9298513927/
http://www.flickr.com/photos/oxerdan/9298514009/
And since toli's rear bar add-on came in, he wanted to mock it all up. Close to how it will sit, only instead of oxers 17" M7's, he'll run his 16" M7's. Pics for the stance kids lol.
http://www.flickr.com/photos/oxerdan/9298514173/
http://www.flickr.com/photos/oxerdan/9298514289/
Oxer was trying yo convince Toli to let him give the car an intense flame job, but he is extremely far from convinced.