
TSX retrofit into 92' prelude JDM black housings!! (56k die)
 01-16-2010, 11:36 AM
#1
Honda-Tech Member
Thread Starter
Join Date: Oct 2006
Location: M Radio, ca
Posts: 345
Likes: 0
Received 0 Likes
on
0 Posts
since im in the process of doing this and found that theres no real good write ups or info for the 4th gen prelude, i will be making this thread for any questions you may have.
i'll be updating this thread as i finish my retrofit and hopefully it will help others out with their own retrofits.
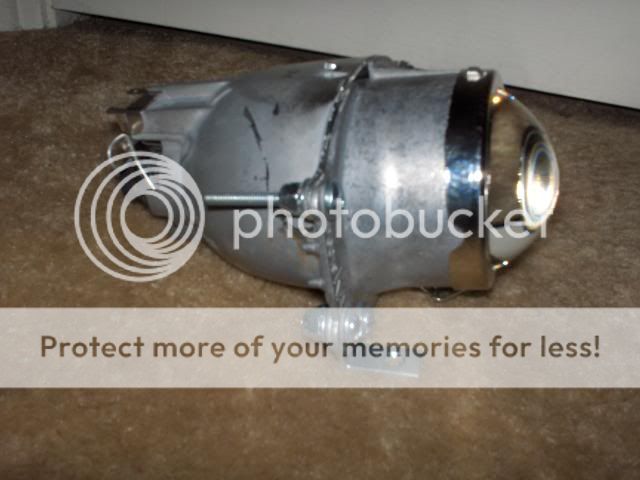
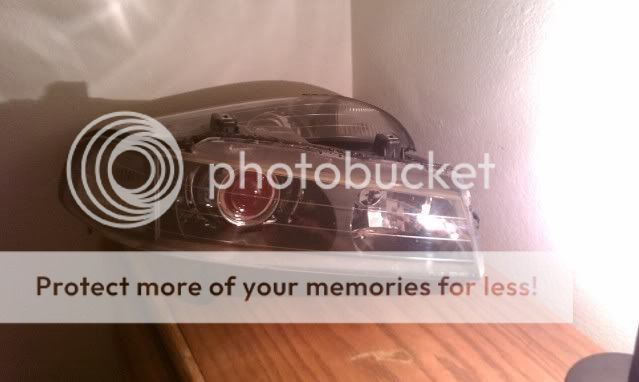
first off get some projectors!!
i went with the TSX projectors cus there are easy to get, have a nice cut off and arent too big unlike the s2k projectors for example.


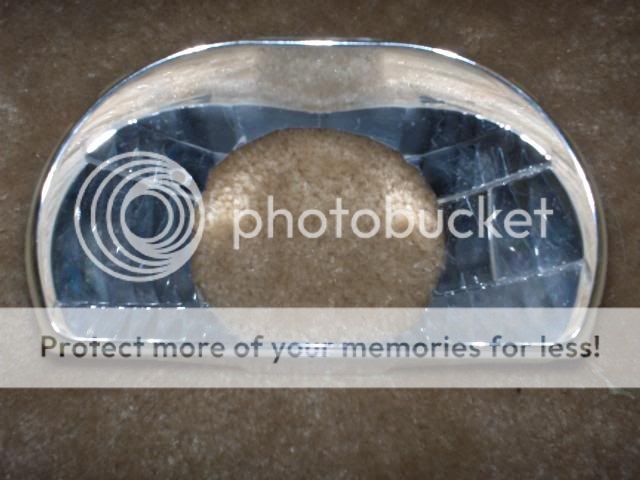
they are from an 06 model so they had the fresnel lenses but i ordered some clear lenses from the retrofit store.

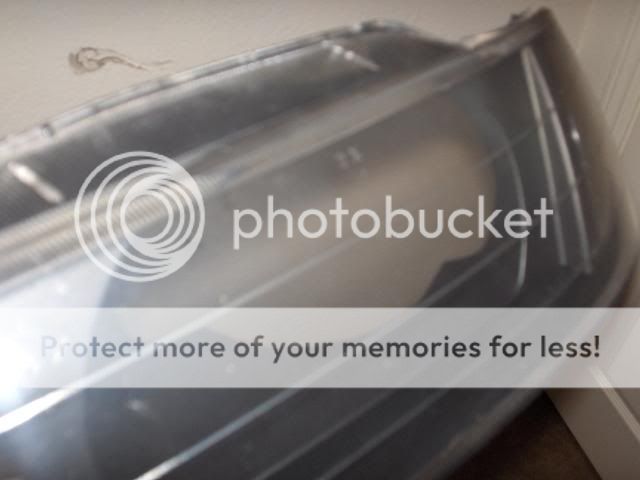
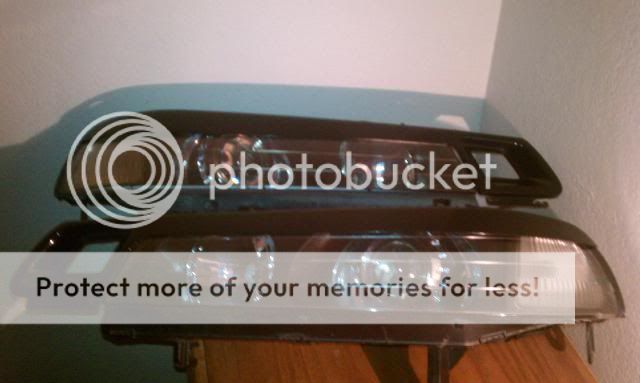
i have the JDM 1 piece so sorry for you USDM guys and gals :lol: preheat oven to 350 degrees. remove the 5 metal clips from the headlights and of course the bulbs and rubber caps. theres also 2 bracket things, remove those also, it is 2 screws each. place the headlight on a cookie tray with a towel under it. turn the oven off and place in over for 8 minutes. remove after 8 minutes and carefully start to pry at the edges with a flat head screwdriver. take your time and work carefully! it should comes off after you have went around the whole headlight with your screw driver.


making poorman custom shrouds...
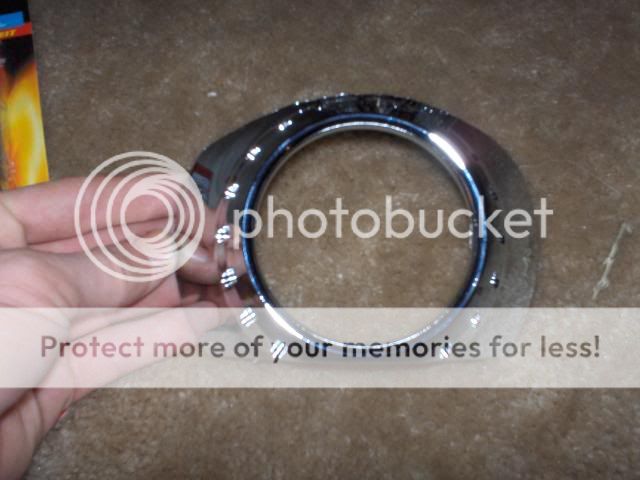
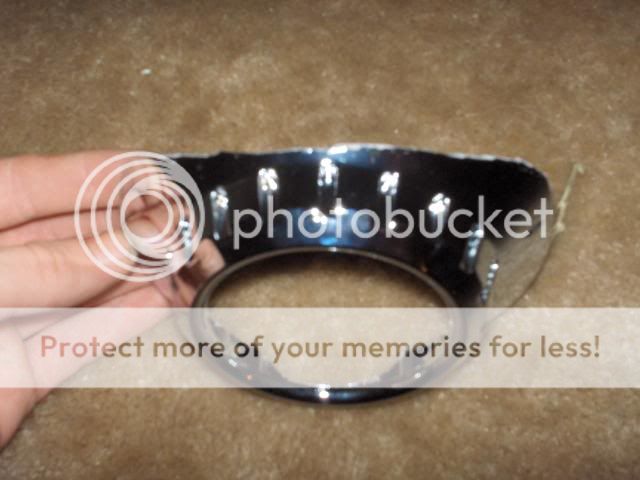
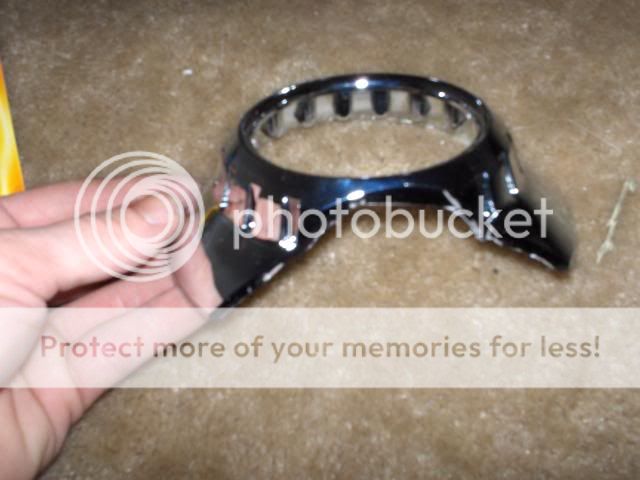
i got this idea from hidplanet forums, you get a 3''-4'' abs plastic reducer from the heating air duct isle at home depot and a travelers coffee mug from walmart, total cost under 10 bucks!! take the chrome ring off the coffee mug lid with a flathead and trim the reducer to fit nice and snug over the projector housing


the reflector bowl and the top half of the projector, i was test fitting and seeing how much needs to be trimmed... its alot


[img]https://i474.photobucket.com/albums/rr103/hotprelude97/HPIM3082.jpg
i cut the holes today and did some more test fitting, still trying to figure out how to mount them and aim them right.


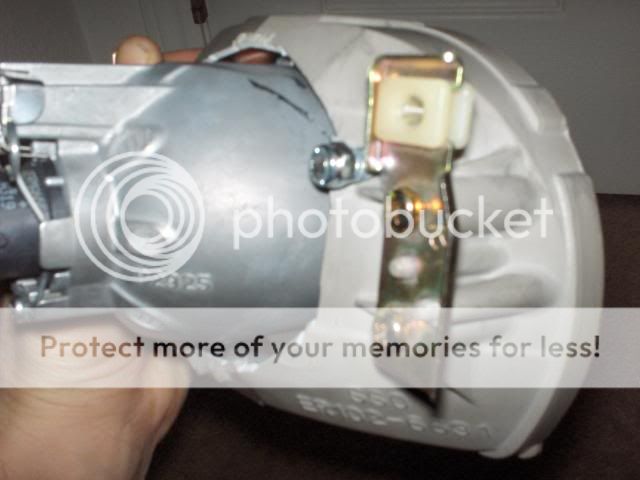
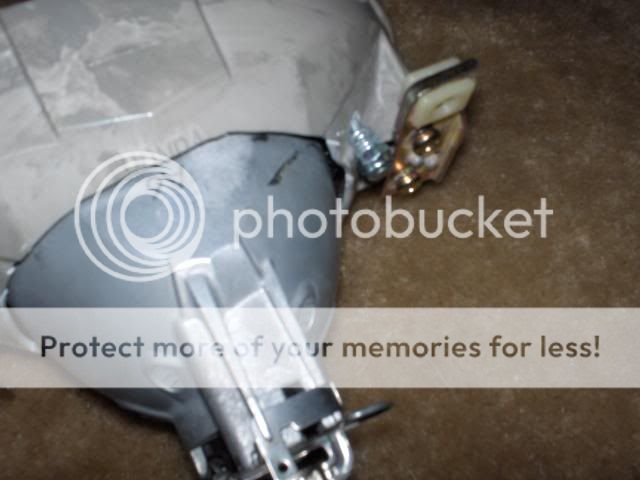
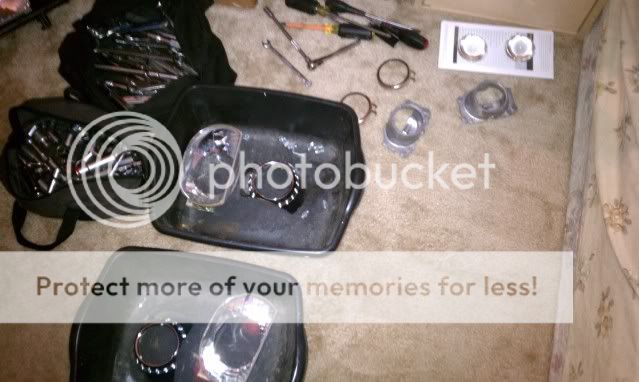
after some research on hidplanetforums i found some other guy used this mounting method and it seems to work pretty good. i got the hardware from home depot, 1" L brackets, #8 32x5/8'' nuts and bolts, and #8 washers and lock washers (i used the washers for color mod). so far i only mounted one side with a nut and bolt so i can go test out the cutoff level and make adjustments before securing the other L bracket. im still gonna put some jb weld on the back of the prjector and reflector bowl for extra strength


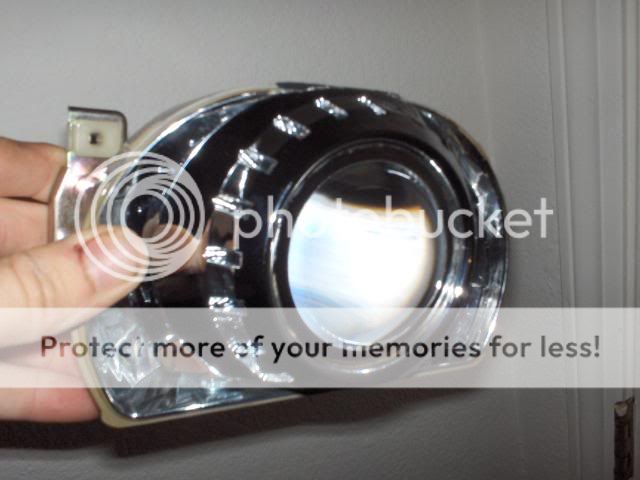
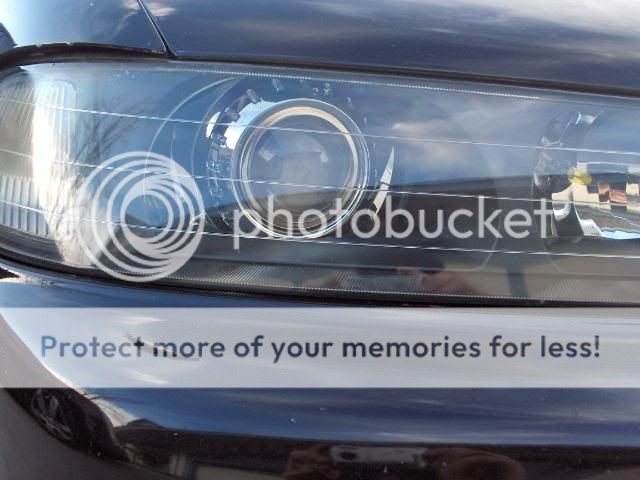
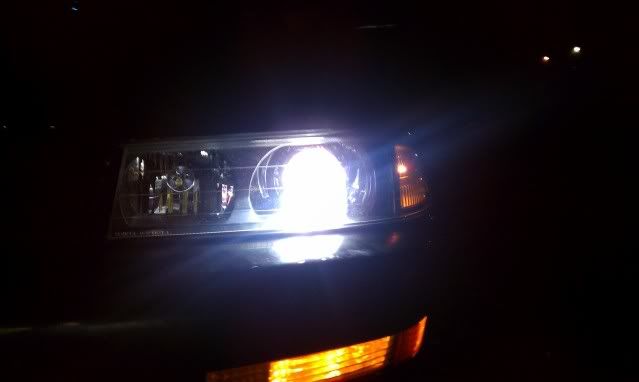
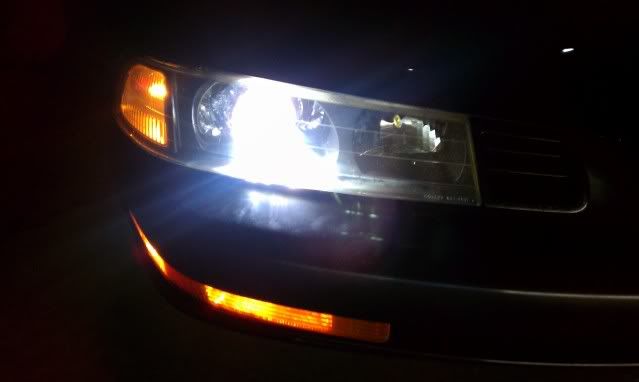
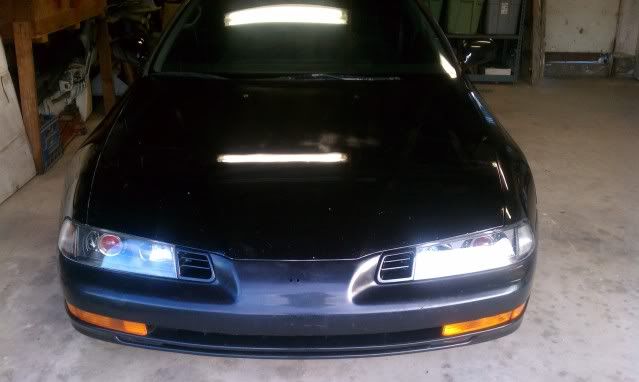
put the headlights on and did some test aiming, these are with the fresnel lenses BTW


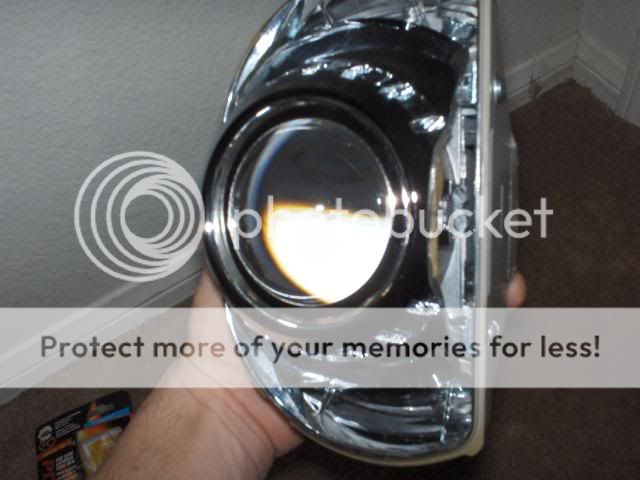
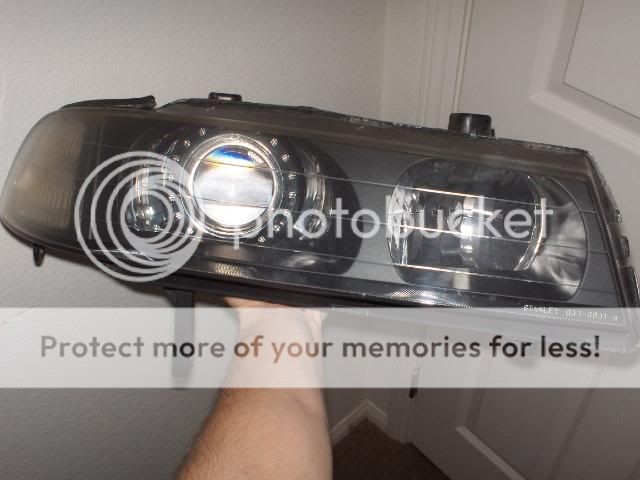
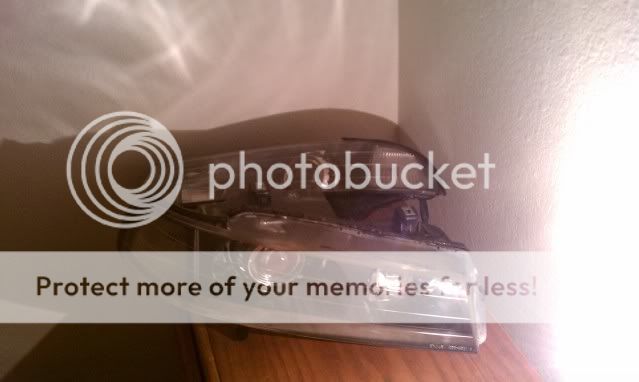
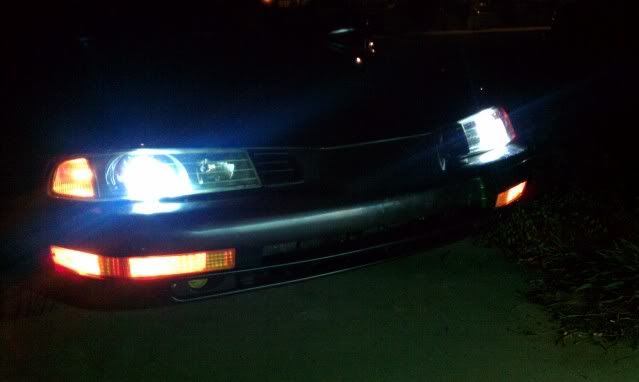
heres some pictures of the projectors all mounted up in the housing, upgraded to ninja star lock washers and nylon lock nuts. i dont want to risk these things coming loose on me


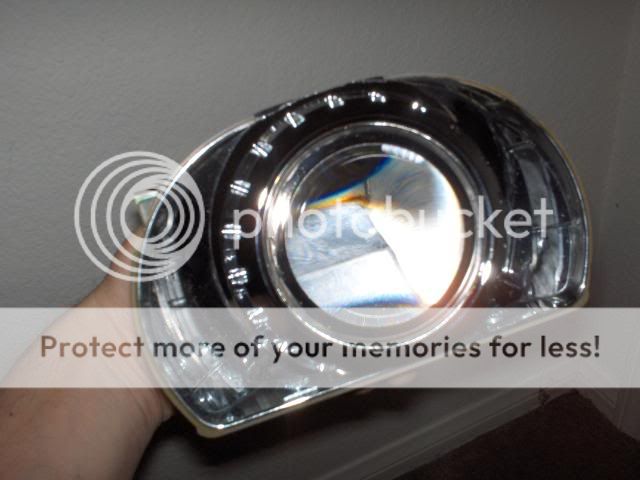
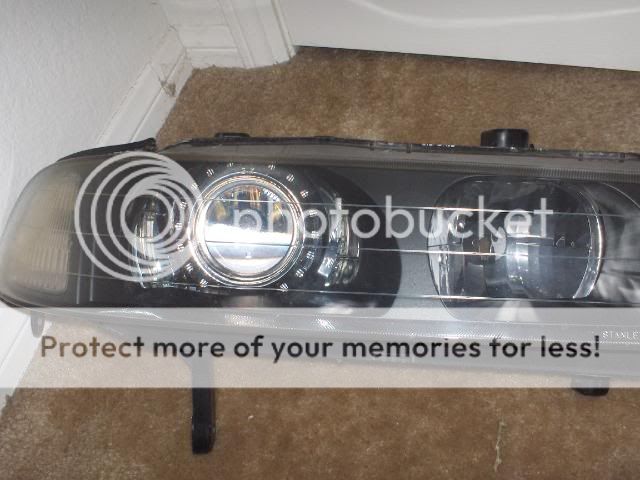
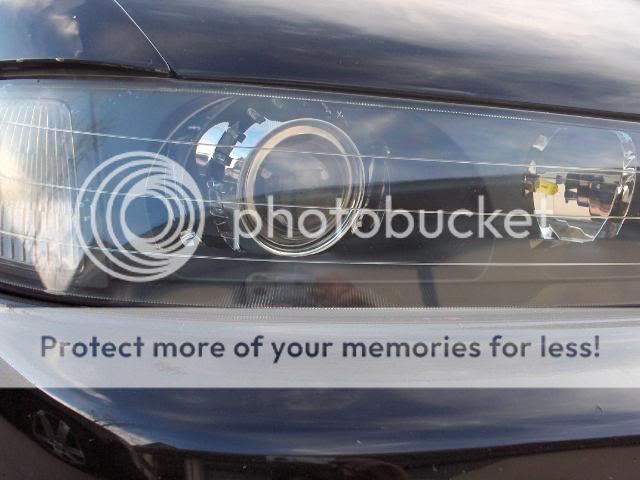
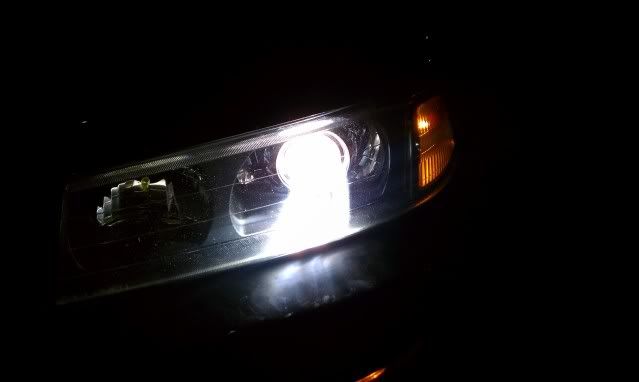
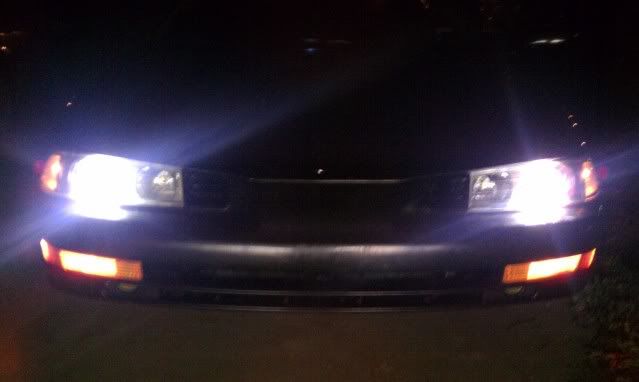
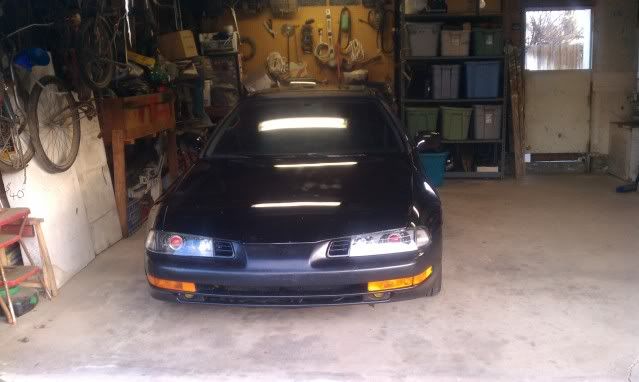
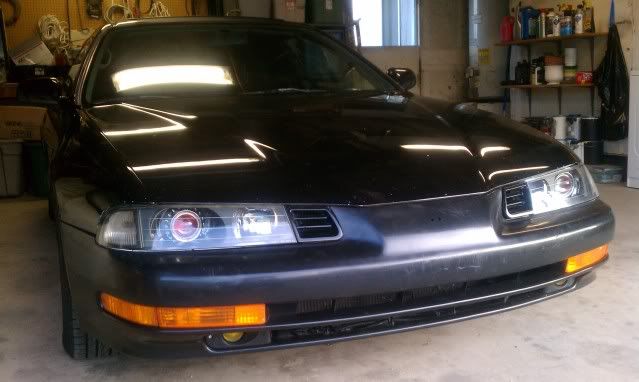
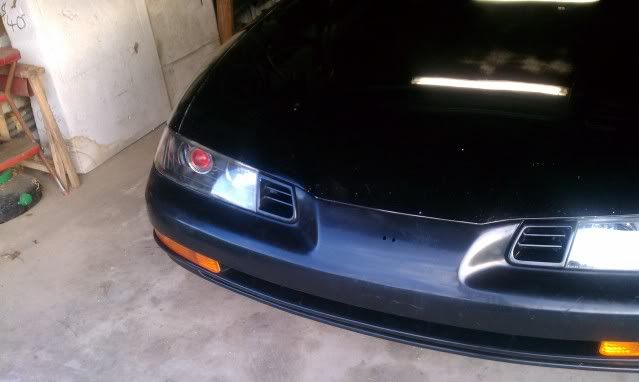
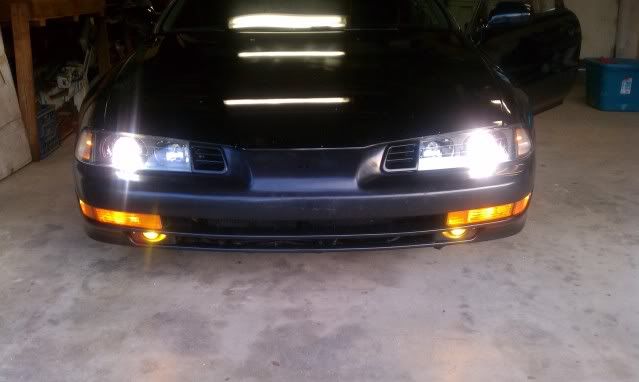
got my cut off as level as i can, these are with the clear lenses BTW


i added a 3rd upper mounting bolt, to keep it more secure. i got 1 1/2" bolt with a nylon lock nut and some lock washers on both sides.
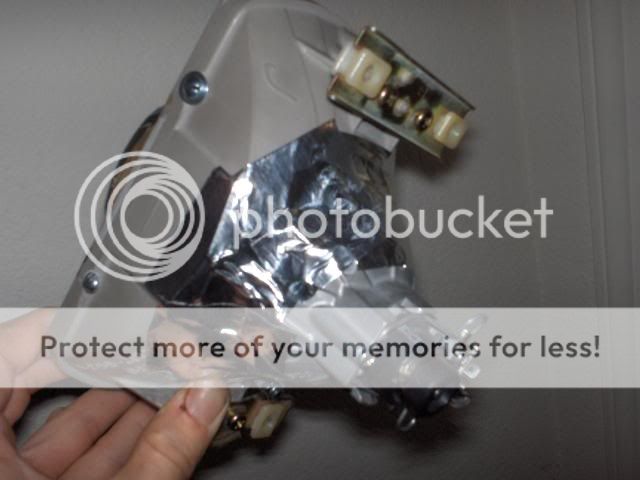
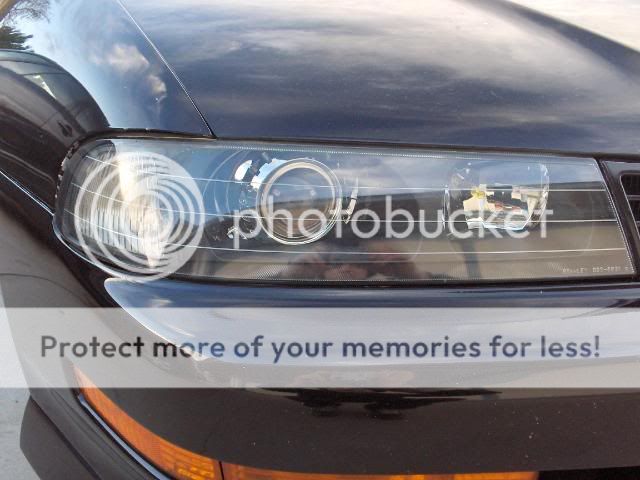
ok so i gave up on my custom shrouds because they didnt really cover everything the way i wanted them too plus splatter punk basically gave me some e46 shrouds for free. thanks again bro!! i had to trim then alot to fit, mostly the top part and some of the bottom
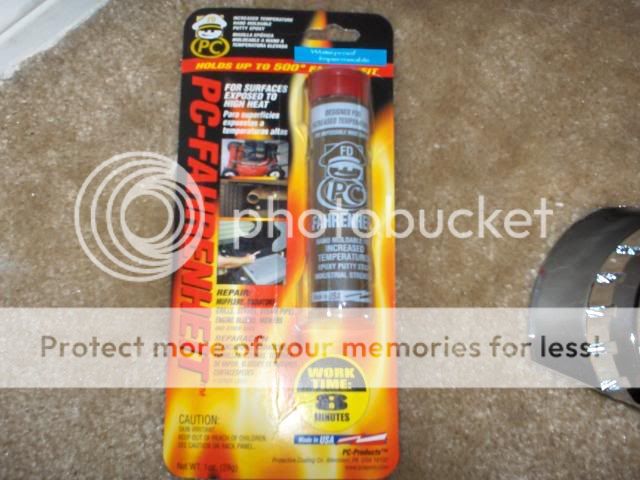
this is the stuff i used to attach the shroud to the projectors, works really well i think and gets rock hard in 10 mins and can withstand high temps up 500 degrees.
then i attached the shroud..
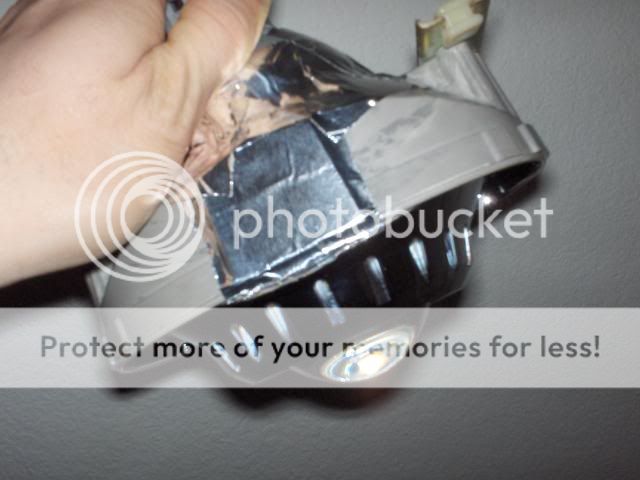
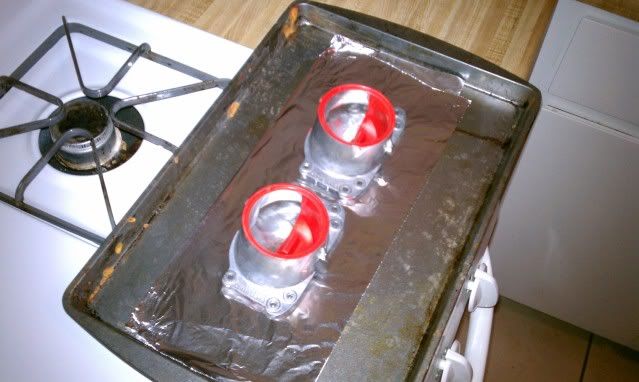
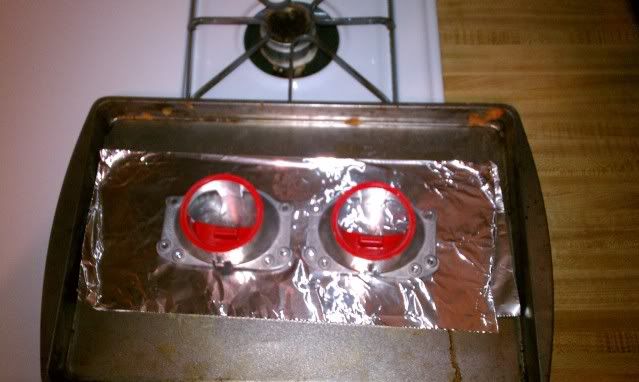
then i added some foil tape, to the exposed parts in the back
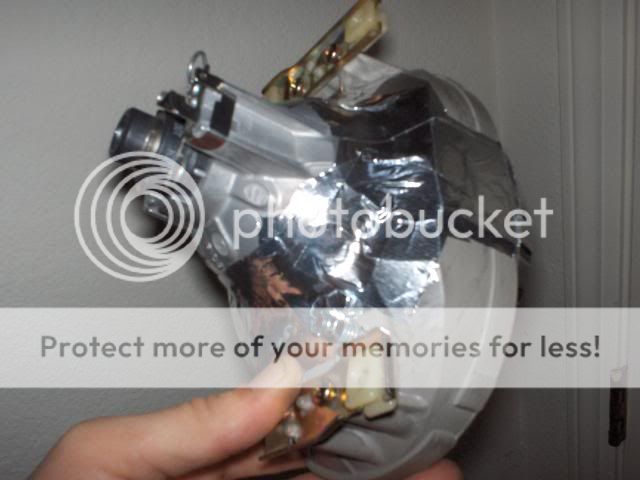
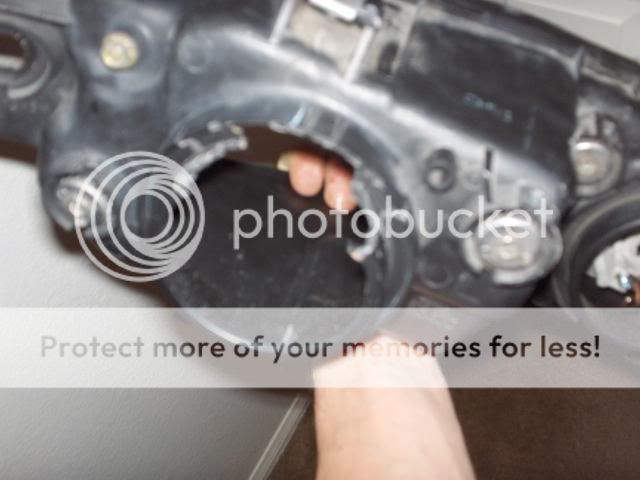
after putting the projector back in the housing, you have to trim some of the black plastic piece thats held in the headlight lense. remove the 2 screws and remove the black piece, then trim as needed to fit the projector and shroud.
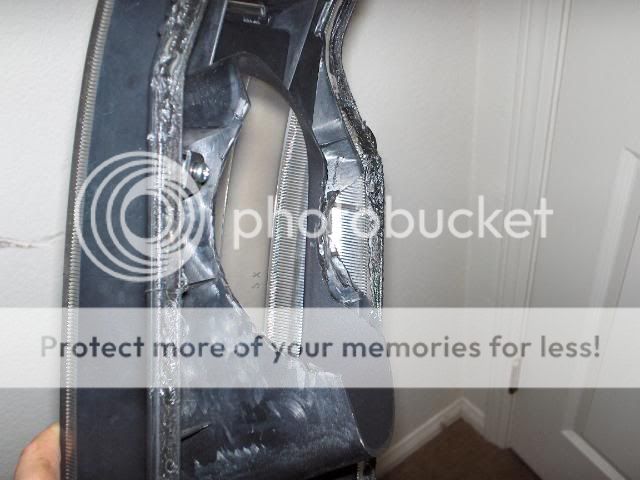
i also had to trim the back of the housing to fit the bulb clip, and make sure it works and doesnt rub on anything
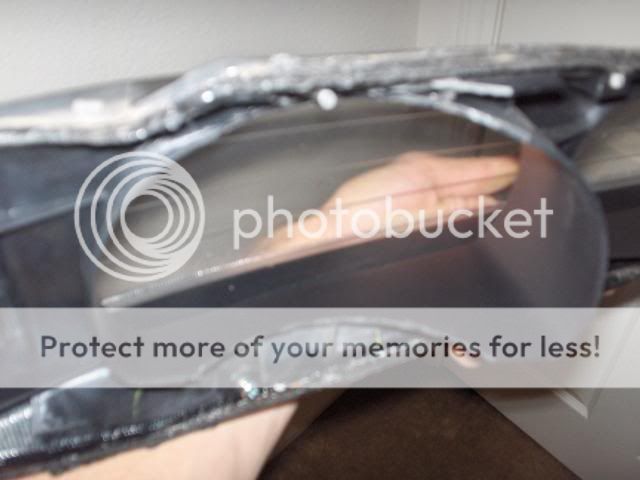
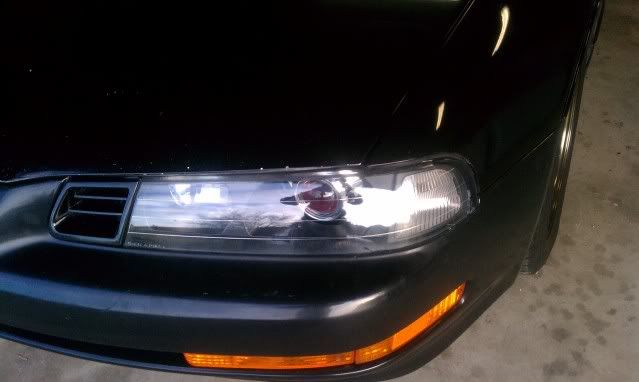
now clean everything off really good and put the headlight lense back on the housing.


sealing the headlight back up, i used the same method i did to open the headlight, but only 300 degress this time at 8 mintues. the little metal clips that come with the headlight really help holding it together when you go to reseal it, just a tip.
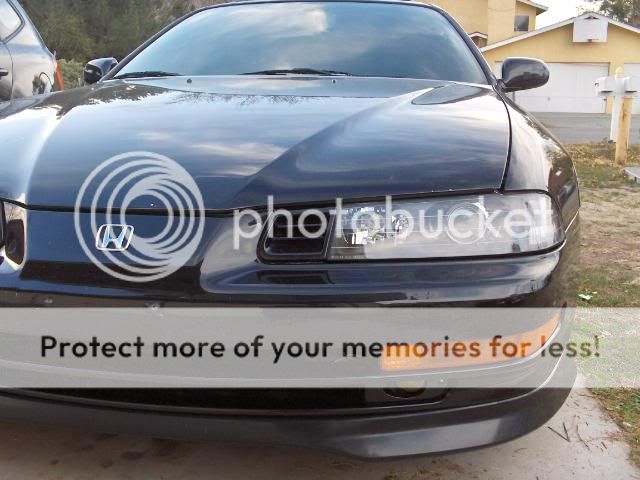
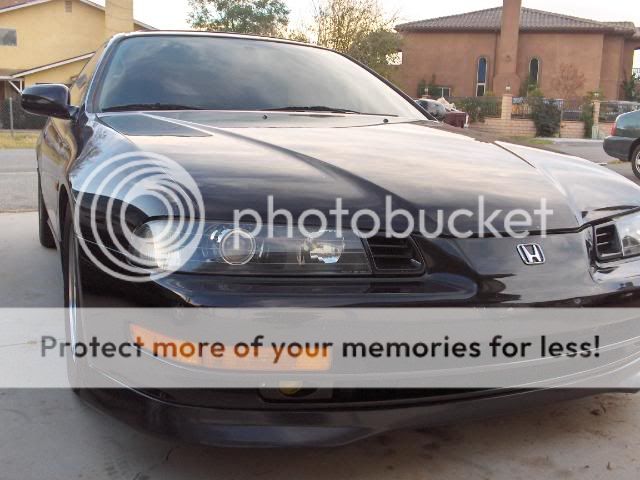
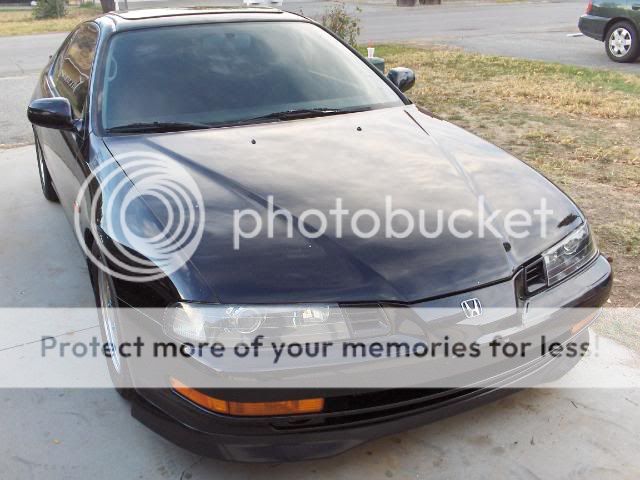
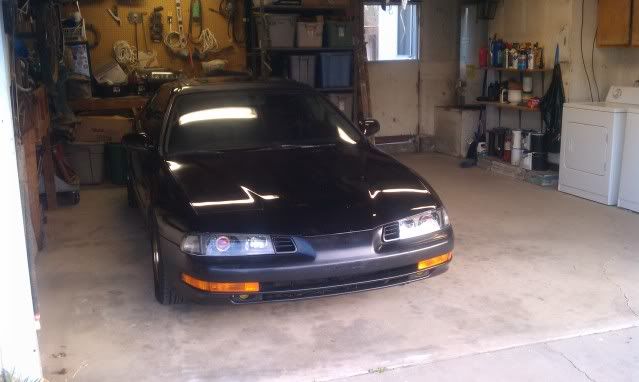
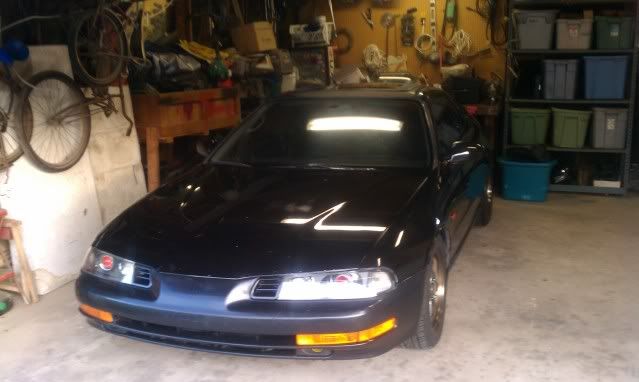
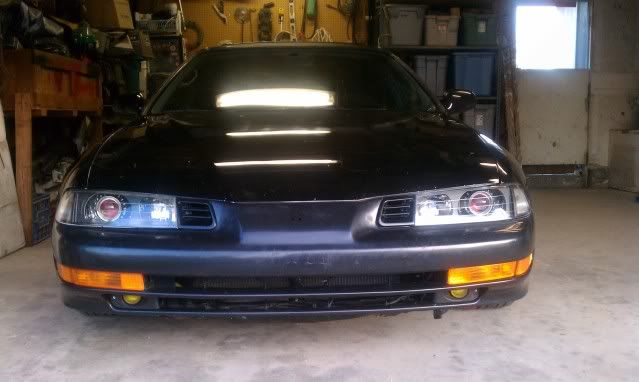
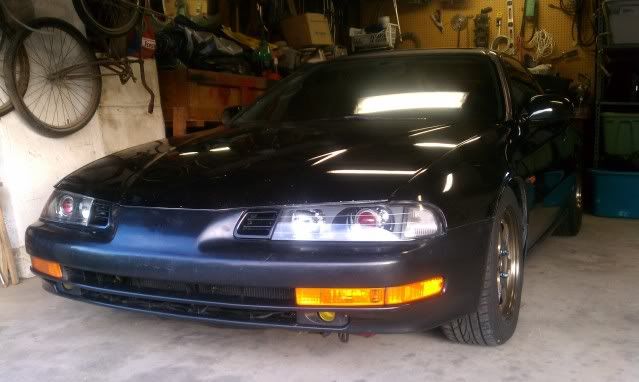
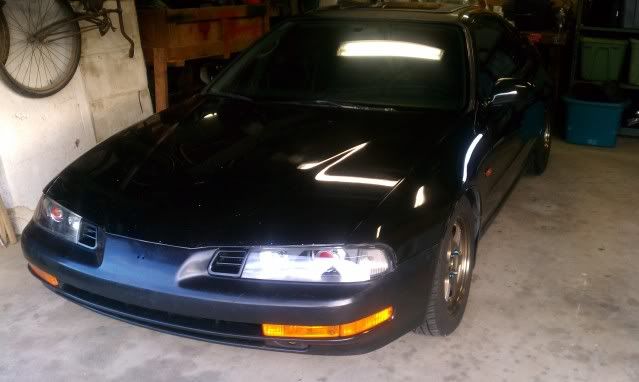
install onto car and enjoy, you just saved yourself about 200-300 bucks


i'll be updating this thread as i finish my retrofit and hopefully it will help others out with their own retrofits.
first off get some projectors!!
i went with the TSX projectors cus there are easy to get, have a nice cut off and arent too big unlike the s2k projectors for example.
they are from an 06 model so they had the fresnel lenses but i ordered some clear lenses from the retrofit store.
i have the JDM 1 piece so sorry for you USDM guys and gals :lol: preheat oven to 350 degrees. remove the 5 metal clips from the headlights and of course the bulbs and rubber caps. theres also 2 bracket things, remove those also, it is 2 screws each. place the headlight on a cookie tray with a towel under it. turn the oven off and place in over for 8 minutes. remove after 8 minutes and carefully start to pry at the edges with a flat head screwdriver. take your time and work carefully! it should comes off after you have went around the whole headlight with your screw driver.
making poorman custom shrouds...
i got this idea from hidplanet forums, you get a 3''-4'' abs plastic reducer from the heating air duct isle at home depot and a travelers coffee mug from walmart, total cost under 10 bucks!! take the chrome ring off the coffee mug lid with a flathead and trim the reducer to fit nice and snug over the projector housing
the reflector bowl and the top half of the projector, i was test fitting and seeing how much needs to be trimmed... its alot
[img]https://i474.photobucket.com/albums/rr103/hotprelude97/HPIM3082.jpg
i cut the holes today and did some more test fitting, still trying to figure out how to mount them and aim them right.
after some research on hidplanetforums i found some other guy used this mounting method and it seems to work pretty good. i got the hardware from home depot, 1" L brackets, #8 32x5/8'' nuts and bolts, and #8 washers and lock washers (i used the washers for color mod). so far i only mounted one side with a nut and bolt so i can go test out the cutoff level and make adjustments before securing the other L bracket. im still gonna put some jb weld on the back of the prjector and reflector bowl for extra strength
put the headlights on and did some test aiming, these are with the fresnel lenses BTW
heres some pictures of the projectors all mounted up in the housing, upgraded to ninja star lock washers and nylon lock nuts. i dont want to risk these things coming loose on me
got my cut off as level as i can, these are with the clear lenses BTW
i added a 3rd upper mounting bolt, to keep it more secure. i got 1 1/2" bolt with a nylon lock nut and some lock washers on both sides.
ok so i gave up on my custom shrouds because they didnt really cover everything the way i wanted them too plus splatter punk basically gave me some e46 shrouds for free. thanks again bro!! i had to trim then alot to fit, mostly the top part and some of the bottom
this is the stuff i used to attach the shroud to the projectors, works really well i think and gets rock hard in 10 mins and can withstand high temps up 500 degrees.
then i attached the shroud..
then i added some foil tape, to the exposed parts in the back
after putting the projector back in the housing, you have to trim some of the black plastic piece thats held in the headlight lense. remove the 2 screws and remove the black piece, then trim as needed to fit the projector and shroud.
i also had to trim the back of the housing to fit the bulb clip, and make sure it works and doesnt rub on anything
now clean everything off really good and put the headlight lense back on the housing.
sealing the headlight back up, i used the same method i did to open the headlight, but only 300 degress this time at 8 mintues. the little metal clips that come with the headlight really help holding it together when you go to reseal it, just a tip.
install onto car and enjoy, you just saved yourself about 200-300 bucks
 01-17-2010, 05:43 AM
#2
Honda-Tech Member
Join Date: Aug 2001
Location: WI
Posts: 2,242
Likes: 0
Received 0 Likes
on
0 Posts
awesome job. i've never seen those foglights before on a prelude  they look like the 93-95 sir integra fogs
they look like the 93-95 sir integra fogs
01-17-2010, 05:52 AM
#3
Honda-Tech Member
Join Date: Jan 2004
Location: Further down the spiral, TX, usa
Posts: 10,629
Likes: 0
Received 1 Like
on
1 Post
Sweet write-up You didn't mention the ballasts and ignitors...or am I missing something? Also, did you use a relay harness to prevent the stock headlight wiring from being overloaded on startup?
You didn't mention the ballasts and ignitors...or am I missing something? Also, did you use a relay harness to prevent the stock headlight wiring from being overloaded on startup?
01-19-2010, 12:38 PM
#5
Honda-Tech Member
Thread Starter
Join Date: Oct 2006
Location: M Radio, ca
Posts: 345
Likes: 0
Received 0 Likes
on
0 Posts
i had an H4 hid PnP kit so yea, it was plug and play once i got the D2S adaptors from the retrofit source
01-19-2010, 01:08 PM
#6
Honda-Tech Member
Join Date: Jul 2007
Location: Baltimore, MD
Posts: 194
Likes: 0
Received 0 Likes
on
0 Posts
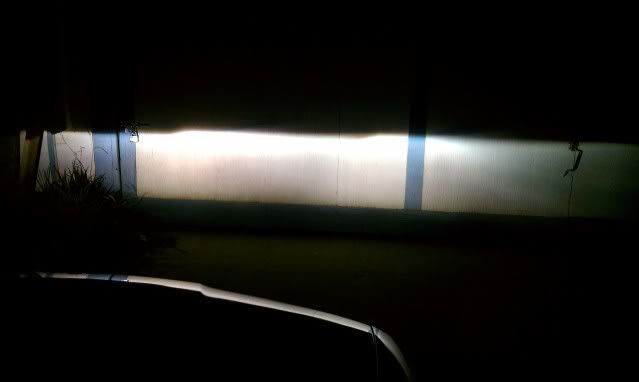
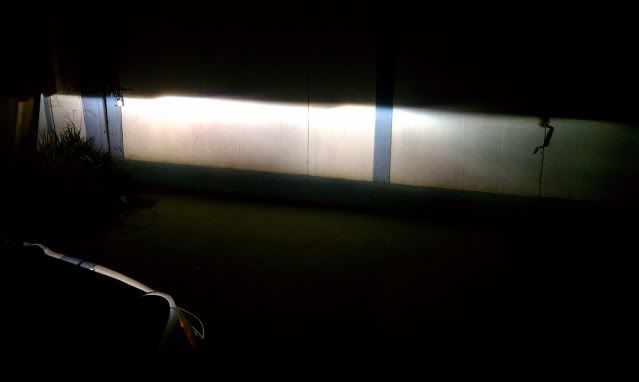
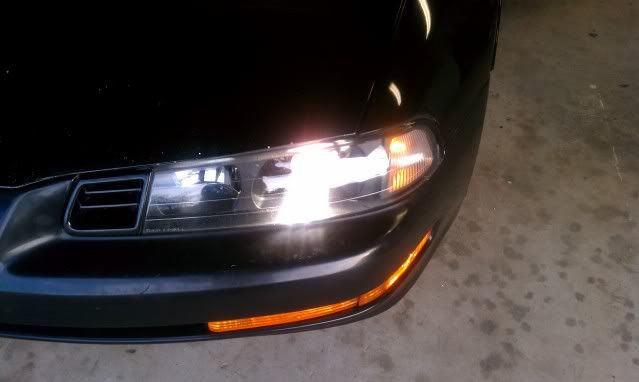
do you have any pics of the cutoff once mounted back int the housings with headlight lens on? I got a tsx retro on my integra and my cutoff is not as clean as yours was. There is a lot of lens flare toward the end, almost looks like two steps. I think it has to do with the lines on the headlight lens. I will try to get a pic on here to better describe it.
01-23-2010, 06:32 AM
#7
Honda-Tech Member
Thread Starter
Join Date: Oct 2006
Location: M Radio, ca
Posts: 345
Likes: 0
Received 0 Likes
on
0 Posts
do you have any pics of the cutoff once mounted back int the housings with headlight lens on? I got a tsx retro on my integra and my cutoff is not as clean as yours was. There is a lot of lens flare toward the end, almost looks like two steps. I think it has to do with the lines on the headlight lens. I will try to get a pic on here to better describe it.
Trending Topics
 02-04-2010, 09:59 AM
#10
New User

Join Date: Jan 2010
Location: Maryland
Posts: 5
Likes: 0
Received 0 Likes
on
0 Posts
Looks superb. I plan on retroing my prelude headlights the same way with the stuff from the retro fit I did on my accord.
06-17-2010, 03:18 AM
#11
Honda-Tech Member

Join Date: Aug 2009
Location: Auckland, New Zealand
Posts: 11
Likes: 0
Received 0 Likes
on
0 Posts
Sorry to dig this up. i am looking at doing this as well.
The direction of the porjector should be the same as the origila light right?
How do you align the projector angle to be the same as the original light?
is there any markings on the projector?
The direction of the porjector should be the same as the origila light right?
How do you align the projector angle to be the same as the original light?
is there any markings on the projector?
06-17-2010, 08:03 AM
#12
Honda-Tech Member
Join Date: Nov 2007
Location: Louisville
Posts: 552
Likes: 0
Received 0 Likes
on
0 Posts
aim your stock headlights against your garage so they are as good as you can get them. mark where the step is, and where the low side (left) cutoff is. Use this as a jig so when you mount the projectors, you can match the cutoffs. keep in mind it will take some trial and error, but its gonna get you pretty close
01-10-2011, 08:11 AM
#13
Honda-Tech Member
Thread Starter
Join Date: Oct 2006
Location: M Radio, ca
Posts: 345
Likes: 0
Received 0 Likes
on
0 Posts
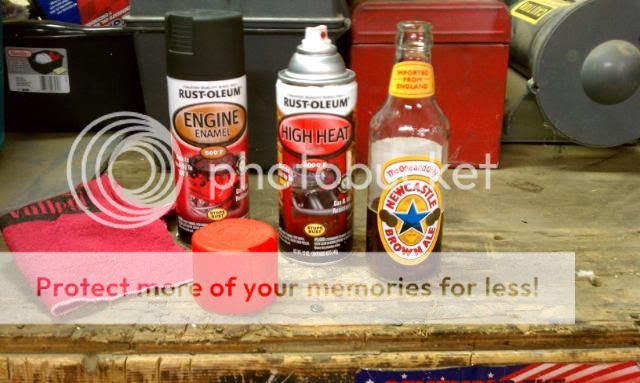
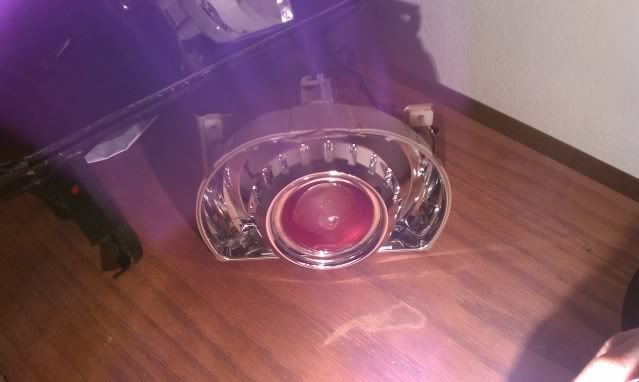
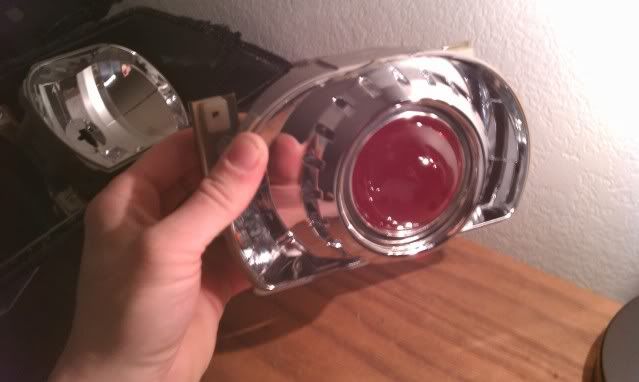
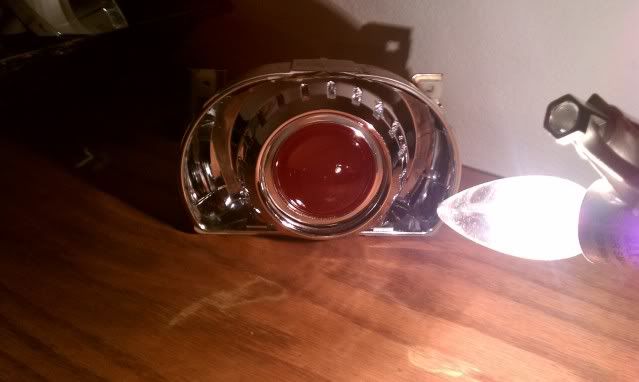
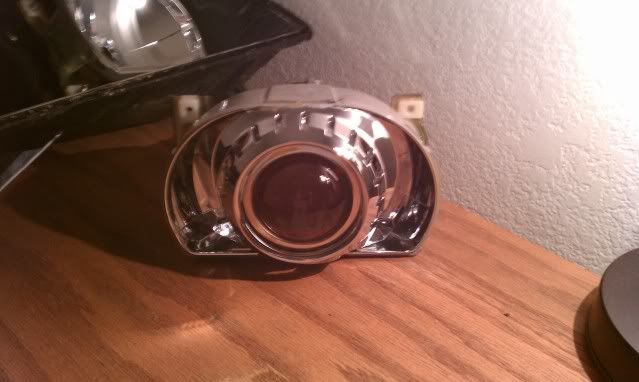
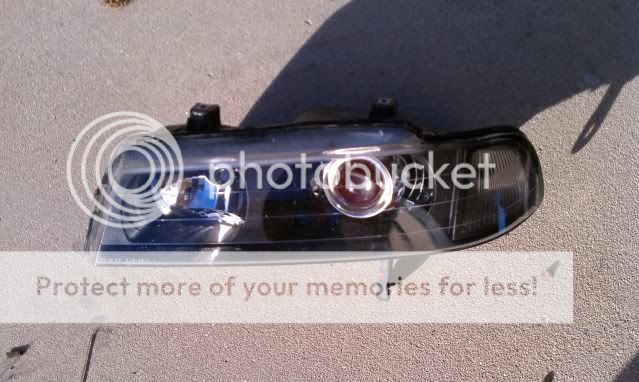
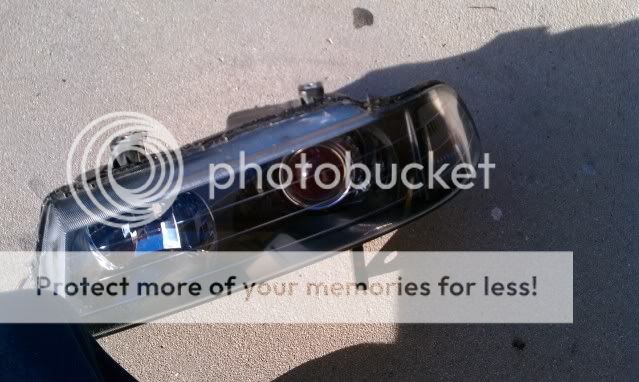
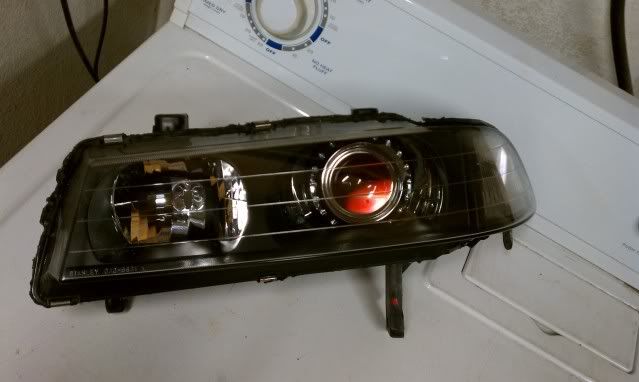
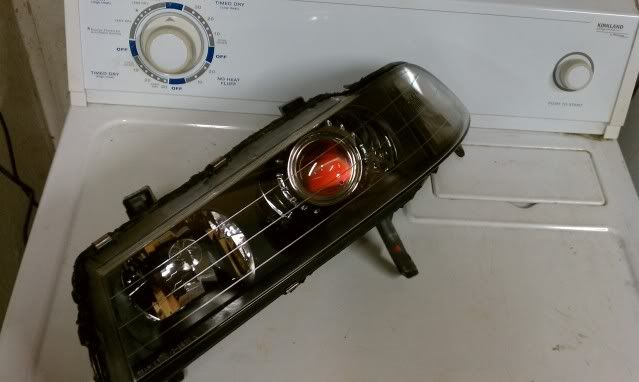
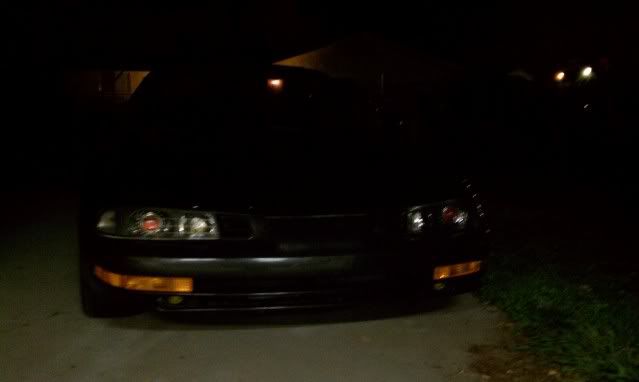
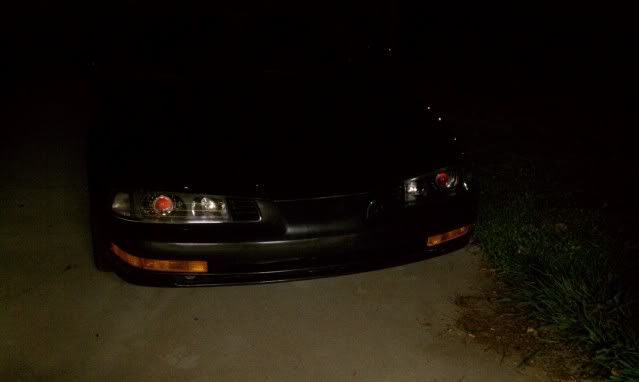
so I finally did the devil eyes mod to my tsx projectors, I've been wanting to do this mod for along time now I've just been to lazy to open my retrofits back up lol I still have to bake them in the oven to cure the paint but so far so good......
Here's a last look at the old set up

Then I cracked them open
Got some supplies
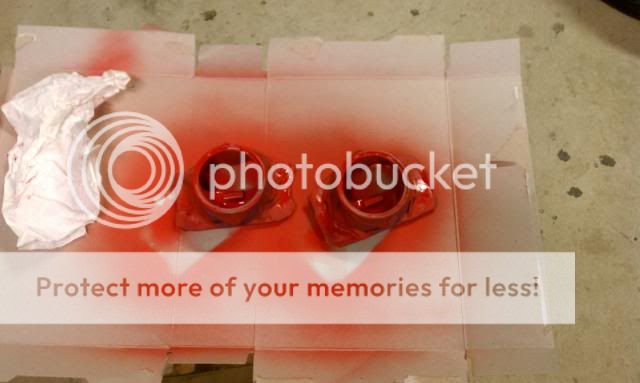
Painted the shields

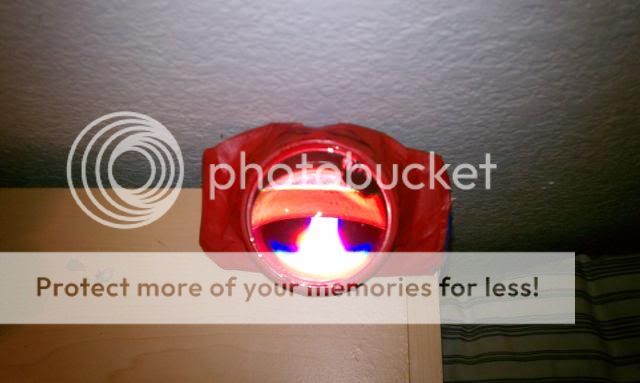
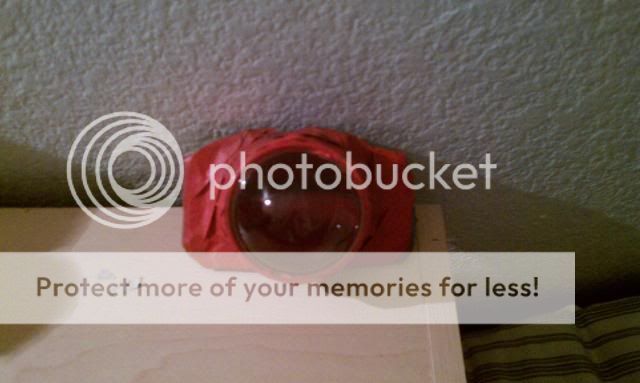
Here's what it looks like so far
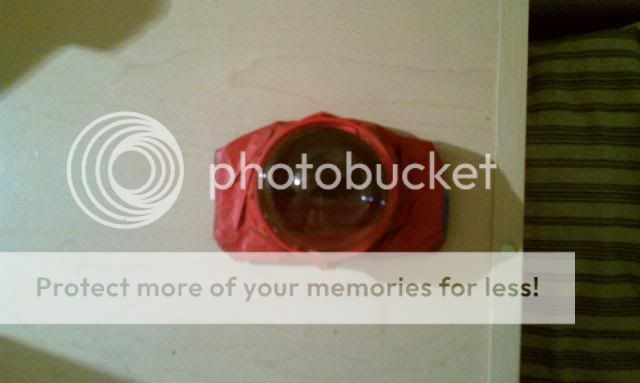
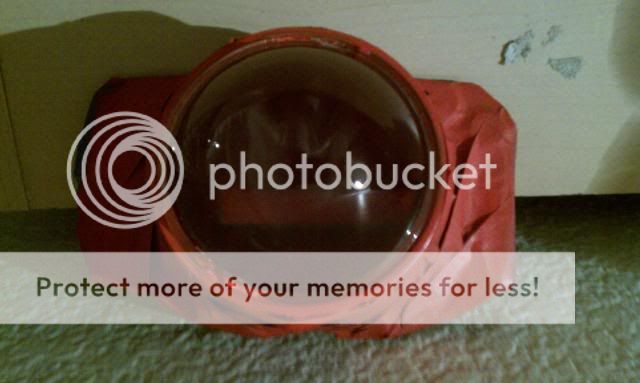
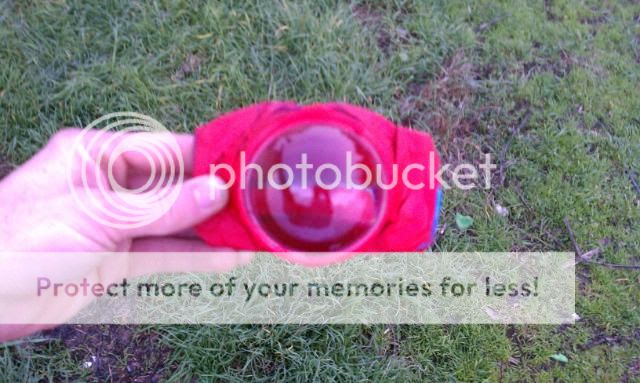
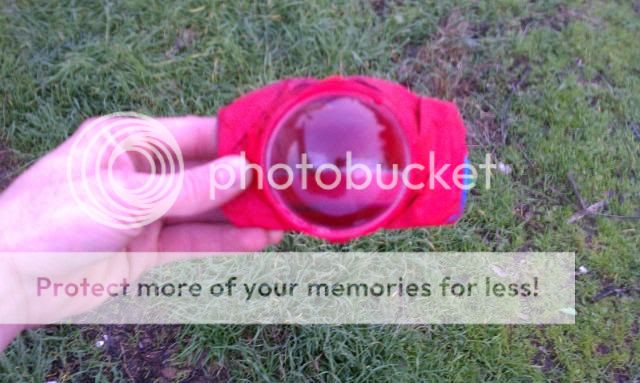
More to come.......
Here's a last look at the old set up
Then I cracked them open
Got some supplies
Painted the shields
Here's what it looks like so far
More to come.......
01-10-2011, 02:27 PM
#15
Honda-Tech Member
I thought the "demon eyes" mod was painting the shield red so that the projector lens looks red during the day?
01-11-2011, 05:56 AM
#16
Honda-Tech Member
Thread Starter
Join Date: Oct 2006
Location: M Radio, ca
Posts: 345
Likes: 0
Received 0 Likes
on
0 Posts
yes it is and thats what i did lol
 01-11-2011, 06:15 AM
#18
Honda-Tech Member
iTrader: (1)
Join Date: Jan 2002
Location: Nowhere and Everywhere
Posts: 29,530
Likes: 0
Received 52 Likes
on
46 Posts
holy damn that looks freaky lol... not really for me, but great work on the Prelude headlights, though. Want to toss my Hella bi-xenons for TSX's soooo bad.
01-11-2011, 03:07 PM
#19
Honda-Tech Member
I see, I didn't understand your photos. It looked like 5 pictures of a taped up projector housing with the lens still attached. It turned out really good. I've seen some guys put red LED's inside the housing also, but that's a little too much. lol
01-14-2011, 05:29 AM
#20
Honda-Tech Member
Thread Starter
Join Date: Oct 2006
Location: M Radio, ca
Posts: 345
Likes: 0
Received 0 Likes
on
0 Posts
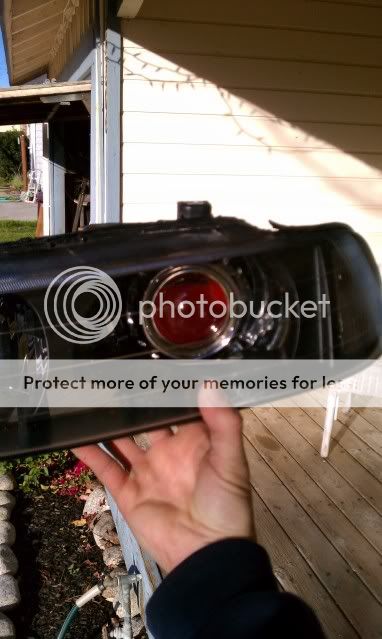
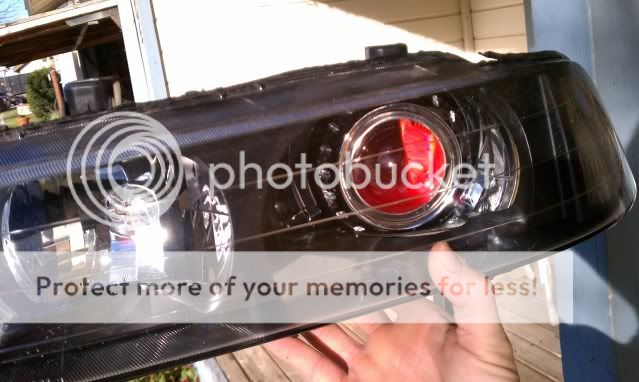
updated 1/14/11
i baked the shields to cure the paint (the heat helps the paint bond to the metal)
then i re-assembled the projectors
i baked the shields to cure the paint (the heat helps the paint bond to the metal)
then i re-assembled the projectors


 Really great work dude.

Thread
Thread Starter
Forum
Replies
Last Post
nuttyvtec
Honda Prelude
20
05-29-2016 03:29 PM