

My H2B Euro-R JDM RHD EJ7 build thread
 10-13-2008, 03:16 PM
#1
Honda-Tech Member
Thread Starter
Join Date: Nov 2006
Location: Auckland, New Zealand
Posts: 90
Likes: 0
Received 0 Likes
on
0 Posts
Hey guys,
Thought I migth post up my H2B build thread from New Zealand.
I don't post on here very much but I'm on here reading and learning a lot.
This is a thread I started in the EM1crew board but I'll keep updating it here from now on.
It's basically 100% DIY
The car is a JDM EJ7, originally sold new in Japan in the only color they were ever produced in, Granada Black Pearl, it's built in Mexico from what i can gather by the assembly tags on it but it was definitely sold new in Japan and imported to NZ from there. It even still has all the japanese instruction manuals with it.
It's right hand drive and originally had grey cloth interior.
Like all EJ7's, it was originally a Vtec-E 1600cc with a CVT automatic gearbox and drum brake rear. yuck.
The EJ7's were sold in Japan as company cars and fleet lease vehicles, never sold to private buyers, this makes them pretty rare, especially outside of Japan.
The owner before me took the original engine out and replaced it with a d16y8 vtec and manual box, he soon got sick of that and swapped out the d-series for a B18c (GSR) and it had a cusco 1.5way lsd.
Then that engine was sold to be used in a drag car so the next engine was a B18cR and S80 box from a 96 spec ITR.
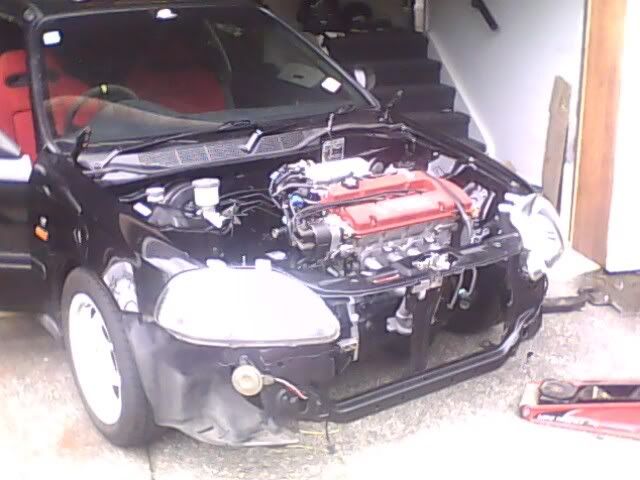
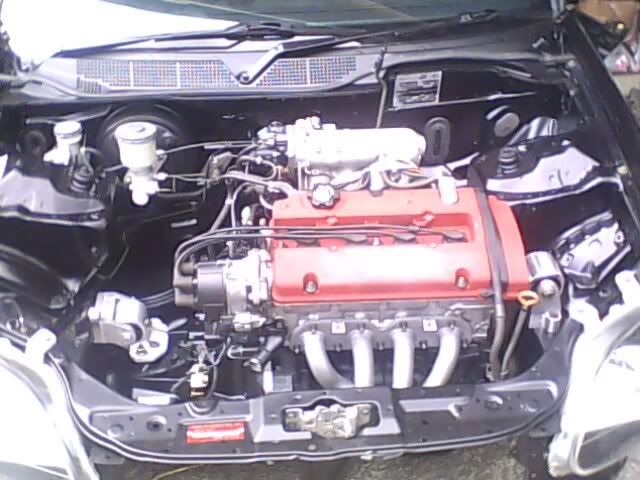
This is the stage where i bought the car and it was in a bit of a sad state, the engine conversion was a bit back-yard and it had some fairly serious wiring issues had had not been looked after very well.
I got it running properly finally but it really failed to impress me, since my previous car was an h22a powered EG hatch and the other car is a turbo ZC CRX. the b18cR was a big failboat to be honest.
The B18cR felt very lame in comparison to the others so naturally it wasn't long till I found a buyer for the B18cR and decided to H2B kit it.
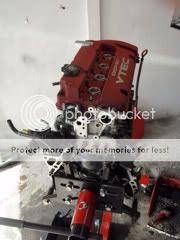
Just after purchasing the evolution kit from a guy in Texas I was given the opportunity to buy an H22a and box from a JDM Euro-R accord for less than half the price I got for my B18cR!! it had a small amount of damage from an accident but nothing major that i couldn't deal with.
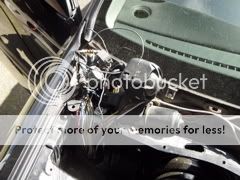
The engine is not in yet but it's very close, I am just waiting till I finish the de-wiring and loom modifications (obd2b swap) and also sort out the front brake lines. It was originally ABS but I have removed all trace of the ABS system (along with the SRS airbag system) and I need to source some non-abs brake lines. I dont want to be doing that once the engine it in.
Anyway heres some pics, some with the B18cR and some of the H2B swap in progress.
I'll up-date this thread regularly as things progress.
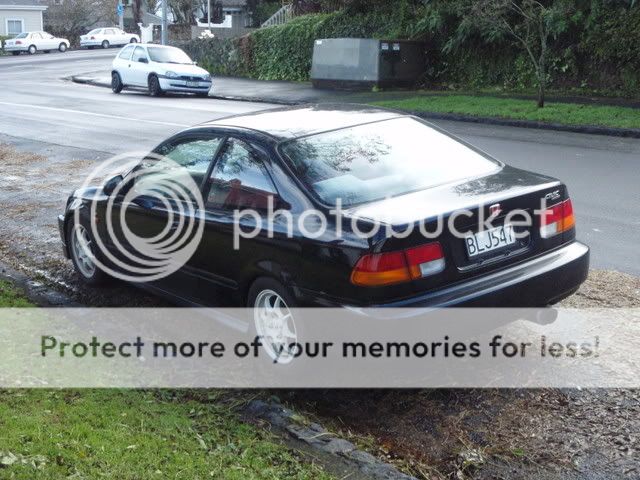
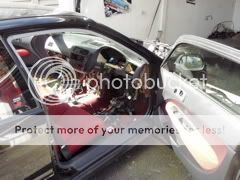
This is what it was like when i first got it, Yuck! Rice city!! I had to imediately ditch the lights and i put some ITR wheels on it and now it looks miles better.


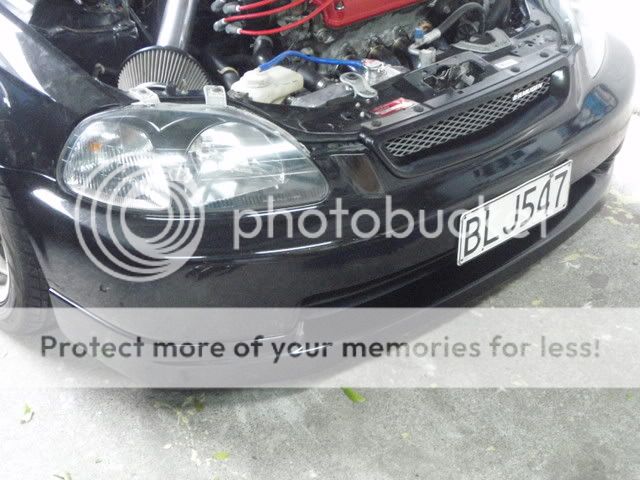
This was after I had tidied up the front bumper with a EM1 style grille off a CTR grille and installed a CTR lip and blacked out the headlight surrounds.

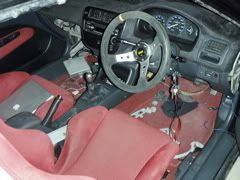
I did a civic type R interior swap too with recaro SR3's, red carpet, door cards the works...


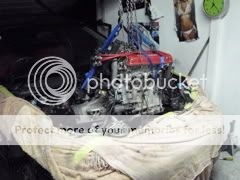
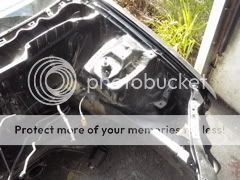
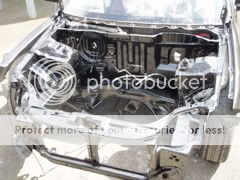
Then it was time to do the engine swap so out came the B series.
I wrapped up the guards and nose of the car so I didn't scratch it up while working on it.
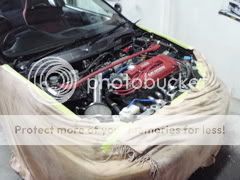
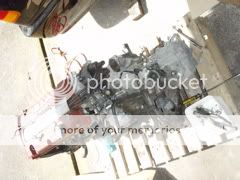
Out she comes....
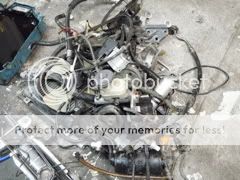
This is what I'm keeping....
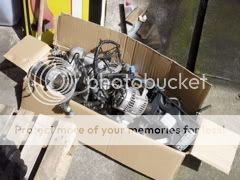
And this is what is going in the bin....A lot of **** must weigh over 30kg

Kit arrived, all brand new still in the boxes, cheers midorihatch!

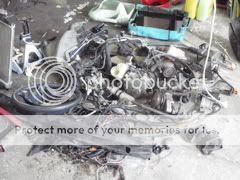
The mission at the moment is getting the wiring sorted, I was originally just going to plug it in and roll with the existing loom but pride got the better of me and I decided I didn't want to have heaps of empty plugs everywhere so there was only one thing for it and that was to strip the car back and chase all the unused wires out of the loom.
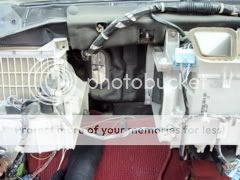
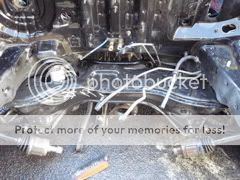
The chassis loom was a monster it was set up for CVT auto transmission and ABS so there was a lot of the loom I no longer wanted to use. Also I have got rid of aircon and power steering too and I didn't just want to pull out the aircon pipes and leave it at that so I removed every trace of the aircon system, wiring and all.
This is going to be my cleanest swap yet, wiring wise anyway.
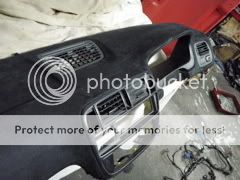
The dash had to come out to get to the loom but thats ok and I'm sourcing a non SRS dash at the moment which I plan to apolster in black alacantra along with the door card tops. Yum.
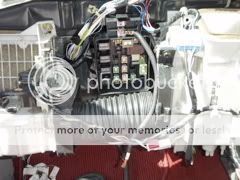
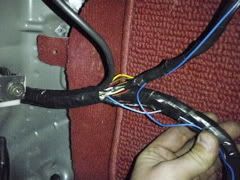
What i basically did was marked all the terminals I wanted to keep and marked all the ones I wanted to get rid of and up-wrapped the entire loom and took each un-wanted plug one by one and chased out the wires that went back from the that plug to where ever they came from, generally an auto or ABS cpu plug or to the fuse box.
I was careful not to damage the web of earth & 12v supply wires that branch through the loom. I only removed the appropriate branch leaving the rest still live.
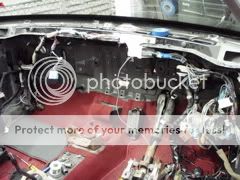
I'm about 3/4 of the way through at the moment and a whole butt load of wire has been removed, the front loom is now just headlights, indicators, piddler, horn and radiator fan. there are only two wires now returning up the passenger side strut tower.
The engine bay fuse box I will relocate under the dash and run the wires down under the guard to the front.
The dash loom has had the most removed from it because it used to have the ABS and CVT ecu's hanging off it plus all the wiring down to the auto shifter, thats all gone now and the main power wires for the ignition which used to bridge the shifter are now linked permanently together up at the fuse box. The reverse light wires have been extended to meet the green plug that the engine loom plugs into so the engine loom reverse light wiring will work.
The car will no longer beep in reverse too which is nice :lol:
Heres a bunch of photos:
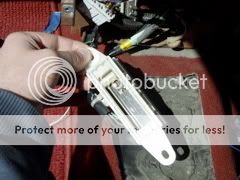
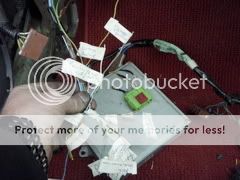
SRS system, easy to remove, it has it's own loom, nothing is damaged and I can put it back in easy if I have too

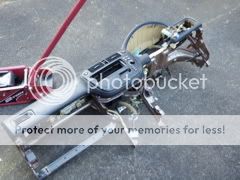
At first i thought I could just drop the column and get to the loom from underneath, that idea soon went out the window
Starting to look a little "vacant"

And the pile of **** I dont needs keeps getting bigger!
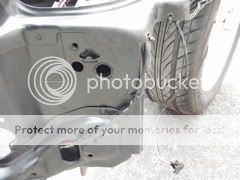
No more wires at all on passenger side, this is how it will stay
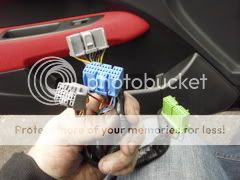
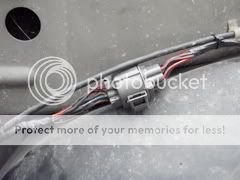
The alarm wiring has been the biggest pain in the ***, it's all hard wired with no plugs and all the wires are black, i guess it's for security but make sit a pain in the ***!
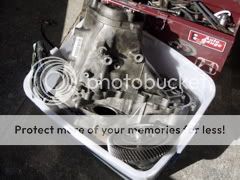
The gearbox, ITR S80 96 spec....in bits...but yes that is an LSD so the whole missing diff thing is sorted
The original shifter board, tucked under the dash in park mode, this is gone now.
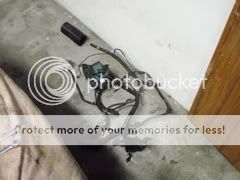
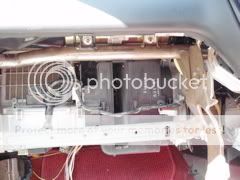
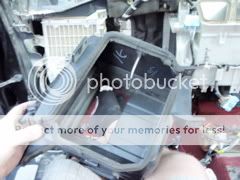
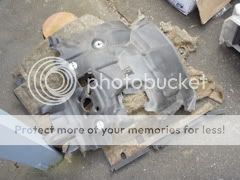
This is the black box containing the air-con evaporator core, I'm keepingt he box just removing the guts..
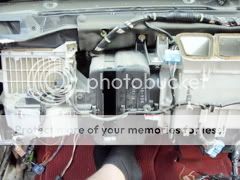
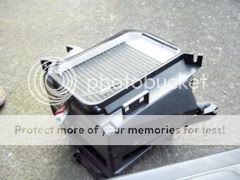
Splitting it...

The guts..
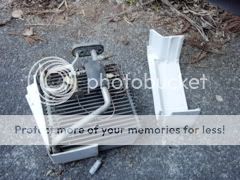
And empty...

Theres a fair few more photos, I'll just keep adding to this thread.
Modified by doo0T!doo0T! at 4:32 PM 10/13/2008
Thought I migth post up my H2B build thread from New Zealand.
I don't post on here very much but I'm on here reading and learning a lot.
This is a thread I started in the EM1crew board but I'll keep updating it here from now on.
It's basically 100% DIY
The car is a JDM EJ7, originally sold new in Japan in the only color they were ever produced in, Granada Black Pearl, it's built in Mexico from what i can gather by the assembly tags on it but it was definitely sold new in Japan and imported to NZ from there. It even still has all the japanese instruction manuals with it.
It's right hand drive and originally had grey cloth interior.
Like all EJ7's, it was originally a Vtec-E 1600cc with a CVT automatic gearbox and drum brake rear. yuck.
The EJ7's were sold in Japan as company cars and fleet lease vehicles, never sold to private buyers, this makes them pretty rare, especially outside of Japan.
The owner before me took the original engine out and replaced it with a d16y8 vtec and manual box, he soon got sick of that and swapped out the d-series for a B18c (GSR) and it had a cusco 1.5way lsd.
Then that engine was sold to be used in a drag car so the next engine was a B18cR and S80 box from a 96 spec ITR.
This is the stage where i bought the car and it was in a bit of a sad state, the engine conversion was a bit back-yard and it had some fairly serious wiring issues had had not been looked after very well.
I got it running properly finally but it really failed to impress me, since my previous car was an h22a powered EG hatch and the other car is a turbo ZC CRX. the b18cR was a big failboat to be honest.
The B18cR felt very lame in comparison to the others so naturally it wasn't long till I found a buyer for the B18cR and decided to H2B kit it.
Just after purchasing the evolution kit from a guy in Texas I was given the opportunity to buy an H22a and box from a JDM Euro-R accord for less than half the price I got for my B18cR!! it had a small amount of damage from an accident but nothing major that i couldn't deal with.
The engine is not in yet but it's very close, I am just waiting till I finish the de-wiring and loom modifications (obd2b swap) and also sort out the front brake lines. It was originally ABS but I have removed all trace of the ABS system (along with the SRS airbag system) and I need to source some non-abs brake lines. I dont want to be doing that once the engine it in.
Anyway heres some pics, some with the B18cR and some of the H2B swap in progress.
I'll up-date this thread regularly as things progress.
This is what it was like when i first got it, Yuck! Rice city!! I had to imediately ditch the lights and i put some ITR wheels on it and now it looks miles better.
This was after I had tidied up the front bumper with a EM1 style grille off a CTR grille and installed a CTR lip and blacked out the headlight surrounds.
I did a civic type R interior swap too with recaro SR3's, red carpet, door cards the works...
Then it was time to do the engine swap so out came the B series.
I wrapped up the guards and nose of the car so I didn't scratch it up while working on it.
Out she comes....
This is what I'm keeping....
And this is what is going in the bin....A lot of **** must weigh over 30kg
Kit arrived, all brand new still in the boxes, cheers midorihatch!
The mission at the moment is getting the wiring sorted, I was originally just going to plug it in and roll with the existing loom but pride got the better of me and I decided I didn't want to have heaps of empty plugs everywhere so there was only one thing for it and that was to strip the car back and chase all the unused wires out of the loom.
The chassis loom was a monster it was set up for CVT auto transmission and ABS so there was a lot of the loom I no longer wanted to use. Also I have got rid of aircon and power steering too and I didn't just want to pull out the aircon pipes and leave it at that so I removed every trace of the aircon system, wiring and all.
This is going to be my cleanest swap yet, wiring wise anyway.
The dash had to come out to get to the loom but thats ok and I'm sourcing a non SRS dash at the moment which I plan to apolster in black alacantra along with the door card tops. Yum.
What i basically did was marked all the terminals I wanted to keep and marked all the ones I wanted to get rid of and up-wrapped the entire loom and took each un-wanted plug one by one and chased out the wires that went back from the that plug to where ever they came from, generally an auto or ABS cpu plug or to the fuse box.
I was careful not to damage the web of earth & 12v supply wires that branch through the loom. I only removed the appropriate branch leaving the rest still live.
I'm about 3/4 of the way through at the moment and a whole butt load of wire has been removed, the front loom is now just headlights, indicators, piddler, horn and radiator fan. there are only two wires now returning up the passenger side strut tower.
The engine bay fuse box I will relocate under the dash and run the wires down under the guard to the front.
The dash loom has had the most removed from it because it used to have the ABS and CVT ecu's hanging off it plus all the wiring down to the auto shifter, thats all gone now and the main power wires for the ignition which used to bridge the shifter are now linked permanently together up at the fuse box. The reverse light wires have been extended to meet the green plug that the engine loom plugs into so the engine loom reverse light wiring will work.
The car will no longer beep in reverse too which is nice :lol:
Heres a bunch of photos:
SRS system, easy to remove, it has it's own loom, nothing is damaged and I can put it back in easy if I have too
At first i thought I could just drop the column and get to the loom from underneath, that idea soon went out the window
Starting to look a little "vacant"
And the pile of **** I dont needs keeps getting bigger!
No more wires at all on passenger side, this is how it will stay
The alarm wiring has been the biggest pain in the ***, it's all hard wired with no plugs and all the wires are black, i guess it's for security but make sit a pain in the ***!
The gearbox, ITR S80 96 spec....in bits...but yes that is an LSD so the whole missing diff thing is sorted
The original shifter board, tucked under the dash in park mode, this is gone now.
This is the black box containing the air-con evaporator core, I'm keepingt he box just removing the guts..
Splitting it...
The guts..
And empty...
Theres a fair few more photos, I'll just keep adding to this thread.
Modified by doo0T!doo0T! at 4:32 PM 10/13/2008
 10-13-2008, 03:18 PM
#2
Honda-Tech Member
Thread Starter
Join Date: Nov 2006
Location: Auckland, New Zealand
Posts: 90
Likes: 0
Received 0 Likes
on
0 Posts
I managed to get the engine mostly stripped to remove the balance shafts and check the bottom-end condition and I got the engine bay all degreased and ready for the paint.
I've decided to go black semi-gloss, not flat black and not gloss so somewhere in between.
I removed the last of the ABS wiring and took the sensors off the front hubs and ditched the front brake lines.
I cant see any evidence of balancing on the H2B flywheel so I have removed the crankshaft and after I have shaved down the alt pulley i will get it all dynamically balanced as one unit.
pics...
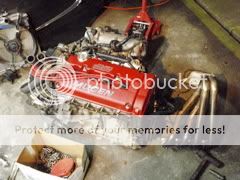
Engine arrived...
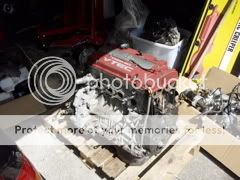
all the extra bits...
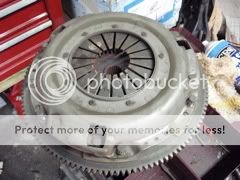
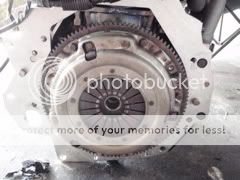
Off with the box, clutch and flywheel.....these are for sale btw PM if you keen

Getting it ready to go onto my new engine stand....had to winch it up, it's no d-series thats for damn sure frick it's weighty
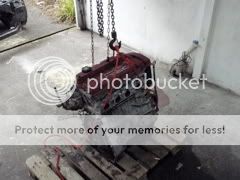
Booyaa Wayco goodness :D

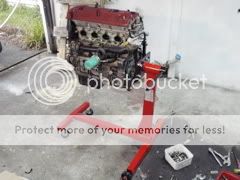
So with the engine up where I can spin it around and get a good look over it I could assess the damage ( the engine came out of a mate's written off Euro-R and the engine had taken a few hits..
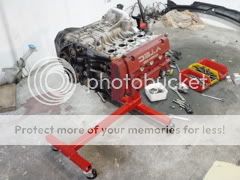
Sump knocked in, but thats ok as I will be modding it with baffles and can panel beat it out again.

Tensioner pin broken, thought it was the block at first but its just the water pump and I dont need the tensioner as the balance shafts are about to get assholed.

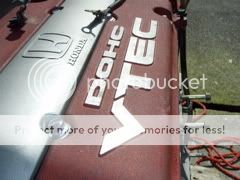
And a ding in the back of the rocker cover, no big deal, I'm sure this can be sealed up, its virtually hidden, i can get another cover later on, it'll be fine for the mean time.

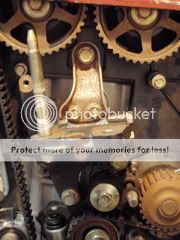
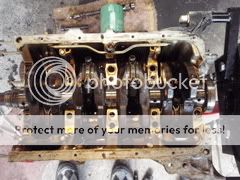
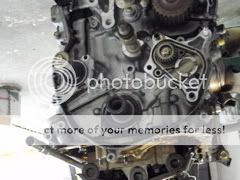
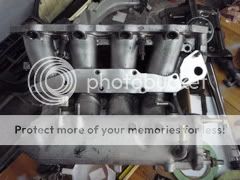
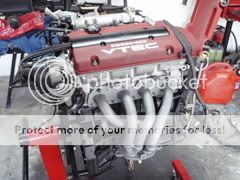
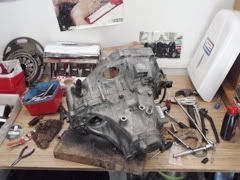
Check these inlet ports out, damn no-wonder these things make power..


You can see the hand prepared ports above the valve seats..

Block is a P5M which means it's open-deck.

This is the single runner manifold..
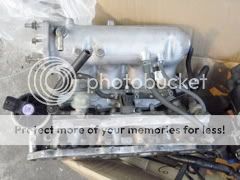
Nice port entry inside the plenum, dirty but not for long :D

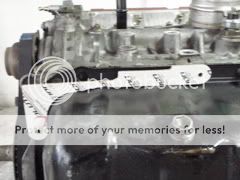
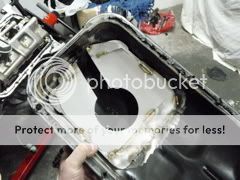
This is the template that comes with the H2B kit which shows where the material has to be removed form the block and oil pan flange to clear the b-series Cv cup.
The cut-away part on the template shows wher eyou have to grond it back on a 45 degree angle, not much material needs to go really.
This bracket needs to be removed, the kit comes with another one.
more coming...
I've decided to go black semi-gloss, not flat black and not gloss so somewhere in between.
I removed the last of the ABS wiring and took the sensors off the front hubs and ditched the front brake lines.
I cant see any evidence of balancing on the H2B flywheel so I have removed the crankshaft and after I have shaved down the alt pulley i will get it all dynamically balanced as one unit.
pics...
Engine arrived...
all the extra bits...
Off with the box, clutch and flywheel.....these are for sale btw PM if you keen
Getting it ready to go onto my new engine stand....had to winch it up, it's no d-series thats for damn sure frick it's weighty
Booyaa Wayco goodness :D
So with the engine up where I can spin it around and get a good look over it I could assess the damage ( the engine came out of a mate's written off Euro-R and the engine had taken a few hits..
Sump knocked in, but thats ok as I will be modding it with baffles and can panel beat it out again.
Tensioner pin broken, thought it was the block at first but its just the water pump and I dont need the tensioner as the balance shafts are about to get assholed.
And a ding in the back of the rocker cover, no big deal, I'm sure this can be sealed up, its virtually hidden, i can get another cover later on, it'll be fine for the mean time.
Check these inlet ports out, damn no-wonder these things make power..
You can see the hand prepared ports above the valve seats..
Block is a P5M which means it's open-deck.
This is the single runner manifold..
Nice port entry inside the plenum, dirty but not for long :D
This is the template that comes with the H2B kit which shows where the material has to be removed form the block and oil pan flange to clear the b-series Cv cup.
The cut-away part on the template shows wher eyou have to grond it back on a 45 degree angle, not much material needs to go really.
This bracket needs to be removed, the kit comes with another one.
more coming...
10-13-2008, 03:19 PM
#3
Honda-Tech Member
Thread Starter
Join Date: Nov 2006
Location: Auckland, New Zealand
Posts: 90
Likes: 0
Received 0 Likes
on
0 Posts
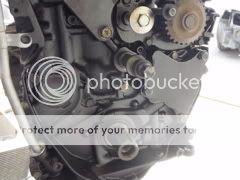
This is the balance shaft belt, one is gear driven with a little gearbox that bolts into the oil pump, the other is just 1:1 driven off a pulley.
i want to take them out as they are of no use to me, they are only there to make the idle smoother, being a 2.2 litre 4 cyl it's inherently unbalanced and will tend to shake a bit but I don't care about that and balance shafts rob power so out they go!!
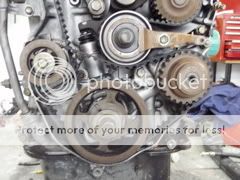
This also has to go, the quirky automatic tensioner, it works very well but apparently they can **** them selves catastrophically (just ask NVA2ND)
I'll device a cunning plan to make a manual tensioner which is a bit more reliable.
REMOVING THE SHAFTS...
1. Take off the belts.


2. Take off the sump.
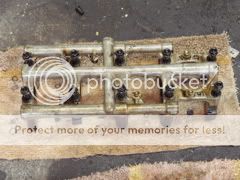
This is what you want to remove, they are two long shafts which are a sort of semi-circle shape.


3. Take off the oil pump pick-up

4. Take off the gear-box for the balance shaft and remove pullies.
5. Un-do all the bolts holding on the oil pump and slowly slide out, one of the balance shafts will come with it...
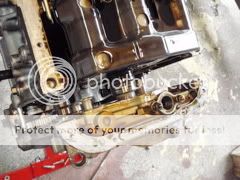
6. Remove the second balance shaft by un-doing the plate that holds it in..
This is with both shafts removed...
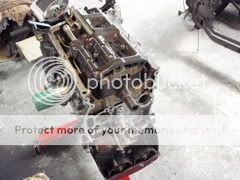
This is what the bits being removed look like..

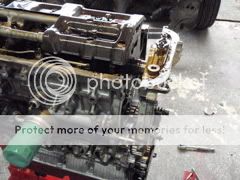
7. Now the crank must be removed in order to get to the oil feed galleries which used to lubricate the shafts, these need to be blocked up or the engine will run no oil pressure once the shafts arn't there to stop the oil flow.
The rear main seal housing must be removed from the back of the block so the crank can lift out.

8. Take off the girdle..
9. Un-do the con-rod lash caps and remove the crank shaft.
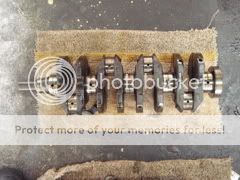
Put the lash caps back on the same way and leave the rods and pistons in place.
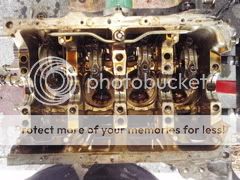
This is looking down the centre of the hole where the shafts were, there are three bearings on each one which have an oil feed hole to them which need to be blocked up.


It appears the best way to do this would be to resin fill the feed lines, or pack a metal kneadable putty in. i have heard of people just spinning the bearing around 180 degrees but thats pretty rangi and if the bearing fell out while the engine was running it would not be nice.
Ideally the best way would be to tap the feed holes and wind in a grub screw but I don't want filings inside the engine. Another way to do it which would be hard work but foolproof would be to cut the bearing journal sections out of the shafts and glue them back into the bearing shells with urethane of some sort of high temp resin like vinyl ester (not epoxy it melts!)
You can sort-of see what i am talking about by looking down this oil feed hole where the bearing shell is at the end and it has a small hole in the shell that lines up with the feed hole.


The bearings are pressed in very tight, I'm just going to leave them in there.
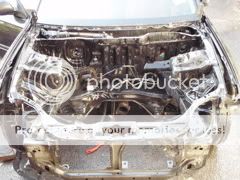
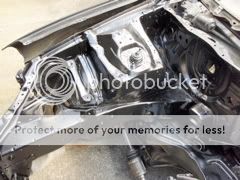
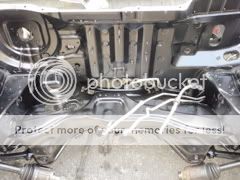
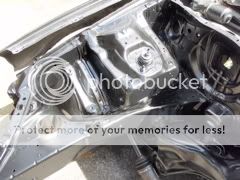
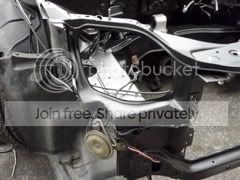
ENGINE BAY PREP
I de-greased the **** out of everything and managed to remove all the road grime and thick grease from popped CV boots over the years, its all ready for the primer now.
i want to take them out as they are of no use to me, they are only there to make the idle smoother, being a 2.2 litre 4 cyl it's inherently unbalanced and will tend to shake a bit but I don't care about that and balance shafts rob power so out they go!!
This also has to go, the quirky automatic tensioner, it works very well but apparently they can **** them selves catastrophically (just ask NVA2ND)
I'll device a cunning plan to make a manual tensioner which is a bit more reliable.
REMOVING THE SHAFTS...
1. Take off the belts.
2. Take off the sump.
This is what you want to remove, they are two long shafts which are a sort of semi-circle shape.
3. Take off the oil pump pick-up
4. Take off the gear-box for the balance shaft and remove pullies.
5. Un-do all the bolts holding on the oil pump and slowly slide out, one of the balance shafts will come with it...
6. Remove the second balance shaft by un-doing the plate that holds it in..
This is with both shafts removed...
This is what the bits being removed look like..
7. Now the crank must be removed in order to get to the oil feed galleries which used to lubricate the shafts, these need to be blocked up or the engine will run no oil pressure once the shafts arn't there to stop the oil flow.
The rear main seal housing must be removed from the back of the block so the crank can lift out.
8. Take off the girdle..
9. Un-do the con-rod lash caps and remove the crank shaft.
Put the lash caps back on the same way and leave the rods and pistons in place.
This is looking down the centre of the hole where the shafts were, there are three bearings on each one which have an oil feed hole to them which need to be blocked up.
It appears the best way to do this would be to resin fill the feed lines, or pack a metal kneadable putty in. i have heard of people just spinning the bearing around 180 degrees but thats pretty rangi and if the bearing fell out while the engine was running it would not be nice.
Ideally the best way would be to tap the feed holes and wind in a grub screw but I don't want filings inside the engine. Another way to do it which would be hard work but foolproof would be to cut the bearing journal sections out of the shafts and glue them back into the bearing shells with urethane of some sort of high temp resin like vinyl ester (not epoxy it melts!)
You can sort-of see what i am talking about by looking down this oil feed hole where the bearing shell is at the end and it has a small hole in the shell that lines up with the feed hole.
The bearings are pressed in very tight, I'm just going to leave them in there.
ENGINE BAY PREP
I de-greased the **** out of everything and managed to remove all the road grime and thick grease from popped CV boots over the years, its all ready for the primer now.
10-13-2008, 03:22 PM
#4
Honda-Tech Member
Thread Starter
Join Date: Nov 2006
Location: Auckland, New Zealand
Posts: 90
Likes: 0
Received 0 Likes
on
0 Posts
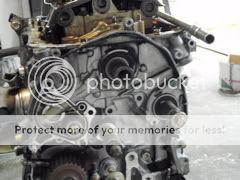
I got the balance shaft removal finished and the block painted and the engine bay painted ready for the engine.
Pics...
Priming...
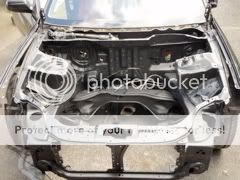
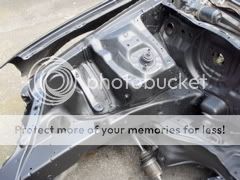
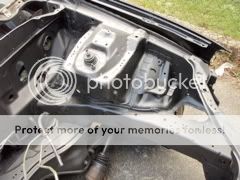
Semi-gloss black, this is the colour I decided on, gloss was a pain in the *** with my crx engine bay as it always looks dirty even after I clean it.

Here's the bad-boy euro-H22 coming together

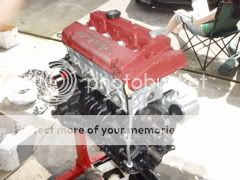

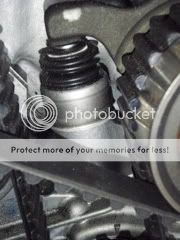
You can see here the frost plug which blocks off one of the balance shaft holes (40mm frost plug form repco $3)
And on the other side is a sheet metal plate which is urethane glued over where the balance shaft reduction gearbox used to be. Even if the urethane gives way it wont leak oil because under the plate all the oil holes are blocked and there is another frost plug in the other balance shaft hole under the plate.
Before...
After...
I'm sorry i didn't get any pics of blocking up the oil gallery holes inside the block, my camera went flat and I needed to press on with the job.
Its pretty simple to do though, first clean out the oil galleries thoroughly with grease and wax remover, and then get some metal filled epoxy putty, you can get this at most hardware stores, i used Selleys brand, it comes in a 2 part sausage which you knead together and it sets in about 20 mins.
Pack it down into the oil galleries in small pieces and pack it in with a metal rod or back of a drill bit etc and keep packing it in solid until it's almost up to the level of the crank caps on the bottom of the block (upside down) there should be about 1-1.5 inches of putty packed in when you are finished. If some worms it's way out through the oil hole in the bearing when you are pressing it in make sure you wipe it off, you dont want these falling off inside the engine.
Make sure the surface of the resin which will be in contact with the oil is flat and uniform without little daggy bits hanging off.
The big oil gallery hole mid-crank is shared for oil supply to the crank main bearings so what ever you do dont fill this one up with resin, only fill the lower 15-20mm below the oil inlet from the oil filter/cooler.
If you get clever you can use the putty to make a nice radiused bend in the corner up from the oil filter to the big ends.
The metal filled epoxy is rated to a constant 120degrees celcius so is plenty capable of handling the 80-90 degree celsius max temperatures of an aluminum engine block. If it gets to 120 you have bigger problems than soft resin on you hands!
I'm pretty confident the engine will be running nice high oil pressure now as there will be no oil loss at all through the now redundant balance shaft system.
Moving on to the EGR system, I used some 0.5mm aluminum sheet to make blanking gaskets using the original gaskets as a pattern.
The big gasket is not really needed as long as the small one is installed but it will also help to stop air-movement from runner to runner which cant be a bad thing.
The system was disgusting inside, it was packed full of the most yuck cancer causing tar **** ever and I'm so glad the engine wont have to breath it any more. It was seriously gross.


I'm just waiting on the crank pulley to arrive so I can lathe it down to alternator only.
My mate Luke who runs ISL performance here in NZ is welding me in a sump baffle at the moment so once that's done the engine will be complete and ready to meet the adapter plate and gearbox.
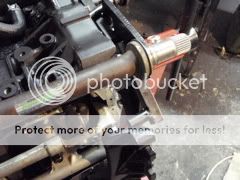
We'll probably alter the bottom section of the stock headers to point at the right angle for the mean time but I think longer term I'll be ordering some long runner 4-1 headers like this off him....he made these ones for another H22a civic in NZ and they were pretty successful with good top-end power gains over stock.
Baller.
Pics...
Priming...
Semi-gloss black, this is the colour I decided on, gloss was a pain in the *** with my crx engine bay as it always looks dirty even after I clean it.
Here's the bad-boy euro-H22 coming together
You can see here the frost plug which blocks off one of the balance shaft holes (40mm frost plug form repco $3)
And on the other side is a sheet metal plate which is urethane glued over where the balance shaft reduction gearbox used to be. Even if the urethane gives way it wont leak oil because under the plate all the oil holes are blocked and there is another frost plug in the other balance shaft hole under the plate.
Before...
After...
I'm sorry i didn't get any pics of blocking up the oil gallery holes inside the block, my camera went flat and I needed to press on with the job.
Its pretty simple to do though, first clean out the oil galleries thoroughly with grease and wax remover, and then get some metal filled epoxy putty, you can get this at most hardware stores, i used Selleys brand, it comes in a 2 part sausage which you knead together and it sets in about 20 mins.
Pack it down into the oil galleries in small pieces and pack it in with a metal rod or back of a drill bit etc and keep packing it in solid until it's almost up to the level of the crank caps on the bottom of the block (upside down) there should be about 1-1.5 inches of putty packed in when you are finished. If some worms it's way out through the oil hole in the bearing when you are pressing it in make sure you wipe it off, you dont want these falling off inside the engine.
Make sure the surface of the resin which will be in contact with the oil is flat and uniform without little daggy bits hanging off.
The big oil gallery hole mid-crank is shared for oil supply to the crank main bearings so what ever you do dont fill this one up with resin, only fill the lower 15-20mm below the oil inlet from the oil filter/cooler.
If you get clever you can use the putty to make a nice radiused bend in the corner up from the oil filter to the big ends.
The metal filled epoxy is rated to a constant 120degrees celcius so is plenty capable of handling the 80-90 degree celsius max temperatures of an aluminum engine block. If it gets to 120 you have bigger problems than soft resin on you hands!
I'm pretty confident the engine will be running nice high oil pressure now as there will be no oil loss at all through the now redundant balance shaft system.
Moving on to the EGR system, I used some 0.5mm aluminum sheet to make blanking gaskets using the original gaskets as a pattern.
The big gasket is not really needed as long as the small one is installed but it will also help to stop air-movement from runner to runner which cant be a bad thing.
The system was disgusting inside, it was packed full of the most yuck cancer causing tar **** ever and I'm so glad the engine wont have to breath it any more. It was seriously gross.
I'm just waiting on the crank pulley to arrive so I can lathe it down to alternator only.
My mate Luke who runs ISL performance here in NZ is welding me in a sump baffle at the moment so once that's done the engine will be complete and ready to meet the adapter plate and gearbox.
We'll probably alter the bottom section of the stock headers to point at the right angle for the mean time but I think longer term I'll be ordering some long runner 4-1 headers like this off him....he made these ones for another H22a civic in NZ and they were pretty successful with good top-end power gains over stock.
Baller.
10-13-2008, 03:23 PM
#6
Honda-Tech Member
Thread Starter
Join Date: Nov 2006
Location: Auckland, New Zealand
Posts: 90
Likes: 0
Received 0 Likes
on
0 Posts
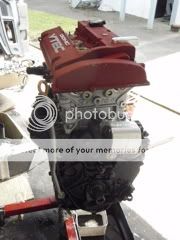
Got the crank and rods torqued up and fitted the inlet manifold and TB. I painted the TB as it had a bit of corrosion on it and it looked a bit ****. I like it black, migth do the distributer body as well.
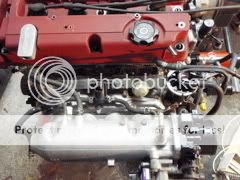

I cleaned all the **** out of the TB, it had quite a bit of gunk on the butterfly and inside the bore.

Also fitted a new Rear main seal, high temp uni-directional, left hand thread too as it's an anti-clockwise motor, lucky I thought of that because the first one i ordered would have pumped oil out due to the vanes going the wrong way.

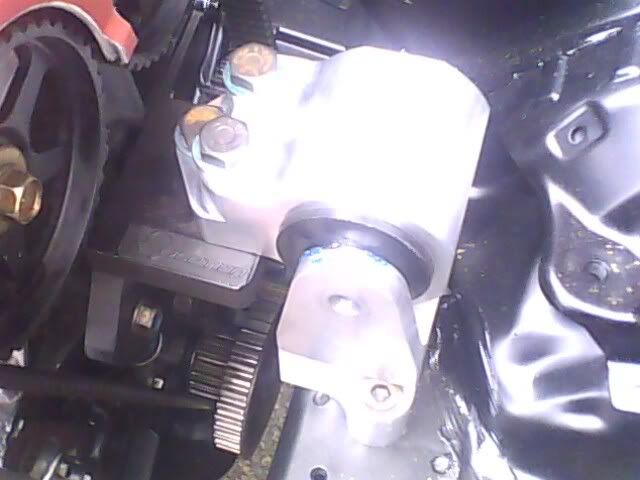
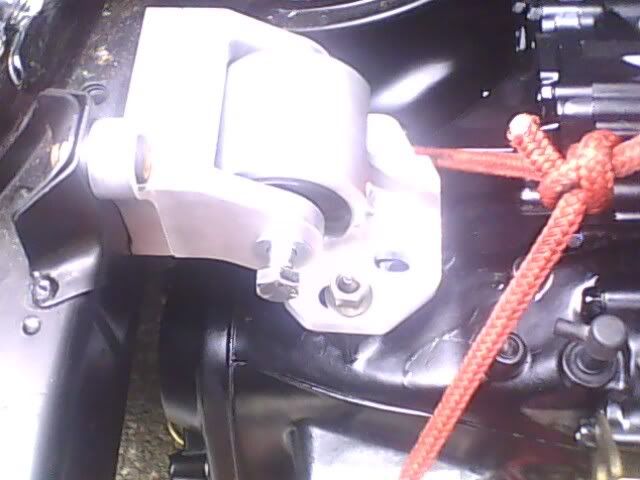
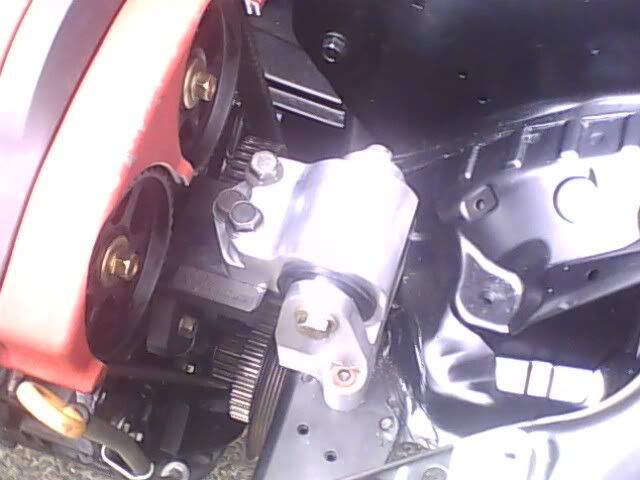
The Euro-R has a die-cast aluminum bell brace which goes under the sump and bolts up to the block and bellhousing on the gearbox, this had to be shortened as the new axel position runs right through it.
I shortened it back to the next bolt hole. There's no way it'll be as effective as a brace now but there was not much choice.
This is the bit that got cut off..

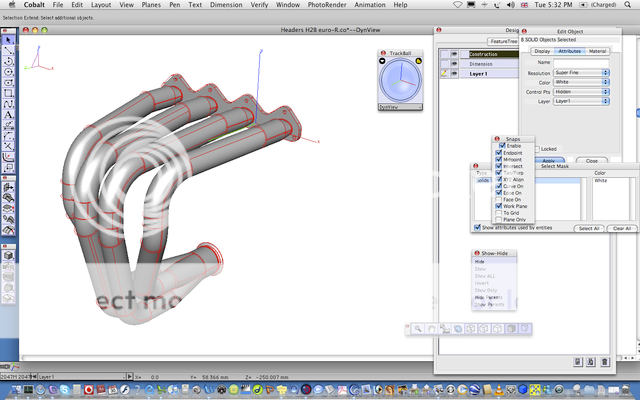
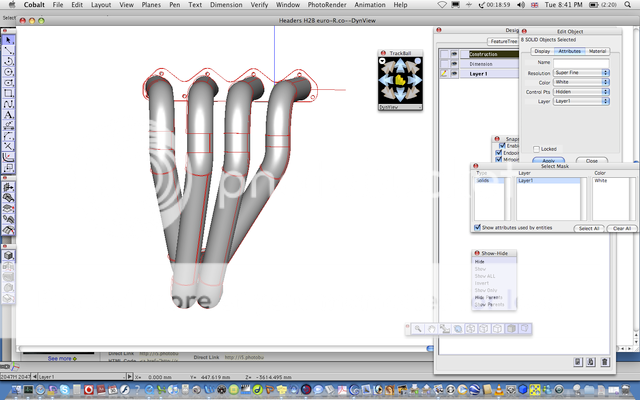
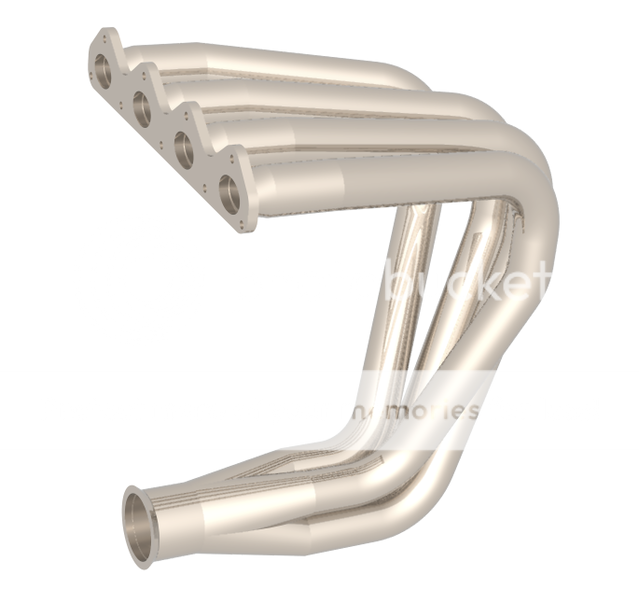
here is a design for the new headers I made up, not sure if it will fit yet pretty sure it will foul badly on the front cross member/radiator support panel.
i can modify the CAD file once the engine is in and I can measure properly.
I know the engine sits quite far back inthe bay and a lot more up-right with the H2B.
I cleaned all the **** out of the TB, it had quite a bit of gunk on the butterfly and inside the bore.
Also fitted a new Rear main seal, high temp uni-directional, left hand thread too as it's an anti-clockwise motor, lucky I thought of that because the first one i ordered would have pumped oil out due to the vanes going the wrong way.
The Euro-R has a die-cast aluminum bell brace which goes under the sump and bolts up to the block and bellhousing on the gearbox, this had to be shortened as the new axel position runs right through it.
I shortened it back to the next bolt hole. There's no way it'll be as effective as a brace now but there was not much choice.
This is the bit that got cut off..
here is a design for the new headers I made up, not sure if it will fit yet pretty sure it will foul badly on the front cross member/radiator support panel.
i can modify the CAD file once the engine is in and I can measure properly.
I know the engine sits quite far back inthe bay and a lot more up-right with the H2B.
10-13-2008, 03:24 PM
#7
Honda-Tech Member
Thread Starter
Join Date: Nov 2006
Location: Auckland, New Zealand
Posts: 90
Likes: 0
Received 0 Likes
on
0 Posts
Work on the engine/gearbox is on hold while I wait to source a crank pulley and while my 4.785 98 spec final drive arrives so i have busied myself doing some of the little stuff that tends to get overlooked in the bigger picture.
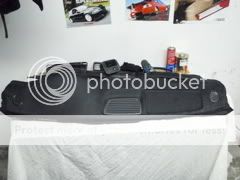
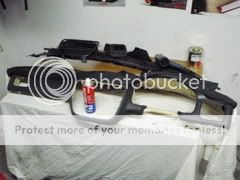
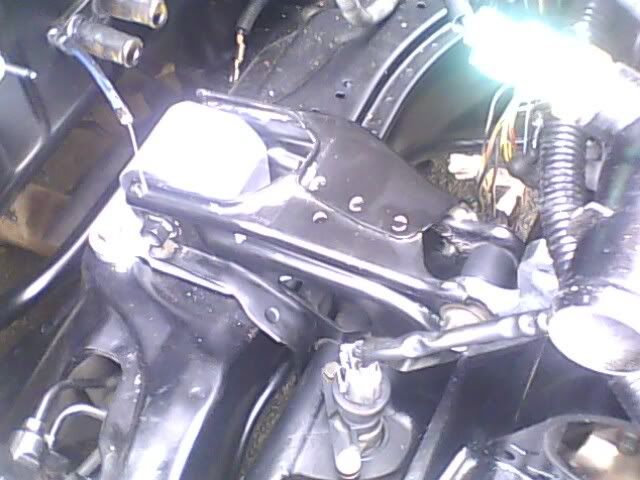
Removed the sound deadening from behind the dash while it was out.
This **** is <u>heavy</u> and must have some sort of lead content, oh well out it goes!
Dash still out, loom still a mess, heaters and aircon boxes still out, but the fire wall has been cleaned of the sound deadening. Dash is basically ready to go back in, I've been busy on that too more in a few slides....
The wiring I have pretty much sussed, it's just a matter of doing the work now.
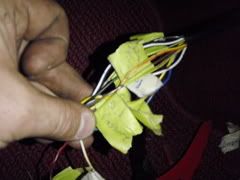
This is all the extra wires from the dash loom which used to join the old loom via the green plug just up-stream from the ecu.
Most of them were aircon and cvt related but I have kept the important ones.
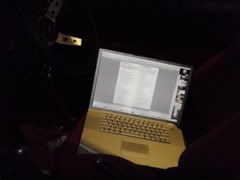
I used these online pinout guides to compare obd2a with OBd2b which as it turns out have sweet [freak] all in common.
The plugs are totally different.
OBD2b has two plugs on the engine loom and the dash plugs directly into the ecu via connector "C"
On obd2a vehicles there are three plugs which go to the ecu and there is an extra plug (the green one I referred to before) which plugs into the dash loom.
By following these back to the ecu plugs I have identfied which wires I need to keep to meet up with a new plug (connector C which I got have yet)
These are the online guides I meant;

Here is the PGE euro-R ecu ...

This is the old obd2a loom ecu end, you can see it has three plugs and an extra green one.
On the obd2b loom the third plug and the green one are missing.
Even more wiring has been assholed out of the car now, check out the bucket, she's chockablock!

I ceramic heat paint coated the headers..
And my mate had a go at putting in a baffle plate. It didn't really work out, turns out the PGE sump is very different to a stock H22a P13 one so the baffle plate didn't fit.
It is also welded in too high up so it fouls on the crank girdle, I think I'll bin it and start again with another sump.
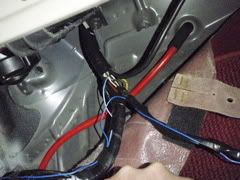
Next i ran my engine bay loom out and extended it so it could run under the guards and through the cross member, it's total stealth now.

used the original plugs so it's still removable, just requires removal of the guards.
I added a rubber grommet into the A pillar under the dash to bring all the wires out through and stop water leaking in..

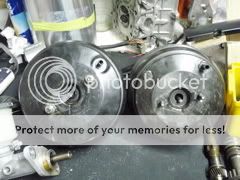
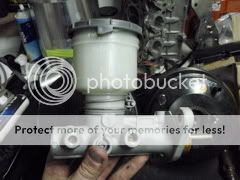
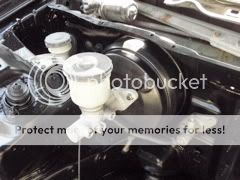
New Prelude booster, shes' a big old girl but the stud pattern and offset is the same so it looks like it might be going to fit ok, havn't tried yet.
New 1" Brake master cylinder.
OK now heres the bit I'm most proud of....
I've been wanting to do this for ages and i was a bit nervous about whether I could pull it off as i've never done anything like it before but it turned out awesome and I'm totally stoked with the result. DIY FTMFW!!!
I took the dash apart and took off the shell and wrapped it in black alacantra suede and it looks badass.
These photos don't really capture it properly, in person it looks way better.
It took about 3 hours to do and was pretty full-on, once the glue was on there was no going back and it wasn't going too well and times and I thought I'd stuffed up bigtime but with persistence and a heat-gun to stretch the fabric around corners i got there in the end.
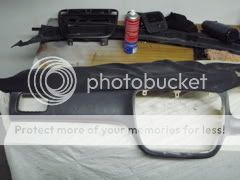
This is how it started, a big pile of loose cloth and some spray glue

I started at the back and worked forward in layers, the top was really tricky to get the fabric to sit down in the trays etc, it was a mission, this was the point where I thought I'd stuffed up and ruined a perfectly good non-airbag dash.
With the top done I could continue on over the front face.
Spray glue misted onto both the fabric and the plastic and left to tack off.
The plastic was cleaned with wax and grease remover first
All the vents clicked in to hold the fabric in place..
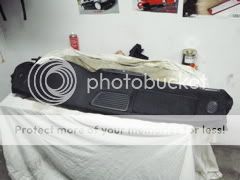
Done!!
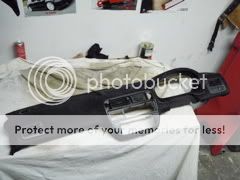


And ready to go onto the NZ-new primed dash frame (jdm ones are bare steel and rust like hell)

Removed the sound deadening from behind the dash while it was out.
This **** is <u>heavy</u> and must have some sort of lead content, oh well out it goes!
Dash still out, loom still a mess, heaters and aircon boxes still out, but the fire wall has been cleaned of the sound deadening. Dash is basically ready to go back in, I've been busy on that too more in a few slides....
The wiring I have pretty much sussed, it's just a matter of doing the work now.
This is all the extra wires from the dash loom which used to join the old loom via the green plug just up-stream from the ecu.
Most of them were aircon and cvt related but I have kept the important ones.
I used these online pinout guides to compare obd2a with OBd2b which as it turns out have sweet [freak] all in common.
The plugs are totally different.
OBD2b has two plugs on the engine loom and the dash plugs directly into the ecu via connector "C"
On obd2a vehicles there are three plugs which go to the ecu and there is an extra plug (the green one I referred to before) which plugs into the dash loom.
By following these back to the ecu plugs I have identfied which wires I need to keep to meet up with a new plug (connector C which I got have yet)
These are the online guides I meant;
Here is the PGE euro-R ecu ...
This is the old obd2a loom ecu end, you can see it has three plugs and an extra green one.
On the obd2b loom the third plug and the green one are missing.
Even more wiring has been assholed out of the car now, check out the bucket, she's chockablock!
I ceramic heat paint coated the headers..
And my mate had a go at putting in a baffle plate. It didn't really work out, turns out the PGE sump is very different to a stock H22a P13 one so the baffle plate didn't fit.
It is also welded in too high up so it fouls on the crank girdle, I think I'll bin it and start again with another sump.
Next i ran my engine bay loom out and extended it so it could run under the guards and through the cross member, it's total stealth now.
used the original plugs so it's still removable, just requires removal of the guards.
I added a rubber grommet into the A pillar under the dash to bring all the wires out through and stop water leaking in..
New Prelude booster, shes' a big old girl but the stud pattern and offset is the same so it looks like it might be going to fit ok, havn't tried yet.
New 1" Brake master cylinder.
OK now heres the bit I'm most proud of....
I've been wanting to do this for ages and i was a bit nervous about whether I could pull it off as i've never done anything like it before but it turned out awesome and I'm totally stoked with the result. DIY FTMFW!!!
I took the dash apart and took off the shell and wrapped it in black alacantra suede and it looks badass.
These photos don't really capture it properly, in person it looks way better.
It took about 3 hours to do and was pretty full-on, once the glue was on there was no going back and it wasn't going too well and times and I thought I'd stuffed up bigtime but with persistence and a heat-gun to stretch the fabric around corners i got there in the end.
This is how it started, a big pile of loose cloth and some spray glue
I started at the back and worked forward in layers, the top was really tricky to get the fabric to sit down in the trays etc, it was a mission, this was the point where I thought I'd stuffed up and ruined a perfectly good non-airbag dash.
With the top done I could continue on over the front face.
Spray glue misted onto both the fabric and the plastic and left to tack off.
The plastic was cleaned with wax and grease remover first
All the vents clicked in to hold the fabric in place..
Done!!
And ready to go onto the NZ-new primed dash frame (jdm ones are bare steel and rust like hell)
Trending Topics
10-13-2008, 03:27 PM
#8
Honda-Tech Member
Thread Starter
Join Date: Nov 2006
Location: Auckland, New Zealand
Posts: 90
Likes: 0
Received 0 Likes
on
0 Posts

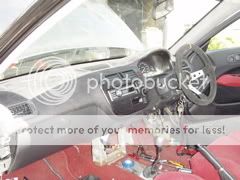
Engine basically ready now and Dash is back in the car, its starting to look a lot more respectable now

The wiring is not complete but I have a pretty good grasp of it so i can do the rest with the dash in.
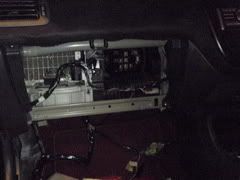
I had no-where to put the black fuse box because I had taken it out from under the bonnet, I decided to ditch the black air-con condenser box and put in a couple of blanking plates and a flexible duct in between. Worked out well, I sawed the flanges off the black box and glued black plastic sheet into the hole and cut a round hole and mounted a pipe flange in it for the ducting to mount too. It's urethane glued into place and works well.
I "hot-wired" the fan motor just to see if it would blow enough air and it was fine.

1" master cyl and booster from a prelude, massive upgrade from the 13/16 one it had :lol:
Adapter plate and flywheel installed and torqued up.
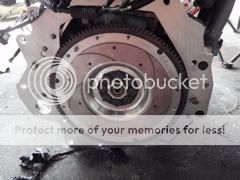
I also ground the engine block back to make room for the dummy shaft and pressed the new dummy shaft carrier on but I forgot to take pics, will have to do it later.
Dad couldn't help himself and had to have a fiddle, we used the input shaft from the gearbox which was in bits as the clutch alignment tool :lol:

Clutch all installed. Stock ITR clutch.
This is the completed dash..

And installed with the suede deep dish OMP wheel which I totally love, will be so nice after the airbag wheel.


The gearbox woould have been back together but the guy i got the 4.785 off accidentally included a 2nd gear instead of a 1st by mistake. As soon as it arrives the box can go back together and we'll be in business.
10-13-2008, 03:39 PM
#9
Honda-Tech Member
Join Date: Apr 2008
Posts: 854
Likes: 0
Received 0 Likes
on
0 Posts
<TABLE WIDTH="90%" CELLSPACING=0 CELLPADDING=0 ALIGN=CENTER><TR><TD>Quote, originally posted by LA_HONDAS »</TD></TR><TR><TD CLASS="quote">g/l with your build  </TD></TR></TABLE>
</TD></TR></TABLE>
10-13-2008, 11:54 PM
#10
Im in!..
Me and a friend.. were thinking of starting a Euro R build but into a completely different platform, A SI crx..
is there anything off the gate that you can think of as far as problems?
BTW love the dash... my friend just did his headliner, but damn that looks like a PITA...
Me and a friend.. were thinking of starting a Euro R build but into a completely different platform, A SI crx..
is there anything off the gate that you can think of as far as problems?
BTW love the dash... my friend just did his headliner, but damn that looks like a PITA...
10-14-2008, 12:39 PM
#14
Honda-Tech Member
Thread Starter
Join Date: Nov 2006
Location: Auckland, New Zealand
Posts: 90
Likes: 0
Received 0 Likes
on
0 Posts
<TABLE WIDTH="90%" CELLSPACING=0 CELLPADDING=0 ALIGN=CENTER><TR><TD>Quote, originally posted by "Didly" »</TD></TR><TR><TD CLASS="quote">Im in!..
Me and a friend.. were thinking of starting a Euro R build but into a completely different platform, A SI crx..
is there anything off the gate that you can think of as far as problems?
BTW love the dash... my friend just did his headliner, but damn that looks like a PITA...</TD></TR></TABLE>
Well funny you should say that, I got this engine off a guy who had crashed his euro-R and planned to put the engine into his crx, however he bought the H22a-EF hasport mount kit and the gearbox mount didn't fit on the euro-R box for some reason and he gave up trying to work it and sold it to me cheap.
So i dont know if it's anything to go by or whether he had the wrong mounts by mistake but he struggled to get a regular H22a mount kit to work, you may find the same thing (unless you also go H2B which would be utterly nuts in a crx)
10-14-2008, 01:45 PM
#15
He prolly wouldnt mind the H2B if it wasnt for the hood clearances..
Looks like I need to find out more about that to..
That was actually the problem Id thought id run in to too.
Thanks and Research begins haha.
Esp told me the mounts would work with a euro R.. But i'll have to double check that.
Looks like I need to find out more about that to..
That was actually the problem Id thought id run in to too.
Thanks and Research begins haha.
Esp told me the mounts would work with a euro R.. But i'll have to double check that.
11-24-2008, 12:30 AM
#17
Honda-Tech Member
Thread Starter
Join Date: Nov 2006
Location: Auckland, New Zealand
Posts: 90
Likes: 0
Received 0 Likes
on
0 Posts
It been a while since I updated this but the car is finally alive!
Awesome, after about a week solid of wiring, re-wiring, checking, re-checking I finally started it this afternoon and it's running mint.
So quick to rev up, very responsive on the throttle and a very lively bark to the exhaust.
i seriously can not wait to road test this sucker, it's going to be mental.
For those who havn't read all the pages previous to this, the reason it took so long to complete was I didn't want to cut corners so did a complete OBD2b swap so it is running OBD2B engine loom, sensors including the rotary IACV and the dash wiring has been re-routed to OBD2b spec.
No dirty boomslang!!
So far everything seems to be working, it is throwing an error but then again there is no knock sensor or oxy sensor connected so of course it is going to. I'm yet to check what the codes are, engine seems to be running fine.
Anyway heres a quick vid of the big moment, cheesy I know but I was very stoked.
And heres all the pics taken since the last update, sorry there's a lot as it's been a while.
The completed S80 box, 96 spec gearset with 98 spec final drive. Pretty much the bomb b-series combo from what I'm told so looking forward to seeing how it goes.
All bearings replaced including diffbearings, conversion to CTR box style bearings as it is apparently less load on the diff head in corners.
Synchros are not new, lets hope they are still ok I couldn't really afford to buy new synchros but the box apparently shifted fine anyway.
This case used to have an ATS metal in it, now it is just running an oem Type-R helical.
Sorry about the quality of these next few pics, they were taken on my shitty chinese cellphone.
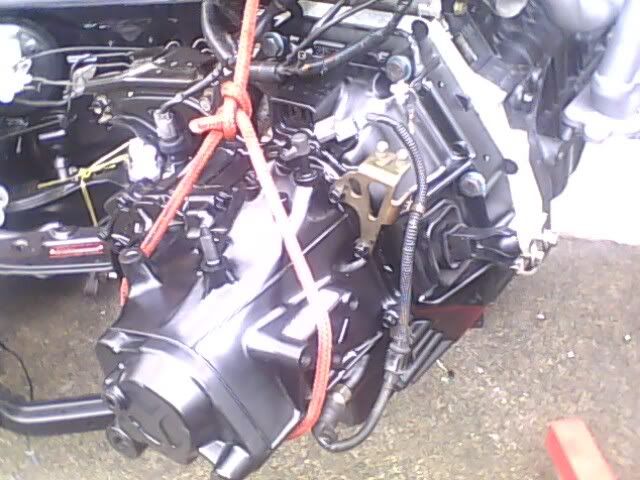
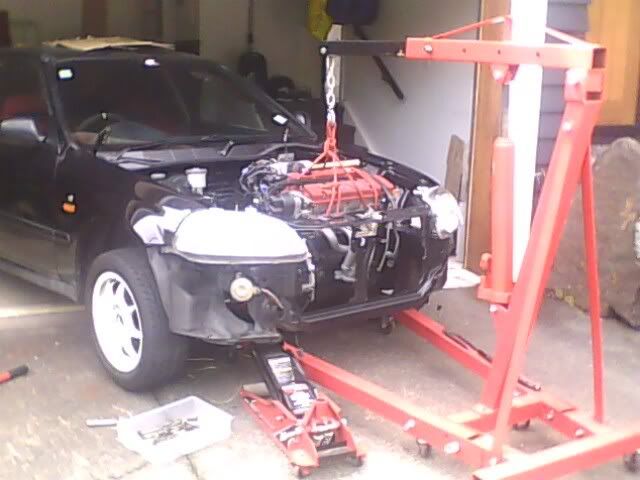
The box all painted up to match the block, bolted to the H2B plate and hanging off the crane ready to go in the hole.
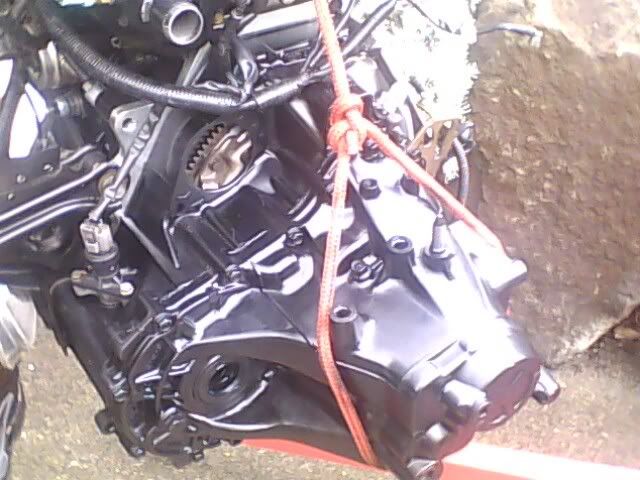
Hired a crane for the day, think I'll have to buy one, very handy.

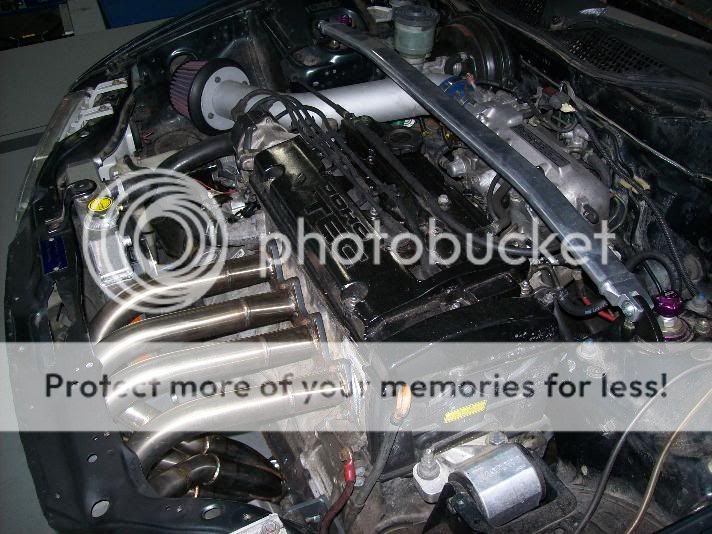
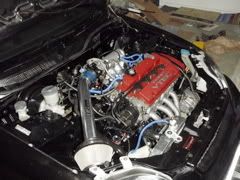
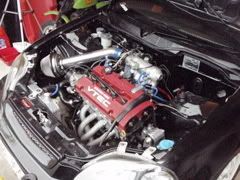
The mounts lines up perfectly and it was not a hard job to get the engine all mounted up, there is a surprising amount of room with the euro-R single runner manifold and the new engine angle, I didn't even touch the sides.
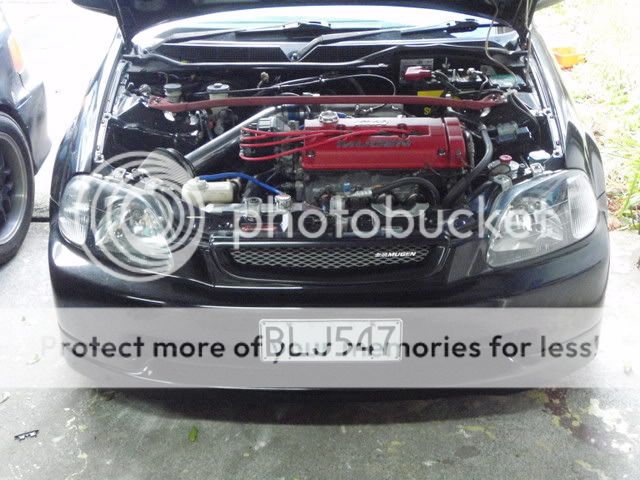
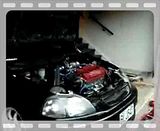
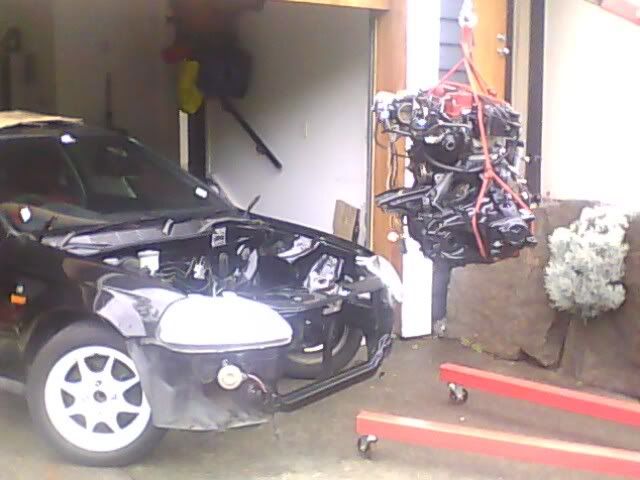
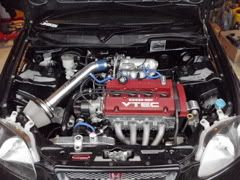
In the hole....looks just like a bought one
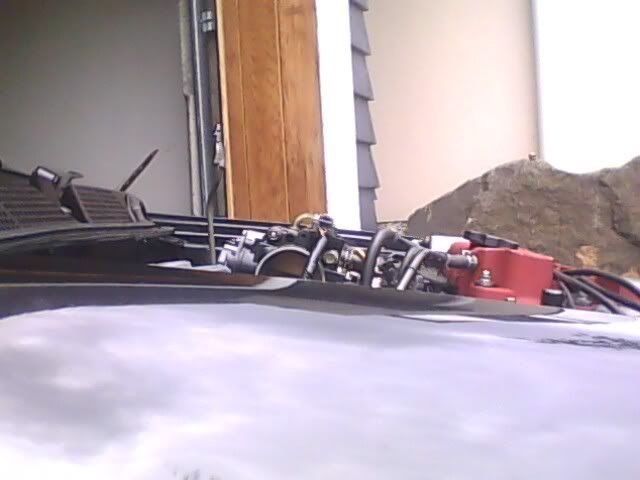
This had me VERY worried.....bonnet clearance = fail?
No turns out it's fine with just a few mods, more on that later...
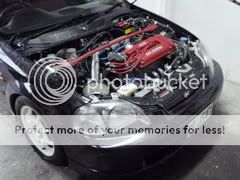
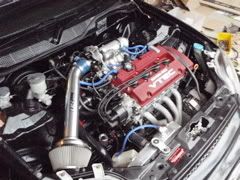
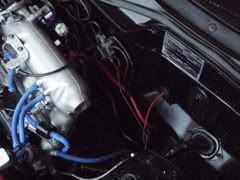
Ok got my proper camera back now so the pics improve a bit
Here it is all plumbed up and about the be started...

Awesome, after about a week solid of wiring, re-wiring, checking, re-checking I finally started it this afternoon and it's running mint.
So quick to rev up, very responsive on the throttle and a very lively bark to the exhaust.
i seriously can not wait to road test this sucker, it's going to be mental.
For those who havn't read all the pages previous to this, the reason it took so long to complete was I didn't want to cut corners so did a complete OBD2b swap so it is running OBD2B engine loom, sensors including the rotary IACV and the dash wiring has been re-routed to OBD2b spec.
No dirty boomslang!!
So far everything seems to be working, it is throwing an error but then again there is no knock sensor or oxy sensor connected so of course it is going to. I'm yet to check what the codes are, engine seems to be running fine.
Anyway heres a quick vid of the big moment, cheesy I know but I was very stoked.
And heres all the pics taken since the last update, sorry there's a lot as it's been a while.
The completed S80 box, 96 spec gearset with 98 spec final drive. Pretty much the bomb b-series combo from what I'm told so looking forward to seeing how it goes.
All bearings replaced including diffbearings, conversion to CTR box style bearings as it is apparently less load on the diff head in corners.
Synchros are not new, lets hope they are still ok I couldn't really afford to buy new synchros but the box apparently shifted fine anyway.
This case used to have an ATS metal in it, now it is just running an oem Type-R helical.
Sorry about the quality of these next few pics, they were taken on my shitty chinese cellphone.
The box all painted up to match the block, bolted to the H2B plate and hanging off the crane ready to go in the hole.
Hired a crane for the day, think I'll have to buy one, very handy.
The mounts lines up perfectly and it was not a hard job to get the engine all mounted up, there is a surprising amount of room with the euro-R single runner manifold and the new engine angle, I didn't even touch the sides.
In the hole....looks just like a bought one
This had me VERY worried.....bonnet clearance = fail?
No turns out it's fine with just a few mods, more on that later...
Ok got my proper camera back now so the pics improve a bit
Here it is all plumbed up and about the be started...
11-24-2008, 12:31 AM
#18
Honda-Tech Member
Thread Starter
Join Date: Nov 2006
Location: Auckland, New Zealand
Posts: 90
Likes: 0
Received 0 Likes
on
0 Posts
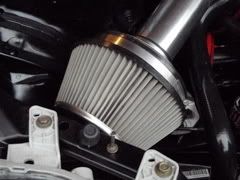
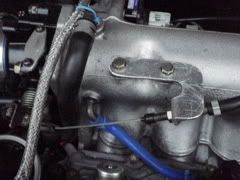
Some ***** close up detail shots....
Blitz filter
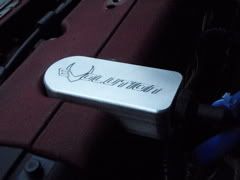
Evo branding everywhere
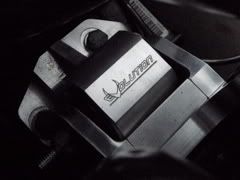
Transmission breather vent
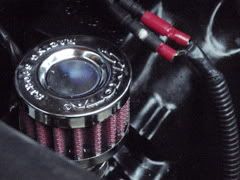
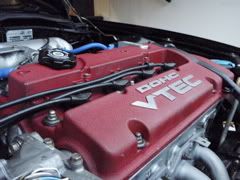
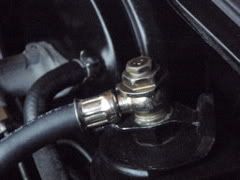
The cam cover breather/PCV. The kit comes with a relocator to get it out of the way of the bonnet.
***** sticker for the window drop

New fuel line.
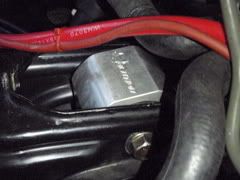
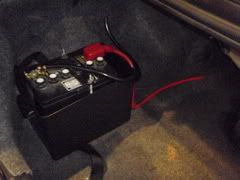
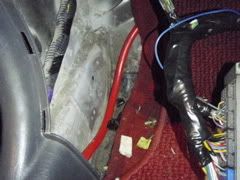
Even the rear mount is bling, the red cable is the new battery cable
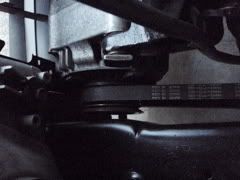
Stock alternator and stock bracket, no worries at all with clearance its perfect.
Passenger side mount

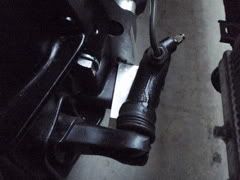
B-series clutch slave cyl and relocating bracket, cheers Adam it works a treat.
Cabling for battery relocation and new alternator wiring
Custom throttle cable retainer, cut from aluminium sheet.
Map sensor blanking plate, now running the map as stand-alone, bonnet fouled on the map and I was scared of cracking it.
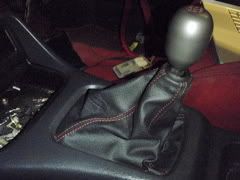
Pa55word JDM shift boot :D
Battery relocation too the boot.
PDE Euro-R ecu all wired in with the new loom.
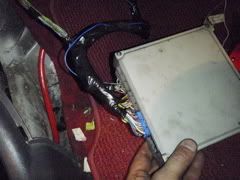
the new location for the fuse box, just take out the glove box and it's right there.
Battery cabling runs under the carpet and down the sill panel, rubber gromets protect it where it passes through metal but I will probbaly put a curcuit breaker at the battery box just in case.
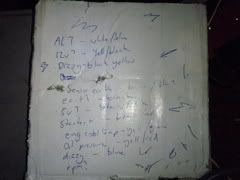
Ha ha this was my notes for the loom modification once I had identified what the extra 15 wires were for. I worked it out by connecting an obd2a loom and beep testing every plug and doingt he same for the obd2b loom and then I just matched up the wires, there were only two left over, a backup voltage and a 2nd water temp sensor line which must have gone to the euro-R dash or somthing.
The other odd difference is on obd2a the tacho gets it's signal off the blue distributer wire, on obd2b there is no blue wire on the dizzy and the blue wire comes from the ecu instead and is called an "Engine Speed Pulse" wire. Took a while to work that out but the tacho works fine so I got it sorted in the end.
Blitz filter
Evo branding everywhere
Transmission breather vent
The cam cover breather/PCV. The kit comes with a relocator to get it out of the way of the bonnet.
***** sticker for the window drop
New fuel line.
Even the rear mount is bling, the red cable is the new battery cable
Stock alternator and stock bracket, no worries at all with clearance its perfect.
Passenger side mount
B-series clutch slave cyl and relocating bracket, cheers Adam it works a treat.
Cabling for battery relocation and new alternator wiring
Custom throttle cable retainer, cut from aluminium sheet.
Map sensor blanking plate, now running the map as stand-alone, bonnet fouled on the map and I was scared of cracking it.
Pa55word JDM shift boot :D
Battery relocation too the boot.
PDE Euro-R ecu all wired in with the new loom.
the new location for the fuse box, just take out the glove box and it's right there.
Battery cabling runs under the carpet and down the sill panel, rubber gromets protect it where it passes through metal but I will probbaly put a curcuit breaker at the battery box just in case.
Ha ha this was my notes for the loom modification once I had identified what the extra 15 wires were for. I worked it out by connecting an obd2a loom and beep testing every plug and doingt he same for the obd2b loom and then I just matched up the wires, there were only two left over, a backup voltage and a 2nd water temp sensor line which must have gone to the euro-R dash or somthing.
The other odd difference is on obd2a the tacho gets it's signal off the blue distributer wire, on obd2b there is no blue wire on the dizzy and the blue wire comes from the ecu instead and is called an "Engine Speed Pulse" wire. Took a while to work that out but the tacho works fine so I got it sorted in the end.
11-24-2008, 12:32 AM
#19
Honda-Tech Member
Thread Starter
Join Date: Nov 2006
Location: Auckland, New Zealand
Posts: 90
Likes: 0
Received 0 Likes
on
0 Posts
Heres the blue wire, which I added after the loom had been wrapped, bugger.
There was a lot of this **** going on!!
I couldn't have done it without my little helper either..
Its still a mess, i have some tidying to do!!!
Well thats it for now, only have to weld up the exhaust headers and then it's road test time.
Need to find a knock sensor and o2 sensor too, got some H22a stainless FGK headers in the pipeline too
01-19-2009, 12:33 PM
#21
Honda-Tech Member
Thread Starter
Join Date: Nov 2006
Location: Auckland, New Zealand
Posts: 90
Likes: 0
Received 0 Likes
on
0 Posts
Whoops I've been away on summer break, I need to put some updates in here!
Cars going mint, pulls sooooo hard, stays in vtec all the way form 1st to the top of 5th just like it should.
The H2B swap is the best mod for an H-series engine it really lets it come alive.
Cars going mint, pulls sooooo hard, stays in vtec all the way form 1st to the top of 5th just like it should.
The H2B swap is the best mod for an H-series engine it really lets it come alive.
01-19-2009, 08:39 PM
#22
Junior Member
Join Date: Sep 2007
Location: corona, CA, usa
Posts: 112
Likes: 0
Received 0 Likes
on
0 Posts
dude i hate you hahal jk your build is the shet dude. I am getting the h22 jdm motor not the euro r. Do you think their is a noticeable difference?
Were you able to get your hood closed all the way to look stock? That is my number one issue that I want to get solved. My car is not lowered or anything so I do not think the ground clearance will be an issue? props to you!!
Were you able to get your hood closed all the way to look stock? That is my number one issue that I want to get solved. My car is not lowered or anything so I do not think the ground clearance will be an issue? props to you!!
01-19-2009, 08:52 PM
#23
Honda-Tech Member
Thread Starter
Join Date: Nov 2006
Location: Auckland, New Zealand
Posts: 90
Likes: 0
Received 0 Likes
on
0 Posts
dude i hate you hahal jk your build is the shet dude. I am getting the h22 jdm motor not the euro r. Do you think their is a noticeable difference?
Were you able to get your hood closed all the way to look stock? That is my number one issue that I want to get solved. My car is not lowered or anything so I do not think the ground clearance will be an issue? props to you!!
Were you able to get your hood closed all the way to look stock? That is my number one issue that I want to get solved. My car is not lowered or anything so I do not think the ground clearance will be an issue? props to you!!
yeah hood shuts perfectly, there is a tiny bit of rubbing I have noticed on the cam cover though where the bonnet must hit somtimes, its real close but it all shuts fine and looks fully stock.
I had to relocate the map sensor and thats about it.
Hard to say about the difference between the two motors as my old hatch with the JDM black top H22a didn't have the b-series gearbox so it felt a lot slower. Its hard to say if the speed comes mostly from the engine or the better gearbox.
01-19-2009, 11:06 PM
#24
Junior Member
Join Date: Sep 2007
Location: corona, CA, usa
Posts: 112
Likes: 0
Received 0 Likes
on
0 Posts
What is the main reason why the b series gear box is more beneficial for the h2b? What is the difference between having it on a b series motor and a h series motor? I am just kinda confused on how some one thought of this conversion and is the stock h22 gearbox bad to have in a hatch? I by all means gonna use my b series trans because it is already in my car but why wouldn't they put a b series trans on the h22 in the first place?
01-19-2009, 11:33 PM
#25
Honda-Tech Member
Thread Starter
Join Date: Nov 2006
Location: Auckland, New Zealand
Posts: 90
Likes: 0
Received 0 Likes
on
0 Posts
An H2B powered car has to have a b-series gearbox, it can be any thing from the 1989 cable clutch right through to 2001 ITR. If it bolts to a b-series engine it will work with the H2B adapter plate.
If you are running an H-series gearbox it isn't H2B its just H :D
The h-series box is suited to the sorts of bigger cruisier cars that the H-series engine comes in.
Imagine your mum's accord sitting at 4000rpm at 60mph, not so cruisy. :lol:
I think you need to google H2B and find out a little more.