

LSVTEC write up 1991 civic si project
 07-21-2006, 07:45 PM
#1
Honda-Tech Member
Thread Starter
Join Date: Sep 2004
Location: Some where in, WA, USA
Posts: 1,610
Likes: 0
Received 1 Like
on
1 Post
Ok. So I got this idea from a friend to build a lsvtec in my civic that already has a b16a in it. It interested me but i wasnt sure how to go about it. Until I came upon a lsvtec write up by Big Teggie. He did a great job writing up on how to build up the block. But didnt really delve into the instalation of the engine and setting up the kit for the lsvtec. I am going to try and go over the building of the block and also the instalation of a Golden Eagle lsvtec kit. And then eventually the instalation of the engine. Right now I dont have the pictures back but i should get some up soon. So I will put up the list of parts I bought and where i got them from.
B18a block
https://honda-tech.com cost ~$565 shipped
Golden Eagle lsvtec kit and GSR timing belt
https://honda-tech.com cost $260 shipped
.25 os P30 pistons
http://www.jhpusa.com cost $220 shipped
PR4 rods shotpeened with arp rod bolts
http://www.ebay.com cost $150 shipped
ARP b18c5 head studs
http://www.lightningmotorsports.com cost $125 shipped
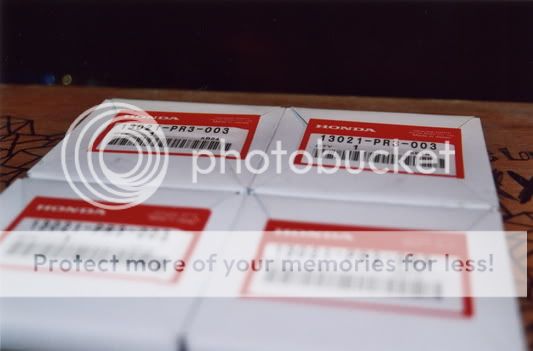
Honda piston rings .25 os
http://www.hondaautomotiveparts.com cost $115 shipped
ACL rod, main, and thrust bearing kit
http://www.lightningmotorsports.com cost $118 shipped
ARP Main studs
http://www.lightningmotorsports.com cost $88 shipped
I sourced the block from this site. It already had the deck tapped. It also already had a vtec water pump and oil pump. The pistons that were in it were CTR's but i couldnt handle that compression ratio so i sold them.
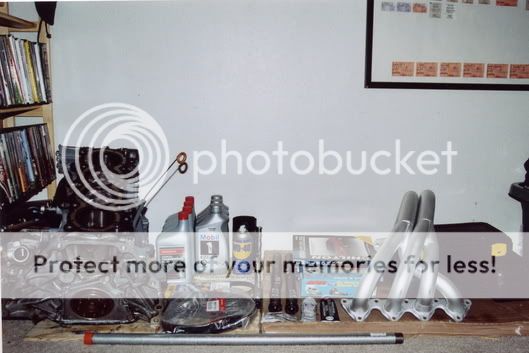
This is all of my parts sitting in my room before the swap.
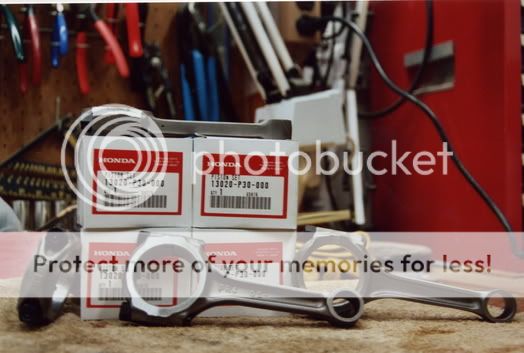
These are my rods and pistons that I got put together at a local machine shop.
These are a series of pictures of the block being built. At the time I had little to no tools and i put it together in my room. Not the best of places but it was nice having the computer right there just in case i needed to find something.
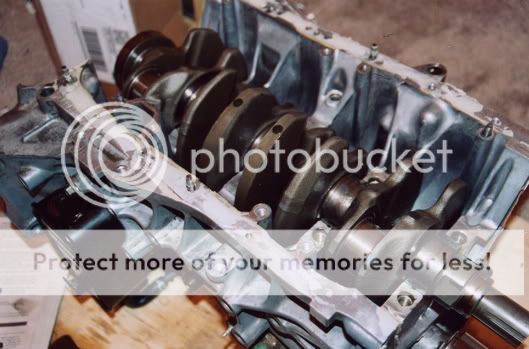
This is the crank being put in. I made sure to clean the surfice where the bearings sat to make sure i didnt get any bearing faliur.
I put the main caps on and used plastigauge. But then i forgot that I had Arp main studs comming so i had to take them off again to put it on the arp's. Sorry i dont have a picture of the arp studs in. pretty much the same picture.

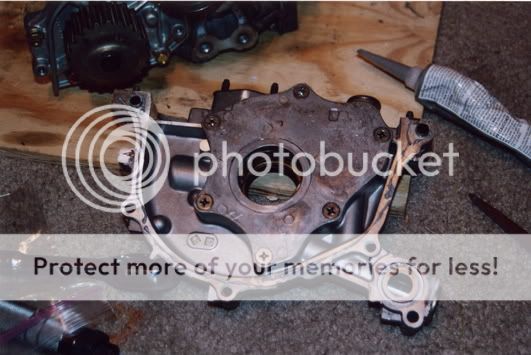
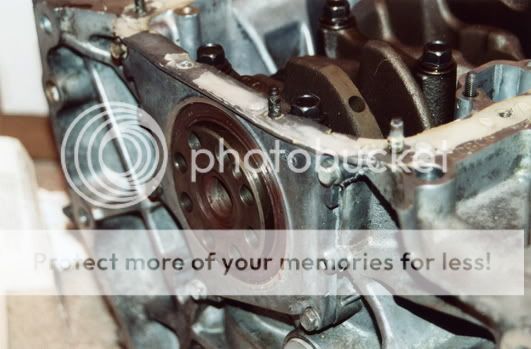
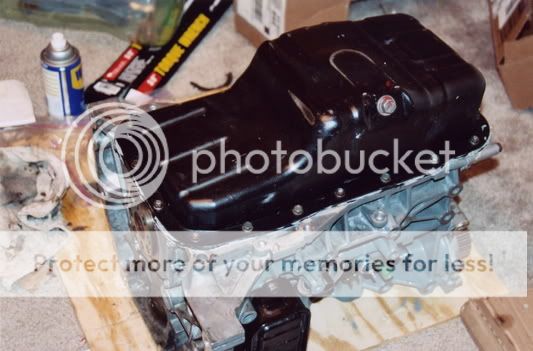
Here is the pic of the oil pump with ultra gray gasket maker on it. I dont have pics of the water pump going one because it was already on the block and its 22t so its vtec. No need to take it off.
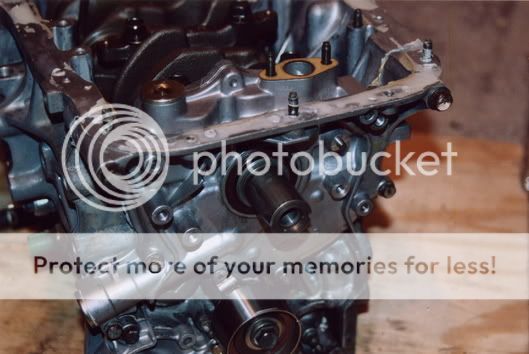
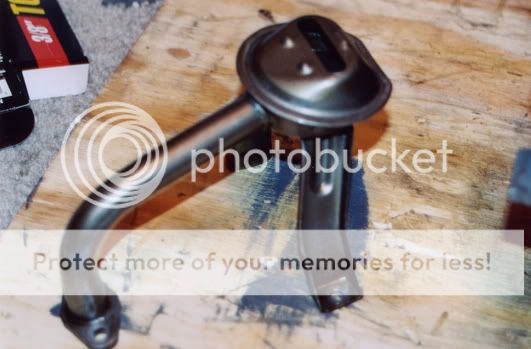
Here is the rear main seal instaled.
These are the piston rings. Once again Im sorry I didnt get a pic of the rings on or the instalation of the pistons. Before putting the pistons in i configured the rings to oem spec and put oil down the cylinder walls and spread it around. I can say one thing. The pistons were a beotch to get in by myself with a cheap piston ring compressor. it took me a good hour maybe hour and a half to get them all in. In the end i chucked the the compressor across my room.
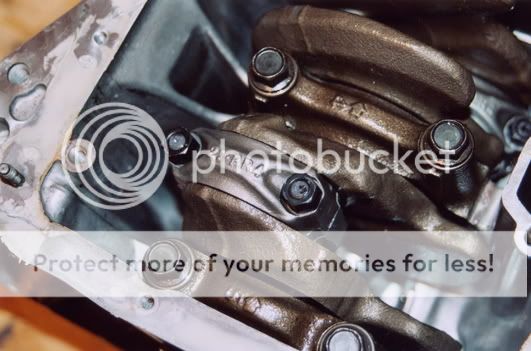
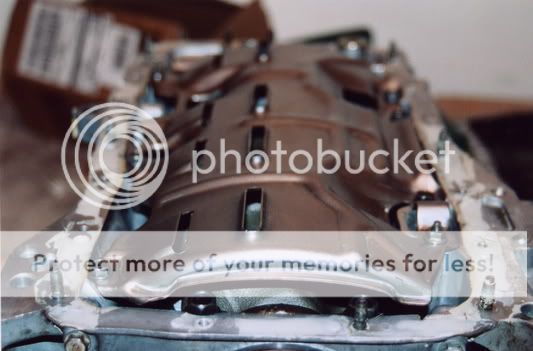
This is the windage tray and oil pick up. Not too hard to instal. Just a couple nuts and bolts. The windage tray was a tight fit though with the arp main studs. But before instalation i made sure all dirt/hair/ and what ever else was on them was all off.


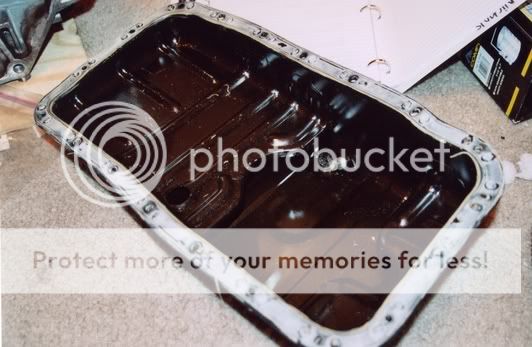
Oil pan only sucks to put on because of all the nuts and bolts. It only goes down a bit more than hand tight, i believe it is 8-10 ft.lbs.
This is a pic of the GSR cams, arp assembly lube, normal assembly lube, ultra gray gasket maker, and the arp main stud box which now is my product sticker holder.
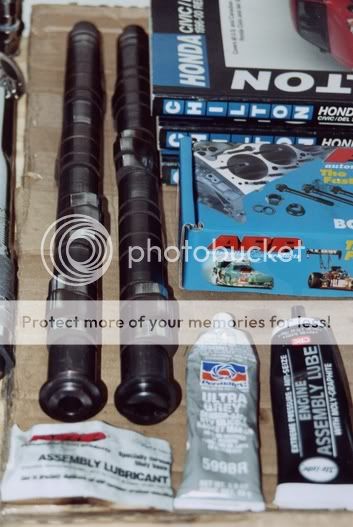
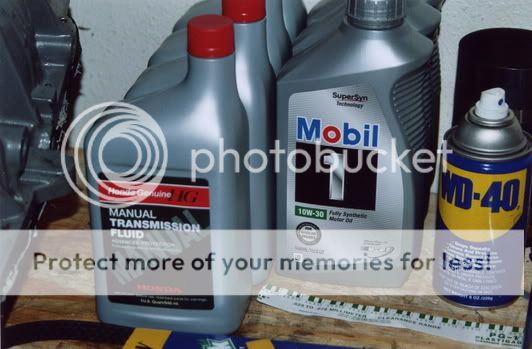
These are some of the liquids I'm useing there is the Honda tranny fluid, the Mobil 1 which im not going to use for oil right away, at first Im going to use normal oil for the break in, there is wd40 which is good for cleaning, the plastigauge, and behind the wd40 is that damn wring compressor!
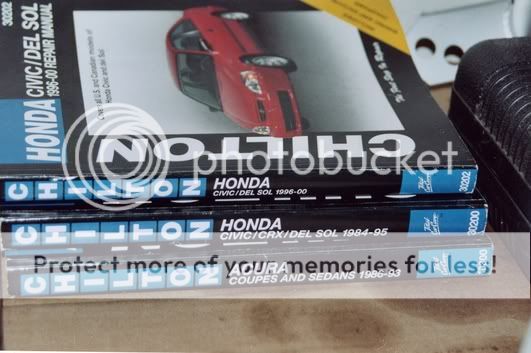
The chilton manuals. Great help and a good read on the *******.
Here is a pretty good link to piston ring placement. You could also just use honda spec placement.
https://honda-tech.com/zerothread?id=520463
Here is a link to the actual Golden Eagle instal sheet.
https://honda-tech.com/zerothread?id=1237510
And here is the link for the search screen. It is my best friend.
https://honda-tech.com/zerosearch
Ok i did a valve adjustment. It was kind of a bitch but with the right tools it wasnt as bad. I got the valve adjustment tool from amazon here is the link.
It wasnt as much money as a snap on and it works just as well.
There is a way to rig one together with some tools you can find any where. Here is the link to that.
https://honda-tech.com/zerothread?id=557944
The other tool I used is the craftsman slanted feeler gauge. It was about 8 bucks as sears. In all it cost me about 28 bucks in tools.
But here is the link I used to do the valve adjustment. Its from c-speed. Its a great site. It has so much info for almost anything for vtecs.
http://www.c-speedracing.com/h...t.php
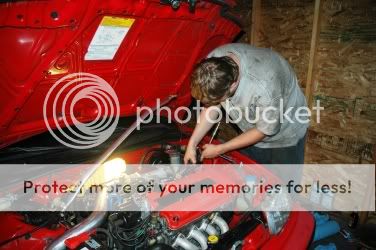
When I did the swap I undid all the wireing harnesses according to the chiltons manual and followed the manual from there. Fairly simple. Had to borrow a engine lift from my friend that was helping me with the swap. He was more of a chevy guy so he was giving me **** the whole swap. Like being able to pick up the block with out much effort. I took off my head and found that my valve seals arent doing to great on cylinder 2. Still waiting to get the money for a new valve train. So i cleaned off the valves and slapped the head onto the block with the arp head studs. Those proved to be more of a problem then I thought. I kept dropping the nut in the head. But I got it on. Then I put on the GE lsvtec plate with oil line going up to the head. Next I started transfering all the other parts to my new ls block. Such as the alternator. I used the set up for the knock sensor being the top bolt to the alternator bracket. I just tapped it out and put it on. Simple.
I put the mounts on the block and it was ready to be put back in. The back mount and the tranny mount were a bit hard to get in but it just took a little elbow greese.
We put all the necessary fluids for start up in and cranked it over. We didnt want to connect everything up and find out we had to take it out all over again. The start up didnt go as smoothly as I hopped. I forgot to plug the whole in the GE lsvtec plate and oil shot out. It sucked but my friend with small steady hands was able to reach back there and plug the whole with the given plug. We cranked it over again and it was hella loud. Idle around 3k on open header. We shut it down checked for leaks and only found a little coolent leak. That was fixed easily. So we hooked everything up and called it a night.
The next day we took it down to an exhaust shop to get my current exhaust to reach the header. Only about 50 bucks later and it was a little more quiet but still hella loud along with a crazy hesitation. The car was slow... too slow.
I tried to find the source of the high idle but couldnt find anything. All the vacume seemed to be perfect. So I started playing around with the plugs and it just went back to normal. NO idea what it was.
After I fixed that I had to find out what the hesitation was from. So I actually took it to a shop and they couldnt figure it out. Ended up paying money for them to tell me that my fuel pump, injectors, and fuel lines were working to spec..... thanks a lot. I ended up fixing the problem by doing ignition timing! Stupid of me to wait so long to do it but it fixed it up in a jiff.
I hated my stock intake manifold so I bought a Skunk2 mani from ebay alont with a hondata gasket. I got the Skunk2 Intake Manifold put on. It wasnt easy. Taking it off was easy, but putting it on sucked. I had a few fitment issues. One of the sensors on the front of the manifold wasnt allowing me to put on my fuel rail. But i needed the sensor. So i dremeled the sensor a bit for it to fit perfect. One of my vacume hoses for the map sensor (my map sensor is located on my firewall) kept falling off so i kept throwing a map sensor code 5. So I got a clamp and put it on there tight. There is no fitv on the new manifold so I cut the coolent hoses that went to it and pluged them off.
For some reason after I got the lsvtec all put in my strut tower bar wouldnt fit. It kept hitting my dashpot diafragm and Air boost valve. But this manifold sits lower and is shorter so it fit perfectly with room to spare.
Even after all the hassle of putting it on it was worth it. The price wasnt too bad and it fit better than some other parts I have instaled.
I bought a compression tester from schucks for about 50 bucks. I did the comp test. The first cylinder was at about 250. #2 about 246 #3 250 #4 252. So over all it was good.
I used sea foam the next day and it worked pretty good. but I might just be saying that because it poured a huge cloud of white smoke out the back of my car in rush hour in my town. Pretty funny. Sincy most parts the foam was supose to clean was new in my engine it probably didnt do as much for me as it would for someone with a high mileage engine. I was mainly targeting my injectors because I still had a bit of a hesitation. Some people pour 1/3 in their gas tank, 1/3 in their crank cast, and 1/3 in their vacume. But I didnt do that to mine. I just simply followed the directions on how to best clean my injectors.
A couple days after I bought a new fuel filter. I figure I might as well change it since I didnt know when the last time it was changed. Very quick instal. The only sucky thing was the gas spilling. But it happens. Once I drove that around it felt WAY better. The other filter must have been blocking up the fuel a lot because my car feels way different.
So I raced my friend with a b16 civic cx with ctr pistons, ctr cams, short ram, nice valve train and a few other things. All in all he is pretty quick. He ran a 14 at the track and hes put a few other things on since then. But we were just neck and neck. Both of our cars were just as fast as each other. It was pretty nice. It was the first time I really opened up my car. Until now Ive been too afraid of breaking something. So far the car is going great. Thanks for the support so far. And yes i know the dc sports header sucks *****. Will change that soon to a nice stainless one.
Here is the video of us racing. http://home.comcast.net/~dohcvtec/Race1.wmv
Its the one where I lost because I kept hitting my rev limiter and loosing major traction. Im in the red civ.
A couple weeks after that I raced another civic and noticed my gears were going. It sucked because i enjoyed my s1 tranny. But I took the hit and bought a Y1 tranny with a new act pressure plate and disc.
The instal of the tranny was easy. Took it out and just put the other one in. Started it up and it was good. I like the lower 5th gear. Its nicer to have a bit lower rpms.
I bought a Golden Eagle Fuel Rail. Here is the link to it when i bought it but they are working on there site right now so it might not work.
http://www.accountwizard.com/c...d=163
I actually bought it from http://www.tunertoys.com for about 115. Got here fairly fast and I installed it. Here are some pics. sorry im lazy about doing it step by step. I will try and do that for the next part I do.
Here is the fuel rail. I think it looks sweet.

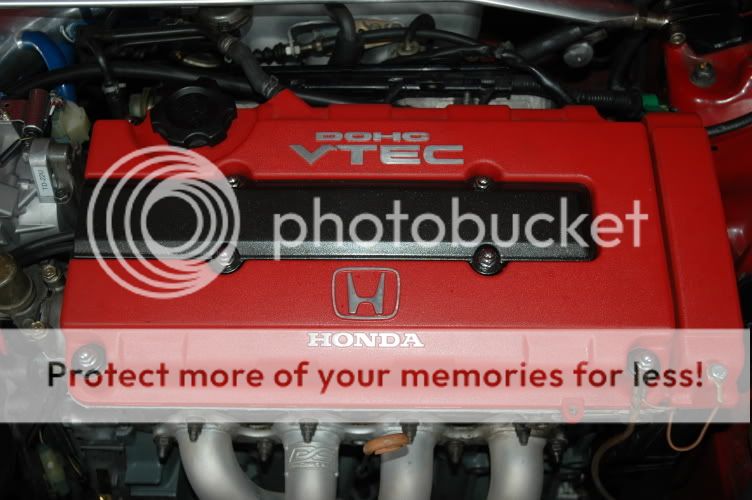
This is the pic of my engine before the fuel rail.
Here is me working on it.
This is the final product. Very nice looking. I really like the look of it. Really makes the engine bay look clean.
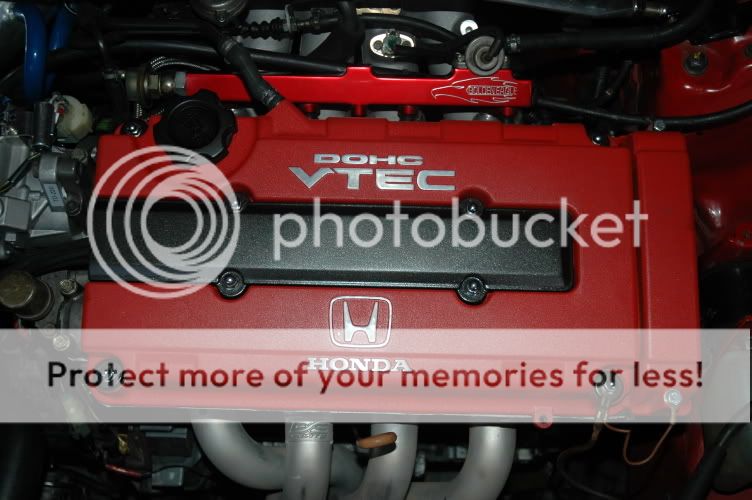
This is a cool artsy photo of my engine bay that I like.

Most recently I am going Obd1 from Obd0. It will only be maybe a week or so when I do it. I sourced the ecu from http://www.phearable.net/chippedecus.html
I also bought a obd0-obd1 conversion harness as well as a obd0-obd1 distributor plug conversion harness from http://rywire.com/store/obd0-o...bfb9d
I bought a 4 wire o2 sensor from ebay for about 35 bucks. But come to find out that I dont need it with the ecu I got from phearable. So Im putting that up for sale. I got an obd1 distributor from ebay as well for about 130 bucks brand spankin new.
Now for the conversion it sucks because it is already wired up to have vtec. So I will have to wire it back up to be stock. It shouldnt take too long. Just some solder and shrink tube and its good. Plug and play rocks. I will be rewireing everything with black wire to be a bit more invisable. And i will be using my one wire o2 sensor plug as the vtec solenoid plug because i dont have one for mine. It will look a lot more clean with black wire and the plug.
While waiting for the distributor to get here I decided to paint my old valve cover that has been just laying around. I think it looks cool and I have seen it done before, just not in wrinkle paint like this. It needs to be touched up a bit but not bad for the first time doing anything like this. I will be putting it in my car tonight maybe and take some pics of it.

B18a block
https://honda-tech.com cost ~$565 shipped
Golden Eagle lsvtec kit and GSR timing belt
https://honda-tech.com cost $260 shipped
.25 os P30 pistons
http://www.jhpusa.com cost $220 shipped
PR4 rods shotpeened with arp rod bolts
http://www.ebay.com cost $150 shipped
ARP b18c5 head studs
http://www.lightningmotorsports.com cost $125 shipped
Honda piston rings .25 os
http://www.hondaautomotiveparts.com cost $115 shipped
ACL rod, main, and thrust bearing kit
http://www.lightningmotorsports.com cost $118 shipped
ARP Main studs
http://www.lightningmotorsports.com cost $88 shipped
I sourced the block from this site. It already had the deck tapped. It also already had a vtec water pump and oil pump. The pistons that were in it were CTR's but i couldnt handle that compression ratio so i sold them.
This is all of my parts sitting in my room before the swap.
These are my rods and pistons that I got put together at a local machine shop.
These are a series of pictures of the block being built. At the time I had little to no tools and i put it together in my room. Not the best of places but it was nice having the computer right there just in case i needed to find something.
This is the crank being put in. I made sure to clean the surfice where the bearings sat to make sure i didnt get any bearing faliur.
I put the main caps on and used plastigauge. But then i forgot that I had Arp main studs comming so i had to take them off again to put it on the arp's. Sorry i dont have a picture of the arp studs in. pretty much the same picture.
Here is the pic of the oil pump with ultra gray gasket maker on it. I dont have pics of the water pump going one because it was already on the block and its 22t so its vtec. No need to take it off.
Here is the rear main seal instaled.
These are the piston rings. Once again Im sorry I didnt get a pic of the rings on or the instalation of the pistons. Before putting the pistons in i configured the rings to oem spec and put oil down the cylinder walls and spread it around. I can say one thing. The pistons were a beotch to get in by myself with a cheap piston ring compressor. it took me a good hour maybe hour and a half to get them all in. In the end i chucked the the compressor across my room.
This is the windage tray and oil pick up. Not too hard to instal. Just a couple nuts and bolts. The windage tray was a tight fit though with the arp main studs. But before instalation i made sure all dirt/hair/ and what ever else was on them was all off.
Oil pan only sucks to put on because of all the nuts and bolts. It only goes down a bit more than hand tight, i believe it is 8-10 ft.lbs.
This is a pic of the GSR cams, arp assembly lube, normal assembly lube, ultra gray gasket maker, and the arp main stud box which now is my product sticker holder.
These are some of the liquids I'm useing there is the Honda tranny fluid, the Mobil 1 which im not going to use for oil right away, at first Im going to use normal oil for the break in, there is wd40 which is good for cleaning, the plastigauge, and behind the wd40 is that damn wring compressor!
The chilton manuals. Great help and a good read on the *******.
Here is a pretty good link to piston ring placement. You could also just use honda spec placement.
https://honda-tech.com/zerothread?id=520463
Here is a link to the actual Golden Eagle instal sheet.
https://honda-tech.com/zerothread?id=1237510
And here is the link for the search screen. It is my best friend.
https://honda-tech.com/zerosearch
Ok i did a valve adjustment. It was kind of a bitch but with the right tools it wasnt as bad. I got the valve adjustment tool from amazon here is the link.
It wasnt as much money as a snap on and it works just as well.
There is a way to rig one together with some tools you can find any where. Here is the link to that.
https://honda-tech.com/zerothread?id=557944
The other tool I used is the craftsman slanted feeler gauge. It was about 8 bucks as sears. In all it cost me about 28 bucks in tools.
But here is the link I used to do the valve adjustment. Its from c-speed. Its a great site. It has so much info for almost anything for vtecs.
http://www.c-speedracing.com/h...t.php
When I did the swap I undid all the wireing harnesses according to the chiltons manual and followed the manual from there. Fairly simple. Had to borrow a engine lift from my friend that was helping me with the swap. He was more of a chevy guy so he was giving me **** the whole swap. Like being able to pick up the block with out much effort. I took off my head and found that my valve seals arent doing to great on cylinder 2. Still waiting to get the money for a new valve train. So i cleaned off the valves and slapped the head onto the block with the arp head studs. Those proved to be more of a problem then I thought. I kept dropping the nut in the head. But I got it on. Then I put on the GE lsvtec plate with oil line going up to the head. Next I started transfering all the other parts to my new ls block. Such as the alternator. I used the set up for the knock sensor being the top bolt to the alternator bracket. I just tapped it out and put it on. Simple.
I put the mounts on the block and it was ready to be put back in. The back mount and the tranny mount were a bit hard to get in but it just took a little elbow greese.
We put all the necessary fluids for start up in and cranked it over. We didnt want to connect everything up and find out we had to take it out all over again. The start up didnt go as smoothly as I hopped. I forgot to plug the whole in the GE lsvtec plate and oil shot out. It sucked but my friend with small steady hands was able to reach back there and plug the whole with the given plug. We cranked it over again and it was hella loud. Idle around 3k on open header. We shut it down checked for leaks and only found a little coolent leak. That was fixed easily. So we hooked everything up and called it a night.
The next day we took it down to an exhaust shop to get my current exhaust to reach the header. Only about 50 bucks later and it was a little more quiet but still hella loud along with a crazy hesitation. The car was slow... too slow.
I tried to find the source of the high idle but couldnt find anything. All the vacume seemed to be perfect. So I started playing around with the plugs and it just went back to normal. NO idea what it was.
After I fixed that I had to find out what the hesitation was from. So I actually took it to a shop and they couldnt figure it out. Ended up paying money for them to tell me that my fuel pump, injectors, and fuel lines were working to spec..... thanks a lot. I ended up fixing the problem by doing ignition timing! Stupid of me to wait so long to do it but it fixed it up in a jiff.
I hated my stock intake manifold so I bought a Skunk2 mani from ebay alont with a hondata gasket. I got the Skunk2 Intake Manifold put on. It wasnt easy. Taking it off was easy, but putting it on sucked. I had a few fitment issues. One of the sensors on the front of the manifold wasnt allowing me to put on my fuel rail. But i needed the sensor. So i dremeled the sensor a bit for it to fit perfect. One of my vacume hoses for the map sensor (my map sensor is located on my firewall) kept falling off so i kept throwing a map sensor code 5. So I got a clamp and put it on there tight. There is no fitv on the new manifold so I cut the coolent hoses that went to it and pluged them off.
For some reason after I got the lsvtec all put in my strut tower bar wouldnt fit. It kept hitting my dashpot diafragm and Air boost valve. But this manifold sits lower and is shorter so it fit perfectly with room to spare.
Even after all the hassle of putting it on it was worth it. The price wasnt too bad and it fit better than some other parts I have instaled.
I bought a compression tester from schucks for about 50 bucks. I did the comp test. The first cylinder was at about 250. #2 about 246 #3 250 #4 252. So over all it was good.
I used sea foam the next day and it worked pretty good. but I might just be saying that because it poured a huge cloud of white smoke out the back of my car in rush hour in my town. Pretty funny. Sincy most parts the foam was supose to clean was new in my engine it probably didnt do as much for me as it would for someone with a high mileage engine. I was mainly targeting my injectors because I still had a bit of a hesitation. Some people pour 1/3 in their gas tank, 1/3 in their crank cast, and 1/3 in their vacume. But I didnt do that to mine. I just simply followed the directions on how to best clean my injectors.
A couple days after I bought a new fuel filter. I figure I might as well change it since I didnt know when the last time it was changed. Very quick instal. The only sucky thing was the gas spilling. But it happens. Once I drove that around it felt WAY better. The other filter must have been blocking up the fuel a lot because my car feels way different.
So I raced my friend with a b16 civic cx with ctr pistons, ctr cams, short ram, nice valve train and a few other things. All in all he is pretty quick. He ran a 14 at the track and hes put a few other things on since then. But we were just neck and neck. Both of our cars were just as fast as each other. It was pretty nice. It was the first time I really opened up my car. Until now Ive been too afraid of breaking something. So far the car is going great. Thanks for the support so far. And yes i know the dc sports header sucks *****. Will change that soon to a nice stainless one.
Here is the video of us racing. http://home.comcast.net/~dohcvtec/Race1.wmv
Its the one where I lost because I kept hitting my rev limiter and loosing major traction. Im in the red civ.
A couple weeks after that I raced another civic and noticed my gears were going. It sucked because i enjoyed my s1 tranny. But I took the hit and bought a Y1 tranny with a new act pressure plate and disc.
The instal of the tranny was easy. Took it out and just put the other one in. Started it up and it was good. I like the lower 5th gear. Its nicer to have a bit lower rpms.
I bought a Golden Eagle Fuel Rail. Here is the link to it when i bought it but they are working on there site right now so it might not work.
http://www.accountwizard.com/c...d=163
I actually bought it from http://www.tunertoys.com for about 115. Got here fairly fast and I installed it. Here are some pics. sorry im lazy about doing it step by step. I will try and do that for the next part I do.
Here is the fuel rail. I think it looks sweet.
This is the pic of my engine before the fuel rail.
Here is me working on it.
This is the final product. Very nice looking. I really like the look of it. Really makes the engine bay look clean.
This is a cool artsy photo of my engine bay that I like.
Most recently I am going Obd1 from Obd0. It will only be maybe a week or so when I do it. I sourced the ecu from http://www.phearable.net/chippedecus.html
I also bought a obd0-obd1 conversion harness as well as a obd0-obd1 distributor plug conversion harness from http://rywire.com/store/obd0-o...bfb9d
I bought a 4 wire o2 sensor from ebay for about 35 bucks. But come to find out that I dont need it with the ecu I got from phearable. So Im putting that up for sale. I got an obd1 distributor from ebay as well for about 130 bucks brand spankin new.
Now for the conversion it sucks because it is already wired up to have vtec. So I will have to wire it back up to be stock. It shouldnt take too long. Just some solder and shrink tube and its good. Plug and play rocks. I will be rewireing everything with black wire to be a bit more invisable. And i will be using my one wire o2 sensor plug as the vtec solenoid plug because i dont have one for mine. It will look a lot more clean with black wire and the plug.
While waiting for the distributor to get here I decided to paint my old valve cover that has been just laying around. I think it looks cool and I have seen it done before, just not in wrinkle paint like this. It needs to be touched up a bit but not bad for the first time doing anything like this. I will be putting it in my car tonight maybe and take some pics of it.


Trending Topics
07-23-2006, 06:50 PM
#8
Honda-Tech Member
Thread Starter
Join Date: Sep 2004
Location: Some where in, WA, USA
Posts: 1,610
Likes: 0
Received 1 Like
on
1 Post
actually no, those fit perfect on the rods. I bought the block with ctr pistons on already on pr4 rods, but i sold them because i didnt want the compression ratio
07-24-2006, 04:59 PM
#9
Honda-Tech Member
Thread Starter
Join Date: Sep 2004
Location: Some where in, WA, USA
Posts: 1,610
Likes: 0
Received 1 Like
on
1 Post
So im in the process of rewiring my crap to obd1. This may also be used as a help guide to what wires to cut and wire for putting a b16 into your civic/crx or whatever.
Things I used:
1) Soldering gun
2) Solder
3) Heat gun
4) Shrink tube
5) Quite a bit of extra wire
6) Needle nose/wire cutters
7) Wire stripper
8) phearable.net chipped p28 ecu
9) rywire.com obd0-obd1 ecu conversion harness
10) rywire.com obd0-obd1 distributor plug conversion harness
11) obd1 distributor
12) Many cold drinks on this 115 degree day!!!
So first I had to figure out where all the wires went to from my ecu wires.

This is the first wire I cut and followed into the engine bay.

I followed it all the way to the vtec pressure switch.

The second wire I wanted to figure out was this weird black wire that was rigged into the smallest black plug.


I cut it and followed it to one of my two o2 sensors. I dont need the o2s any more because of my chipped p28 ecu. So I ripped it out the the plug and clipped the wire on the o2 sensor.
The third wire I cut was the yellow wire on the biggest ecu plug.

I followed that to the vtec solenoid.

This last wire I cut and followed to the knock sensor. So I cut that off since I also dont need that with my chipped p28.

So after I followed all those I trimmed down the wires and resoldered it back to their original place.

I am currently not done with the conversion. But I will continue to take pictures and post on here. I will edit this once I go back out there and get the original wire colors to more accurately tell you which wire goes to what.
Modified by jakscivic at 11:30 AM 7/25/2006
Things I used:
1) Soldering gun
2) Solder
3) Heat gun
4) Shrink tube
5) Quite a bit of extra wire
6) Needle nose/wire cutters
7) Wire stripper
8) phearable.net chipped p28 ecu
9) rywire.com obd0-obd1 ecu conversion harness
10) rywire.com obd0-obd1 distributor plug conversion harness
11) obd1 distributor
12) Many cold drinks on this 115 degree day!!!
So first I had to figure out where all the wires went to from my ecu wires.
This is the first wire I cut and followed into the engine bay.
I followed it all the way to the vtec pressure switch.
The second wire I wanted to figure out was this weird black wire that was rigged into the smallest black plug.
I cut it and followed it to one of my two o2 sensors. I dont need the o2s any more because of my chipped p28 ecu. So I ripped it out the the plug and clipped the wire on the o2 sensor.
The third wire I cut was the yellow wire on the biggest ecu plug.
I followed that to the vtec solenoid.
This last wire I cut and followed to the knock sensor. So I cut that off since I also dont need that with my chipped p28.
So after I followed all those I trimmed down the wires and resoldered it back to their original place.
I am currently not done with the conversion. But I will continue to take pictures and post on here. I will edit this once I go back out there and get the original wire colors to more accurately tell you which wire goes to what.
Modified by jakscivic at 11:30 AM 7/25/2006
07-27-2006, 06:43 PM
#10
Honda-Tech Member
Thread Starter
Join Date: Sep 2004
Location: Some where in, WA, USA
Posts: 1,610
Likes: 0
Received 1 Like
on
1 Post
Still dont have a dizzy for the obd0-obd1 swap but here are some more pictures of how it went together.
This is the rywire conversion harness hooked up. I ended up only using 4 of the 12 or so wires provided. So I cut them down so they werent in the way. But i didnt cut them enough that wouldnt enable me to resolder on the wires for use. But after I cut them down I put some shrink tube over them so they couldnt ground out or anything.

This is after I put the loose wires inside wire loom. It makes it look a lot nicer. Before they were just wrapped in electrical tape. Which was REALLY fun pealing off and getting black sticky crap all over my hands.


This is all the extra wireing I got out of my car after the change over. Trust me, I didnt put that much back in it. Looks a lot cleaner now with out all the butt connectors, electrical tape, and crappy wireing job.

Today I just put on my hot moroso oil pan. So I decided I would try and get in the habit of doing more step by step instructions with pictures. But first I must show you how much my oil pan was leaking after just one day sitting.

The tools I used:
1) New oil pan gasket
2) 3/8 and 1/4 wratchet
3) 3/8 and 1/4 extention
4) 3/8 and 1/4 10 mm and 12mm
5) 1/4 knuckle
6) Gasket maker
7) Flat head screw driver
8) Obviously a new oil pan
This doesnt show you all the crap I used, but most of it.


So first I drained the oil. Dont think we need pictures of that. Then I started unbolting the oil pan (I wanted to get it out of the way before I got too tired to constantly hold my arms up). But there is one bolt that wasnt accesable because the header was in the way. So I used my 1/4 wratchet, extension, and 10mm to get it. I didnt take them all off. I left one on on each side.

I then unbolted the header. Some studs came out with the nuts but whatever.

I then dropped the oil pan out.

After that its just the reverse. I believe the tq specs for the oil pan is 10 ft lbs. Or it was about 108 inch lbs. Here it is installed and looking so hot.

This is the rywire conversion harness hooked up. I ended up only using 4 of the 12 or so wires provided. So I cut them down so they werent in the way. But i didnt cut them enough that wouldnt enable me to resolder on the wires for use. But after I cut them down I put some shrink tube over them so they couldnt ground out or anything.
This is after I put the loose wires inside wire loom. It makes it look a lot nicer. Before they were just wrapped in electrical tape. Which was REALLY fun pealing off and getting black sticky crap all over my hands.
This is all the extra wireing I got out of my car after the change over. Trust me, I didnt put that much back in it. Looks a lot cleaner now with out all the butt connectors, electrical tape, and crappy wireing job.
Today I just put on my hot moroso oil pan. So I decided I would try and get in the habit of doing more step by step instructions with pictures. But first I must show you how much my oil pan was leaking after just one day sitting.
The tools I used:
1) New oil pan gasket
2) 3/8 and 1/4 wratchet
3) 3/8 and 1/4 extention
4) 3/8 and 1/4 10 mm and 12mm
5) 1/4 knuckle
6) Gasket maker
7) Flat head screw driver
8) Obviously a new oil pan
This doesnt show you all the crap I used, but most of it.
So first I drained the oil. Dont think we need pictures of that. Then I started unbolting the oil pan (I wanted to get it out of the way before I got too tired to constantly hold my arms up). But there is one bolt that wasnt accesable because the header was in the way. So I used my 1/4 wratchet, extension, and 10mm to get it. I didnt take them all off. I left one on on each side.
I then unbolted the header. Some studs came out with the nuts but whatever.
I then dropped the oil pan out.
After that its just the reverse. I believe the tq specs for the oil pan is 10 ft lbs. Or it was about 108 inch lbs. Here it is installed and looking so hot.
08-15-2006, 07:28 PM
#11
Honda-Tech Member
Thread Starter
Join Date: Sep 2004
Location: Some where in, WA, USA
Posts: 1,610
Likes: 0
Received 1 Like
on
1 Post
Well Im planning to go to the track and dyno on the 1st of next month. I also bought a Dual Bend B&M short shifter. I tried out my friends b16 EG and he had a b&m short shifter in there and it was soooooooo crazy short inbetween shifts. I had to get one.
When I bought my car it had a short shifter in it but I think it was an ebay 9.99 special short shifter because it was NOT that short inbetween shifts and it broke when i shifted a while back. Kinda sucked.
I might very soon be buying a full omnipower valve train with std comp. valves. Then i need to save up to get new valve guides and valve seals. Then I will take it to a machine shop and have it hot tanked and probly get a valve job. Not sure though. But does anyone know how much it will be to hot tank my head?
08-16-2006, 07:04 PM
#14
Honda-Tech Member
Thread Starter
Join Date: Sep 2004
Location: Some where in, WA, USA
Posts: 1,610
Likes: 0
Received 1 Like
on
1 Post
Another thing i just bought is new shifter bushings to make the shifts even better. All of this should get here with in the week so I will be instaling it soon.
08-18-2006, 11:41 PM
#15
Honda-Tech Member
Thread Starter
Join Date: Sep 2004
Location: Some where in, WA, USA
Posts: 1,610
Likes: 0
Received 1 Like
on
1 Post
Well I was looking into getting a set of skunk2 pro1s but ive heard that they are pretty hard to tune. So I was talking to my friend and he mentioned Rocket Motorsports M22xx package that includs the cams, custom spark plugs, a custom chip, dual valve springs, and retainers. It looks like a sweet package deal and ive read a lot of really good stuff about Rocket and their cams and valve train. Might be able to get those bought in about 2 months. And thats not just buying the package. Thats buying new valve guides, valve seals, new valves, and getting the head hot tanked. Dont have enough money for head work . That would be nice, but just dont have to money for that right now.
Modified by jakscivic at 1:05 AM 8/19/2006
Modified by jakscivic at 1:05 AM 8/19/2006
08-19-2006, 11:10 PM
#16
Honda-Tech Member
Thread Starter
Join Date: Sep 2004
Location: Some where in, WA, USA
Posts: 1,610
Likes: 0
Received 1 Like
on
1 Post
Im really sorry but i didnt get any pictures of putting in my short shifter. But I did find this write up on it and it kicks the hell out of what I would have writen up.
https://honda-tech.com/zerothread?id=1007935
Over all the short shifter ROCKS! I love it. At first when i just got it in and shifted when it was still up on stands it didnt feel too short. But when i actually got to drive it it felt awsome. Very short. Hell of a lot shorter than stock. You can REALLY feel the difference. My friend with an APC short shifter said he is going to go get a B&M shifter. The bushing are nice. I coulst really feel the difference between the oem and energy suspension ones. The oem has so much give.
08-24-2006, 01:42 PM
#17
Honda-Tech Member
Thread Starter
Join Date: Sep 2004
Location: Some where in, WA, USA
Posts: 1,610
Likes: 0
Received 1 Like
on
1 Post
So I found a dealer that has m22xx power package that I will be buying here soon. I almost had to put the cams on hold because I found a nice crx si for 1k that ran and everything. But I want the cams more. My ultimate goal is to get a 90-91 black crx si and swap in my lsvtec.
08-24-2006, 05:03 PM
#18
Honda-Tech Member
Thread Starter
Join Date: Sep 2004
Location: Some where in, WA, USA
Posts: 1,610
Likes: 0
Received 1 Like
on
1 Post
Ok, so i finally taped off my other valve cover and cut it. This gives you a better idea on how I did it. first i painted it all red, including the spark plug cover. Then I taped off the whole thing. Then I put a dot in the center on the oil hole and drew lines from there. It gives you a much better idea how to do it. All in all its a couple hour project over several days. you have to let the paint dry for a while because it remaines wet/soft for quite some time and if you put tape on it it will take some paint off. This happened to me on this one but since the valve cover was already red from before it only took off my top coat, nothing really happened. Here is a picture of the oil hole and how i drew it out.

This is the whole thing after I taped it off and used and exactly knife and cut the tape off. It should look nice after i get it painted.

This is the whole thing after I taped it off and used and exactly knife and cut the tape off. It should look nice after i get it painted.
08-31-2006, 09:11 PM
#19
Honda-Tech Member
Thread Starter
Join Date: Sep 2004
Location: Some where in, WA, USA
Posts: 1,610
Likes: 0
Received 1 Like
on
1 Post
Im going to the dyno and track tomorrow. My car is leaking a little oil, which sucks. But I will post up the dyno sheet and my time slip either today or tomorrow. I might also get some videos up on here as well.
09-01-2006, 10:00 PM
#20
Honda-Tech Member
Thread Starter
Join Date: Sep 2004
Location: Some where in, WA, USA
Posts: 1,610
Likes: 0
Received 1 Like
on
1 Post
Well. There is good news and bad news. I got to the dyno and figured out a 2 things. One was that my ecu is ****, or atleast the chip is. It makes me run hella lean which really sucks because it might have fucked some **** up in my block because my car is starting to spew white and blue/white smoke out my exhaust. Its not good. The guys at the dyno didnt know what it smelled like and they didnt know what it might be. They said since im running so lean that i might have cracked something since I have over heated since I got the chip. I used that ecu on the first run just to see what was up with it. And with the air/fuel ratio I was off the scale on lean when it was floored. It was at 18, and thats all it could go up on the dyno jet. I was rather pissed. On that run they went to about 6800 and it made 129 hp and 113 tq.
On the second run I used my friends chipped p28 with an itr chip in it and it ran nice. The air to fuel was pretty damn good. On that run it got 159 hp and 118 tq. They did another run and it made 161 hp and 118 tq. It was a bit less than I expected but they said that if I had tuning I would be making a lot more power. So Im going to post pone the cams and get hondata and get a fuel pressure regulator and fuel injectors. So those are my new plans.
 I really wanted cams.
On the second run I used my friends chipped p28 with an itr chip in it and it ran nice. The air to fuel was pretty damn good. On that run it got 159 hp and 118 tq. They did another run and it made 161 hp and 118 tq. It was a bit less than I expected but they said that if I had tuning I would be making a lot more power. So Im going to post pone the cams and get hondata and get a fuel pressure regulator and fuel injectors. So those are my new plans.
I really wanted cams.
09-02-2006, 09:17 PM
#22
Honda-Tech Member
Thread Starter
Join Date: Sep 2004
Location: Some where in, WA, USA
Posts: 1,610
Likes: 0
Received 1 Like
on
1 Post
<TABLE WIDTH="90%" CELLSPACING=0 CELLPADDING=0 ALIGN=CENTER><TR><TD>Quote, originally posted by Wayne_Curr »</TD></TR><TR><TD CLASS="quote">That really sux bawls dude. If its not one thing its another. Have you figured out why you're leaking oil?</TD></TR></TABLE>
You got it right on the dot man. It truely is one thing or another. It sucks major *****. I actually have a very good idea where im leaking oil from. I believe its from the cam seals. Ive had two people tell me now that know cars a lot say that it is most likely the cam seals. So im going to order a new pair of those and put them on along with my new head gasket.
You got it right on the dot man. It truely is one thing or another. It sucks major *****. I actually have a very good idea where im leaking oil from. I believe its from the cam seals. Ive had two people tell me now that know cars a lot say that it is most likely the cam seals. So im going to order a new pair of those and put them on along with my new head gasket.
09-03-2006, 06:34 PM
#23
Honda-Tech Member
Thread Starter
Join Date: Sep 2004
Location: Some where in, WA, USA
Posts: 1,610
Likes: 0
Received 1 Like
on
1 Post
Here is the video of one of my dyno runs. Its the only one that shows the smoke that comes out of my exhaust. If anyone has any idea what it could be please tell me.
http://youtube.com/watch?v=9fjIDBeL9Pg
http://youtube.com/watch?v=9fjIDBeL9Pg
09-08-2006, 02:06 AM
#24
Honda-Tech Member
Join Date: Apr 2005
Location: madera, ca, usa
Posts: 270
Likes: 0
Received 0 Likes
on
0 Posts
it could be bad piston rings or valve steme seals ...one or the other , start with replacing valves seals.... does blue smoke come at idle or high rpm>?