
1980 Honda Prelude Build Thread
 02-05-2011, 04:40 PM
#1
Honda-Tech Member
Thread Starter

Join Date: Dec 2010
Posts: 30
Likes: 0
Received 0 Likes
on
0 Posts
I bought this car on craigslist almost 2 years ago for $200.00 delivered to my house. It had been sitting in a garage for over 15 years and someone who knew very little about cars had made it a mechanical mess. I will try to keep this thread flowing in some kind of direction....but if anyone has questions or opinions along the way please throw them in! Hopefully this will inspire others to go "oldskool JDM".
The day she came home:

The day she came home:


 02-05-2011, 04:54 PM
#5
Honda-Tech Member
Thread Starter
Join Date: Dec 2010
Posts: 30
Likes: 0
Received 0 Likes
on
0 Posts
After fitting a new carb. and getting it running (new timing belt, spark plugs, cap, rotor, wires fuel filter, fuel pump relay) I moved on to the brakes . For the time being I just restored them to operational! While I had the tires of the wheels off I couldn't resist adding a little bling. I sandblasted and repainted the wheels and bought two beauty rings to replace the ones that were missing.

02-05-2011, 05:08 PM
#6
Honda-Tech Member
Thread Starter
Join Date: Dec 2010
Posts: 30
Likes: 0
Received 0 Likes
on
0 Posts
After everything I had a pretty decent driving vehicle, except after it was warm it would be really tough to restart. I think that a large part of it had to do with the vacuum box that went to the carburetor. What a MESS! So I decided that I would fuel inject it with megasquirt. The only thing was that the engine bay was a very oily mess and I wanted to do a color change on the body so I pulled the drivetrain for a makeover.
After a bath:

After a bath:

Trending Topics

 02-05-2011, 10:17 PM
#11
Honda-Tech Member
Join Date: Sep 2005
Location: Knoxville, TN, United States
Posts: 2,905
Likes: 0
Received 1 Like
on
1 Post
If it sat for 15 years, you're gonna want to drop that gas tank for inspection. Especially if you're gonna be moving all that fuel for injection, you'll clog up the pump and filter really quick
02-06-2011, 04:35 AM
#12
Honda-Tech Member
Thread Starter
Join Date: Dec 2010
Posts: 30
Likes: 0
Received 0 Likes
on
0 Posts
Before I started it the first time I pumped all the gas out of the system without a filter. I then filled it with fresh fuel and some stabil. I drove about three tanks of fuel through it and then replaced the filters again. Until next winter it will be rolling with a Weber.
02-06-2011, 04:11 PM
#17
Honda-Tech Member
Thread Starter
Join Date: Dec 2010
Posts: 30
Likes: 0
Received 0 Likes
on
0 Posts

I already have an exhaust manifold that I made that is 75% complete , I will post pics when I can.
 02-07-2011, 05:57 PM
#19
Honda-Tech Member
Join Date: Feb 2011
Location: Kingwood, TX
Posts: 10
Likes: 0
Received 0 Likes
on
0 Posts
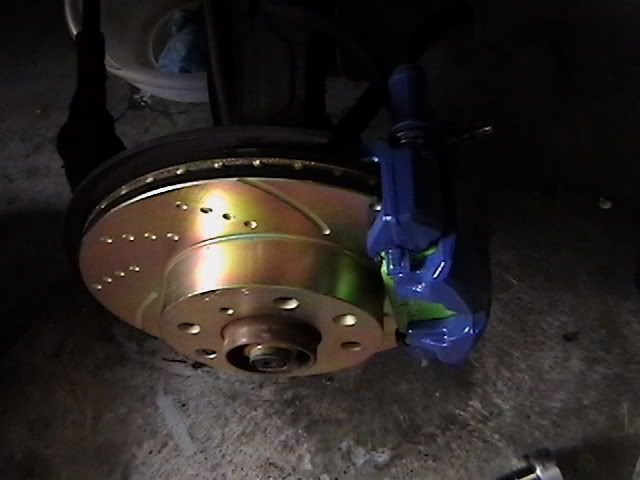
'84 Accord breaks... upgrades to vented rotors, and bigger front pads, you will have to get the calipers with the relocation attachment.
Part RAYBESTOS Part # FRC3612 (right) and RAYBESTOS Part # FRC3611 (left) on rockauto
I used EBC rotors and GreenStuff pads when I did mine:
After some use:
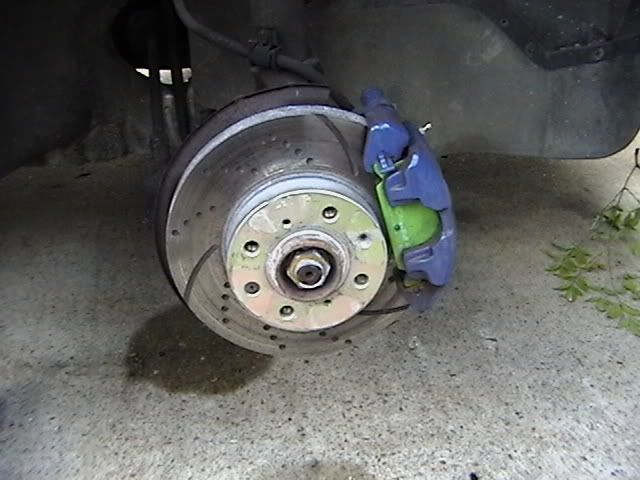
was an unbelievable difference in stopping power from the solid disks to the vented, and they are bigger diameter which means more friction surface.
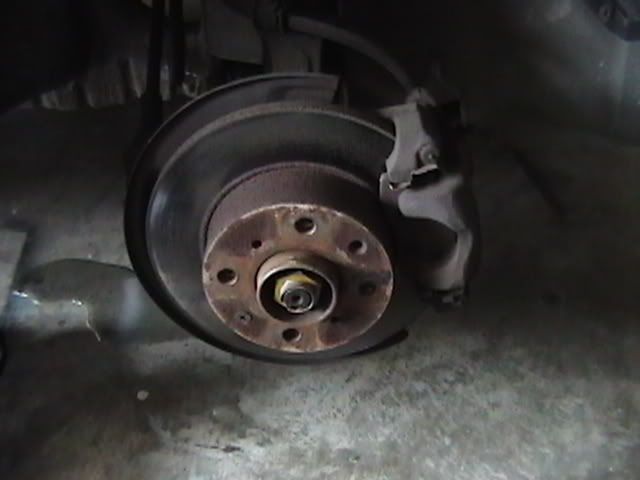
here is stock:
Part RAYBESTOS Part # FRC3612 (right) and RAYBESTOS Part # FRC3611 (left) on rockauto
I used EBC rotors and GreenStuff pads when I did mine:
After some use:
was an unbelievable difference in stopping power from the solid disks to the vented, and they are bigger diameter which means more friction surface.
here is stock:
02-07-2011, 06:38 PM
#20
Honda-Tech Member
Thread Starter
Join Date: Dec 2010
Posts: 30
Likes: 0
Received 0 Likes
on
0 Posts
That is actually my next step. I just ordered some new KYB struts for the front and some new wheel seals. I probably won't go all drilled and slotted, but definently want to do the upgrade.
02-07-2011, 07:02 PM
#21
Honda-Tech Member
Join Date: Feb 2011
Location: Kingwood, TX
Posts: 10
Likes: 0
Received 0 Likes
on
0 Posts
It was as straight forward as doing a new rotor pad install with the added part of having to bleed the brakes, it all just bolts right up.
Keep up the good work, I know I miss my '81, but it is in good hands.
Keep up the good work, I know I miss my '81, but it is in good hands.
02-08-2011, 11:31 AM
#22
Honda-Tech Member
Wow, keep up the good work man! Looks like 2 of us going at it with our old school ludes. Loving the engine bay and engine work!
 02-12-2011, 06:09 PM
#25
Honda-Tech Member
Thread Starter
Join Date: Dec 2010
Posts: 30
Likes: 0
Received 0 Likes
on
0 Posts
I started work on the trunk today. I had already ran a new power cable for the battery and purchased a pre-made box. It is an 8" Kicker Solobaric that is going to be powered by a Chrysler 300 factory amp that I picked up from Partsexpress for $20.00. It is designed to turn on and off with the headunit. It is a 100w 1ohm amp. The sub is dual voice coil 2ohm, so I can bridge it down to 1 ohm. The box is ported on the side and I like the thick bedliner-like coating on the outside. Here's what I started with:
