
DIY: How to install JDM DSP Speakers
 05-12-2011, 12:29 PM
#1
Honda-Tech Member
Thread Starter
Join Date: Jul 2006
Posts: 249
Likes: 0
Received 0 Likes
on
0 Posts
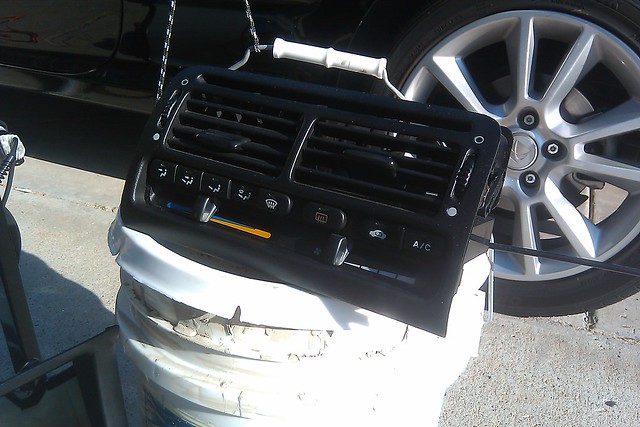
This is the gem you want to install:
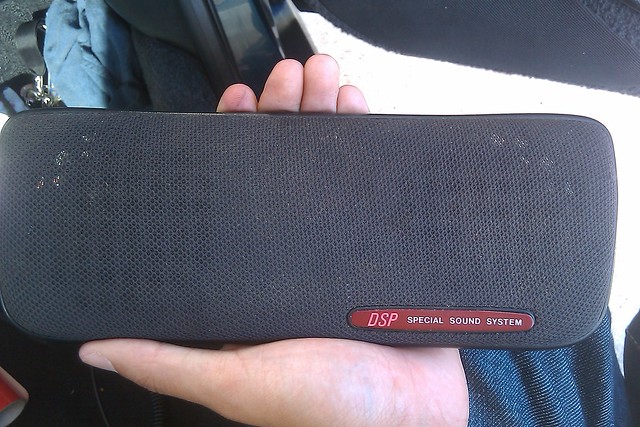
Hopefully you got lucky and everything stayed intact and you received the harness with it as well...


Things you need:
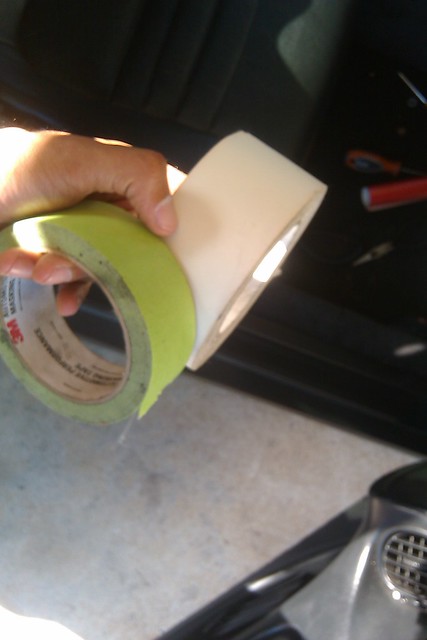
A dremel, cloth/masking/any sort of tape, a buddy and a compact vacuum cleaner...

Step 1: You start by taking off your shift ****... LOL to get the ball rolling...

Step 2: Take off your shift boot
Put it to the side...
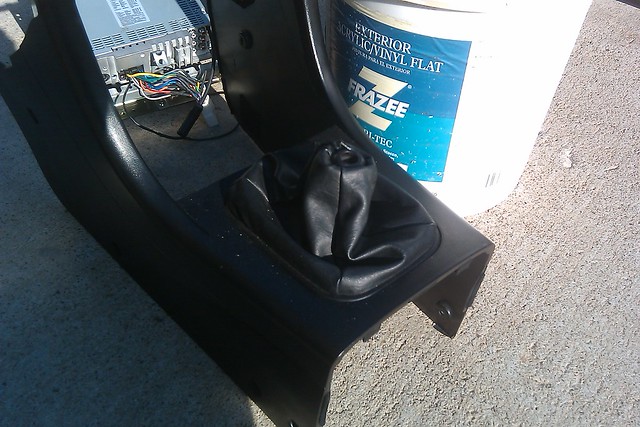
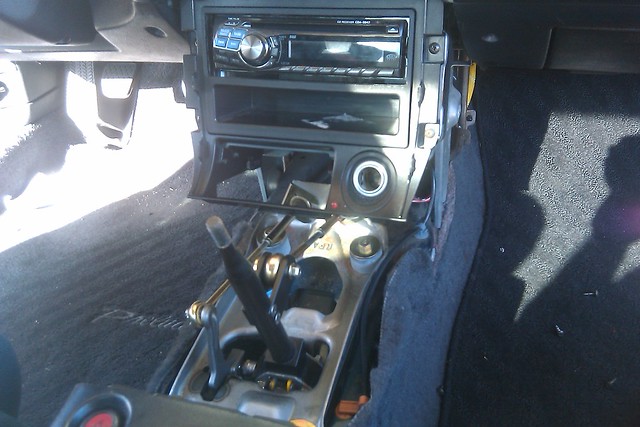
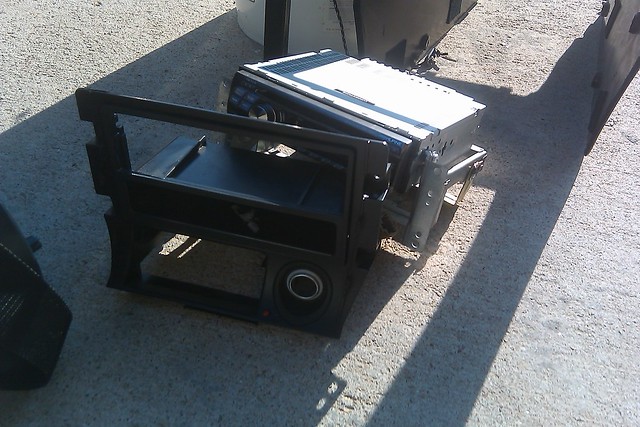
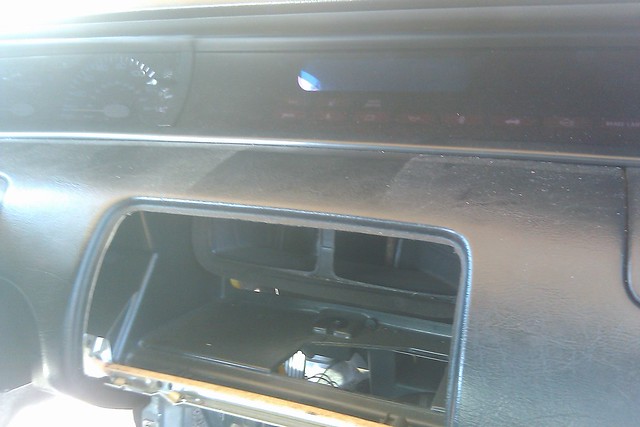
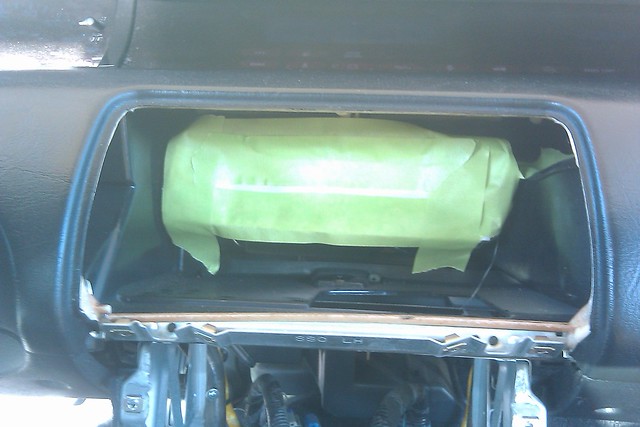
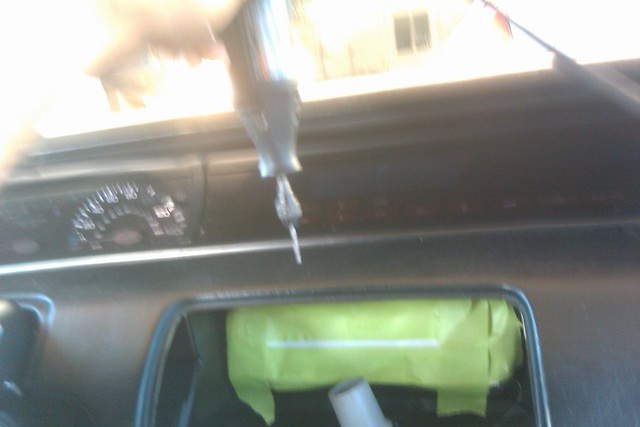
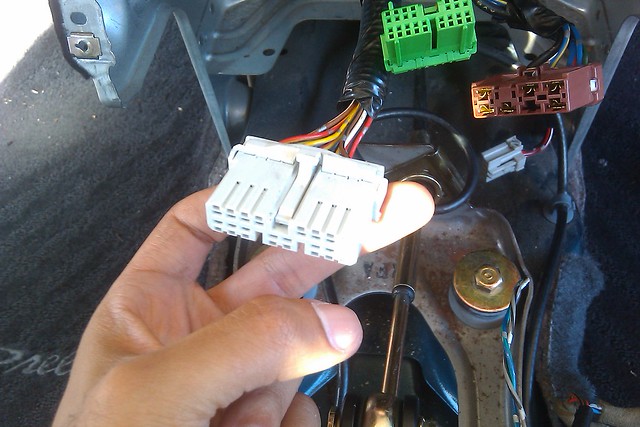
Step 3: Take out your head unit
Put it to the side...
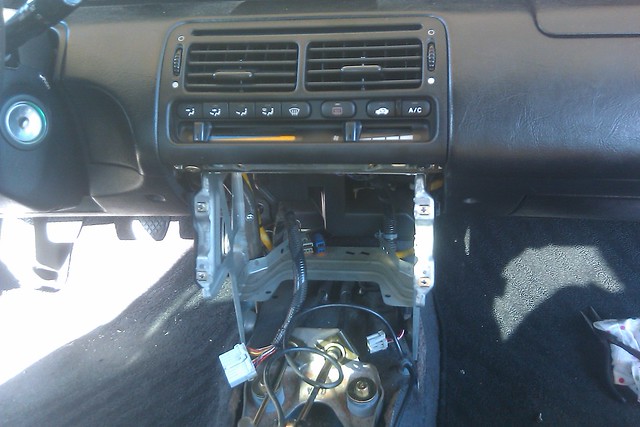
Step 4:
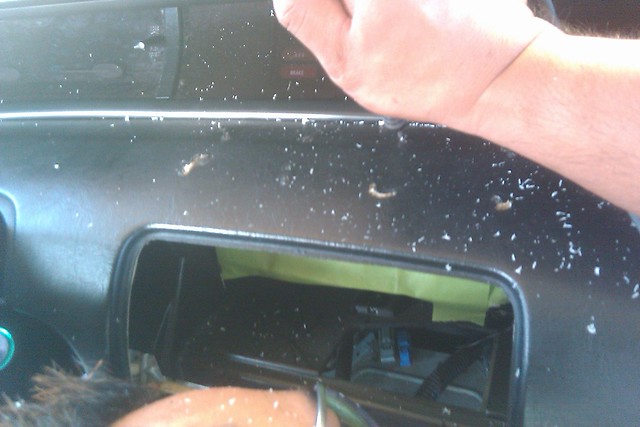
Unplug the two connections under your climate control
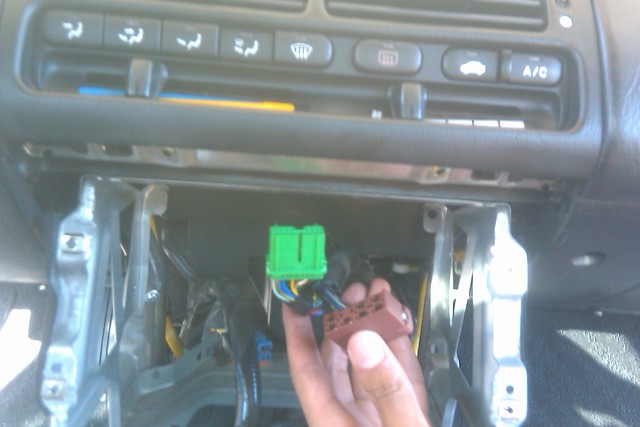
And dont forget to unplug the cable under the dashboard as well, or you will hate yourself and have to buy another climate control for damaging your current one...

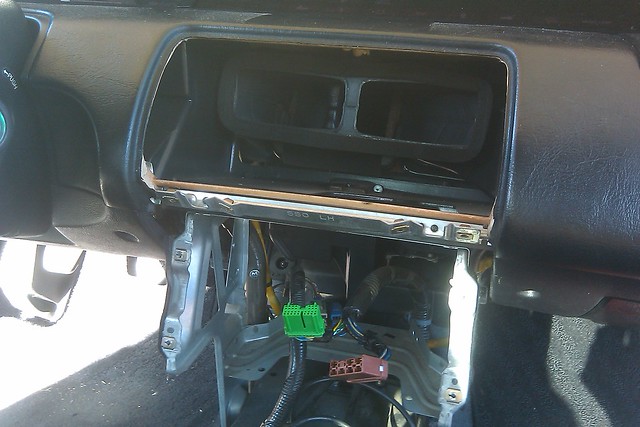
There is one screw you have to remove under the climate control
Then pull out the climate control carefully with the sticking hard line and put it to the side
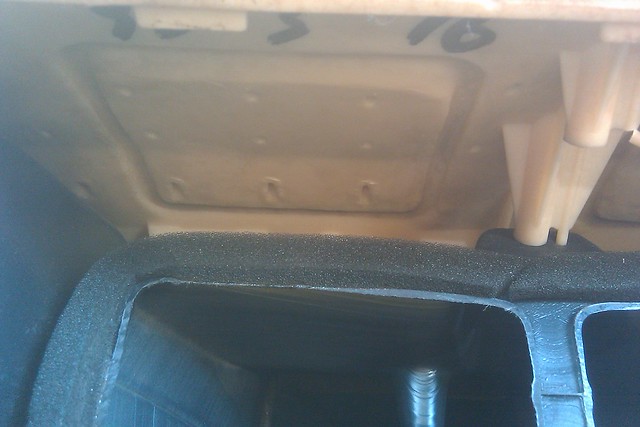
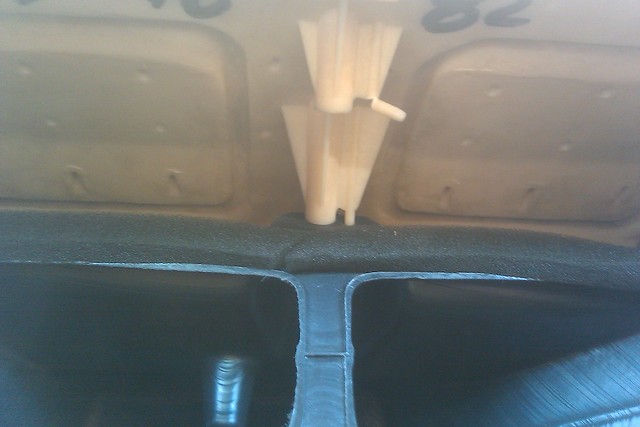
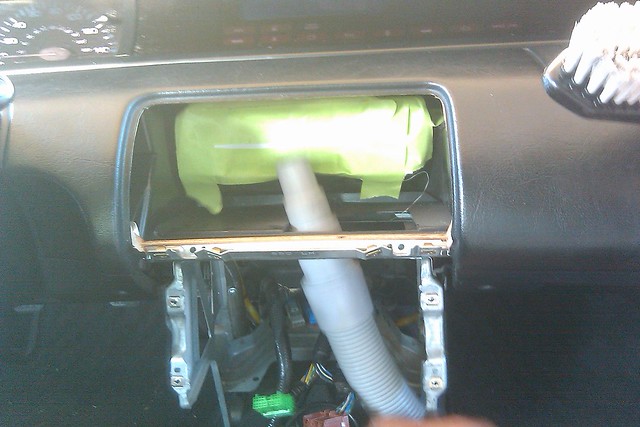
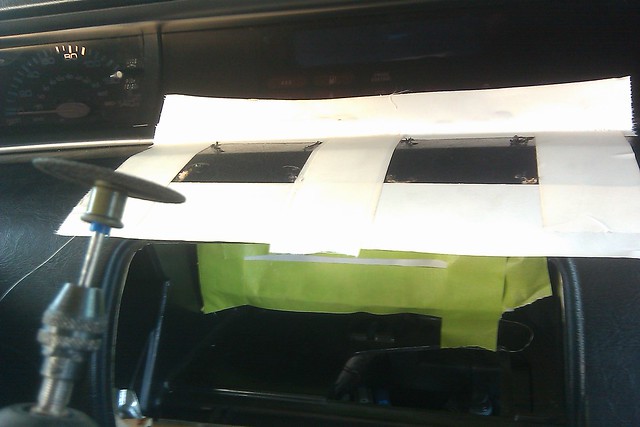
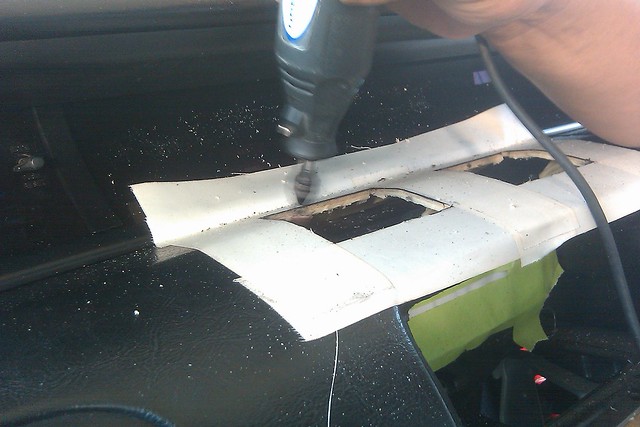
Step 5: Look under the dash and you will see two rectangular shapes... PAY ATTENTION!!! There will be 2 rectangular shapes, I suggest start off with the first smallest ones, and then work on making the rectangular shapes bigger, BTW while you are looking under the dash, YOU will see some permanent marker writing in there... You will see when your lude came to birth, mine was made on 1993 in March and there is some other writing im trying to decipher, maybe to figure out what series in came under...
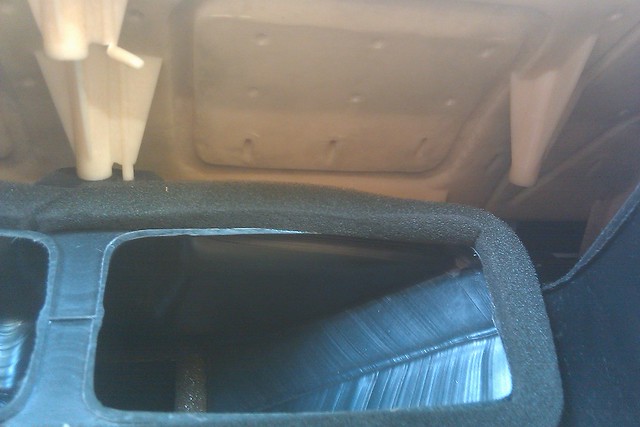
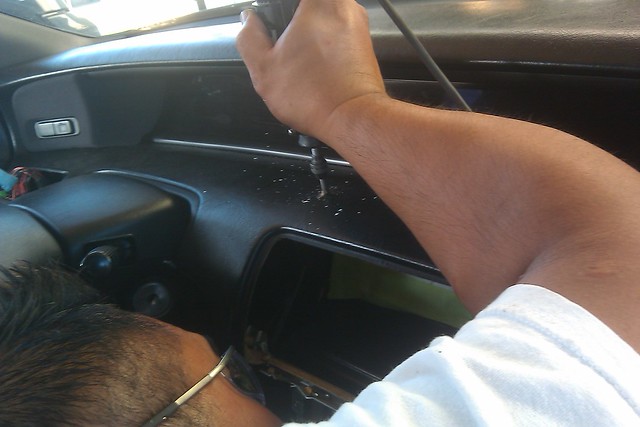
Step 6:
Cover the vents so that the plastic dust doesnt go through your climate control system
Step 7:
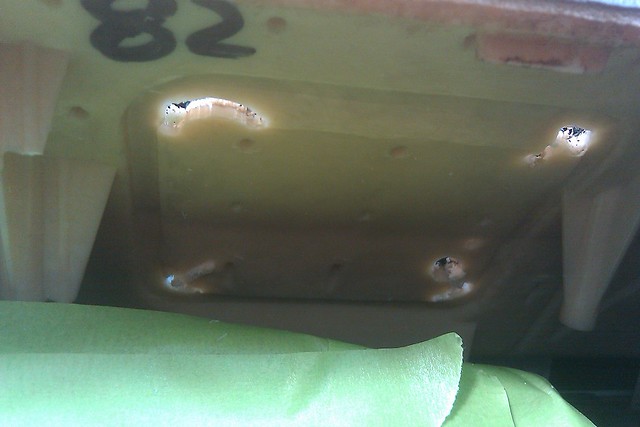
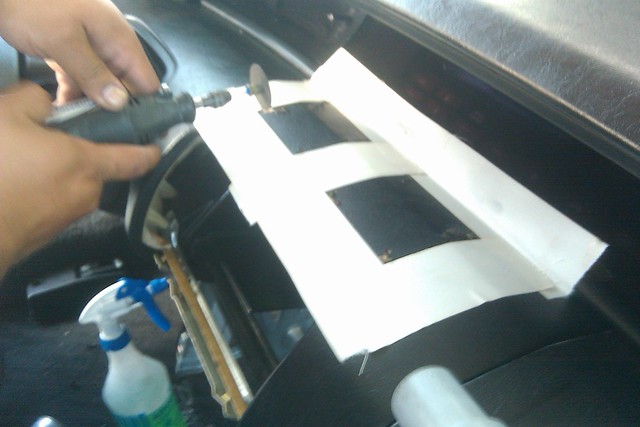
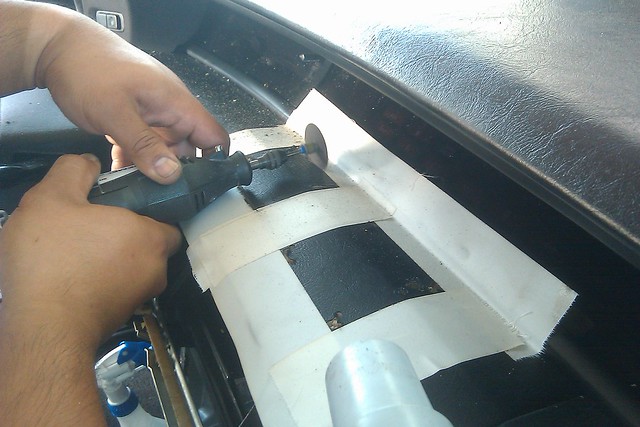
Start drilling away, be cautious and try to drilling on each corner of the smallest rectangle so that you can get an idea the size of the rectangle and measure later and dremel away on top of the dash...
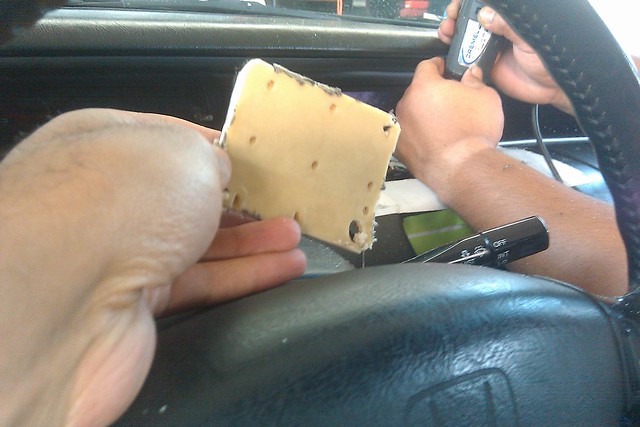
LOOK AT THE MESS YOU CREATED:
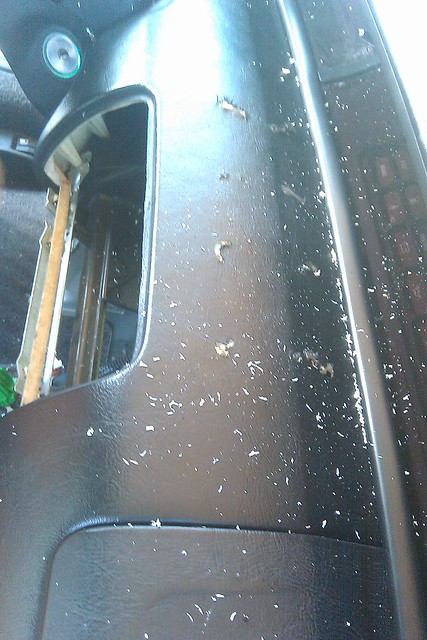
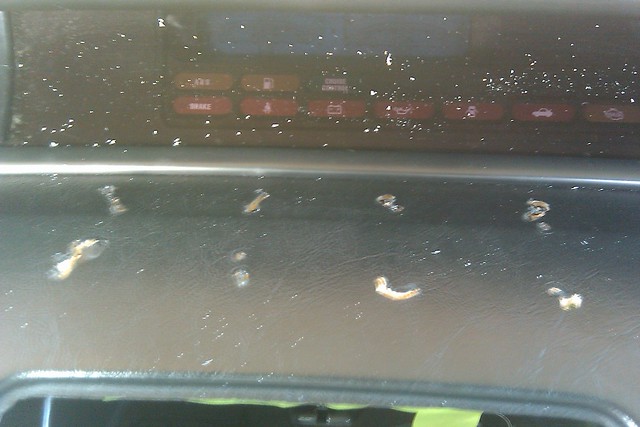
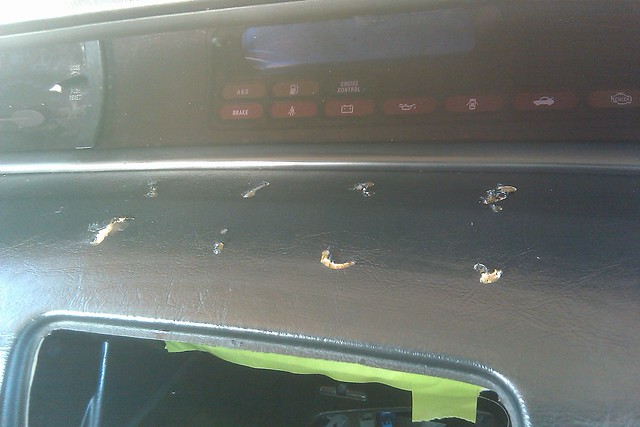
CLEAN IT UP:
RESULTS:

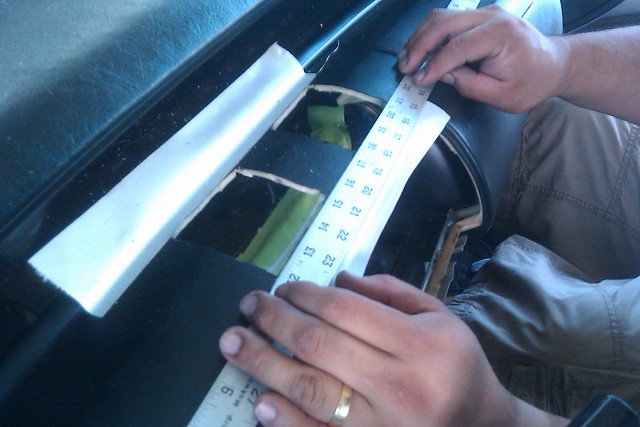
Step 7:
Now that you got the corners of your rectangles, now you can use the tape and use the climate control line as your reference point and double check if the tape looks straight and ready to cut. Remember, measure twice, cut once... You only got once chance... :D
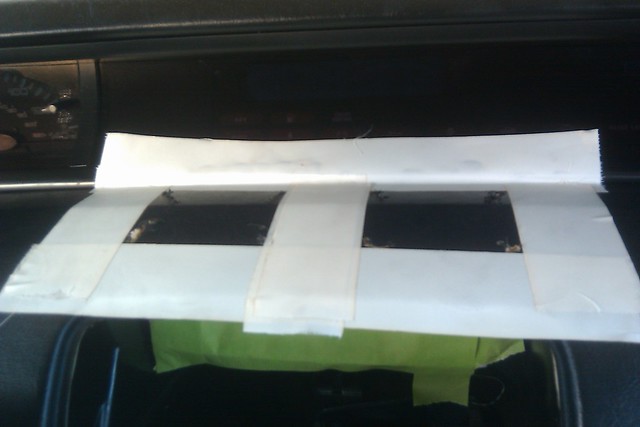
LETS DO THIS!!!! Remember try to stay inside the small rectangle, AKA inside the tape lines...
Have your buddy have the vacuum cleaner ready to roll as well:


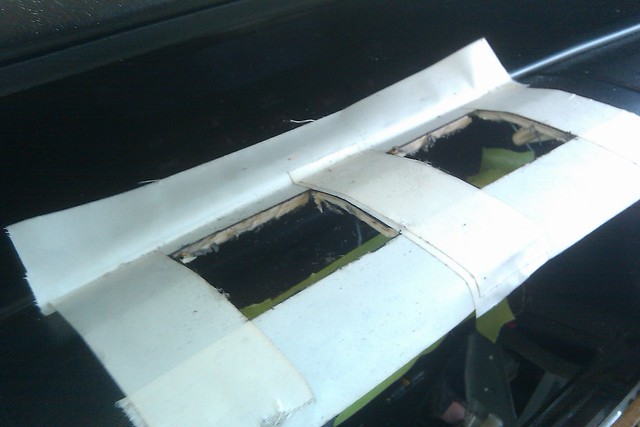
Results:

After you cut your two small rectangles, try to sand them down and have the corners and sides clean


Try to fit your speakers:

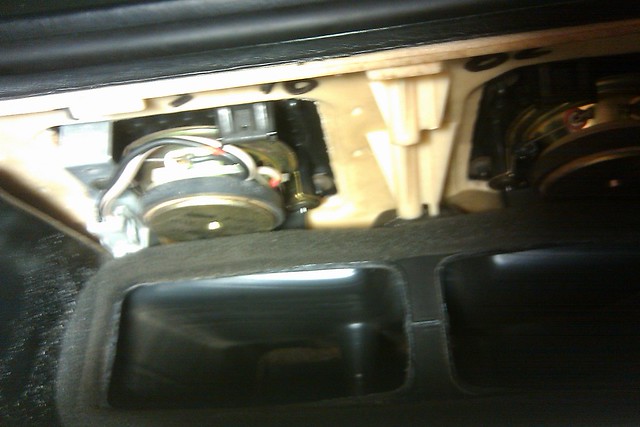
Don't be alarmed, the first cut wont be perfect, it might not even fit, therefore YOU determine to make the rectangle bigger, remove the tape and measure a tad bit bigger rectangle and make sure YOU ARE INSIDE the BIGGER rectangle... Basically start small and work your way out...
Repeat the process, until your speakers fit snug and tight...
NOW THE ELECTRICAL PART:
Step 8:
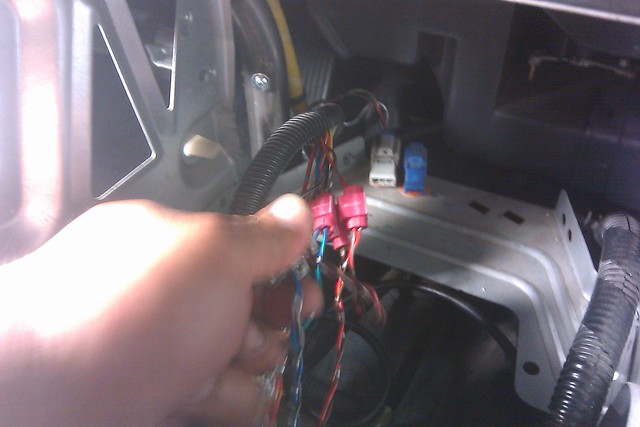
Get your radio harness and locate the front right and front left wires, you are looking for a total of 4 wires, 2 for each side...
The passenger side aka right speaker color wires are:
BROWN/BLACK for ground & RED/GREED for positive
The driver side aka left speaker color wires are:
GRAY/BLACK for ground & BLUE/GREEN for positive
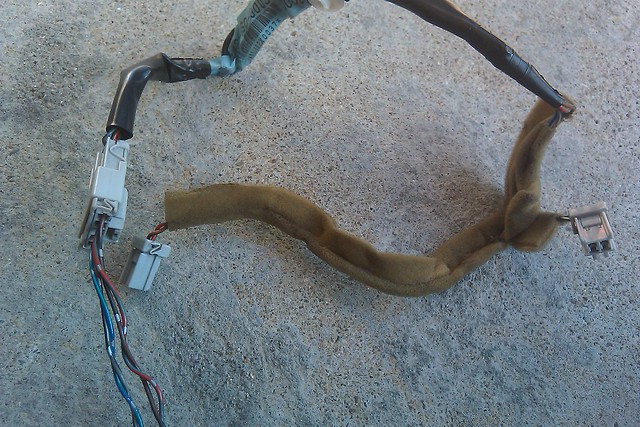
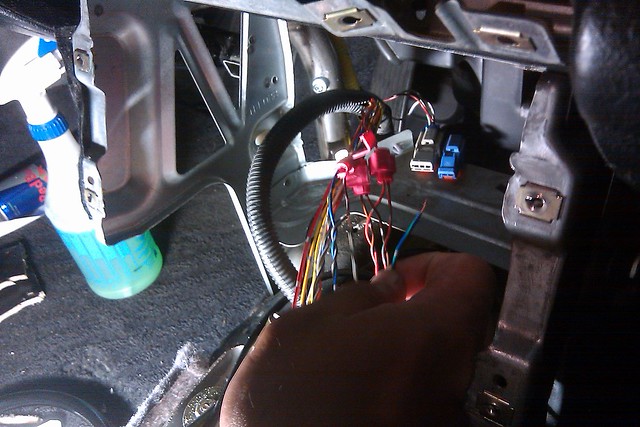
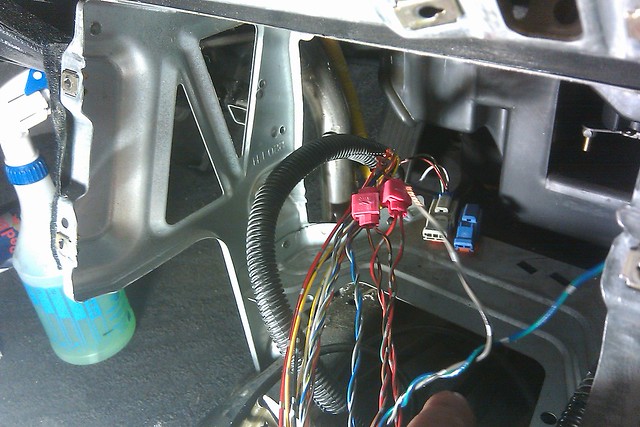
But before you tap into the radio harness, try to take off the wire loom off the stock radio harness and tap to the harness all the way in the back, to have a cleaner look... like this...

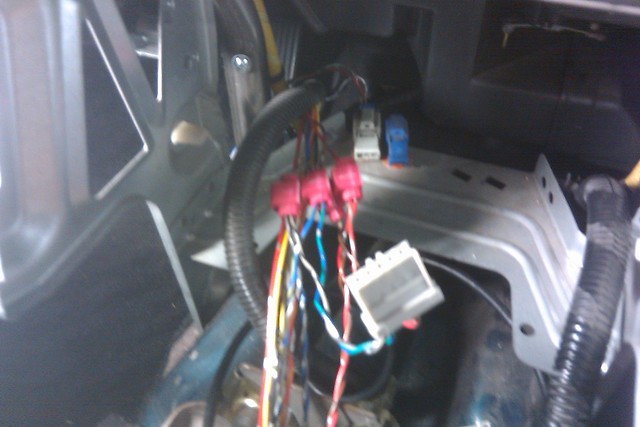
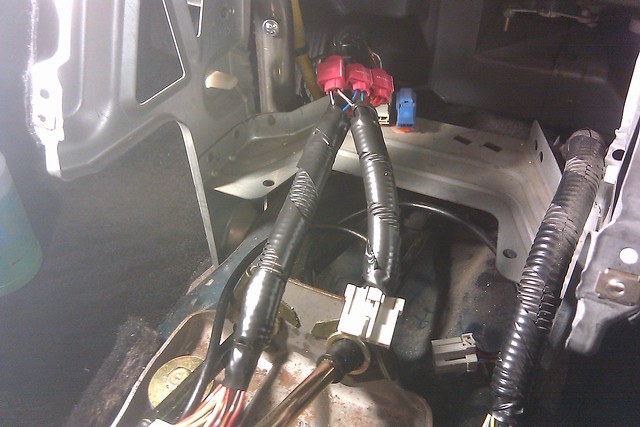
If you are a neat freak like me, it should look like this
Now you are done with the wiring...
Take a break, have you and your buddy a beer, talk about how dirty and sweaty you guys are... and how much effort you put, just to have this JDM gathers speakers in your lude...
Then work your way back, by putting everything back together...
And viola... YOU ARE ALL DONE...

Questions?
Hit me up...
Hopefully you got lucky and everything stayed intact and you received the harness with it as well...
Things you need:
A dremel, cloth/masking/any sort of tape, a buddy and a compact vacuum cleaner...
Step 1: You start by taking off your shift ****... LOL to get the ball rolling...
Step 2: Take off your shift boot
Put it to the side...
Step 3: Take out your head unit
Put it to the side...
Step 4:
Unplug the two connections under your climate control
And dont forget to unplug the cable under the dashboard as well, or you will hate yourself and have to buy another climate control for damaging your current one...
There is one screw you have to remove under the climate control
Then pull out the climate control carefully with the sticking hard line and put it to the side
Step 5: Look under the dash and you will see two rectangular shapes... PAY ATTENTION!!! There will be 2 rectangular shapes, I suggest start off with the first smallest ones, and then work on making the rectangular shapes bigger, BTW while you are looking under the dash, YOU will see some permanent marker writing in there... You will see when your lude came to birth, mine was made on 1993 in March and there is some other writing im trying to decipher, maybe to figure out what series in came under...
Step 6:
Cover the vents so that the plastic dust doesnt go through your climate control system
Step 7:
Start drilling away, be cautious and try to drilling on each corner of the smallest rectangle so that you can get an idea the size of the rectangle and measure later and dremel away on top of the dash...
LOOK AT THE MESS YOU CREATED:
CLEAN IT UP:
RESULTS:
Step 7:
Now that you got the corners of your rectangles, now you can use the tape and use the climate control line as your reference point and double check if the tape looks straight and ready to cut. Remember, measure twice, cut once... You only got once chance... :D
LETS DO THIS!!!! Remember try to stay inside the small rectangle, AKA inside the tape lines...
Have your buddy have the vacuum cleaner ready to roll as well:
Results:
After you cut your two small rectangles, try to sand them down and have the corners and sides clean
Try to fit your speakers:
Don't be alarmed, the first cut wont be perfect, it might not even fit, therefore YOU determine to make the rectangle bigger, remove the tape and measure a tad bit bigger rectangle and make sure YOU ARE INSIDE the BIGGER rectangle... Basically start small and work your way out...
Repeat the process, until your speakers fit snug and tight...
NOW THE ELECTRICAL PART:
Step 8:
Get your radio harness and locate the front right and front left wires, you are looking for a total of 4 wires, 2 for each side...
The passenger side aka right speaker color wires are:
BROWN/BLACK for ground & RED/GREED for positive
The driver side aka left speaker color wires are:
GRAY/BLACK for ground & BLUE/GREEN for positive
But before you tap into the radio harness, try to take off the wire loom off the stock radio harness and tap to the harness all the way in the back, to have a cleaner look... like this...
If you are a neat freak like me, it should look like this
Now you are done with the wiring...
Take a break, have you and your buddy a beer, talk about how dirty and sweaty you guys are... and how much effort you put, just to have this JDM gathers speakers in your lude...
Then work your way back, by putting everything back together...
And viola... YOU ARE ALL DONE...
Questions?
Hit me up...


Thread
Thread Starter
Forum
Replies
Last Post
FG_Coupe
Honda Civic (2006 - 2015)
2
04-17-2008 09:32 PM
MattsGreenEG
Honda Civic / Del Sol (1992 - 2000)
4
03-19-2007 10:03 PM
1993, del, dsp, honda, instal, install, installation, installatoin, installing, jdm, prelude, ridgeline, sol, speaker, speakers

