
Head Gasket problem
 10-09-2016, 05:10 PM
#1
Trial User
Thread Starter
Join Date: Oct 2016
Location: Canada
Posts: 1
Likes: 0
Received 0 Likes
on
0 Posts
Hello everyone! Finally decided to join the forums after browsing for so long. I haven't been able to find a possible solution to my problem in the forums so here it is: (Note: pictures are in spoilers for loading convenience due to their size)
This post will include the pictures of some of the steps so that others can see what it looks like and get an idea of what I've done. Skip to the bottom if you don't want to view the headgasket job I did.
A basic description of my 1997 crv:
215,000km , 1997, and rust!
I've had the radiator replaced, as well as the water pump and timing belt. New upper rad hose and new spark plug cables, as well as a new exhaust.
Gas tank currently leaks at the filler neck so I don't fill up all the way, body is rusted like crazy between the cabin and exterior body where the filler tube goes through. I've also patched a giant hole in the passenger floor.
Anyway, the car overheated one day during the summer while driving home from school. Smoke out the hood and everything, started to make weird noises. Luckily it only overheated while stuck at red lights, made it home fine due to it not overheating while actually driving.
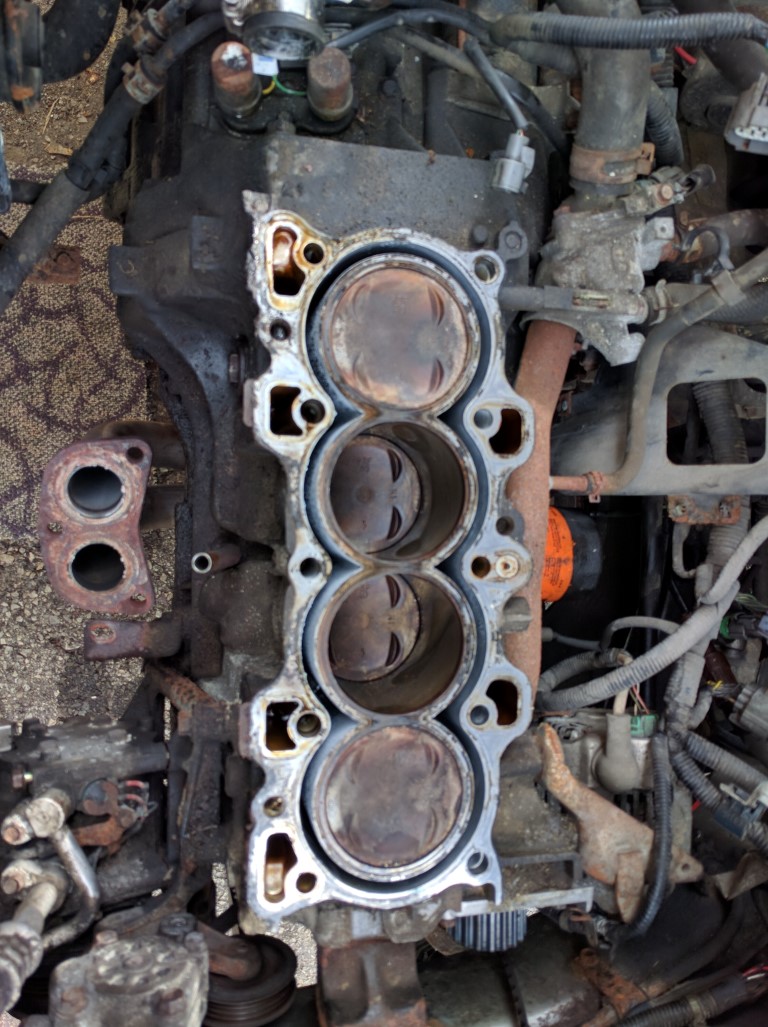
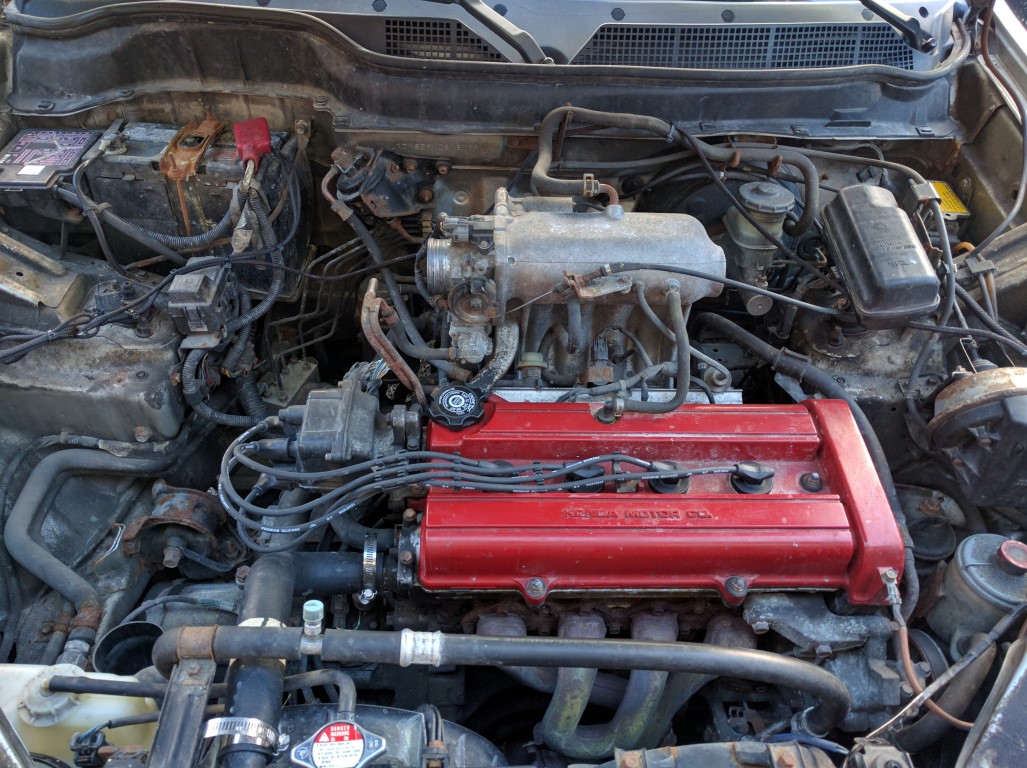
Brought the car to my mechanic and he said it blew the headgasket and needed a new one. Being the poor student I am, I ended up using a radiator fix from canadian tire. This solution worked for a few months, but now I have a blocked heater core (not surprised) and the car is starting to overheat every now and then. So being the handy man I am, I ordered myself a new headgasket kit with bolts and gaskets for intake, exhaust etc... Took me a few days, but I managed to get everything apart. The heat actually melted the plastic covers for the engine.
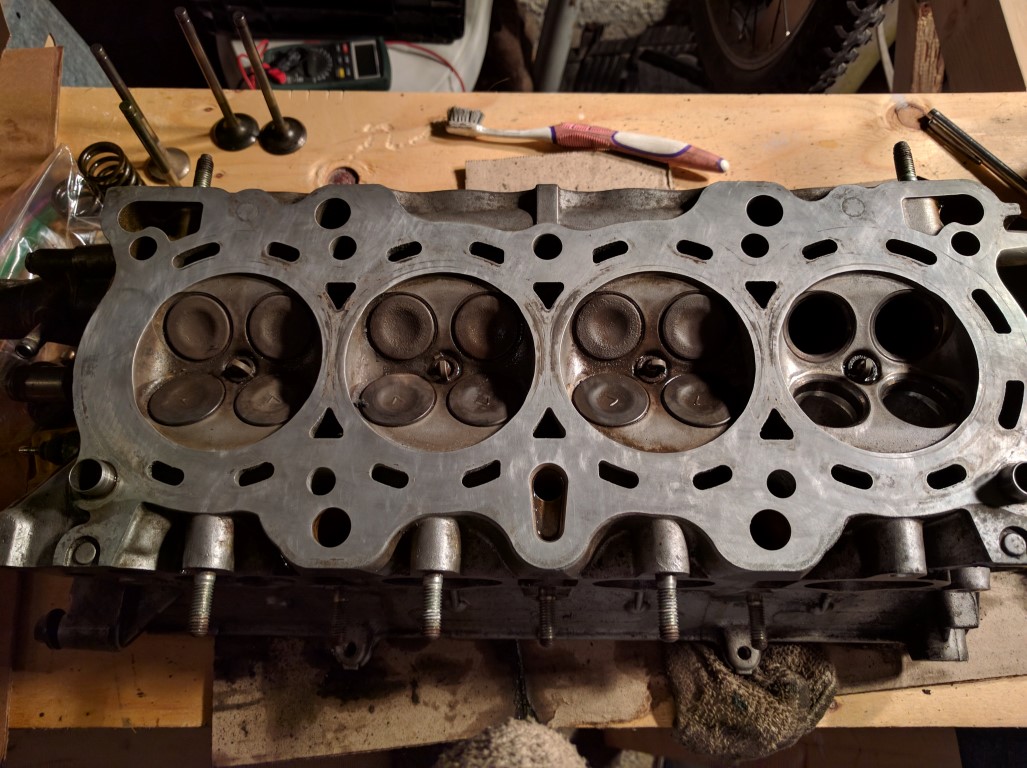
Removed all the valve seals, valves etc... Did a major clean up and even reseated all the valves and oiled everything. After cleaning all the valves and intake & exhaust surfaces I went on to the head gasket surfaces. Cleaned it up real good, the old gasket was pretty caked on so I used a brass brush and brake cleaner to clean the surfaces. I did measure the head (the part with all the valves) and it was around 0.003" off, the service manual says to get it machined flat if its 0.002" but being poor I decided to put it together anyway. I reseated the valves after I cleaned them up and everything.
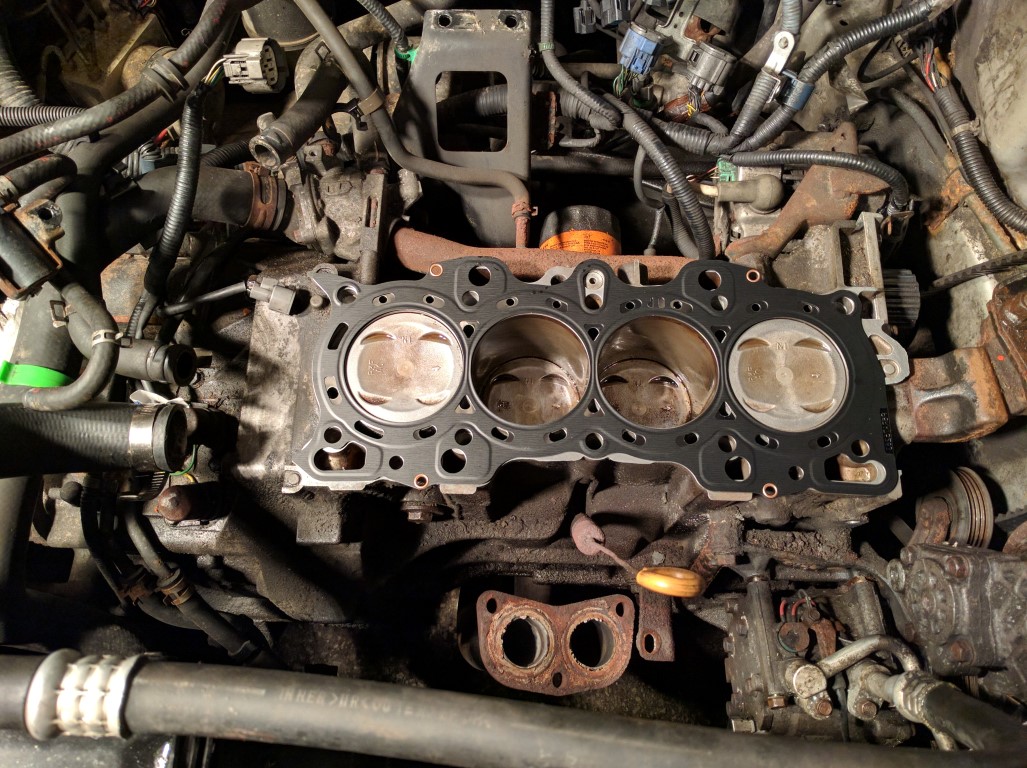
After all the final preparations I installed the head gasket correctly; I double checked it to be sure. After that I installed the new head bolts to in two steps to the specified torque spec, tightening them in the order the manual said.
Note that in the picture the head gasket is on the wrong way. I did flip it off camera before putting it together. The pointy part on the top left should actually be on the top right.
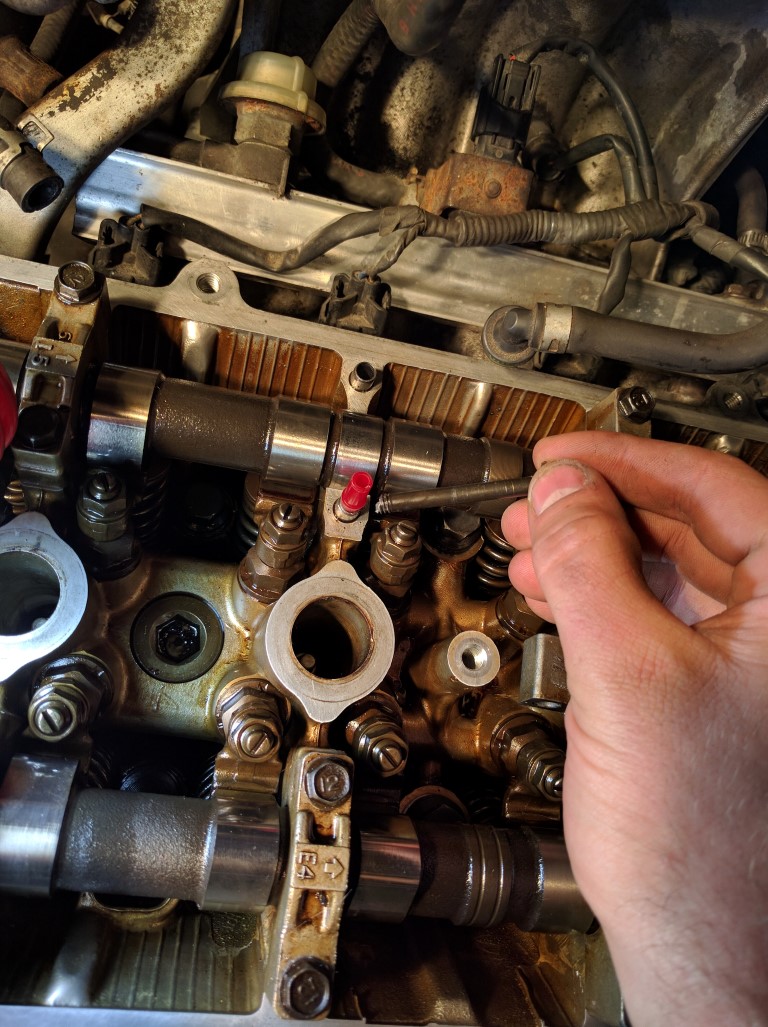
After getting those bolts back on I started putting the cams back in, this is where disaster struck! One of the cam keeper bolts snapped in the head while being torq'd down. Lucky enough I was able to use the body of a pen to guide a drill bit and got it to the point where I was able to remove the bolt without damaging the threads.After that I simply just replaced it with a new bolt I got from the junkyard.
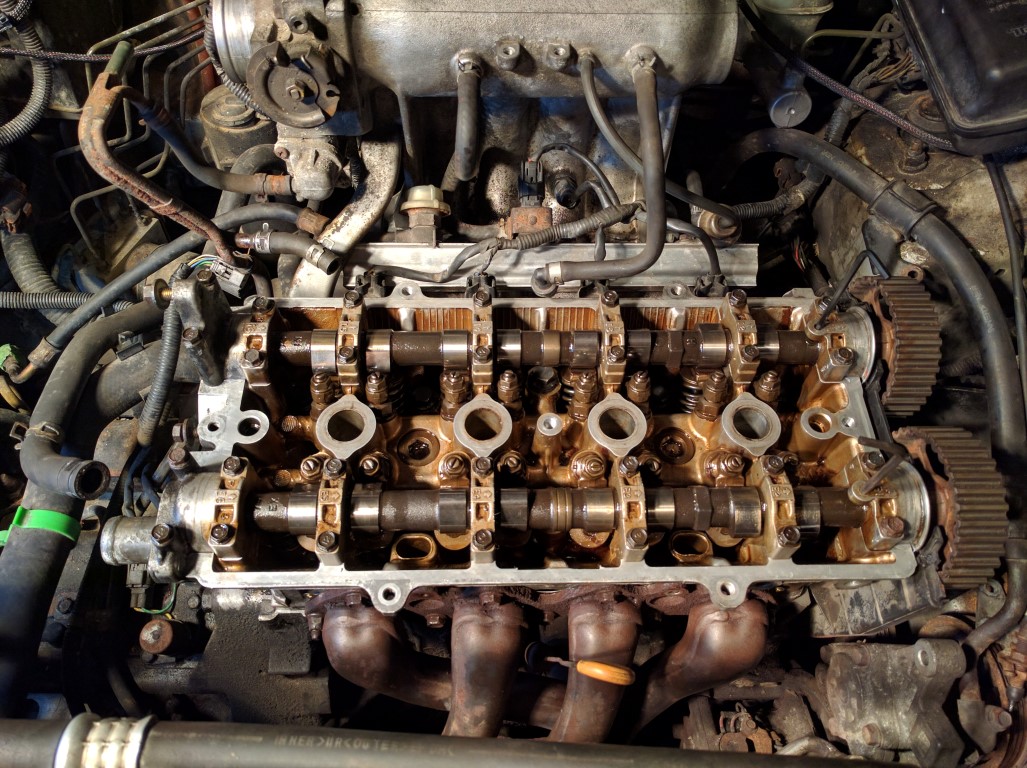
Once the cams were in and the timing belt, as well as all the other belts were back on I did a valve adjustment. I adjusted the valves to the specifications in the book, it's 0.006" for the intake and 0.003" for the exhaust if I recall correctly. Re-installing the timing belt on this thing is a pain, but after doing it 3 times I've gotten pretty good at it. I found that you need to bring the exhaust cam one tooth back to get the belt one rougly move by one tooth on the intake cam to get the belt on the proper way. I marked my belt and teeth before hand so I knew exactly where they went.
The final step was to put in fresh oil and new coolant (I did a coolant flush before disassembly) To my surprise the car actually started the first try with no hiccups! Drove the car around for a good 15 min, no overheating, no knocking or anything like that. The car actually ran way better than before. The problem came when I sat in my driveway idling. The car started to get rough and the idle began to drop. The tac slowly started to drop and eventually just went all the way down and the engine died. I managed to get it to start again but the same problem. So here comes the troubleshooting stage:
Possible Head Gasket leak or worse?
1. Wet spark plugs, they were wet with gas and the cylinders were flooded with gas. This lead me to the intake, which also had gas in it for some reason. After doing some research I replaced the fuel pressure regulator which can feed gas into the intake and flood the engine if it's broken. Replaced it and clean up the gas, car started and ran fine, but same idle problem. The car would idle for a good 5 minutes and then the rpms would drop slowly until the car died. Once again, flooded cylinders and wet plugs.
After cleaning it all up again I started the car and just watched it as it ran, inspecting everything. that's when I notices some bubbles coming out in the coolant reservoir tank.
2. A possible leak? Seeing bubbles in the reservoir tank made me suspect the coolant system or something along those lines. I topped up the rad with some deionized water and closed it up. Car started and ran, but this time after stalling I checked the cylinders, it was no longer smelly gas, it was basically water. This lead me to believe that coolant was once again flooding the engine somehow, even with the new gasket. So I started to experiment. The next time I got the car started I played with the rad cap. When the idle started to slow down I decided to remove the rad cap, to my surprise removing the cap made the engine idle come back up to normal. Then putting the cap back on would slowly cause the rpm to drop and ultimately make the car die. After doing this I tested the car with the rad cap off, a funnel on the rad inlet and water in that, I noticed that bubbles would consistently come up while running. To me this means there's a leak in the gasket. After removing the funnel and just running the car without a rad cap I noticed that it was what I believe is exhaust gas coming out of the radiator.
I'm not too sure how to proceed at this point, I did replace the head gasket and do everything to spec, but I still have coolant leaking into the cylinders. My questions to you honda experts:
1. Is the head being off by 0.003" enough to cause flooding of the cylinders ultimately causing the car to die?
2. Could there be another problem that I'm not thinking of, possibly a cracked cylinder wall or something ? I didnt notice anything like that but I also didn't turn over the engine once I had it apart.
3. If I need to machine down the head, do I need to also machine down the part in the actual engine bay or just the half that has the valves?
4. How much would getting the head machined down cost roughly? and finally, Is it worth getting a mechanic to do the headgasket job and machine down the engine; This would cost me around 800$ or so. Maybe getting a new car would be a better bet seeing as thats almost the worth of the car.
I hope someone finds the pictures in this post helpful, and thank you to anyone that has a possible answer of how I should go about fixing this problem that I've got.
Steve.
This post will include the pictures of some of the steps so that others can see what it looks like and get an idea of what I've done. Skip to the bottom if you don't want to view the headgasket job I did.
A basic description of my 1997 crv:
Spoiler

I've had the radiator replaced, as well as the water pump and timing belt. New upper rad hose and new spark plug cables, as well as a new exhaust.
Gas tank currently leaks at the filler neck so I don't fill up all the way, body is rusted like crazy between the cabin and exterior body where the filler tube goes through. I've also patched a giant hole in the passenger floor.
Anyway, the car overheated one day during the summer while driving home from school. Smoke out the hood and everything, started to make weird noises. Luckily it only overheated while stuck at red lights, made it home fine due to it not overheating while actually driving.
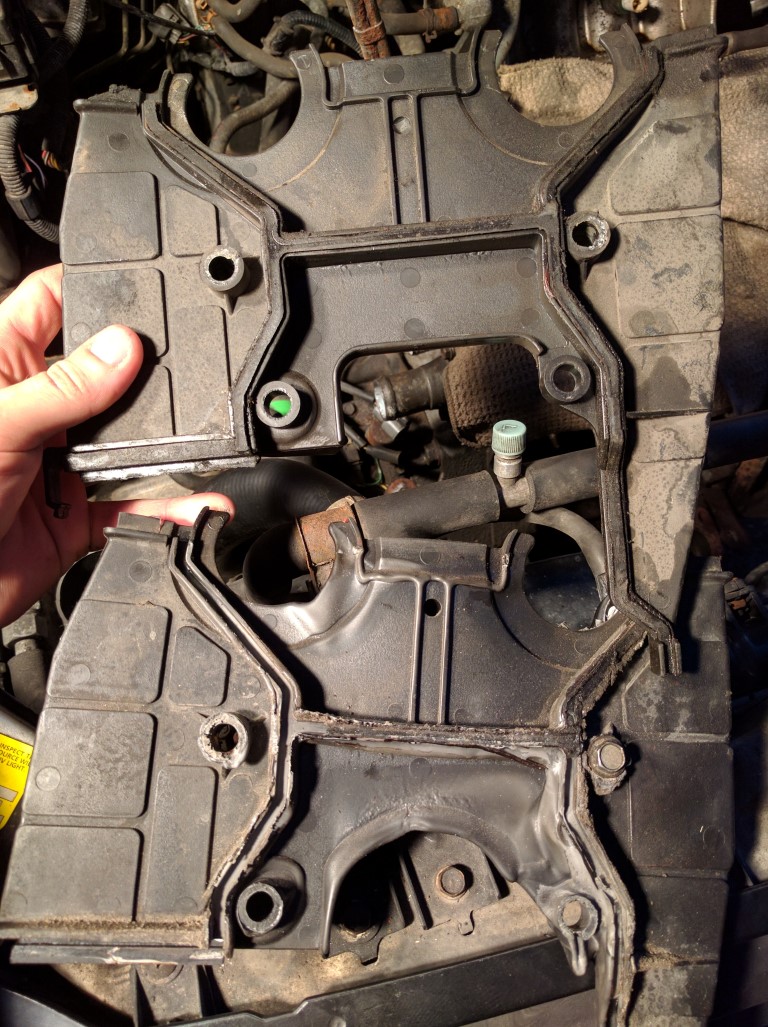
Brought the car to my mechanic and he said it blew the headgasket and needed a new one. Being the poor student I am, I ended up using a radiator fix from canadian tire. This solution worked for a few months, but now I have a blocked heater core (not surprised) and the car is starting to overheat every now and then. So being the handy man I am, I ordered myself a new headgasket kit with bolts and gaskets for intake, exhaust etc... Took me a few days, but I managed to get everything apart. The heat actually melted the plastic covers for the engine.
Spoiler
Spoiler
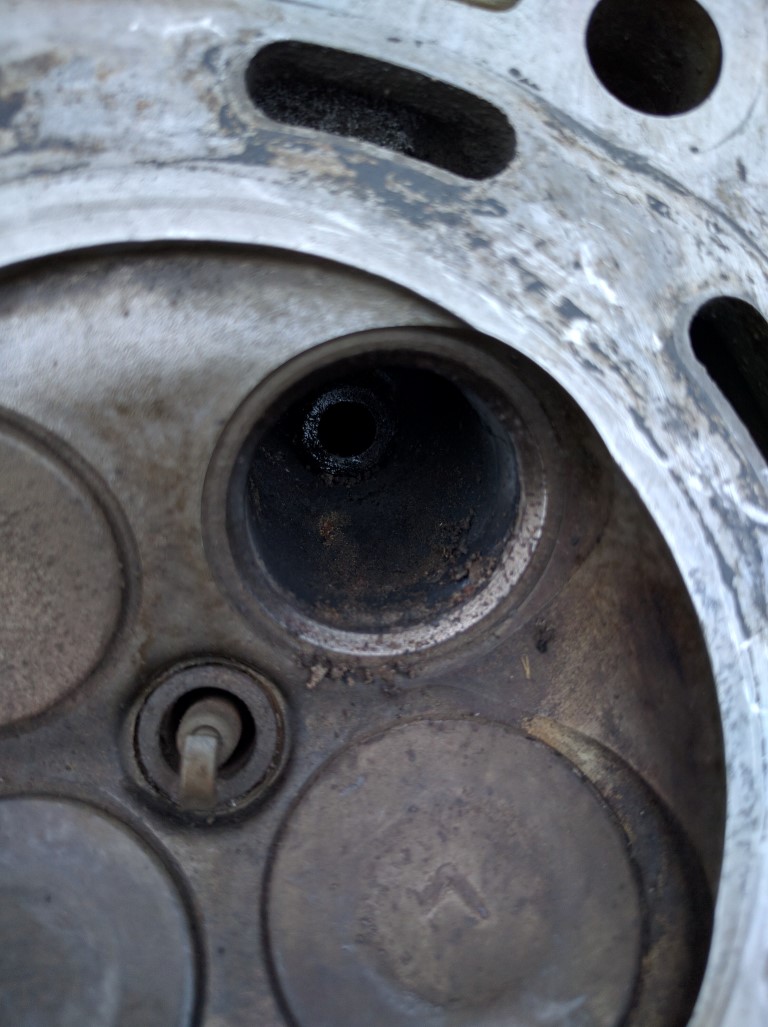
Spoiler
After getting those bolts back on I started putting the cams back in, this is where disaster struck! One of the cam keeper bolts snapped in the head while being torq'd down. Lucky enough I was able to use the body of a pen to guide a drill bit and got it to the point where I was able to remove the bolt without damaging the threads.After that I simply just replaced it with a new bolt I got from the junkyard.
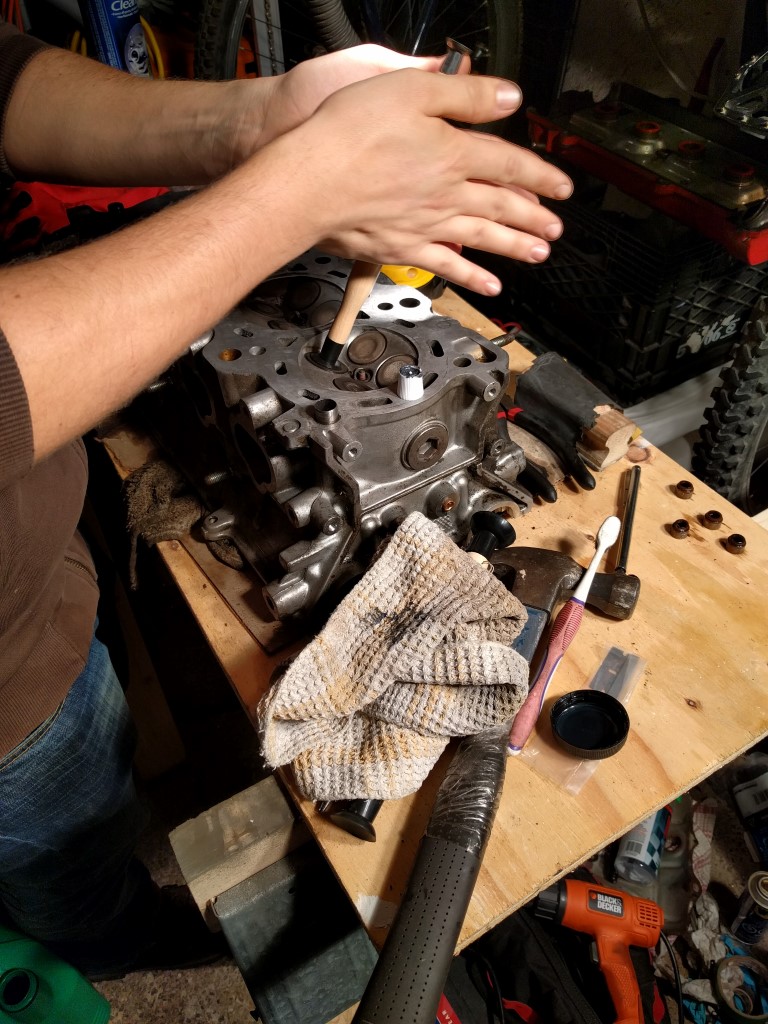
Spoiler
Spoiler
Possible Head Gasket leak or worse?
1. Wet spark plugs, they were wet with gas and the cylinders were flooded with gas. This lead me to the intake, which also had gas in it for some reason. After doing some research I replaced the fuel pressure regulator which can feed gas into the intake and flood the engine if it's broken. Replaced it and clean up the gas, car started and ran fine, but same idle problem. The car would idle for a good 5 minutes and then the rpms would drop slowly until the car died. Once again, flooded cylinders and wet plugs.
After cleaning it all up again I started the car and just watched it as it ran, inspecting everything. that's when I notices some bubbles coming out in the coolant reservoir tank.
2. A possible leak? Seeing bubbles in the reservoir tank made me suspect the coolant system or something along those lines. I topped up the rad with some deionized water and closed it up. Car started and ran, but this time after stalling I checked the cylinders, it was no longer smelly gas, it was basically water. This lead me to believe that coolant was once again flooding the engine somehow, even with the new gasket. So I started to experiment. The next time I got the car started I played with the rad cap. When the idle started to slow down I decided to remove the rad cap, to my surprise removing the cap made the engine idle come back up to normal. Then putting the cap back on would slowly cause the rpm to drop and ultimately make the car die. After doing this I tested the car with the rad cap off, a funnel on the rad inlet and water in that, I noticed that bubbles would consistently come up while running. To me this means there's a leak in the gasket. After removing the funnel and just running the car without a rad cap I noticed that it was what I believe is exhaust gas coming out of the radiator.
I'm not too sure how to proceed at this point, I did replace the head gasket and do everything to spec, but I still have coolant leaking into the cylinders. My questions to you honda experts:
1. Is the head being off by 0.003" enough to cause flooding of the cylinders ultimately causing the car to die?
2. Could there be another problem that I'm not thinking of, possibly a cracked cylinder wall or something ? I didnt notice anything like that but I also didn't turn over the engine once I had it apart.
3. If I need to machine down the head, do I need to also machine down the part in the actual engine bay or just the half that has the valves?
4. How much would getting the head machined down cost roughly? and finally, Is it worth getting a mechanic to do the headgasket job and machine down the engine; This would cost me around 800$ or so. Maybe getting a new car would be a better bet seeing as thats almost the worth of the car.
I hope someone finds the pictures in this post helpful, and thank you to anyone that has a possible answer of how I should go about fixing this problem that I've got.
Steve.


Thread
Thread Starter
Forum
Replies
Last Post
djnickles
Honda Civic / Del Sol (1992 - 2000)
2
09-04-2005 01:33 PM