
THE WAGO!


 09-04-2018, 01:10 PM
#53
Honda-Tech Member
Thread Starter
Cheers guys! Yeah been quite busy past 2 weekends, hopefully get some good progress done this weekend. I want the bloody roof back on already so I can do the fun things.. like lower it haha
09-05-2018, 01:13 AM
#55
Honda-Tech Member
Thread Starter
09-11-2018, 05:46 AM
#56
Honda-Tech Member
Thread Starter
Update time!
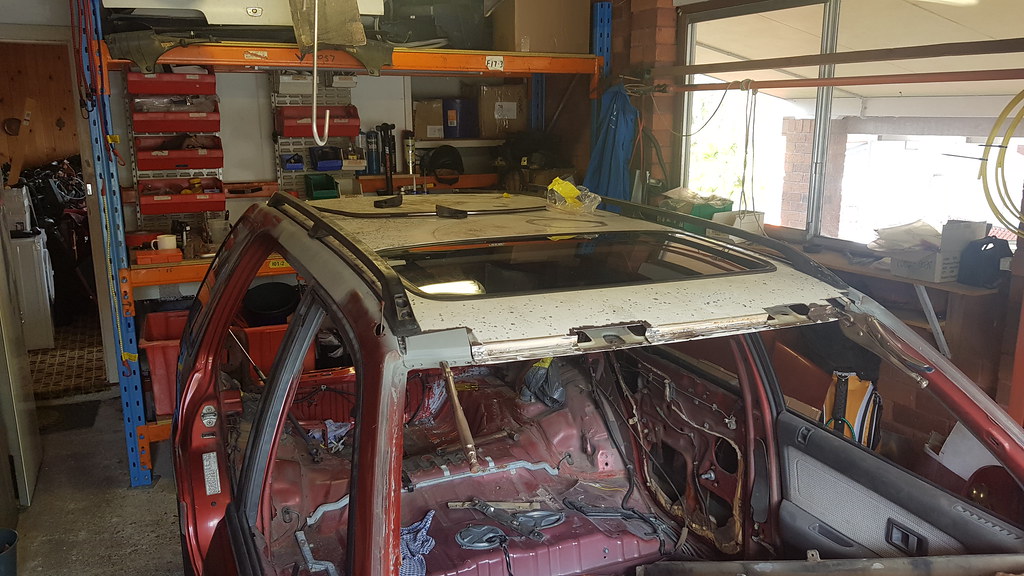
Weekend that just past, a decent amount of work on the Wago took place, with the possbility the roof shall be welded on next weekend! Big update with many photos so incoming spam..
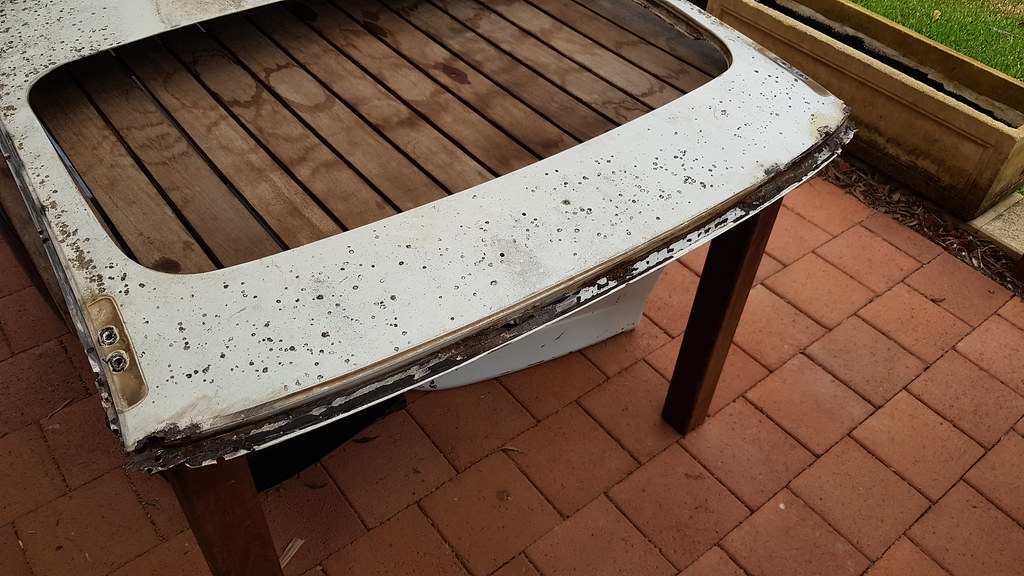
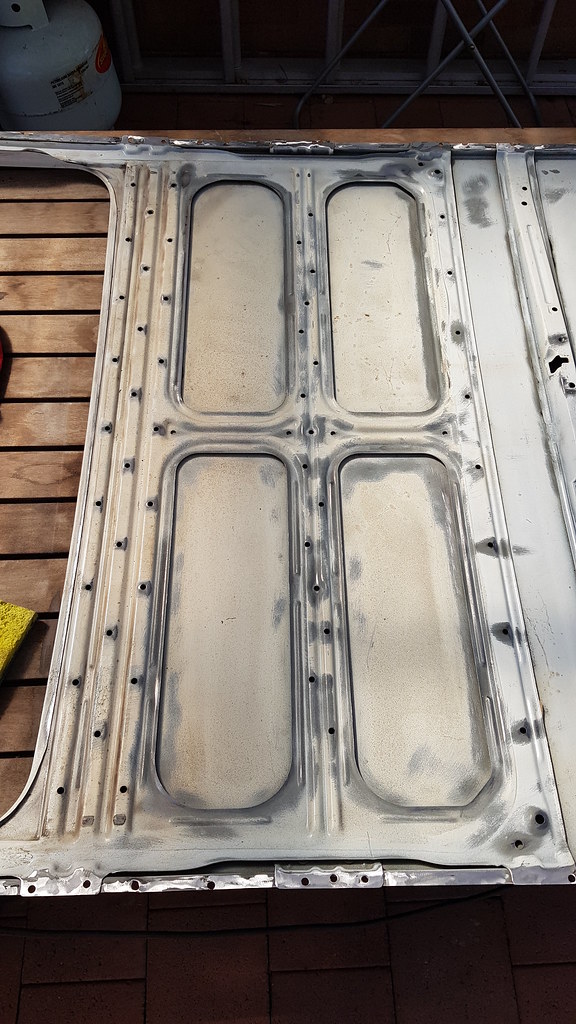
We decided to continue and get the roof skin all repaired, theres 5 rust spots in the front of the roof itself, all which would have been under the windscreen. The windscreen had been replaced so I'm assuming not done properly, water leaked under the seal and the rust occured. Started off with cutting out the 5 sections, only cutting off the outer skin. Next marking those pieces onto my original roof (which we are using for replacement pieces) and begun cutting them. Once cut, final grinding was carried out to ensure a good fit for each piece.
From left to right (drivers to passenger)

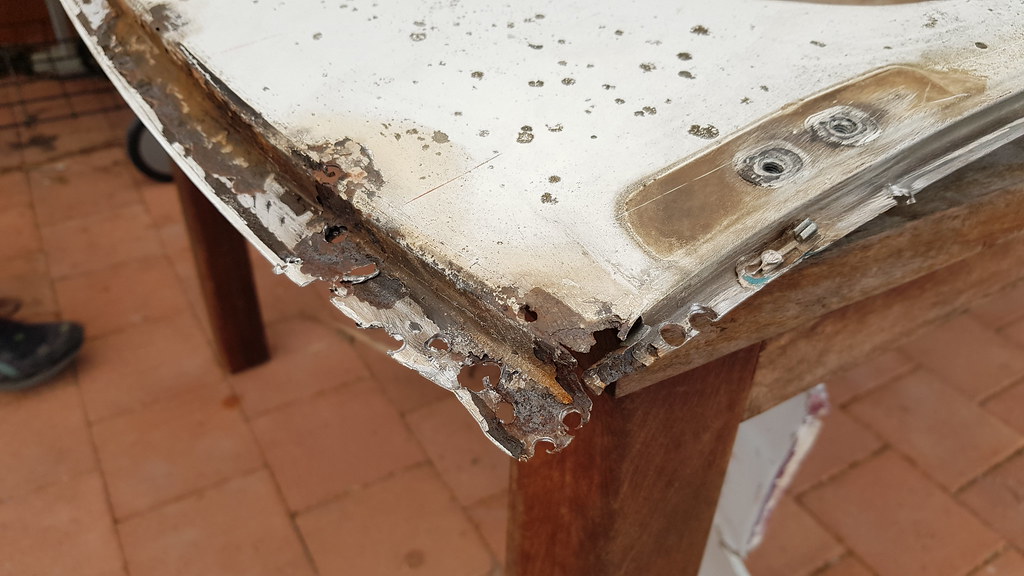

So you now might be wondering, why didn't I just repair the other roof as the front of that one is mint! Well, 3/4 of the drivers side where the roof dips down into the side channel was completely rusted out, more rust on the rear than this one, and the roof rack holes were welded in, rusted out and roof rack studs cut off the mid section of the roof. Both skins had pros and cons, I simply went with this one as all roof rack bolt holes/studs were still there and seemed harder to replace.
After moving roof skins back and forth & the car sat there without a roof for a few months, everything still lines up shmick! Didn't get any photos, but we bolted in the sunroof to position it with the hole in the roof. Also, the rear 2 tabs for the sunroof on the driver side were also rusted out, the bolt snapped when trying to undo, completely rusted. So I drilled the 2 brackets off the spare shell, wire brushed and welded them on!
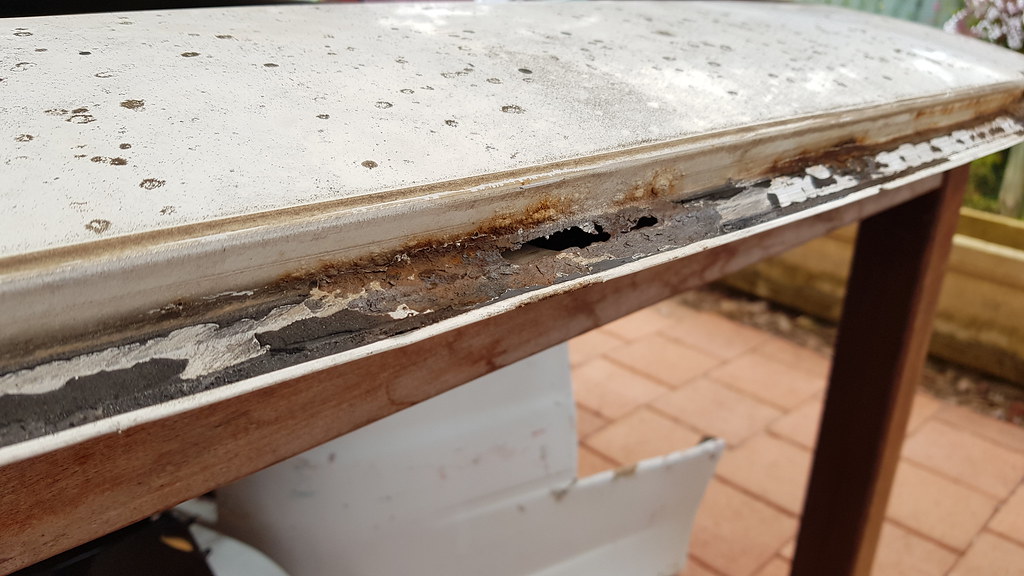
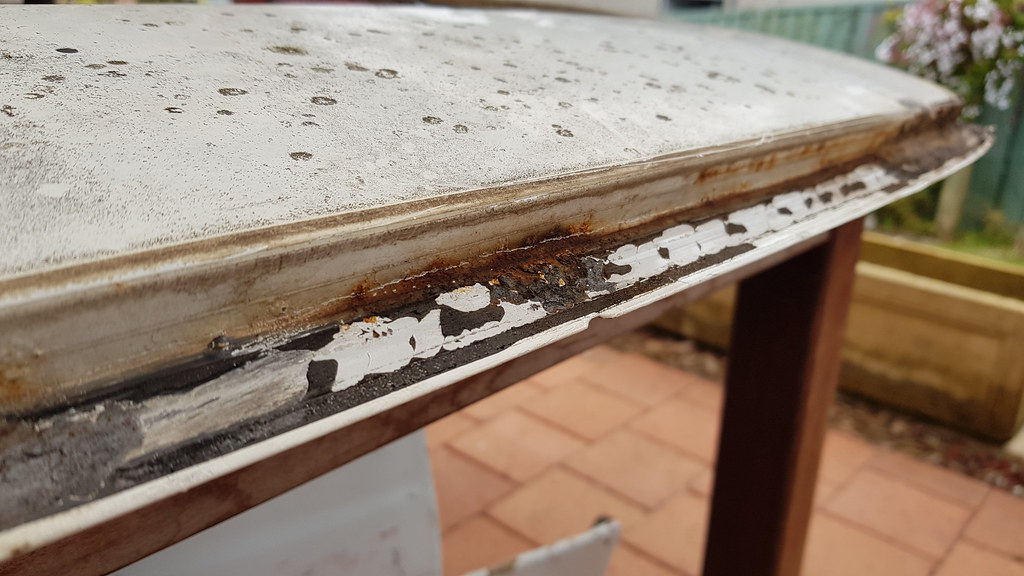
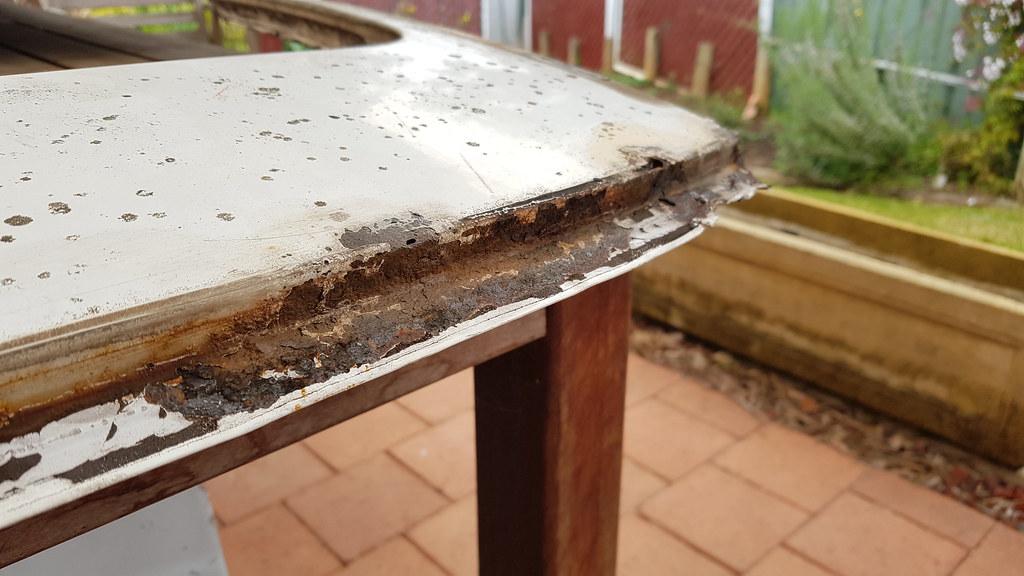
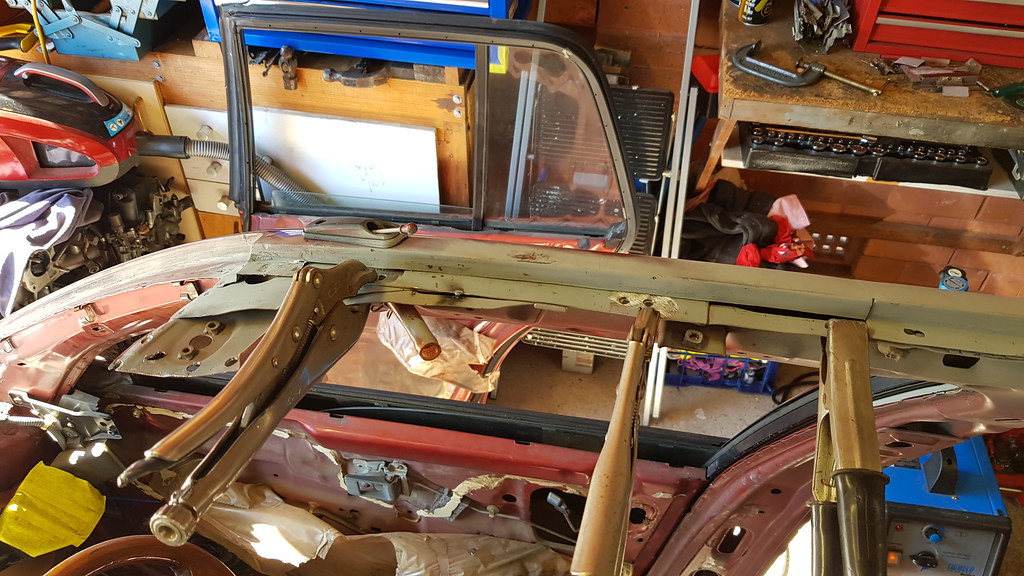
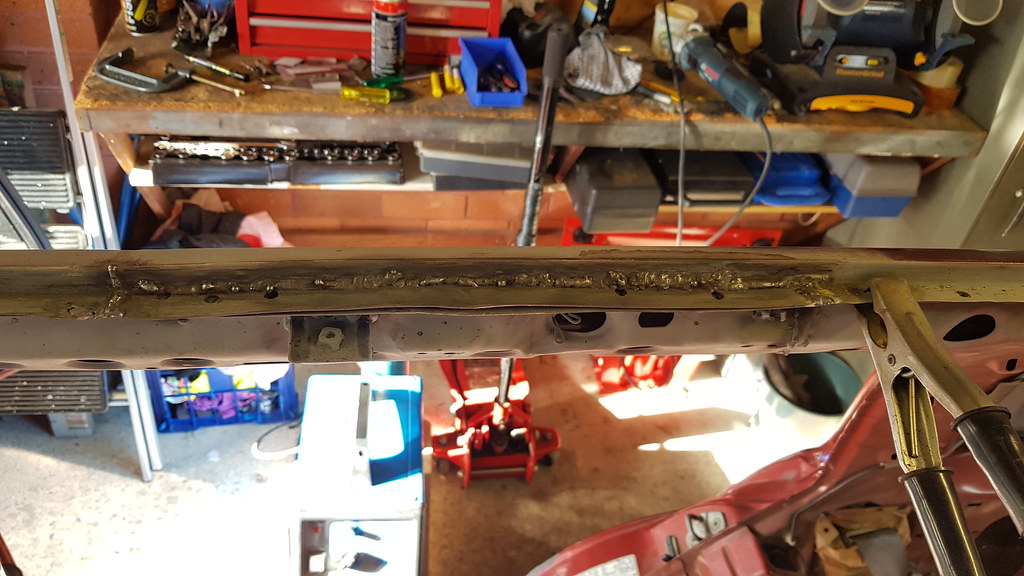
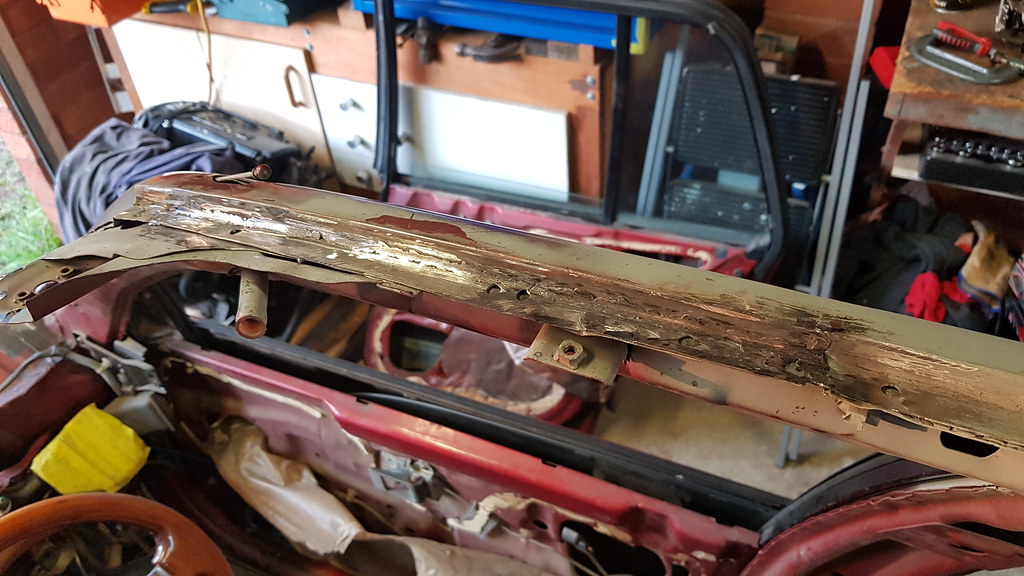
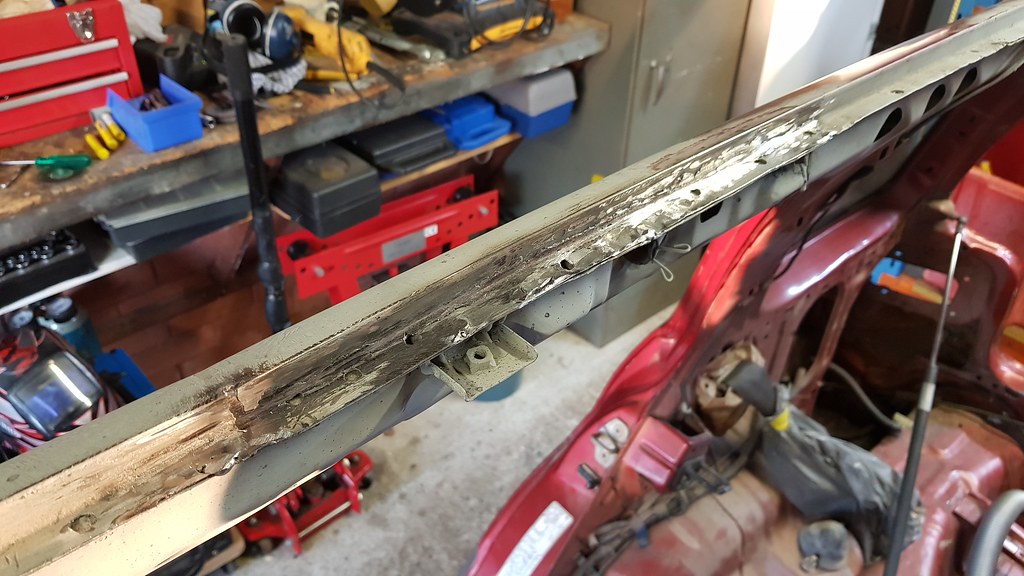
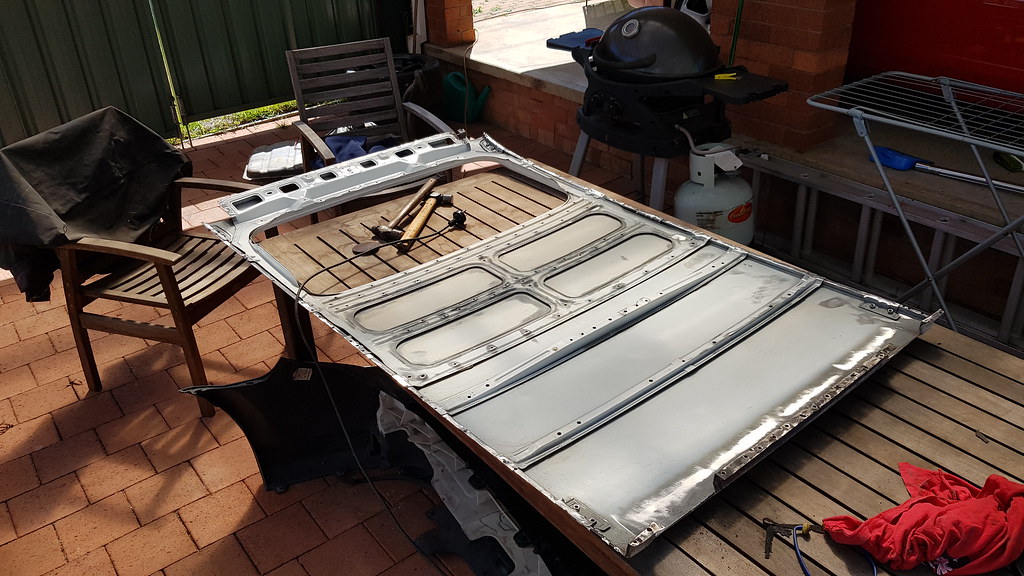
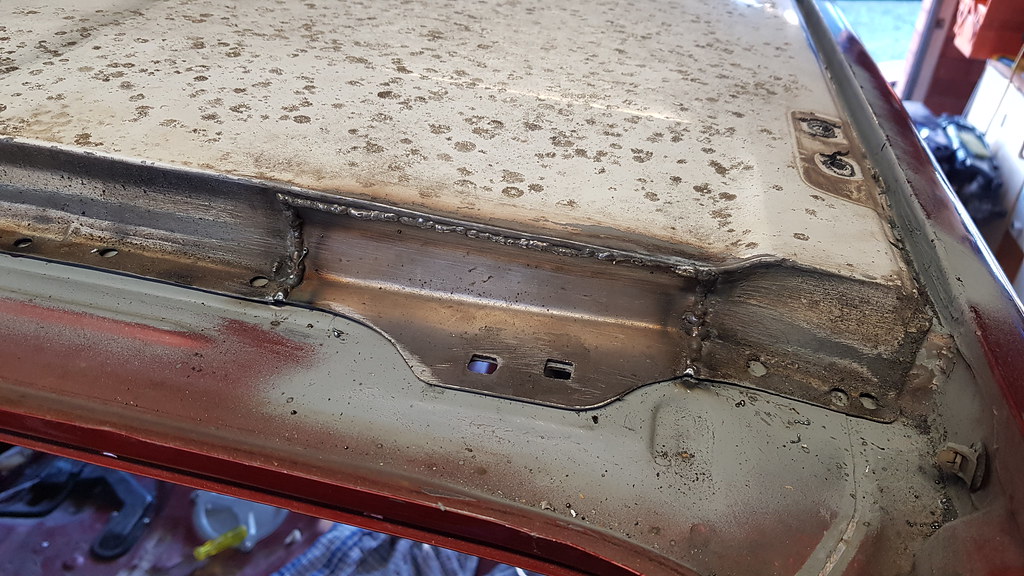
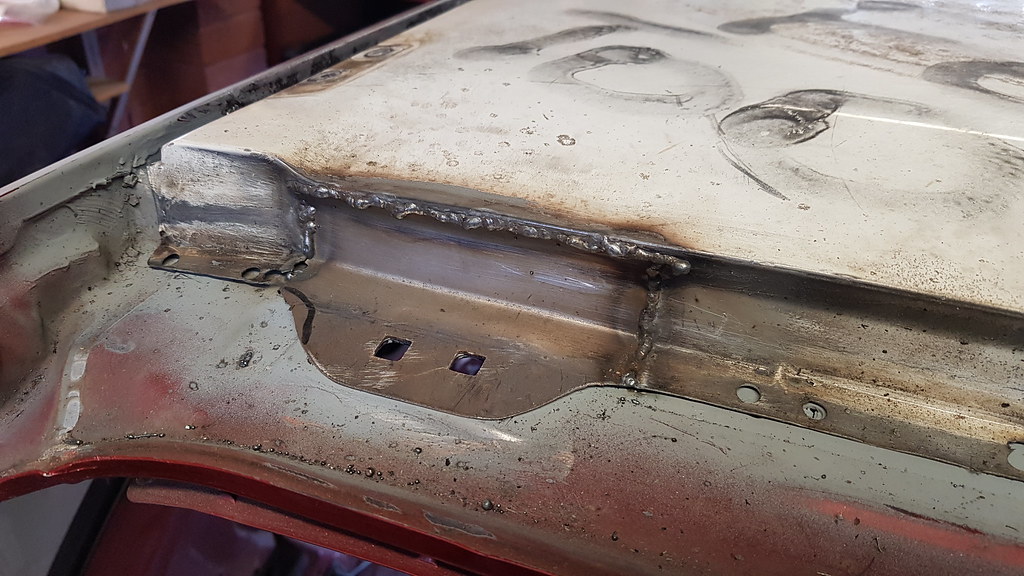
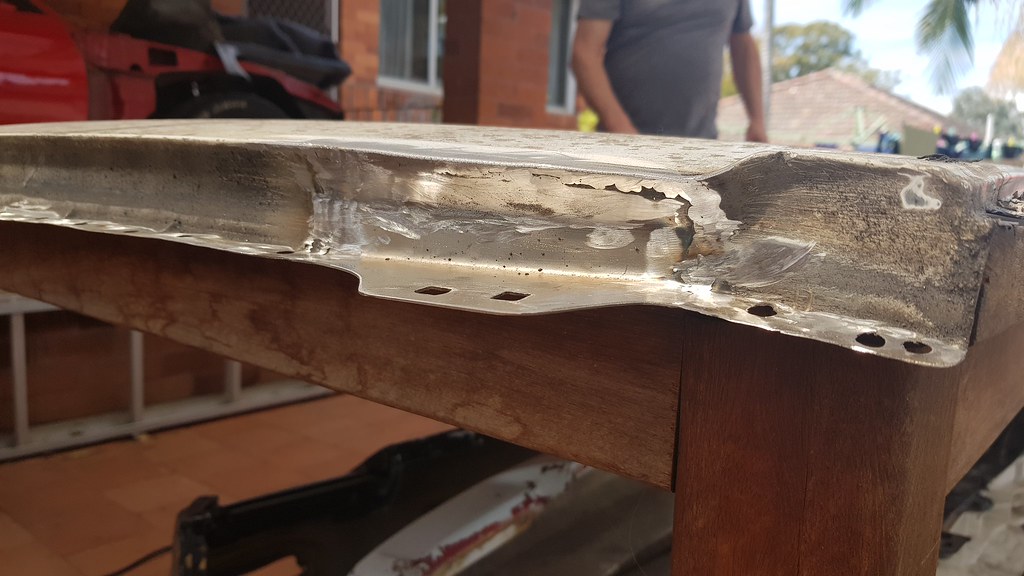
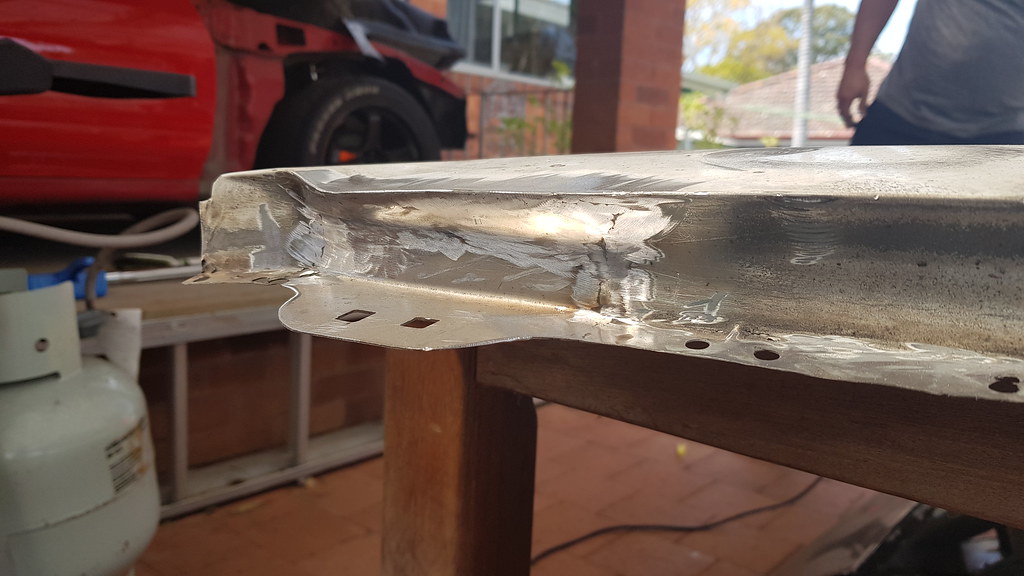
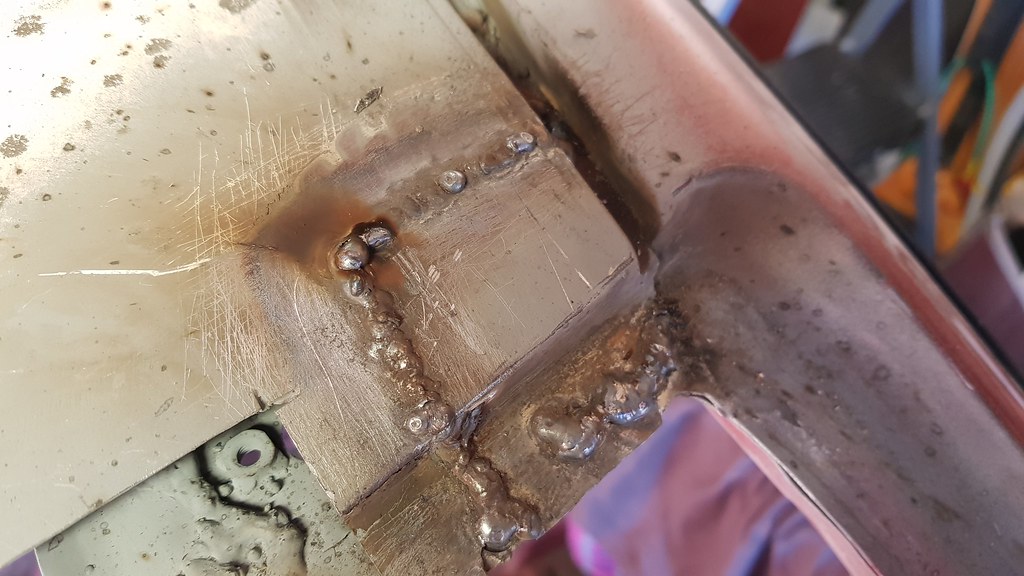
With this done, we cut the 2 pieces required to replace to upper skin chassis side where the roof lays (previous update we did the bottom ones). I didn't take many photos of each bit inplace/welded/grinded, but they were welded up and grinded down, ensuring the distance from the top of the pillar to the piece we were welding in was the same as the untouched passenger side. I will admit, my welding skills were a bit off today. Not to mention on the right side it kept blowing holes here and there so had to fill them up. Was trying the stitch weld method where you weld for a second then let off, as oppose to a constant pool dragging it across, as that will generate too much heat.
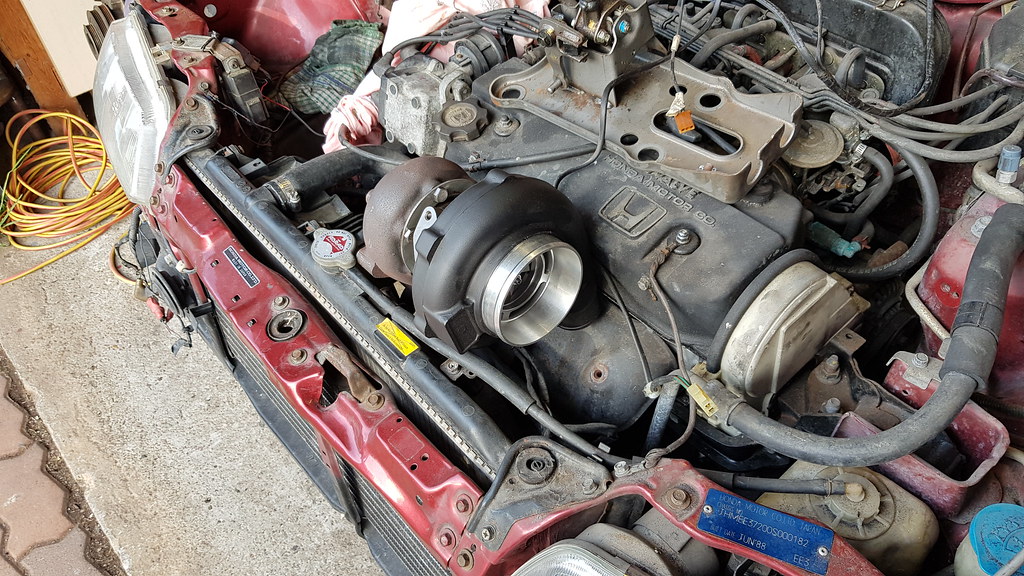
and to finish the update off, 'mocking up' a turbo from my brothers drift car
Weekend that just past, a decent amount of work on the Wago took place, with the possbility the roof shall be welded on next weekend! Big update with many photos so incoming spam..
We decided to continue and get the roof skin all repaired, theres 5 rust spots in the front of the roof itself, all which would have been under the windscreen. The windscreen had been replaced so I'm assuming not done properly, water leaked under the seal and the rust occured. Started off with cutting out the 5 sections, only cutting off the outer skin. Next marking those pieces onto my original roof (which we are using for replacement pieces) and begun cutting them. Once cut, final grinding was carried out to ensure a good fit for each piece.
From left to right (drivers to passenger)
So you now might be wondering, why didn't I just repair the other roof as the front of that one is mint! Well, 3/4 of the drivers side where the roof dips down into the side channel was completely rusted out, more rust on the rear than this one, and the roof rack holes were welded in, rusted out and roof rack studs cut off the mid section of the roof. Both skins had pros and cons, I simply went with this one as all roof rack bolt holes/studs were still there and seemed harder to replace.
After moving roof skins back and forth & the car sat there without a roof for a few months, everything still lines up shmick! Didn't get any photos, but we bolted in the sunroof to position it with the hole in the roof. Also, the rear 2 tabs for the sunroof on the driver side were also rusted out, the bolt snapped when trying to undo, completely rusted. So I drilled the 2 brackets off the spare shell, wire brushed and welded them on!
With this done, we cut the 2 pieces required to replace to upper skin chassis side where the roof lays (previous update we did the bottom ones). I didn't take many photos of each bit inplace/welded/grinded, but they were welded up and grinded down, ensuring the distance from the top of the pillar to the piece we were welding in was the same as the untouched passenger side. I will admit, my welding skills were a bit off today. Not to mention on the right side it kept blowing holes here and there so had to fill them up. Was trying the stitch weld method where you weld for a second then let off, as oppose to a constant pool dragging it across, as that will generate too much heat.
and to finish the update off, 'mocking up' a turbo from my brothers drift car
09-11-2018, 08:09 PM
#58
Honda-Tech Member
Thread Starter
 09-12-2018, 01:51 PM
#60
Honda-Tech Member
Thread Starter
Yeah I've been wondering that. Ill be pumping fish oil/cavity wax into everywhere, as shown weld through primer and when laying the roof skin onto chassis I'll be getting some expensive sealer like OEM.. but I'm sure rust will find its way out somewhere
09-19-2018, 05:29 AM
#61
Honda-Tech Member
Thread Starter
Weekend that just passed we made some big progress, to the point where the roof is now ready to be welded back on. However just as I was making a coffee before looking at the wagon my mate Ram messaged me 'DROP EVERYTHING RIGHT NOW!' with a link to Pick N Payless (wreckers), with the link containing a JDM import Honda Legend, with some goodies. $59 AUD later
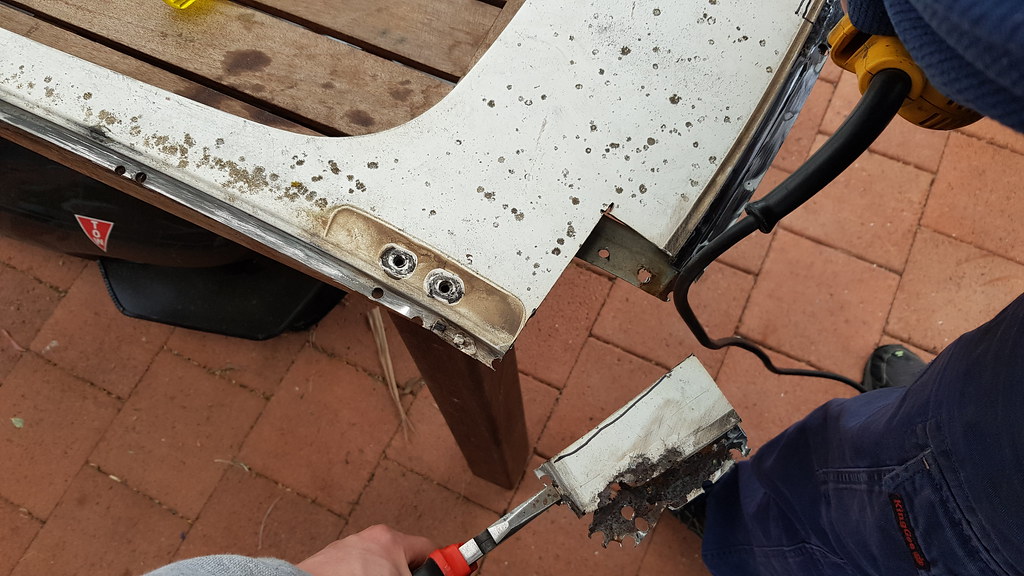
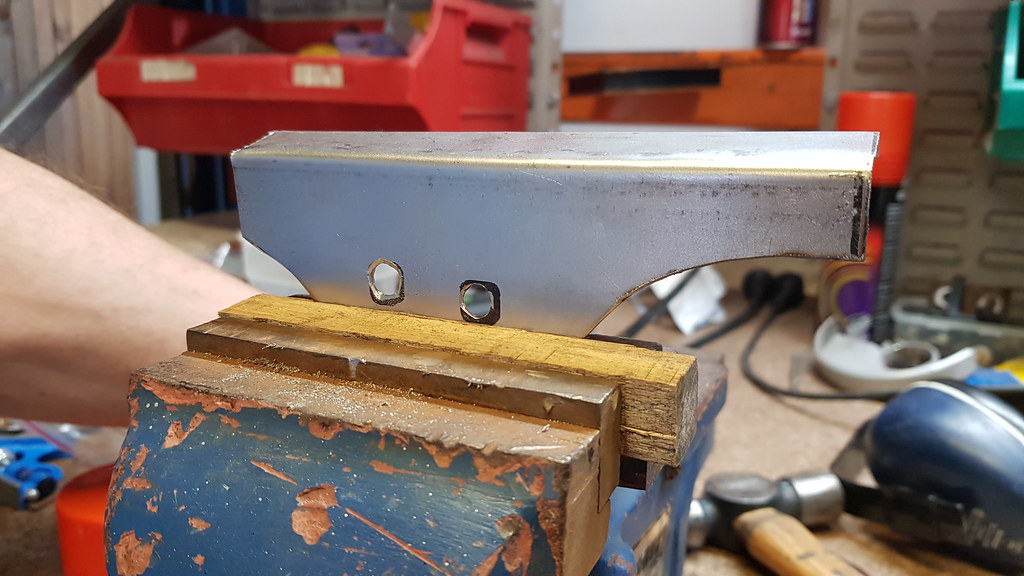
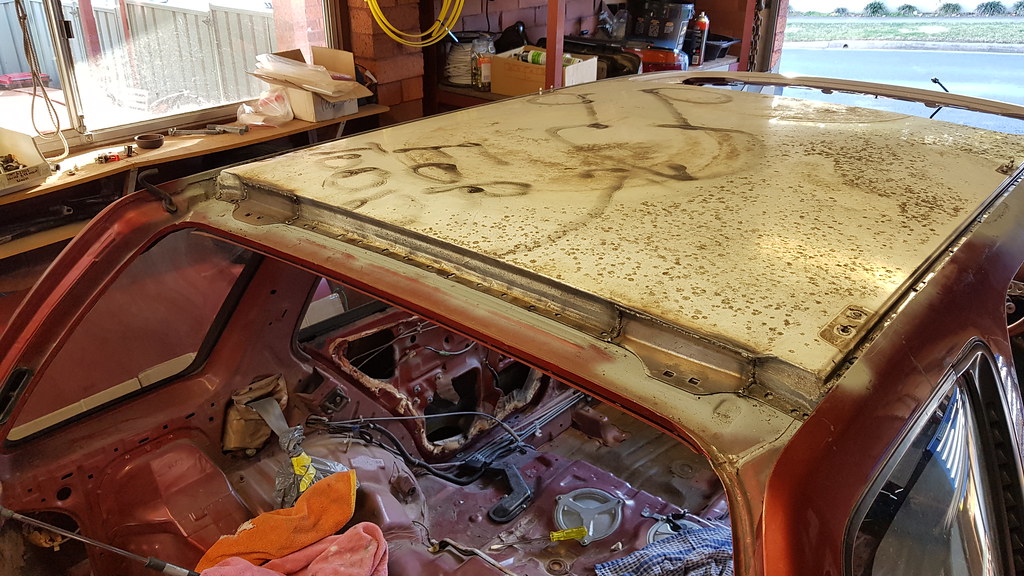
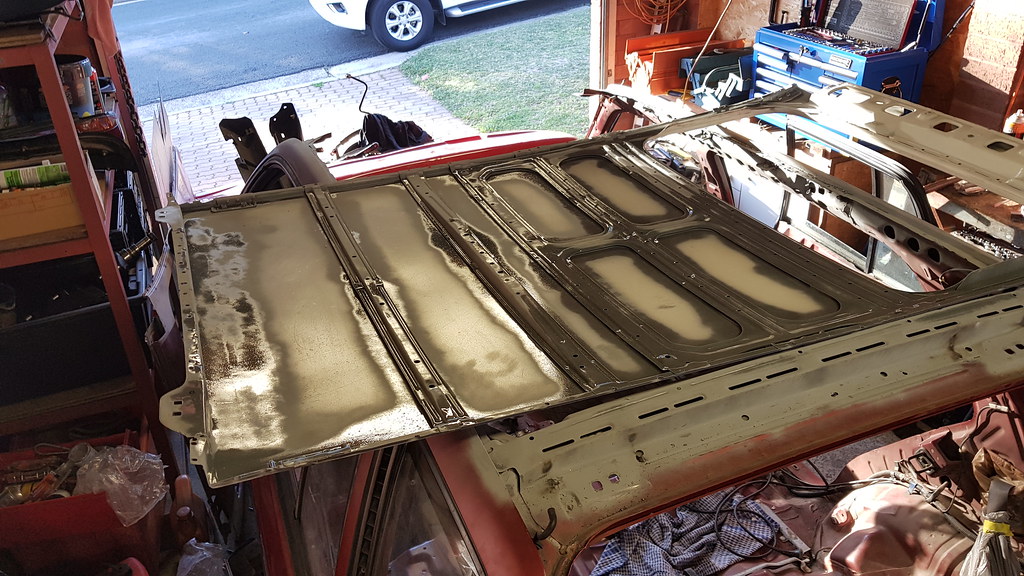
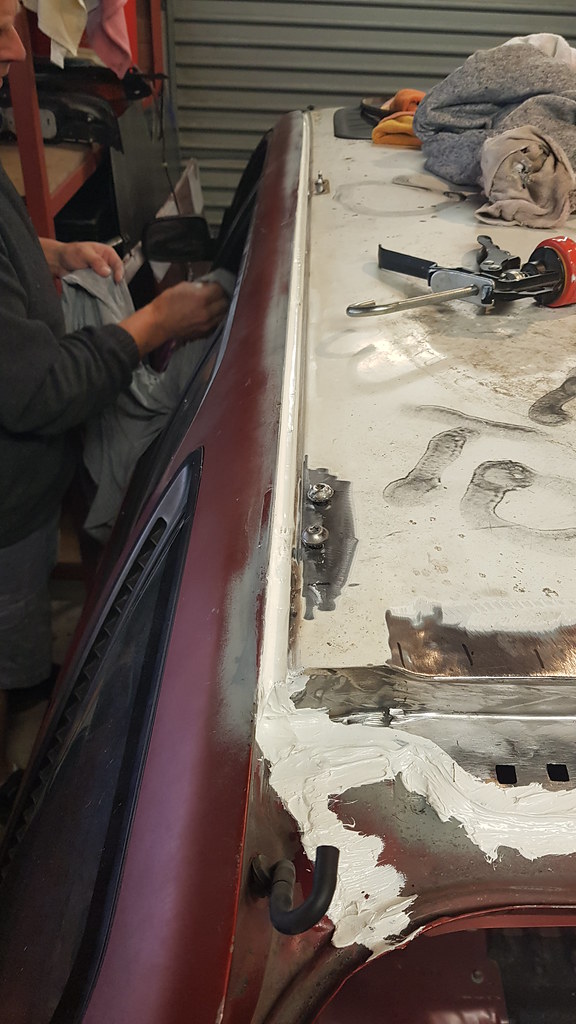
For the actual wagon work, the day started off with bending up another piece of sheet metal for the roof skin hinge section on the other side. Same process as the other sode, just obivously flipped. Once this was done I went about running the wire wheel over the underneath of the roof as surface rust had started to appear around the edges of the webbing.

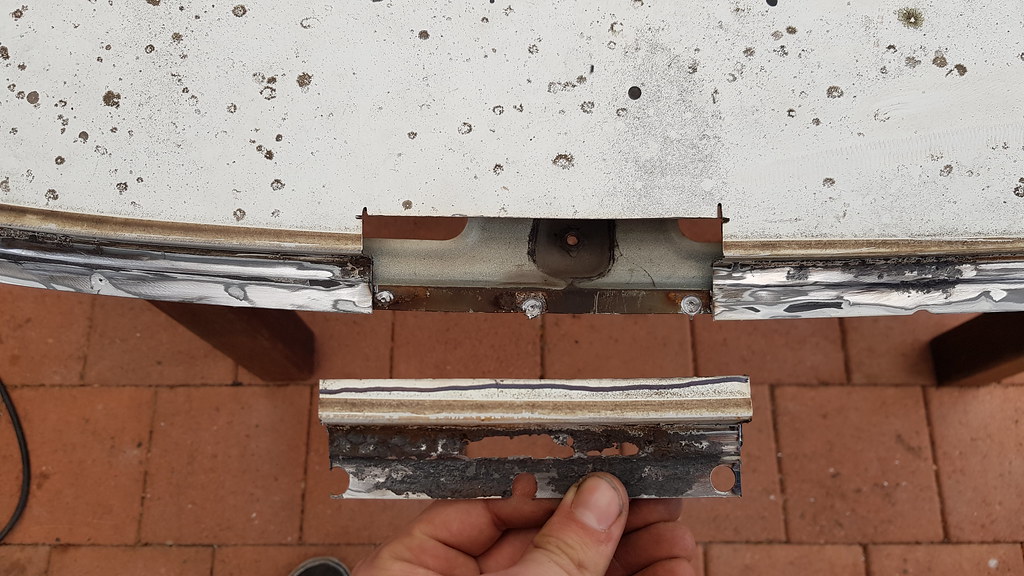
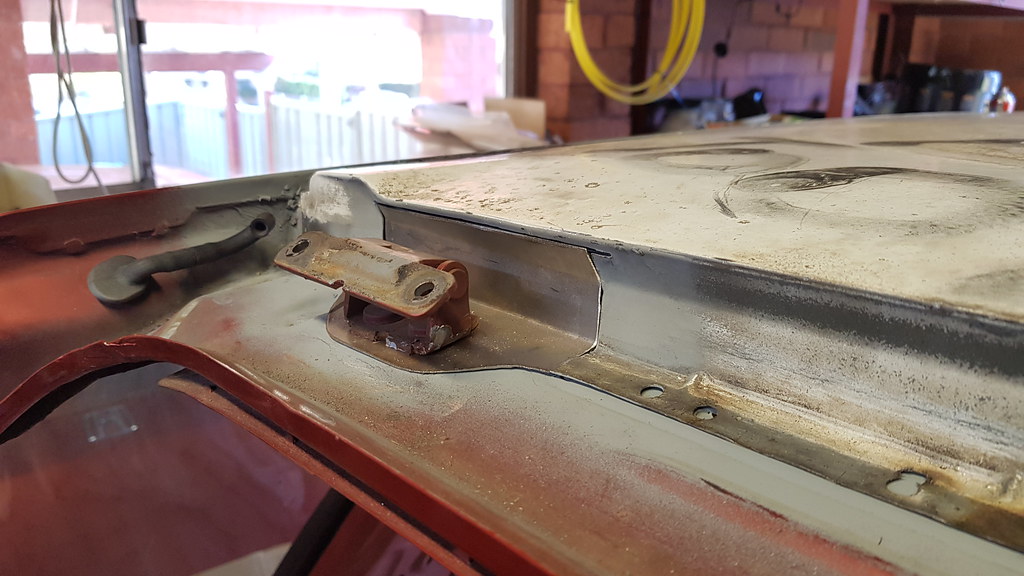
Next up we placed the roof skin back onto the chassis and positioned the 2 tabs so the 2 square holes for the hinge could be marked from underneath. Once drilled a square file was used to achieve the square hole.

With these 2 tabs ready, we left them bolted in on the hinges and went around tacking them, followed by completely welding it up off the car. We stood the roof up vertically where there was a step in the back yard so I could weld the area flat.
Came out quite nice, one or two small holes blew through so a little extra welding was required! And the roof is ready to be welded on! I'll have to grind down the welds first obviously but apart from that we are looking good!
The roof skin was then laid upside down on top of the car and I sprayed the areas I wire wheeled with some weld through primer, same same. I also put down some rust convert on the chassis side where the roof lays, passenger side as there was still some small areas of pitting, any further wire wheeling and there will be no metal left.

For the actual wagon work, the day started off with bending up another piece of sheet metal for the roof skin hinge section on the other side. Same process as the other sode, just obivously flipped. Once this was done I went about running the wire wheel over the underneath of the roof as surface rust had started to appear around the edges of the webbing.
Next up we placed the roof skin back onto the chassis and positioned the 2 tabs so the 2 square holes for the hinge could be marked from underneath. Once drilled a square file was used to achieve the square hole.
With these 2 tabs ready, we left them bolted in on the hinges and went around tacking them, followed by completely welding it up off the car. We stood the roof up vertically where there was a step in the back yard so I could weld the area flat.
Came out quite nice, one or two small holes blew through so a little extra welding was required! And the roof is ready to be welded on! I'll have to grind down the welds first obviously but apart from that we are looking good!
The roof skin was then laid upside down on top of the car and I sprayed the areas I wire wheeled with some weld through primer, same same. I also put down some rust convert on the chassis side where the roof lays, passenger side as there was still some small areas of pitting, any further wire wheeling and there will be no metal left.
Last edited by afx31; 02-13-2023 at 02:22 AM.
09-23-2018, 03:51 AM
#64
Honda-Tech Member
Thread Starter
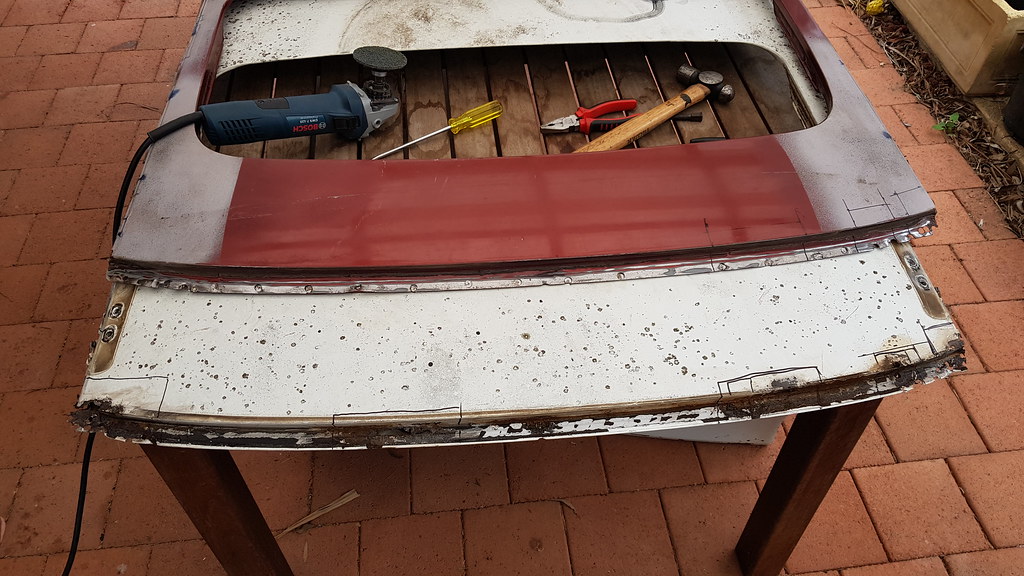
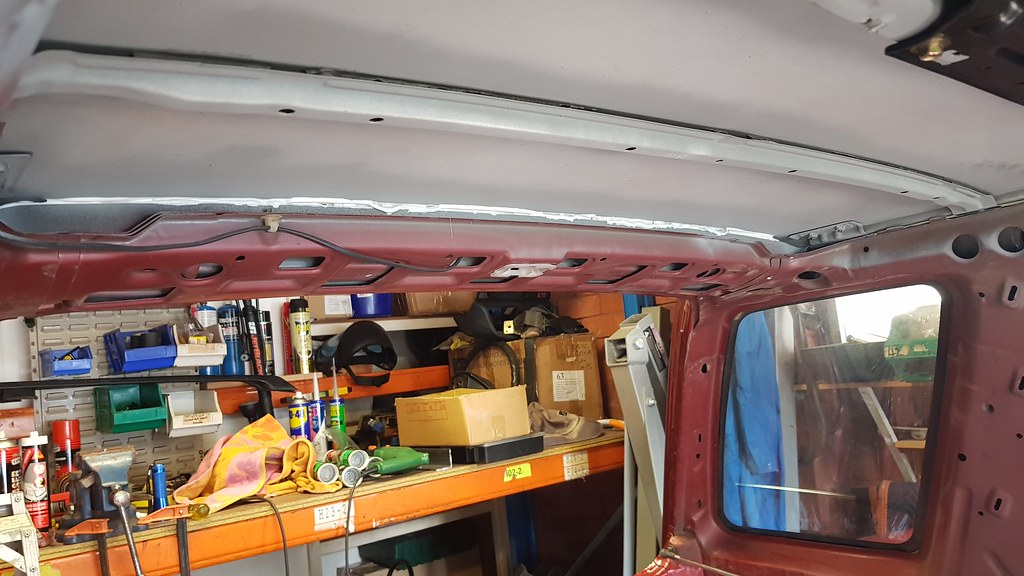
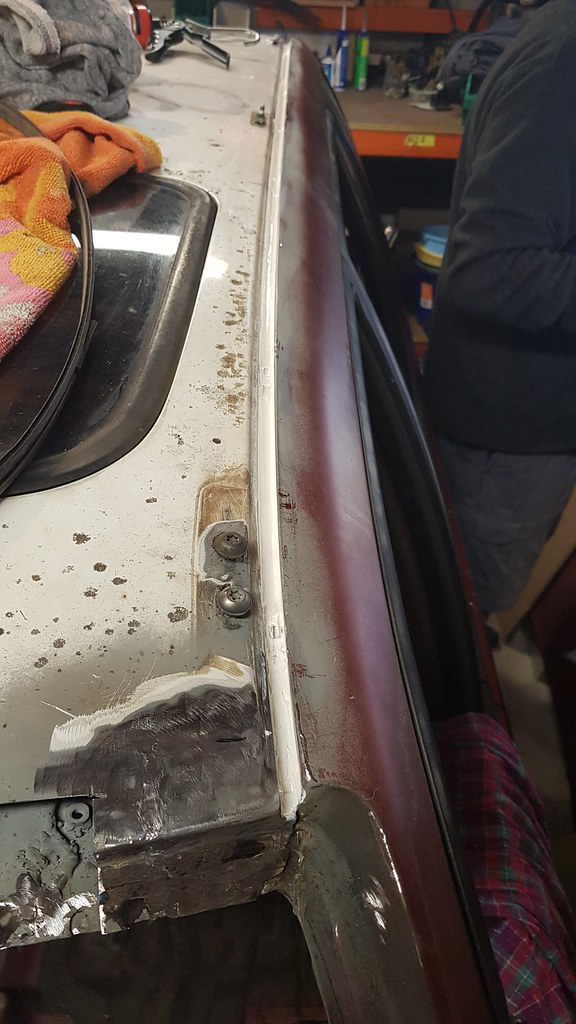
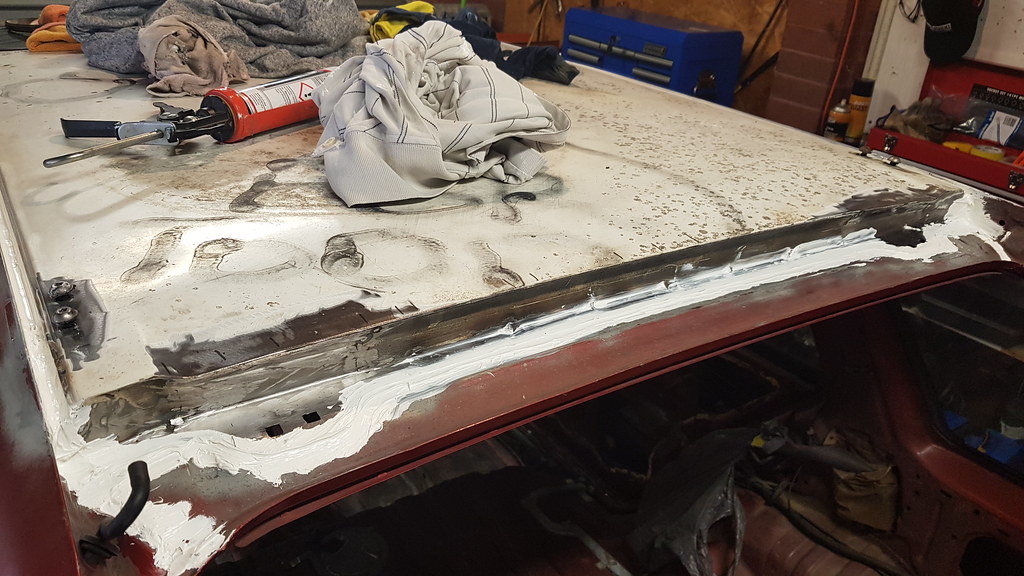
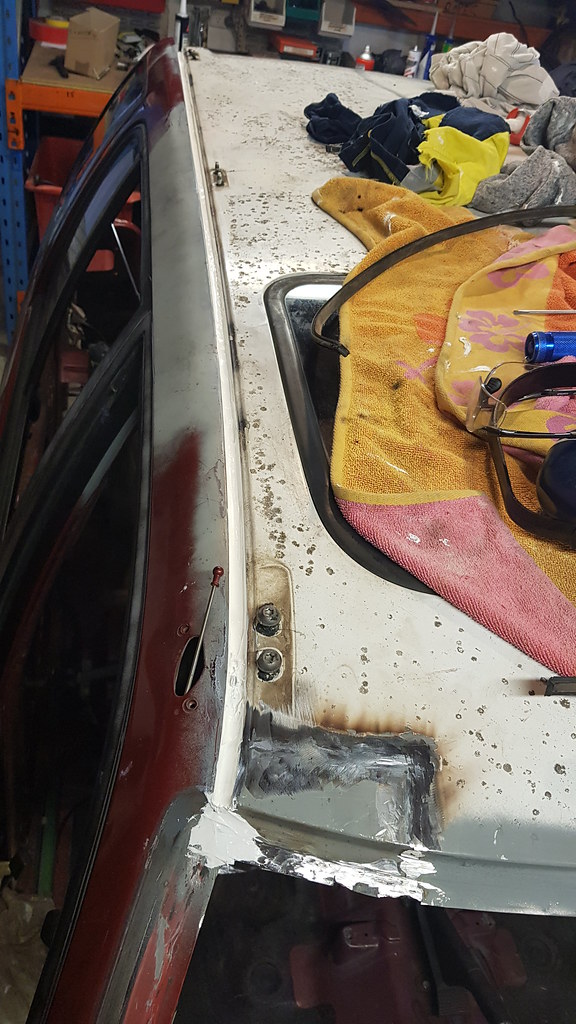
Some good progress was made this weekend, so happy! Saturday started off with grinding down the 2 tabs I welded onto the rear of the roof skin (replacing rust) so they were flush with the rest of the roof, one or two minor holes were found, re-welded and grinded down again.
With this done we placed the roof skin onto the car, bolted in the sunroof and the factory roof racks as well. We did this as the sunroof and roof racks would allow use to position the roof to where it should sit, as if it's welded in the incorrect position the sunroof won't line up, along with things like the windscreen etc
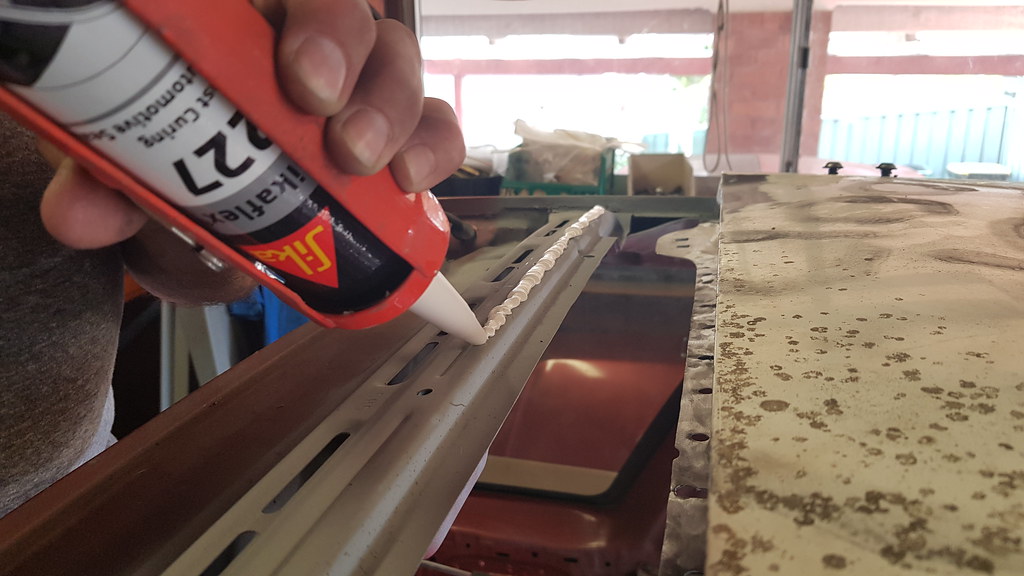
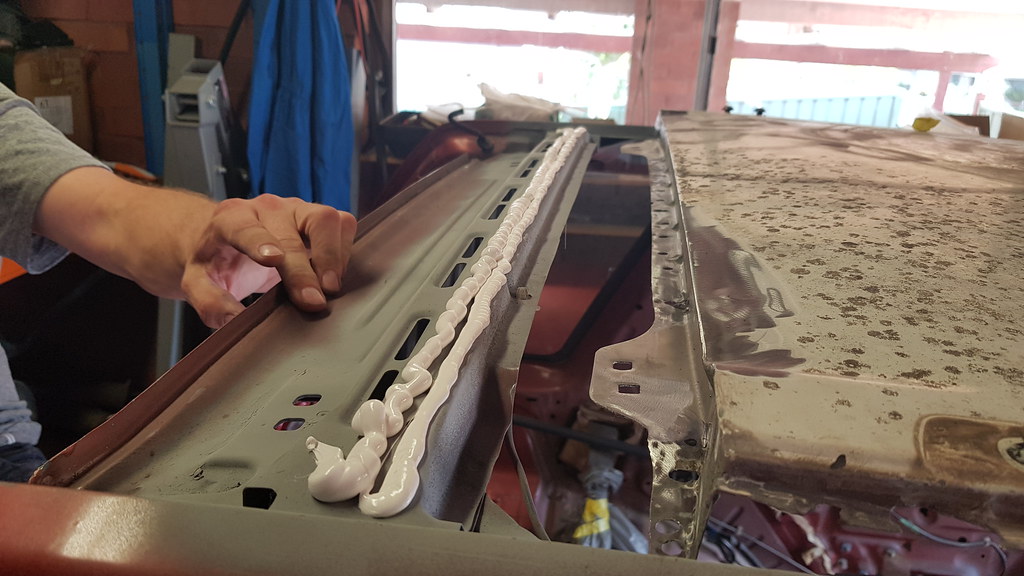
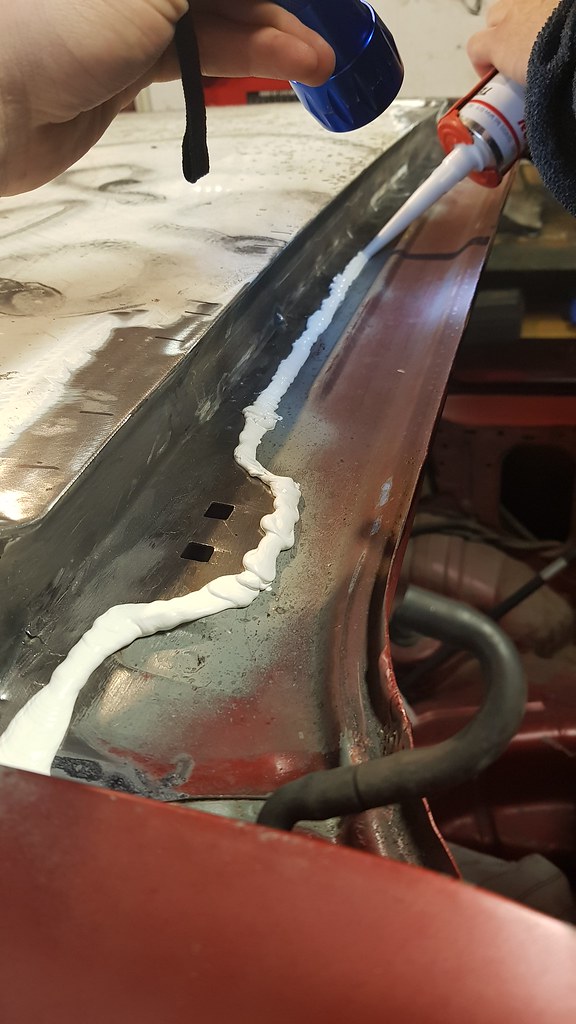
With this sorted we lifted the rear of the roof skin to lay down some sealant, from factory theres an expanding foam placed here to hold the roof skin down to the back of the chassis, just in front of the boot hinges.
Wasn't sure where to get this expanding foam, to be honest I didn't really look but decided to go ahead with some Sika automotive sealant, she'll be right. The roof was then placed back into position and everything realigned, ready for welding.
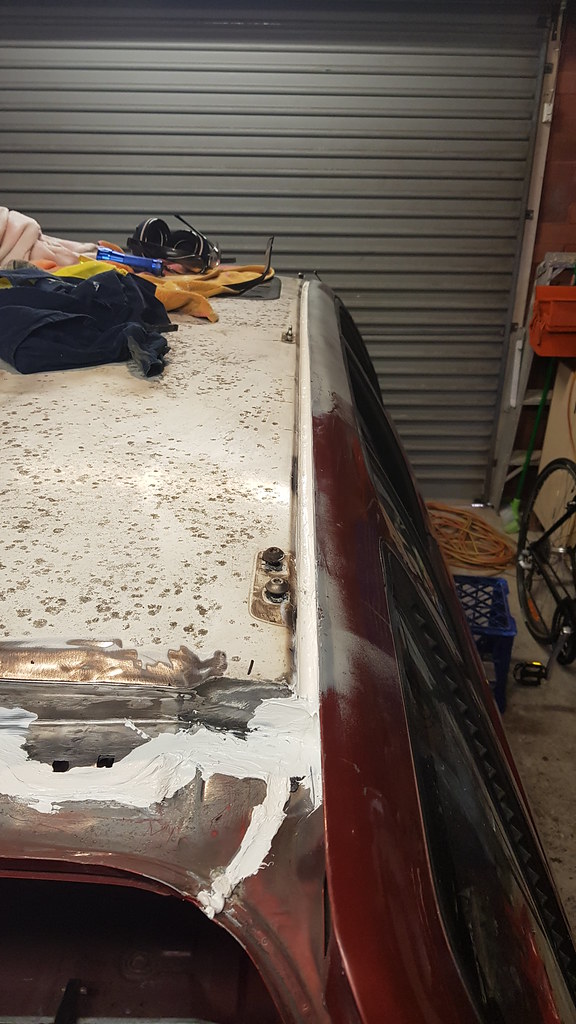
It was a scary process at first, little nervous the weld wouldn't go all the way through/hold but after the first weld drivers side in the middle, I shortly realised this would actually be fairly simple.
I pumped the weld in, holding the welder on the spot weld location and moved it around, trying to get a lot of heat into it so it would sink through all the layers to the bottom. Went around the roof with dad holding down the roof skin next to each spot weld with a flat head and yeah, its done!
Beers were cracked during the process and after when completed, to finally have it welded in is so satisfying, the roof has been off the car for quite a few months, now with it back on I can move the car around and try to start it/drive it!
I do still need to grind down the welds and prep it for body sealant, also need to weld the 4 tabs in across the front of the roof as you'll see in one of the photos below, but that will be easy. We are very happy with our work, considering we have never done something like this, to see the roof sitting there now is a good feeling. Can't wait to drive this!
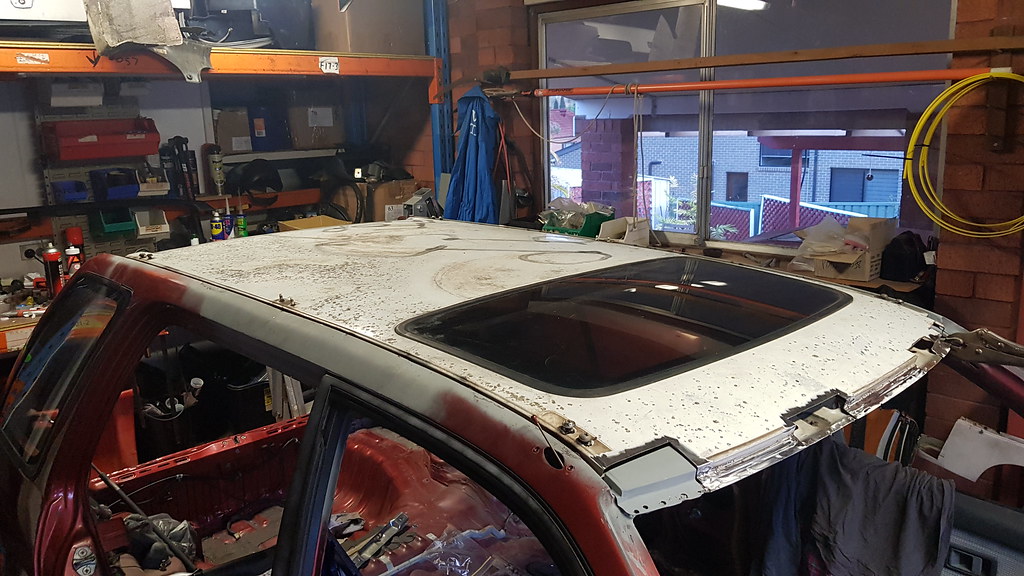
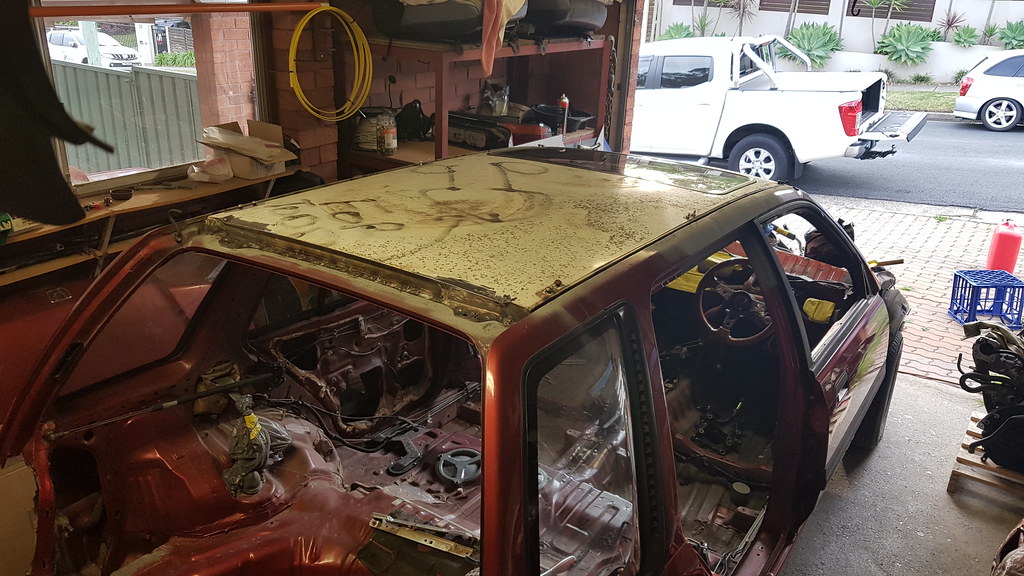
With this done we placed the roof skin onto the car, bolted in the sunroof and the factory roof racks as well. We did this as the sunroof and roof racks would allow use to position the roof to where it should sit, as if it's welded in the incorrect position the sunroof won't line up, along with things like the windscreen etc
With this sorted we lifted the rear of the roof skin to lay down some sealant, from factory theres an expanding foam placed here to hold the roof skin down to the back of the chassis, just in front of the boot hinges.
Wasn't sure where to get this expanding foam, to be honest I didn't really look but decided to go ahead with some Sika automotive sealant, she'll be right. The roof was then placed back into position and everything realigned, ready for welding.
It was a scary process at first, little nervous the weld wouldn't go all the way through/hold but after the first weld drivers side in the middle, I shortly realised this would actually be fairly simple.
I pumped the weld in, holding the welder on the spot weld location and moved it around, trying to get a lot of heat into it so it would sink through all the layers to the bottom. Went around the roof with dad holding down the roof skin next to each spot weld with a flat head and yeah, its done!
Beers were cracked during the process and after when completed, to finally have it welded in is so satisfying, the roof has been off the car for quite a few months, now with it back on I can move the car around and try to start it/drive it!
I do still need to grind down the welds and prep it for body sealant, also need to weld the 4 tabs in across the front of the roof as you'll see in one of the photos below, but that will be easy. We are very happy with our work, considering we have never done something like this, to see the roof sitting there now is a good feeling. Can't wait to drive this!
Last edited by afx31; 02-13-2023 at 02:31 AM.
10-23-2018, 01:58 AM
#67
Honda-Tech Member
Thread Starter
Been a few weeks since last update, been very busy with uni assignments and now studying for my final exams next week. 2 weeks ago we grinded down the spot welds around the roof. Also went ahead and welded in the 2 corners on the front of the roof. Once all this was down, grinded back smooth we then went ahead and applied the sealant to finally finish off the roof install. I bought 2 tubes but only needed 1, can't complain with spares! So happy the roof is now finally sealed, it means I can try to start the car for the first time and drive it!
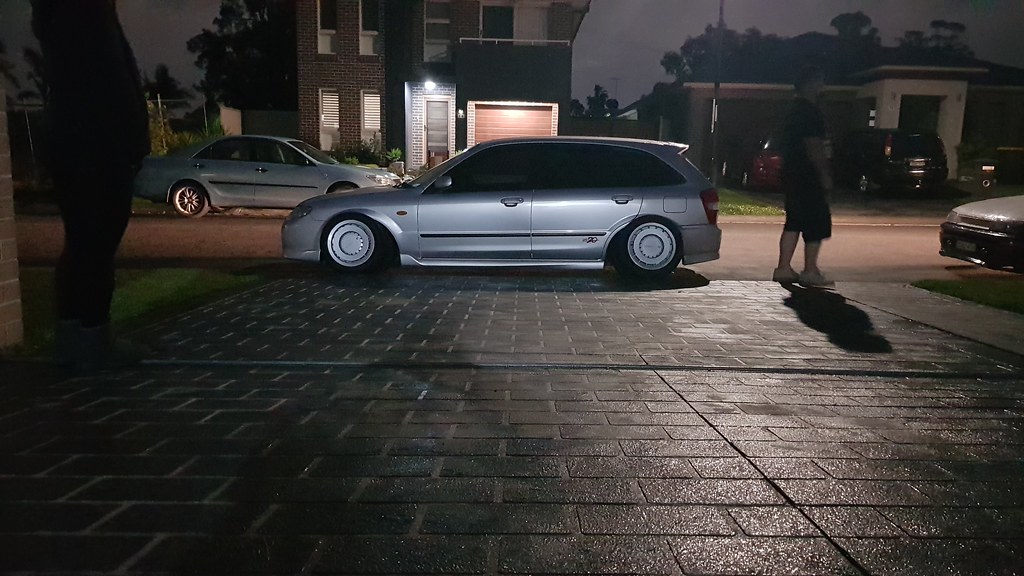
My buddy Kev got my old RS3's from my track wheels on my ED hatch mounted onto the zender turbos I bought for the wagon. Can say they would look dope on the daily SP20!

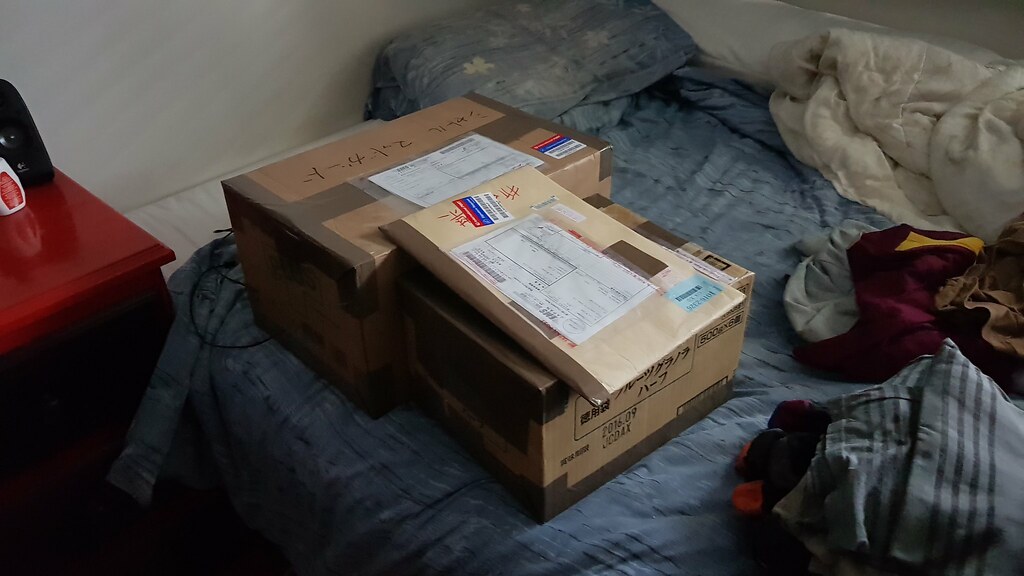
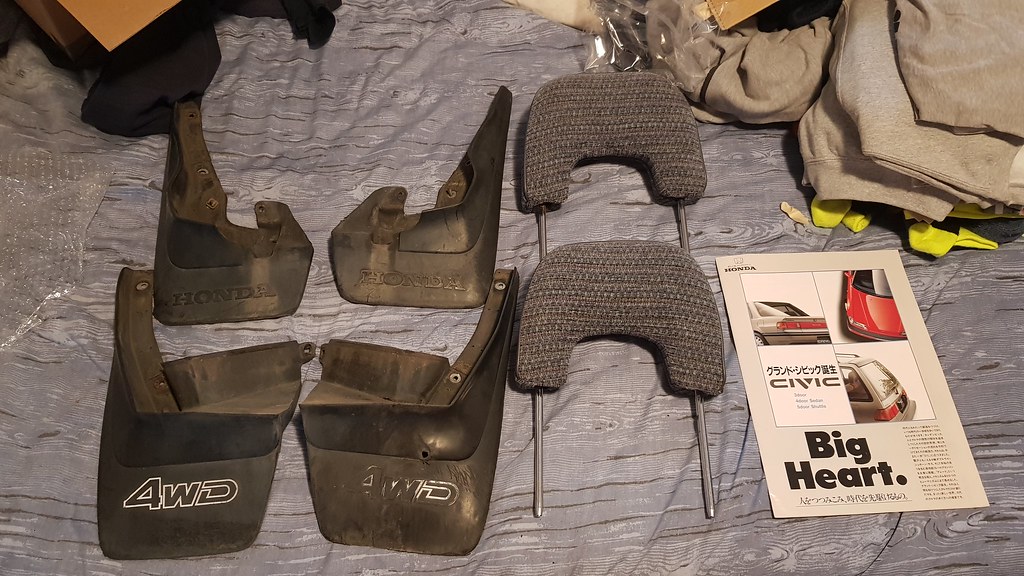
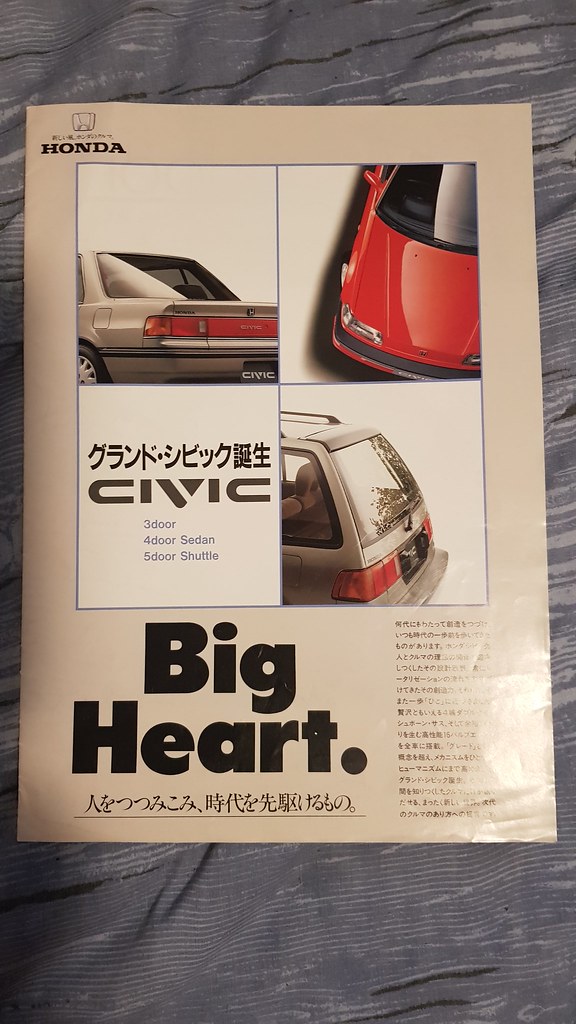
Annnnd I came home today to these 3 parcels from Japan, yes I've been doing some Yahoo Auctions shopping lately! 4WD mud flaps, beagle front head rests and another catalogue to add to the collection!


My buddy Kev got my old RS3's from my track wheels on my ED hatch mounted onto the zender turbos I bought for the wagon. Can say they would look dope on the daily SP20!
Annnnd I came home today to these 3 parcels from Japan, yes I've been doing some Yahoo Auctions shopping lately! 4WD mud flaps, beagle front head rests and another catalogue to add to the collection!
11-12-2018, 02:46 AM
#68
Honda-Tech Member
Thread Starter
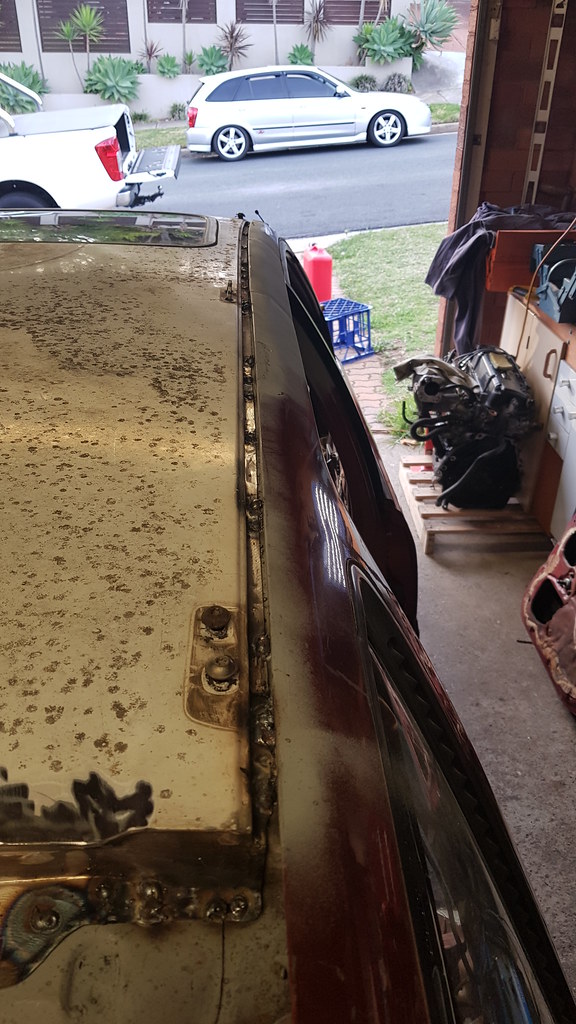
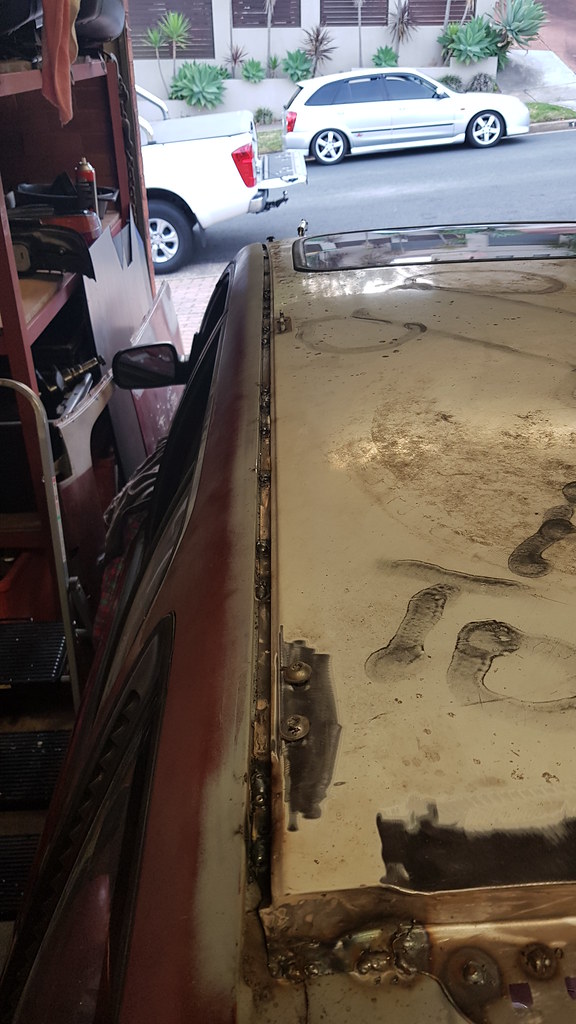
So not much has happened on the wago as the past 3 weeks was the end of uni semester and then exams straight away, so I was jam packed finishing off assignments/studying for exams. With uni semester & exams completed, it's all guns blazing on the wagon.
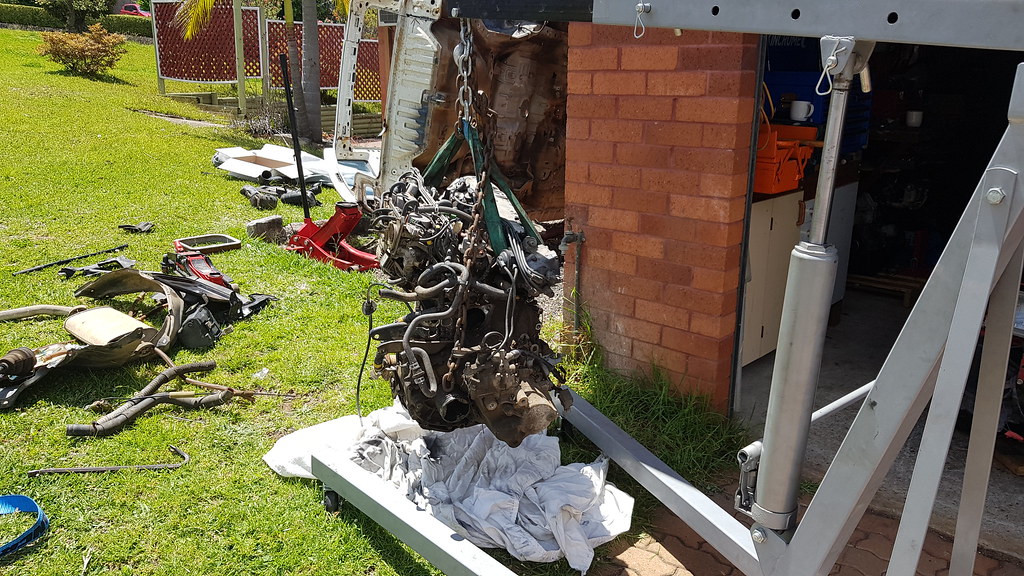
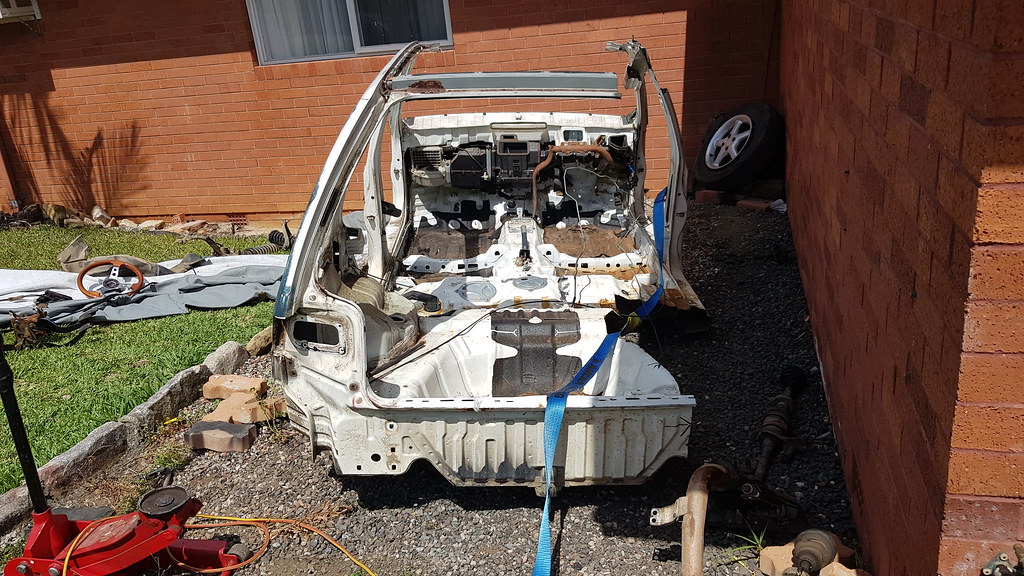
First off however I needed to sort out the parts wagon so we can scrap it and get it out of the way. The motor was unbolted and resting on chassis, unbolted a few brackets and then.. just lifted the car over the motor lol..
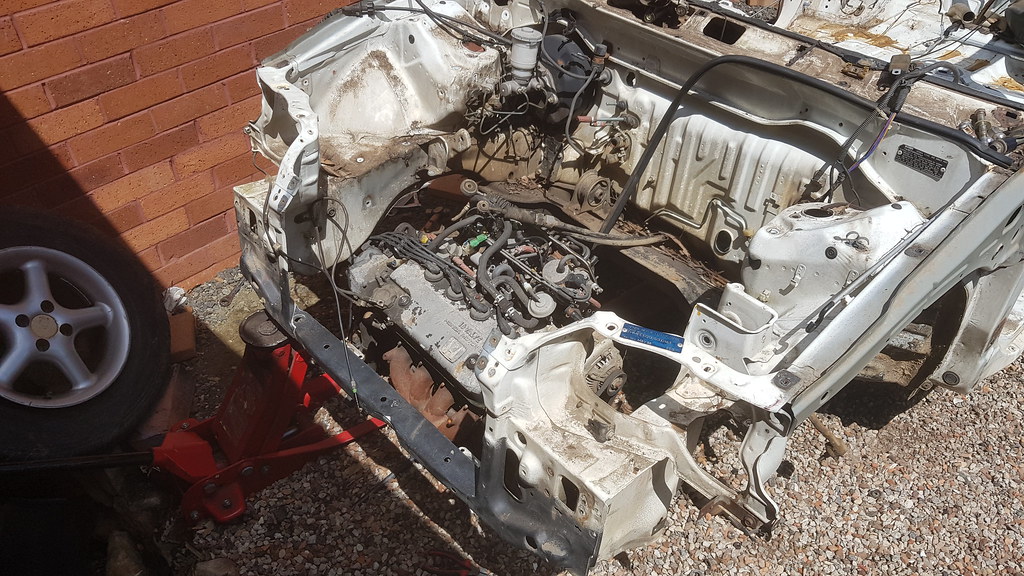

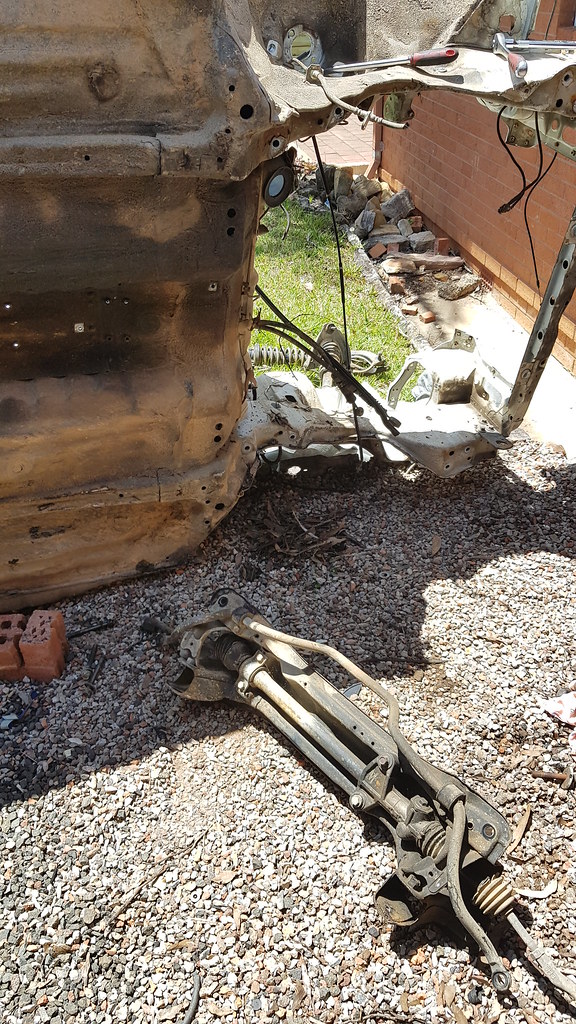
Then dragged the motor out and onto the crane to drop the box as I'll keep it for spares, rare RT4WD box. Also it's quite easy to drop the subframe/steering rack assembly with the car like this, should do more often on other cars..
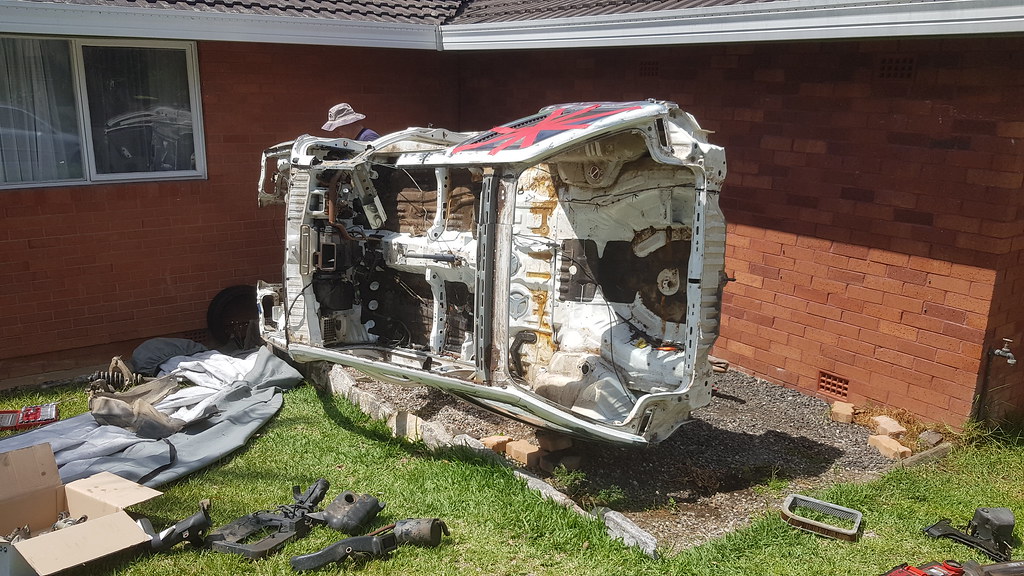
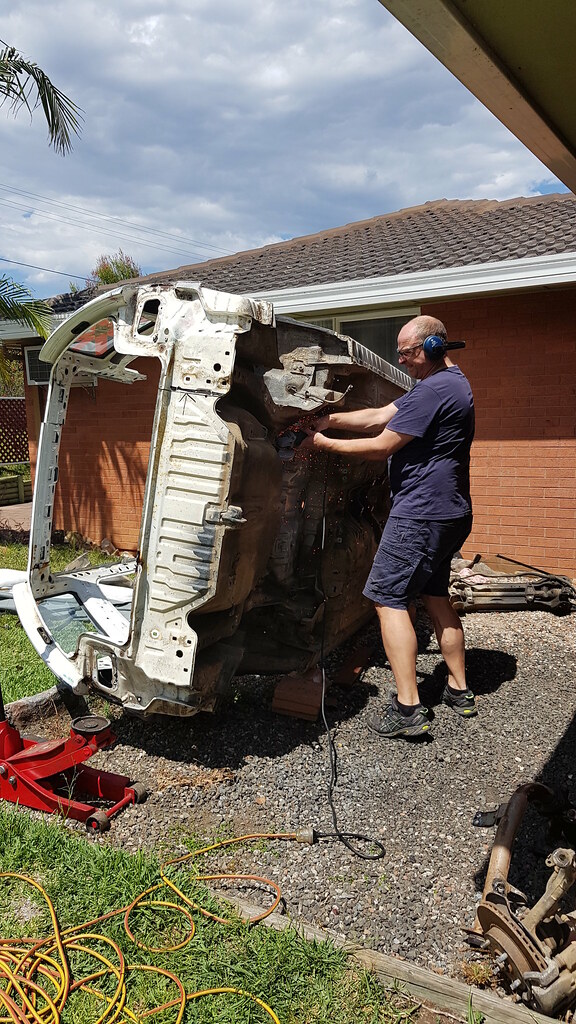
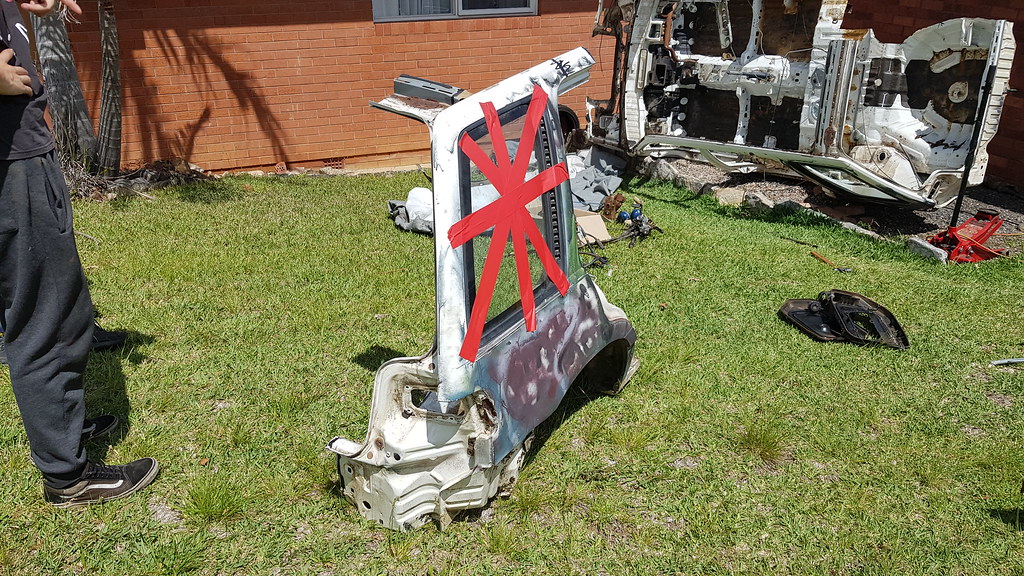
A fellow wagon owner in VIC has a spare wagon which took a hit to the drivers rear corner, for him to source that section would be impossible as these cars are so hard to find, luckily I have this scrapping wagon. Weather was too hot for me so I let mi old man go ham with the grinder.
Just waiting for a mate..
And that was that. Got some other random bits of metal lying around, the motor that came in this and a broken gearbox or two and chucked it all in, ready for scrap later this week. Next Saturday I'll hopefully do a little bit of work on the wagon however Sunday I have a track day at Wakefield so no wago on that day. I'm really going to push for all rust to be repaired by the time I go to Japan next January 8th, as when I'm back I want to register it and drive it, even with the paint as is.
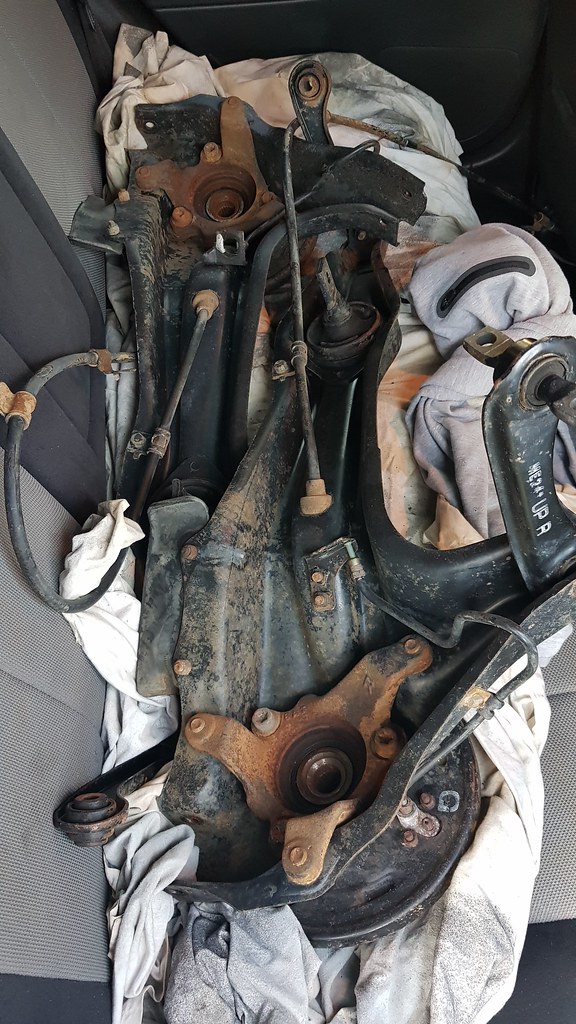
Also picked up some spare RT4WD rear trailing arms tonight off the guy I bought the scrap wagon off, he decided he didn't need them no more and yeah.. I like spares.
First off however I needed to sort out the parts wagon so we can scrap it and get it out of the way. The motor was unbolted and resting on chassis, unbolted a few brackets and then.. just lifted the car over the motor lol..
Then dragged the motor out and onto the crane to drop the box as I'll keep it for spares, rare RT4WD box. Also it's quite easy to drop the subframe/steering rack assembly with the car like this, should do more often on other cars..
A fellow wagon owner in VIC has a spare wagon which took a hit to the drivers rear corner, for him to source that section would be impossible as these cars are so hard to find, luckily I have this scrapping wagon. Weather was too hot for me so I let mi old man go ham with the grinder.
Just waiting for a mate..
And that was that. Got some other random bits of metal lying around, the motor that came in this and a broken gearbox or two and chucked it all in, ready for scrap later this week. Next Saturday I'll hopefully do a little bit of work on the wagon however Sunday I have a track day at Wakefield so no wago on that day. I'm really going to push for all rust to be repaired by the time I go to Japan next January 8th, as when I'm back I want to register it and drive it, even with the paint as is.
Also picked up some spare RT4WD rear trailing arms tonight off the guy I bought the scrap wagon off, he decided he didn't need them no more and yeah.. I like spares.
Last edited by afx31; 02-14-2023 at 10:11 PM.
11-12-2018, 02:01 PM
#69
EFB055
The fact that he parted them to begin with was dumb. What does he have left now? The rear diff / prop shaft? When is he selling those? haha. Those trailing arms are so much different to my sedan ones. I think because mine's an earlier model. All the bolt on section at the back of the hub is all welded sheetmetal on mine.
I didn't realise it came with the 4wd box though that's cool, neat that dutch can use the panel too!
If you can be bothered, those broken gearboxes you're getting rid of, the input shafts make a perfect clutch alignment tool.
I didn't realise it came with the 4wd box though that's cool, neat that dutch can use the panel too!
If you can be bothered, those broken gearboxes you're getting rid of, the input shafts make a perfect clutch alignment tool.
11-12-2018, 03:03 PM
#70
Honda-Tech Member
Thread Starter
The fact that he parted them to begin with was dumb. What does he have left now? The rear diff / prop shaft? When is he selling those? haha. Those trailing arms are so much different to my sedan ones. I think because mine's an earlier model. All the bolt on section at the back of the hub is all welded sheetmetal on mine.
I didn't realise it came with the 4wd box though that's cool, neat that dutch can use the panel too!
If you can be bothered, those broken gearboxes you're getting rid of, the input shafts make a perfect clutch alignment tool.
I didn't realise it came with the 4wd box though that's cool, neat that dutch can use the panel too!
If you can be bothered, those broken gearboxes you're getting rid of, the input shafts make a perfect clutch alignment tool.
Interesting.. wonder why they made another design, guess more beefier?
Yeh he wasnt bothered to drop box, maybe ill look into building it on the side
Dont really have time to rip them apart. Hoepfully scrap it all tomorrow and bring the sedan back Saturday
12-04-2018, 08:07 PM
#71
Honda-Tech Member
Thread Starter
So got some progress done last weekend, not a lot but it has directed our future steps with what to do.
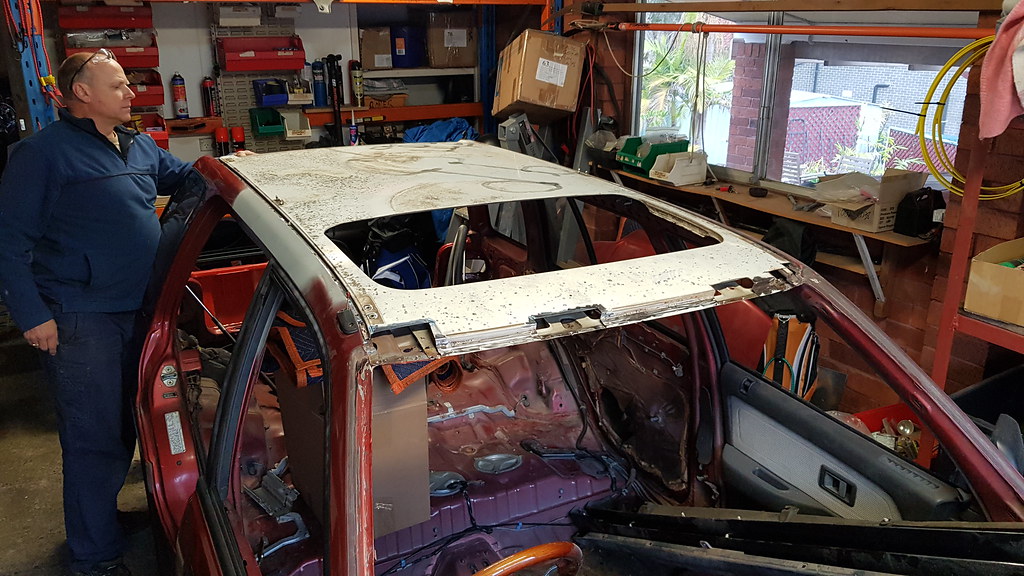
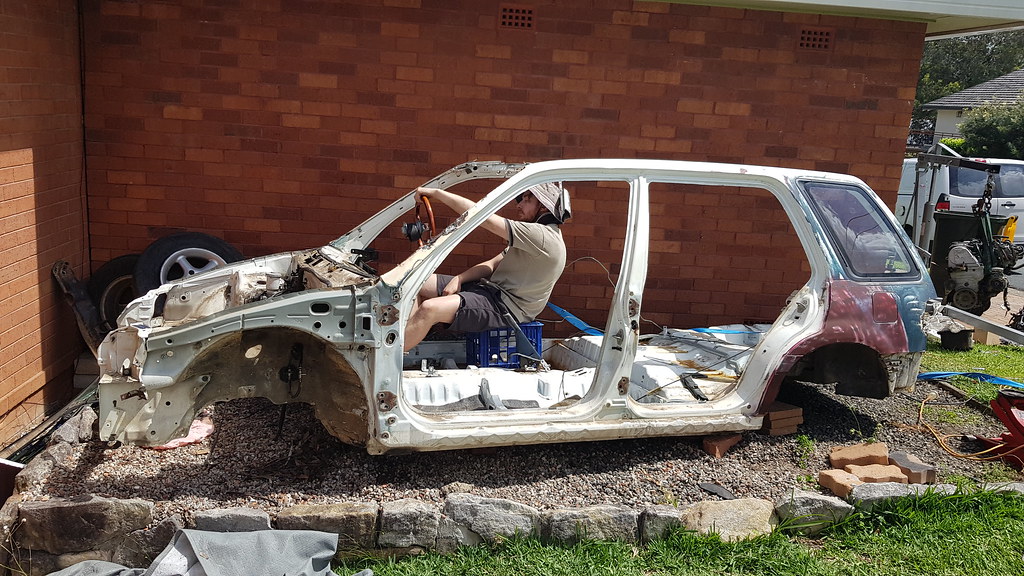
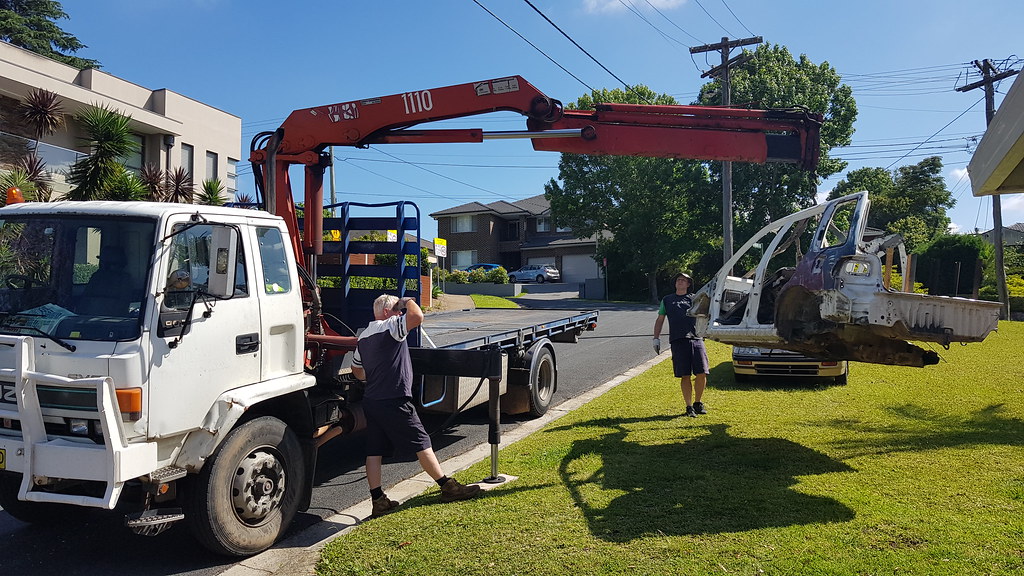
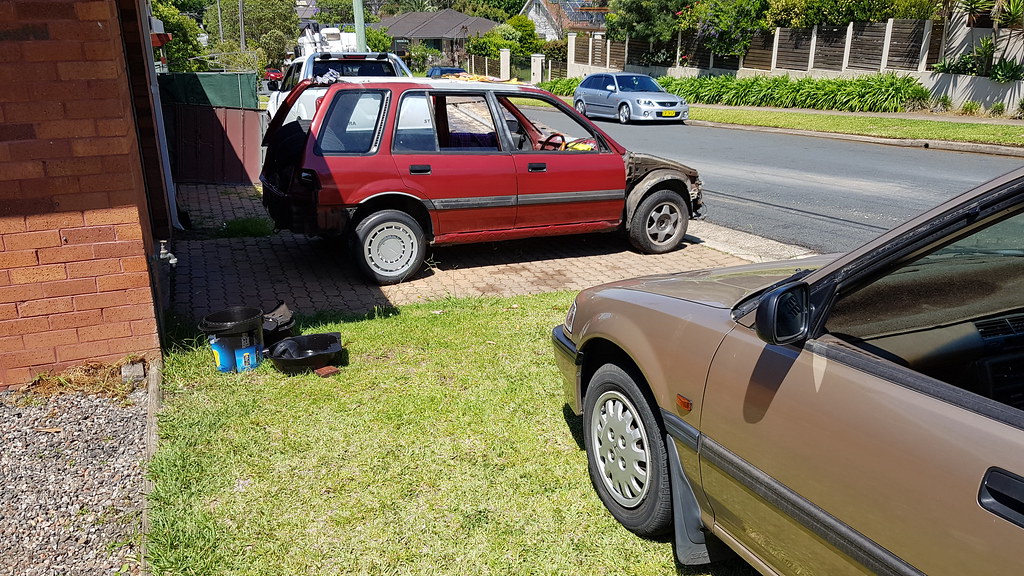
First off to start the Saturday was to get rid of the scrap wagon, had our new pommy scrapper come pick it up. Now the sedan can go back to its resting spot on the gravel next to the garage. The wagon then finally came out of the garage, it's been quite a while since it's moved, as with the roof off it's not ideal to move it around, the chassis could possibly flex out of alignment.
I brought it out to put on my spare Honda Fat 5's so I could sell the wheels which came on the wagon for some extra spending money for Japan at the start of 2019!
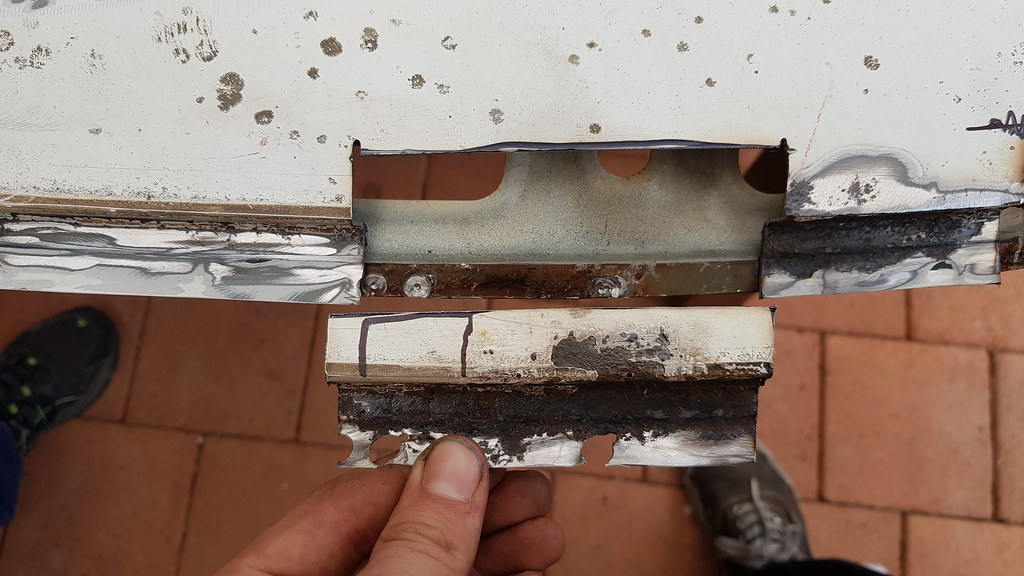
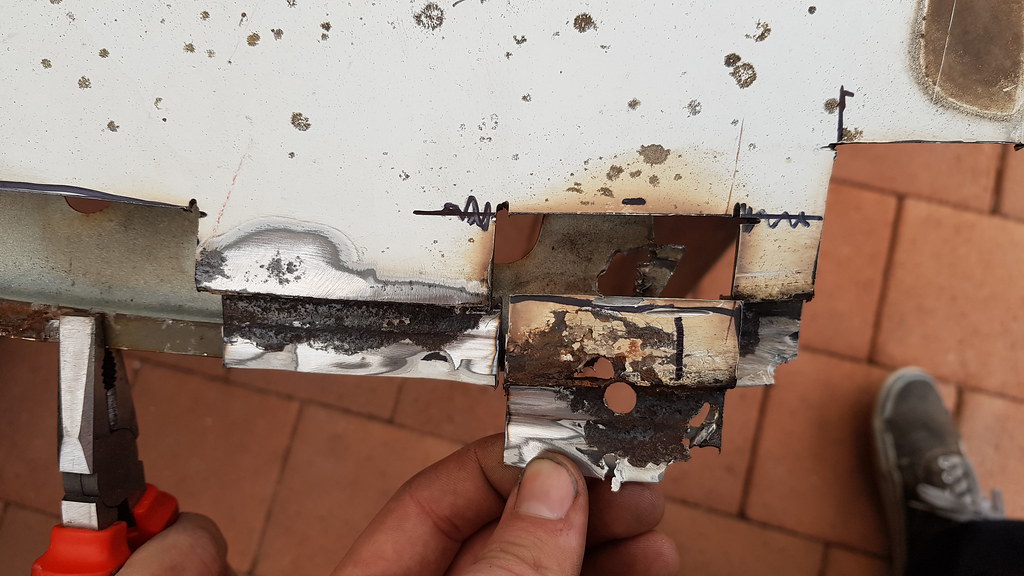
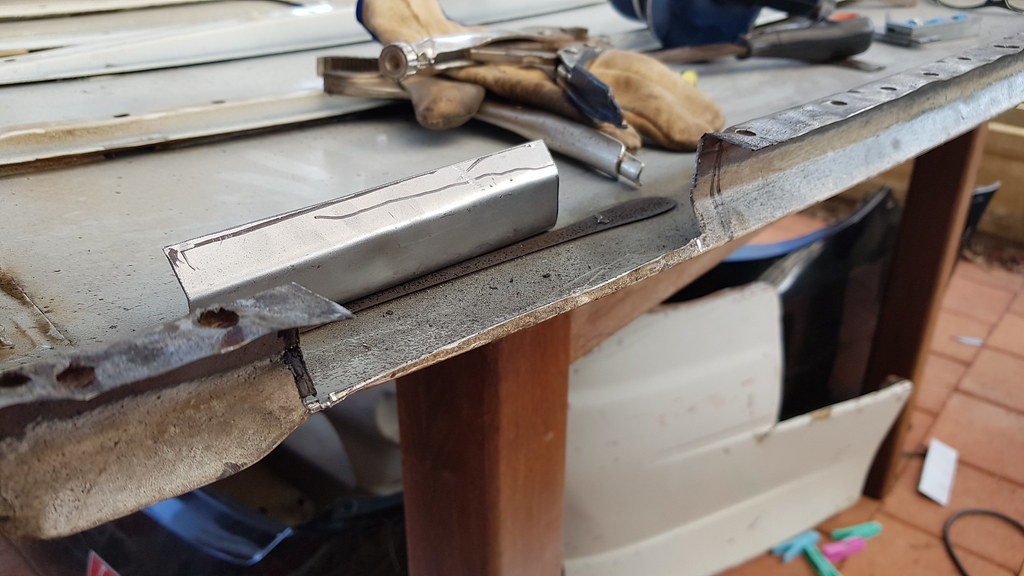
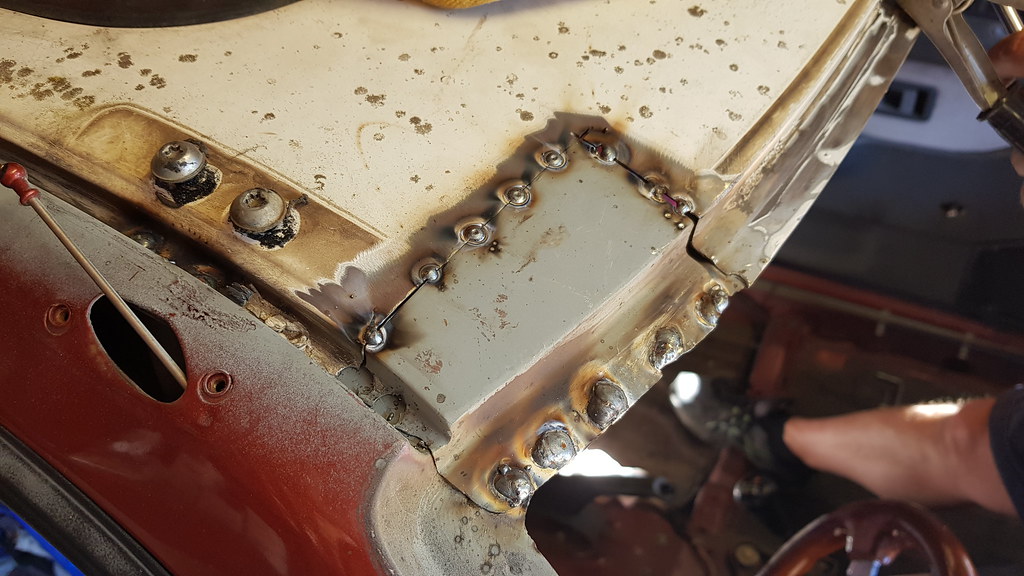
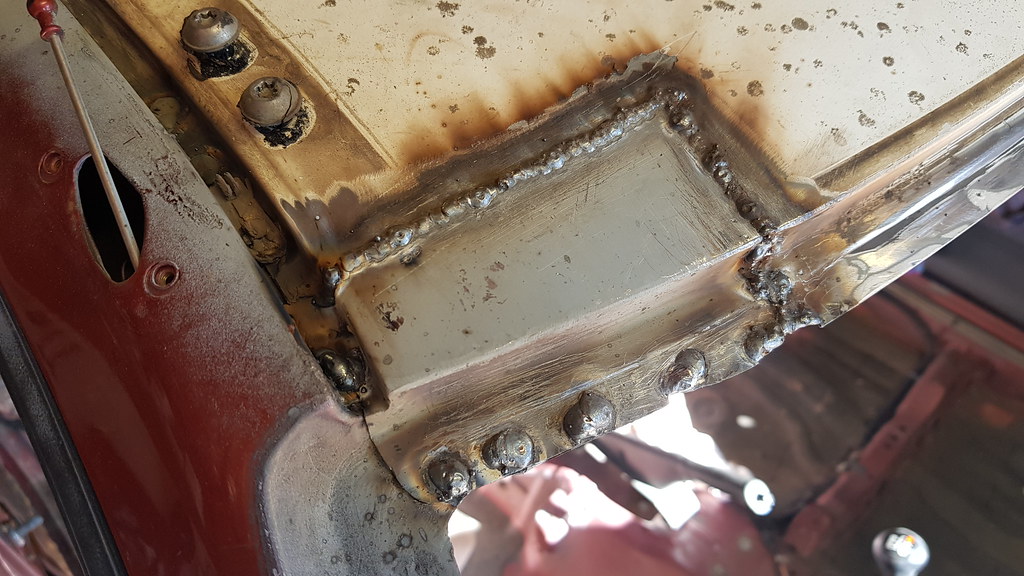
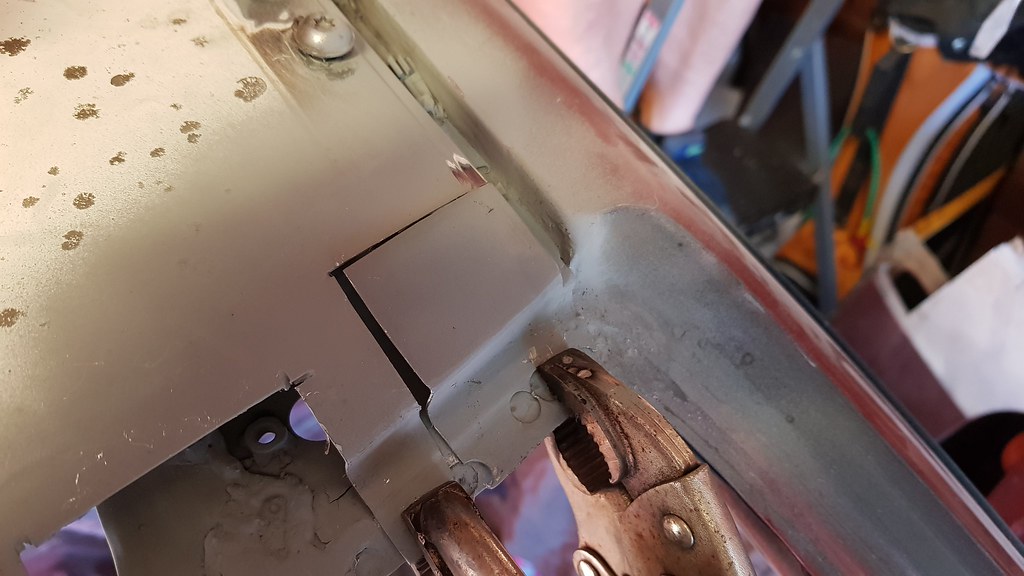
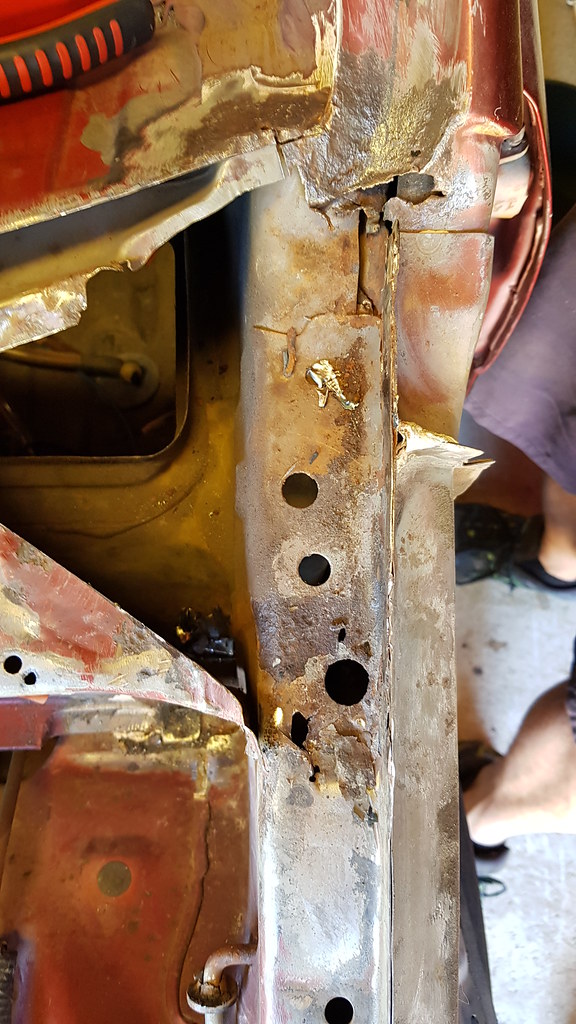
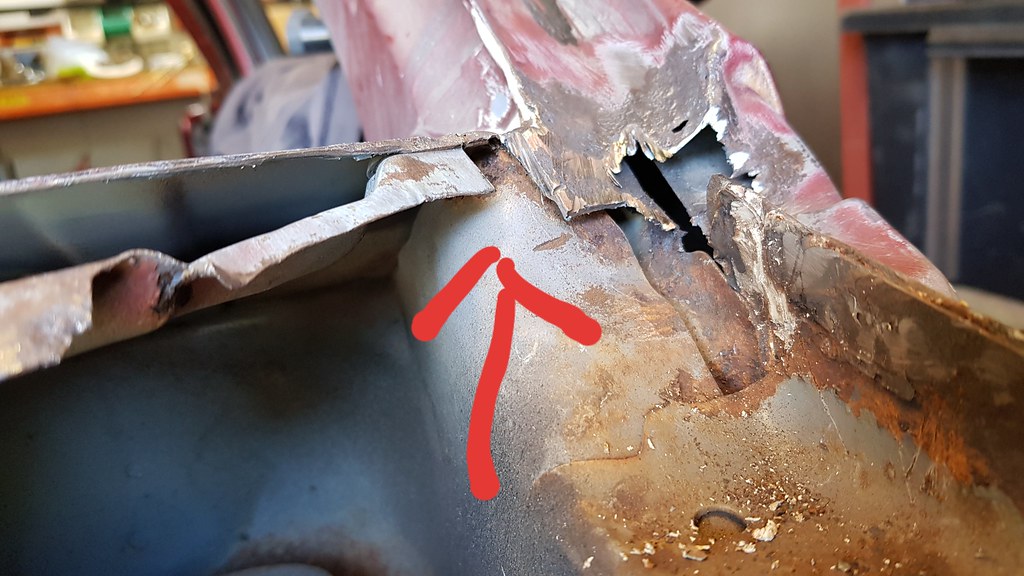
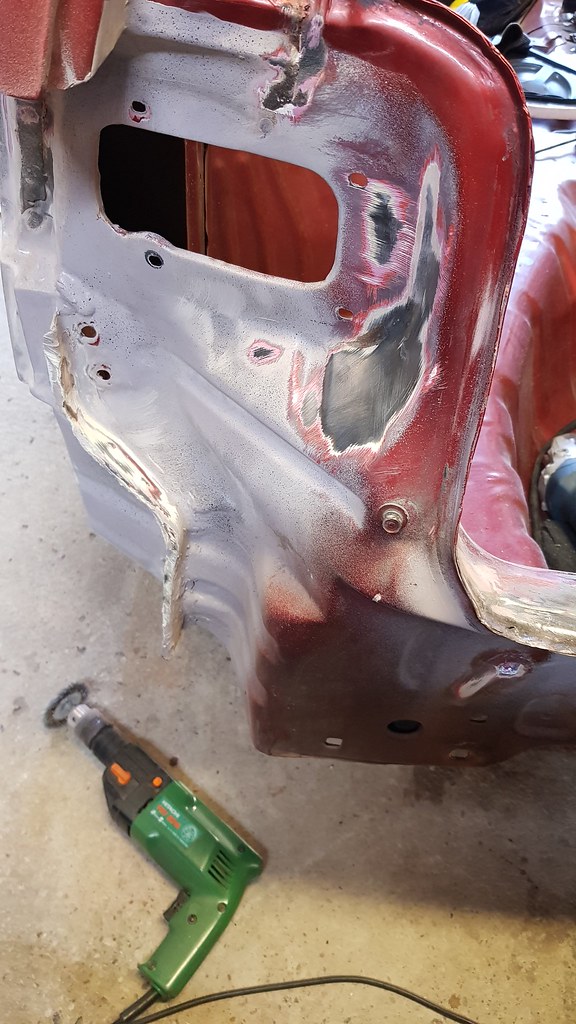
Here is a bit of ramble in regards to our next steps. It was time to tackle the rust spots under the windscreen on the crowl. In the photo below you'll see what we have already cut out with a piece still there where the hinges for the bonnet bolt down to. There is usually a think layer over this to cover it, which was rusted away completely, as in it was a huge hole when we got it. You can see on the top of the photo, where it would be the bottom corner of the windscreen, passenger side that there is still pitted metal. Underneath that there is rust of a lower layer of metal, however the piece on top is quite solid still which we didn't want to cut.
However, all rust needs to come out, so what we plan to do is cut off that top pitted layer completely and replace, it will be tricky trying to fab up a piece to the correct shape, especially as its where the windscreen lays. It needs to be spot on. At the bottom corner of where the engine bay is behind the shock tower is also rust from wheres its run down on top, you can kinda see it in the photos. This too needs to be cut open and replaced.

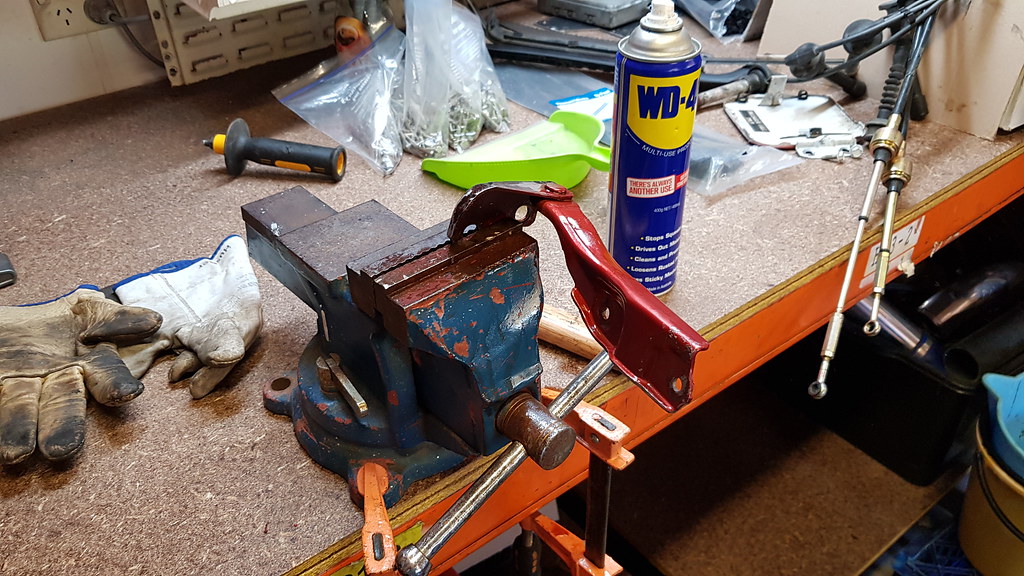
To finish off the day I soaked the hinges in WD-40 as they were seized up and kept moving back and forth until they freely moved, and started wire brushing away the rear passenger corner. It was covered in primer, which contained a lot of body filler under neath, not sure why. Previous owner had mentioned there was rust repairs done there (still rust there from incorrect rust repairs) however the filler makes me a little confused as its over perfeclty fine metal... oh well
So yeah we have quite a fair bit of work for these sections. Monday night I went over to my fathers (where the wagon is stored) for dinner and so we could just look into what needs to be done with this front windscreen area.
My dad suggested we remove the motor was well so we can stand in the engine bay especially for those corners behind the shock tower, just for some ease of movement and to confirm any rust in the engine bay lower down.
Saturday I will buy some new battery terminals from SuperCheap Auto and use my hatch battery to try start it. I want to jack the wago up and test the 4WD system to ensure it works, would also be cool to see if the wago even starts as I havn't tried that since I've bought it. Stay tuned!
First off to start the Saturday was to get rid of the scrap wagon, had our new pommy scrapper come pick it up. Now the sedan can go back to its resting spot on the gravel next to the garage. The wagon then finally came out of the garage, it's been quite a while since it's moved, as with the roof off it's not ideal to move it around, the chassis could possibly flex out of alignment.
I brought it out to put on my spare Honda Fat 5's so I could sell the wheels which came on the wagon for some extra spending money for Japan at the start of 2019!
Here is a bit of ramble in regards to our next steps. It was time to tackle the rust spots under the windscreen on the crowl. In the photo below you'll see what we have already cut out with a piece still there where the hinges for the bonnet bolt down to. There is usually a think layer over this to cover it, which was rusted away completely, as in it was a huge hole when we got it. You can see on the top of the photo, where it would be the bottom corner of the windscreen, passenger side that there is still pitted metal. Underneath that there is rust of a lower layer of metal, however the piece on top is quite solid still which we didn't want to cut.
However, all rust needs to come out, so what we plan to do is cut off that top pitted layer completely and replace, it will be tricky trying to fab up a piece to the correct shape, especially as its where the windscreen lays. It needs to be spot on. At the bottom corner of where the engine bay is behind the shock tower is also rust from wheres its run down on top, you can kinda see it in the photos. This too needs to be cut open and replaced.
To finish off the day I soaked the hinges in WD-40 as they were seized up and kept moving back and forth until they freely moved, and started wire brushing away the rear passenger corner. It was covered in primer, which contained a lot of body filler under neath, not sure why. Previous owner had mentioned there was rust repairs done there (still rust there from incorrect rust repairs) however the filler makes me a little confused as its over perfeclty fine metal... oh well
So yeah we have quite a fair bit of work for these sections. Monday night I went over to my fathers (where the wagon is stored) for dinner and so we could just look into what needs to be done with this front windscreen area.
My dad suggested we remove the motor was well so we can stand in the engine bay especially for those corners behind the shock tower, just for some ease of movement and to confirm any rust in the engine bay lower down.
Saturday I will buy some new battery terminals from SuperCheap Auto and use my hatch battery to try start it. I want to jack the wago up and test the 4WD system to ensure it works, would also be cool to see if the wago even starts as I havn't tried that since I've bought it. Stay tuned!
Last edited by afx31; 02-14-2023 at 10:32 PM.
12-04-2018, 10:49 PM
#73
Honda-Tech Member
Thread Starter
12-05-2018, 03:27 PM
#74
EFB055
It'll work, you'll be sweet. Remember to check the lever isn't in FWD mode if you notice the prop shaft not turning with the fronts.
Don't sweat too much about getting the metal perfect under the windshield, i was pretty amazed at how thick the silicone is that they use to glue in the windshield. There's loads of room for error, and i'm sure you'll get it roughly in the right spot.
Don't sweat too much about getting the metal perfect under the windshield, i was pretty amazed at how thick the silicone is that they use to glue in the windshield. There's loads of room for error, and i'm sure you'll get it roughly in the right spot.
12-05-2018, 06:06 PM
#75
Honda-Tech Member
Thread Starter
It'll work, you'll be sweet. Remember to check the lever isn't in FWD mode if you notice the prop shaft not turning with the fronts.
Don't sweat too much about getting the metal perfect under the windshield, i was pretty amazed at how thick the silicone is that they use to glue in the windshield. There's loads of room for error, and i'm sure you'll get it roughly in the right spot.
Don't sweat too much about getting the metal perfect under the windshield, i was pretty amazed at how thick the silicone is that they use to glue in the windshield. There's loads of room for error, and i'm sure you'll get it roughly in the right spot.
Yeh I did have a feeling theres some room as there would be the silicone, still good to get it as close as possible