
THE WAGO!


 05-30-2018, 01:38 PM
#27
EFB055
Yeah the sedan is pre cool. Old bloke from top of the street came down to have a look (CEO Marketing Manager for Achilles Tyres) and he was amazed how mint it was,let him sit in it and all. I think slammed on some nice wheels and thats that for the sedan. Or keep it stock.
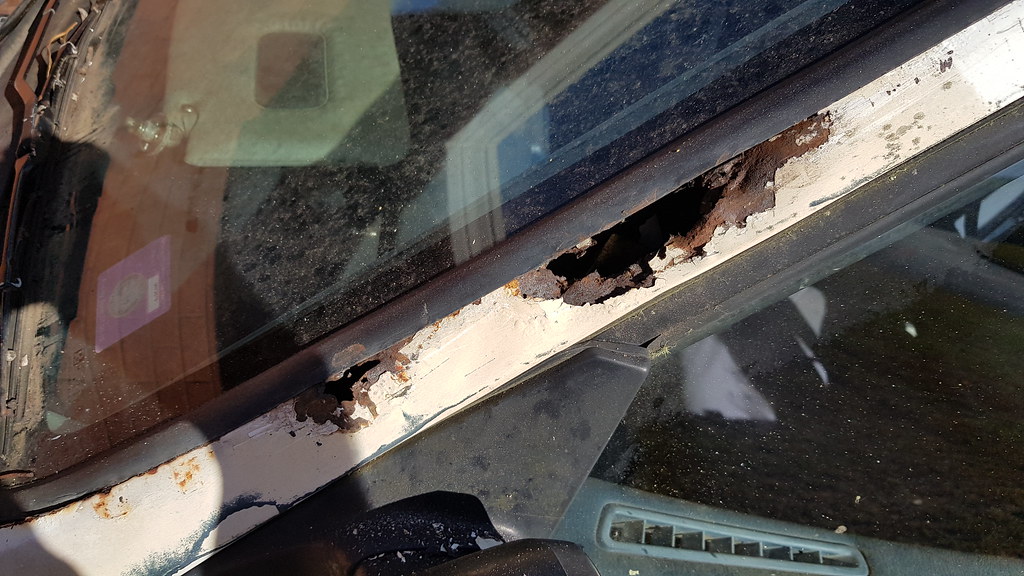
The sunroof didnt cause any rust, rust is only on the sides. I'd say it is the cause of the rust on that side of the roof, the only other rust is each corner of the roof, surprisingly where previous owner had the roof rack holes welded in. You can see in the photos above of the poor job.
Haven't seen it however I'll look now.
05-30-2018, 05:34 PM
#28
Honda-Tech Member
Thread Starter
05-30-2018, 05:35 PM
#29
Honda-Tech Member
Thread Starter
06-26-2018, 02:56 AM
#30
Honda-Tech Member
Thread Starter
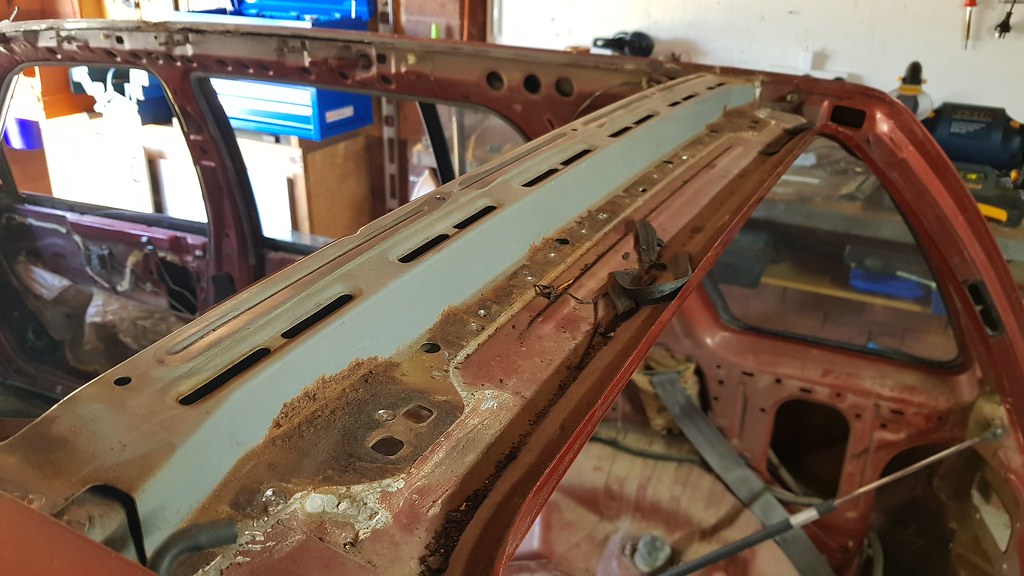
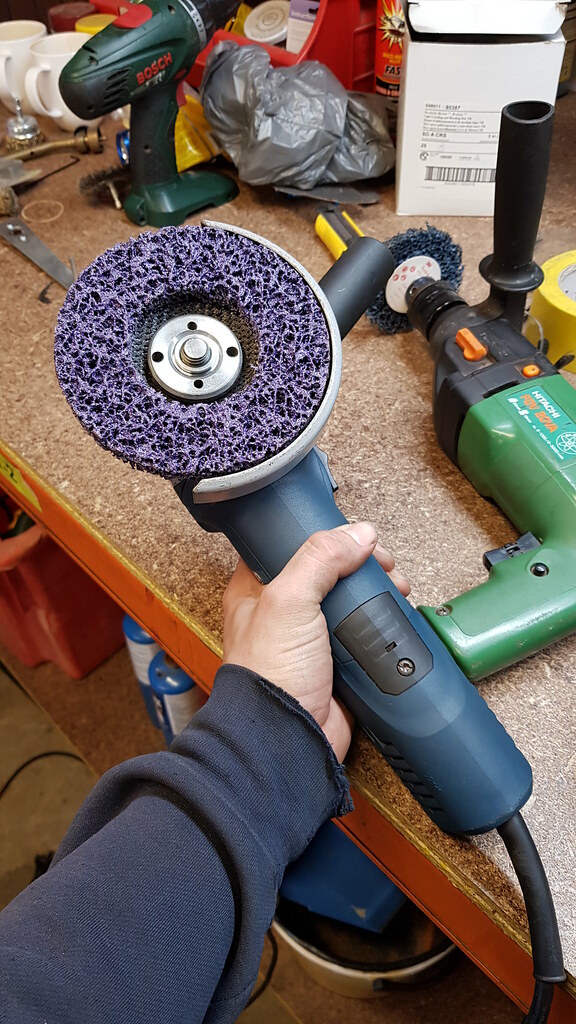
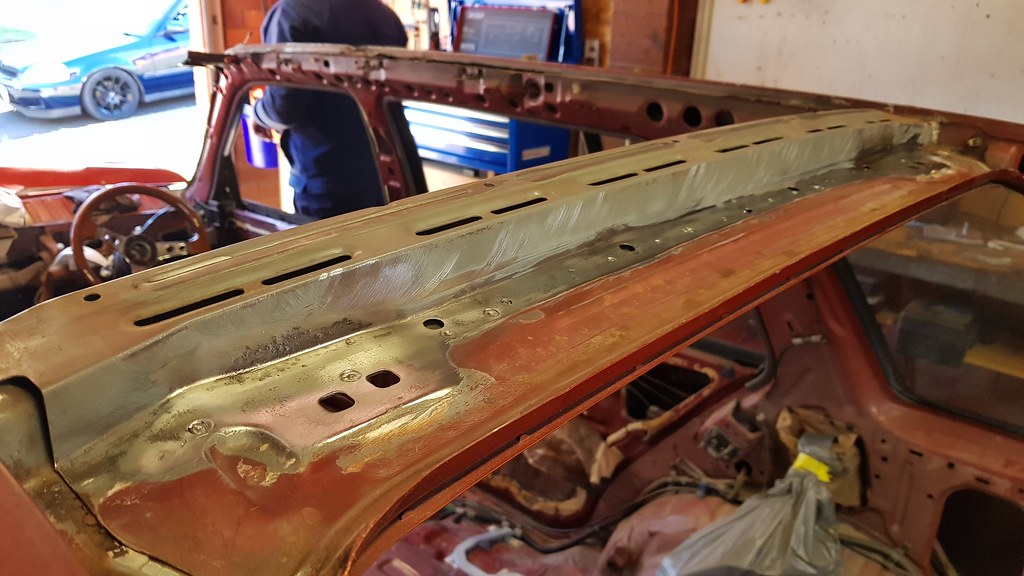
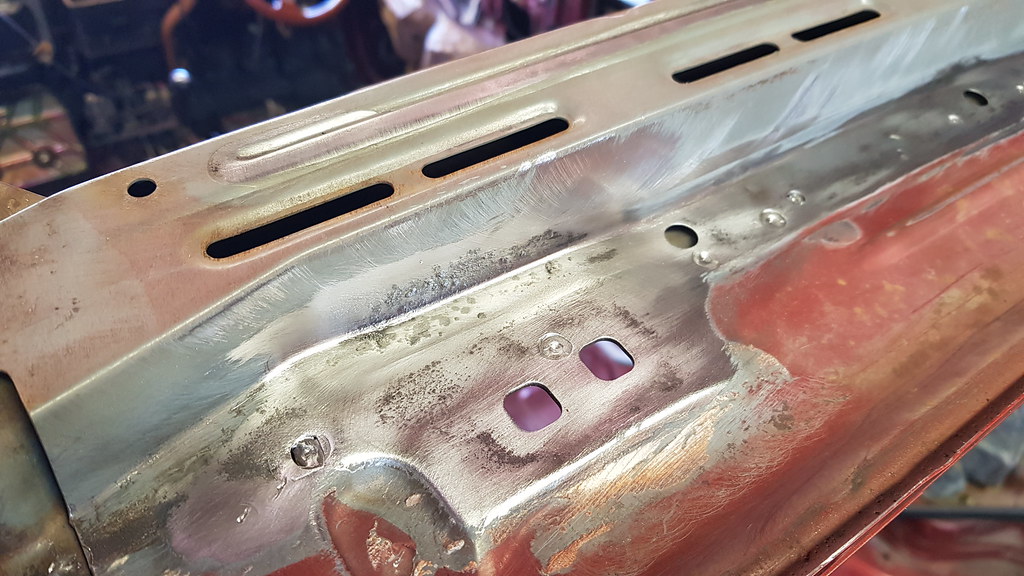
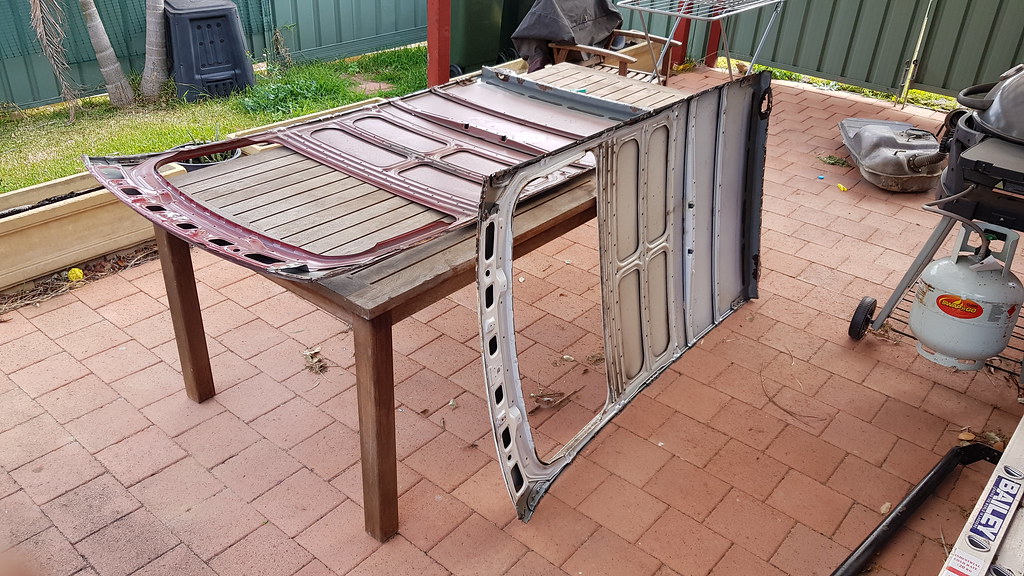
Alrighty time to start tackling the rust on this roof. Uni exams are nearly done so I was able to fit in some time, one more exam this Friday and then freedom! ... until next semester.. My dad runs a warehouse whom supply 3M products and other products to other warehouses like DHL/TOLL, Quantas and other buinesses, he brought home these rust remove wheels, they are bloody awesome! Got rid of heaps of surface rust from around the chassis roof where the roof skin sits on. I also cut out the remaining rust on the drivers side. Once it was all off from these grinding wheels and also some wire brushing, I wiped on some WD-40 as a panel beater mate informed me to do, so the clear metal won't corrode again. Then I started working on the roof skin side, passenger side came clean very quickly however the rust got under the webbing supports, so they will need to come off as well.
 06-26-2018, 04:23 AM
#32
Honda-Tech Member
Thread Starter
06-26-2018, 12:54 PM
#34
Honda-Tech Member
Thread Starter
06-26-2018, 02:48 PM
#35
EFB055
06-27-2018, 03:17 AM
#36
Honda-Tech Member
Thread Starter
I'll see.. As said it's just sitting outside. A close mate really wants it, his a bit older (39) and likes how it's a true grandpa car.. He needs the nugget life for when his R32 GTR breaks down lel.. If not I'll just keep it I guess, maybe get a tent and put it over it
07-08-2018, 02:59 AM
#37
Honda-Tech Member
Thread Starter
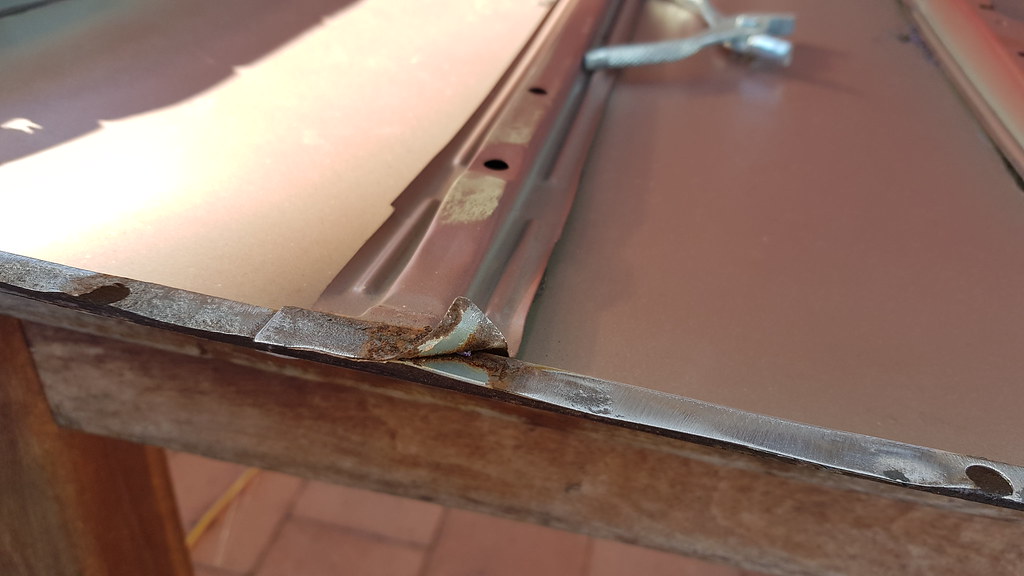
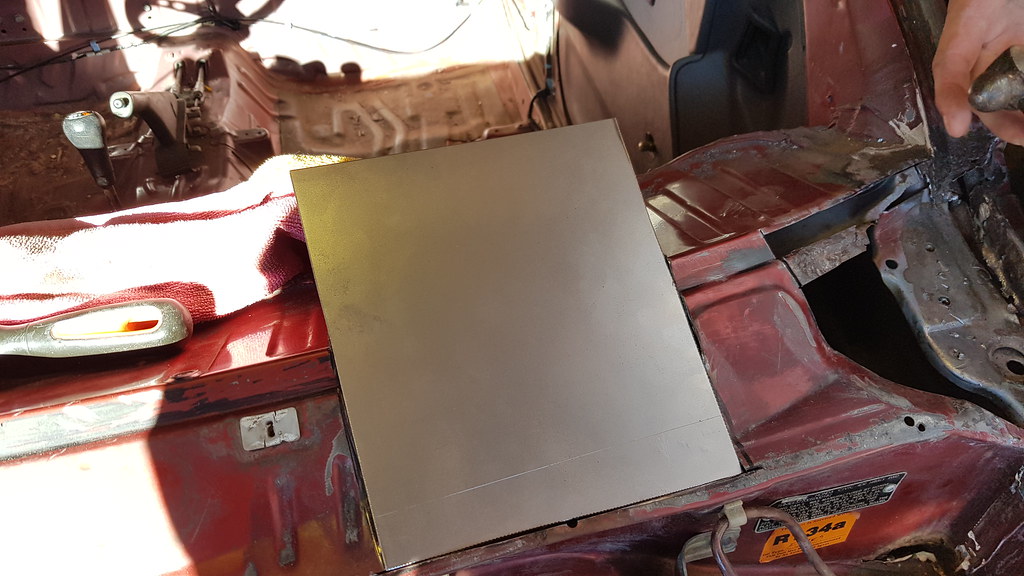
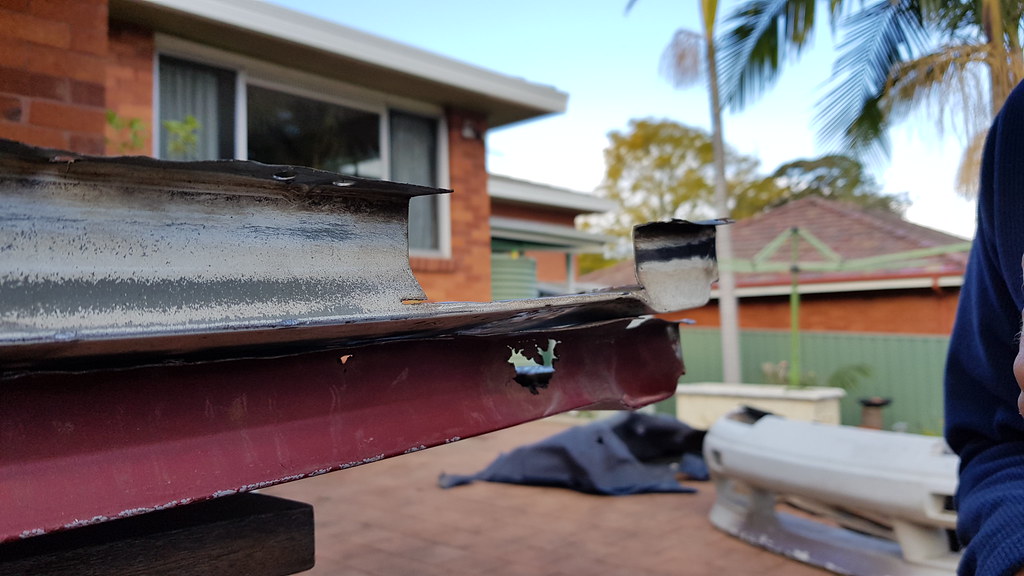
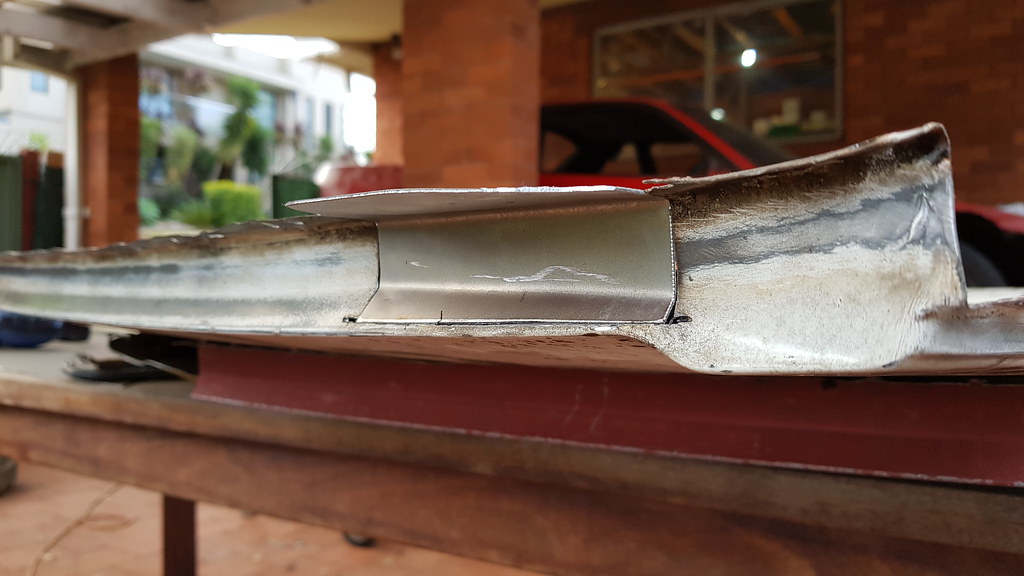
Progress time! Got a nice big 1200 x 1200 piece of mild steel sheet which we will use to patch up all the rusty goodness. Started with the chassis side on the roof section, a few posts above we cut ut the bad rusty bits as the rest was only surface rust. We needed to replace a smaller section on the lower piece (chassis side theres 2 layers, with the roof skin then sitting on top of that) so we cut the smaller piece accordingly. Next we then had the upper piece which ran from the back of the rear door to the front windscreen. Towards the front the chassis actually curves outwards (can see in the pic below) so we decided to do it in 2 pieces, can see faint scribe markings where we cut it on a curve to follow the shape required. Nothing actually got welded in today, remembered last night at midnight I needed weld through primer and the shops that would stock it were shut today (Sunday) so welding will occur next weekend.
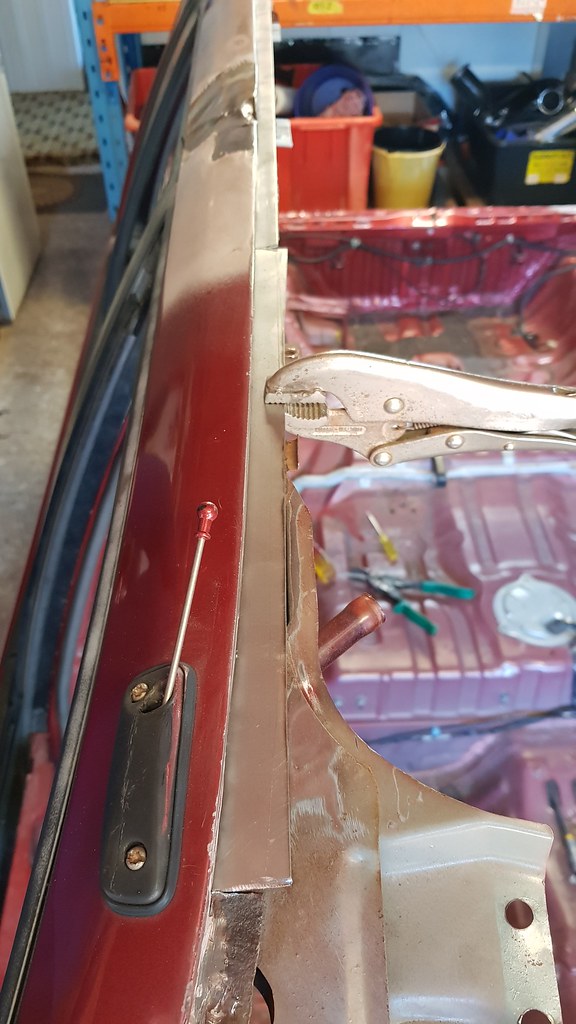
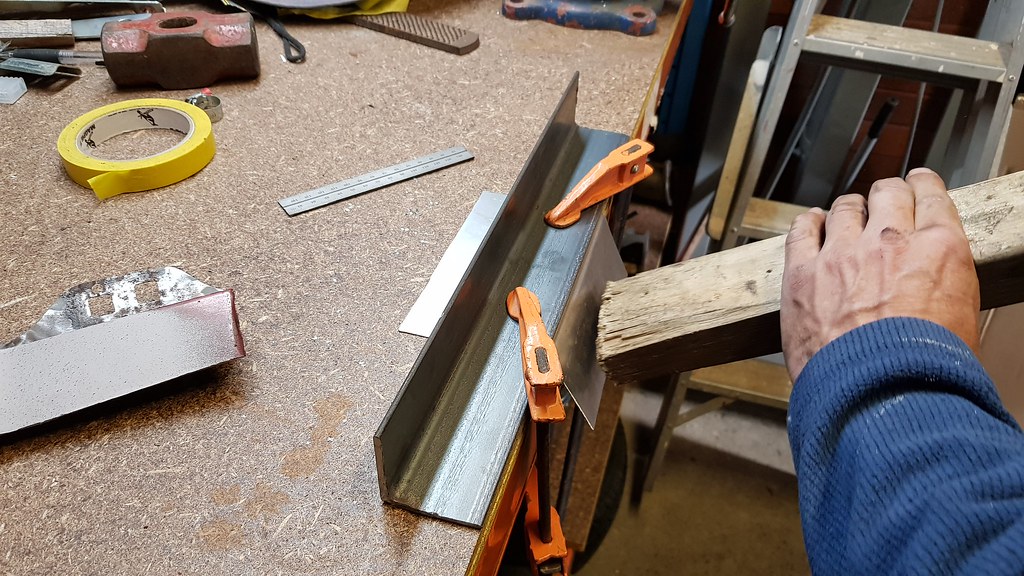
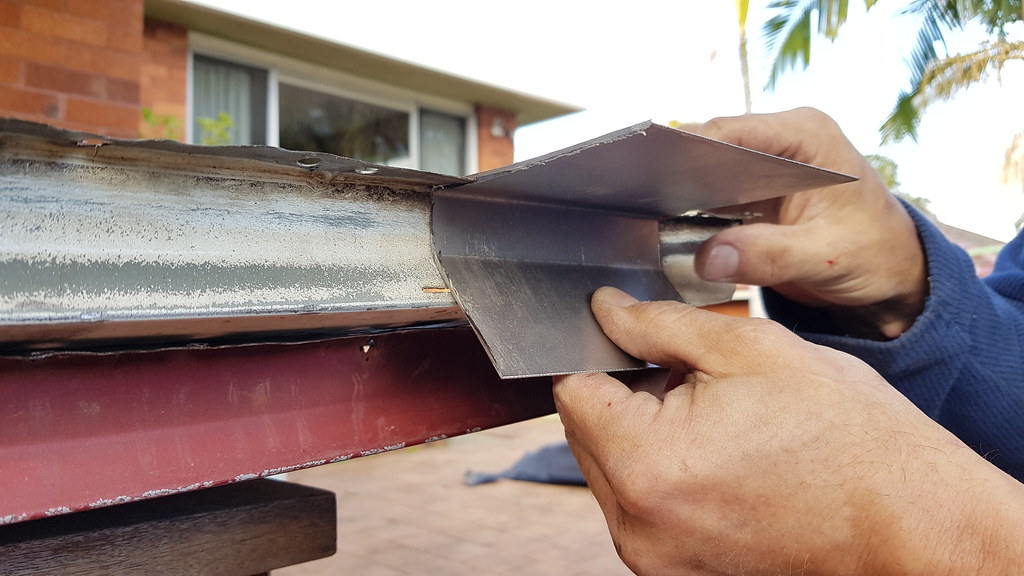
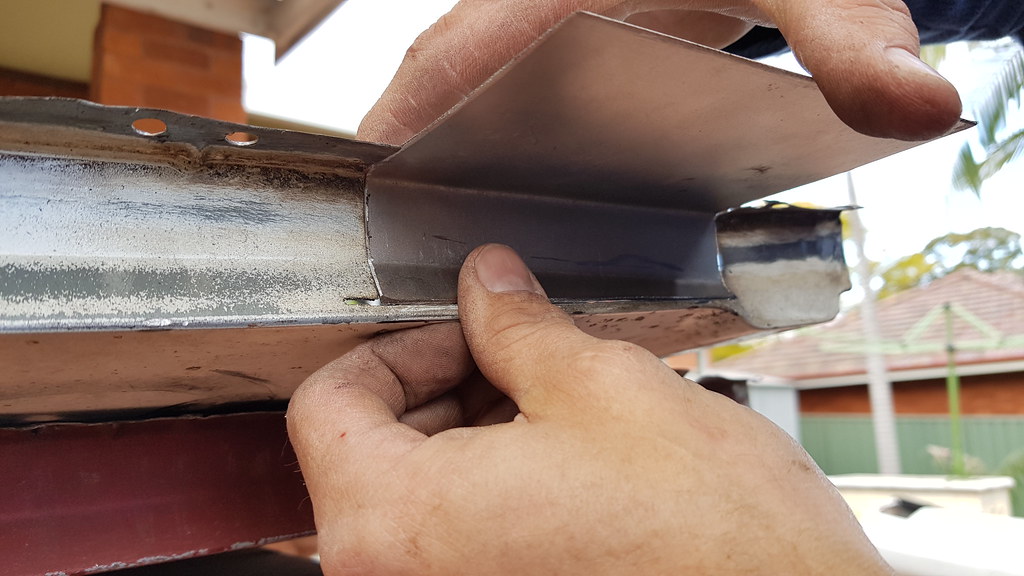
Next up was one of the 3 holes under the crowl. This section was the one which actually rusted under the windscreen. Theres a step in the factory metal with a radius where the windscreen would sit. I don't have access to a sheet bender so we improvised, to be honest it worked perfect. Used a block of wood and hammered it on the corner so it bent on the crease (does that make sense?) and yeah. Little bit of fiddling around but we got it to this shape. We decided it will be easier to tack it in from the top the slightly bend some sections in the lower bit for a perfect fit.
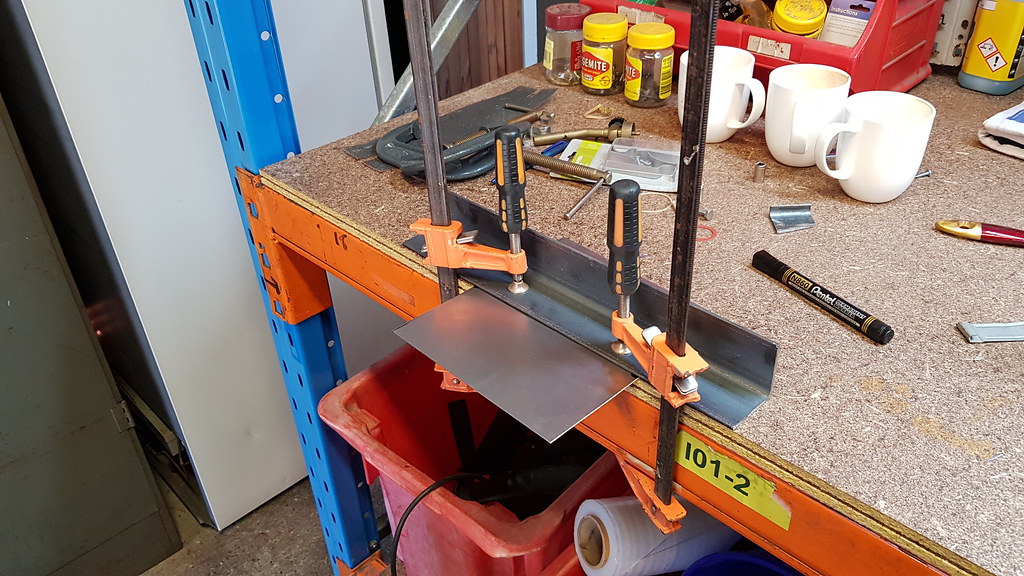
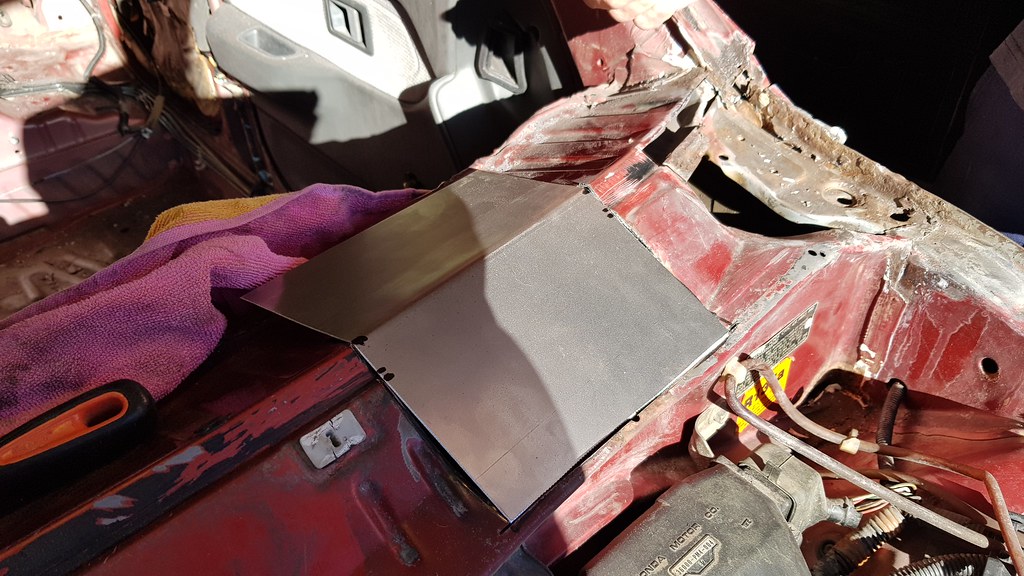
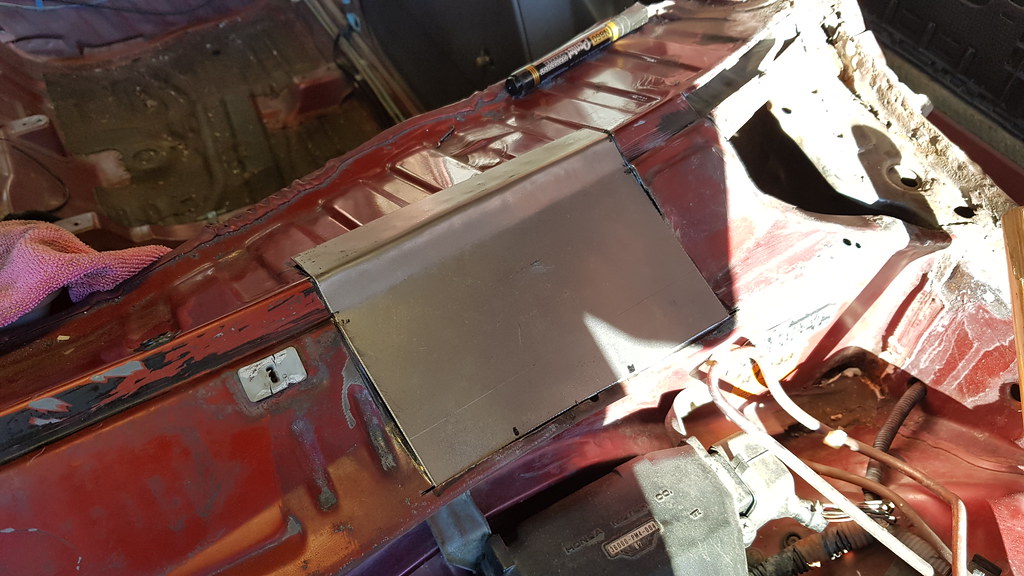
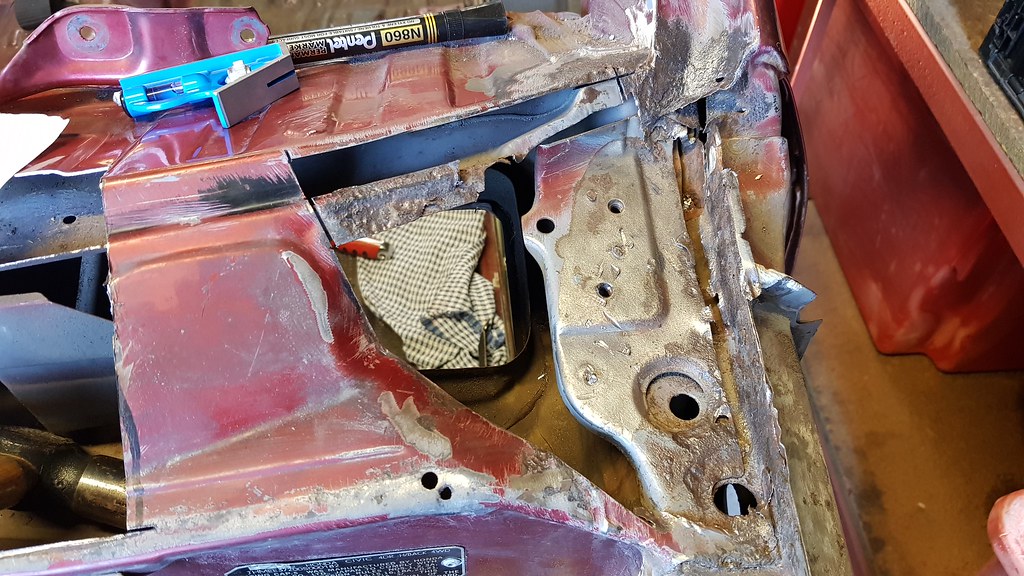
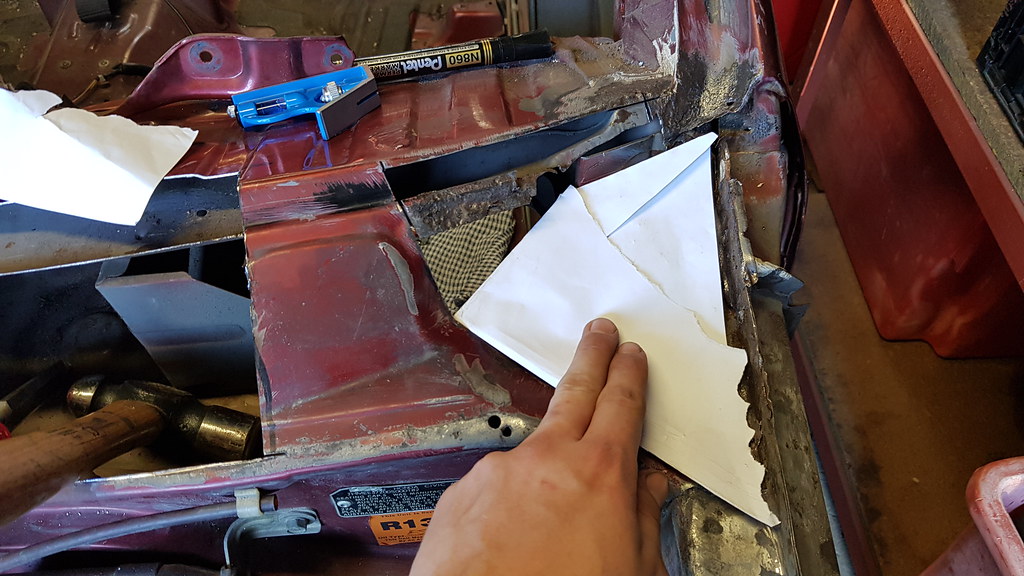
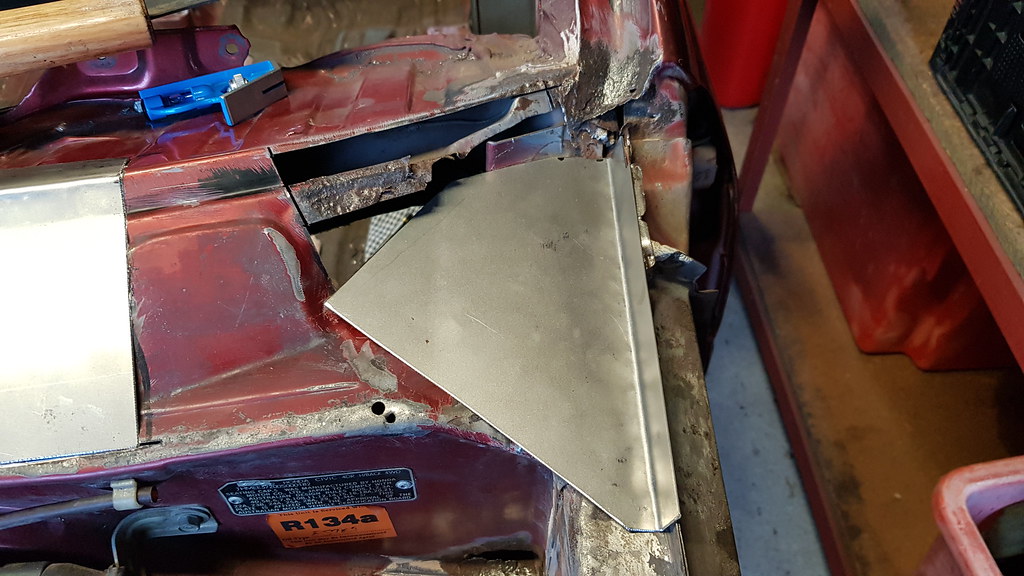
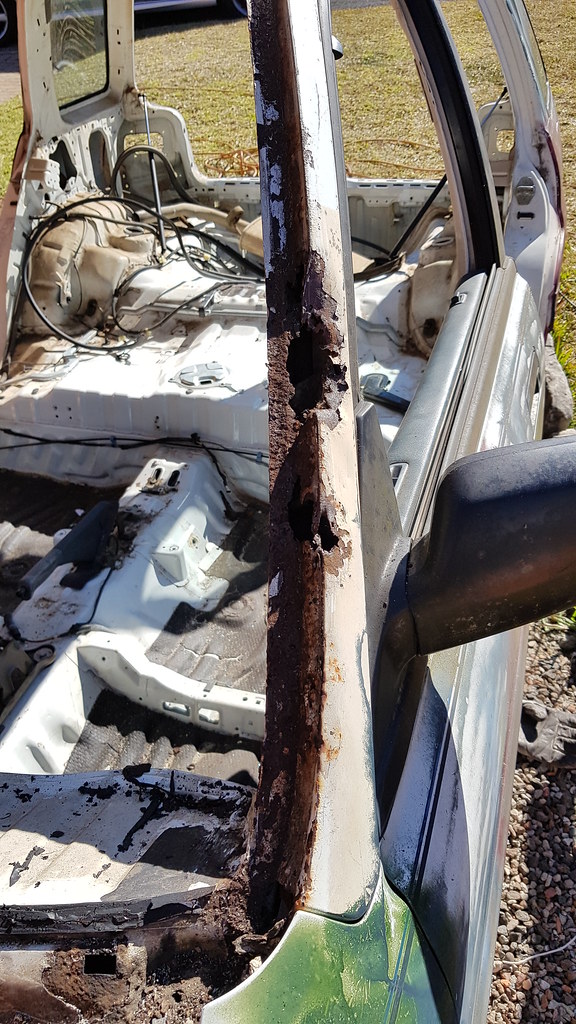
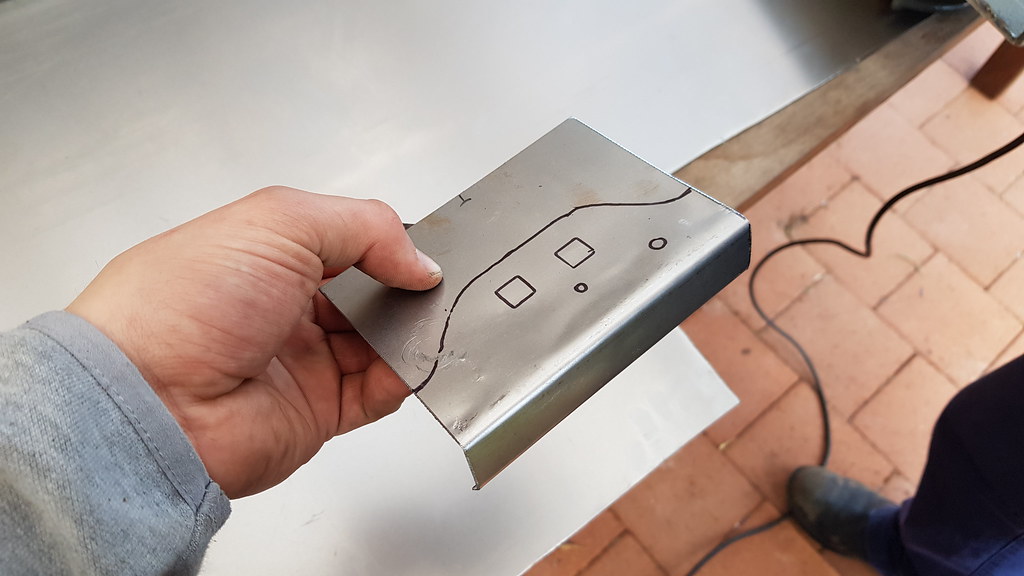
Last piece we got around to today was a second out of three holes under the crowl, the one passenger side where the hinge goes (probably the trickier one). After a 3 hour proscation chat with a old childhood mate/father who came over to see how rusty rust could be, we got around to this. Not fully complete, ummm'd and arrrr'd over a few options and decided to go with 2 seperate pieces as oppose to one, as theres too much bending and yeah, ceebs. Used some engineering tools (paper) and started folding around to get a rough shape of the lower section, it sits rather flat. We will then have the upper angle piece weld on top of this. Also had the right hand side piece 30mm longer so we could bend it up the side of the chassis and fold it over (looks like it was the same from factory)
Next up was one of the 3 holes under the crowl. This section was the one which actually rusted under the windscreen. Theres a step in the factory metal with a radius where the windscreen would sit. I don't have access to a sheet bender so we improvised, to be honest it worked perfect. Used a block of wood and hammered it on the corner so it bent on the crease (does that make sense?) and yeah. Little bit of fiddling around but we got it to this shape. We decided it will be easier to tack it in from the top the slightly bend some sections in the lower bit for a perfect fit.
Last piece we got around to today was a second out of three holes under the crowl, the one passenger side where the hinge goes (probably the trickier one). After a 3 hour proscation chat with a old childhood mate/father who came over to see how rusty rust could be, we got around to this. Not fully complete, ummm'd and arrrr'd over a few options and decided to go with 2 seperate pieces as oppose to one, as theres too much bending and yeah, ceebs. Used some engineering tools (paper) and started folding around to get a rough shape of the lower section, it sits rather flat. We will then have the upper angle piece weld on top of this. Also had the right hand side piece 30mm longer so we could bend it up the side of the chassis and fold it over (looks like it was the same from factory)
07-08-2018, 03:44 PM
#39
Honda-Tech Member
Looking great so far man, i thought just tearing a car down was some work. i commend you.
07-08-2018, 05:01 PM
#40
Honda-Tech Member
Thread Starter
07-08-2018, 05:01 PM
#41
Honda-Tech Member
Thread Starter
07-09-2018, 01:24 PM
#42
EFB055
07-09-2018, 01:47 PM
#43
Honda-Tech Member
Thread Starter
07-09-2018, 03:43 PM
#44
EFB055
Maybe... Don't think i really documented the repair, I took to a bodyshop that a mate worked at and we smashed it out over a couple of weekends. Time was pretty tight so i didn't really get to take many progress pics. The beauty of having it at a body shop was that there was all the tools we needed for this kind of thing.
07-09-2018, 05:25 PM
#45
Honda-Tech Member
Thread Starter
Maybe... Don't think i really documented the repair, I took to a bodyshop that a mate worked at and we smashed it out over a couple of weekends. Time was pretty tight so i didn't really get to take many progress pics. The beauty of having it at a body shop was that there was all the tools we needed for this kind of thing.
09-03-2018, 02:40 AM
#46
Honda-Tech Member
Thread Starter
Okay it's been a while since I last updated, have made some good progress lately, other weekends have been taken up with prepping my track hatch ED for Honda Nationals which was a few weekends ago, now it's full steam ahead with the wagon!
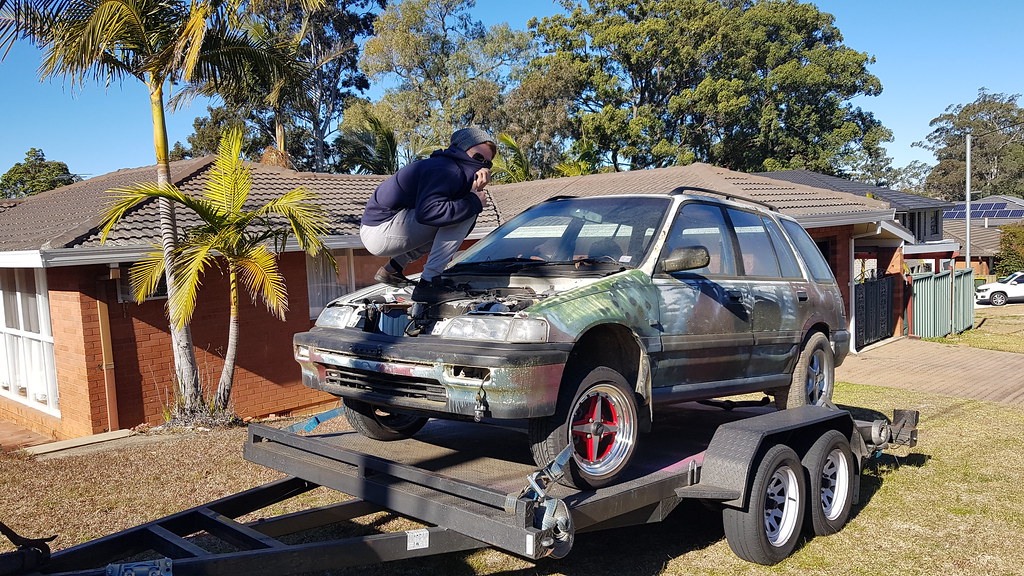
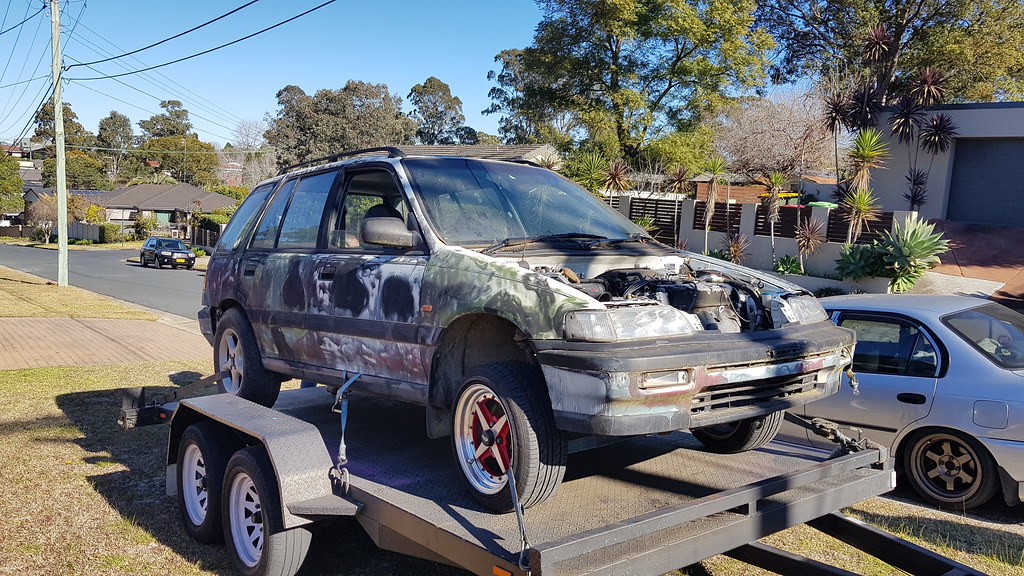
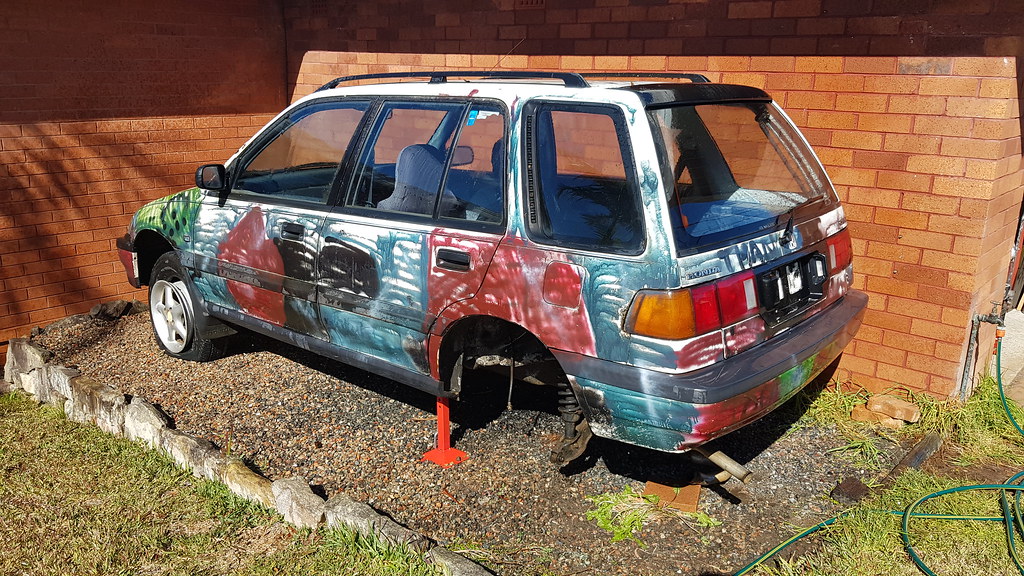
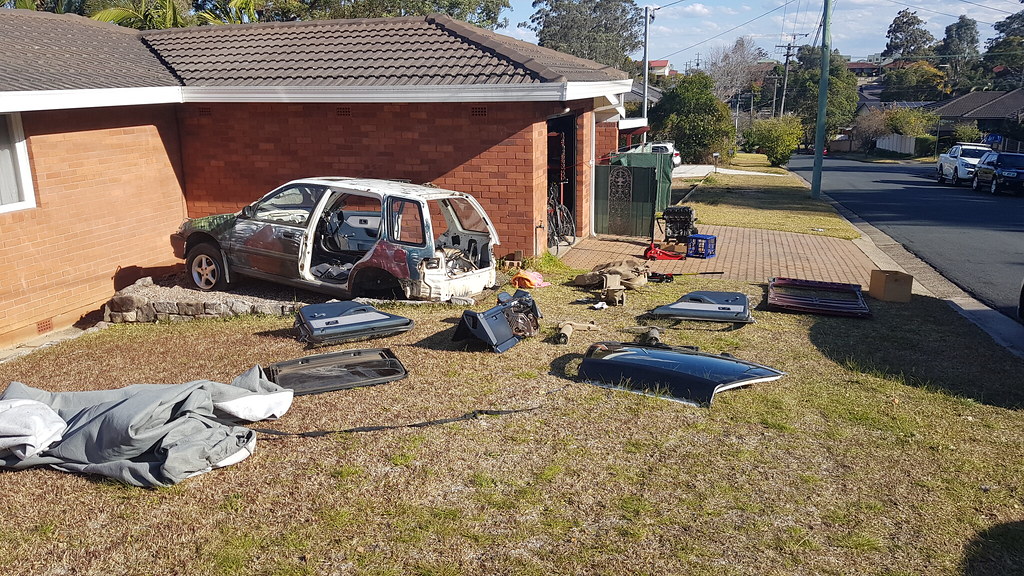
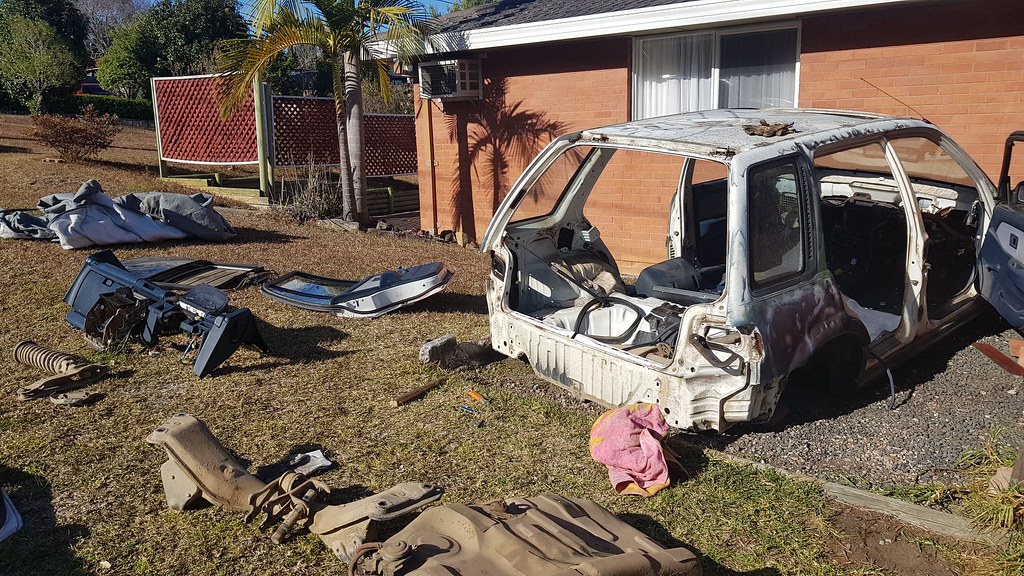
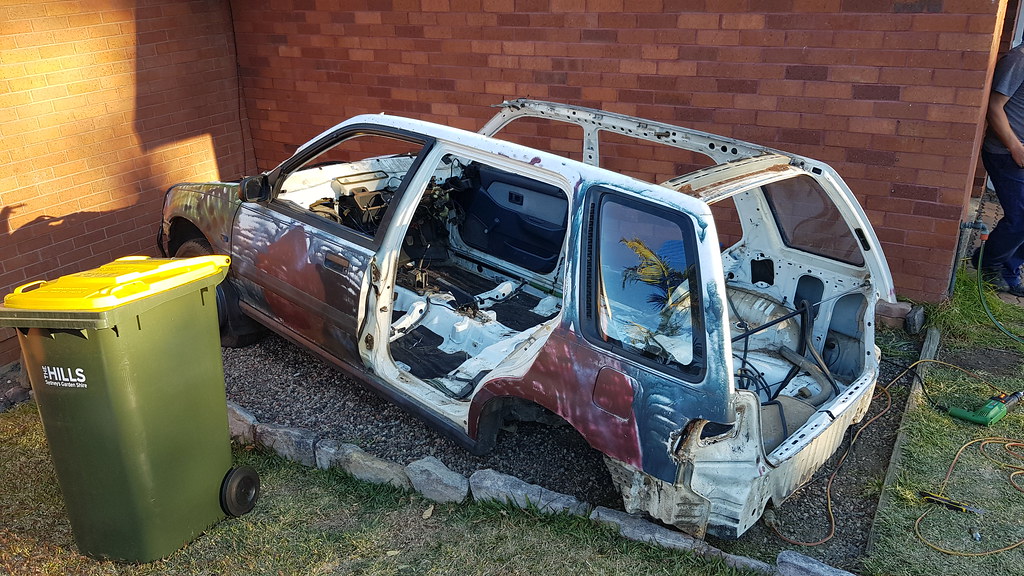
First off I'll start with what I bought, another wagon! As I've said before the RT4WD Wagons are very rare here in Australia, currenty we only have like 30ish accounted for? Apparently 100-200 were sold in Australia, and somehow I found one which was a paddock basher, been painted by the kids and yeah, nothing like some 'honda' moss growing on every panel. The owner kept the RT4WD system apart from the gearbox (no idea why) but I still bought it. Sun roof isn't cracked, good interior pieces and panels we can use to repair my rusted sections. Once we got it home the stripping commenced over 2 days, pretty much gut EVERYTHING from it and store for spares. Once the roof liner was dropped I could check to see if the roof was rusty like my maroon one and guess what, it's not on the sides (rear was a little rusty, same spot as maroon one, not as bad)! So we went about drilling this roof skin off as well, however as we don't need to reweld the spot welds, we just drilled straight through them with a normal drill bit!
Photo dump incoming
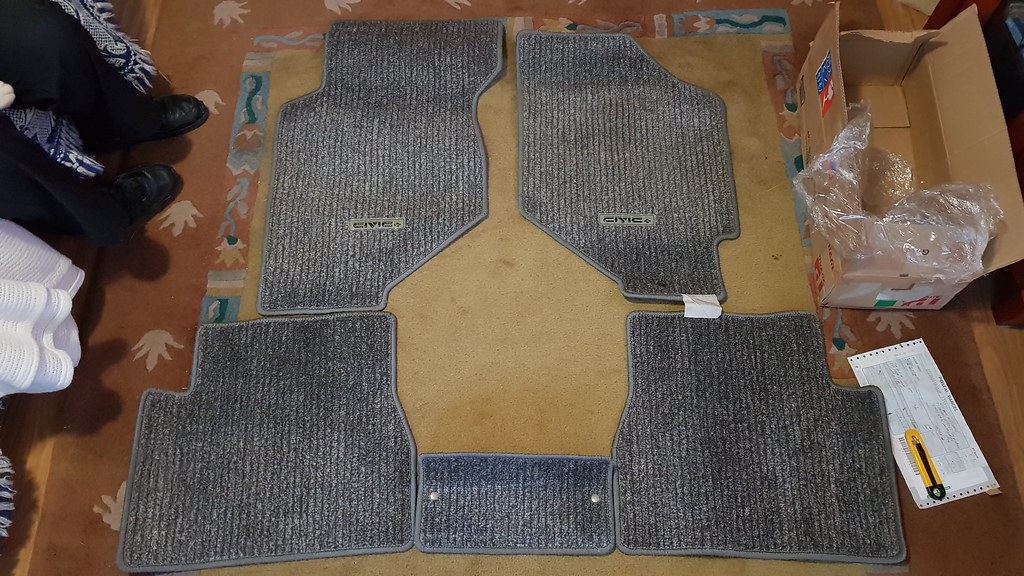
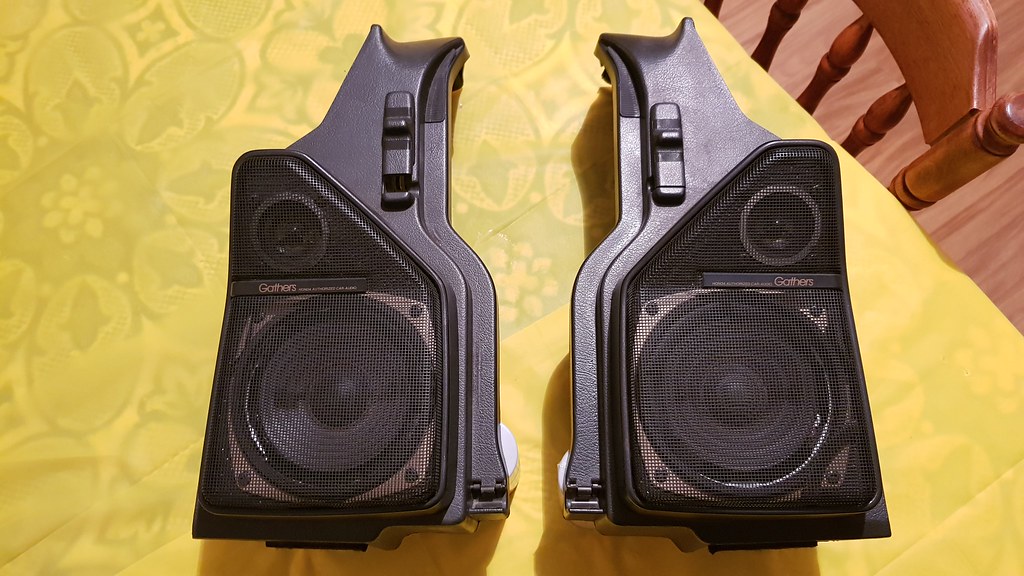
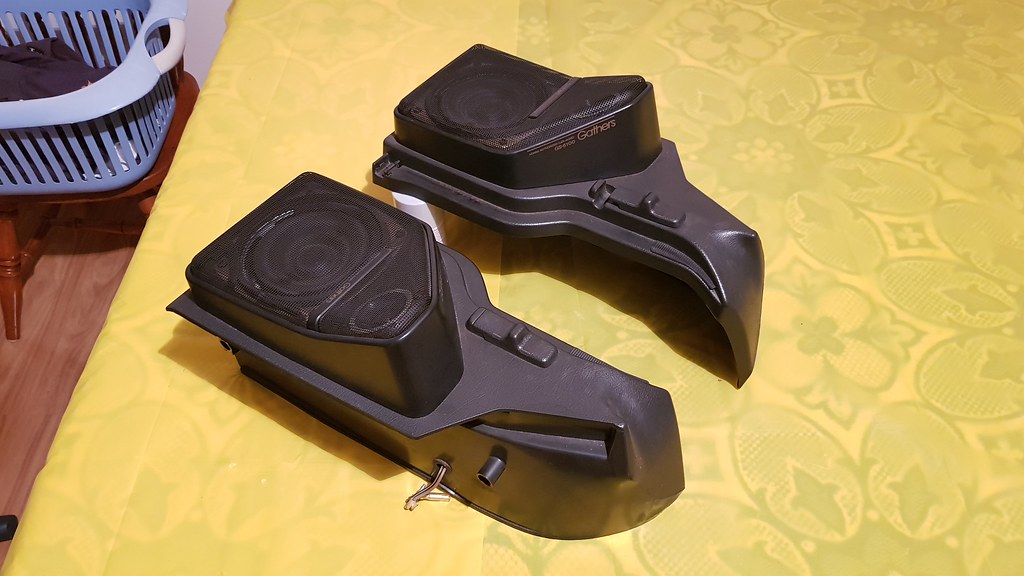
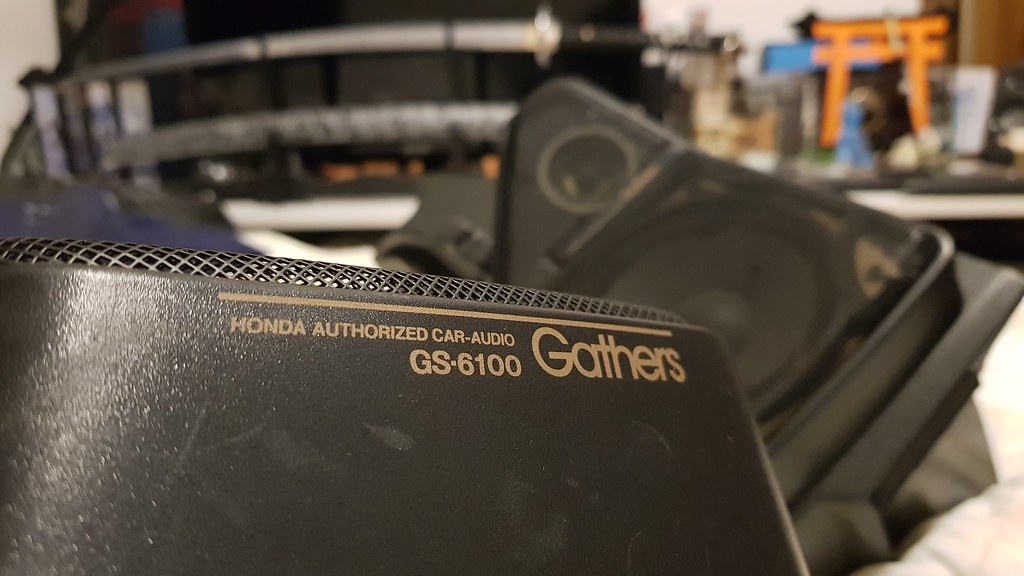
A few of my latest Honda Access purchases for the Wagon, I also got a pair of Gathers rear speaker pods from Japan, the holy grail of my slowly building collection!
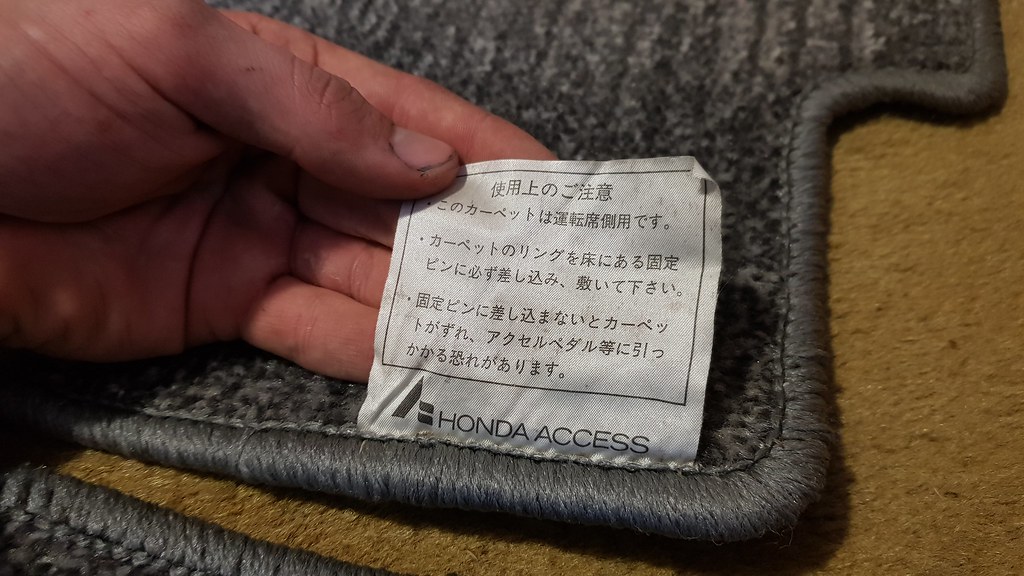
Honda Access EF5 floor mats! MINT Condition!
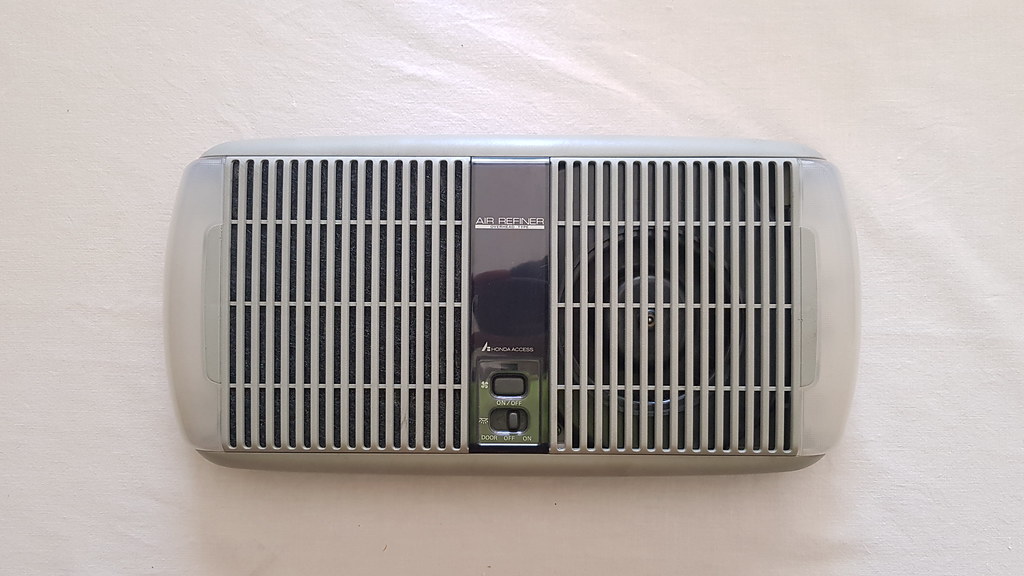
Honda Access Air Refiner, works well and lights work too!
Gathers rear speaker pods for my hatch!
First off I'll start with what I bought, another wagon! As I've said before the RT4WD Wagons are very rare here in Australia, currenty we only have like 30ish accounted for? Apparently 100-200 were sold in Australia, and somehow I found one which was a paddock basher, been painted by the kids and yeah, nothing like some 'honda' moss growing on every panel. The owner kept the RT4WD system apart from the gearbox (no idea why) but I still bought it. Sun roof isn't cracked, good interior pieces and panels we can use to repair my rusted sections. Once we got it home the stripping commenced over 2 days, pretty much gut EVERYTHING from it and store for spares. Once the roof liner was dropped I could check to see if the roof was rusty like my maroon one and guess what, it's not on the sides (rear was a little rusty, same spot as maroon one, not as bad)! So we went about drilling this roof skin off as well, however as we don't need to reweld the spot welds, we just drilled straight through them with a normal drill bit!
Photo dump incoming
A few of my latest Honda Access purchases for the Wagon, I also got a pair of Gathers rear speaker pods from Japan, the holy grail of my slowly building collection!
Honda Access EF5 floor mats! MINT Condition!
Honda Access Air Refiner, works well and lights work too!
Gathers rear speaker pods for my hatch!
09-03-2018, 02:53 AM
#47
Honda-Tech Member
Thread Starter
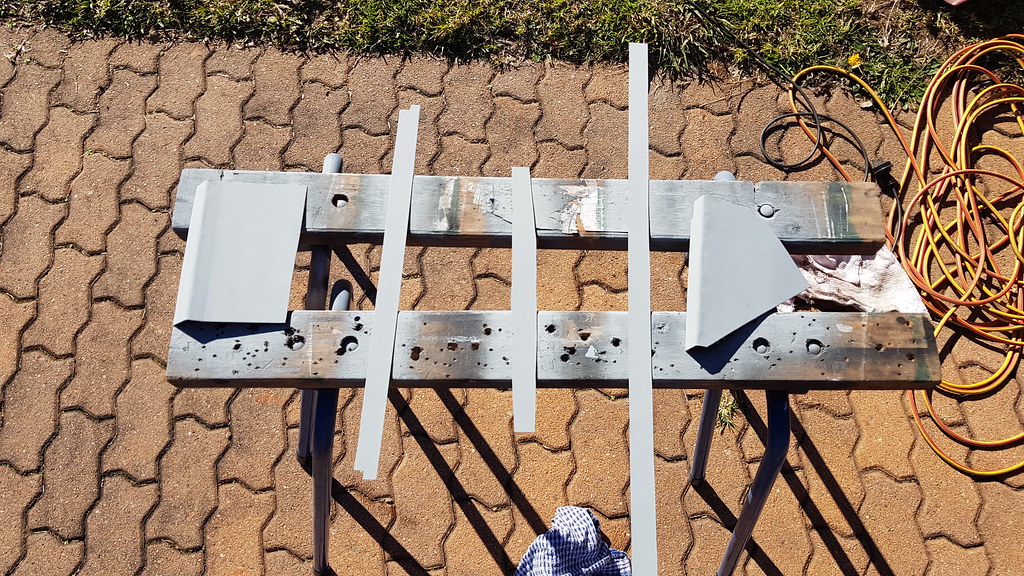
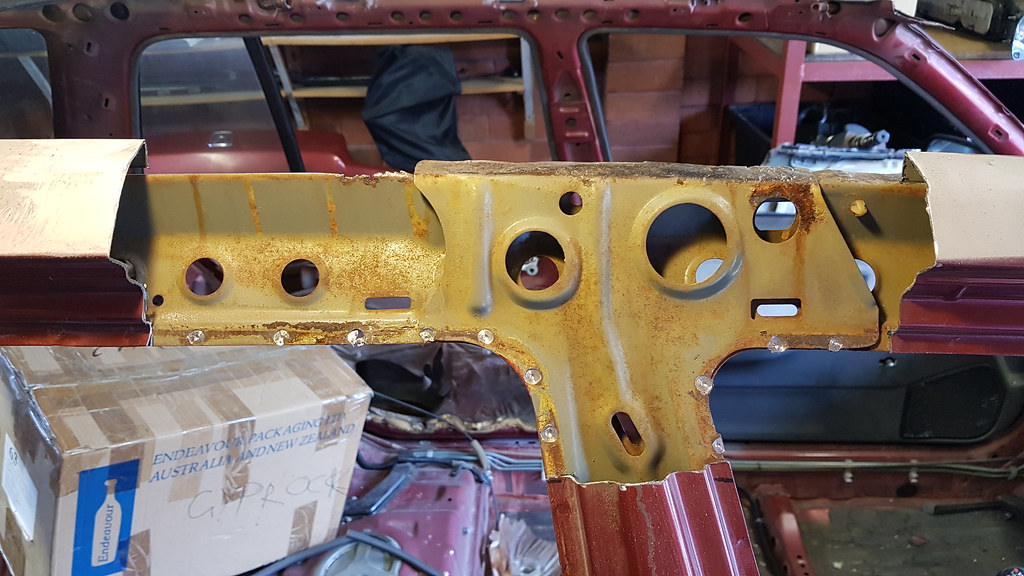
Onto some actual progress on my wagon. With the metal strips we had previous cut for the roof support chassis side, and 2 pieces for 2/3 of the rust holes under windscreen, I sprayed them in weld through primer to protect the metal from rusting. With this sheet metal, as with any bare metal, once your fingers touch it, the oil on them attracts rust straight away, so best to clean the pieces off once they are finalised with some degreaser and then paint to protect from surface rust.
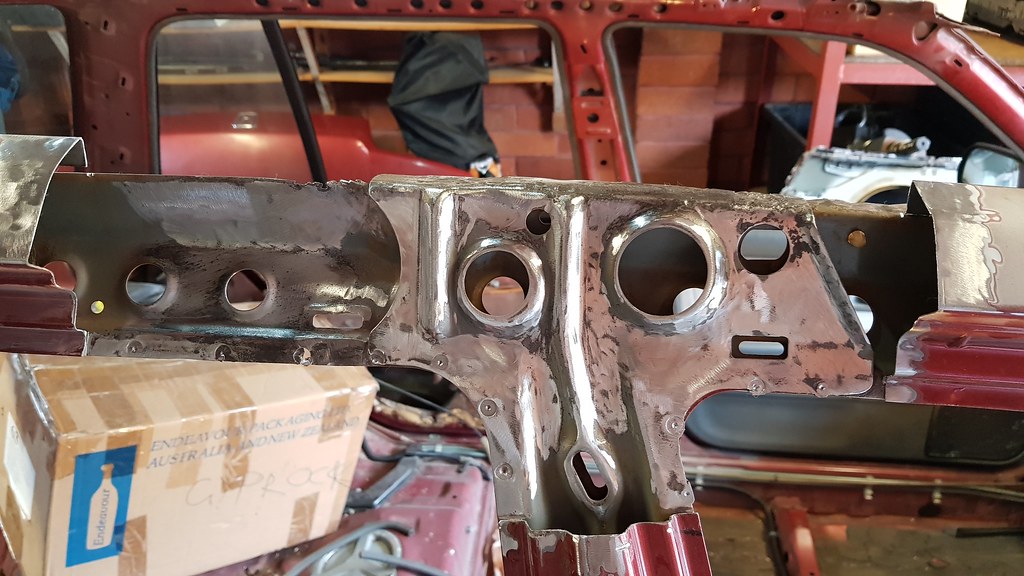
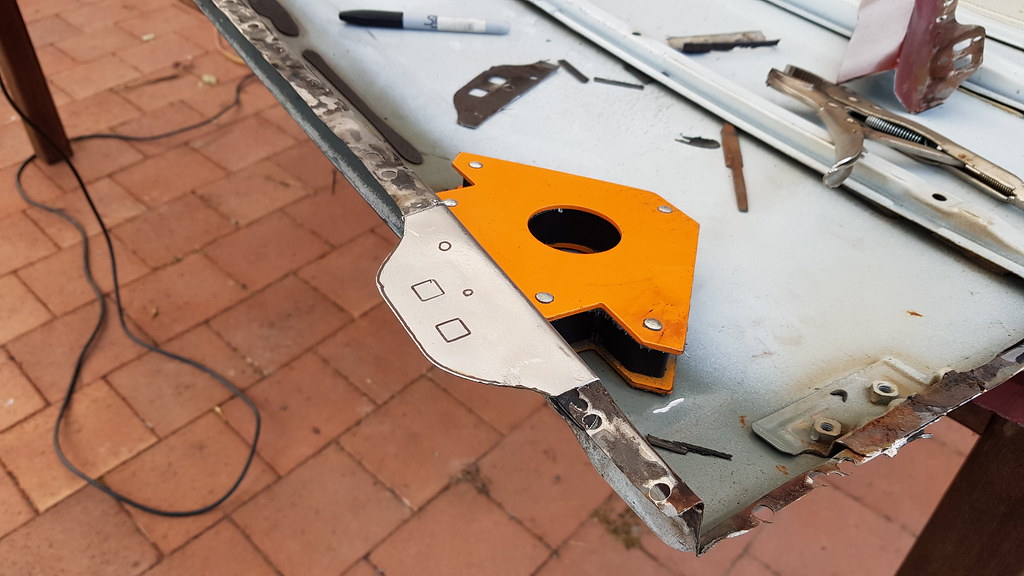
Next I slapped some weld through primer onto the first rust hole we were going to weld our new piece into, the middle peice of the crowl which previously we bent the metal different ways to try and following the OEM design. The piece was then held in place via a magnet by hand by my father whilst I went around it tacking to the chassis. Our plan was to continue bending it in different angles whilst tacking it for the perfect fitment. With it tacked into position I then went around it to weld it fully. Here I tried different methods I had researched, welding normally and trying 'stitch' welding when you weld 1 spot quickly, almost zapping it, then move down 1mm and do again etc. Whilst doing all this we were fiddling around with the welder settings to try see what worked, going on some of the angles one or two sections blew through as well, but was easy to patch up the hole.
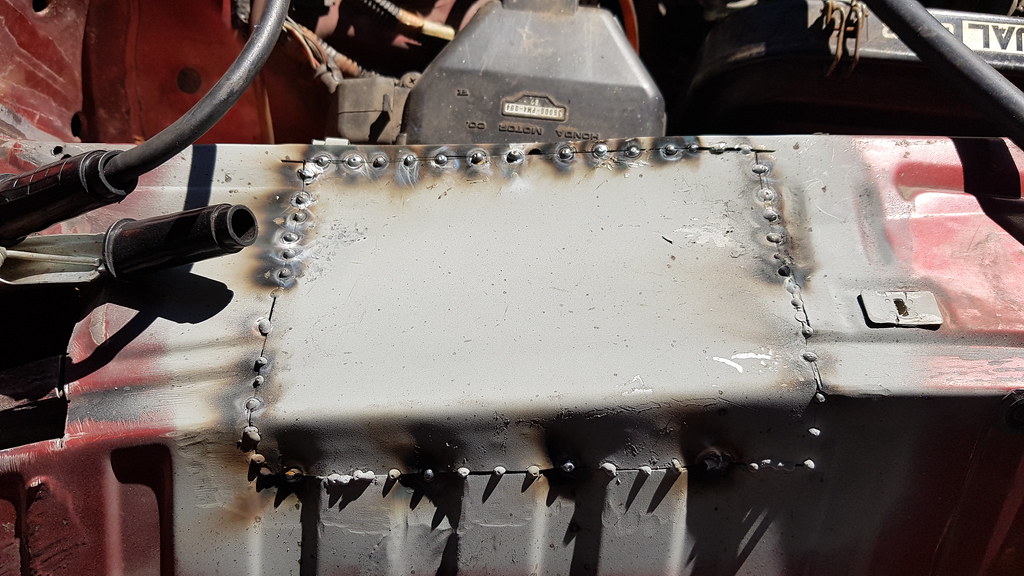
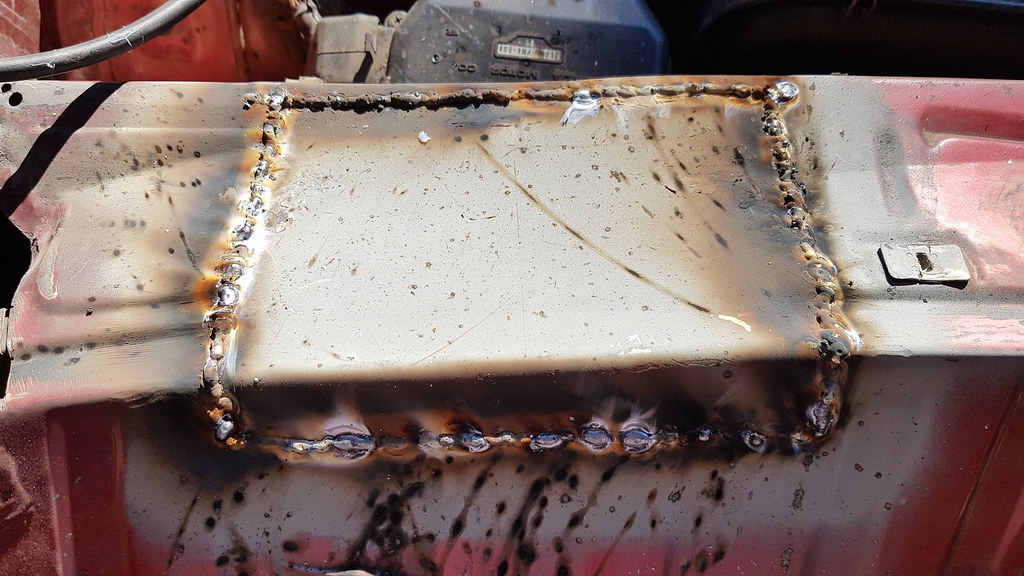
With this done we cracked out the grinder and started grinding down the welds to be flush with the chassis by using a flappy disk. A good majority of it was done, I'd say 90% with a few mini holes I need to go over again to completely fill (I still need to do this to this date, will do next weekend). Considering neither my father or I have done panel beating before we were quite impressed with our work, so have bent the metal into shape and to see it welded in there faily smooth, it's a good feeling. Only skill sets for this was my dad did his apprenticeship when he was a teenager in the UK as a fitter & turner, learnt to weld somewhere along the line, and me learning to weld in highschool and continue with exhaust jobs at home. We look forward to doing the rest of the panels!

Next I slapped some weld through primer onto the first rust hole we were going to weld our new piece into, the middle peice of the crowl which previously we bent the metal different ways to try and following the OEM design. The piece was then held in place via a magnet by hand by my father whilst I went around it tacking to the chassis. Our plan was to continue bending it in different angles whilst tacking it for the perfect fitment. With it tacked into position I then went around it to weld it fully. Here I tried different methods I had researched, welding normally and trying 'stitch' welding when you weld 1 spot quickly, almost zapping it, then move down 1mm and do again etc. Whilst doing all this we were fiddling around with the welder settings to try see what worked, going on some of the angles one or two sections blew through as well, but was easy to patch up the hole.
With this done we cracked out the grinder and started grinding down the welds to be flush with the chassis by using a flappy disk. A good majority of it was done, I'd say 90% with a few mini holes I need to go over again to completely fill (I still need to do this to this date, will do next weekend). Considering neither my father or I have done panel beating before we were quite impressed with our work, so have bent the metal into shape and to see it welded in there faily smooth, it's a good feeling. Only skill sets for this was my dad did his apprenticeship when he was a teenager in the UK as a fitter & turner, learnt to weld somewhere along the line, and me learning to weld in highschool and continue with exhaust jobs at home. We look forward to doing the rest of the panels!
09-03-2018, 03:42 AM
#48
Honda-Tech Member
Thread Starter
And now this weekends progress! :D
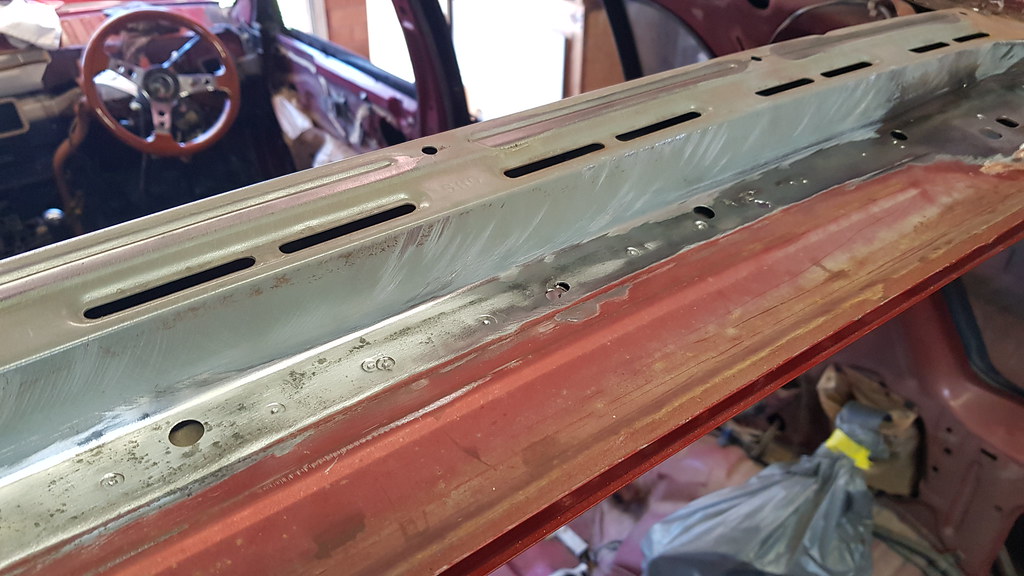
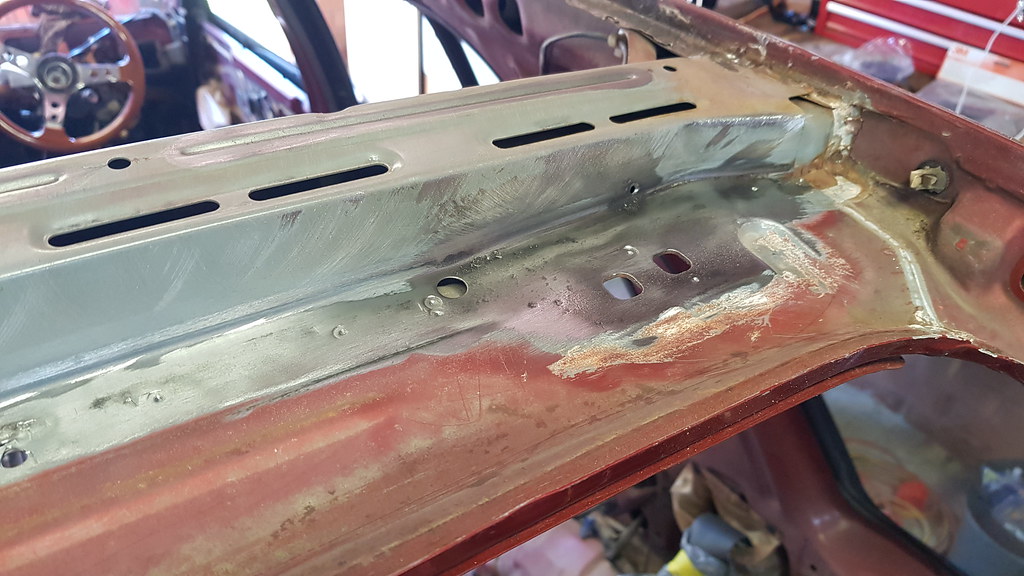
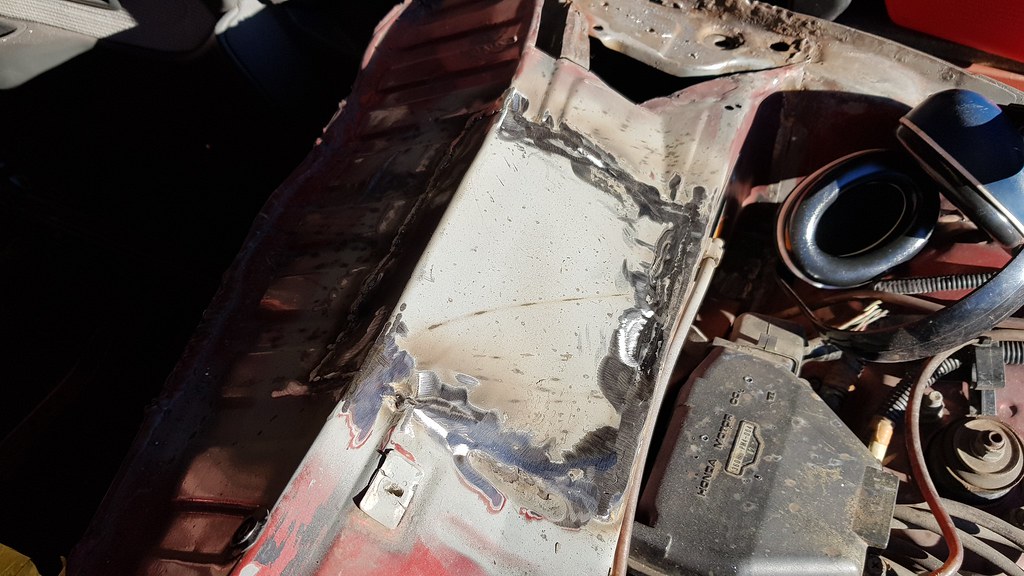
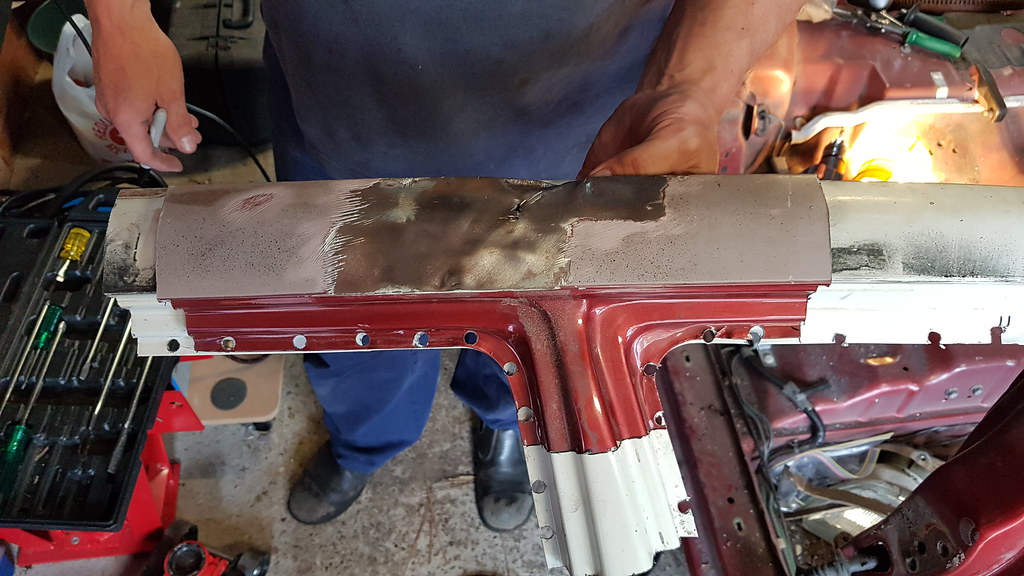
Time to address the dent I found underneath all the bog between the front and rear door on the drivers side. With the spare shitty wagon I bought we decided to cut the damaged piece area from that one as it was mint and weld it onto my maroon one! So we marked out roughly what we needed, then added some extra length to be safe, drilled out the spot welds and cut each of the 3 sides and off she came, with ease!
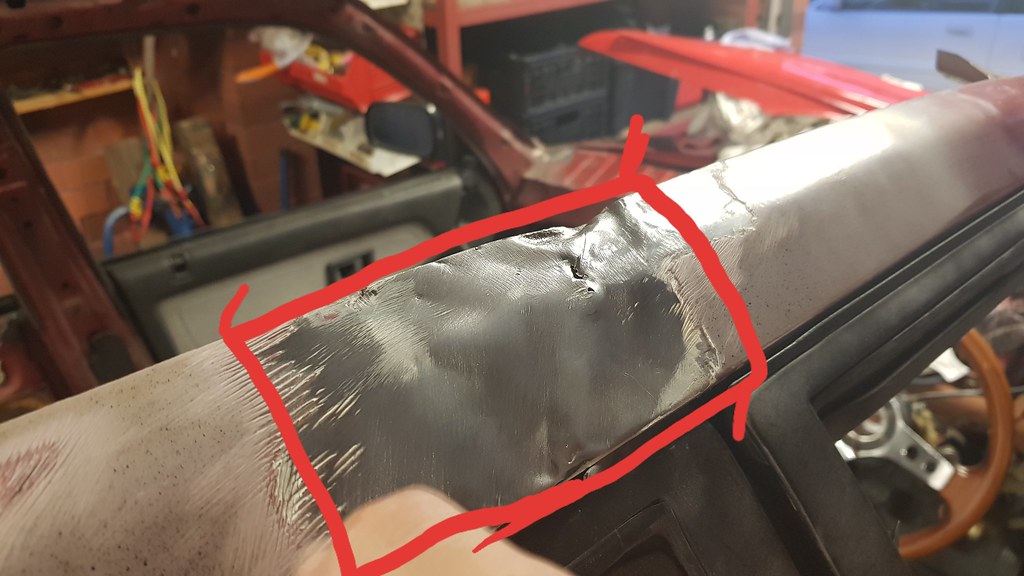
Now it's time to cut the piece off my car, this time obviously needing to take a bit more care.. Same process as before.. Once it was off it revealed the damage behind, luckily it was all surface rust which was easy to remove. It looks like previously they possibly tried to pull the dents out by welding something to it, but that ofcourse rusted from behind..

With the chassis piece off we placed it over the replacement piece to mark out what we actually needed, and obviously leaving a little extra to play with. Then back and forth with the grinder slowly shaving down each side to get a good fitment with about 1mm gap where the welding is required and wallah we have a replacement piece ready to be welded! Slapped some weld through primer over the chassis side and back of the replacement piece.
Welding time, started with the sections that would be above the doors, either side of the section cut out those areas move freely as we have preivously cut out the inner sections which holds it down, so if we match these panel lines up we can push it down for correct fitment with the spot welds, hard to explain if anyone is confused lemme know I'll draw on the photos to show what I mean. I then moved down and did the sections in the door jams tacking it into place to ensure the panels were level to each other, with this done we moved onto the spot welds in the door jams too. Bolted the drivers door back on to check the fitment, spot on!
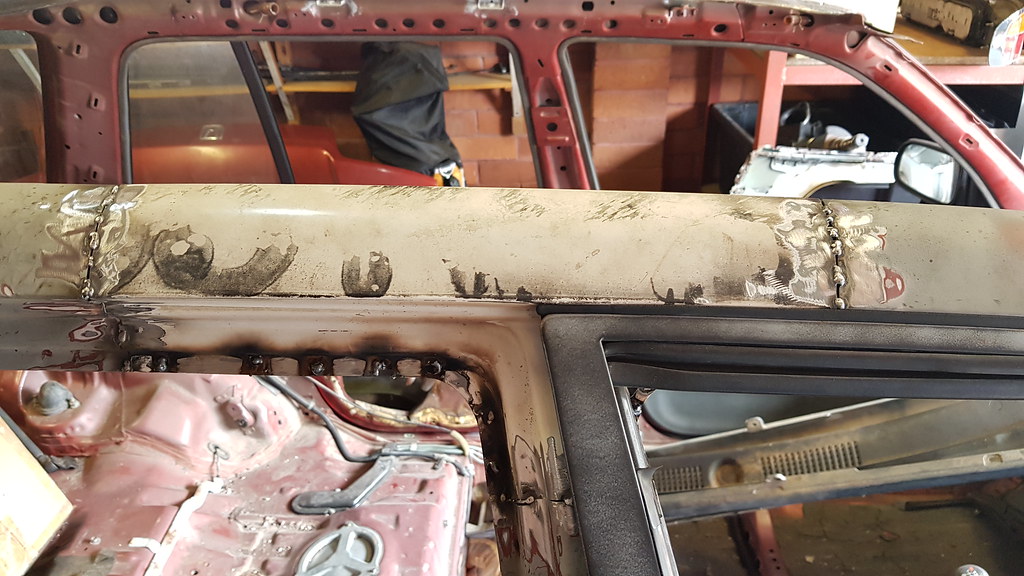
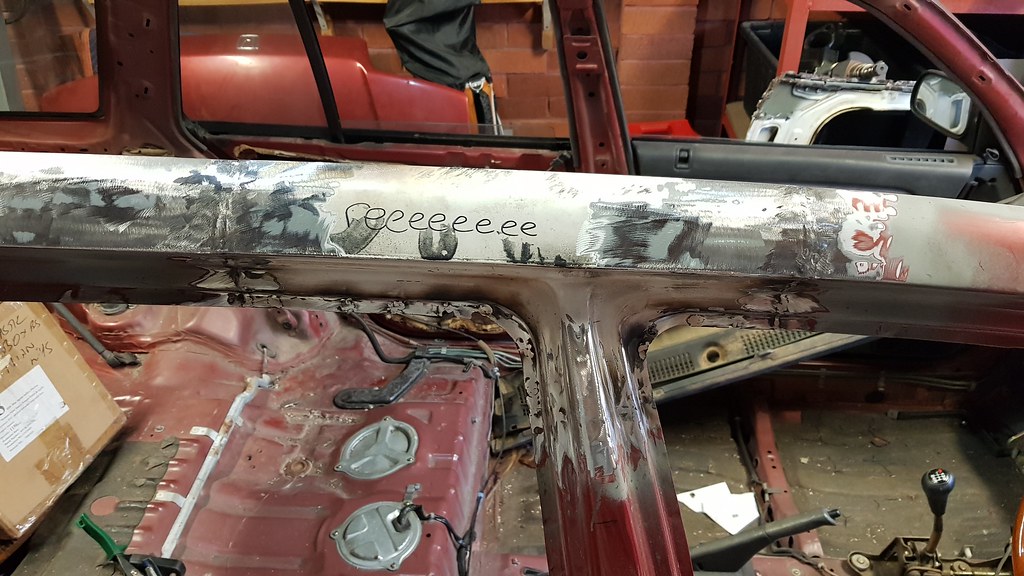
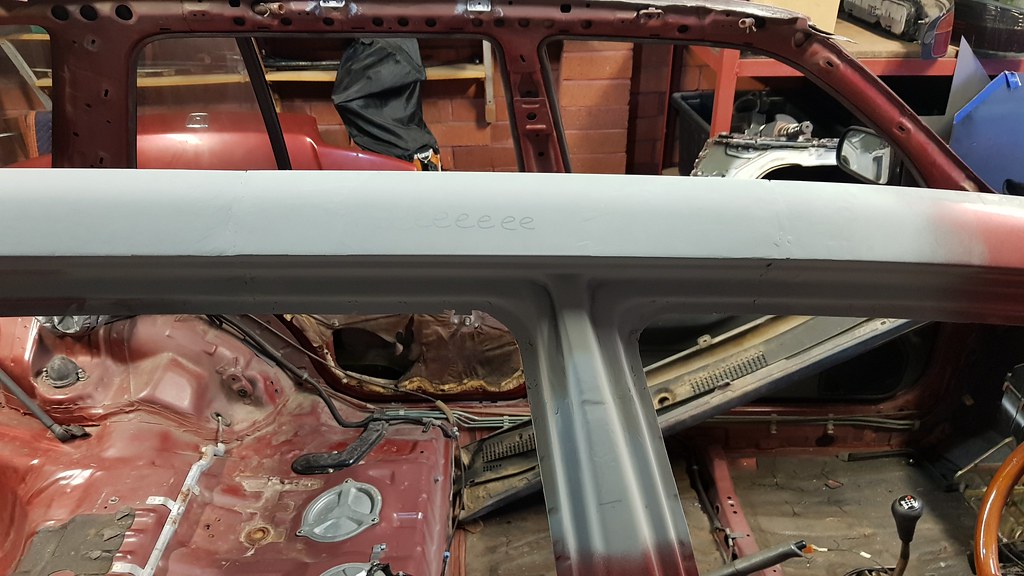
With everything tacked up and looking gucci I went ahead and welded it all together, the sections inside the door jams were a little tricky, somewhat welding up above my face on an angle, the weld pool was at times running down too fast, but got it done. Then back to grinding it down flat with a flappy disk, then using a special pad my dad got from his work, its like a cloth disk for the final fine details. We were able to get it very smooth, probably going to need a small amount of body filler for a perfect shapre but we are very impressed with our work. I was able to stand on the door sill, hold onto the section we just welded in and yank back on it, didn't move at all! Finished it off with some primer to protect the metal until I body fill it before paint!
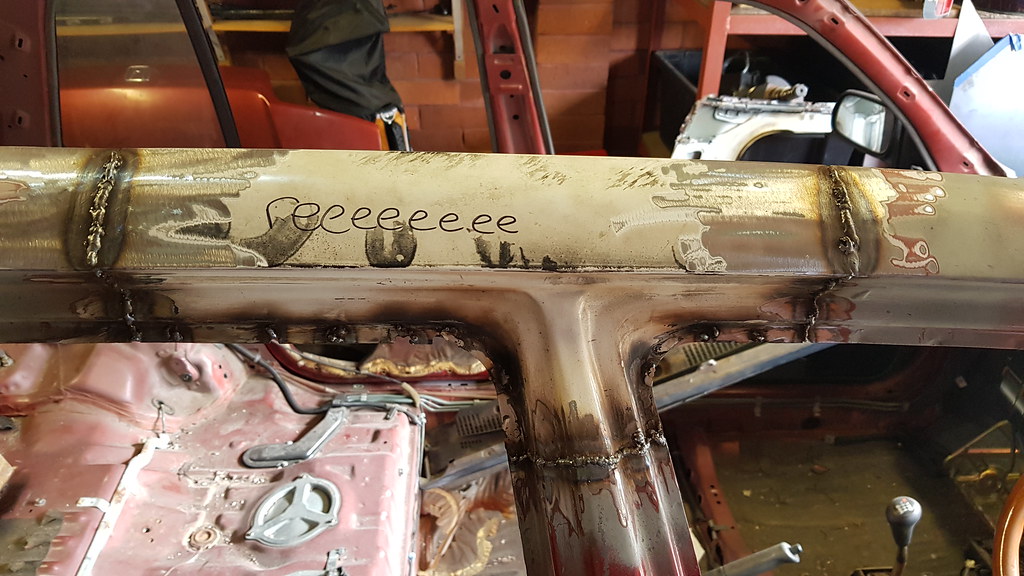
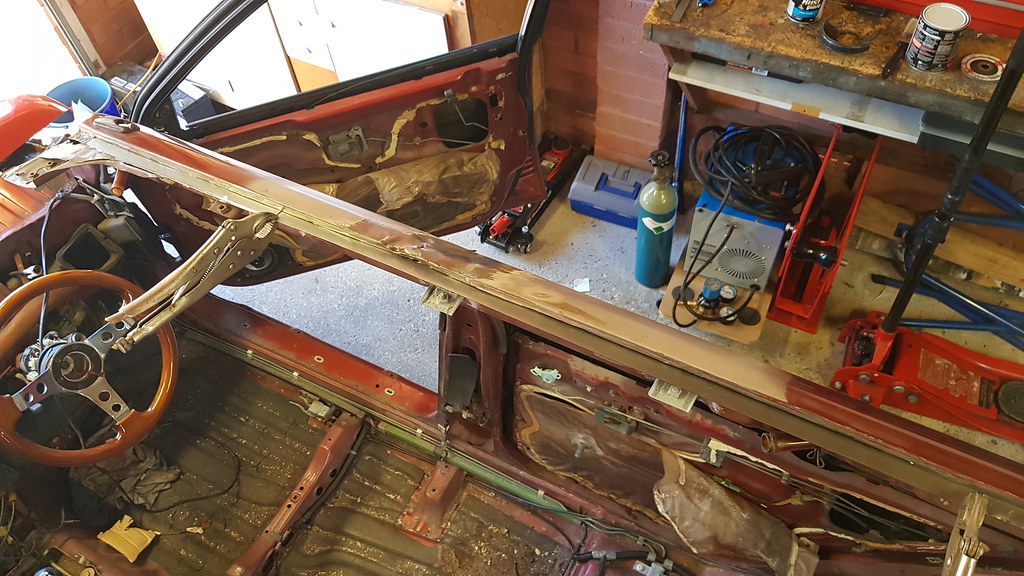
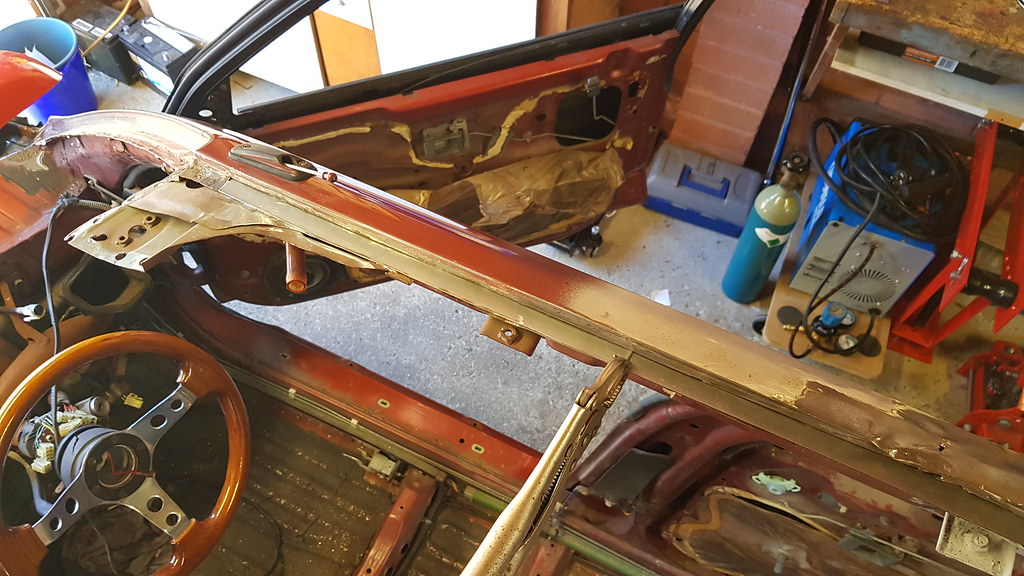
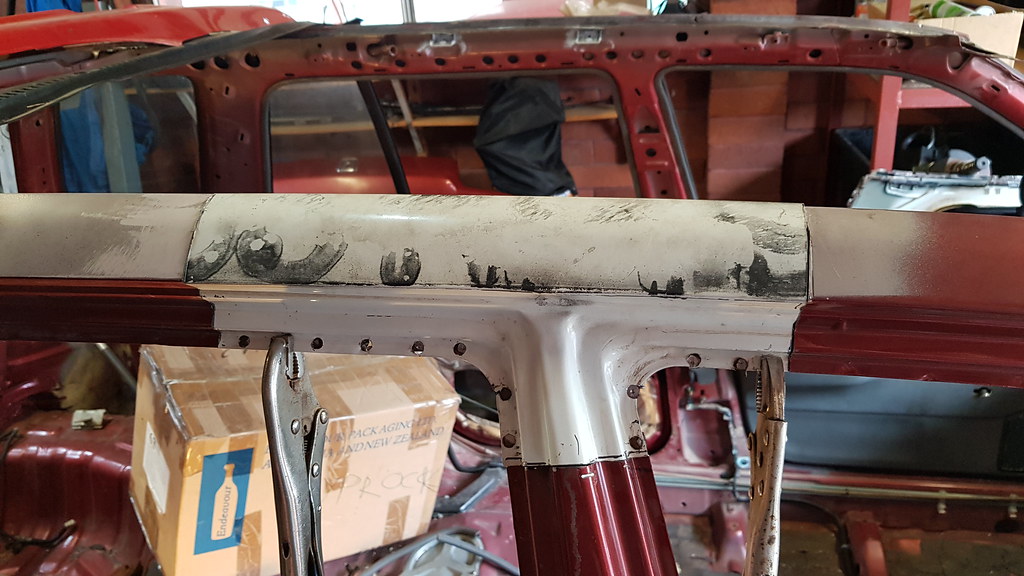
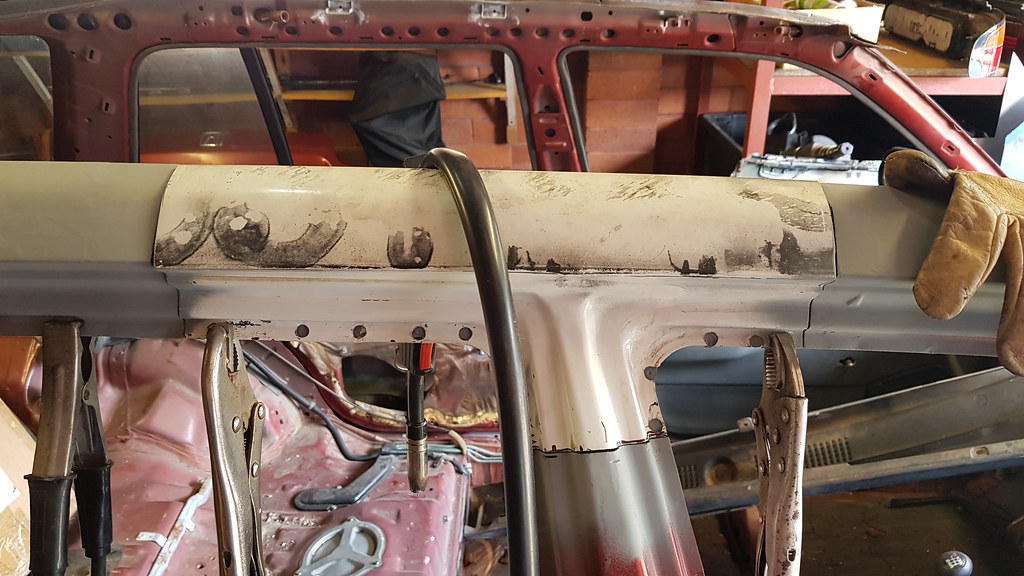
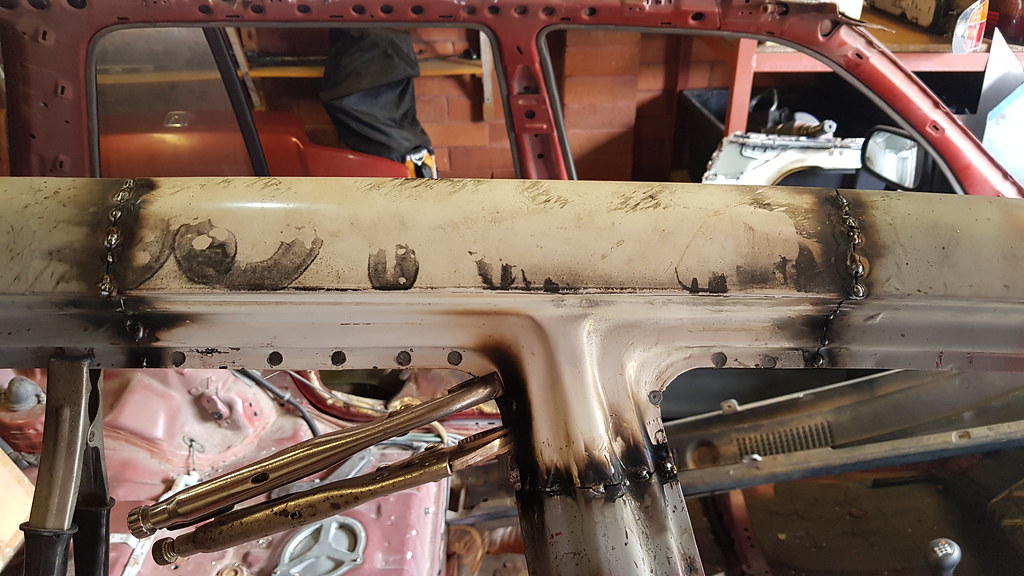
With the final few hours of daylight for the weekend, the insider section of where we just replaced the dented bit I sprayed with weld through primer. Previous posts I showed were we had to cut out the upper and lower folds of the metal which the roof skin actually sits on top of, obviously because it was completely rusted out. I tacked and welded in the lower piece, I must say it was an absolute @$^!@#% trying to weld it in. Upside down, nothing wanted to cooperate, eventually got it done after playing around with the welder settings, found it best to crank up the powa and just hold the weld pool a bit, defs not as much as I would do on any other panel, but seemed the only option. The other few photos show me holding a piece we need to cut to fit into the 2 upper sections which need replacing.
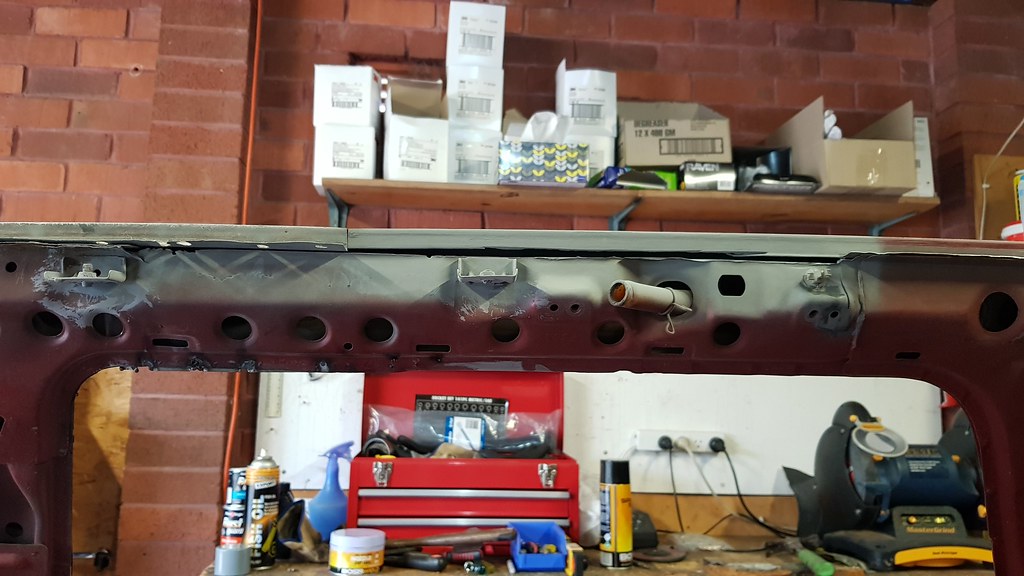
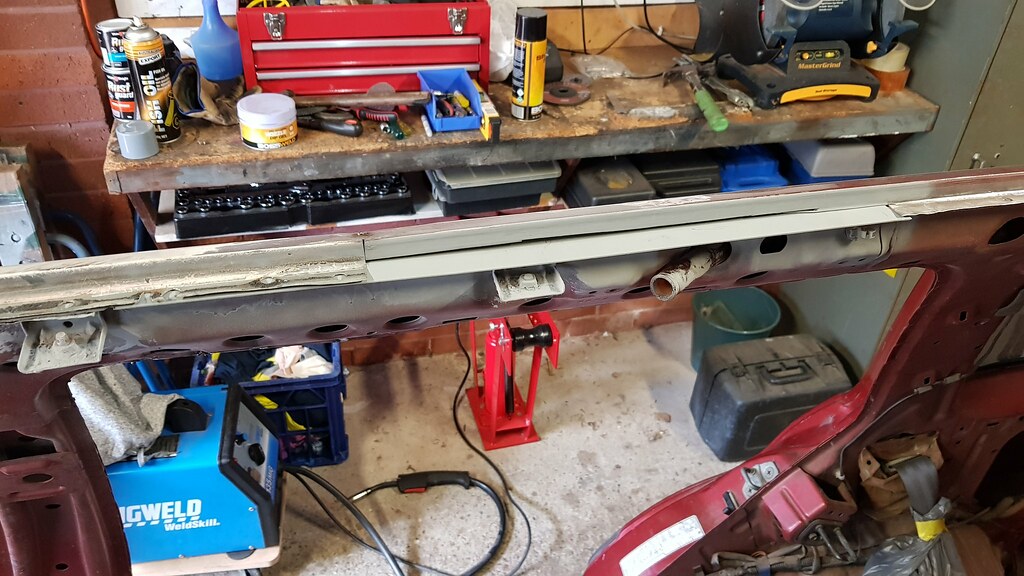
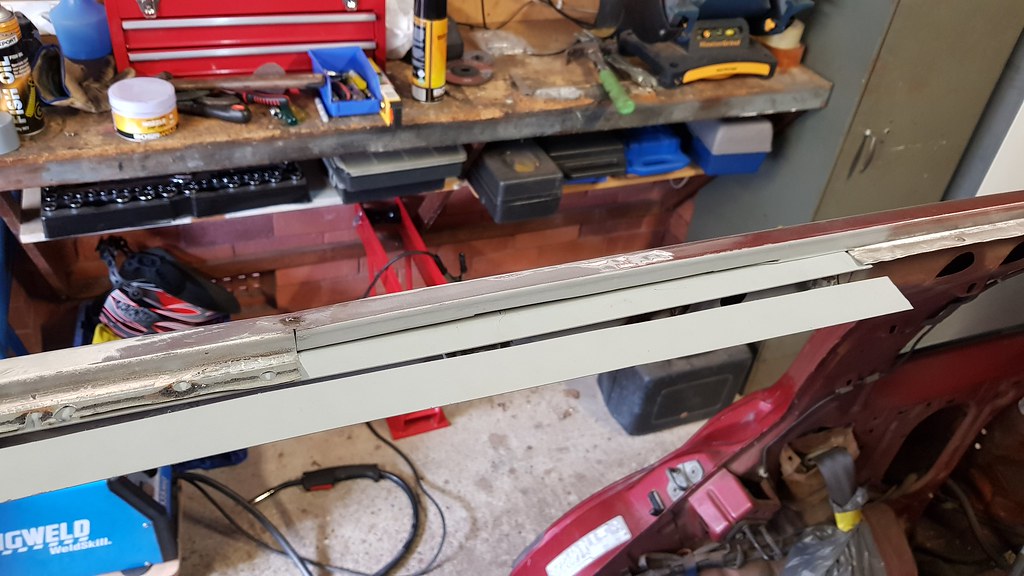
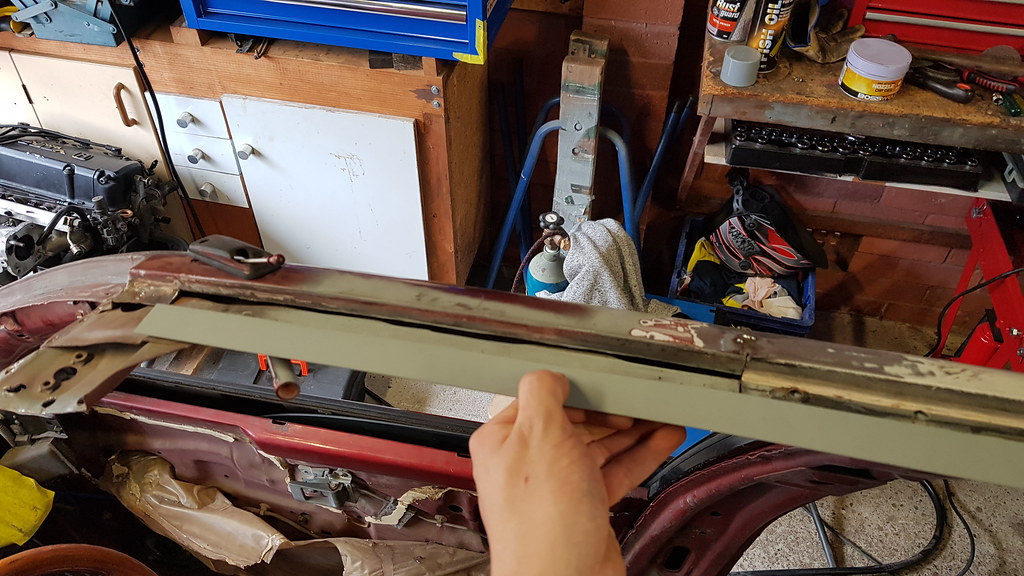
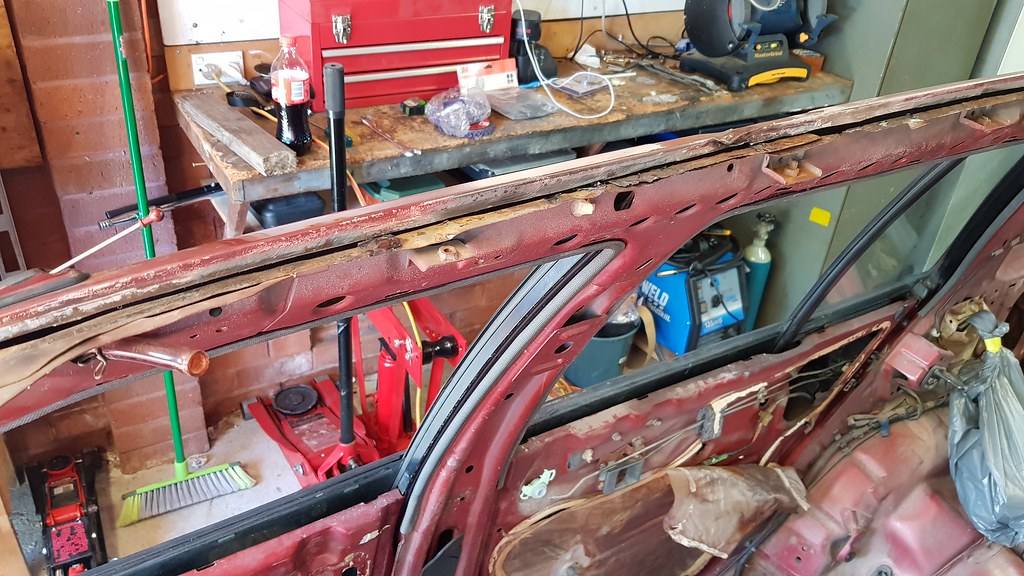
With only 2 small strips needing to be welded onto the chassis side of the roof section, the chassis would then be ready to have the roof skin welded back on! It's been off for like 3 months, and with it off your not meant to move or jack the car else things can go sideways.. I've been wanting to go ahead with swapping my D16Y1 in (which I need to update on too).
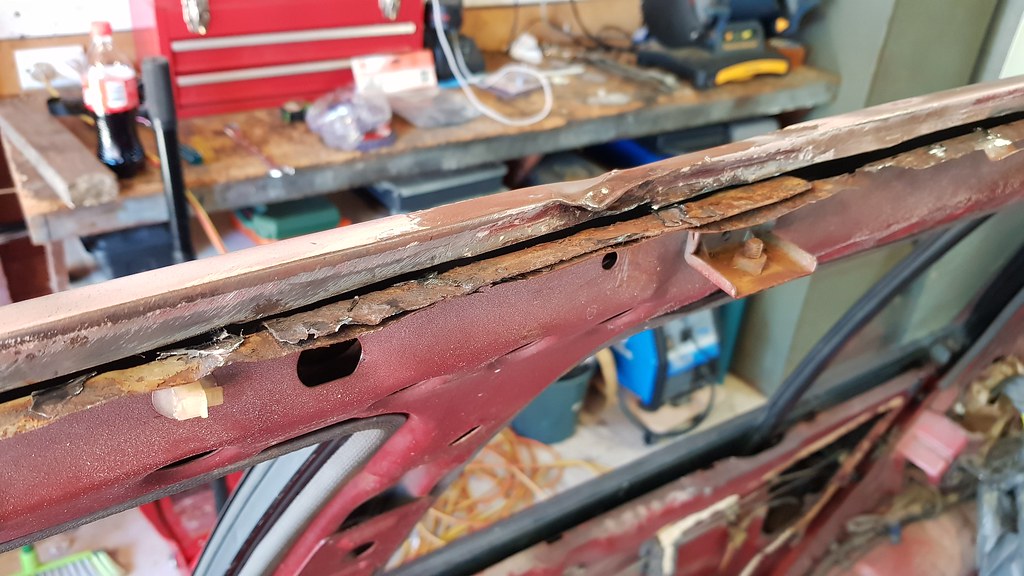
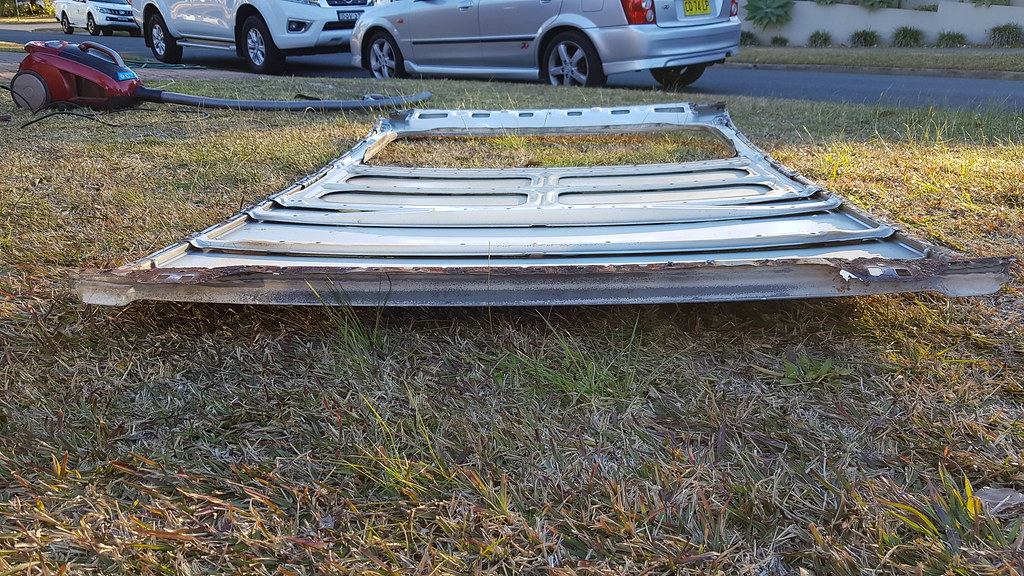
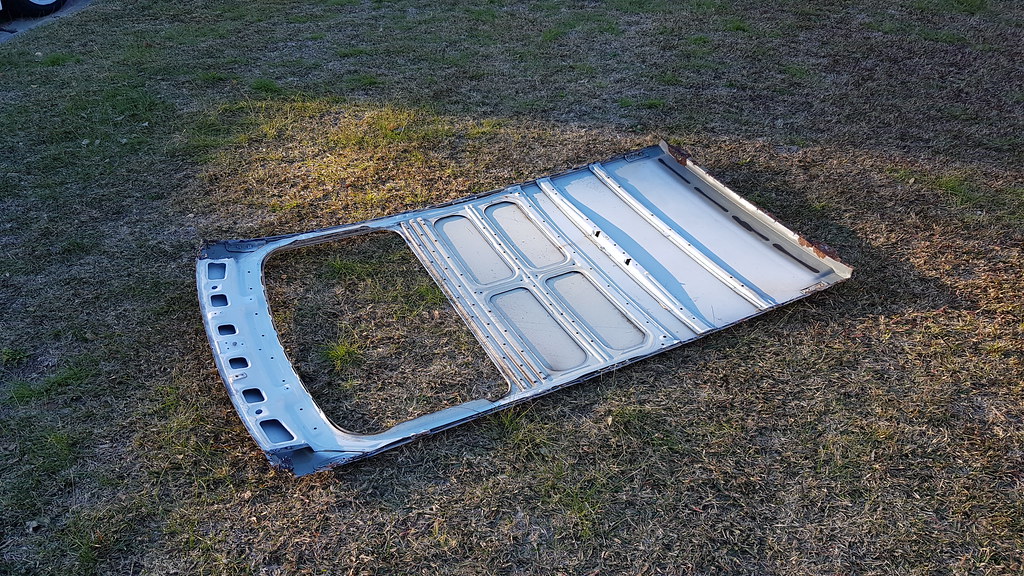
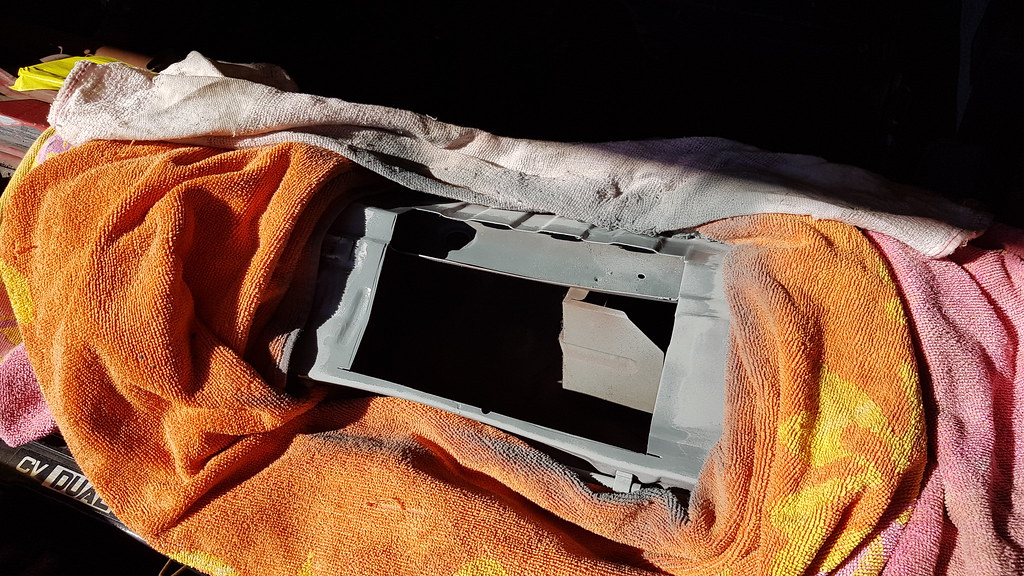
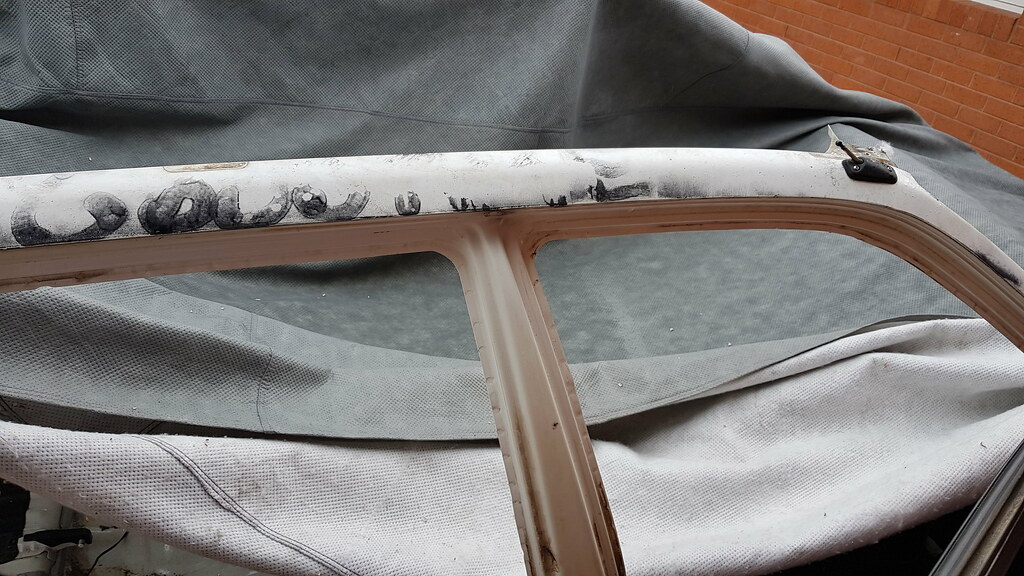
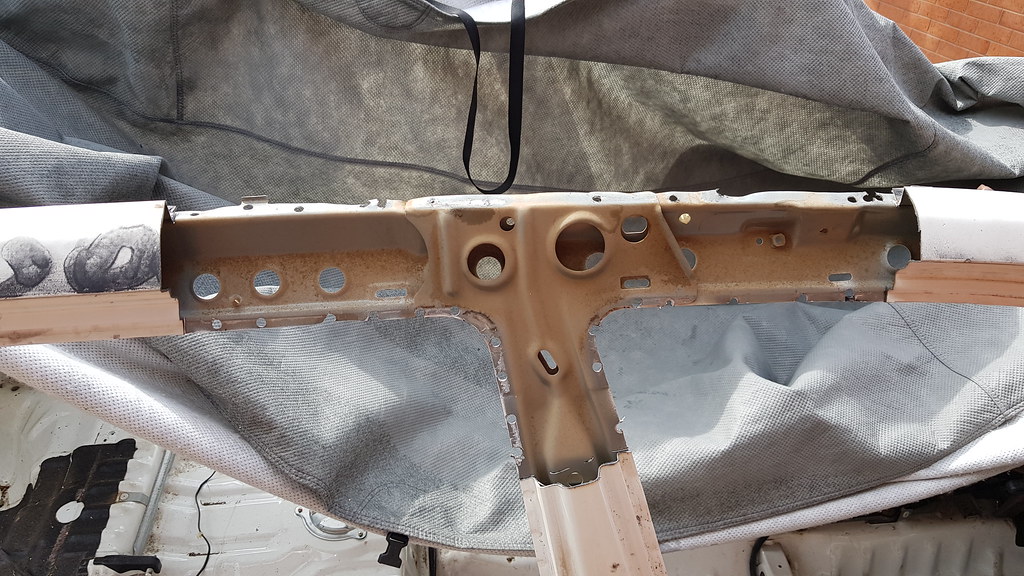
So we pulled out the 2 roof skins and looked at what needed to be replaced on the new roof skin from the donor car. Reason for choosing this skin mostly because the whole drivers side is rusted, but mainly because previous owner had the roof rack holes filled in, front and rear has nuts welded on underneath the roof skin itself. They were welded up but not protected from behind so they rusted, and in the middle studs are welded into the roof which were cut flush with the roof.
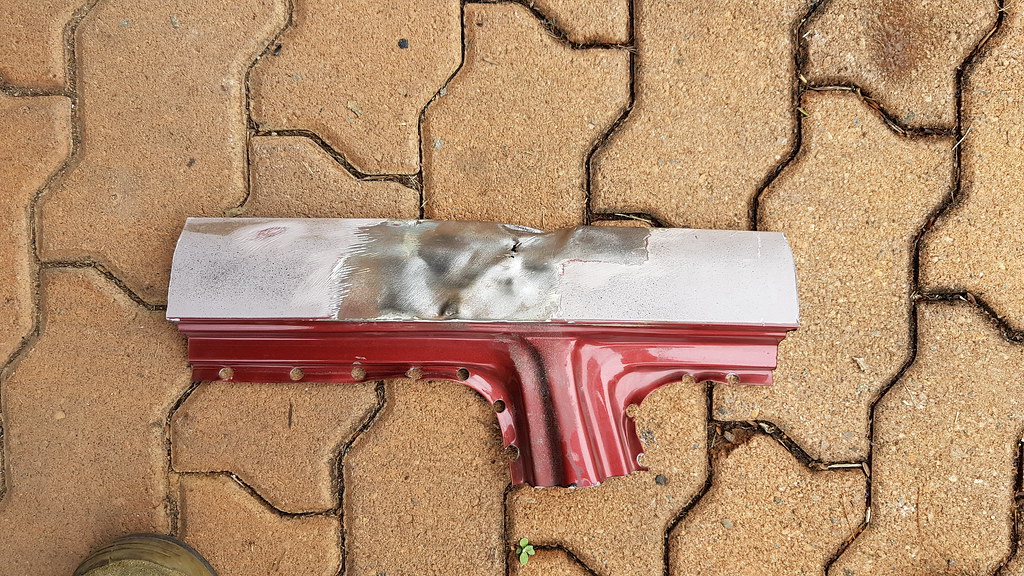
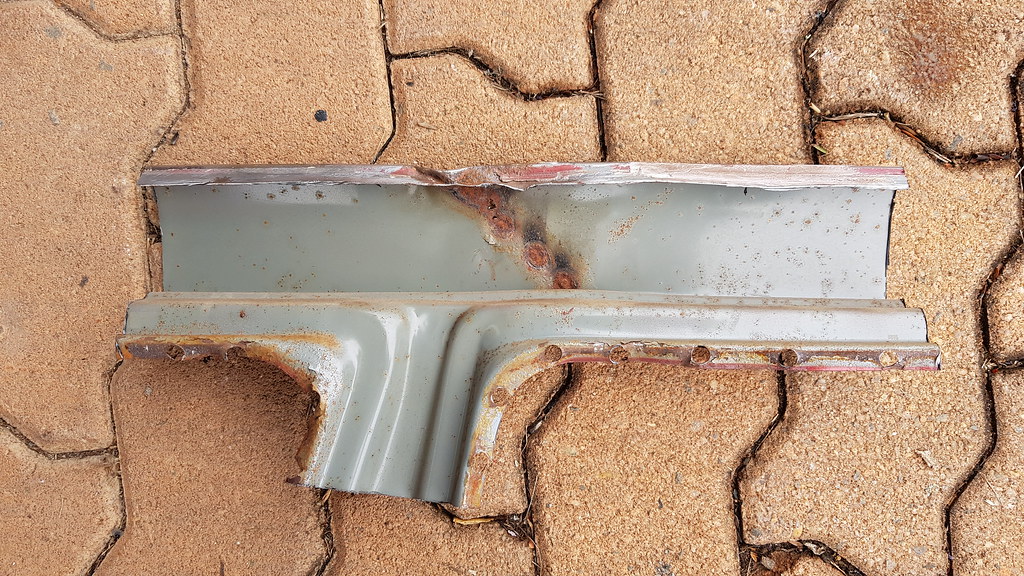
First section to tackle was the huge hole on the rear where the boot hinge bolts to, it's very common for rust to appear here on the wagons, even some of the hatches.
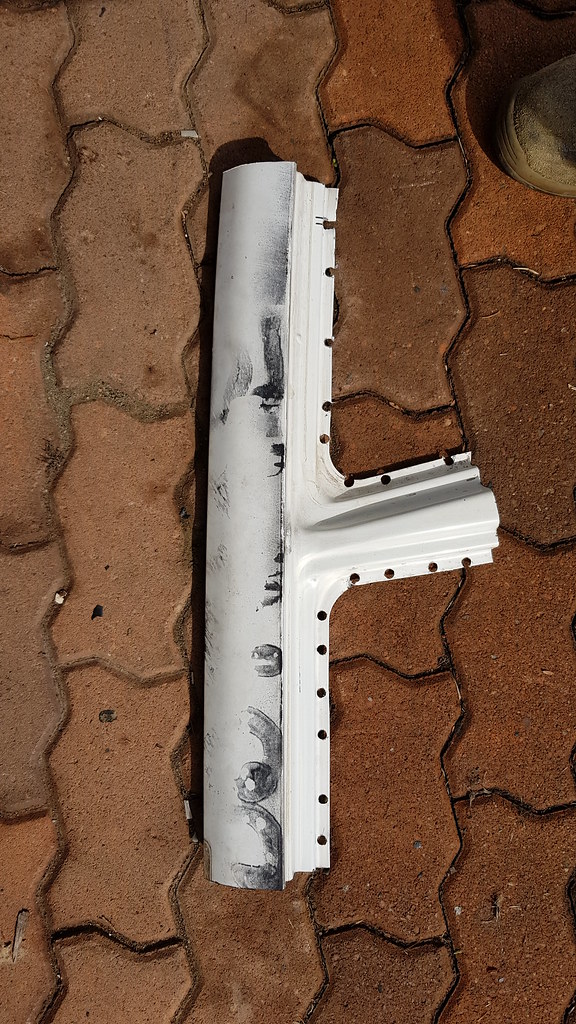
Sealant cracks, water gets under, gg. We cut out the rust affected area and followed similar methods from bending a piece to go under the windscreen which we previously welded in. Took a little bit of fiddling around, including cutting a new piece of sheet metal and starting again but we eventually got the shape working.
The crease in the middle of it we could not replicate 100% but this should be fine. Traced the holes for the hinge which will be cut out later, then made some final cuts, neatened her up and done! Once again, we are starting to scare ourselves with how these panels are turning out! I ran out of gas as I had to weld some stuff for my brothers S13 drift car, so I'll have to refill my bottle this Friday, with more welding to occur this weekend. Stay tuned!

Time to address the dent I found underneath all the bog between the front and rear door on the drivers side. With the spare shitty wagon I bought we decided to cut the damaged piece area from that one as it was mint and weld it onto my maroon one! So we marked out roughly what we needed, then added some extra length to be safe, drilled out the spot welds and cut each of the 3 sides and off she came, with ease!
Now it's time to cut the piece off my car, this time obviously needing to take a bit more care.. Same process as before.. Once it was off it revealed the damage behind, luckily it was all surface rust which was easy to remove. It looks like previously they possibly tried to pull the dents out by welding something to it, but that ofcourse rusted from behind..
With the chassis piece off we placed it over the replacement piece to mark out what we actually needed, and obviously leaving a little extra to play with. Then back and forth with the grinder slowly shaving down each side to get a good fitment with about 1mm gap where the welding is required and wallah we have a replacement piece ready to be welded! Slapped some weld through primer over the chassis side and back of the replacement piece.
Welding time, started with the sections that would be above the doors, either side of the section cut out those areas move freely as we have preivously cut out the inner sections which holds it down, so if we match these panel lines up we can push it down for correct fitment with the spot welds, hard to explain if anyone is confused lemme know I'll draw on the photos to show what I mean. I then moved down and did the sections in the door jams tacking it into place to ensure the panels were level to each other, with this done we moved onto the spot welds in the door jams too. Bolted the drivers door back on to check the fitment, spot on!
With everything tacked up and looking gucci I went ahead and welded it all together, the sections inside the door jams were a little tricky, somewhat welding up above my face on an angle, the weld pool was at times running down too fast, but got it done. Then back to grinding it down flat with a flappy disk, then using a special pad my dad got from his work, its like a cloth disk for the final fine details. We were able to get it very smooth, probably going to need a small amount of body filler for a perfect shapre but we are very impressed with our work. I was able to stand on the door sill, hold onto the section we just welded in and yank back on it, didn't move at all! Finished it off with some primer to protect the metal until I body fill it before paint!
With the final few hours of daylight for the weekend, the insider section of where we just replaced the dented bit I sprayed with weld through primer. Previous posts I showed were we had to cut out the upper and lower folds of the metal which the roof skin actually sits on top of, obviously because it was completely rusted out. I tacked and welded in the lower piece, I must say it was an absolute @$^!@#% trying to weld it in. Upside down, nothing wanted to cooperate, eventually got it done after playing around with the welder settings, found it best to crank up the powa and just hold the weld pool a bit, defs not as much as I would do on any other panel, but seemed the only option. The other few photos show me holding a piece we need to cut to fit into the 2 upper sections which need replacing.
With only 2 small strips needing to be welded onto the chassis side of the roof section, the chassis would then be ready to have the roof skin welded back on! It's been off for like 3 months, and with it off your not meant to move or jack the car else things can go sideways.. I've been wanting to go ahead with swapping my D16Y1 in (which I need to update on too).
So we pulled out the 2 roof skins and looked at what needed to be replaced on the new roof skin from the donor car. Reason for choosing this skin mostly because the whole drivers side is rusted, but mainly because previous owner had the roof rack holes filled in, front and rear has nuts welded on underneath the roof skin itself. They were welded up but not protected from behind so they rusted, and in the middle studs are welded into the roof which were cut flush with the roof.
First section to tackle was the huge hole on the rear where the boot hinge bolts to, it's very common for rust to appear here on the wagons, even some of the hatches.
Sealant cracks, water gets under, gg. We cut out the rust affected area and followed similar methods from bending a piece to go under the windscreen which we previously welded in. Took a little bit of fiddling around, including cutting a new piece of sheet metal and starting again but we eventually got the shape working.
The crease in the middle of it we could not replicate 100% but this should be fine. Traced the holes for the hinge which will be cut out later, then made some final cuts, neatened her up and done! Once again, we are starting to scare ourselves with how these panels are turning out! I ran out of gas as I had to weld some stuff for my brothers S13 drift car, so I'll have to refill my bottle this Friday, with more welding to occur this weekend. Stay tuned!
Last edited by afx31; 02-13-2023 at 02:05 AM.
 09-03-2018, 04:44 AM
#50
Honda-Tech Member
Thread Starter
$500 AUD for the piece of **** wagon
 Already made $100 back from selling a few small things, more to sell still!

