
[88' CRX B20v Build]

 01-01-2012, 09:17 AM
#52
Honda-Tech Member
Thread Starter
I cut the carpet out because I'm replacing it with new carpet.
The interior I got was mostly blue, including the carpet. I'm changing colors as you can see - to black. So I need to get new carpet. It's a shame, the old carpet was in decent shape..
anyways here we go..
I sprayed out the door and under the rocker panels. I decided I will be re-doing the driver-side the same way with primer because the rattle-can red isn't as durable as I would like it to be.
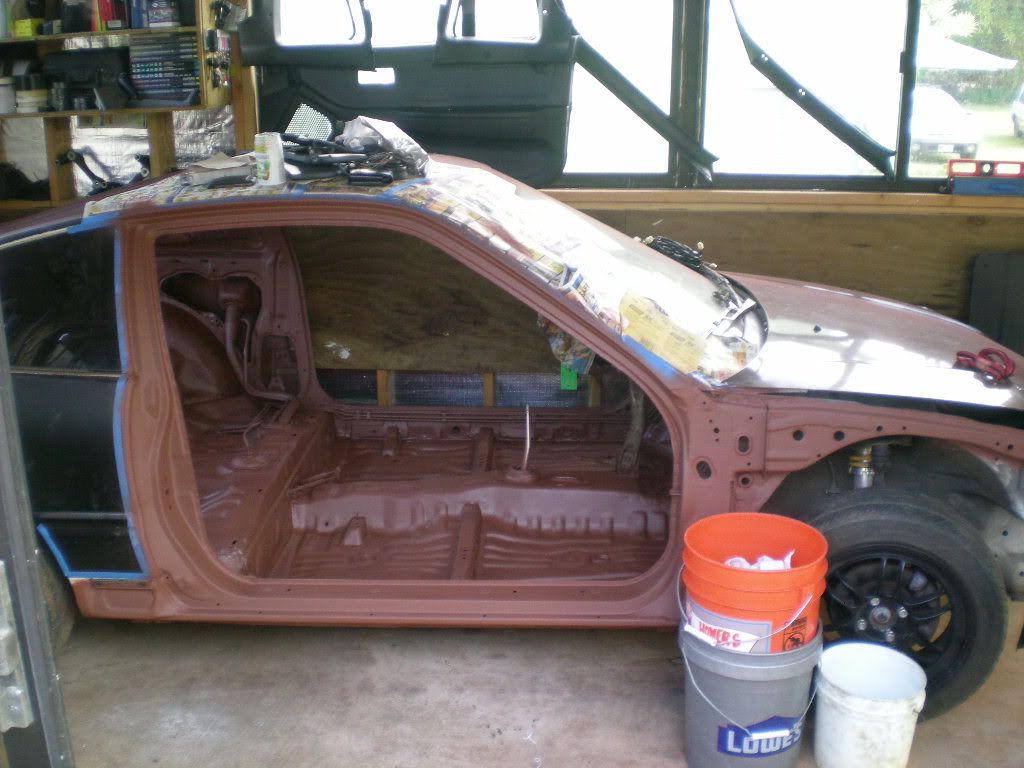
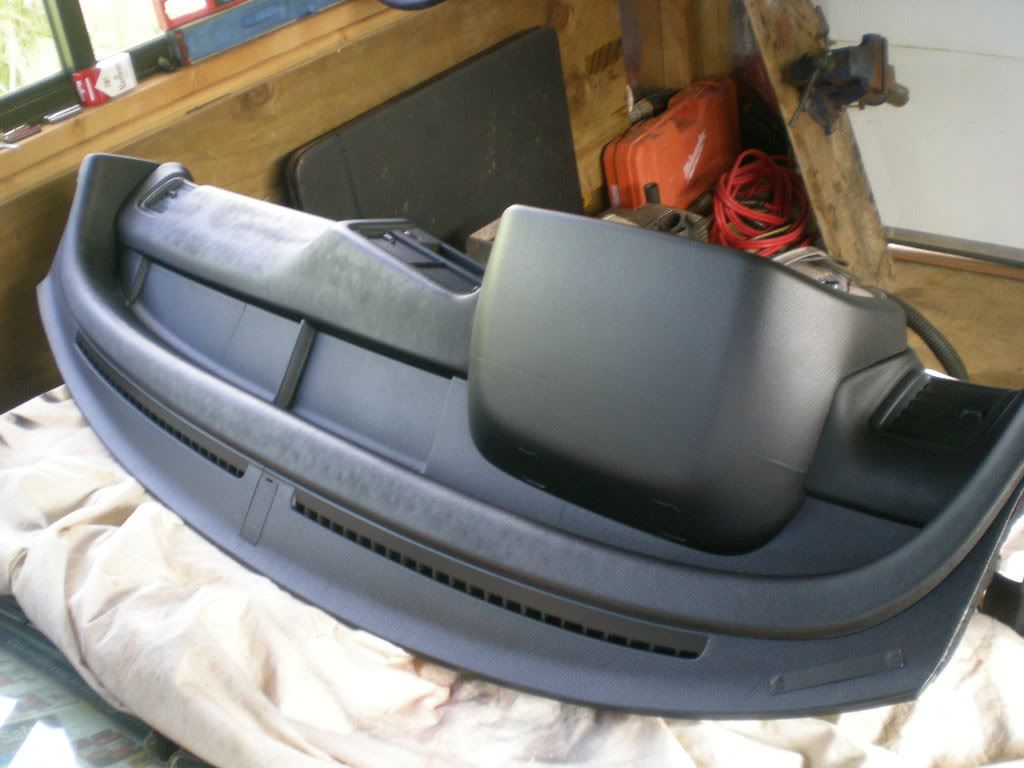
Then we mask off the dashboard..
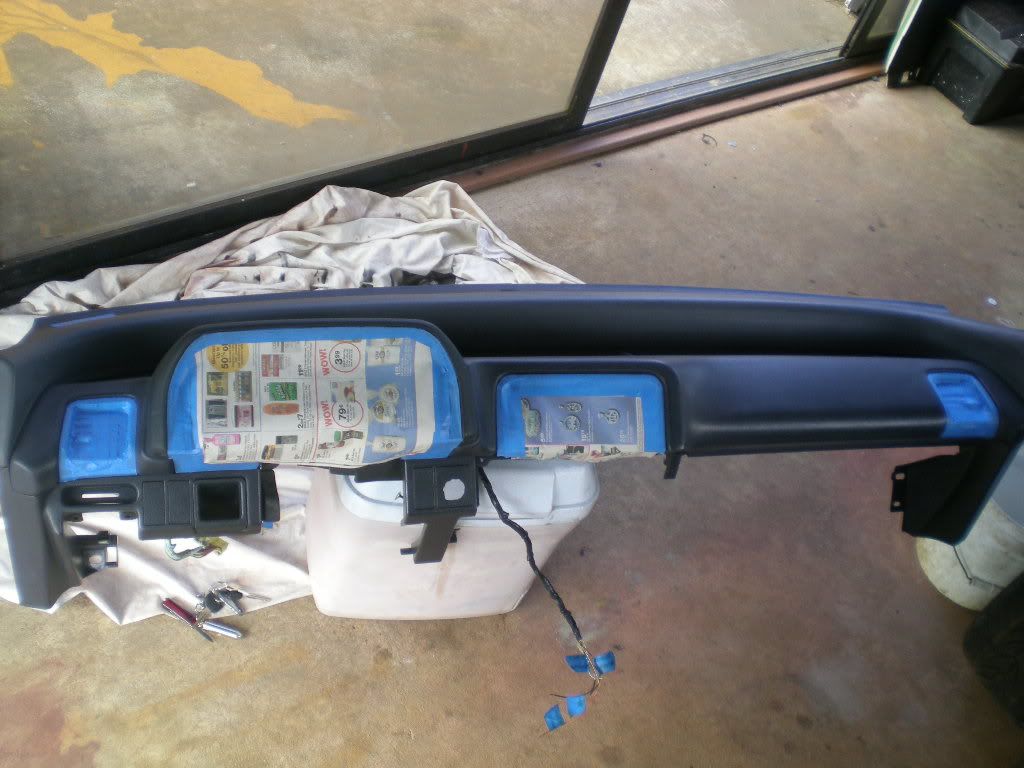
And change the color to black.
I got the other door done up in it's first coat.
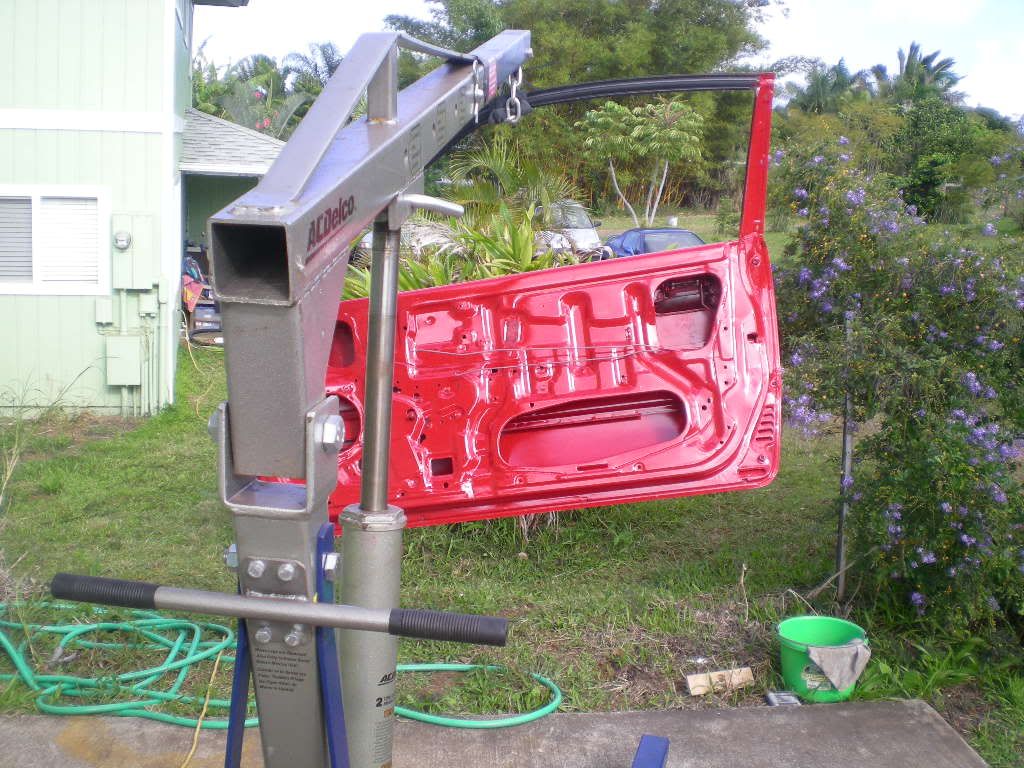
Woooo tasty gloss red.
Now we literally watch paint dry.
The differences in the finish sheen should go away as things dry up.
The interior I got was mostly blue, including the carpet. I'm changing colors as you can see - to black. So I need to get new carpet. It's a shame, the old carpet was in decent shape..
anyways here we go..
I sprayed out the door and under the rocker panels. I decided I will be re-doing the driver-side the same way with primer because the rattle-can red isn't as durable as I would like it to be.
Then we mask off the dashboard..
And change the color to black.
I got the other door done up in it's first coat.
Woooo tasty gloss red.
Now we literally watch paint dry.
The differences in the finish sheen should go away as things dry up.

 01-01-2012, 01:49 PM
#55
Honda-Tech Member
Inspirational indeed, cut my carpet out yesterday...I intend on replacing it with black si carpet that I have. But I have to get the si carpet out in order to put it in my std, so how do I get it out in order to reuse it?
01-01-2012, 01:59 PM
#56
Honda-Tech Member
Join Date: Apr 2008
Location: claymont, de
Posts: 270
Likes: 0
Received 0 Likes
on
0 Posts
thats pretty sick what products did you use on the weather seal exactly? sorry if you already said i didnt read through yet
Last edited by claymonthug; 01-01-2012 at 06:08 PM.
01-01-2012, 02:43 PM
#57
Honda-Tech Member
Join Date: Apr 2008
Location: claymont, de
Posts: 270
Likes: 0
Received 0 Likes
on
0 Posts
 01-01-2012, 07:26 PM
#59
Honda-Tech Member
Thread Starter
@ getting the carpet out without damaging it...
I'm not sure what to tell you, you can unbolt the dash-support and maybe wedge it out from underneath without cutting. Don't flex the dash up too hard and it shouldn't crack. I've never tried this.
Or you could just make a little cut in the area under the dash, then gorilla-tape it from the back when you reinstall.
@claymont - plz don't quote pics, it makes this thread even bigger to scroll through.
and I did not thin the primer, but if I did you were supposed to use acetone. I tried thinning it, but I like to put it on heavy and if i thinned it, runs and sags would have been likely.
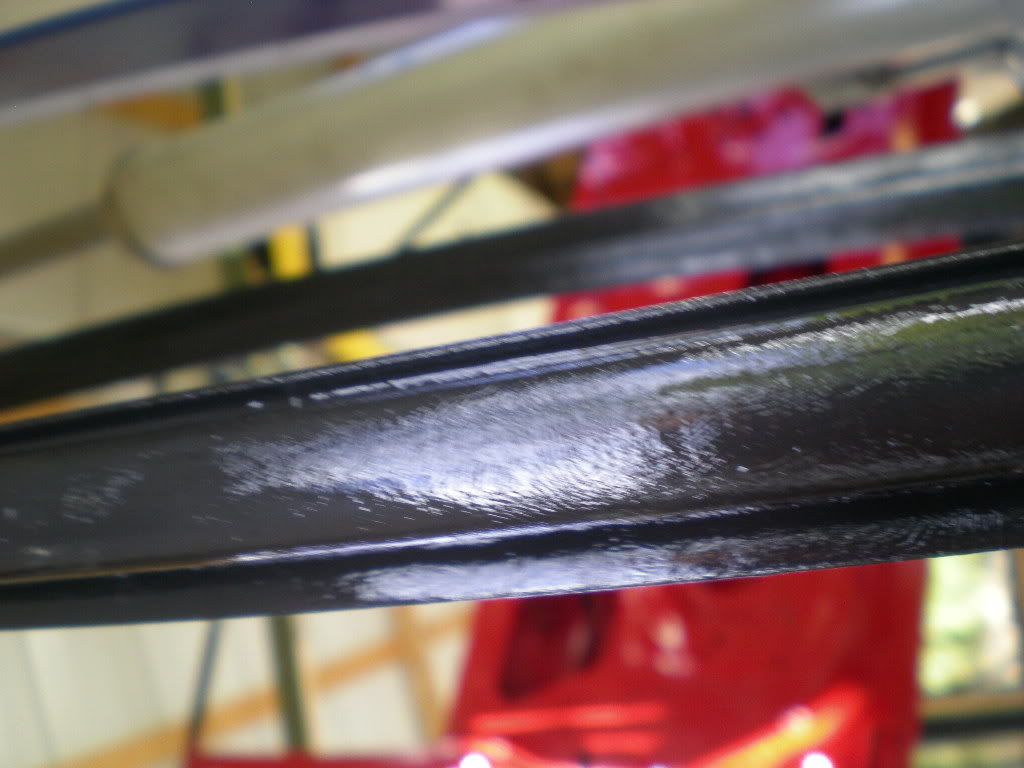
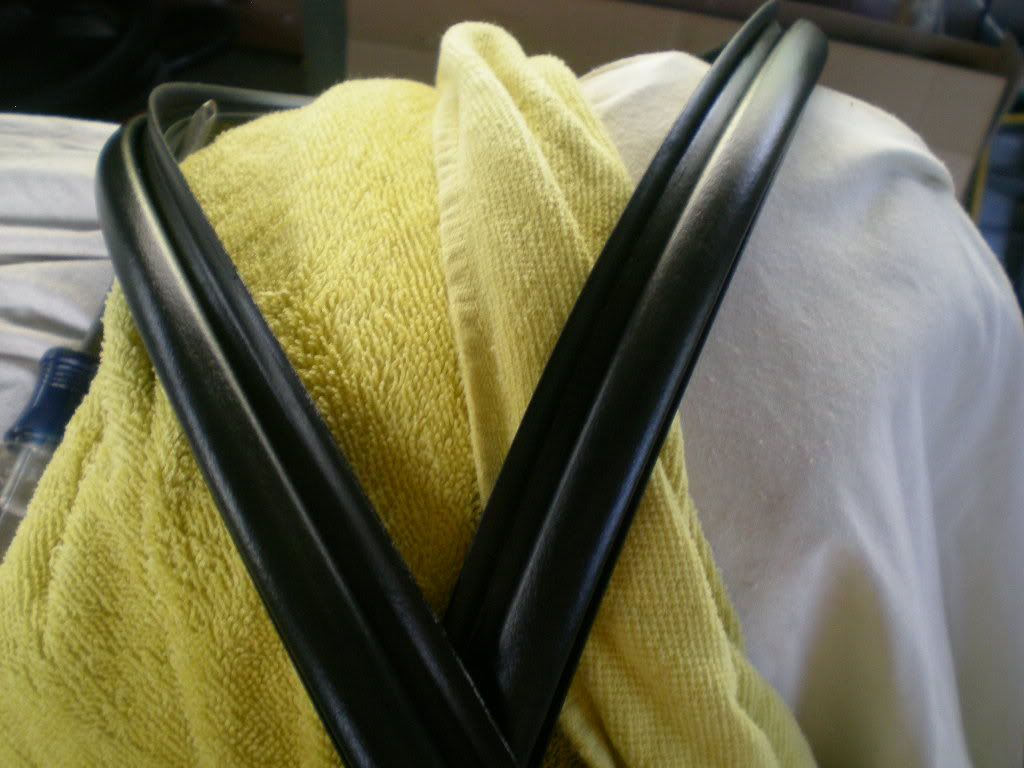
used dielectric grease and a 30/70 solution of water-heavy purple-power-degreaser.
dielectric grease seems to soak into the weatherstrip and make it black/fluffy again. Water also beads on it. better than it does with silicone lube.
and here's ur update.........
...
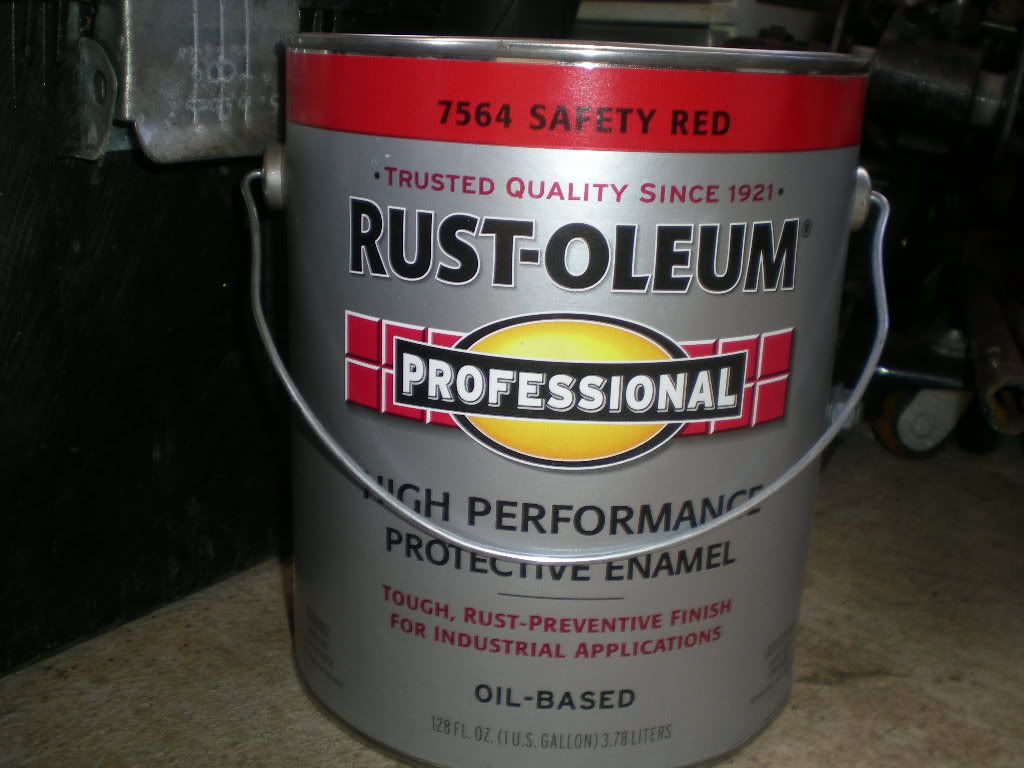
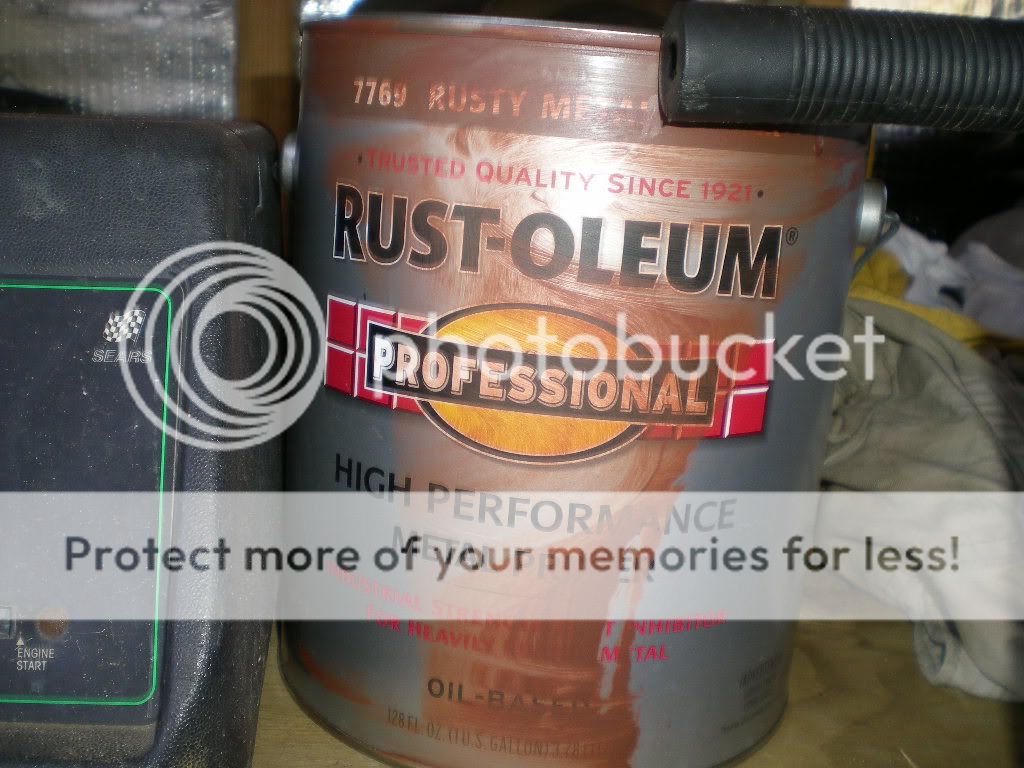
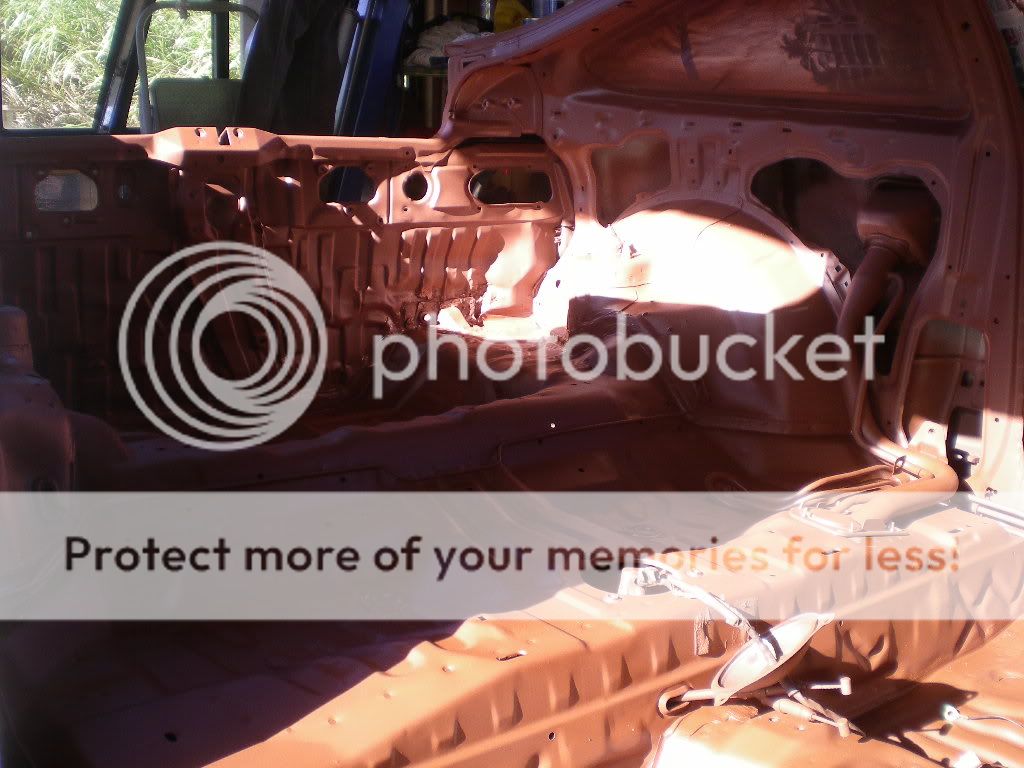
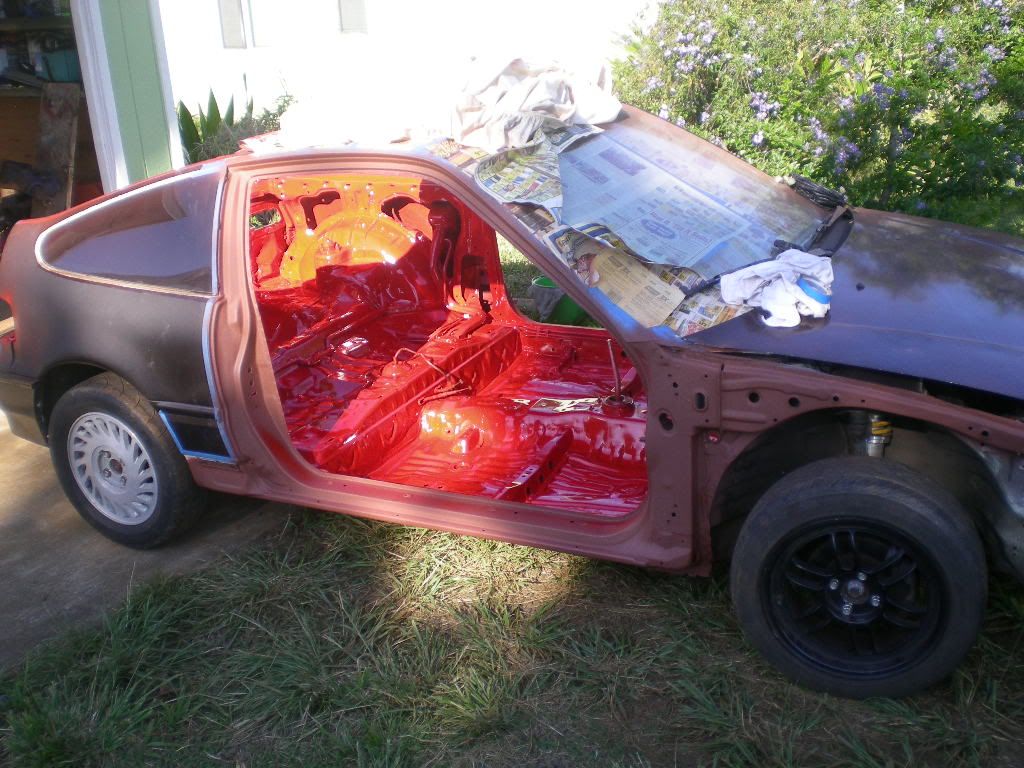
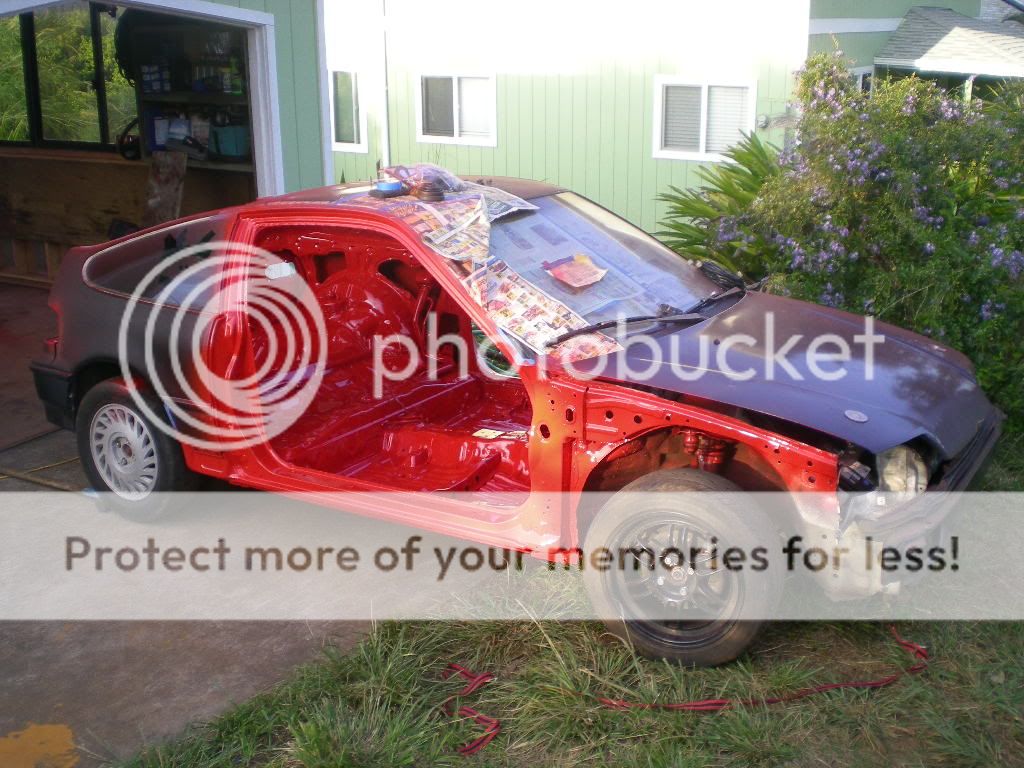
30usd/gal - basic cheap and functional. A little bright for my taste, a little too orange. Luckily these are the things you take into consideration when you have stripped out a CRX and painted it the same color in the past... If you notice, I sprayed the doors directly over the OEM championship white. I used rattle cans of a slightly-less-orange than the 'safety red' I used for the interior.
So why did I use two different colors of red instead of all the 'safety red?'
Because the doors got done with a white undercoat, and no primer. This means the true color of the topcoat comes out as desired. The shell of the car was primed first with a darker-tan color of primer before the topcoat. This basically means, the over 'brightness' of the shell paint is lessened due to a dark primer undercoat. All said and done, the doors/shell come out *very* close to the same color. Aaaand I didn't want to have to prime the doors.
I thinned the primer with acetone about 8%. I did not thin the topcoat (it is thicker than the primer in base-form anyways) and I played with the gun settings and the pressure to get a similar thickness. I figure it was about 90psi at the nozzle and the paint/pressure ratio was favored to the paint about 70/30.
anyways here you go. pictures speak louder.
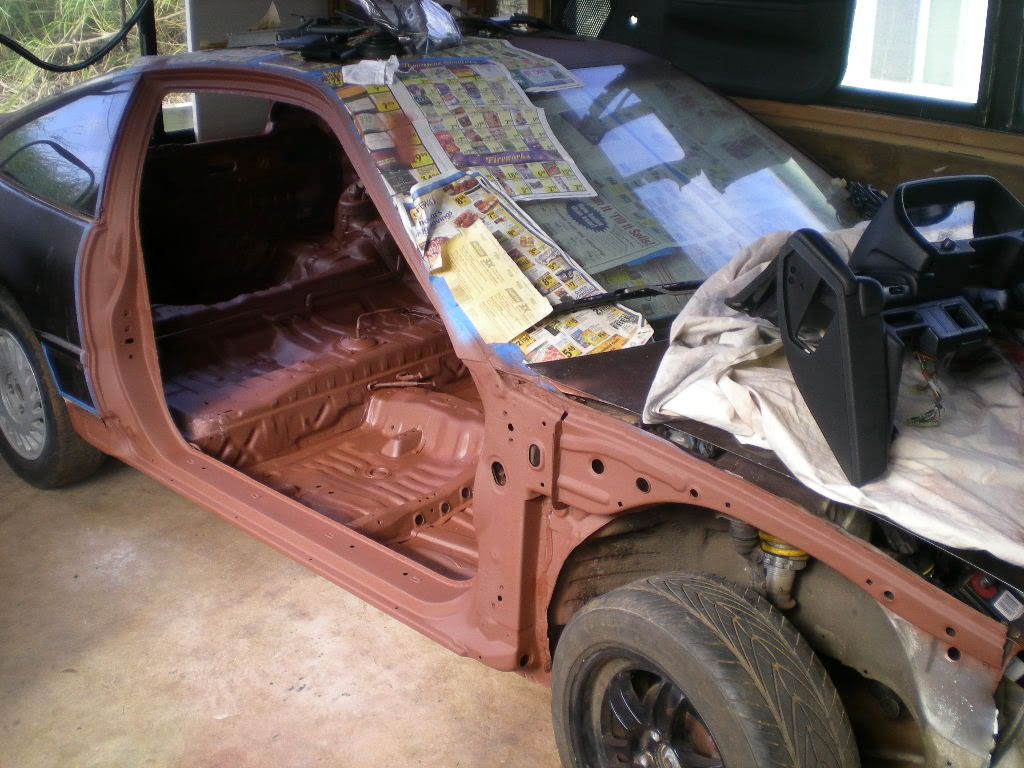
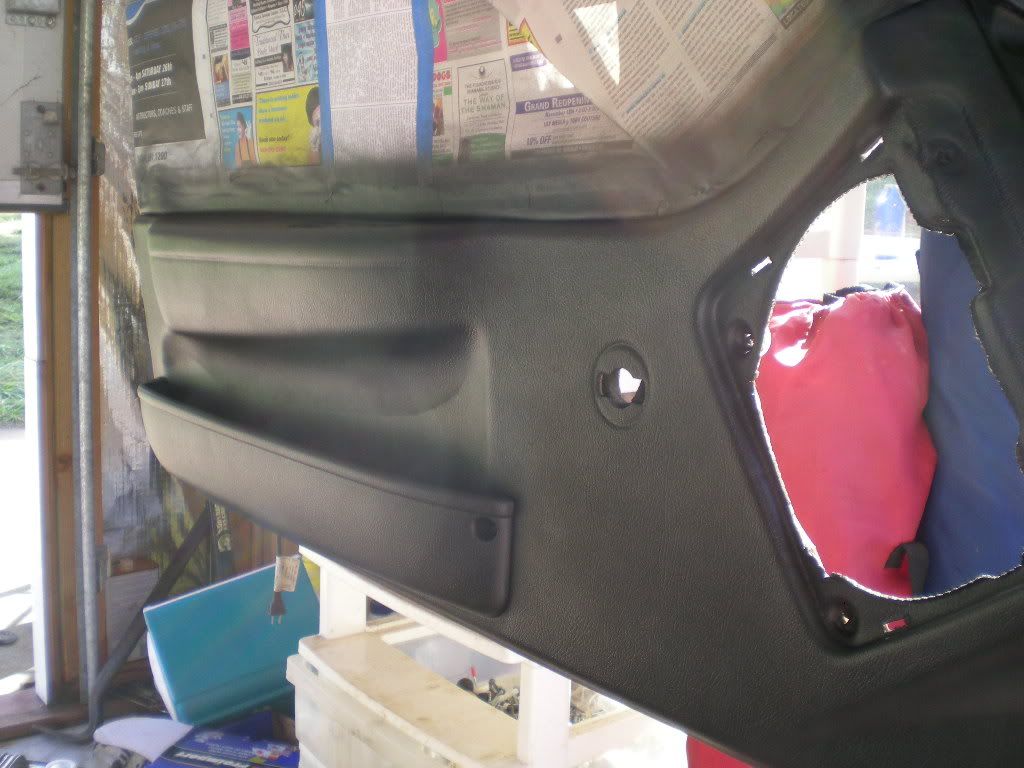
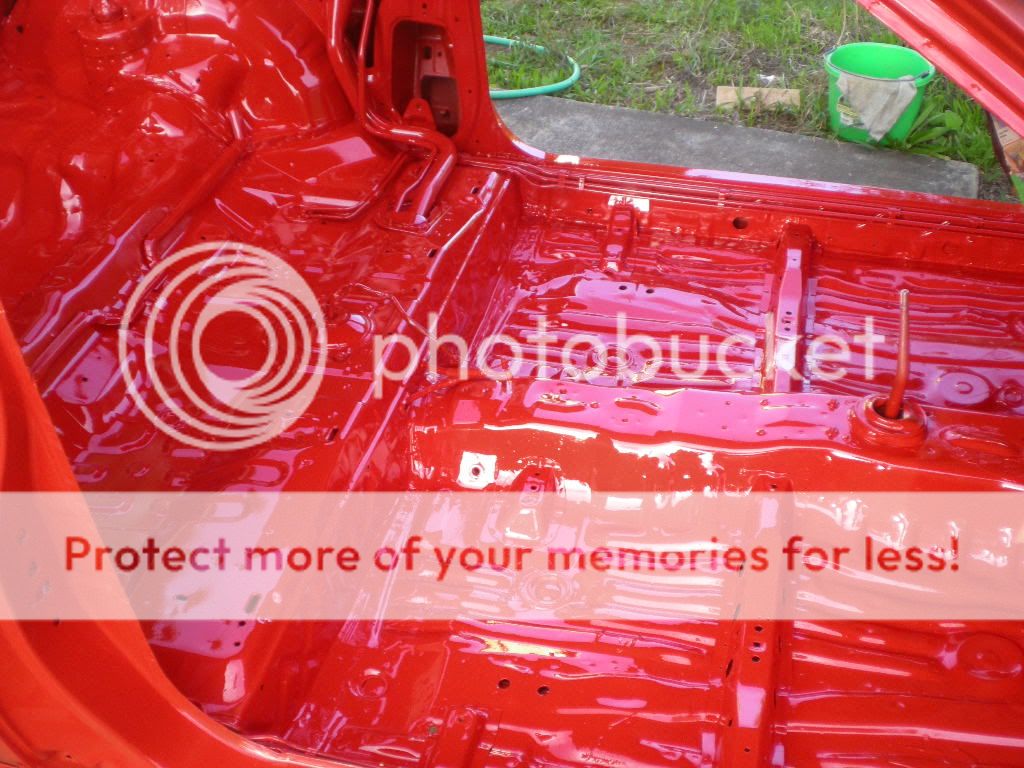
Interior is sprayed
another angle
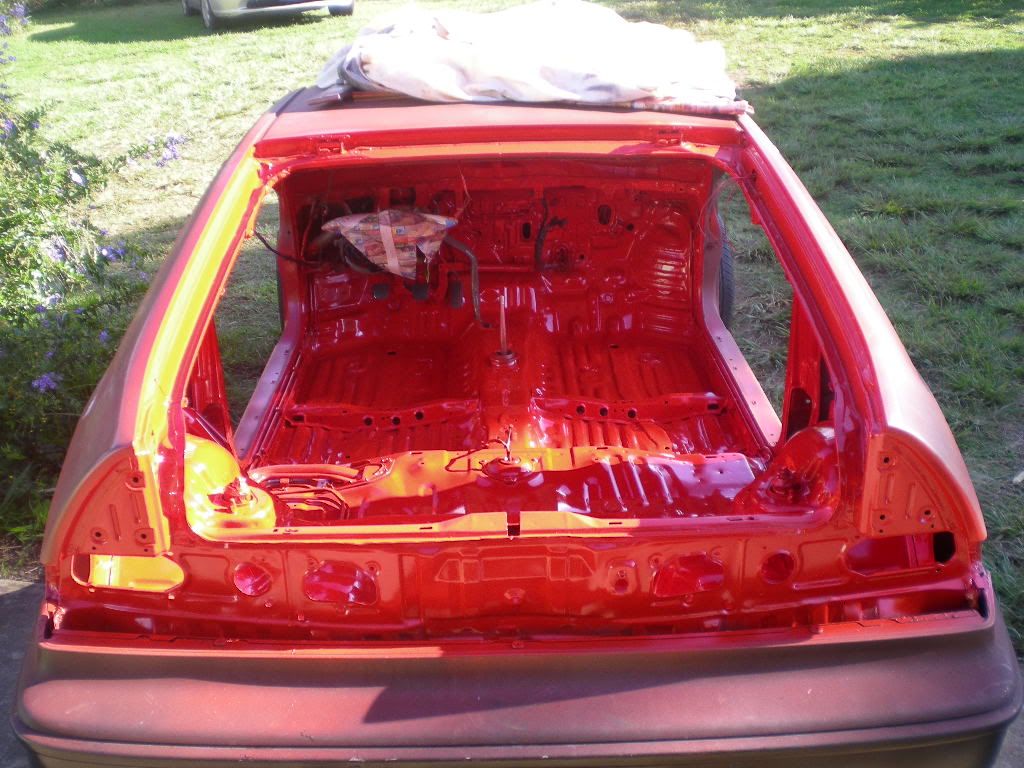
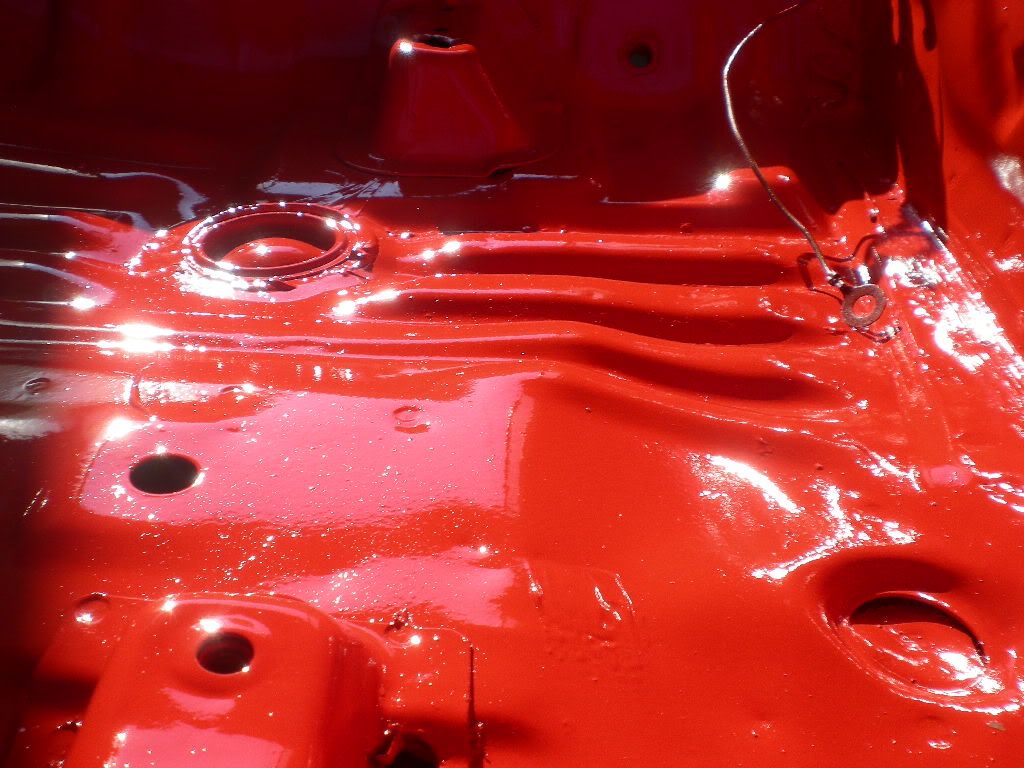
the lighting is a little strange in the sun, the paint looks orange in the pic. it's not. it's red.
a solid first coat, i'll be adding another in 3 days when the paint is closer to 'cured.'
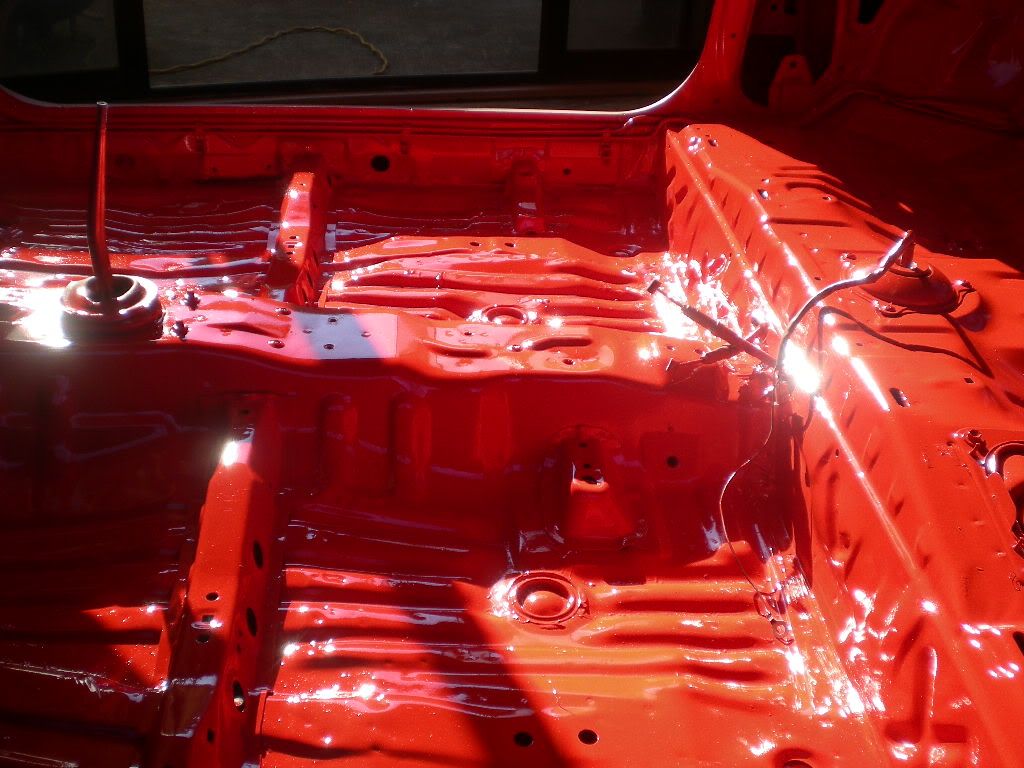
smooooooth flowing liquid gloss. I disturbed a bunch of dust in the air when the paint was tacky, but all those little dirt specks will be covered with a thick second coat. And maybe a third if required. I used 1/2 gallon to get this first coat of red on there. The second coat should only be another 1/4 gallon.
stay tuned.
I'm not sure what to tell you, you can unbolt the dash-support and maybe wedge it out from underneath without cutting. Don't flex the dash up too hard and it shouldn't crack. I've never tried this.
Or you could just make a little cut in the area under the dash, then gorilla-tape it from the back when you reinstall.
@claymont - plz don't quote pics, it makes this thread even bigger to scroll through.
and I did not thin the primer, but if I did you were supposed to use acetone. I tried thinning it, but I like to put it on heavy and if i thinned it, runs and sags would have been likely.
used dielectric grease and a 30/70 solution of water-heavy purple-power-degreaser.
dielectric grease seems to soak into the weatherstrip and make it black/fluffy again. Water also beads on it. better than it does with silicone lube.
and here's ur update.........
...
30usd/gal - basic cheap and functional. A little bright for my taste, a little too orange. Luckily these are the things you take into consideration when you have stripped out a CRX and painted it the same color in the past... If you notice, I sprayed the doors directly over the OEM championship white. I used rattle cans of a slightly-less-orange than the 'safety red' I used for the interior.
So why did I use two different colors of red instead of all the 'safety red?'
Because the doors got done with a white undercoat, and no primer. This means the true color of the topcoat comes out as desired. The shell of the car was primed first with a darker-tan color of primer before the topcoat. This basically means, the over 'brightness' of the shell paint is lessened due to a dark primer undercoat. All said and done, the doors/shell come out *very* close to the same color. Aaaand I didn't want to have to prime the doors.
I thinned the primer with acetone about 8%. I did not thin the topcoat (it is thicker than the primer in base-form anyways) and I played with the gun settings and the pressure to get a similar thickness. I figure it was about 90psi at the nozzle and the paint/pressure ratio was favored to the paint about 70/30.
anyways here you go. pictures speak louder.
Interior is sprayed
another angle
the lighting is a little strange in the sun, the paint looks orange in the pic. it's not. it's red.
a solid first coat, i'll be adding another in 3 days when the paint is closer to 'cured.'
smooooooth flowing liquid gloss. I disturbed a bunch of dust in the air when the paint was tacky, but all those little dirt specks will be covered with a thick second coat. And maybe a third if required. I used 1/2 gallon to get this first coat of red on there. The second coat should only be another 1/4 gallon.
stay tuned.
01-01-2012, 07:28 PM
#60
Honda-Tech Member
Thread Starter
and i'm gonna get a new oem-spec carpet from stockinteriors, unless anyone else says they know a better solution. i'll get the thicker stuff with extra backing.
when i get tired of road noise, i'll rip it all out and use dynamat extreme. it's gonna be hella loud in the car with no firewall matting or anything under the carpet (oem-sound-deadening was removed.)
when i get tired of road noise, i'll rip it all out and use dynamat extreme. it's gonna be hella loud in the car with no firewall matting or anything under the carpet (oem-sound-deadening was removed.)
01-02-2012, 09:41 AM
#62
Honda-Tech Member
Thread Starter
sound deadening is about adding mass.
it's roughly the opposite of weight-reduction.
The more mass you add to an object, the more you lower it's resonant frequency.
when something vibrates and hums and makes noise, it's because it's vibrating at the resonant frequency which makes it move, thus moving the air around it and creating sound waves. Just like a speaker... even speakers have a resonant frequency that they perform the best at.
when you add mass to something, you lower the frequency it will make noise/rattle/vibrate at, and it doesn't make as much noise.
like after you deaden your car door and you slam it... it's just a dull thud instead of the previous metallic twang/banging sound before you deadened it.
house carpet padding is not very heavy and doesn't have much mass. it would work (not very well) as a heat shield, but wouldn't do much for sound.
dynamat extreme ftw.
 01-03-2012, 05:12 PM
#64
Honda-Tech Member
 01-04-2012, 07:15 PM
#66
Honda-Tech Member
Thread Starter
It seems to stick pretty well. The cans I bought must have been sitting for ages because they don't spray properly... I'll be laying a nice long pass down on the dashboard, then half-ways across the can stops spraying for a second. Kind of like it clogs... Infuriating. I attribute that to old stock sitting in the back room for too long.
01-04-2012, 07:15 PM
#67
Honda-Tech Member
Thread Starter
Here we sit after one coat of paint. It's been a few days, so it's time for another.
More red paint. Exciting stuff. I'm into 3/4 gallon as of now.
Final coat is done. Now she dries for two days.....
I discovered that someone disconnected the key-in-ignition dinger. I understand why now, it's quite annoying. I might have to disconnect it again..
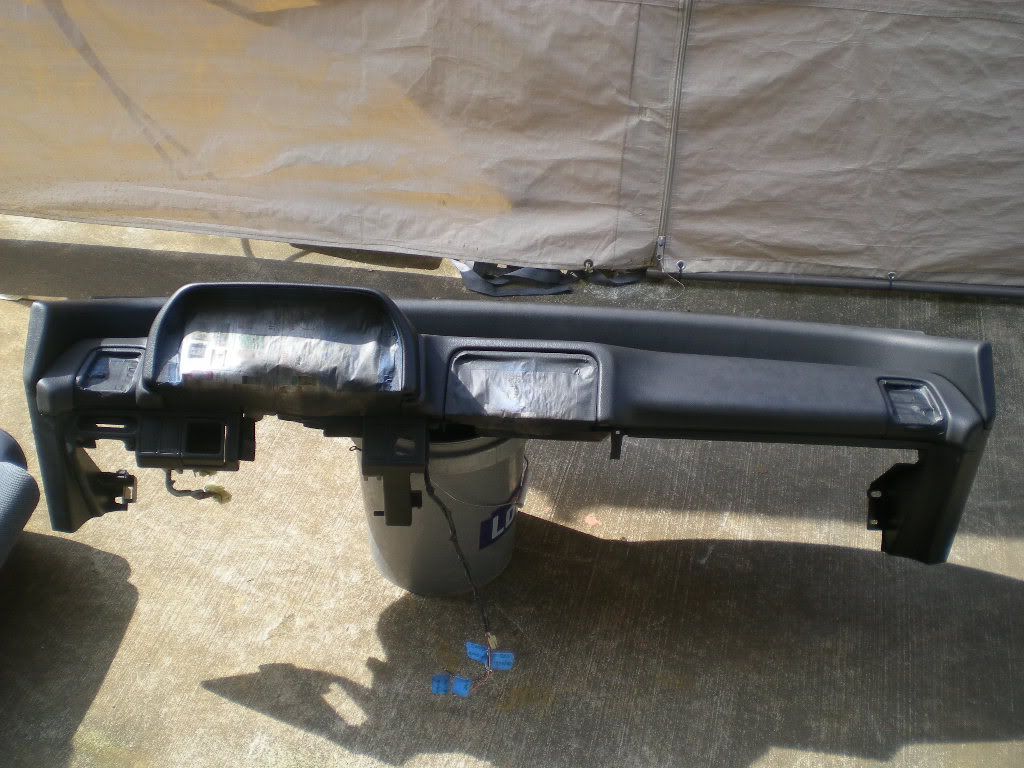
I got the dash back in..
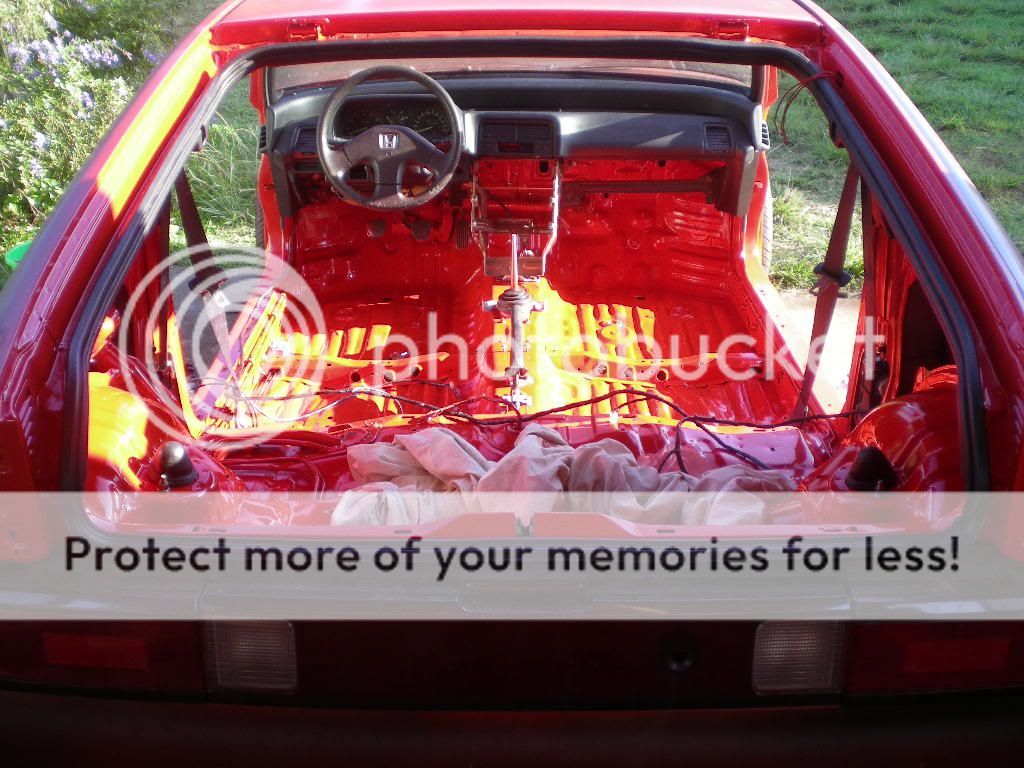
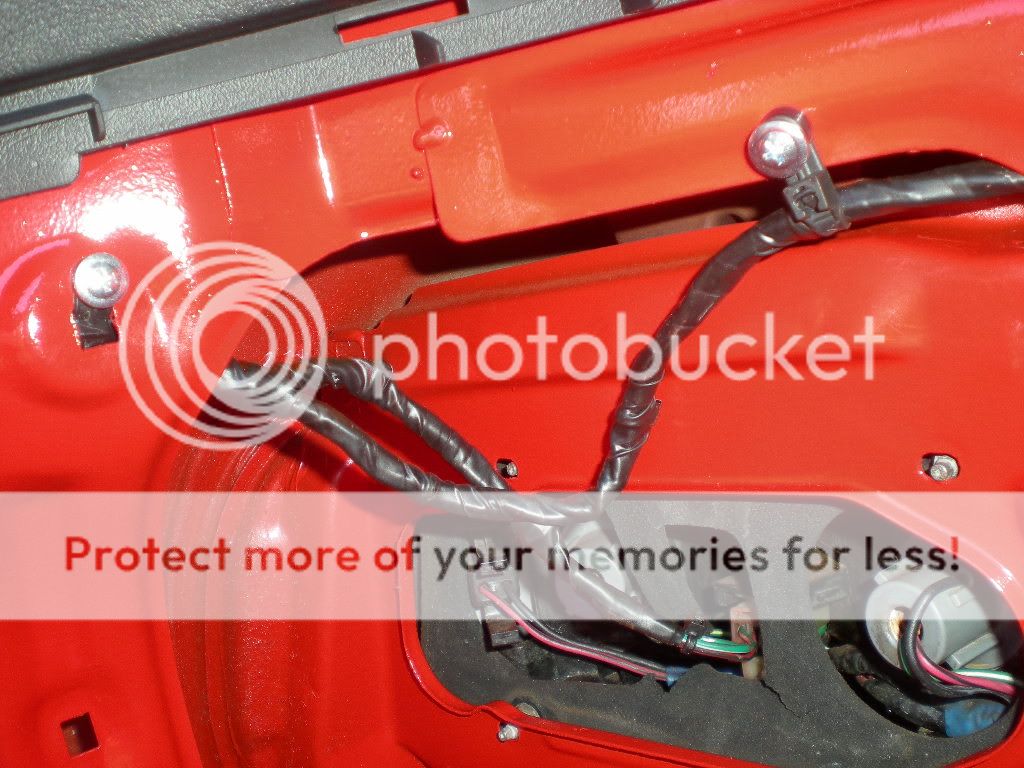
And got part of my rear cabin harness tucked before I ran out of the screw-loop cable ties.
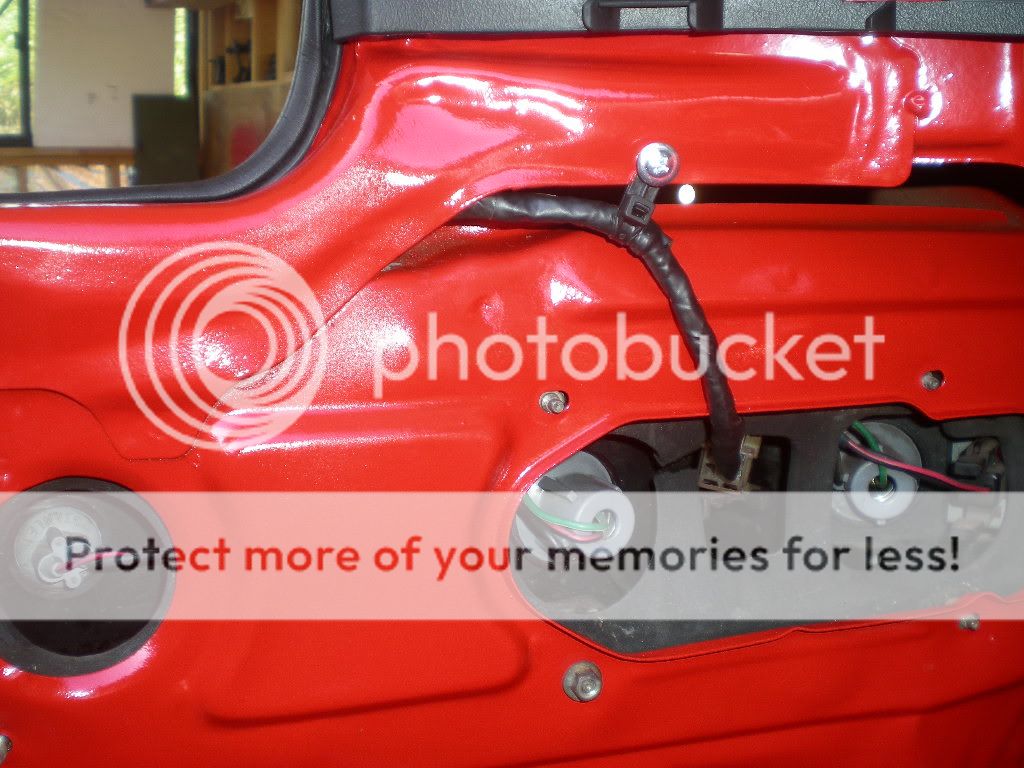
Nicely hidden and protected..
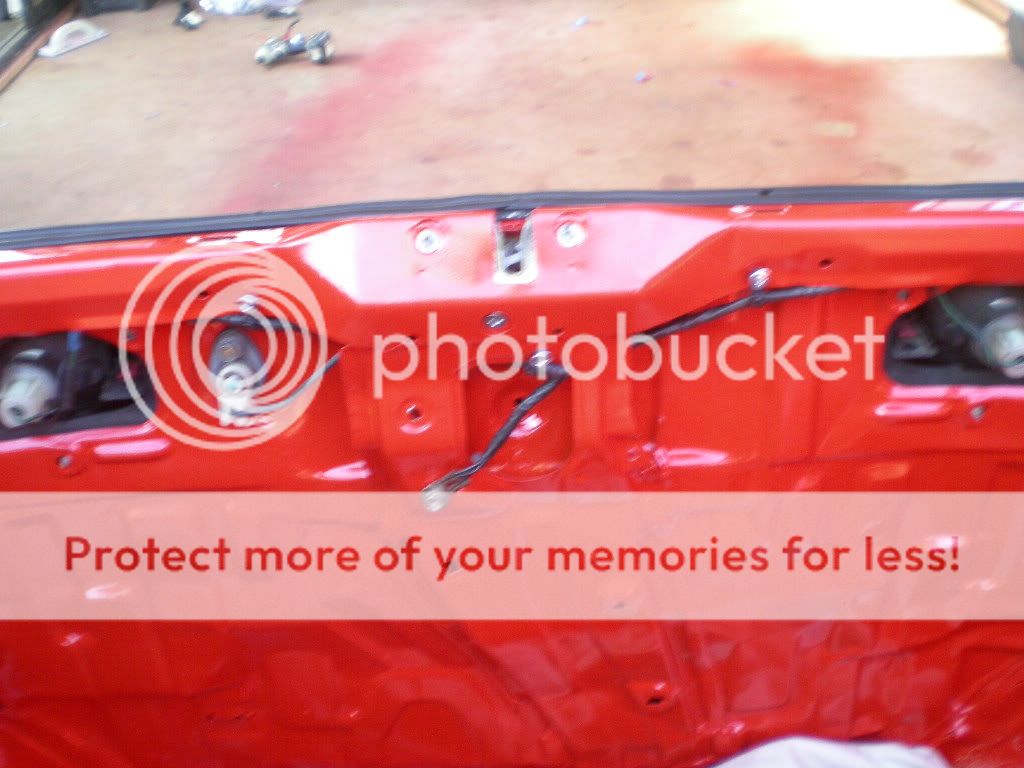
Working my way down the wires..
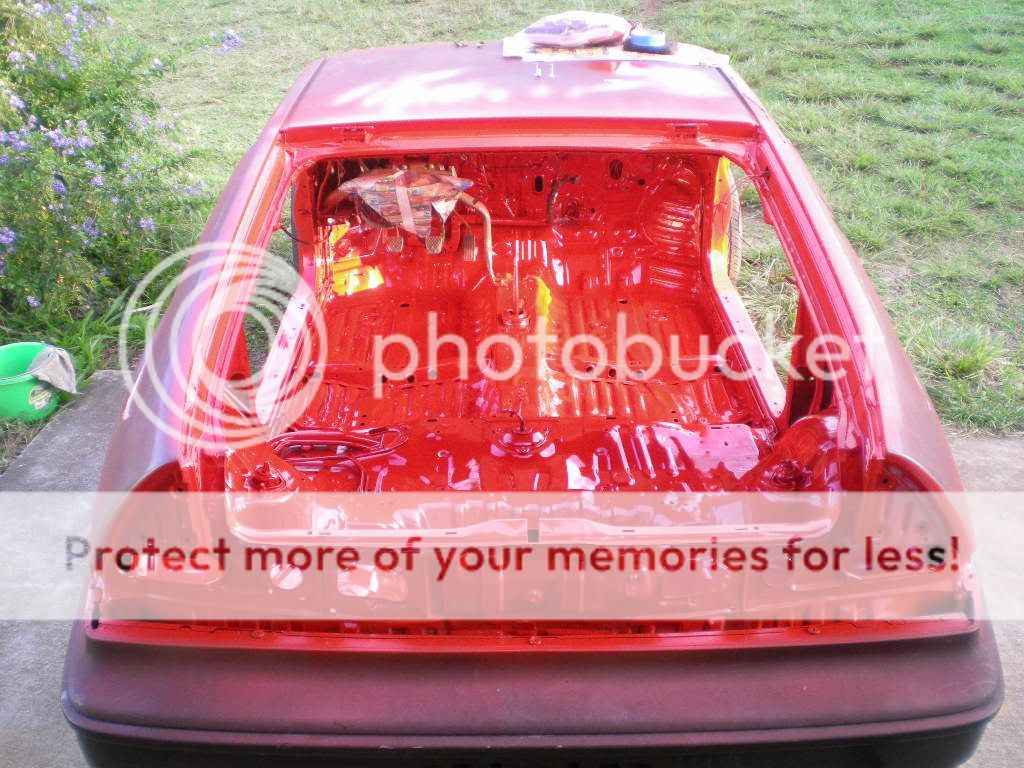
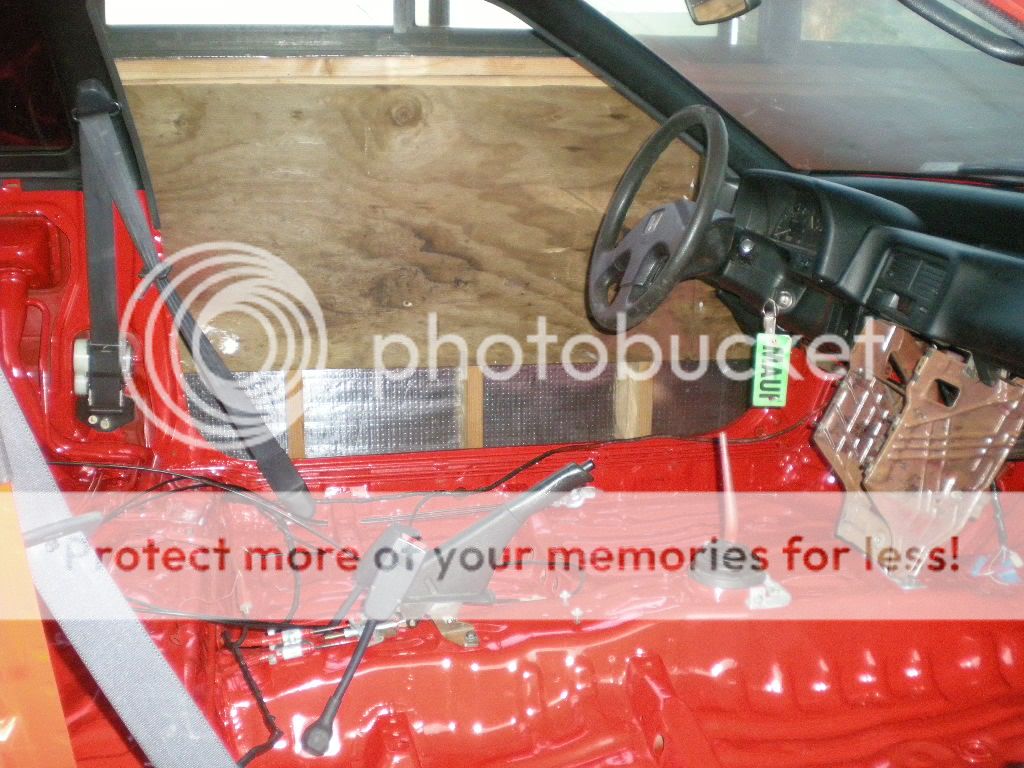
With the interior back in, the tint looks half-ways decent.

Seatbelts and trim make it feel like a car again..

Some more interior installation to do... waiting on new carpet as well.
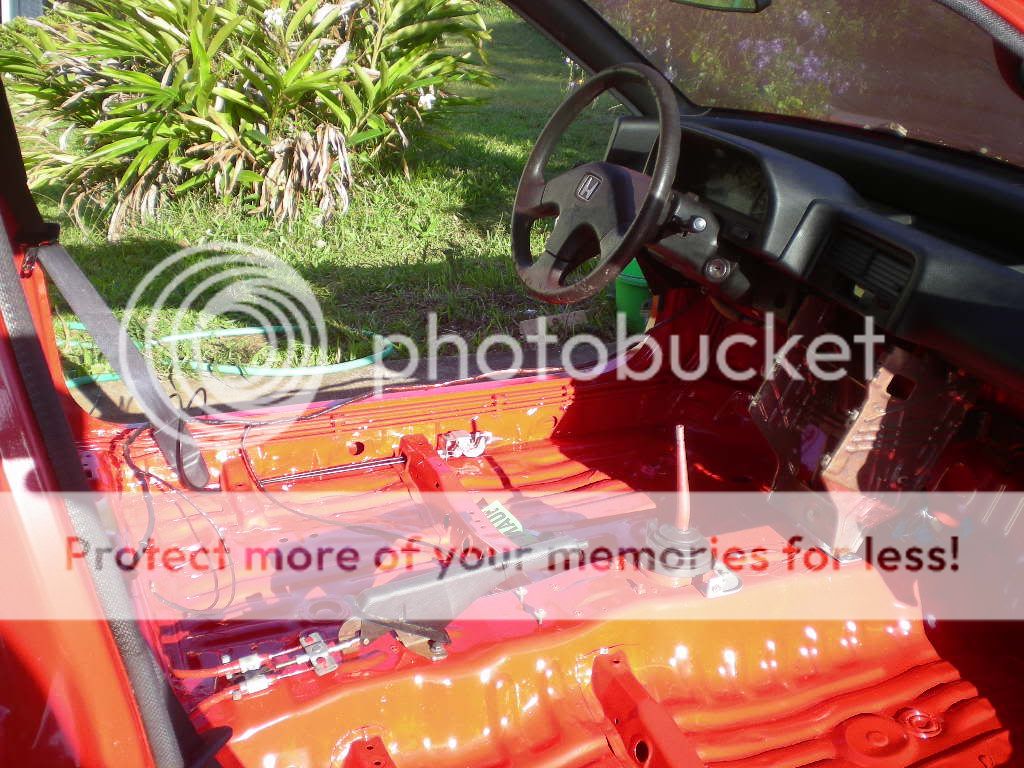
And a headliner!

Here we sit for the night. Tomorrow I might start my tucking procedures.. I'm tempted to tuck most everything in the bay..
If I do the full tuck, I'll cut and reflare fuel/brake lines and re-route them into the cabin. Put the fuel filter on the inside of the firewall, tuck the fuse box etc.. Delete the emissions stuff, put the b20v catch-can inside... Hmmm what else.
Anyways stay tuned.
More red paint. Exciting stuff. I'm into 3/4 gallon as of now.
Final coat is done. Now she dries for two days.....
I discovered that someone disconnected the key-in-ignition dinger. I understand why now, it's quite annoying. I might have to disconnect it again..
I got the dash back in..
And got part of my rear cabin harness tucked before I ran out of the screw-loop cable ties.
Nicely hidden and protected..
Working my way down the wires..
With the interior back in, the tint looks half-ways decent.
Seatbelts and trim make it feel like a car again..
Some more interior installation to do... waiting on new carpet as well.
And a headliner!
Here we sit for the night. Tomorrow I might start my tucking procedures.. I'm tempted to tuck most everything in the bay..
If I do the full tuck, I'll cut and reflare fuel/brake lines and re-route them into the cabin. Put the fuel filter on the inside of the firewall, tuck the fuse box etc.. Delete the emissions stuff, put the b20v catch-can inside... Hmmm what else.
Anyways stay tuned.
01-05-2012, 07:21 PM
#69
Honda-Tech Member
Thread Starter
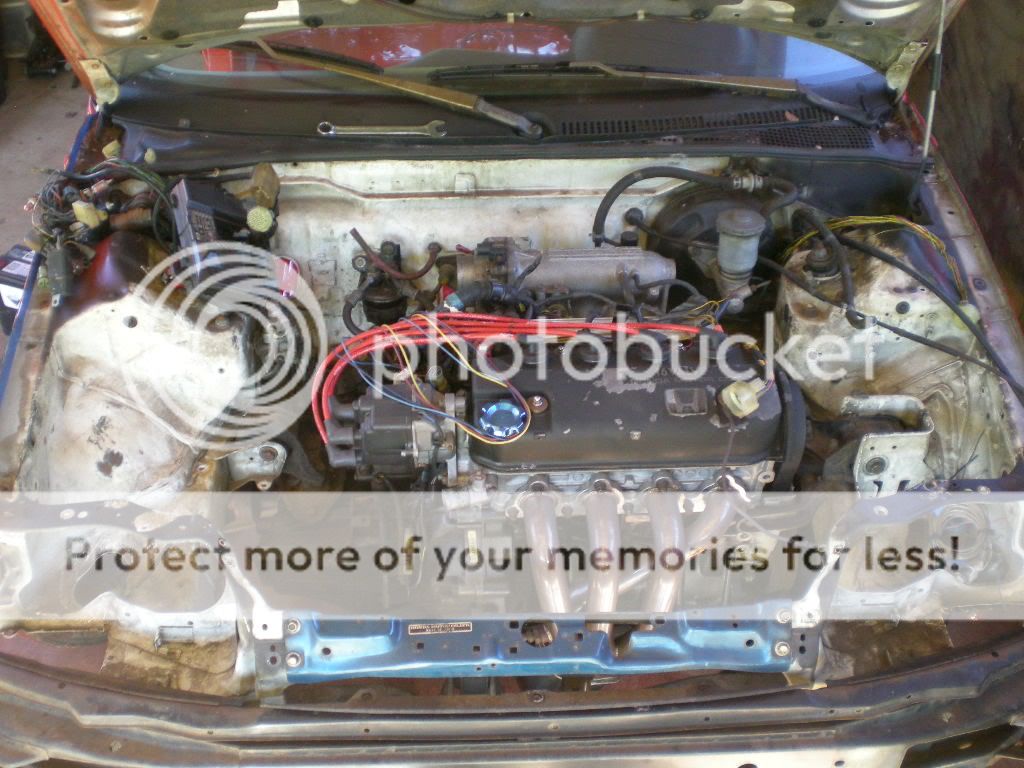
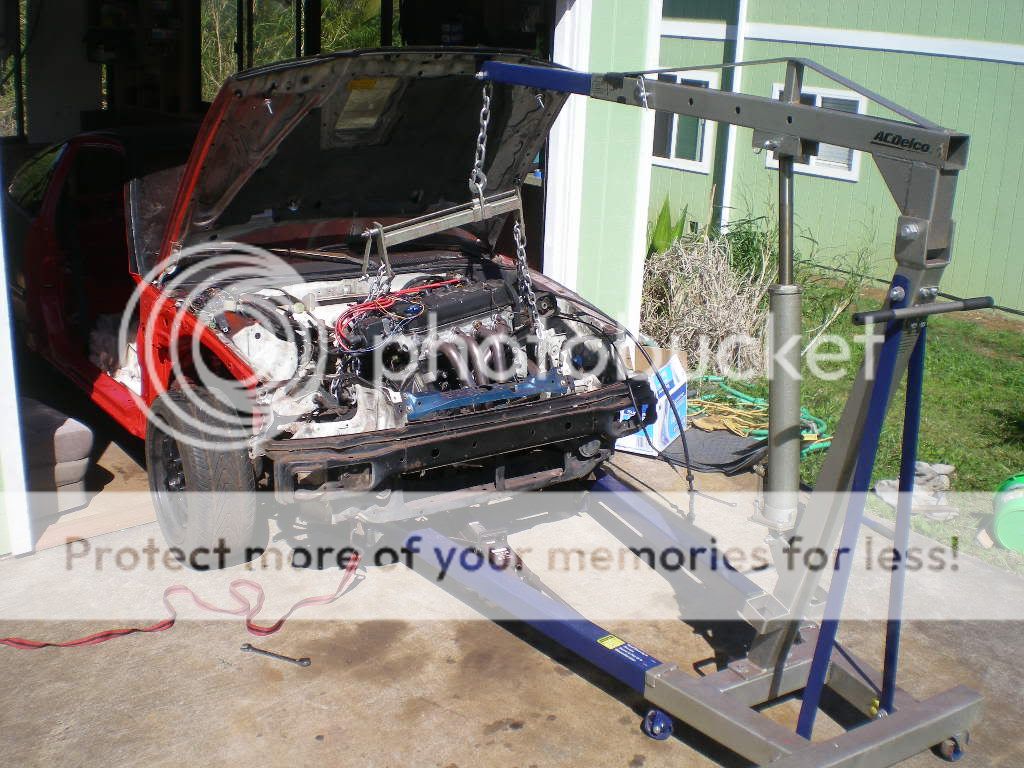
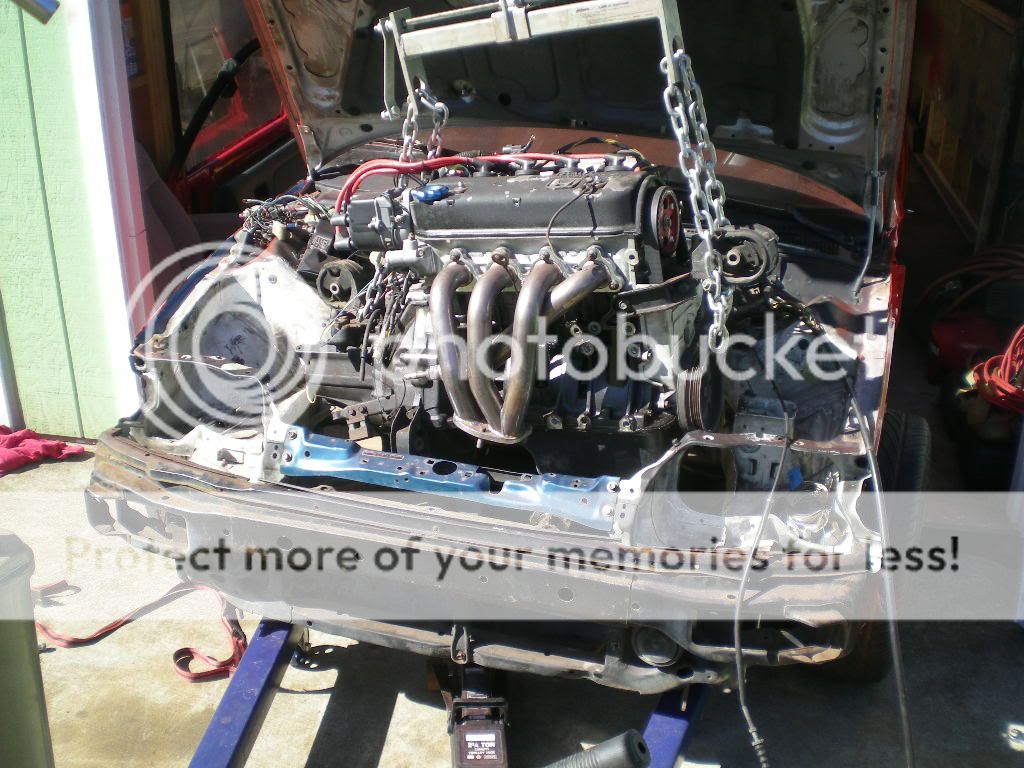
Here we see a motor. sitting there like it owns the place.... silly motor.
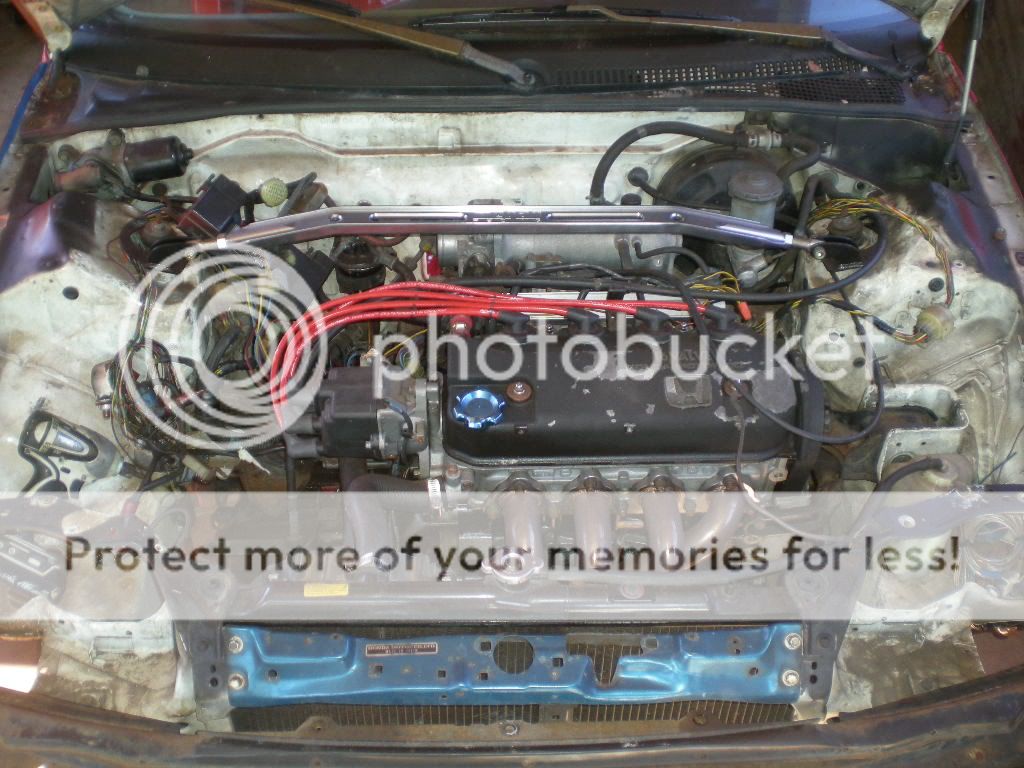
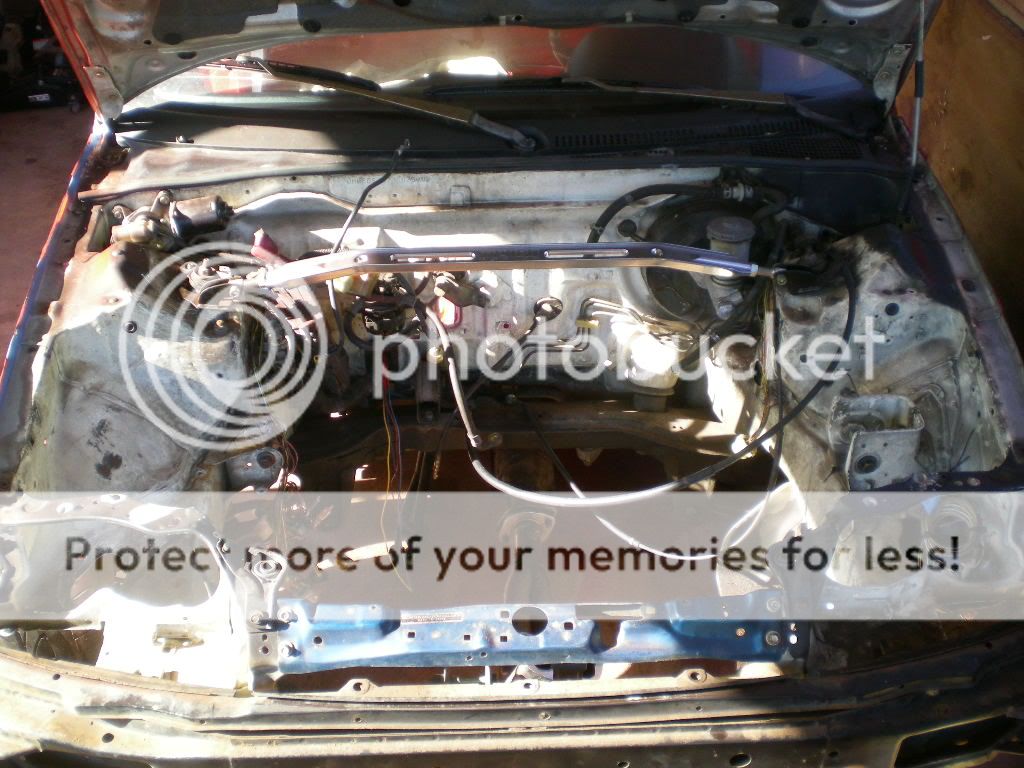
then we remove the strut tower bar and the radiator.
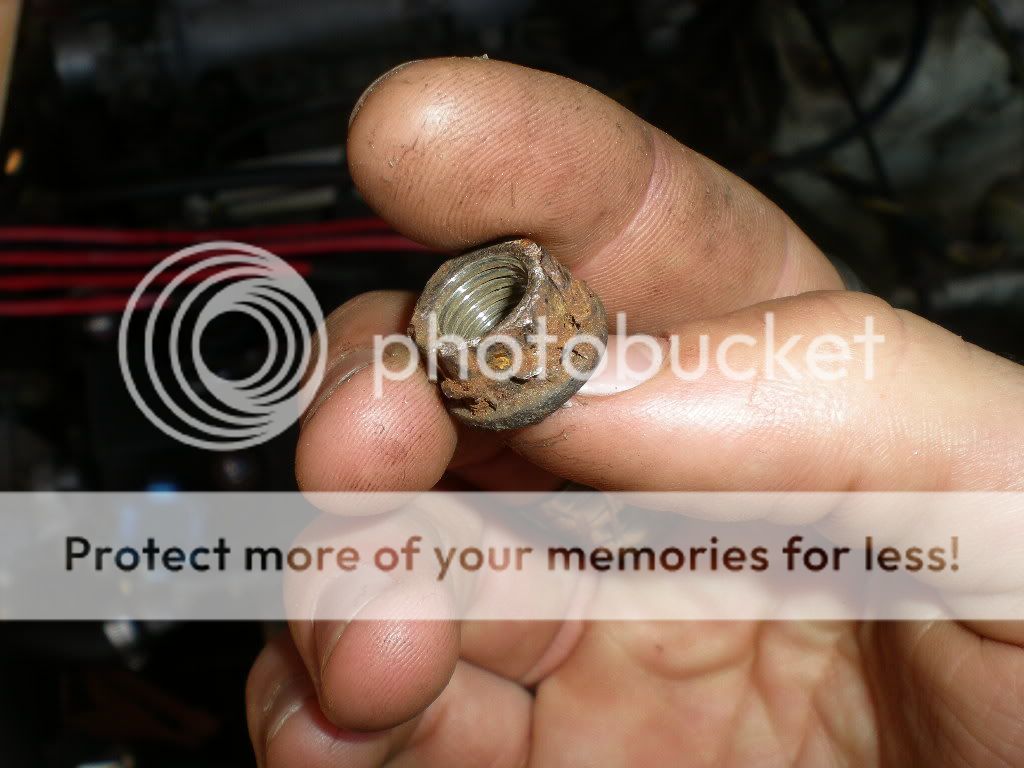
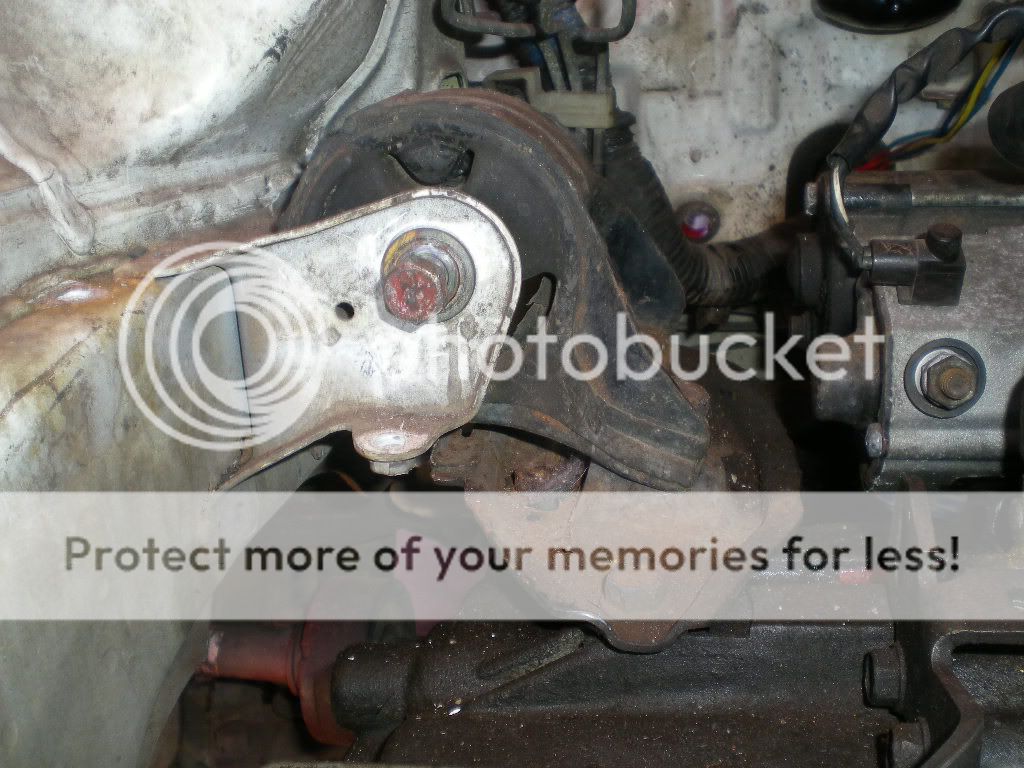
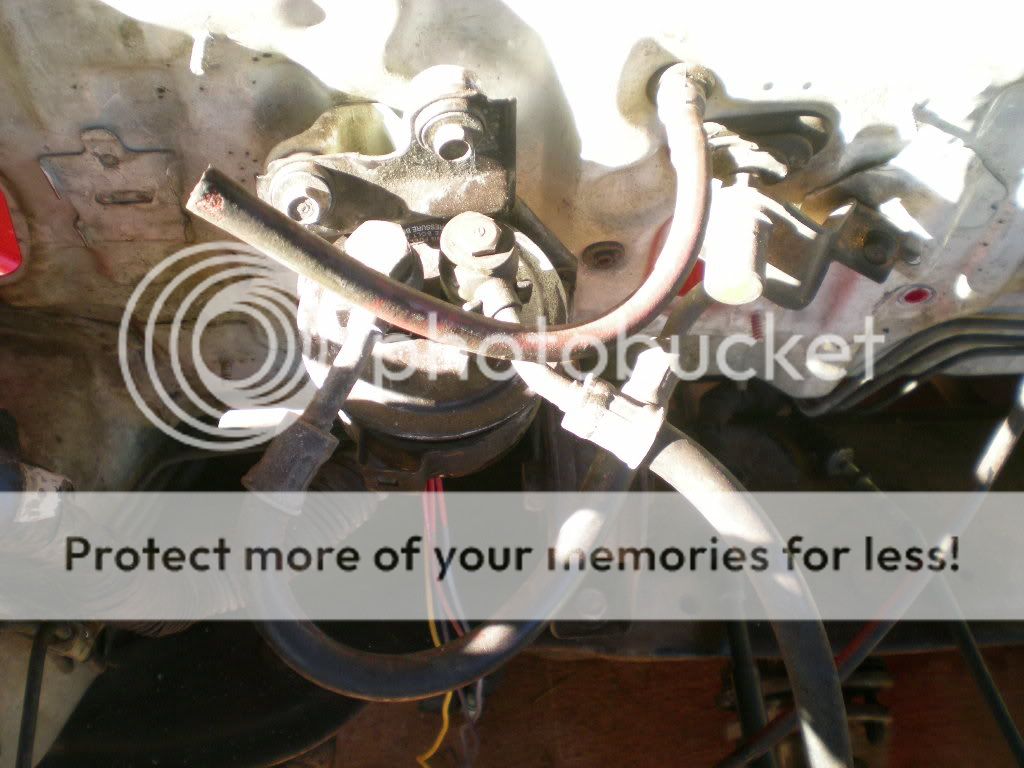
And we discover a strange looking nut. I don't know what to make of this nut. It's a very strange nut. Look at it.
Then we remove the transmission mount.. it doesn't look right either, it's bolted to the trans at a weird angle.
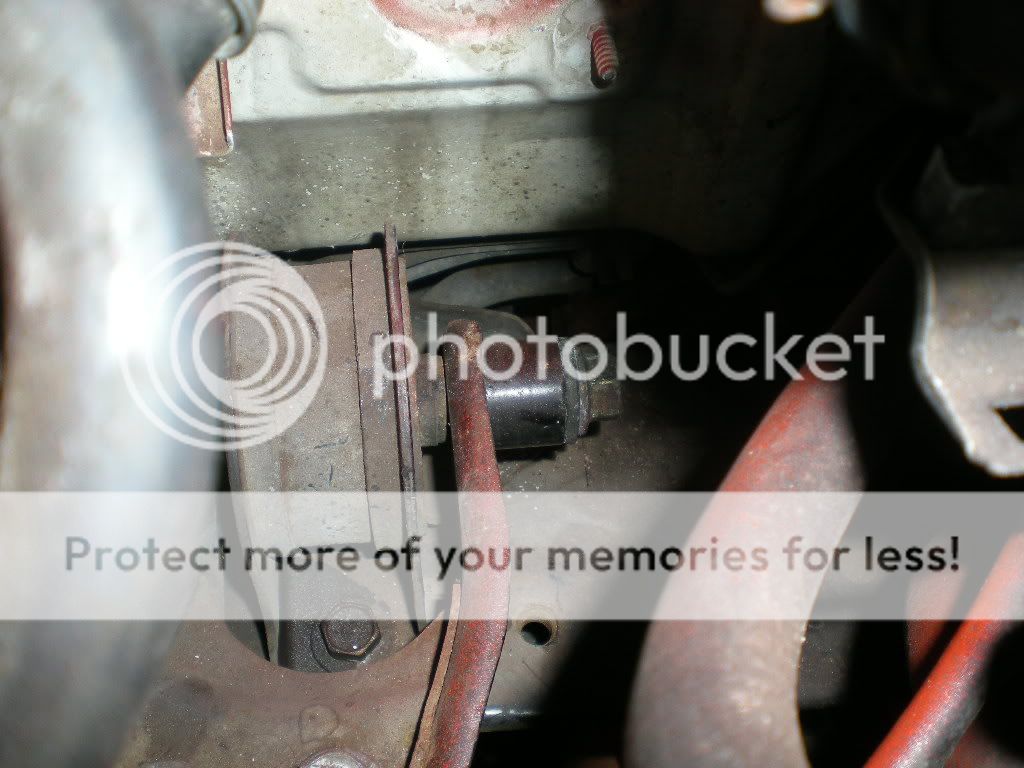
and then the rear mount. Why is there a spacer stuck in between the bolt and the mount.. that doesn't look right either.
Then we begin coming up with the motor...
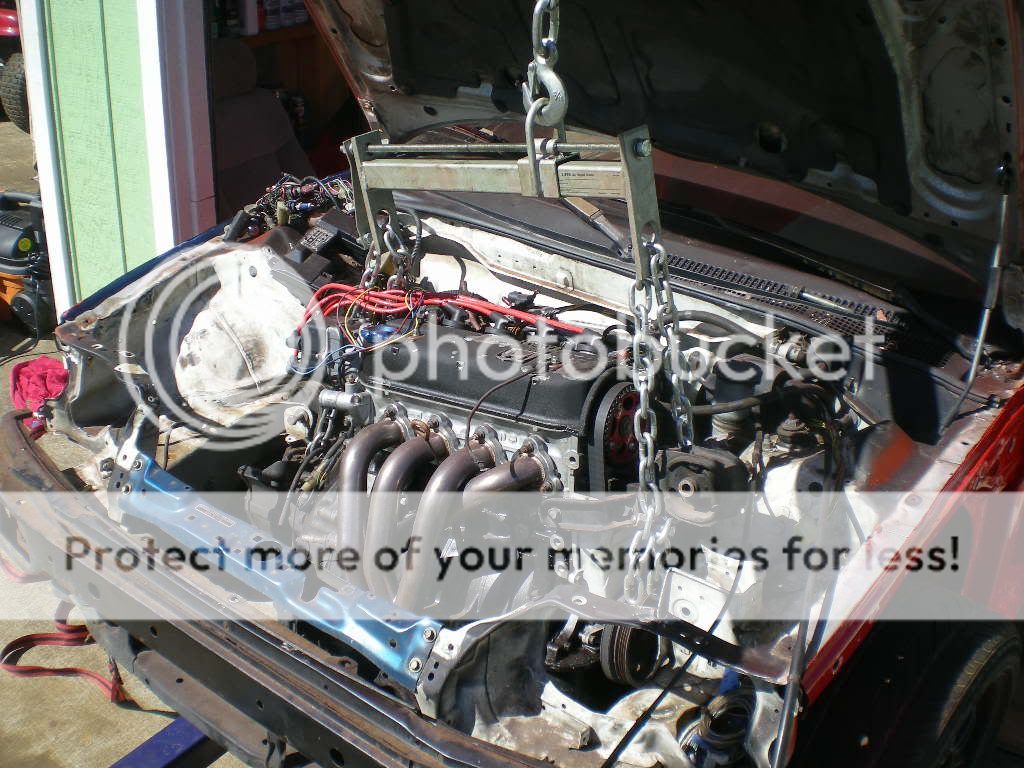
A little more...
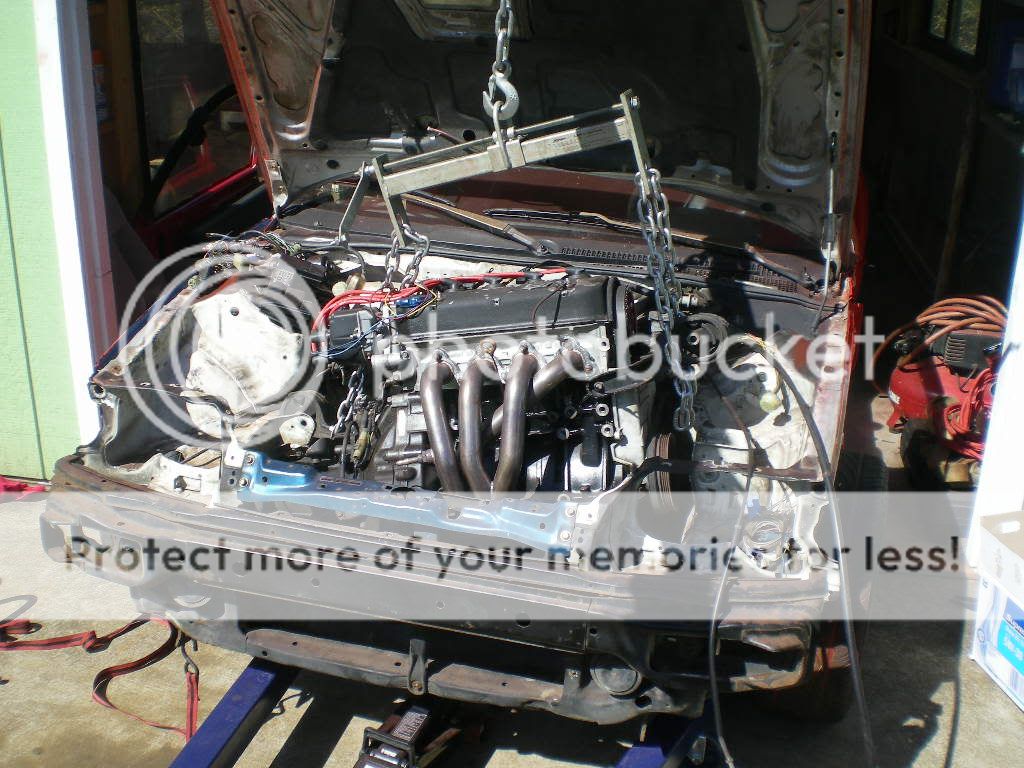
and just a little more...

this is a motor lift. it's much easier than the device i used in my other build.. don't even remind me how that went..
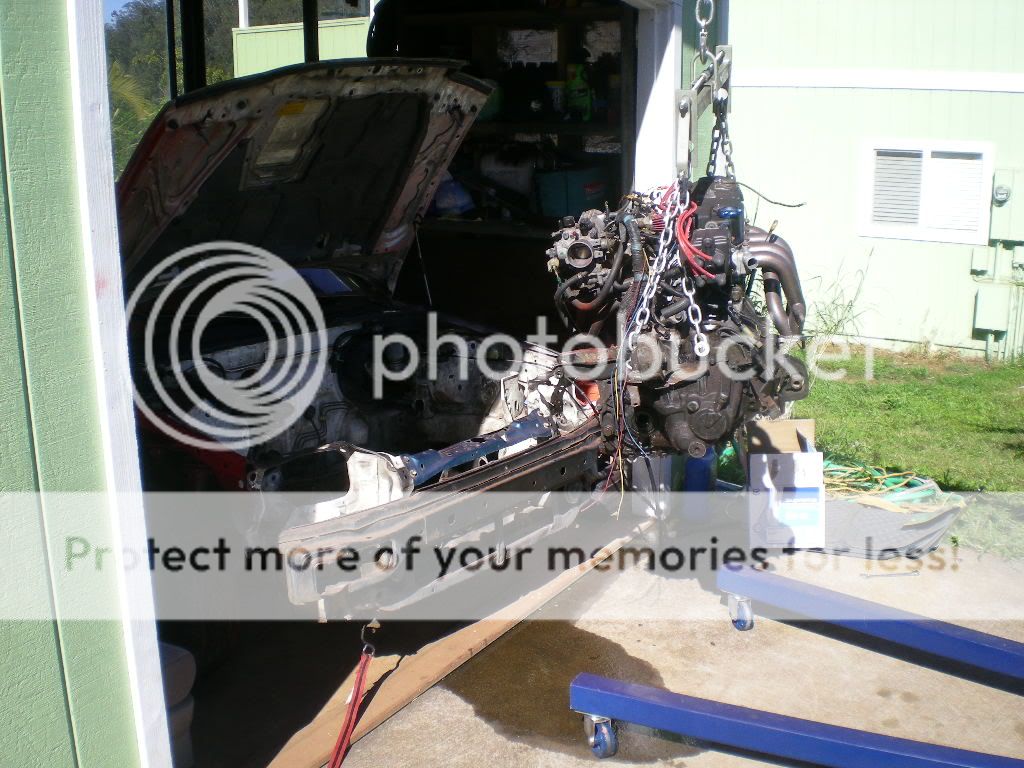
And here's the radiator and axles. I can now understand what ppl mean when they say there are different intermediate shaft setups. There is no intermediate shaft...

It looks like we are free!
After emerging into the sunlight to cough up her old motor, the beast slides back into the shadows and waits for her next meal.
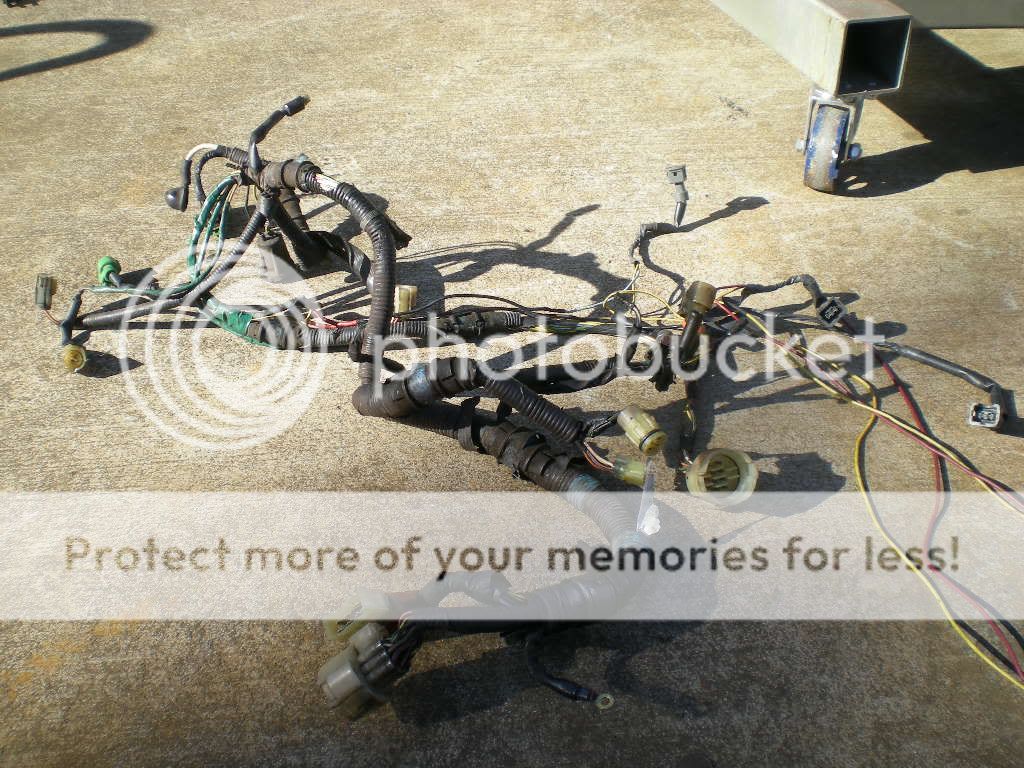
So I'm gonna have to re-use this harness. I'm going to have to completely rebuild it... it's not very pretty.
Tomorrow I might get the bay prepped and primed out.
I think I'm gonna do a full tuck. This means the brake prop valve, all these fuel components, and pretty much everything else.
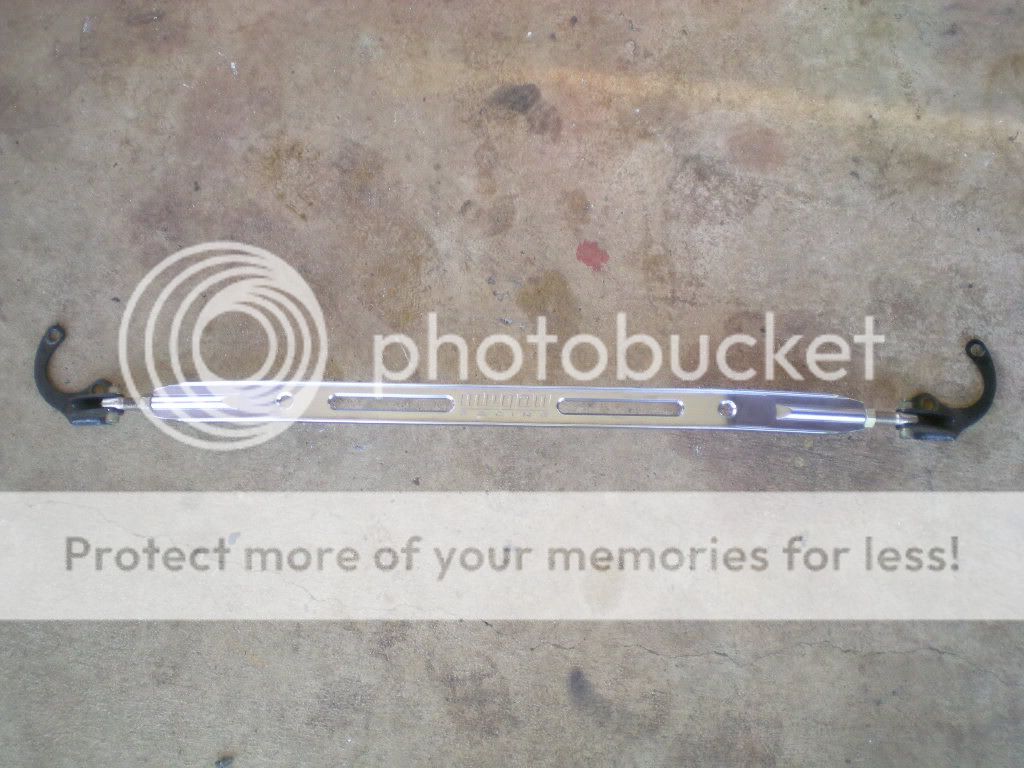
This bar flexed so much when I put some weight on it... into the trash it goes.
more tomorrow, researching parts list for full tuck right now.
then we remove the strut tower bar and the radiator.
And we discover a strange looking nut. I don't know what to make of this nut. It's a very strange nut. Look at it.
Then we remove the transmission mount.. it doesn't look right either, it's bolted to the trans at a weird angle.
and then the rear mount. Why is there a spacer stuck in between the bolt and the mount.. that doesn't look right either.
Then we begin coming up with the motor...
A little more...
and just a little more...
this is a motor lift. it's much easier than the device i used in my other build.. don't even remind me how that went..
And here's the radiator and axles. I can now understand what ppl mean when they say there are different intermediate shaft setups. There is no intermediate shaft...
It looks like we are free!
After emerging into the sunlight to cough up her old motor, the beast slides back into the shadows and waits for her next meal.
So I'm gonna have to re-use this harness. I'm going to have to completely rebuild it... it's not very pretty.
Tomorrow I might get the bay prepped and primed out.
I think I'm gonna do a full tuck. This means the brake prop valve, all these fuel components, and pretty much everything else.
This bar flexed so much when I put some weight on it... into the trash it goes.
more tomorrow, researching parts list for full tuck right now.
01-06-2012, 11:29 AM
#71
Honda-Tech Member
Very nice bro can't wait for more.
But I have a question, you had said some one did a dpfi to mpfi swap, but hf's came multi point already
But I have a question, you had said some one did a dpfi to mpfi swap, but hf's came multi point already
01-06-2012, 03:10 PM
#73
Honda-Tech Member
Thread Starter
 01-07-2012, 09:36 AM
#75
Honda-Tech Member
Thread Starter
updates..
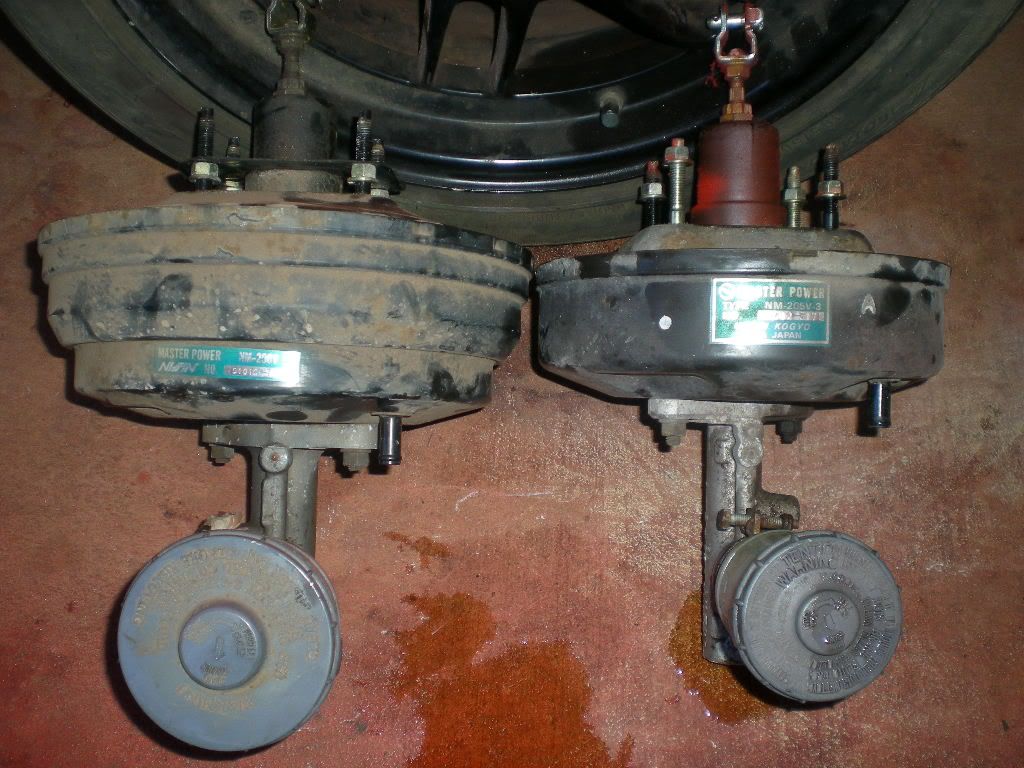
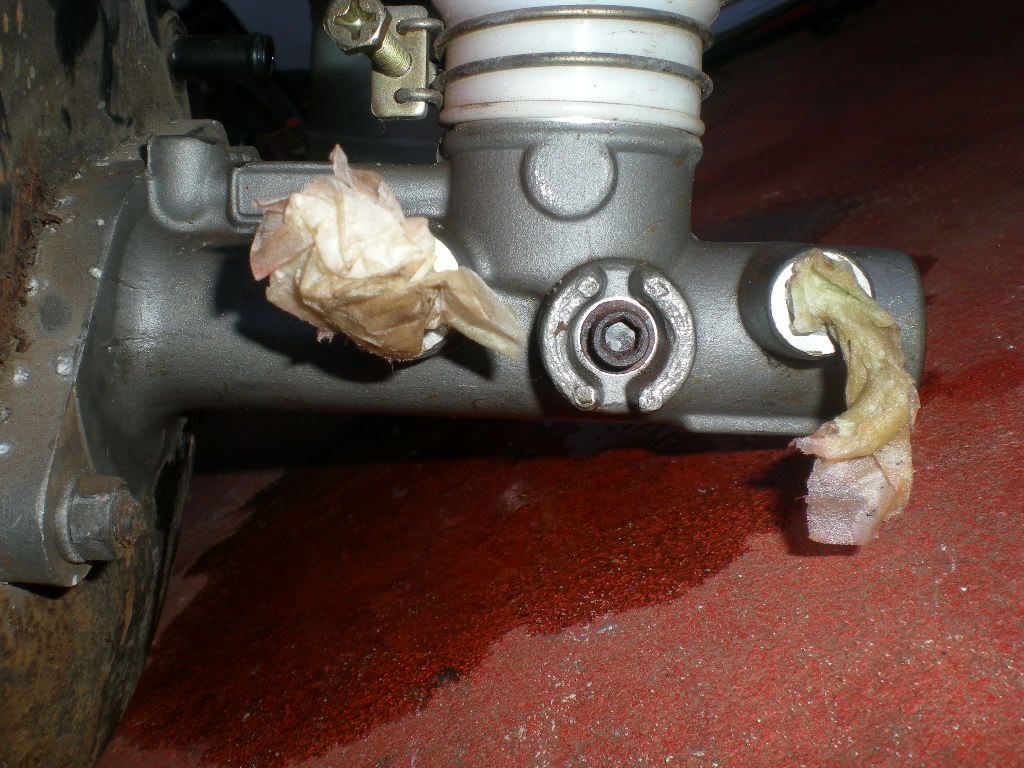
Anyone who doesn't see the point of this upgrade is lacking a few brain cells. The 1" MC is the bigger one, and the smaller one was OEM on an 88 CRX DX (13/16")
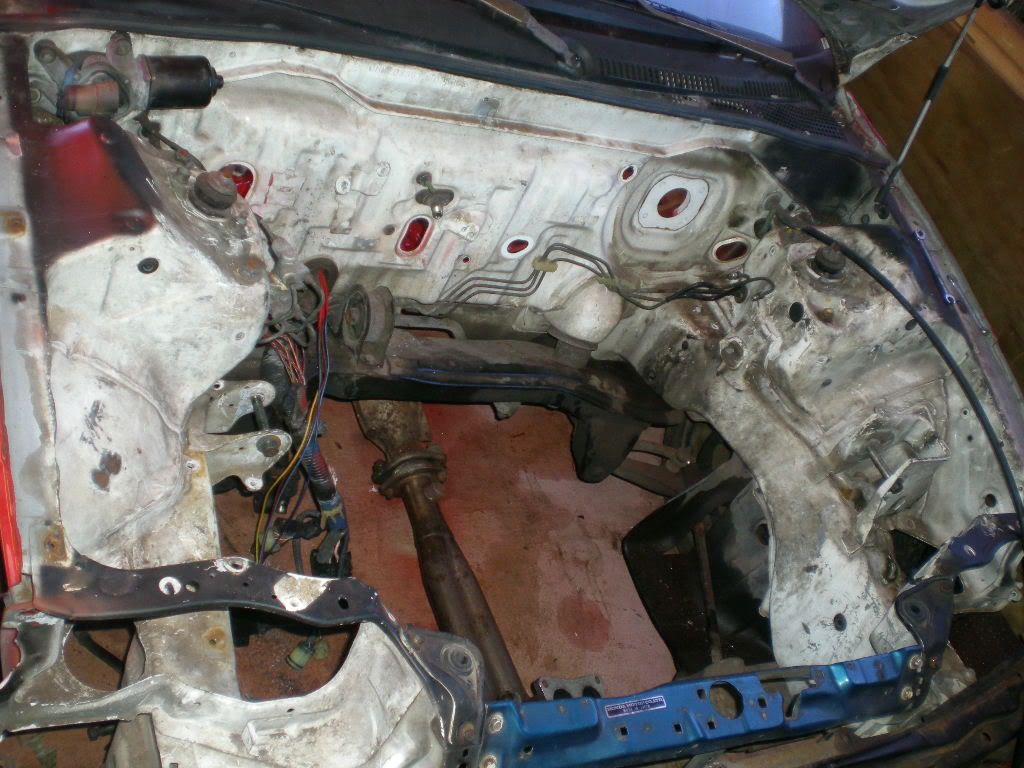
Now we begin stripping the bay for paint...
Test fit the 1" MC..

The one inch MC has the lines on the other side (the one I got from a 96 Odyssey.) It also has one 10mm and one 12mm line instead of two 10mm.
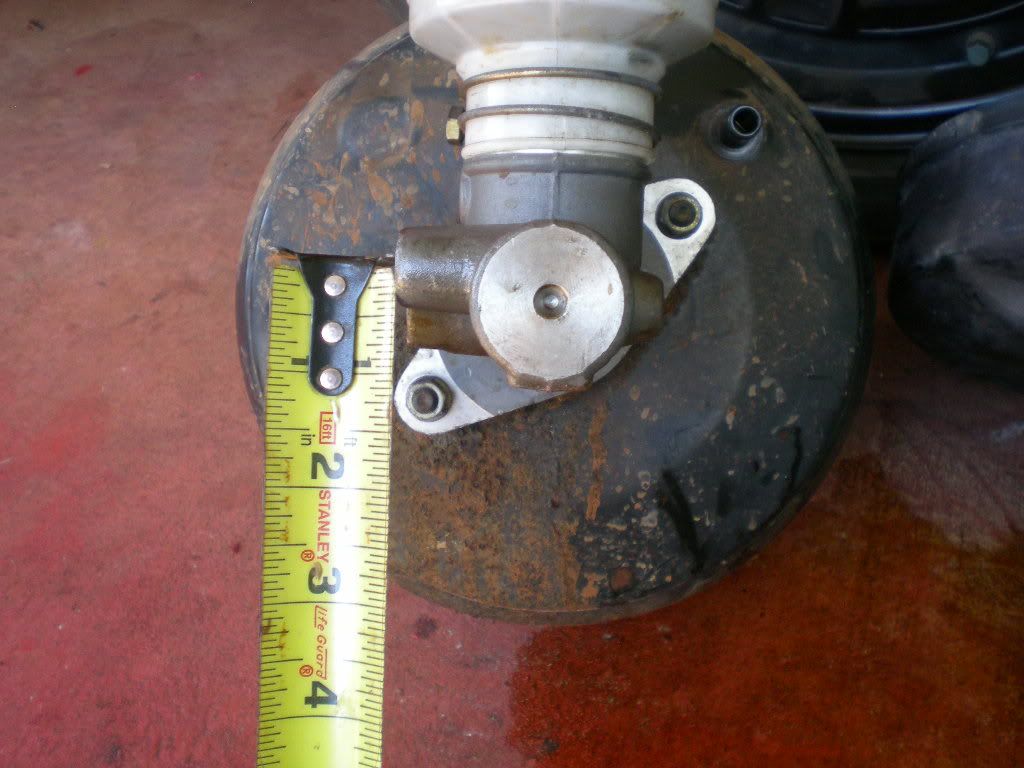
Time to take measurements for a brake/prop-valve tuck with SS. A U-bend with 1-1/2" On-center clearance should get the lines sorted out of the way.
Things are starting to clean up nicely.
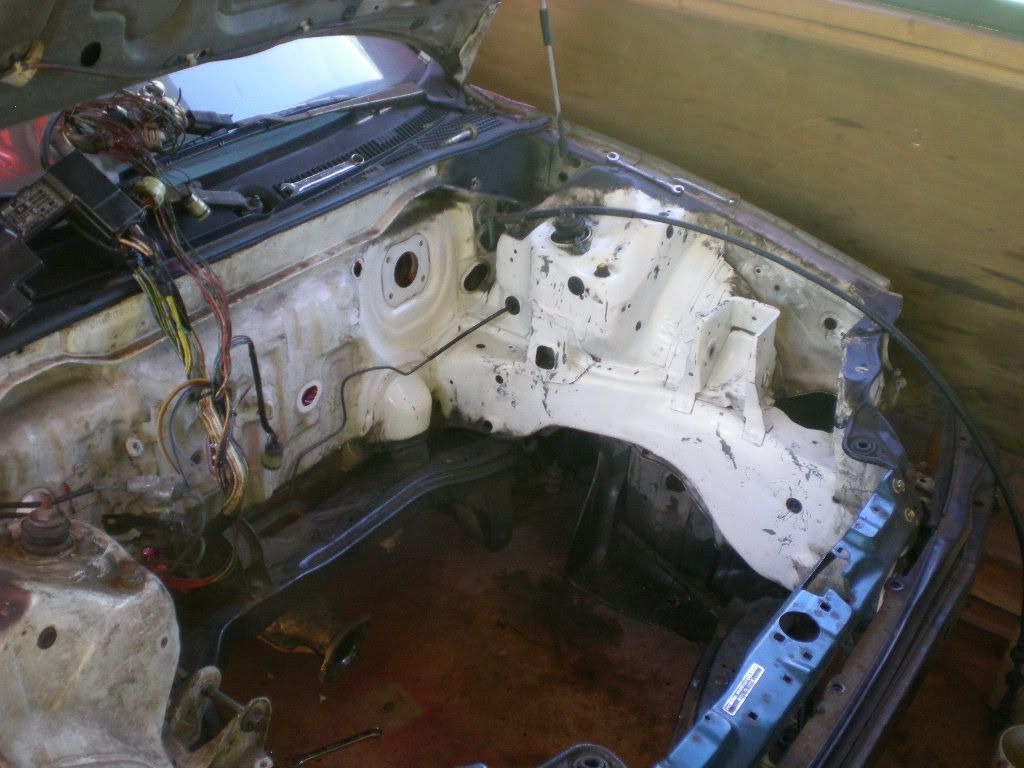
Once I get the bay painted (and the area the windshield wiper linkage hides in) there will be no more white paint anywhere on the car. I can't wait.
Anyone who doesn't see the point of this upgrade is lacking a few brain cells. The 1" MC is the bigger one, and the smaller one was OEM on an 88 CRX DX (13/16")
Now we begin stripping the bay for paint...
Test fit the 1" MC..
The one inch MC has the lines on the other side (the one I got from a 96 Odyssey.) It also has one 10mm and one 12mm line instead of two 10mm.
Time to take measurements for a brake/prop-valve tuck with SS. A U-bend with 1-1/2" On-center clearance should get the lines sorted out of the way.
Things are starting to clean up nicely.
Once I get the bay painted (and the area the windshield wiper linkage hides in) there will be no more white paint anywhere on the car. I can't wait.

