
Replace ignition cylinder in a Gen 1 CRV - DIY
 09-29-2014, 07:12 PM
#1
Honda-Tech Member
Thread Starter

Join Date: Sep 2014
Posts: 124
Likes: 0
Received 0 Likes
on
0 Posts
If you need to replace your ignition cylinder, read on. This was done on a 1997 CR-V. An ignition cylinder from a 1998 CR-V was used to replace the worn cylinder in the '97.
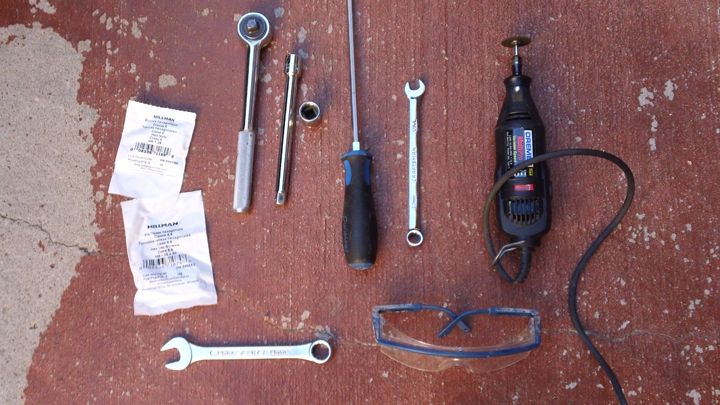
Tools needed:
10mm wrench
12mm socket
14mm socket
Ratchet w 6" extender
Phillips screwdriver
Needle nose pliers
Safety glasses
Cutting tool to remove old shear bolt (I used a Dremmel)
Materials needed:
New cylinder
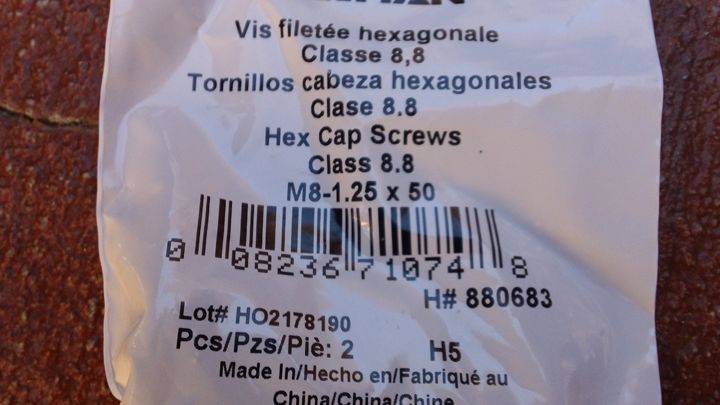
M8-1.25x50 metric bolt and its corresponding nut (to use as replacement shear bolt. Optionally you can order a new shear bolt)
1. Disconnect your battery (10mm wrench). This is a good idea when working on electrical systems, and a VERY good idea if you are working near an airbag/SRS system. I opted to disconnect the negative and positive cables. Make sure you pull them away from the posts so they do not fall back onto them and make a connection.
2. Rack the driver side seat back to give you some room to work on the foot well. You will want to move the seat up later to rest the steering column on, but for now give yourself some room.
3. Locate (3) screws under the steering wheel. There are two side by side and one in the middle below those. This is on the shield on the underside of the column. Remove these screws and set aside. The shield that comes off has a metal plate in it which can fall out. If it does just put it back in place.
4. Remove the shroud covering the wheel. This is snapped into place, so be gentle as you may break the tabs. It is split midway along the shifter, and is in two pieces. Don’t be surprised if you break some of the tabs, especially if this is an old vehicle. No screws hold this in place, just these tabs. Work the pieces off and set aside. Be sure to remove the rubber ring around the old ignition cylinder as you will use this again.
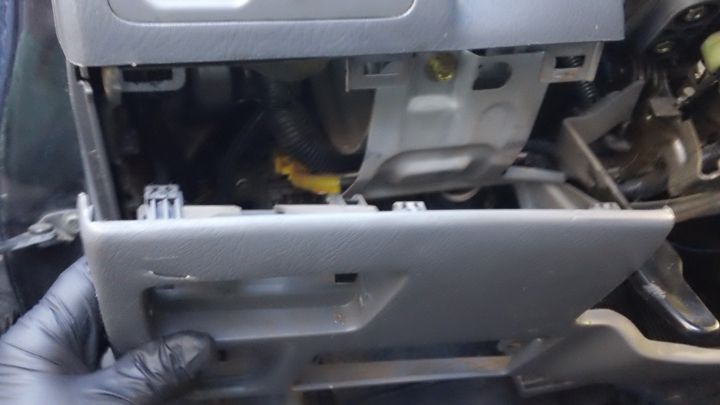
5. Unscrew the lower dash panel. There are (3) screws I believe (writing this weeks after doing the job, and the car is not with me). It’s fairly evident.
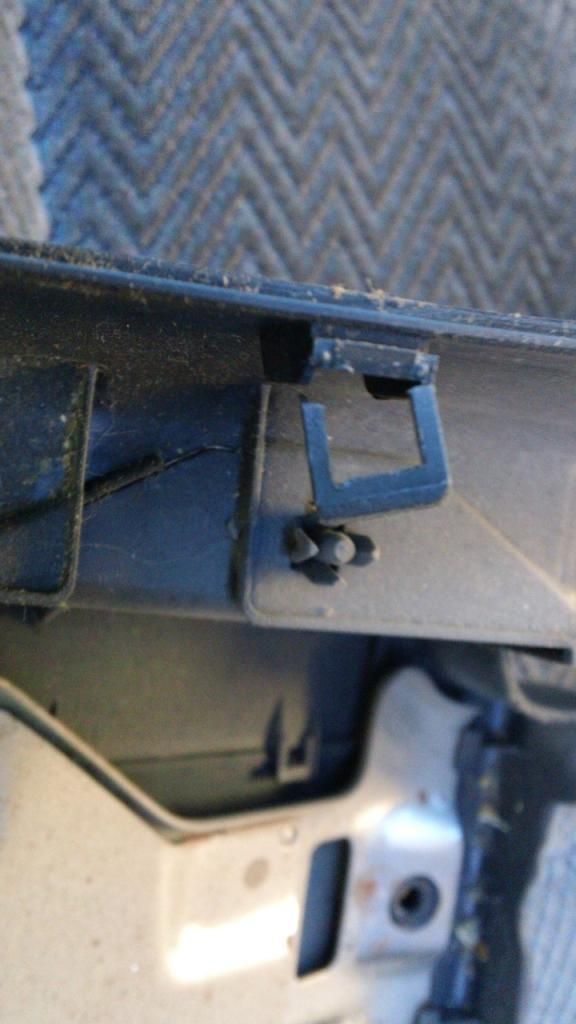
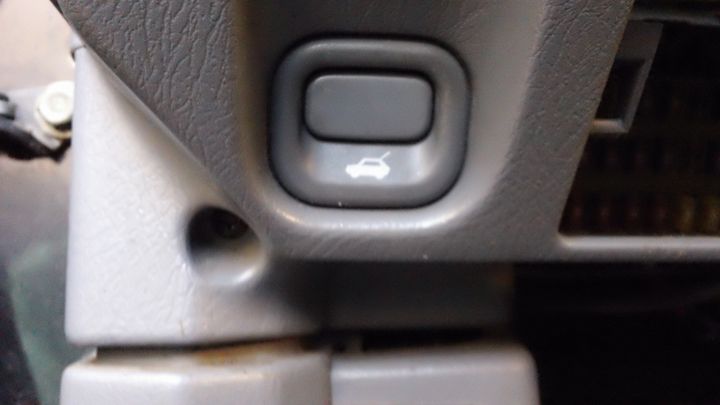
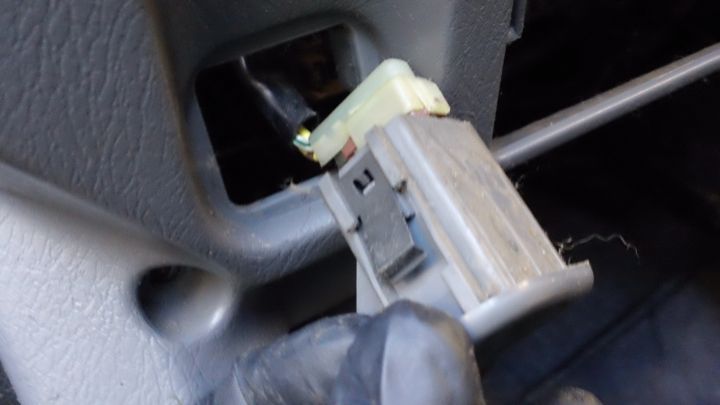
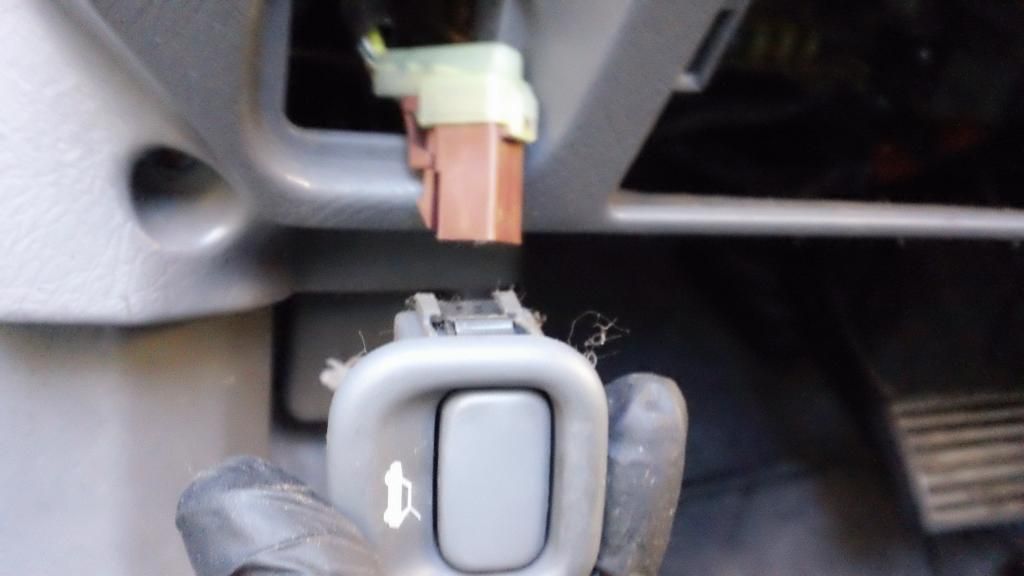
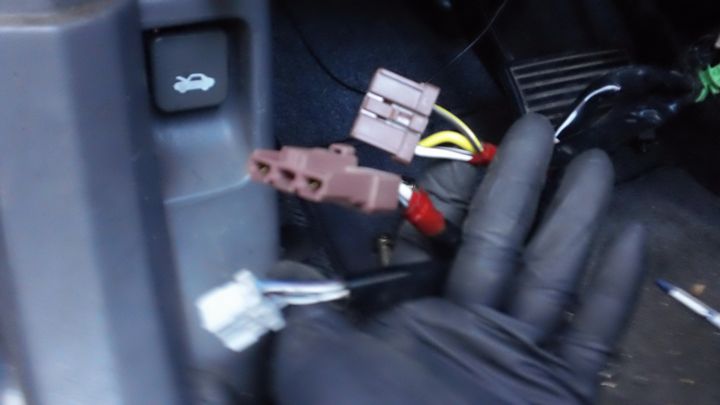
6. Unscrew the panel around the trunk pop. This pops out. Disconnect the wire harness. The panel has a screw in the lower left corner, and has (3) VERY tough tabs to get out at the top. You will need to really pull on this to get it loose. I created a small crack in my panel as the plastic was brittle. Be careful, but be forceful.
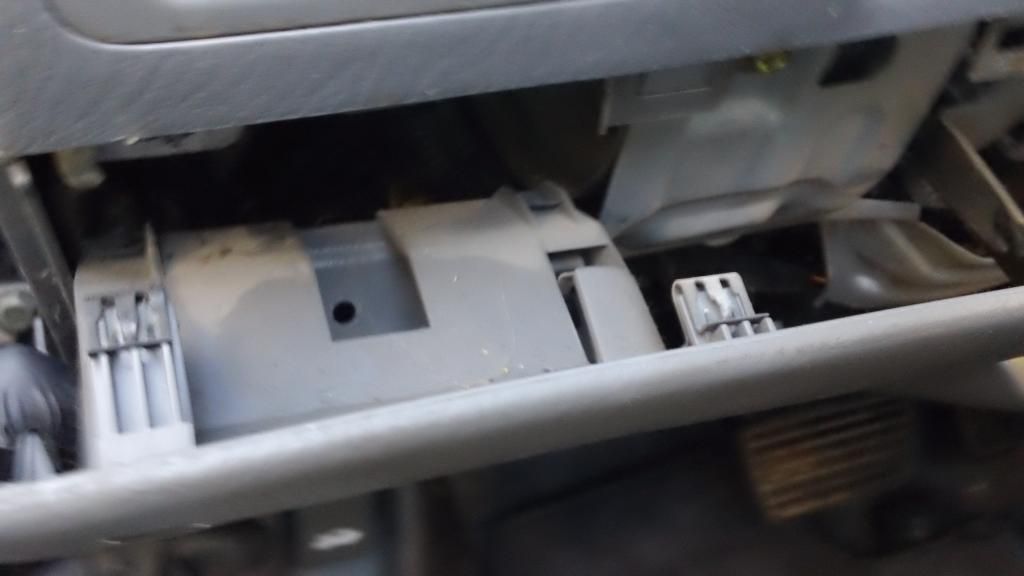
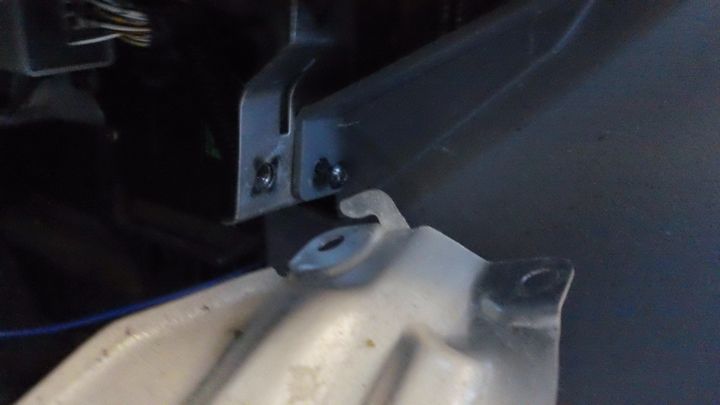
7. This exposes a metal bracket with three brass nuts, that are 12mm I believe. Remove. The right side has a hook so be mindful of removing this so that you do not damage it.
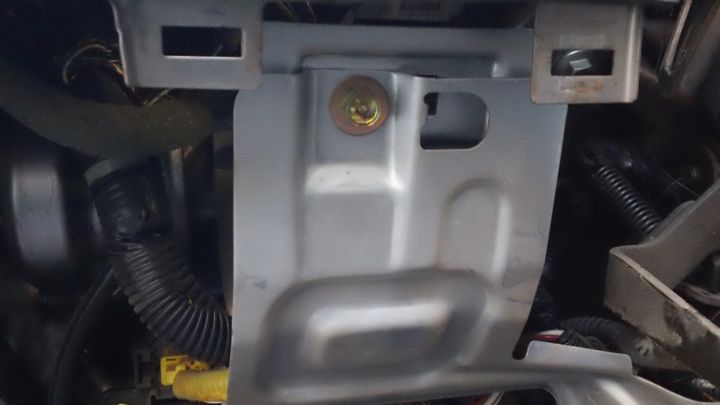
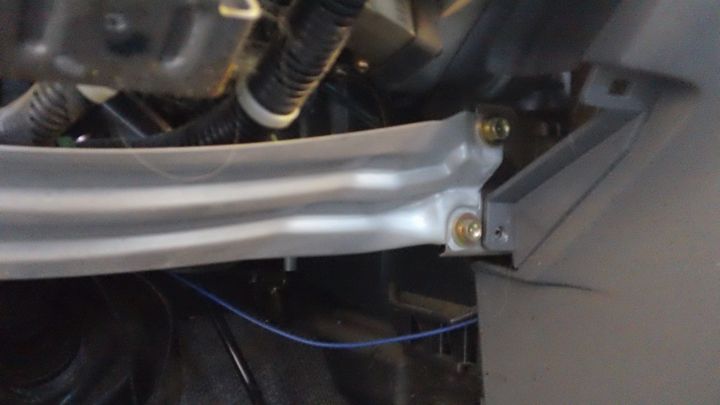
8. You now have unrestricted access to the steering column. There are (2) 14mm nuts and (2) 14mm bolts you need to remove. The nuts in the back are easy to get off. The bolts in the front are LONG and will take some time to ratchet out. I would remove these first, then 1 of the nuts. Prepare to hold the column when you remove the last nut as it will come loose.
9. Move the seat forward and rest the column on it. You can straddle the column and get to both sides of the ignition cylinder easily in this position.

10. The cylinder has (3) wire wraps and harnesses coming off it, which are secured up to the column with a green clip. Remove this clip to free up the wires.
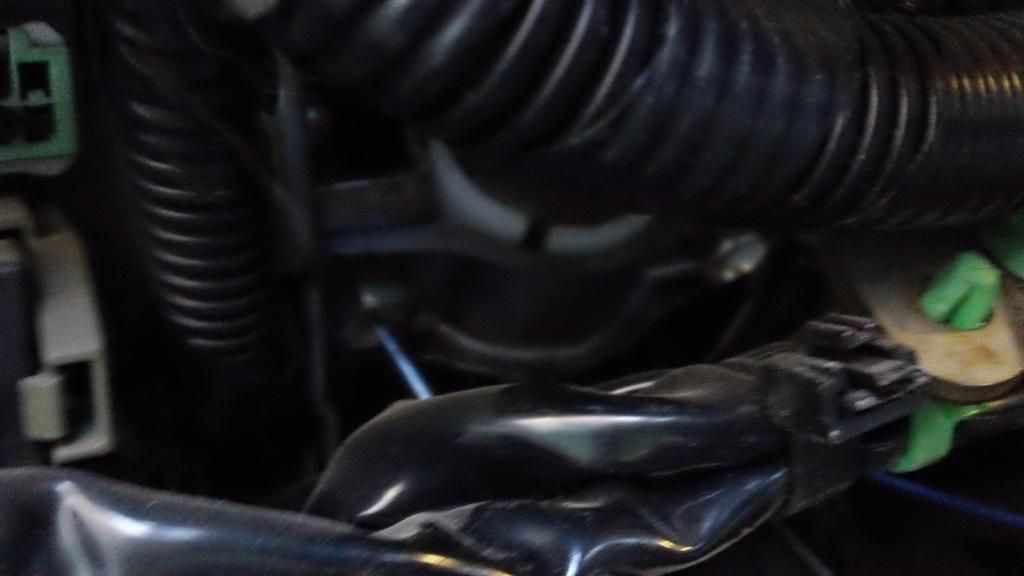
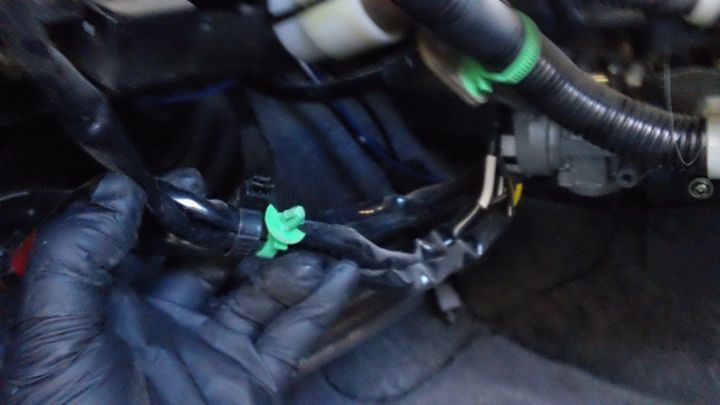
11. Trace them back and unhook them. They are each different, so just pay attention to where they go so you can replace with the new one.

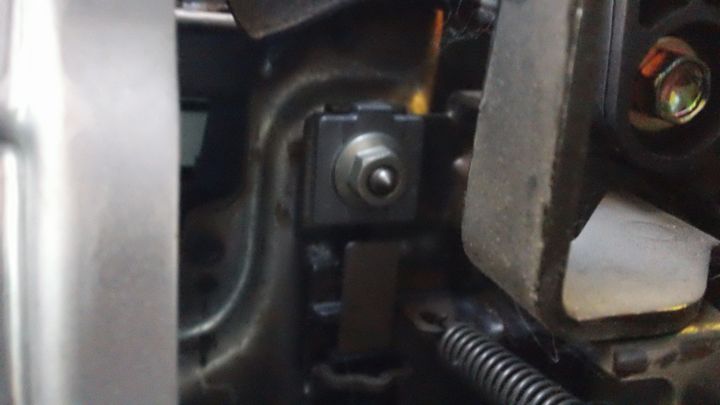
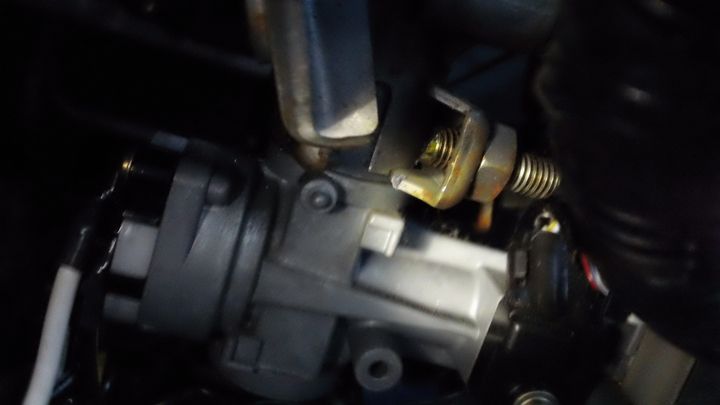
12. Roll the column (be mindful of the shifter and levers so you do not break them) to expose the shear bolt on the bottom of the ignition cylinder. It will be brass. The only way to get this off is to punch the head counter clockwise or cut it. Cutting it takes a few seconds, just be careful not to cut any other part or wire! Don’t bother with the nut, it is tack welded on. When you cut the bolt the head part will explode towards the firewall as that clamp is under pressure. Hence the safety glasses. Once the bolt is cut you can walk the threaded end backwards out the middle of the clamp.

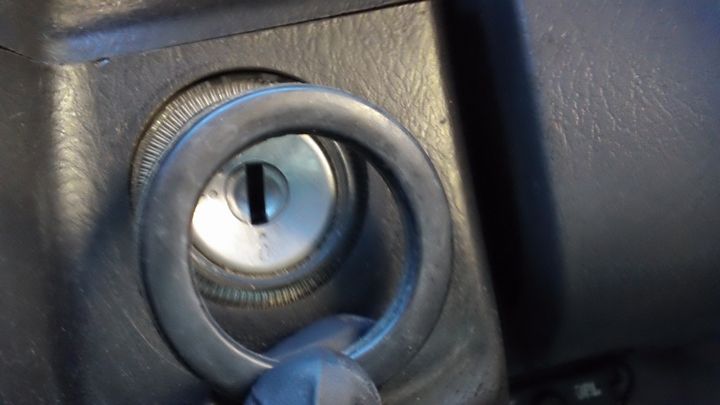
13. Roll the column back over to expose the other side of the cylinder. You will see a small pin. This is released by putting the key in the switch and turning it to the 1 position. This will allow the pin to depress. Push the pin in and pull the cylinder outwards, twisting as you go. It will pop out without much effort. If you do not have your key or your cylinder is locked, you can opt to drill this pin out. It will ruin the cylinder, but it is trash anyway. Don't cut up or damage the steering column, kill the old ignition switch before you damage the column.
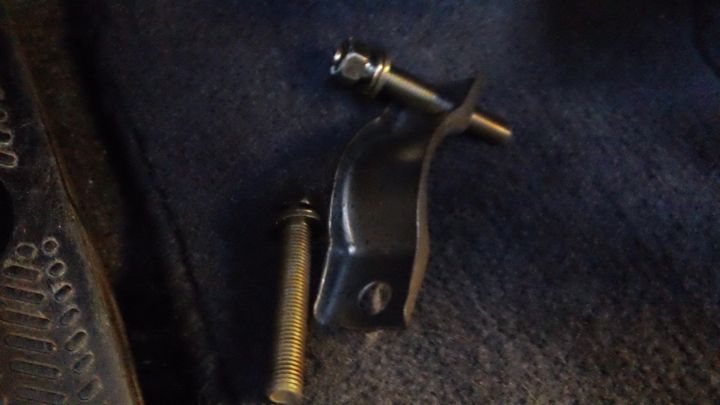
14. Put the new cylinder in with its key in the 1 position as well, popping it back into the column the same way the old one came out. Slide the new metric bolt in and secure with a nut. Tighten but don’t over torque.
15. Run your wires and plug them back in.
16. Reverse your removal to get everything back in place. Be sure to secure the wires so they don’t hang and get in your way or get pinched when you put the panels back.
There you go – new cylinder. Since I took an ignition cylinder out of a junker, I also removed all the door locks (front, side, rear) and replaced those as well so that 1 key would work for the entire vehicle. The dealer can cut you a new key if you bring the VIN and proof of ownership. If you place in an aftermarket cylinder you’ll be stuck with 2 keys – one for the ignition and one for the doors. You can get re-key kits per door, but I hear it is pricey.
Tools needed:
10mm wrench
12mm socket
14mm socket
Ratchet w 6" extender
Phillips screwdriver
Needle nose pliers
Safety glasses
Cutting tool to remove old shear bolt (I used a Dremmel)
Materials needed:
New cylinder
M8-1.25x50 metric bolt and its corresponding nut (to use as replacement shear bolt. Optionally you can order a new shear bolt)
1. Disconnect your battery (10mm wrench). This is a good idea when working on electrical systems, and a VERY good idea if you are working near an airbag/SRS system. I opted to disconnect the negative and positive cables. Make sure you pull them away from the posts so they do not fall back onto them and make a connection.
2. Rack the driver side seat back to give you some room to work on the foot well. You will want to move the seat up later to rest the steering column on, but for now give yourself some room.
3. Locate (3) screws under the steering wheel. There are two side by side and one in the middle below those. This is on the shield on the underside of the column. Remove these screws and set aside. The shield that comes off has a metal plate in it which can fall out. If it does just put it back in place.
4. Remove the shroud covering the wheel. This is snapped into place, so be gentle as you may break the tabs. It is split midway along the shifter, and is in two pieces. Don’t be surprised if you break some of the tabs, especially if this is an old vehicle. No screws hold this in place, just these tabs. Work the pieces off and set aside. Be sure to remove the rubber ring around the old ignition cylinder as you will use this again.
5. Unscrew the lower dash panel. There are (3) screws I believe (writing this weeks after doing the job, and the car is not with me). It’s fairly evident.
6. Unscrew the panel around the trunk pop. This pops out. Disconnect the wire harness. The panel has a screw in the lower left corner, and has (3) VERY tough tabs to get out at the top. You will need to really pull on this to get it loose. I created a small crack in my panel as the plastic was brittle. Be careful, but be forceful.
7. This exposes a metal bracket with three brass nuts, that are 12mm I believe. Remove. The right side has a hook so be mindful of removing this so that you do not damage it.
8. You now have unrestricted access to the steering column. There are (2) 14mm nuts and (2) 14mm bolts you need to remove. The nuts in the back are easy to get off. The bolts in the front are LONG and will take some time to ratchet out. I would remove these first, then 1 of the nuts. Prepare to hold the column when you remove the last nut as it will come loose.
9. Move the seat forward and rest the column on it. You can straddle the column and get to both sides of the ignition cylinder easily in this position.
10. The cylinder has (3) wire wraps and harnesses coming off it, which are secured up to the column with a green clip. Remove this clip to free up the wires.
11. Trace them back and unhook them. They are each different, so just pay attention to where they go so you can replace with the new one.
12. Roll the column (be mindful of the shifter and levers so you do not break them) to expose the shear bolt on the bottom of the ignition cylinder. It will be brass. The only way to get this off is to punch the head counter clockwise or cut it. Cutting it takes a few seconds, just be careful not to cut any other part or wire! Don’t bother with the nut, it is tack welded on. When you cut the bolt the head part will explode towards the firewall as that clamp is under pressure. Hence the safety glasses. Once the bolt is cut you can walk the threaded end backwards out the middle of the clamp.
13. Roll the column back over to expose the other side of the cylinder. You will see a small pin. This is released by putting the key in the switch and turning it to the 1 position. This will allow the pin to depress. Push the pin in and pull the cylinder outwards, twisting as you go. It will pop out without much effort. If you do not have your key or your cylinder is locked, you can opt to drill this pin out. It will ruin the cylinder, but it is trash anyway. Don't cut up or damage the steering column, kill the old ignition switch before you damage the column.
14. Put the new cylinder in with its key in the 1 position as well, popping it back into the column the same way the old one came out. Slide the new metric bolt in and secure with a nut. Tighten but don’t over torque.
15. Run your wires and plug them back in.
16. Reverse your removal to get everything back in place. Be sure to secure the wires so they don’t hang and get in your way or get pinched when you put the panels back.
There you go – new cylinder. Since I took an ignition cylinder out of a junker, I also removed all the door locks (front, side, rear) and replaced those as well so that 1 key would work for the entire vehicle. The dealer can cut you a new key if you bring the VIN and proof of ownership. If you place in an aftermarket cylinder you’ll be stuck with 2 keys – one for the ignition and one for the doors. You can get re-key kits per door, but I hear it is pricey.
 04-07-2021, 12:47 AM
#2
Honda-Tech Member

Join Date: May 2020
Posts: 2
Likes: 0
Received 0 Likes
on
0 Posts
If you need to replace your ignition cylinder, read on. This was done on a 1997 CR-V. An ignition cylinder from a 1998 CR-V was used to replace the worn cylinder in the '97.
Tools needed:
10mm wrench
12mm socket
14mm socket
Ratchet w 6" extender
Phillips screwdriver
Needle nose pliers
Safety glasses
Cutting tool to remove old shear bolt (I used a Dremmel)
Materials needed:
New cylinder
M8-1.25x50 metric bolt and its corresponding nut (to use as replacement shear bolt. Optionally you can order a new shear bolt)
1. Disconnect your battery (10mm wrench). This is a good idea when working on electrical systems, and a VERY good idea if you are working near an airbag/SRS system. I opted to disconnect the negative and positive cables. Make sure you pull them away from the posts so they do not fall back onto them and make a connection.
2. Rack the driver side seat back to give you some room to work on the foot well. You will want to move the seat up later to rest the steering column on, but for now give yourself some room.
3. Locate (3) screws under the steering wheel. There are two side by side and one in the middle below those. This is on the shield on the underside of the column. Remove these screws and set aside. The shield that comes off has a metal plate in it which can fall out. If it does just put it back in place.
4. Remove the shroud covering the wheel. This is snapped into place, so be gentle as you may break the tabs. It is split midway along the shifter, and is in two pieces. Don’t be surprised if you break some of the tabs, especially if this is an old vehicle. No screws hold this in place, just these tabs. Work the pieces off and set aside. Be sure to remove the rubber ring around the old ignition cylinder as you will use this again.
5. Unscrew the lower dash panel. There are (3) screws I believe (writing this weeks after doing the job, and the car is not with me). It’s fairly evident.
6. Unscrew the panel around the trunk pop. This pops out. Disconnect the wire harness. The panel has a screw in the lower left corner, and has (3) VERY tough tabs to get out at the top. You will need to really pull on this to get it loose. I created a small crack in my panel as the plastic was brittle. Be careful, but be forceful.
7. This exposes a metal bracket with three brass nuts, that are 12mm I believe. Remove. The right side has a hook so be mindful of removing this so that you do not damage it.
8. You now have unrestricted access to the steering column. There are (2) 14mm nuts and (2) 14mm bolts you need to remove. The nuts in the back are easy to get off. The bolts in the front are LONG and will take some time to ratchet out. I would remove these first, then 1 of the nuts. Prepare to hold the column when you remove the last nut as it will come loose.
9. Move the seat forward and rest the column on it. You can straddle the column and get to both sides of the ignition cylinder easily in this position.
10. The cylinder has (3) wire wraps and harnesses coming off it, which are secured up to the column with a green clip. Remove this clip to free up the wires.
11. Trace them back and unhook them. They are each different, so just pay attention to where they go so you can replace with the new one.
12. Roll the column (be mindful of the shifter and levers so you do not break them) to expose the shear bolt on the bottom of the ignition cylinder. It will be brass. The only way to get this off is to punch the head counter clockwise or cut it. Cutting it takes a few seconds, just be careful not to cut any other part or wire! Don’t bother with the nut, it is tack welded on. When you cut the bolt the head part will explode towards the firewall as that clamp is under pressure. Hence the safety glasses. Once the bolt is cut you can walk the threaded end backwards out the middle of the clamp.
13. Roll the column back over to expose the other side of the cylinder. You will see a small pin. This is released by putting the key in the switch and turning it to the 1 position. This will allow the pin to depress. Push the pin in and pull the cylinder outwards, twisting as you go. It will pop out without much effort. If you do not have your key or your cylinder is locked, you can opt to drill this pin out. It will ruin the cylinder, but it is trash anyway. Don't cut up or damage the steering column, kill the old ignition switch before you damage the column.
14. Put the new cylinder in with its key in the 1 position as well, popping it back into the column the same way the old one came out. Slide the new metric bolt in and secure with a nut. Tighten but don’t over torque.
15. Run your wires and plug them back in.
16. Reverse your removal to get everything back in place. Be sure to secure the wires so they don’t hang and get in your way or get pinched when you put the panels back.
There you go – new cylinder. Since I took an ignition cylinder out of a junker, I also removed all the door locks (front, side, rear) and replaced those as well so that 1 key would work for the entire vehicle. The dealer can cut you a new key if you bring the VIN and proof of ownership. If you place in an aftermarket cylinder you’ll be stuck with 2 keys – one for the ignition and one for the doors. You can get re-key kits per door, but I hear it is pricey.
Last edited by tech8; 04-08-2021 at 07:58 AM. Reason: Quote images deleted.
04-08-2021, 07:40 AM
#3
Honda-Tech Member
Next time you quote someone with pics, try to delete the pics, makes it difficult for mobile users if you don't.
Try to find a local locksmith, and explain your situation. They might not do late models' keys but common cars from the nineties are usually no problem. You might want to get the VIN from the junkyard CRV too just in case you need to have the key cut "by VIN".
Try to find a local locksmith, and explain your situation. They might not do late models' keys but common cars from the nineties are usually no problem. You might want to get the VIN from the junkyard CRV too just in case you need to have the key cut "by VIN".


Thread
Thread Starter
Forum
Replies
Last Post