
Steering: Power to Manual Conversion
 12-29-2008, 03:42 PM
#1
Honda-Tech Member
Thread Starter

Join Date: Sep 2008
Location: WV
Posts: 589
Likes: 0
Received 0 Likes
on
0 Posts
INTRO:
I first saw this topic in the FAQ's on Hondatech. I noticed that there are about 10 pages on that thread about Integra's with only a few posts about Civics; the 92-95 Eg specifically. There is a fair difference in the power racks between the two, so I thought I would get the facts out there for us Civic guys. I have a 93 hatch that will be getting a GSR swap so I figured I would get this out of the way while I am still running my D15.
The original thread is here: https://honda-tech.com/forums/acura-integra-type-r-8/how-power-steering-manual-184202/
After reading the entire thing, there is some good information that can be extracted for us Civic guys.
1. Civic Power racks have 3 ports. Integra's have 4 ports.
2. Almost everyone recommends using a reservoir of some type. The reservoir serves as a breather to keep the system from being pressurized reducing resistance and a place for excess fluid to gather under repeated use such as a track day. However, after reading many posts, I just don't see the necessity of a reservoir, especially if most are just using the line to hold excess fluid. I chose something a little more practical.
3. The rack works best with some fluid left in it. This maintains lubrication of the internal valve piston.
OVERVIEW:
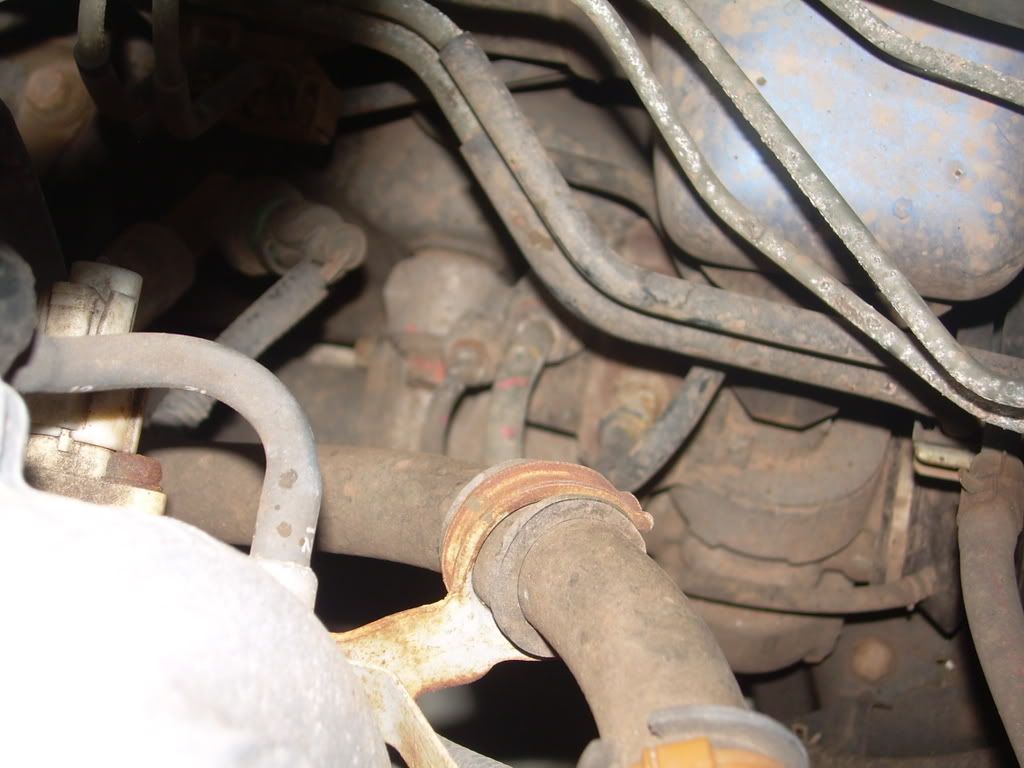
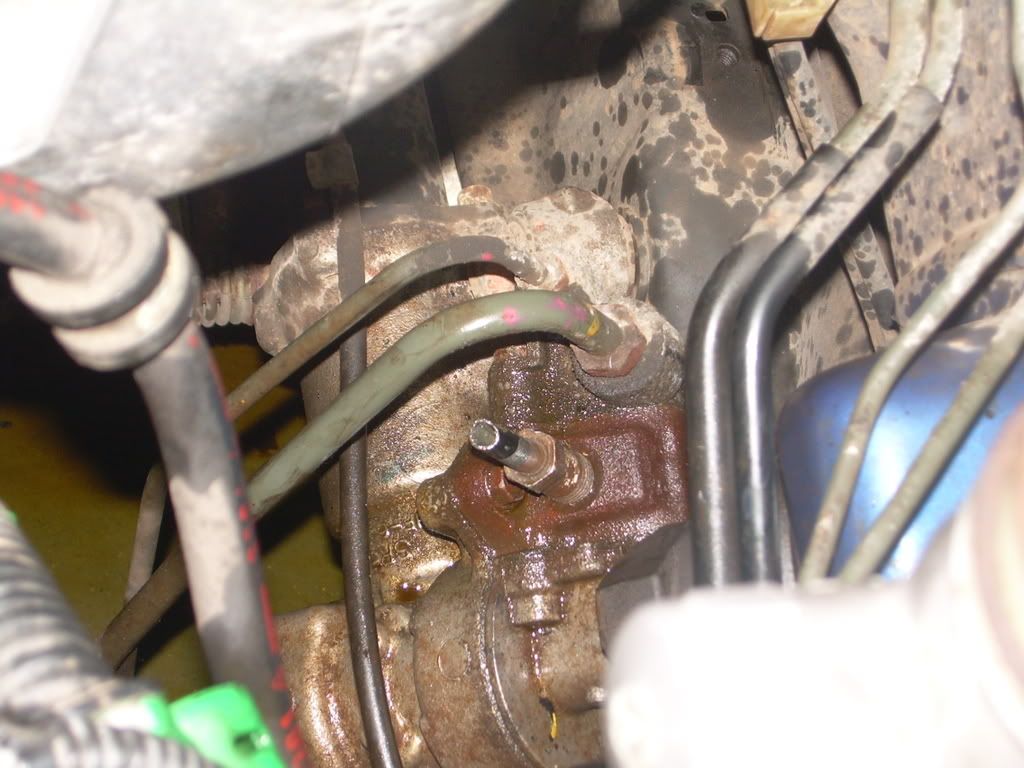
Civic racks have 3 ports. The smaller port to the left, and the center port are the outputs for each side of the control piston in the rack. Hot steering fluid is pushed out of each hole depending which way you turn the steering wheel. The line on the right is a high pressure line that comes from the Pump and feeds the rack.
Some would recommend buying expensive fittings and line.....much like the kit offered for the Integra. There is simply no need for high pressure fittings or line. The removal of the pump takes away all input pressure, and the lack of fluid in the rack removes most output pressure. Simple fuel line and hose clamp will work fine.
PARTS
2ft. 5/16 fuel line
2ft. 3/8 fuel line
2 brass T fittings 3/8
4 small hose clamps
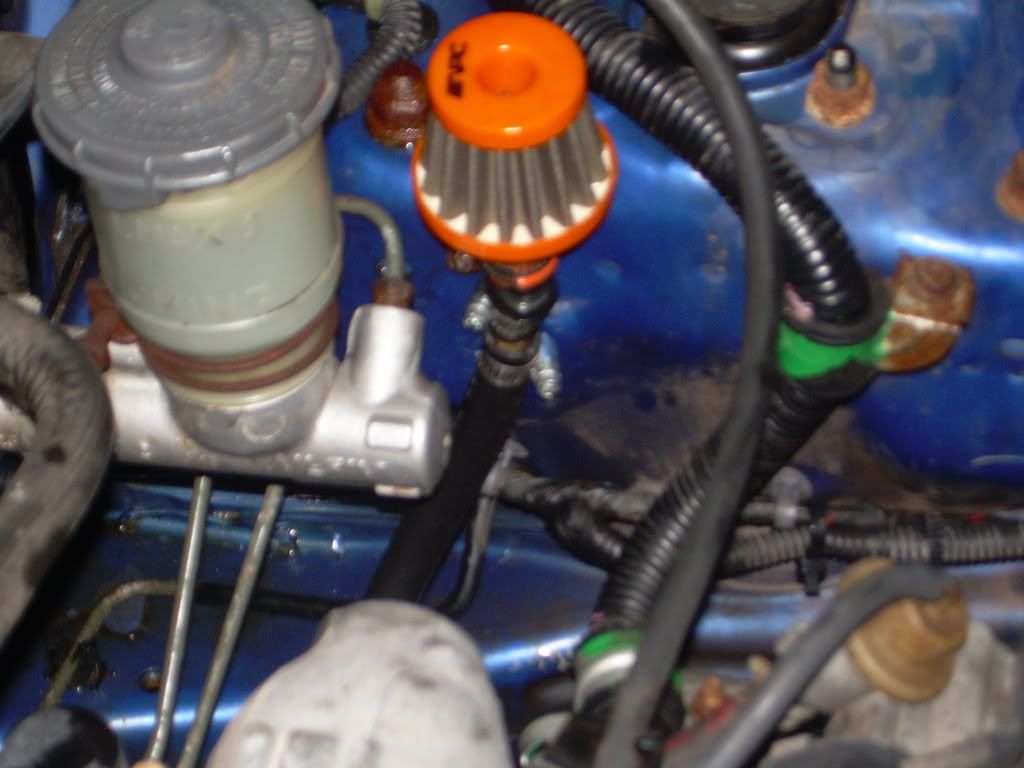
Small mesh filter (I used the APC one from Advance Auto)
HOW TO:
1. First thing is to remove that pump and lines. I recommend draining or removing the reservoir first. This will help with fluid spillage, but ultimately its going to happen,.. a lot, so prepare for it. The lines run fro the reservoir to both the pump, and the rack. It is fairly straight forward. Start unbolting brackets and getting those lines out of there. The cooler that is mounted behind the bumper will take some maneuvering to remove. If you have A/C, I suggest removing the two top brackets that hold the condenser so it can be pushed back. This helps when pulling the cooler line out.
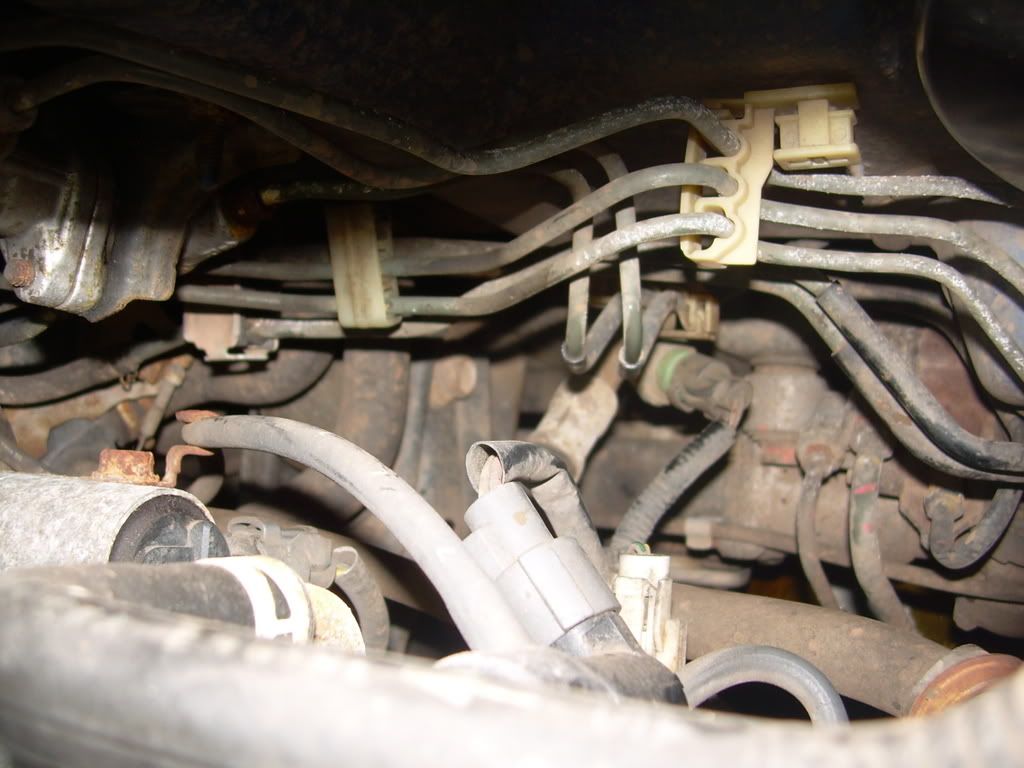
2. I removed the two low pressure lines from the reservoir and cooler up until the last hard lines twist into the rack. Simply pull off the hose clamps and the rubber hose. The high pressure line however will need to be removed completely from the pump to the fitting on the rack, this fitting will be gut in the next step. You will see a sensor that plugs in to the high pressure line coming from the pump. Simply unplug the connector and move it aside. It will not throw a CEL.
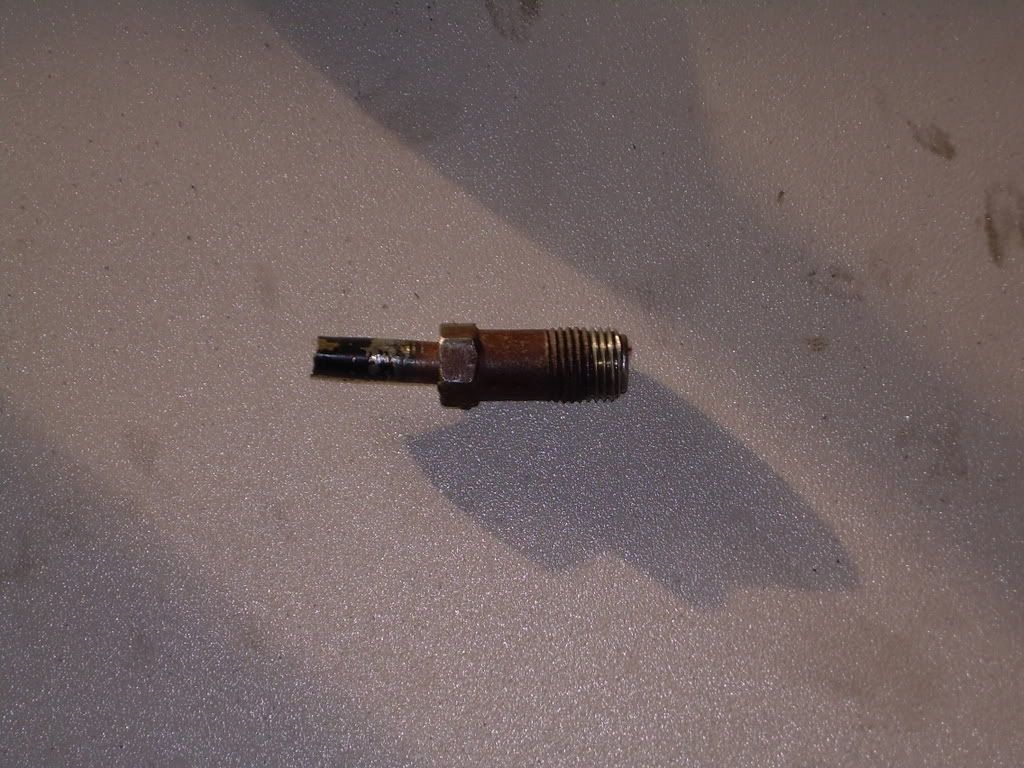
3. After removing the entire high pressure line, its time to cut off the fitting that went into the steering rack. Now you can purchase a fitting if you like. The thread size is M16x1.5. I looked everywhere for it locally only to find that I would have to order it. I didn't care about converting it back, and cutting the factory fitting was cheap and easy. Be sure to cut right before it starts to curve. Then tighten it back into the rack.
4. After testing multiple variations and studying the fluid flow diagram from the service manual, I decided to vent all three lines to the breather. This keeps every chamber in the control valve breathing and unpressurized. After testing it works well.

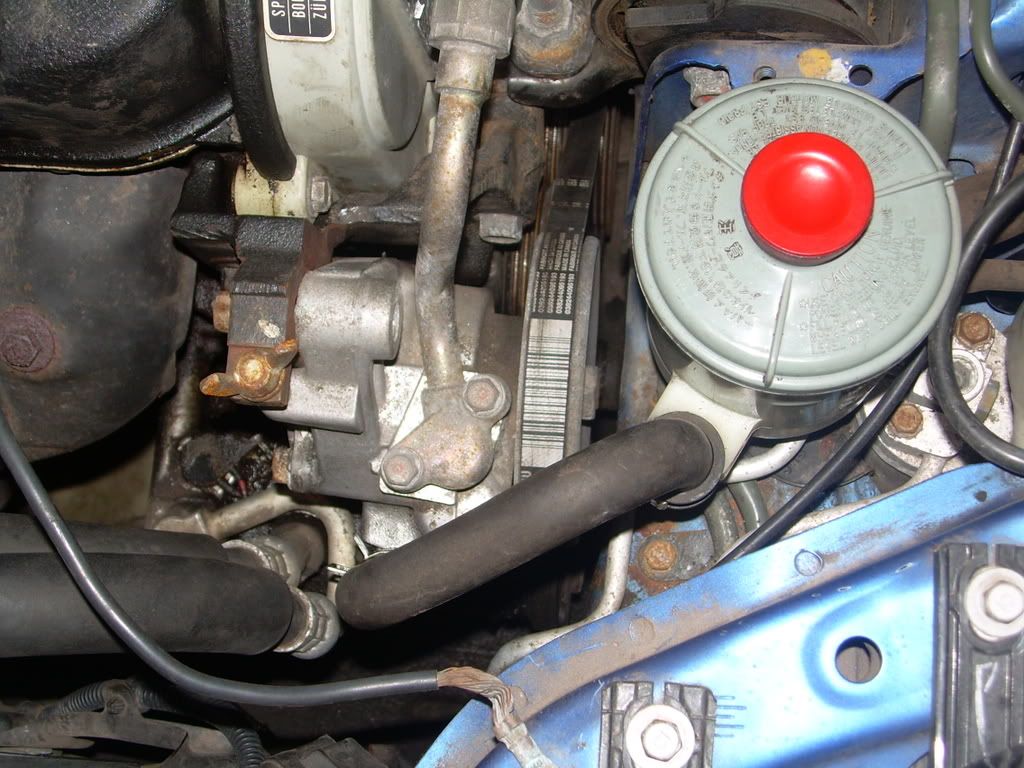
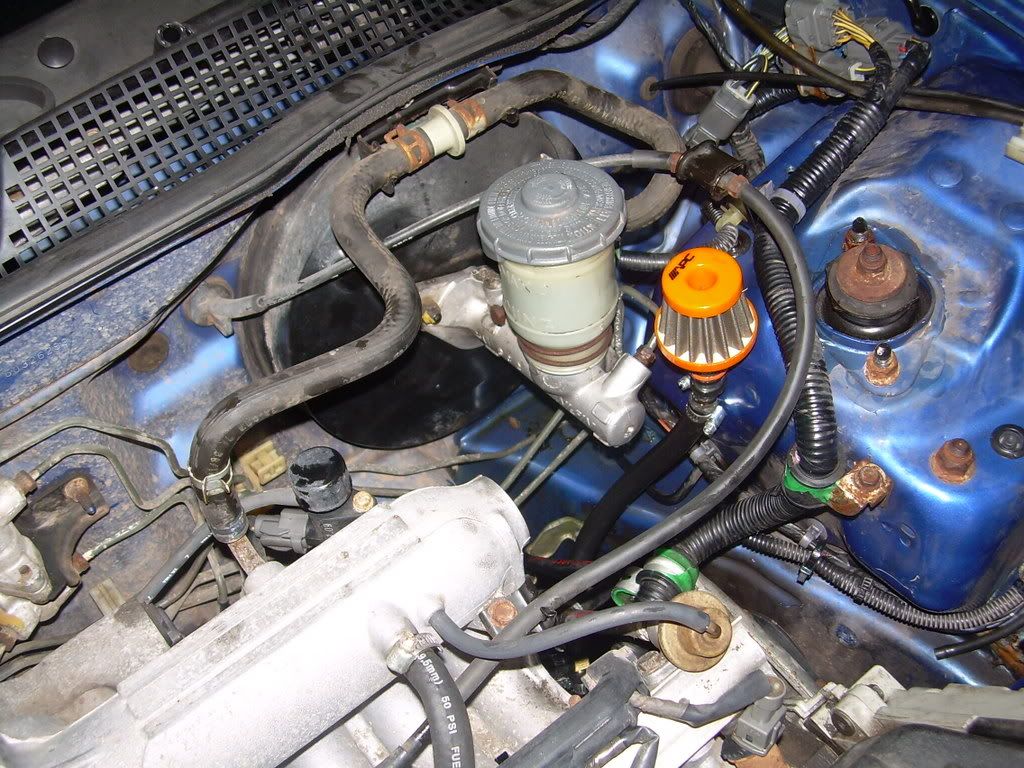
5. The main line is going to the breather. I used a 3/8 brackets at the hardware store to secure the line and breather. Not necessary but it keeps it clean and it isn't going anywhere. Mounting location is up to you. I chose the spot below for now. Granted, when I put on my ITR booster and master cylinder it may not fit there, and I will have to move it elsewhere.
IMPRESSION
Driving the car feels great. When sitting still the car is noticeably harder to steer, but not bad at all. Once you begin to roll, it all becomes just as easy to steer. While driving, it feels like you have power steering but with much more feedback. If you thought you needed tie rods before, you will definitely notice it now. The wheel feedback is awesome, much easier to feel the road and drive aggressively. I definitely noticed the play more from my worn steering. I imagine when I put my new Moog tie rod ends and ball joints on, it will feel great. I even noticed the slight power gain. Overall, a great mod.
MAINTENANCE
I would recommend periodically pouring some Steering fluid or ATF into the breather hole. This will keep the piston and seal in the control valve happy.
Enjoy!
-XLR8
I first saw this topic in the FAQ's on Hondatech. I noticed that there are about 10 pages on that thread about Integra's with only a few posts about Civics; the 92-95 Eg specifically. There is a fair difference in the power racks between the two, so I thought I would get the facts out there for us Civic guys. I have a 93 hatch that will be getting a GSR swap so I figured I would get this out of the way while I am still running my D15.
The original thread is here: https://honda-tech.com/forums/acura-integra-type-r-8/how-power-steering-manual-184202/
After reading the entire thing, there is some good information that can be extracted for us Civic guys.
1. Civic Power racks have 3 ports. Integra's have 4 ports.
2. Almost everyone recommends using a reservoir of some type. The reservoir serves as a breather to keep the system from being pressurized reducing resistance and a place for excess fluid to gather under repeated use such as a track day. However, after reading many posts, I just don't see the necessity of a reservoir, especially if most are just using the line to hold excess fluid. I chose something a little more practical.
3. The rack works best with some fluid left in it. This maintains lubrication of the internal valve piston.
OVERVIEW:
Civic racks have 3 ports. The smaller port to the left, and the center port are the outputs for each side of the control piston in the rack. Hot steering fluid is pushed out of each hole depending which way you turn the steering wheel. The line on the right is a high pressure line that comes from the Pump and feeds the rack.
Some would recommend buying expensive fittings and line.....much like the kit offered for the Integra. There is simply no need for high pressure fittings or line. The removal of the pump takes away all input pressure, and the lack of fluid in the rack removes most output pressure. Simple fuel line and hose clamp will work fine.
PARTS
2ft. 5/16 fuel line
2ft. 3/8 fuel line
2 brass T fittings 3/8
4 small hose clamps
Small mesh filter (I used the APC one from Advance Auto)
HOW TO:
1. First thing is to remove that pump and lines. I recommend draining or removing the reservoir first. This will help with fluid spillage, but ultimately its going to happen,.. a lot, so prepare for it. The lines run fro the reservoir to both the pump, and the rack. It is fairly straight forward. Start unbolting brackets and getting those lines out of there. The cooler that is mounted behind the bumper will take some maneuvering to remove. If you have A/C, I suggest removing the two top brackets that hold the condenser so it can be pushed back. This helps when pulling the cooler line out.
2. I removed the two low pressure lines from the reservoir and cooler up until the last hard lines twist into the rack. Simply pull off the hose clamps and the rubber hose. The high pressure line however will need to be removed completely from the pump to the fitting on the rack, this fitting will be gut in the next step. You will see a sensor that plugs in to the high pressure line coming from the pump. Simply unplug the connector and move it aside. It will not throw a CEL.
3. After removing the entire high pressure line, its time to cut off the fitting that went into the steering rack. Now you can purchase a fitting if you like. The thread size is M16x1.5. I looked everywhere for it locally only to find that I would have to order it. I didn't care about converting it back, and cutting the factory fitting was cheap and easy. Be sure to cut right before it starts to curve. Then tighten it back into the rack.
4. After testing multiple variations and studying the fluid flow diagram from the service manual, I decided to vent all three lines to the breather. This keeps every chamber in the control valve breathing and unpressurized. After testing it works well.
5. The main line is going to the breather. I used a 3/8 brackets at the hardware store to secure the line and breather. Not necessary but it keeps it clean and it isn't going anywhere. Mounting location is up to you. I chose the spot below for now. Granted, when I put on my ITR booster and master cylinder it may not fit there, and I will have to move it elsewhere.
IMPRESSION
Driving the car feels great. When sitting still the car is noticeably harder to steer, but not bad at all. Once you begin to roll, it all becomes just as easy to steer. While driving, it feels like you have power steering but with much more feedback. If you thought you needed tie rods before, you will definitely notice it now. The wheel feedback is awesome, much easier to feel the road and drive aggressively. I definitely noticed the play more from my worn steering. I imagine when I put my new Moog tie rod ends and ball joints on, it will feel great. I even noticed the slight power gain. Overall, a great mod.
MAINTENANCE
I would recommend periodically pouring some Steering fluid or ATF into the breather hole. This will keep the piston and seal in the control valve happy.
Enjoy!
-XLR8
Last edited by iliv2xlr8; 03-10-2009 at 05:51 PM.
 12-29-2008, 06:16 PM
#2
awesome man, do a good write up with lots of pics. I plan on buying the stealthmode kit for p/s delete, but id like to see what you do. If you go to stealthmode.com they have a link to a write that super street or someone did with there product with a lot of pics if you want to take a look at how they did it
12-30-2008, 06:57 AM
#3
Honda-Tech Member
Thread Starter
Join Date: Sep 2008
Location: WV
Posts: 589
Likes: 0
Received 0 Likes
on
0 Posts
awesome man, do a good write up with lots of pics. I plan on buying the stealthmode kit for p/s delete, but id like to see what you do. If you go to stealthmode.com they have a link to a write that super street or someone did with there product with a lot of pics if you want to take a look at how they did it
I have read the write-up about stealth's kit. I found two issues with this kit and write-up.
1. They use nice and expensive AN fittings and stainless line. Though this may be necessary for a brake or fuel application, these lines will see next to no pressure. It is simply overkill.
2. Again, this write-up applies to an Integra rack. These racks have 4 ports. 2 cooler ports, 1 in, and 1 out port. Our Civic racks are different with only 3 ports.
The write up shown here: http://www.jdmuniverse.com/forums/ho...-20-bucks.html is similar to what I will be doing, but with the Civic rack.
I have also decided not to go sourcing fittings. I will simply cut the factory lines and apply a rubber hose with clamp. Though this does create an issue if I ever want to add PS again, I just don't see it happening given my cars future plans.
12-31-2008, 10:39 AM
#5
Did you get started on this? I went and bought me some line and im going to start on it in a while. Im just trying to figure out what to do with the 3rd line, loop it to itself?

Trending Topics
01-02-2009, 12:11 PM
#8
Honda-Tech Member
Join Date: Apr 2007
Location: baltimore, md, 21060
Posts: 288
Likes: 0
Received 0 Likes
on
0 Posts
my EJ1 has a 4 port rack like the integra but its a honda part # and its also equip with a cooler, not that big a deal i was just wondering cause you guys said the civic has 3 and the teg has 4? J/W
01-02-2009, 01:13 PM
#9
Honda-Tech Member
Thread Starter
Join Date: Sep 2008
Location: WV
Posts: 589
Likes: 0
Received 0 Likes
on
0 Posts
Interesting. If your rack is a 4 port then I would consider the same method as the Integra rack. It really depends on fluid flow. You want the least resistance as possible.
01-03-2009, 09:58 AM
#10
Honda-Tech Member
Join Date: Apr 2007
Location: baltimore, md, 21060
Posts: 288
Likes: 0
Received 0 Likes
on
0 Posts
its funny because i made mine about 6 years ago out of stainless line and AN fittings and spent a dick load of cash on it, then come to find out after read a past issue of honda tuning when they did the same exact thing but there kit cost a lil less than me parting mine together, except they used an CBR1000 res. as where i just used another clutch res. from my local honda dealer. but on the budget this method on here is flaw less and is a great right up.
04-21-2009, 09:28 AM
#13
Junior Member
Join Date: Mar 2009
Location: Mid New-York
Posts: 11
Likes: 0
Received 0 Likes
on
0 Posts
very nice write-up... pics helped out a lot, i had been wanting to reduce the loop the previous owner had done (aka hacked, with only eliminating the pump n looping at the resevoir)
I finally did this yesterday, used the breather and linked all 3 lines together as well, but now it seems maybe too much fluid? but my breather is being soaked and even sprays out PS fluid....
im guessing if i just put a slave cylinder resevoir instead of a breather it will be fine... but im wondering if i did something wrong? please help
sorry for the lengthy post but im concerned lol... first post but i frequently read the forum, please dont flame me
07-02-2009, 09:32 PM
#14
Honda-Tech Member
Thread Starter
Join Date: Sep 2008
Location: WV
Posts: 589
Likes: 0
Received 0 Likes
on
0 Posts
Been awhile since I checked this thread....my apologies.
The soaked breather is normal when first doing the mod. It does take some time for the fluid to work out of the system.
UPDATE:
Over 10k miles and running strong. No squeaks or rattles. The mod continually performs as it did the first day.
The soaked breather is normal when first doing the mod. It does take some time for the fluid to work out of the system.
UPDATE:
Over 10k miles and running strong. No squeaks or rattles. The mod continually performs as it did the first day.
09-30-2012, 05:54 PM
#16
Honda-Tech Member
Join Date: Jan 2007
Location: Arvada, Co, USA
Posts: 217
Likes: 0
Received 0 Likes
on
0 Posts
02-01-2016, 04:05 PM
#19
Why the actual **** are you bumping this? A member for 10 years, and you are incapable of following simple rules? Right there in the rules sticky, plain as day. "Forbidden thread and post topics: Bumping old threads without a very good reason". You obviously have no reason, so you're just shitposting. Don't do that.


Thread
Thread Starter
Forum
Replies
Last Post
SQ is the SQUAD
Suspension & Brakes
1
12-06-2010 10:16 AM